碳纤维电暖控制器使用说明书
AAMP Global PHSK-2LS 双温度碳纤维椅暖器套件说明书

K S H P2****************************(US)tel - 1-800-477-2267 (East Coast) - 1-888-883-2790 (West Coast)*********************************(Europe)PHSK-2LSUniversal Dual TempCarbon Fiber Seat Heater KitWith Split Pad DesignDo NOT install PHSK-2LS if:u The OEM seat covers are glued to the foamu The flat center part of the seat is not 10” wideBe sure to disconnect the vehicle’s battery (check tomake sure you have radio codes if equipped).DO NOT modify the factory seat covers or seatcover seams on seats equipped with side airbags.The heating elements should only be installed in thecenter, flat portions of the seat.Professional installation is recommended. Improperinstallation can result in element malfunction,causing injury or reliability issues.General InformationDO NOT modify or replace any components of the kit with parts not supplied.Be sure to mount and secure the heating element to the seat foam, and that it is free of bends and creases. Damaged elements should NOT be installed and should be replaced.FIG. A FIG. B IntroductionThank you for purchasing your EchoMaster Pro Universal Dual T emp Carbon Fiber Seat Heater Kit, With Split Pad Design.EchoMaster seat heaters are designed to work fast, minimizing the time that you have to deal with discomfort from cold seats.With adjustable temperature settings and an ON/OFF switch, you have full control over your seat heating experience.3****************************(US)tel - 1-800-477-2267 (East Coast) - 1-888-883-2790 (West Coast)*********************************(Europe)This heating element is designed for use on 12 volt vehicles and should not be used on any other vehicle with a different operating voltage such as 24 volt or 6 volt vehicles. All power connections should be made to an IGN source and fused at a max of 12 amps.DO NOT cut the heating element width wise, as this will damage the element and cause malfunction (fig. B).DO NOT modify the harness in any way. Be sure that the harness is routed and secured in a way to avoid sharp objects, metal edges, or any object that could chafe the wire harness.Make sure the seat moves freely from front to rear after installation.Be sure that the seat foam is clean and free of contaminants such as grease or silicone. Allow the elements proper time for the adhesion process in order to ensure the best adhesion (typically 48 hours). Do not reuse elements after they have been adhered to a surface.DO NOT allow the heating element to come into contact with the with conductive surfaces in the seats frame, metal bars or hog rings or short circuit may occur.Seat cover material will affect the heating time. Customers should benotified about the location of the fuses used in the installation process in case of failure.DO NOT install this product over sensors, airbags, or other parts related to the SRS airbag system.WARNINGSeat heaters must not be installed in vehicles that will be used byparaplegic or other occupants who cannot sense heat. Customers must notify the original installer if the vehicle is sold to a third party.General Information (continued)PHSK-2LSUniversal Dual TempCarbon Fiber Seat Heater KitWith Split Pad Design4****************************(US)tel - 1-800-477-2267 (East Coast) - 1-888-883-2790 (West Coast)*********************************(Europe)12 3456 71. 4 x Heated Carbon Fiber Heating Pads2. Illuminated High/Low Switch3. Wire Harness Assembly4. Fuse Holder (10A Fuse)5. 5 Pole SPDT Relay6. Heat Transfer Tape7. Zip Ties Box ContentsInstallation Park vehicle on a level surface with hand brake engaged.Disconnect the vehicles battery (check to make sure that you have radio codes if equipped).Unplug all harnesses attached to the underside of the seat. Remove seat bolts.Remove the seat from the vehicle taking care not to damage any of the interior panels during removal.Remove the seat covers by carefully detaching the “J” clips located at the seat back’s seam or on the underside of the seat’s base.CAUTION: the metal that the “J” clip is attached to may be very sharp.Test fit the heating elements against their respective seat cushion and mark any location that need to be cut.PHSK-2LSUniversal Dual TempCarbon Fiber Seat Heater KitWith Split Pad Design5****************************(US)tel - 1-800-477-2267 (East Coast) - 1-888-883-2790 (West Coast)*********************************(Europe)If required, carefully cut 2 holes vertically or horizontally, holes should not exceed 1” in diameter. DO NOT cut more than two holes in each heating element.Seat heating elements may be trimmed to fit seat cushions length wise. If the element is too long to fit the seat simply trim the element with scissors to fit desired area.DO NOT cut the heating element widthwise.Remove the adhesive backing from the heating element and carefully adhere to the seat cushion in the desired location. Be sure to align any mounting holes that you have created.If working with “rod” style seat covers, insulate the rod from contact with the heating element using a strip of the provided adhesive contact tape. If working with a “velcro” style seat cover this is not needed.Reinstall the seat cover and replace the “J” clips to their original location.Locate 12 volt power source that is capable of supplying 10 amps ofcontinuous power. EchoMaster recommends using an IGN power source that rests at 0 volts when the key is not in the RUN position.Once you have found a suitable power source, route the harness in a safe manner from under the seat to the desired power source. Be sure that harness is fastened to vehicle using zip ties.Find a suitable location for the seat heater switches to be mounted in the side of the seat, dash, or center console between the driver and passenger seats.Drill a 13/16” hole (21mm) at the desired switch location. Route the switch harness through the hole and plug into main harness.Push the switch into the hole and snap into place firmly.Reinstall the seats in to the vehicle. Plug all removed connectors back into seat, and plug the EchoMaster seat heater harness to the heater elements.Installation (continued)PHSK-2LSUniversal Dual TempCarbon Fiber Seat Heater KitWith Split Pad Design6****************************(US)tel - 1-800-477-2267 (East Coast) - 1-888-883-2790 (West Coast)*********************************(Europe)Installation (continued)Make the connection of the EchoMaster provided harness power (RED) to the IGN source previously identified, and connect the ground wire (BLACK) to good chassis ground on the vehicle.Reconnect the battery terminals, and turn the key to the IGN or RUN position.Test the system to ensure proper functionalityUP = High Middle = OFF Down = LowOperating InstructionsThe PHSK-2LS is designed to be operated only when the seat is occupied. It is imperative that the person occupying the seat is able to feel temperature differences and be able to react to them.Those who have difficulty feeling temperature differences, such as paraplegic, young or elderly people should NOT use this product.The PHSK-2LS should not be switched on and left unattended. Caution should be used to ensure no accidental activation of the seat heater switch.IF the occupant feels excessive/undesired heat from the seat heater, the PHSK-2LS should be switched off immediately.External seat covers, blankets, towels, rugs or coverings other than theoriginal seat cover should not be placed on the seat while the PHSK-2LS is in the “ON” position.WARNING: The PHSK-2LS should not be exposed to liquids of any kind. If the heater has been exposed to spills or liquids, ample time should be given for the heaters to dry before continuing use. Otherwise, failure or injury may occur.PHSK-2LSUniversal Dual TempCarbon Fiber Seat Heater KitWith Split Pad Design7****************************(US)tel - 1-800-477-2267 (East Coast) - 1-888-883-2790 (West Coast)*********************************(Europe)Operating Instructions (continued)“HIGH” T emperature Setting: - The PHSK-2LS is switched ‘ON’ by pressing the switch up. This will engage the seat heater in the HIGH temperature setting. When in the HIGH setting the LED will illuminate RED.LOW T emperature Setting:- The PHSK-2LS is also switched ‘ON’ by pressing the switch down. This will engage the seat heater in the LOW temperature setting. When in the LOW setting the LED will illuminate AMBER.Note:The seat heating element is switched “ON” by moving the switch upwards or downwards from its center OFF position. The heat will be noticeable within 4 - 5 minutes.The heating time can vary according to the type of seat cover material and kind of clothing or coat that is being worn. The heating must be switched to the ‘Low’ setting in order to avoid overheating, when the desired temperature has been achieved.PHSK-2LSUniversal Dual TempCarbon Fiber Seat Heater KitWith Split Pad Design8Installation Guide****************************(US)tel - 1-800-477-2267 (East Coast) - 1-888-883-2790 (West Coast)*********************************(Europe)Wiring DiagramPHSK-2LSUniversal Dual TempCarbon Fiber Seat Heater KitWith Split Pad Design9****************************(US)tel - 1-800-477-2267 (East Coast) - 1-888-883-2790 (West Coast)*********************************(Europe)Installation GuideTroubleshootingProblemSolution The seat heater does not function although the switch is in the HIGH or LOW position and the LED is not illuminated.Verify that they system’s main power fuse is not blown. Replace if blown.The LED is not illuminating on the switch, but the seat heater is functioning properly.The LED in the switch is defective. Replace switch.The seat heater is not functioning and the LED is illuminated.The temperature of the seat heater is too high and may be in protection mode. Switch the heater off and allow to cool.The distribution of heat is not even between the seat bottom and backDiscontinue use and consult a professional installer.The fuse continues to blow repeatedly.Check system wiring for shortcircuit, and contact a professionalinstaller.PHSK-2LSUniversal Dual TempCarbon Fiber Seat Heater KitWith Split Pad DesignPHSK-2LSUniversal Dual TempCarbon Fiber Seat Heater KitWith Split Pad Design10****************************(US)tel - 1-800-477-2267 (East Coast) - 1-888-883-2790 (West Coast)*********************************(Europe)11****************************(US)tel - 1-800-477-2267 (East Coast) - 1-888-883-2790 (West Coast)*********************************(Europe)PHSK-2LSUniversal Dual TempCarbon Fiber Seat Heater KitWith Split Pad Design15500 Lightwave Drive, Suite 202, Clearwater, Florida 33760 Woolmer Way, Bordon, Hampshire, United Kingdom****************************(US)tel - 1-800-477-2267 (East Coast) - 1-888-883-2790 (West Coast) *********************************(Europe)tel - +44(0)1420 487110 (Sales) - +44(0)1420 470618 (Technical) EchoMaster is a Power Brand of AAMP Global. 。
地暖温控开关使用手册

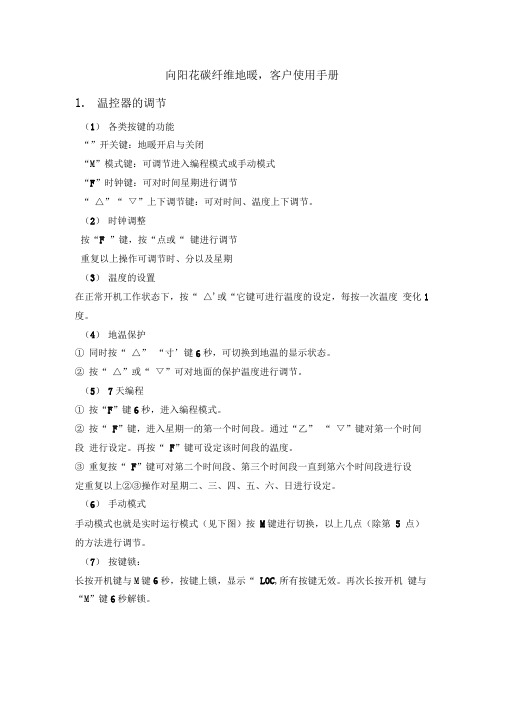
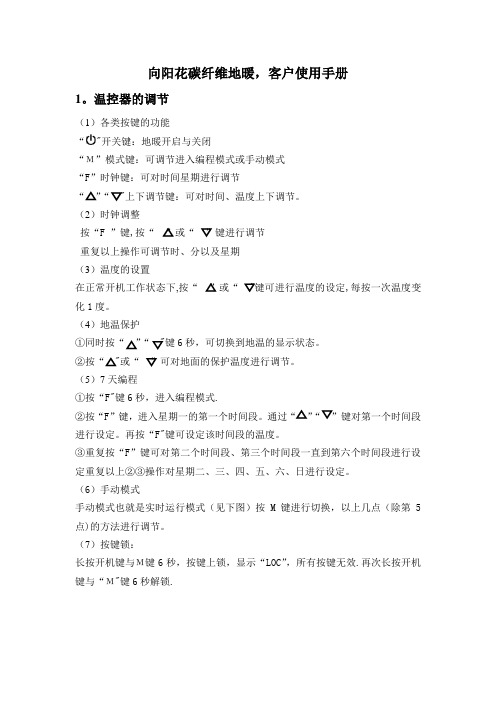
向阳花碳纤维地暖,客户使用手册1.温控器的调节(1)各类按键的功能“”开关键:地暖开启与关闭“M”模式键:可调节进入编程模式或手动模式“F”时钟键:可对时间星期进行调节“ △”“ ▽”上下调节键:可对时间、温度上下调节。
(2)时钟调整按“F ”键,按“点或“ 键进行调节重复以上操作可调节时、分以及星期(3)温度的设置在正常开机工作状态下,按“ △'或“它键可进行温度的设定,每按一次温度变化1度。
(4)地温保护①同时按“ △” “寸’键6秒,可切换到地温的显示状态。
②按“ △”或“ ▽”可对地面的保护温度进行调节。
(5)7天编程①按“F”键6秒,进入编程模式。
②按“ F”键,进入星期一的第一个时间段。
通过“乙” “ ▽”键对第一个时间段进行设定。
再按“ F”键可设定该时间段的温度。
③重复按“ F”键可对第二个时间段、第三个时间段一直到第六个时间段进行设定重复以上②③操作对星期二、三、四、五、六、日进行设定。
(6)手动模式手动模式也就是实时运行模式(见下图)按M键进行切换,以上几点(除第 5 点)的方法进行调节。
(7)按键锁:长按开机键与M键6秒,按键上锁,显示“ LOC,所有按键无效。
再次长按开机键与“M”键6秒解锁。
2.科学的使用温控器(1)开启温控器。
(2)看温控器显示的室温,选择按上调或下调键将设定的温度高于室温2-3度。
(3)按模式键选择手动模式。
(4)操作完成保持连续工作48小时。
(5)以后每隔24小时,温控器上调2-3度,直至室温符合要求(16C-20 C)(6)地暖系统设计和使用的温控器为双温双控型,除了温控器本体设置有对室内温度传感器外,同时加带了一条地面温度传感器用于控制和保护地面温度。
地面保护温度的设定对地面装饰材料的不同而设定不同的温度:①地面为瓷砖时,瓷砖的热传导快,可把温度设定为40C -45 C;②地面为木地板时,木地板的热传导性能较差,可把温度设定为50E -55 C。
地暖温控开关使用手册

向阳花碳纤维地暖,客户使用手册1.温控器的调节(1)各类按键的功能“”开关键:地暖开启与关闭“Μ”模式键:可调节进入编程模式或手动模式“F”时钟键:可对时间星期进行调节“”“”上下调节键:可对时间、温度上下调节。
(2)时钟调整按“F ”键,按“”或“”键进行调节重复以上操作可调节时、分以及星期(3)温度的设置在正常开机工作状态下,按“”或“”键可进行温度的设定,每按一次温度变化1度。
(4)地温保护①同时按“”“”键6秒,可切换到地温的显示状态。
②按“”或“”可对地面的保护温度进行调节。
(5)7天编程①按“F”键6秒,进入编程模式。
②按“F”键,进入星期一的第一个时间段。
通过“”“”键对第一个时间段进行设定。
再按“F”键可设定该时间段的温度。
③重复按“F”键可对第二个时间段、第三个时间段一直到第六个时间段进行设定重复以上②③操作对星期二、三、四、五、六、日进行设定。
(6)手动模式手动模式也就是实时运行模式(见下图)按M键进行切换,以上几点(除第5点)的方法进行调节。
(7)按键锁:长按开机键与Μ键6秒,按键上锁,显示“LOC”,所有按键无效。
再次长按开机键与“Μ”键6秒解锁。
2.科学的使用温控器(1)开启温控器。
(2)看温控器显示的室温,选择按上调或下调键将设定的温度高于室温2-3度。
(3)按模式键选择手动模式。
(4)操作完成保持连续工作48小时。
(5)以后每隔24小时,温控器上调2-3度,直至室温符合要求(16℃-20℃)(6)地暖系统设计和使用的温控器为双温双控型,除了温控器本体设置有对室内温度传感器外,同时加带了一条地面温度传感器用于控制和保护地面温度。
地面保护温度的设定对地面装饰材料的不同而设定不同的温度:①地面为瓷砖时,瓷砖的热传导快,可把温度设定为40℃-45℃;②地面为木地板时,木地板的热传导性能较差,可把温度设定为50℃-55℃。
如有特殊情况,室内设定温度上不去,而导致用电量的增加,如果出现这样的情况可按如下方法操作:(1)查看设定温度是否过高,可适当调低设定温度。
碳纤维电暖控制器使用说明书

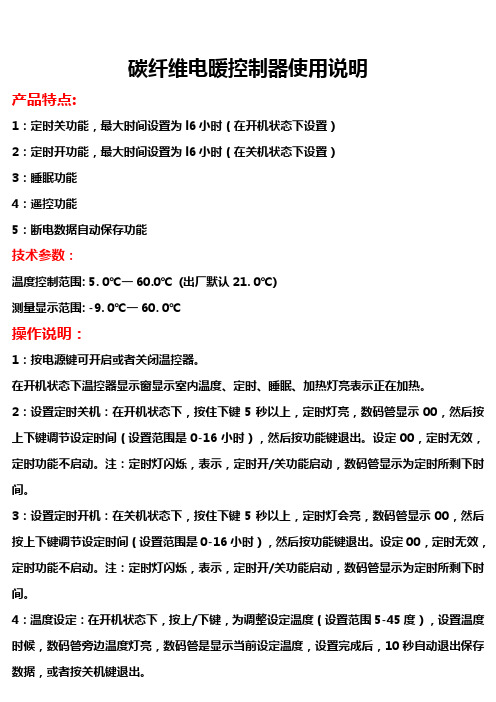
碳纤维电暖控制器使用说明产品特点:1:定时关功能,最大时间设置为l6小时(在开机状态下设置)2:定时开功能,最大时间设置为l6小时(在关机状态下设置)3:睡眠功能4:遥控功能5:断电数据自动保存功能技术参数:温度控制范围: 5. 0℃一60.0℃(出厂默认21. 0℃)测量显示范围: -9. 0℃一60. 0℃操作说明:1:按电源键可开启或者关闭温控器。
在开机状态下温控器显示窗显示室内温度、定时、睡眠、加热灯亮表示正在加热。
2:设置定时关机:在开机状态下,按住下键5秒以上,定时灯亮,数码管显示00,然后按上下键调节设定时间(设置范围是0-16小时),然后按功能键退出。
设定00,定时无效,定时功能不启动。
注:定时灯闪烁,表示,定时开/关功能启动,数码管显示为定时所剩下时间。
3:设置定时开机:在关机状态下,按住下键5秒以上,定时灯会亮,数码管显示00,然后按上下键调节设定时间(设置范围是0-16小时),然后按功能键退出。
设定00,定时无效,定时功能不启动。
注:定时灯闪烁,表示,定时开/关功能启动,数码管显示为定时所剩下时间。
4:温度设定:在开机状态下,按上/下键,为调整设定温度(设置范围5-45度),设置温度时候,数码管旁边温度灯亮,数码管是显示当前设定温度,设置完成后,10秒自动退出保存数据,或者按关机键退出。
5:温度校准设置:比如:测量的温度低于或者高于实际环境温度的时候,使用此功能进行温度校准。
设置方法:在关机状态下,按功能键5秒以上,出现00,然后按上/下键设置校准数字(比如测量的温度比实际环境温度偏高3度就设置-3,比如测量的温度比实际环境温度偏低3度就设置3)。
6:回差设定:回差意思是,启动加热温度与停止温度之间的一个差距。
比如20度停止加热,温度下降到17度再启动加热,这个回差就是3度,根据自己实际情况设定。
设定方法:在在关机状态下,按功能键5秒以上,出现温度校准数字,然后再按一次功能键,进入回差设置页面,然后上/下键设置回差参数,设置完成后,10秒自动退出保存数据,或者按关机键退出。
电取暖控制器使用说明书

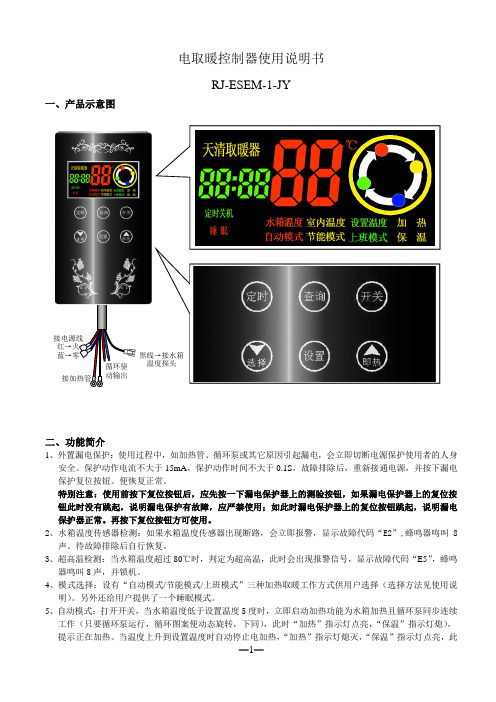
电取暖控制器使用说明书RJ-ESEM-1-JY一、产品示意图二、功能简介1、外置漏电保护:使用过程中,如加热管、循环泵或其它原因引起漏电,会立即切断电源保护使用者的人身安全。
保护动作电流不大于15mA ,保护动作时间不大于0.1S ,故障排除后,重新接通电源,并按下漏电保护复位按钮。
便恢复正常。
特别注意:使用前按下复位按钮后,应先按一下漏电保护器上的测验按钮,如果漏电保护器上的复位按钮此时没有跳起,说明漏电保护有故障,应严禁使用;如此时漏电保护器上的复位按钮跳起,说明漏电保护器正常。
再按下复位按钮方可使用。
2、水箱温度传感器检测:如果水箱温度传感器出现断路,会立即报警,显示故障代码“E2”,蜂鸣器鸣叫8声。
待故障排除后自行恢复。
3、超高温检测:当水箱温度超过80℃时,判定为超高温,此时会出现报警信号,显示故障代码“E5”,蜂鸣器鸣叫8声,并锁机。
4、模式选择:设有“自动模式/节能模式/上班模式”三种加热取暖工作方式供用户选择(选择方法见使用说明)。
另外还给用户提供了一个睡眠模式。
5、自动模式:打开开关,当水箱温度低于设置温度5度时,立即启动加热功能为水箱加热且循环泵同步连续工作(只要循环泵运行,循环图案便动态旋转,下同),此时“加热”指示灯点亮,“保温”指示灯熄), 提示正在加热。
当温度上升到设置温度时自动停止电加热,“加热”指示灯熄灭,“保温”指示灯点亮,此时循环泵继续运行2分钟后,再以3分钟停止2分钟运行的方式持续工作。
当水箱温度再次低于设置温度5度时,立即启动加热且循环泵同步连续工作。
当水箱温度再次上升到设置温度时,停止加热,循环泵继续运行2分钟后,以3分停止2分运行的方式持续工作。
如此循环。
如在加热期间按动开关键会进入关机状态,也将会停止加热。
6、节能模式:在打开开关时,当加热条件成立,启动加热功能为水箱加热且循环泵同步连续工作(只要循环泵运行,循环图案便动态旋转,下同),加热期间循环泵连续工作,加热停止期间循环泵按2分钟运行3分钟停止的方式持续工作。
地暖温控开关使用手册

向阳花碳纤维地暖,客户使用手册1。
温控器的调节(1)各类按键的功能“"开关键:地暖开启与关闭“Μ”模式键:可调节进入编程模式或手动模式“F”时钟键:可对时间星期进行调节“”“ "上下调节键:可对时间、温度上下调节。
(2)时钟调整按“F ”键,按“”或“”键进行调节重复以上操作可调节时、分以及星期(3)温度的设置在正常开机工作状态下,按“”或“ ",每按一次温度变化1度。
(4)地温保护①同时按“”“ "键6秒,可切换到地温的显示状态。
②按“ "或“”可对地面的保护温度进行调节。
(5)7天编程①按“F"键6秒,进入编程模式.②按“F”键,进入星期一的第一个时间段。
通过““”键对第一个时间段进行设定。
再按“F"键可设定该时间段的温度。
③重复按“F”键可对第二个时间段、第三个时间段一直到第六个时间段进行设定重复以上②③操作对星期二、三、四、五、六、日进行设定。
(6)手动模式手动模式也就是实时运行模式(见下图)按M键进行切换,以上几点(除第5点)的方法进行调节。
(7)按键锁:长按开机键与Μ键6秒,按键上锁,显示“LOC”,所有按键无效.再次长按开机键与“Μ"键6秒解锁.2.科学的使用温控器(1)开启温控器。
(2)看温控器显示的室温,选择按上调或下调键将设定的温度高于室温2—3度。
(3)按模式键选择手动模式。
(4)操作完成保持连续工作48小时.(5)以后每隔24小时,温控器上调2-3度,直至室温符合要求(16℃—20℃)(6)地暖系统设计和使用的温控器为双温双控型,除了温控器本体设置有对室内温度传感器外,同时加带了一条地面温度传感器用于控制和保护地面温度。
地面保护温度的设定对地面装饰材料的不同而设定不同的温度:①地面为瓷砖时,瓷砖的热传导快,可把温度设定为40℃—45℃;②地面为木地板时,木地板的热传导性能较差,可把温度设定为50℃—55℃。
碳纤维电暖器使用说明

碳纤维电暖器使用说明
碳纤维电暖器的使用说明如下:
1. 确保电源插头与电源插座充分接触,临时不使用电暖器时,可以将温度控制调到休眠或断开开关电源以确保安全。
2. 碳纤维电暖器对流孔上严禁遮盖物件。
工作时,机器内部结构温度较高,提高温度过程中需要与室内冷气产生对流功效,以加速室内温度的提高。
如果在电暖器对流孔上遮盖物件,不仅会伤害碳纤维电暖器,严重还会引发火灾。
3. 电暖器都装有专门晒衣架,可以在上面干躁衣物,切勿用脏东西塞住对流孔。
4. 碳纤维电地暖的使用环境也有一定的要求,使用中需要注意防水。
由于碳纤维电暖器供暖时有一定的对流效用,因此很难做到彻底封闭式,使用中一定要保证避开水源,防止影响设备。
5. 电暖器周边不可以放脏物和易燃物。
6. 新电暖器到了之后,取出电暖器,擦净,插上电。
观察一下电暖器,如果开关是旋钮开关,旋转下边的控温旋钮,转动至所需要的档,一般为低、中、高三档。
当温度感觉低时,可以旋转温控按钮至高一档;如果感觉屋内过热则反之。
如果是带有智能控制或者温度设定的控制面板,设定一个想要室内达到的温度即可。
当屋内温度达到设定温度时,电暖器会自动停止加热;如
果室内温度低于设定温度一定度数,则会自动开启加热系统,通过智能温控器来实现室内恒温的效果。
遵循以上步骤,您应该能够正确、安全地使用碳纤维电暖器。
如在使用过程中遇到问题,建议联系专业人员或厂家进行维修和检查。
智能暖风机控制器功能说明书

智能取暖器功能说明书上海天轩冷暖环境设备有限公司技术指标专有名词及相关说明功能说明一、自动模式1 温度控制范围为:10C ~ 32 C。
2 该模式下有定时、睡眠功能。
3 加热管规格:两组三脚单头加热管,一组功率=W(低),一组功率=W(高),可组成如下功率:“ W(低)”、“ W(高)”、“ W(高+低)”三档;4 风速分成“弱”“中”“强”三档;5 加热管和风速的具体控制:5.1 刚开机时:a)T H>TS时,加热管不加热,内风机不运转,转为待机状态;b)TH< TS时,先根据下表控制加热管运行,10S后风机按防冷风条件运行;a)TH W TS-2C时,保持前状态,加热管按2700W(高+低)的功率运行,风速按照“强”档运转;b)TS-2C< TH< TS+TC,加热管按W(高)的功率运行,风速按照“中”档运转。
5.2.3系统自动选定运行功率及风速后半小时内不随着室内温度变化而变化,半小时后或者转模式重新检测环境温度重新选择运行功率及风速。
5.3 待机时,室温呈下降状态;a)T H> TS时,保持待机状态;b)T H< TS-1C时,加热管照W(低)的功率运行;6 防冷风功能:风机的风速由Tp控制,具体情况如下:a)当TP呈下降状态时,TP W 31C时,内风机吹微风;TP W 25C时,内风机关;b)当TP呈上升状态时,TP>28C时,内风机吹微风;TP>45C时,内风机按正常运行(即与功率匹配运行);c)当TP上升到85C时,风机强制强风,下降到80C时内风机按正常运行(即与功率匹配运行)。
咼风25 28 31 35 80 85 (散热器检测温度)(图1)7 吹余热功能:停机时若TP>50C,先关闭电加热管,室内风机延时50秒关闭。
8 高温保护:a)运行时,若TP>85C且连续10s,电加热管全部停止加热,风速按照“强”档强制运行;当TP< 80E,恢复正常运行;b)此温度保护只在TP传感器正常时有效。
- 1、下载文档前请自行甄别文档内容的完整性,平台不提供额外的编辑、内容补充、找答案等附加服务。
- 2、"仅部分预览"的文档,不可在线预览部分如存在完整性等问题,可反馈申请退款(可完整预览的文档不适用该条件!)。
- 3、如文档侵犯您的权益,请联系客服反馈,我们会尽快为您处理(人工客服工作时间:9:00-18:30)。
碳纤维电暖控制器使用说明
产品特点:
1:定时关功能,最大时间设置为l6小时(在开机状态下设置)
2:定时开功能,最大时间设置为l6小时(在关机状态下设置)
3:睡眠功能
4:遥控功能
5:断电数据自动保存功能
技术参数:
温度控制范围: 5. 0℃一60.0℃(出厂默认21. 0℃)
测量显示范围: -9. 0℃一60. 0℃
操作说明:
1:按电源键可开启或者关闭温控器。
在开机状态下温控器显示窗显示室内温度、定时、睡眠、加热灯亮表示正在加热。
2:设置定时关机:在开机状态下,按住下键5秒以上,定时灯亮,数码管显示00,然后按上下键调节设定时间(设置范围是0-16小时),然后按功能键退出。
设定00,定时无效,定时功能不启动。
注:定时灯闪烁,表示,定时开/关功能启动,数码管显示为定时所剩下时间。
3:设置定时开机:在关机状态下,按住下键5秒以上,定时灯会亮,数码管显示00,然后按上下键调节设定时间(设置范围是0-16小时),然后按功能键退出。
设定00,定时无效,定时功能不启动。
注:定时灯闪烁,表示,定时开/关功能启动,数码管显示为定时所剩下时间。
4:温度设定:在开机状态下,按上/下键,为调整设定温度(设置范围5-45度),设置温度时候,数码管旁边温度灯亮,数码管是显示当前设定温度,设置完成后,10秒自动退出保存数据,或者按关机键退出。
5:温度校准设置:比如:测量的温度低于或者高于实际环境温度的时候,使用此功能进行温度校准。
设置方法:在关机状态下,按功能键5秒以上,出现00,然后按上/下键设置校准数字(比如测量的温度比实际环境温度偏高3度就设置-3,比如测量的温度比实际环境温度偏低3度就设置3)。
6:回差设定:回差意思是,启动加热温度与停止温度之间的一个差距。
比如20度停止加热,温度下降到17度再启动加热,这个回差就是3度,根据自己实际情况设定。
设定方法:在在关机状态下,按功能键5秒以上,出现温度校准数字,然后再按一次功能键,进入回差设置页面,然后上/下键设置回差参数,设置完成后,10秒自动退出保存数据,或者按关机键退出。
7:睡眠功能:通过按键或遥控器来开启或者关闭睡眠功能,在开机状态下,按上键5秒以上,启动睡眠功能,也可通过同样的方法关闭。
启动睡眠功能后,温控器开始记时,时间1小时后,温度设定値自动减1℃,计时2小时后,温度设定值再次减1℃,计时3小时后,温度设值再次减1℃,计时满8小时后, 温度设定值自动还原成开启睡眠功能前的温度设定值。
6、遥控器定时键: (定时时间単位为小时)
遥控器上按“定时”键,温控器上显示当前定时的时间,再按一次“定时”键,定时
时间加“l”,当设定值为“16”小时时,再技一次“定时“键,则定时值变为“0”, 10
秒内无按遥控“定时“键时,退出定时设置,并保存设置的定时值;注意:“定时开、关”
带停电恢复功能, 来电后自动进入定时状态, 定时小时按停电前累计的小时计算;
7:遥控器上的开机键:按一下开关键执行开机或者关机功能。
8:遥控器上的睡眠键:按一下睡眠键执行启动睡眠功能或者取消睡眠功能。
9:遥控器上的温度+/-键:按此按键可以设置温度上下调整。
故障代码: 出现E1、E2时,为测温探头断路、短路。
接线:L:火线N: 零线L1:输出线
L、N:电源220输入: L1、N: 暖器片输出电源。
