永诺闪光灯YN600EX-RT说明书-中文版
佳能闪光灯600EX
佳能闪光灯600EX-RT 红外功能佳能600 EX 闪光灯∙品牌: Canon/佳能∙型号: 600EX-RT∙按保修方式选择: 全国联保∙适用主件品牌: 佳能专用∙闪光灯及附件产品类型: 机顶闪光灯∙闪光指数(ISO100): 60∙兼容TTL: 佳能TTL∙灯头旋转: 是∙面向专业摄影的闪光灯,最大闪光指数60通过无线电传输方式可实现无线多灯闪光∙SPEEDLITE 600EX-RT是受到活跃于新闻、体育摄影界等专业摄影师们高度信赖的SPEEDLITE 580EX II的升级产品,是佳能原厂外接闪光灯的旗舰产品。
最大闪光指数是60(ISO 100,以米为单位)。
闪光覆盖范围对应从广角端20mm到远摄端200mm的视角,使用广角散光板时,可以覆盖到超广角约14mm。
SPEEDLITE600EX-RT所搭载的自动变焦功能可对所搭配的镜头焦距和相机图像感应器尺寸进行识别,大幅缩短了自动设置闪光覆盖范围的驱动时间。
对应可以活用与被摄体之间距离信息的自动闪光系统E-TTL II,可旋转角度向上约90°、左右约180°、向下约7°,利用天花板和墙壁的跳闪拍摄变得更容易。
还搭载了配合高速快门的高速同步、调节闪光量的闪光曝光锁以及±3级的闪光曝光补偿等功能。
此外,无线闪光传输除了有光学脉冲传输方式外,还增加了无线电传输方式。
使用多个SPEEDLITE600EX-RT通过无线电传输方式可以进行无线多灯操控。
闪光灯背面的操作面板使用可照明的点阵大型液晶显示屏(172×104点),功能类按钮采用了背透型照明方式,即使在昏暗场所也具有高可视性和操作性。
闪光灯本身还实现了和EOS-1D X相同级别的高防水滴防尘性能※。
闪光灯触点部分采用了拂尘机构,可以有效防止灰尘引发的传输错误。
SPEEDLITE 600EX-RT配备了2种色彩滤镜,通过浓度不同的2种橙色滤镜,即使在钨丝灯下进行闪光摄影也可以控制背景颜色。
操控光影的乐趣佳能600EX

操控光影的乐趣佳能600EX佳能600EX-RT是伴随5D3发布的一款专业级高指数闪光灯,属于佳能的旗舰产品系列,有着高大GN60的闪光指数和非常强大的闪光性能,相信对于各路“灯客们”,对这支闪光灯一定不陌生。
不过对于很多网友而言,可能并不是非常了解这款闪光灯的具体使用方法,今天笔者将要讲解一下佳能600EX-RT的使用指南,并带来一些非常有趣的创意玩法。
·操控光影的乐趣我们都知道佳能600EX-RT是一款旗舰闪光灯,不过它和一般闪光灯究竟有哪些不同呢?笔者先简单为大家梳理一下:1、600EX-RT的闪光指数更大,达到GN60,而且变焦范围达20-200mm(使用广角散射片后可达14mm),可以满足从广角到长焦的拍摄需求。
2、这款闪光灯有着3.3秒的回电速度,而且可以以500Hz的频率频闪30次,并且具有高速同步功能。
3、这款闪光灯可以使用高级无线闪光功能,最多支持5组15灯的旁边编组。
佳能600EX-RT闪光灯对于数码产品,一分价钱一分货是大家都明白的道理,所以600EX-RT作为旗舰产品,在性能上自然不必多说。
下面笔者将着重介绍这款闪光的实际操作,为广大玩家,特别是刚开始接触闪光灯的玩家提供一些参考。
·佳能600EX-RT控制面板介绍我们先来看一下佳能600EX-RT的操作面板。
佳能600EX-RT作为专业级闪光灯,操作界面更加人性化,功能功能也更加丰富。
今天我们为大家带来的主要是单灯使用介绍。
佳能600EX-RT功能简介由于闪光灯属于比较常见的配件产品,相信大部分玩家都会或多或少有过接触。
如果您没有接触过这类产品,下面笔者将具体介绍下600EX-RT的面板操作和常见功能的简单操作。
佳能600EX-RT的操作面板非常并不复杂首先我们来看下操控面板,面板上按键,佳能600EX-RT的按键布局保持了佳能的一贯作风,上排是四个功能按键,用于在不同模式下选择调节内容,下面是主播轮和模式切换按钮。
永诺YN568EX闪光灯说明书
永诺YN568EX闪光灯说明书一、警告请勿让本产品淋雨或受潮,以免发生火灾或触电。
处理电池时,请将电池的触点包裹好以避免短路,并请遵守好当地有关处理电池的规定。
请将电池或容易误吞的东西远离儿童存放,如果误吞了物体,请立即与医生联系。
不要近距离对人体的眼睛使用闪光元件,否则有可能对人体视网膜造成伤害。
不要对需要高度注意力的人使用闪光灯,否则有可能引发安全事故。
如果发生以下情况,请立即取出电池并停止使用。
本产品跌落或受到强烈冲击,使产品的内部裸露。
电池内部腐蚀性液体泄漏,此时应带手套取出电池。
产品发出奇怪的气味,发热或冒烟。
请勿自行拆卸或维修本产品,如果接触产品内部的高压电路,可能会触电。
长期不使用本产品时,请取出所有电池。
二、产品特点支持高速同步可支持高速同步TTL 闪光,您可以在所有的快门速度下同步使用 YN568EX 闪光灯,最高快门同步达 1/8000秒。
兼容 N 家、C 家无线闪光系统同一台 YN568EX 可分别接受580EX II、SB-900/800/700、7D/60D/600D 内闪、N 家相机 C 指令、SU-800及ST-E2 无线信号,支持 4 个频道,实现离机 TTL 及手动闪光。
大尺寸 LCD 显示屏大尺寸 LCD 显示,可更清晰、更直观地查看及设置闪光功能,使用更便捷。
GN58 ISO100,105mmYN568EX 为永诺新型高指数闪光灯,支持 TTL、M、Multi 闪光。
多种触发同步方式,灵活多变YN568EX 可以通过相机机顶触发、内置或主控闪光灯指令触发、S1 和 S2 避预闪触发。
配备灯头电动变焦功能通过操作闪光灯上的变焦按钮,可以使灯头覆盖焦距在 auto,24,105mm 之间变动。
全面支持TTL 功能支持高速同步、曝光补偿、曝光包围、后帘同步、曝光锁定、光圈预览造影闪光、佳能相机菜单访问。
远程无线触发感应YN568EX 具备远程无线触发感应功能;Sc/Sn/S1/S2 模式可工作于户外环境,无线触发感应距离长达 15 米。
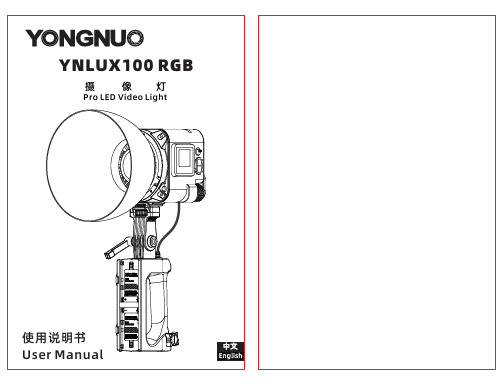
永诺 YNLUX100 RGB 摄像灯 Pro LED Video Light 使用说明书
e this product in dry environment.This product
is not waterproof or fireproof.Do not use it in hot,
rainy, damp or dusty environment.
11.Do not use this product near chemicals, flammable
YNLUX100 RGB
摄 像灯
Pro LED Video Light
使用说明书 User Manual
中文 English
前言
感谢您使用永诺产品! 在使用产品前,请认真阅读使用说明书。
注意事项
1.请保管好本产品,请勿让儿童接触,勿放置在儿童活动之处。 2.请在有人员看管时使用本产品,无人员看管时应断电产品。 3.在使用产品前,请确认电源电压和本产品所标识的电压是否符合。 4.建议使用永诺提供的原厂线缆或出售的配件。 5.产品接通电源线时,请妥当放置电源线,避免绊倒人员或拉扯
电源输入接口
-5-
2 按箭头方向
安装电池
2、开机与关机。
━:开机 ○:关机 中文
-6-
3、色温设置。 按下旋钮切换选择色温与亮度,长按旋钮选择红绿偏移, 旋转旋钮调节参数。 (色温调节精准至50K。)
1 2 34 5
1. 频道显示
2. 2.4G(开启显示)
3. 蓝牙(连接显示)
8
6 4. 风扇(开启显示)
13.Please do not use the damaged power cord or the cracked product caused by falling off.
TTL 永诺YN468闪光灯使用心得

TTL 永诺YN468闪光灯使用说明2011-02-07 13:30:58Canon 50D, 40D, 30DCanon 500D/T1i, 450D/Xsi, 400D/Xti, 350D不适用机型:Canon 1Ds, 1D, 5D, 5DII Series, and 7D)一、警告:请勿让本产品淋雨或受潮,以免发生火灾或触电。
处理电池时,请将电池的触点包裹好以避免短路,并请遵守好当地有关处理电池的规定。
请将电池或容易误吞的东西远离儿童存放,如果误吞了物体,请立即与医生联系。
不要近距离对人体的眼睛使用闪光元件,否则有可能对人体视网膜造成伤害。
不要对需要高度注意力的人使用闪光灯,否则有可能引发安全事故。
如果发生以下情况,请立即取出电池并停止使用。
本产品跌落或受到强烈冲击,使产品的内部裸露。
电池内部腐蚀性液体泄漏,此时应带手套取出电池。
产品发出奇怪的气味,发热或冒烟。
请勿自行拆卸或维修本产品,如果接触产品内部的高压电路,可能会触电。
长期不使用本产品时,请取出所有电池。
二、部件及显示屏说明1、反射板2、广角扩散板3、闪光灯头4、电池仓盖5、辅助对焦灯及无线触发感应器6、固定旋钮7、热靴座8、热靴触点9、显示屏10、+、—按钮11、测试按钮(PILOT)12、模式切换按钮(MODE)13、电源按钮(ON/OFF)14、充电指示灯15、模式指示16、功率/EV指示17、ISO指示(仅尼康版本可用)18、光圈指示19、输出功率微调指示20、频闪次数及频率指示21、后帘同步指示22、对焦灯开关指示23、灯头焦距指示24、灯头手动变焦指示三、产品安装1、安装电池。
按箭头所示方向滑动【电池仓盖】将其打开。
按电池仓中贴纸的指示安放电池,确保电池的正负极接点朝向正确。
按箭头所示方向滑动【电池仓盖】将其关闭。
2、将闪光灯安装到相机上。
按箭头所示方向转动【固定旋钮】到最高点。
将闪光灯【热靴座】完全推入相机热靴。
如箭头所示方向转动【固定旋钮】拧紧。
TTL 永诺YN468闪光灯 使用说明

TTL 永诺YN468闪光灯使用说明2011-02-07 13:30:58Canon 50D, 40D, 30DCanon 500D/T1i, 450D/Xsi, 400D/Xti, 350D不适用机型:Canon 1Ds, 1D, 5D, 5DII Series, and 7D)一、警告:请勿让本产品淋雨或受潮,以免发生火灾或触电。
处理电池时,请将电池的触点包裹好以避免短路,并请遵守好当地有关处理电池的规定。
请将电池或容易误吞的东西远离儿童存放,如果误吞了物体,请立即与医生联系。
不要近距离对人体的眼睛使用闪光元件,否则有可能对人体视网膜造成伤害。
不要对需要高度注意力的人使用闪光灯,否则有可能引发安全事故。
如果发生以下情况,请立即取出电池并停止使用。
本产品跌落或受到强烈冲击,使产品的内部裸露。
电池内部腐蚀性液体泄漏,此时应带手套取出电池。
产品发出奇怪的气味,发热或冒烟。
请勿自行拆卸或维修本产品,如果接触产品内部的高压电路,可能会触电。
长期不使用本产品时,请取出所有电池。
二、部件及显示屏说明1、反射板2、广角扩散板3、闪光灯头4、电池仓盖5、辅助对焦灯及无线触发感应器6、固定旋钮7、热靴座8、热靴触点9、显示屏10、+、—按钮11、测试按钮(PILOT)12、模式切换按钮(MODE)13、电源按钮(ON/OFF)14、充电指示灯15、模式指示输出功率将闪烁,在此状态下按【模式切换按钮】即MODE按钮,闪光次数将闪烁,此时按【+】与【-】可以调整闪光次数,再按【模式切换按钮】,闪光频率将开始闪烁,此时按【+】与【-】可以调整闪光次数。
注意:电池电量不足的情况,闪光灯充电速度较慢,可能会引起高频率闪光出现漏闪,在这种情况下,请降低闪光频率。
6、S1/S2模式通过按下【模式切换按钮】,可以使闪光灯进入S1、S2模式。
这两种模式适合作为副灯使用,以创建多种照明效果,它们分别适合于手动闪光环境和TTL闪光环境。
永诺560闪光灯说明书

3、M模式
该M模式下,您可以根据自己的喜好设定闪光亮度,通过【左】【右】、【上】【下】及中间的 【确定】按钮可以对闪光亮度进行调节。闪光亮度的调整范围是1/128~1/1,亮度共8档,每 一档可有8档微调,【上】【下】按钮作为微调输出功率使用。亮度等级由亮度指示灯显示。 拍摄时, 您只需要设定闪光亮度,调整相机并按下快门,闪光灯会在相机同步信号下进行闪光。
5、测试闪光
无论处在哪种模式下,您都可以通过按【PILOT】按钮来测试闪光灯是否闪光正常。测试闪光时, 闪光灯会根据所选择的输出功率的等级发出相应亮度的闪光。
6、节电模式
永诺为YN560设计了节电模式,此节电模式可以通过长按【声音开关】进行开启或关闭。 在M模式下,开启闪光灯节电模式,节电指示灯熄灭,闪光灯闲置3分钟将进入休眠状态,以 节省电量,您可以通过按【PILOT】按钮、【电源开关】按钮,或通过PC接口来唤醒闪光灯以 便继续操作。闲置15分钟后闪光灯将自动关机。如果关闭节电模式,节电指示灯亮起,闪光 灯停止操作后不会进入休眠状态,闲置30分钟后闪光灯将自动关机。 -11-
在S1、S2模式下,开启闪光灯节电模式,闲置30分钟后闪光灯将自动关机;若关闭闪光灯 节电模式,闲置60分钟后闪光灯将自动关机。 闪光模式
节电模式[开]
节电模式[关]
M模式
闲置3分钟休眠,15分钟自动关机
不休眠,30分钟自动关机
S1/S2模式
闲置3分钟休眠,30分钟自动关机
不休眠,60分钟自动关机
7、过热保护
嘀嘀嘀3声
指示灯长亮
节电模式 关闭
嘀嘀嘀嘀4声
正常
指示灯长灭
节电模式 开启
连接快速响
更换电池 指示灯闪烁 正常 可以通过按电源 闪光灯进入 开关或【PILOT】 节能状态 按钮重新唤醒闪 光灯
说明手册:GODOX TTL无线引闪器指南说明书

说明手册Instruction Manual地址/Add: 深圳市宝安区福永镇福洲大道西新和村华发工业园A4栋Building A4, Xinhe Huafa Industrial Zone, Fuzhou RD West, Fuyong Town, Baoan District, Shenzhen 518103, China电话/Tel: +86-755-29609320(8062) 传真/Fax: +86-755-25723423邮箱/E-mail:***************深圳市神牛摄影器材有限公司GODOX Photo Equipment Co., Ltd.TTL 无线引闪器TTL Wireless Flash TriggerForeword Warning Names of Parts Body LCD Panel BatteryInstalling Batteries Battery Level Indication Using the Flash TriggerAs a Wireless Camera Flash Trigger As a Wireless Outdoor Flash Trigger As a Wireless Original Flash Trigger As a Wireless Studio Flash Trigger As a Wireless Shutter Release Trigger As a Flash Triggerwith 2.5mm Sync Cord Jack Setting the Flash Trigger Power SwitchAutomatically Enter Power Saving Mode Power Switch of AF Assist Beam Channel Settings Wireless ID SettingsMode Settings Magnification Function Output Value SettingsFlash Exposure Compensation SettingsMulti Flash Settings (Output Value, Times and Frequency) Modeling Lamp Settings ZOOM Value Settings Shutter Sync Settings Buzz Settings Sync Socket Settings TCM FunctionSHOOT Function Settings C.Fn: Setting Custom Functions Compatible Flash Models Compatible Camera Models Technical DataRestore Factory Settings Firmware Upgrade AttentionsCaring for Flash TriggerContentsThanks for your purchase of this XProC wireless flash trigger.This wireless flash trigger is suitable for using Canon cameras to control Godox flashes with X system e.g. camera flash, outdoor flash, and studio flash. It can also control Canon original speedlites with the coordination of X1R-C receiver. Featuring multi-channel triggering, stable signal transmission, and sensitive reaction, it gives photographers unparalleled flexibility and control over their strobist setups. The flash trigger applies to hotshoe-mounted Canon EOS series cameras, as well as the cameras which have PC sync sockets.With XProC wireless flash trigger, high speed synchronization is available for most of camera flashes in the market which support E-TTL II. The max flash synchronization speed is up to 1/8000s *.*: 1/8000s is achievable when the camera has a max camera shutter speed of 1/8000s.24252628283444454647474848Do not disassemble. Should repairs become necessary, this product must be sent to an authorized maintenance center.Always keep this product dry. Do not use in rain or in damp conditions.Keep out of reach of children.Do not use the flash unit in the presence of flammable gas. In certain circumstance, please pay attention to the relevant warnings.Do not leave or store the product if the ambient temperature reads over 50℃.Turn off the flash trigger immediately in the event of malfunction.Observe precautions when handling batteries- Use only batteries listed in this manual. Do not use old and new batteries or batteries of different types at the same time.- Read and follow all warnings and instructions provided by the manufacturer.- Batteries cannot be short-circuited or disassembled.- Do not put batteries into a fire or apply direct heat to them. - Do not attempt to insert batteries upside down or backwards.- Batteries are prone to leakage when fully discharged. To avoid damage to the product, be sure to remove batteries when the product is not used for a long time or when batteries run out of charge.- Should liquid from the batteries come into contact with skin or clothing, rinseimmediately with fresh water.LCD PanelTrigger (Flash) + Focus (Camera) --Red:Trigger (Flash) + Shutter (Camera)3 4Cord JackPort17693LCD Panel(1) Multi Groups Display1. Channel (32)2. Camera Connection3. Modeling Lamp Master Control4. High-Speed/Rear Curtain Sync5. Sound6. Battery Level Indication7. Group8. Mode9. Power 10. Group’s Modeling Lamp 11. ZOOM Value 12. Icons of Function Button 13. C.Fn Menu 14. Version(4) Multi Groups’ ZOOMDisplay(2) Single Group Display(3) MenuInstalling BatteriesAs shown in the illustration, slide the batterycompartment lid of the flash trigger and insert two AA batteries separately.Battery IndicationCheck the battery level indication on the LCD panel to see the remaining battery level during the usage.AA alkaline batteries are recommended.Battery Level Indication 3 grids2 grids 1 grid Blank grid BlinkingMeaning Full Middle LowLow battery, please replace it.< 2.5V The battery level is going to be used out immediately (please replace new batteries, as low power leads to no flash or flash missing incase of long distance).1. As a Wireless Camera Flash Trigger Take TT685C as an example:1.1 Turn off the camera and mount the transmitter on camera hotshoe. Then, power on the flash trigger and the camera.Using the Flash TriggerThe battery indication only refers to AA alkaline batteries. As the voltage of Ni-MH battery tends to be low, please do not refer to this chart.1.2 Long press the <Zm/CH> button to setchannel, group, mode and parameters (refersto the contents of “Setting the Flash Trigger”).1.3 Turn on the camera flash, press thewireless setting button and the wirelessicon and <SLAVE> slave unit icon will bedisplayed on the LCD panel. Press the <CH>button to set the same channel to the flashtrigger, and press the <Gr> button to set thesame group to the flash trigger (Note: please refer to the relevant instruction manual whensetting the camera flashes of other models).1.4 Press the camera shutter to trigger and the status lamp of the flash triggerturns red synchronously.2. As a Wireless Outdoor Flash TriggerTake AD600B as an example:2.1Turn off the camera and mount thetransmitter on camera hotshoe. Then,power on the flash trigger and thecamera.2.2Long press the <Zm/CH> button to setchannel, group, mode and parameters(refers to the contents of “Setting theFlash Trigger”).2.3 Power on the outdoor flash and press the wireless setting button and thewireless icon will be displayed on the LCD panel. Long press the3. As a Wireless Original Flash TriggerTake 600EX-RT as an example:3.1Turn off the camera and mount the transmitteron camera hotshoe. Then, power on the flashtrigger and the camera.3.2Long press the <Zm/CH> button to set channel,group, mode and parameters (refers to thecontents of “Setting the Flash Trigger”).3.3Attach the original flash to the X1R-C receiver.Press the <CH> button on the receiver to setthe same channel to the flash trigger, and pressthe <Gr> button to set the same group to theflash trigger (Note: please refer to the relevantinstruction manual when setting the originalcamera flashes).3.4 Press the camera shutter to trigger. And thestatus lamp of the camera flash and the flashtrigger both turn red synchronously.< >< >< >< ><GR/CH> button to set the same channel to the flash trigger, and short pressthe < GR/CH> button to set the same group to the flash trigger (Note: pleaserefer to the relevant instruction manual when setting the oudoor flashes of othermodels).2.4 Press the camera shutter to trigger and the status lamp of the flash trigger turnsred synchronously.power it on. Synchronously press down the <G R/CH > button and <S1/S2>button and the wireless icon will be displayed on the LCD panel. Long press the <GR/CH > button to set the same channel to the flash trigger, and short press the < GR/CH > button to set the same group to the flash trigger (Note: please refer to the relevant instruction manual when setting the studio flashes of other models). 4.4 Press the camera shutter to trigger. And thestatus lamp of the camera flash and the flash trigger both turn red synchronously.Note: As the studio flash’s minimum output value is1/32, the output value of the flash trigger should be set to or over 1/32. As the studio flash do not have TTL and stroboscopic functions, the flash trigger should be set to M mode in triggering.5. As a Wireless Shutter Release Trigger Operation method:5.1 Turn off the camera. Take a camera remotecable and insert one end into the camera’s shutter socket and the other end to theshutter release port of X1R-C to connect. Power on the camera and the receiver.5.2 Long press the <Zm/CH > button to set channel, group, mode and parameters (refers to the contents of “Setting the Flash Trigger”).5.3 Press the receiver’s <CH > button to set the same channel to the flash trigger, and press the <Gr > button to set the same group to the flash trigger.5.4 Half press the button to focus and full press the <TEST > button to shoot. Release the button until the status lamp turns to red.Using the Flash Trigger< >Slide the Power Switch to ON, and the device is on and status indicator lamp will not reveal.Note: In order to avoid power consumption, turn off the transmitter when not in use.Power Switch1. The system will automatically enter standby mode after stop operating the transmitter over 90 seconds. And the displays on the LCD panel disappear now.2. Press any button to wake up. If the flash trigger is attached to the hot shoe of CANON EOS camera, half press the camera shutter can also wake the system up.Note: If do not want to enter power saving mode, press the <MENU> button to enter C.Fn custom settings and set STBY to OFF.Automatically Enter Power Saving ModeSlide the AF-assist beam switch to ON , and the AF lighting is allowed to output.When the camera cannot focus, the AF assist beam will turn on; when the camera can focus, the AF assist beam will turn off.Power Switch of AF Assist BeamChannel Setting1. Long press the <Zm/CH > button and the channel value will be chosen.2. Turn the select dial to choose the appropriate channel. Press the <SET > button again to confirm the setting.3. This flash trigger contains 32 channels which can be changed from 1 to 32. Set the transmitter and the receiver to the same channel before usage.6. As a Flash Trigger with 2.5mm Sync Cord Jack Operation method:6.1 The connection method please refers to thecontents of “As a Wireless Studio Flash Trigger” and “As a Wireless Shutter Release”.6.2 Press the shutter normally and the flashes will be controlled by sync cord jack’s signal.Change the wireless channels and wireless ID to avoid interference for it can only be triggered after the wireless IDs and channels of the master unit and the slave unit are set to the same.Press the <MENU> button to enter C.Fn ID. Press the <SET> button to choose OFF channel expansion shutdown, and choose any figure from 01 to 99.Note: As the current Godox flashes do not have wireless ID setting functions, please set ID to OFF. Wireless ID SettingsMode Setting Switch between multi-group and one-group mode: choose a group in multi-group mode and press the <TCM> button to magnify it to one-group mode. Then, press the <TCM> button to back to multi-group.Magnification FunctionOutput Value Settings1. Short press the <MODE> button, and the mode of thecurrent group will change.2. Set the groups to five groups (A-E)2.1When displaying multiple groups, press the <MODE> button to switch the multi-group mode to MULTI mode. Press the group selection button can set the MULTImode to ON or OFF.2.2When displaying multiple groups, press the groupselection button or <MODE> button in one-groupmode, and all the current group’s mode will bechanged by the order of TTL/M/--.3. When setting the group to 16 groups (0-F), there is only manual mode M.4. Long press the <MODE> button for 2 seconds until“LOCKED” is displayed on the bottom of the LCD panel, which means the screen is locked and no parameters can be set. Long press the <MODE> button again to unlock.1. Multi-group displays in the M mode1.1Press the group button to choose the group, turn the select dial, and the power output value will change from Min to 1/1 in 0.3 stop increments. Press the<SET> button to confirm the setting.1.2Press <ALL> button to choose all groups’ power output value, turn the select dial, and all groups’ power output value will change from Min to 1/1 in 0.3 stop increments. Press <ALL> button again to confirm the setting.2. One-group displays in the M modeTurn the select dial and the group’s power output value will change from Min to 1/1 in 0.3 stop increments.Note: Min. refers to the minimum value that can be set in M or Multi mode. The minimum value can be set to 1/128 or 1/256 according to C.Fn-Min. For most of camera flashes, the minimum output value is 1/128 and cannot be set to 1/256. However, the value can change to 1/256 when using in combination with Godox strong power flashes e.g. AD600, etc.Modeling Lamp Settings1. Multi-group displays in the TTL mode1.1 Press the group button to choose the group, turn the select dial, and the FEC value will change from -3 to ~3 in 0.3 stop increments. Press the <SET > button to confirm the setting.1.2 Press <ALL > button to choose all groups’ FEC value, turn the select dial, and all groups’ FEC value will change from -3 to ~3 in 0.3 stop increments. Press <ALL > button again to confirm the setting.2. One-group displays in the TTL modeTurn the select dial and the group’s power output value will change from -3 to ~3 in 0.3 stop increments.1. When displaying multiple groups, press the <MOD > button to control the ON/OFF of the modeling lamp.2. Press the group button to choose the group when displaying multiple groups or when displaying one-group, press the <MOD > button to control the ON/OFF of the modeling lamp (note: The models that can use one- group to ON/OFF the modeling lamp are as follows: GSII, SKII, QSII, QDII, DEII, DPII series, etc. The outdoor flash AD200 and AD600 can use this functionafter upgrade. The new arrivals with modeling lamps can also use this function.).Flash Exposure Compensation Settings1. In the multi flash (TTL and M icon are not displayed).2. The three lines are separately displayed as power output value, Times(flash times) and Hz (flash frequency).3. Turn the Select Dial to change the power output value from Min. to 1/4 in integer stops.4. Short press the Times button can change flash times. Turn the select dial to change the setting value.5. Short press the Hz button can change flash frequency. Turn the select dial to change the setting value.Multi Flash Settings (Output Value, Times and Frequency)6. Until all the amounts are set. Or during any value setting, short press the <MODE > button to exit the setting status. No values will blink.7. In the multi flash setting submenu, short press the <MODE > button to return to main menu when no values are blinking.Note: As flash times are restricted by flash output value and flash frequency, the flashtimes cannot surpass the upper value that permitted by the system.The times that transported to the receiver end are a real flash time, which is alsorelated to the camera’s shutter setting.1.High-speed sync: press the <SYNC > button and is displayed on the LCD panel.2. Second-curtain sync: press the <SYNC > button and is displayed on the LCD panel.Shutter Sync SettingsPress the <MENU > button to enter C.Fn BEEP and press the <SET > button. Choose ON to turn on the BEEP while OFF to turn off it. Press the <MENU > button again to back to the main menu.Buzz Settings1.Press the <MENU > button to enter C.Fn SYNC andpress the <SET > button to choose IN or OUT. Press the <MENU > button again to back to the main menu. 1.1 When choosing IN, this sync socket will enable XProC to trigger flash.1.2 When choosing OUT, this sync socket will send trigger signals to trigger other remote control and flash.Sync Socket SettingsTCM transform function is a particular function that owned by Godox: TTL flash value transform into power output value in M mode.1.1 Set the flash trigger to TTL mode and attach it to the camera. Press the shutter for shooting.1.2 Long press the <TCM > button, and the flash value in TTL mode will transform into power output value in M mode (The displayed minimum value is the set Min. value).1.3 Please refer to the C.Fn setting custom functions to see the flash models which are compatible with TCM functions.Note: Please choose the relevant models in TCM function in C.Fn custom settings according to your own flash.TCM FunctionZOOM Value SettingsShort press the <Zm/CH > button and the ZOOM value will be displayed on the LCD panel. Choose the group and turn the select dial, and the ZOOM value will change from AUTO/24 to 200. Choose the desired value and long press the <Zm/CH > button again to back to the main menu.Note: The flash’s ZOOM should be set to Auto (A) mode before responding.The following table lists the available and unavailable custom functions of this flash.C.Fn: Setting Custom FunctionsSHOOT Function SettingsPress the <MENU > button to enter C.Fn SHOOT. Press the <SET > button to choose one-shoot or multi-shoots, and press the <MENU > button again to back to the main menu.One-shoot: When shooting, choose one-shoot. In the M and Multi mode, the master unit only sends triggering signals to the slave unit, which is suitable for one person photography for the advantage of power saving.Multi-shoots: When shooting, choose multi-shoots, and the master unit will send parameters and triggering signals to the slave unit, which is suitable for multi person photography. However, this function consumes power quickly.APP: Only send triggering signal when camera is shooting (control the flash's parameters by smartphone APP).Compatible Flash ModelsReceiver --X1R-C XTR-16 XTR-16S FlashAD600 series/AD360II series/AD200/V860II series/V850II/TT685 seriesTT600/TT350CQuickerII series/QTII/SK II seriesDP II series/GSII600EX-RT/580EXII/580EX/430EXIIV860CAD360/AR400Quicker series/SK series/DP series/GT/GS series/Smart flash seriesV860CV850NoteAs there are so many camera flashes inthe market which are compatible withCanon speedlites, we do not test one by one.The flashes with Godox wireless USB portC an only be triggeredTransmitterXProCNote: The range of support functions: the functions that are both owned by XProC and flash.The relationship of XT wireless system and X1 wireless system:1Dx Mark II 1Dx 5Ds/5Dsr 5DⅣ 5D Mark III 5D Mark II5D7D Mark II 7D6D80D70D60D50D40D30D750D/760D 700D 650D 600D 550D500D 450D 400D Digital 350D DIGITAL 100D 1200D 1000D 1100D M5 M31. This table only lists the tested camera models, not all Canon EOS series cameras. For the compatibility of other camera models, a self-test is recommended.2. Rights to modify this table are retained.3. The cameras which are released before 2012 do not have TTL mode in their D and E group.This flash trigger can be used on the following Canon EOS series camera models:Compatible Camera ModelsSynchronously press the two function button in the middle, and the restore factory settings are finished until the “RESET” is displayed on the LCD panel.and Power Switch is turned on. Check if the transmitter and the receiver are set to the same channel, if the hotshoe mount or connection cable is well connected, or if the flash triggers are set to the correct mode.2. Camera shoots but does not focus. Check if the focus mode of the camera or lens is set to MF. If so, set it to AF.3. Signal disturbance or shooting interference. Change a different channel on thedevice.4. Operating distance limited or flash missing. Check if batteries are exhausted. If so, change them.Avoid sudden drops. The device may fail to work after strong shocks, impacts, or excess stress.Keep dry. The product isn’t water-proof. Malfunction, rust, and corrosion may occur and go beyond repair if soaked in water or exposed to high humidity.Avoid sudden temperature changes. Condensation happens if suddentemperature changes such as the circumstance when taking the transceiver out of a building with higher temperature to outside in winter. Please put the transceiver in a handbag or plastic bag beforehand.Keep away from strong magnetic field. The strong static or magnetic fieldproduced by devices such as radio transmitters leads to malfunction.Caring for Flash TriggerFirmware UpgradeThis flash trigger supports firmware upgrade through the Type-CUSB port. Update。