weblogic创建domain域
weblogic常见错误

这个错误信息意思是:名称为1234的服务器没有找到,在配置中只存在以下服务:myserver。
选择“Window -> Preferences”菜单,打开首选项对话框。展开 MyEclipse 下的 Application Servers 节点,点击 WebLogic 9,将Execution server name的属性改为:myserver。注意:如果在配置域的时候没有配置服务器名称,那么服务器名称默认为:AdminServer。
输入用户名和密码,是我们在第4步配置的用户名:weblogic,密码:weblogic。
三、在MyEclipse中配置Weblogic的开发环境。
1、Window(窗口)---> Preferences(首选项)---> MyEclipse ---> Application Servers(应用服务器)---> WebLogic ---> WebLogic 9.X ---> 选中Enable单选按钮,启用WebLogic服务器。
9、测试一下是否配置成功。开始菜单 ---> 程序 ---> BEA Products(BEA产品)---> User Projects ---> mydomain(是我们在第7步取的域名) ---> Start Admin Server for Weblogic Server Domain(启动WebLogic服务器)。当看到输出:Server started in RUNNING mode(服务器正在运行)的信息后,表示配置正确,服务器已经启动成功。停止服务,可以这样:开始菜单 ---> 程序 ---> BEA Products(BEA产品)---> User Projects ---> mydomain(是我们在第7步取的域名) ---> Stop Admin Server。
weblogic10的简单使用
Weblogic1.安装1.双击安装。
2.选择BEA根目录,点击下一步。
3.进入注册安全更新页面,去掉“我希望通过My OracleSupport接受安全更新”前面的勾弹出是否确定页面如图,选择Yes,点击下一步。
4.进入安装类型页面,选择典型,点击下一步。
5.进入选择产品安装目录页面,点击下一步。
6.进入选择快捷方式位置页面,点击下一步。
7.进入安装概要页面,点击下一步。
8.开始安装。
9.安装完成,点击完成(取消勾选Quickstart)。
2.新建一个域1.在安装完成的界面中,如果选中“运行Quickstart”(默认是选中),则过几秒会自动弹出下图所示的界面,选择“Getting started with WebLogic Server 10.3.5”选项就可进入配置向导,直接进行第二步操作:如果在安装完成的界面中,没有选中“运行Quickstart”,则打开“开始菜单->程序-> Oracle WebLogic -> WebLogic Server 11gR 1-> Tools -> Configuration Wizard”,进入配置向导选择Configuration Wizard配置向导。
选择创建新的Weblogic域,点击下一步。
2.进入选择域源页面,点击下一步。
3.指定域名与位置,点击下一步。
4.填写用户名、密码,点击下一步。
5.选择domain模式和JDK,默认即可(注:WebLogic不支持大于自带JDK版本)。
6.进入可选配置页面,不再勾选选项,直接下一步。
7.开始创建。
8.配置完成,点击完成退出。
3.myeclipse中配置weblogic1.关联域A,在Ide中点击Window选择preferences,输入weblogic选中webloogic10如下图B,点击Enable启用,选择BEA home directory值为:BEA的安装目录C,选择Excution domain root为你要关联的一个域的路径D,在Administratrartion username和Administratrartion password 填写上你建域时设置的用户名和密码其他几项是自动填充的不需要设置2.配置jdk及启动参数A,2Weblogic 10支持的jdk版本是1. 6,在weblogic10下方选择jdk,点击右边的Add,选择JRE home Arguments 后的Browse,选择weblogic安装目录下的jdk,确定后点OK即可B,下图中的输入框里可以配置weblogc的启动参数4.启动weblogic1.Myeclipse中启动点击Run/Stop/Restart Myeclipse Server按钮,选择Weblogic 10.x选择Start如下图2.脚本启动进入{新建的域名所在目录}/bin,双击startWebLogic.cmd以上两种方式,当控制台输出如下:说明服务器启动成功4.w eblogic部署项目1.控制台布署这种部署方式需要先启动服务,服务启动后,在浏览器地址栏输入:http://ip地址:端口号/console,如:http://localhost:7001/console输入建域时设置的用户名和密码:登录后界面如下:在左侧菜单栏的域结构中点击“部署”,此时右边部署下的按钮是灰色的点击安装按钮后进入相应目录选择需要布署的项目,点击下一步将此部署为安装程序,点击下一步输入部署项目名称,点击完成完成部署2.在Myeclipse中部署6.端口设置1.单击左边菜单栏环境(Environment) 服务器(Servers)2.单击AdminServer(admin),修改页面上Listen Port。
linux weblogic创建域
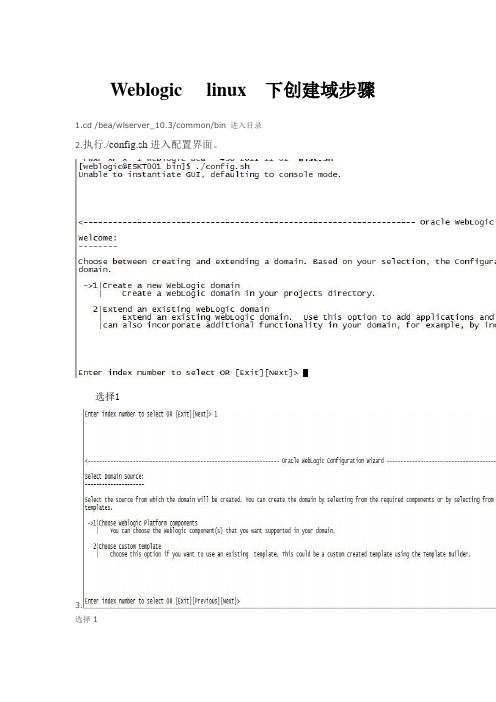
Weblogic linux 下创建域步骤1.cd /bea/wlserver_10.3/common/bin 进入目录2.执行./config.sh进入配置界面。
选择13.选择1这一步直接继续这一步是设置用户名密码和确认密码这是选择模式我们选择2 (产品模式)选择JDK版本我们选择第一个选择1我们选择1 (YES)这里选择1 (不配置安全存储)这里指需要修改端口号就行 3继续继续继续继续v这里输入你要改的名字我这里随便写了一个1作为域名了这里确认名字选择1然后完成修改setDomainEnv.sh在底端处JA V A_OPTIONS="${JA V A_OPTIONS}" export JA V A_OPTIONS后面加上这两句话WLS_USER=weblogicWLS_PW=weblogic在startWeblogic.sh 中间添加这些参数SA VE_JA V A_OPTIONS="${JA VA_OPTIONS}"SA VE_CLA S SPATH="${CLASSPATH}" 找到这个所在的位置在下面添参数WLS_USER="weblogic" 域用户民export WLS_USERWLS_PW="weblogic_note" 域密码export WLS_PWMEM_ARGS="-Xms2048m -Xmx2048m -XX:MaxPermSize=1024m"export MEM_ARGS在setDomainEnv.sh最前面添加此参数JA V A_OPTIONS="${JA V A_OPTIONS} -Djava.security.egd=file:/dev/./urandom" export JA V A_OPTIONSWLS_USER=weblogic 域用户名WLS_PW=weblogic_note 域密码。
WEBLOGIC的安装、配置和启动

WEBLOGIC的安装、配置和启动WEBLOGIC的安装、配置和启动⼀、软件安装1. 安装前的准备⼯作1.1 ⾸先请确认您要安装的WebLogic版本所在的平台已通过了BEA的认证,完整的认证平台列表请参考1.2 确定⼀个安装⽬录,建议该⽬录下⾄少有1个G的空间,可单独创建个逻辑卷和⽂件系统1.3 创建⼀个BEA⽤户组帐号1.4 创建⼀个weblogic⽤户帐号2. 安装步骤WebLogic在AIX平台下的安装⽅法⼀般有三种:图形窗⼝模式,控制台模式,⽆⼈守护安装模式。
由于控制台模式的使⽤最为⼴泛且不受任何其它硬件条件的限制(所以我们这⾥只介绍控制台安装模式。
2.1 安装JRE环境WebLogic安装程序需要JRE的⽀持,根据安装平台的不同,WebLogic的安装介质也分为两类,⼀种⾃带了JRE(后缀名为.bin),⼀种需要下载平台⼚商所提供的JRE环境(后缀名为.jar),以WebLogic Server 8.1 with SP2为例,⽬前所⽀持的UNIX/LINUX平台如下所⽰(截⽌2004.2.23) WebLogic Server 8.1 with SP2⽀持平台是否⾃带JDKHP-UX (11.0,11.i, PA-RISC) YESSun Solaris (8, 9, SPARC) YESRed Hat Enterprise Linux (2.1, Pentium) YESRed Hat Enterprise Linux (2.1, Itanium) YESSuSE SLES (8, Pentium) YESUnited Linux (1.0, Pentium) YESIBM AIX (5.1, 5.2) NO⾸先要下载和操作系统以及WEBLOGIC相匹配JDK版本,最好是经过BEA认证的版本。
可查询以下链接;在AIX上安装JDK要注意以下步骤:安装后要修改环境变量/etc/environment⽂件,将PATH中Java部分更改为新安装的Java版本(Java131或Java14),并重新Login后⽣效!否则系统会使⽤原有的Java130环境,在安装weblogic7.0以上版本时会⾃动退回到提⽰符下。
weblogic创建域

配置Domain1.安装weblogic后,查看下面的图片所选来创建“域”。
2.默认给它第一个选项,直接下一步next3.把下面的第一个选项全部打钩然后next4. 创建weblogic控制台。
登录用户名和密码必须是:weblogic/1qaz2WSXNext之后到了这一步,不用管它。
系统会默认选择第二个JDK 。
如果你那不是的话。
请选择第二个JDK 。
然后点击next5.点击yes ,然后next6. 一直按照默认,点击Next 。
1.dbms=数据库主键标识host=) 3.输入对应的信息。
点击测试test7.到这一步。
不用修改。
会有一个默认的服务名称。
直接next就行了8.直接next9.直接next10.经过一路的next 。
下面到了最关键的部分。
下面有7个填写信息项。
都要填写。
并且填写的方式和信息都是一样的。
大致跟第6步的图片差不多。
(箭头所指的红色圈里的选项一定要注意,当你点击一个信息项的时候,先不要忙于填写信息。
而是先记住红色圈里的选择项。
因为你填写信息的时候,圈里的选择项会随之改动或默认不选。
这时候你填写完信息后把圈里的选择项改成初始的选择。
)7个信息项全部填写完成后。
点击测试11.点击测试之后会出现这个窗口(红色箭头所指的test 从第一个挨个点下去。
绿色圆圈中的status 为绿色的表示成功! 红色的表示失败。
因为我安装过一遍了。
所以失败) 测试完点击OK再点击第10步的next1 2345612.直接next13.直接next14.又经过一路的next 。
我们马上就要完工了。
但是呢,最后一步一定要注意了。
(一定要把domain name:js_domain)。
然后就可以点击create了。
weblogic基础教程
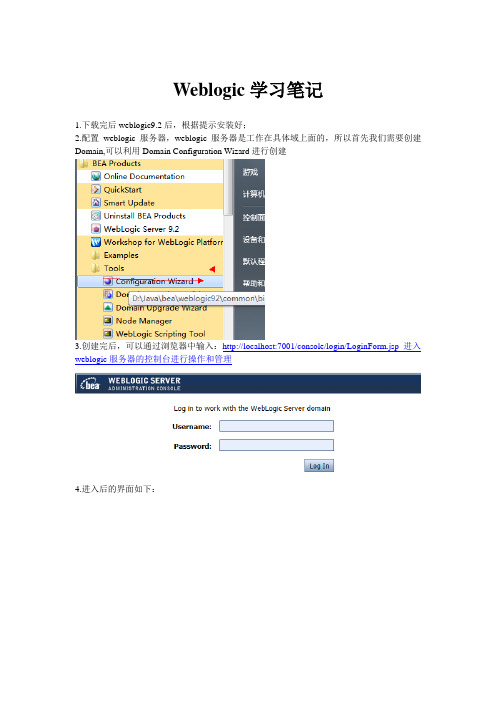
Weblogic学习笔记1.下载完后weblogic9.2后,根据提示安装好;2.配置weblogic服务器,weblogic服务器是工作在具体域上面的,所以首先我们需要创建Domain,可以利用Domain Configuration Wizard进行创建3.创建完后,可以通过浏览器中输入:http://localhost:7001/console/login/LoginForm.jsp进入weblogic服务器的控制台进行操作和管理4.进入后的界面如下:在里面我们可以部署工程、配置数据源、配置jdbc、修改密码等。
注意:在weblogic中,很重要的一个文件就是config.xml文件,这个文件中配置了域配置信息。
我们可以使用工具进行配置,也可以直接对这个文件进行操作。
5.在eclipse中进行集成这里我们选择的jdk是其自身自带的在这个版本的weblogic中,如果不用自带的,则会出现错误。
之后就可以把工程用weblogic进行部署了。
然后访问即可:需要注意的地方是:1.这个版本的weblogic是不支持eclipse自动生成的web.xml文件,需要把web.xml该为下面的内容:<?xml version="1.0"encoding="UTF-8"?><web-app version="2.4"xmlns="/xml/ns/j2ee"xmlns:xsi="/2001/XMLSchema-instance"xsi:schemaLocation="/xml/ns/j2ee/xml/ns/j2ee/web-app_2_4.xsd"><welcome-file-list><welcome-file>index.jsp</welcome-file></welcome-file-list></web-app>2.一定要使用其自带的jdk,否则也会很容易出现问题。
weblogic命令行创建域
Weblogic远程创建域
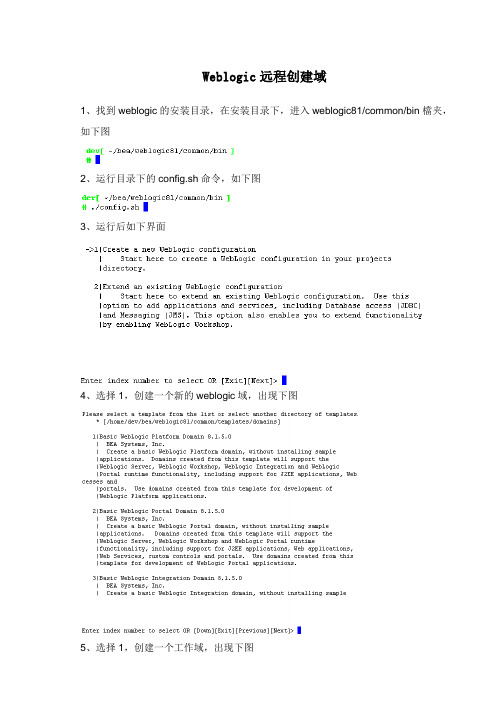
1、找到weblogic的安装目录,在安装目录下,进入weblogic81/common/bin檔夹,如下图
2、运行目录下的config.sh命令,如下图
3、运行后如下界面
4、选择1,创建一个新的weblogic域,出现下图
,出现下图
6、是否使用向导,选择1
,修改密码,出现下图
北京市朝阳区裕民路12号华展国际1202室第 2 页共 5 页
,出现下图
9、密码修改结束,输入确认密码,选择3
出现下图
北京市朝阳区裕民路12号华展国际1202室第 3 页共 5 页
12、输入1,选择开发模式,出现下图
,出现下图
13、输入weblogic的JDK版本。
选择2
15、输入Next,出现下图
北京市朝阳区裕民路12号华展国际1202室第 4 页共 5 页
,创建服务名,出现下图
16、输入”xjdomain”
17、输入Next,出现下图
工作域创建成功。
下面的操作就是去域路径下启动这个服务就可以了。
注意,请停止原来的那个服务,否则会端口冲突。
北京市朝阳区裕民路12号华展国际1202室第 5 页共 5 页。
weblogic入门使用详解及集群
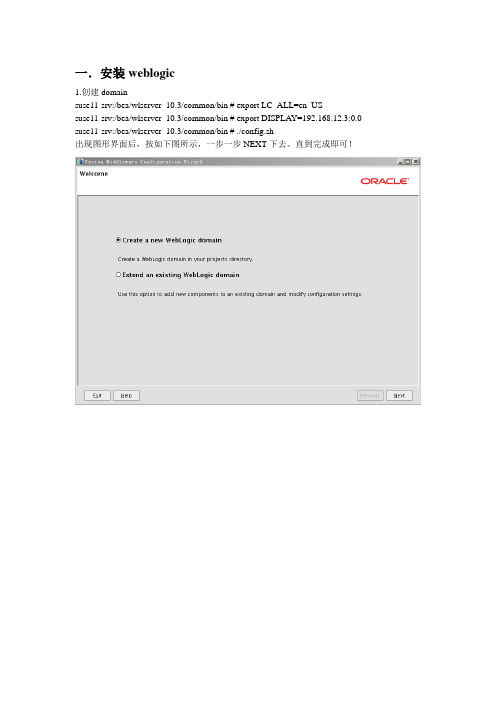
一.安装weblogic1.创建domainsuse11-srv:/bea/wlserver_10.3/common/bin # export LC_ALL=en_USsuse11-srv:/bea/wlserver_10.3/common/bin # export DISPLAY=192.168.12.3:0.0 suse11-srv:/bea/wlserver_10.3/common/bin # ./config.sh出现图形界面后,按如下图所示,一步一步NEXT下去。
直到完成即可!安装完成后:启动weblogic 新建的domain xcj01_domain1. 修改 suse11-srv:/bea/user_projects/domains/ xcj01_domain/bin # vi ./startWebLogic.sh 加入如下内容:#for weblogic auto loginWLS_USER="weblogic"WLS_PW="weblogic2011"2..启动use11-srv:/bea/user_projects/domains/ xcj01_domain/bin # ./startWebLogic.sh3.进入weblogic后台管理:http://192.168.12.254:7001/console/login/LoginForm.jsp二.管理weblogic:新建Server并用不同的方法启动它1.创建machine(相当于一台实际的物理主理),用来管理远程的weblogic实例。
2.创建设machine的server:再点左上方的保存更改!3.启动被管理服务器Server-xcj01的两种方法:A.方法一:startManagedWebLogic.sh 被管理服务器名来直接启动suse11-srv:/bea/user_projects/domains/xcj01_domain/bin #./startManagedWebLogic.sh Server-xcj01B.方法二:将machine关联到Server-xcj01上并通过节点方式启动1.先建一个/bea/wlserver_10.3/common/nodemanager # vi nodemanager.properties 文件内容如下:127.0.0.1 #是管理服务器的IP2. ./startNodeManager.sh IP port 来启动machinesuse11-srv:/bea/wlserver_10.3/server/bin # ./startNodeManager.sh 127.0.0.1 5556 3.machine启动完成后,再在weblogic后台管理中的servers中右击,启动servers 三.Weblogic脚本管理工具:wlst1.设置环境变量suse11-srv:/bea/wlserver_10.3/server/bin # ./setWLSEnv.sh2.启动wlst: suse11-srv:/bea/wlserver_10.3/common/bin # ./wlst.shconnect('weblogic','weblogic2011','t3://127.0.0.1:7001')wls:/offline> connect('weblogic','weblogic2011','t3://127.0.0.1:7001') Connecting to t3://127.0.0.1:7001 with userid weblogic ...Successfully connected to Admin Server 'AdminServer' that belongs to domain 'xcj01_domain'.Warning: An insecure protocol was used to connect to theserver. To ensure on-the-wire security, the SSL port orAdmin port should be used instead.wls:/xcj01_domain/serverConfig>wls:/xcj01_domain/serverConfig> ls()wls:/xcj01_domain/serverConfig> help()wls:/xcj01_domain/serverConfig> edit()wls:/xcj01_domain/edit !> cd('Log')wls:/xcj01_domain/edit/Log !> startEdit()wls:/xcj01_domain/edit/Log !> set('FileCount','4')wls:/xcj01_domain/edit/Log !> save()wls:/xcj01_domain/edit/Log !> activate()wls:/xcj01_domain/edit/Log !> disconnect()wls:/xcj01_domain/edit/Log> exit()1.新建一个wlst批处理文件test.py,内容如下:connect('weblogic','weblogic2011','t3://127.0.0.1:7001')ls()edit()cd('Log')startEdit()set('FileCount','4')save()activate()disconnect()exit()2.运行批处理:suse11-srv:/bea/wlserver_10.3/common/bin # ./wlst.sh test.py四.Weblogic应用的发布及管理将应用程序发布到某个server上。
- 1、下载文档前请自行甄别文档内容的完整性,平台不提供额外的编辑、内容补充、找答案等附加服务。
- 2、"仅部分预览"的文档,不可在线预览部分如存在完整性等问题,可反馈申请退款(可完整预览的文档不适用该条件!)。
- 3、如文档侵犯您的权益,请联系客服反馈,我们会尽快为您处理(人工客服工作时间:9:00-18:30)。
weblogic创建domain域.txt2008-02-21 15:55bash-2.05# lsbsu utils.jarbash-2.05# cd..bash: cd..: command not foundbash-2.05# cd ..bash-2.05# cd weblogic81bash-2.05# lscommon javelin samples server uninstall workshopbash-2.05# cd serverbash-2.05# ls3rd_party_licenses.txtabout_wls.html builder extLICENSE.TXT bin copyright libbash-2.05# cd binbash-2.05# '> ls>>>bash-2.05# pwd/usr/local/bea/weblogic81/server/binbash-2.05# ls -ltotal 7830-rwxr-xr-x 1 root other 5054 May 26 2006 ant-rwxr-xr-x 1 root other 171 May 26 2006 antRun-rwxr-xr-x 1 root other 1433 May 26 2006 antRun.pl-rwxr-xr-x 1 root other 2488 May 26 2006complete-ant-cmd.pl-rwxr-xr-x 1 root other 1406 May 26 2006 cw_blueglobe.ico -rwxr-xr-x 1 root other 1406 May 26 2006 html.ico-rwxr-xr-x 1 root other 557056 May 26 2006 iisproxy128.dll drwxr-xr-x 2 root other 512 May 26 2006 international-rwxr-xr-x 1 root other 569344 May 26 2006 mod_wl128_20.so -rwxr-xr-x 1 root other 569344 May 26 2006 mod_wl_20.so drwxr-xr-x 2 root other 512 May 26 2006 oci817_8drwxr-xr-x 2 root other 512 May 26 2006 oci901_8drwxr-xr-x 2 root other 512 May 26 2006 oci920_8-rwxr-xr-x 1 root other 548864 May 26 2006 proxy30128.dll -rwxr-xr-x 1 root other 548864 May 26 2006 proxy35128.dll -rwxr-xr-x 1 root other 548864 May 26 2006 proxy36128.dll -rwxr-xr-x 1 root other 548864 May 26 2006 proxy61128.dll-rwxr-xr-x 1 root other 4544 May 26 2006 runant.pl-rwxr-xr-x 1 root other 2894 May 26 2006 runant.py-rwxr-xr-x 1 root other 3722 May 26 2006 setWLSEnv.sh-rwxr-xr-x 1 root other 4039 May 26 2006 startNodeManager.sh-rwxr-xr-x 1 root other 1311 May 26 2006 startWLBuilder.sh -rwxr-xr-x 1 root other 12395 May 26 2006 startWLS.shdrwxr-xr-x 3 root other 512 May 26 2006 win64bash-2.05# cd /usr/local/bea/weblogic81/common/bin/bash-2.05# ls -ltotal 68-rwxr-xr-x 1 root other 10898 May 26 2006 commEnv.sh-rwxr-xr-x 1 root other 868 May 26 2006 config.sh-rwxr-xr-x 1 root other 2547 May 26 2006 configDB.sh-rwxr-xr-x 1 root other 840 May 26 2006 config_builder.sh -rwxr-xr-x 1 root other 377 May 26 2006 encryptWSSEPolicy.sh-rwxr-xr-x 1 root other 362 May 26 2006 generateSecretKeyFile.sh-rwxr-xr-x 1 root other 464 May 26 2006 quickstart.sh-rwxr-xr-x 1 root other 3922 May 26 2006 startManagedWebLogic.sh-rwxr-xr-x 1 root other 5437 May 26 2006 startPointBase.sh -rwxr-xr-x 1 root other 2681 May 26 2006 startPointBaseConsole.sh-rwxr-xr-x 1 root other 1792 May 26 2006 stopPointBase.sh bash-2.05# ./config.shUnable to instantiate GUI, defaulting to console mode.<--------------------- BEA WebLogic Configuration Wizard--------------------->Create or Extend a Configuration:---------------------------------Choose between creating and extending a configuration. Based on your selection, the Configuration Wizard guides you through the steps to generate a new orextend an existing configuration.->1|Create a new WebLogic configuration| Start here to create a WebLogic configuration in your projects |directory.2|Extend an existing WebLogic configuration| Start here to extend an existing WebLogic configuration. Use this|option to add applications and services, including Database access (JDBC)|and Messaging (JMS). This option also enables you to extend functionality|by enabling WebLogic Workshop.Enter index number to select OR [Exit][Next]> 1<--------------------- BEA WebLogic Configuration Wizard--------------------->Select a Domain Template:-------------------------Please select a template from the list or select another directory of templates.* [/usr/local/bea/weblogic81/common/templates/domains]1|Basic WebLogic Workshop Domain 8.1.5.0| BEA Systems, Inc.| Create a basic WebLogic Workshop domain, without installing sample |applications. Domains created from this template will support the |WebLogic Server and WebLogic Workshop runtime functionality, including|support for J2EE applications, Web applications, Web Services and custom|controls. Use domains created from this template for development of |WebLogic Workshop applications.->2|Basic WebLogic Server Domain 8.1.5.0| BEA Systems, Inc.| Create a basic WebLogic Server domain without installing sample |applications.3|WebLogic Server Examples Domain 8.1.5.0| BEA Systems, Inc.| Create the WebLogic Server Examples domain in a directory outside of the |installed kit. The Examples domain contains a collection of examples to|show best practices for coding individual J2EE APIs.4|Avitek Medical Records Sample Domain 8.1.5.0| BEA Systems, Inc.Enter index number to select OR [Down][Exit][Previous][Next]> 2<--------------------- BEA WebLogic Configuration Wizard--------------------->Choose Configuration Option:----------------------------*Do you want to run the wizard in express mode?->1|Yes2|NoEnter index number to select OR [Exit][Previous][Next]><--------------------- BEA WebLogic Configuration Wizard--------------------->Configure Administrative Username and Password:-----------------------------------------------Create a user automatically assigned to the Administrative Role. This user isthe default administrator used to start development mode servers.| Name | Value |_|_________________________|_________________________________|1| *User name: | weblogic |2| *User password: | |3| *Confirm user password: | |4| Description: | The default administration user |Select Option:1 - Modify "User name"2 - Modify "User password"3 - Modify "Confirm user password"4 - Modify "Description"Enter option number to select OR [Exit][Previous][Next]> 2<--------------------- BEA WebLogic Configuration Wizard--------------------->Configure Administrative Username and Password:-----------------------------------------------Create a user automatically assigned to the Administrative Role. This user isthe default administrator used to start development mode servers."*User password:" = []Input new *User password: OR [Exit][Reset][Accept]> weblogic<--------------------- BEA WebLogic Configuration Wizard--------------------->Configure Administrative Username and Password:-----------------------------------------------Create a user automatically assigned to the Administrative Role. This user isthe default administrator used to start development mode servers.| Name | Value |_|_________________________|_________________________________|1| *User name: | weblogic |2| *User password: | ******** |3| *Confirm user password: | |4| Description: | The default administration user |Select Option:1 - Modify "User name"2 - Modify "User password"3 - Modify "Confirm user password"4 - Modify "Description"5 - Discard ChangesEnter option number to select OR [Exit][Previous][Next]> 3<--------------------- BEA WebLogic Configuration Wizard--------------------->Configure Administrative Username and Password:-----------------------------------------------Create a user automatically assigned to the Administrative Role. This user isthe default administrator used to start development mode servers."*Confirm user password:" = []Input new *Confirm user password: OR [Exit][Reset][Accept]> weblogic<--------------------- BEA WebLogic Configuration Wizard--------------------->Configure Administrative Username and Password:-----------------------------------------------Create a user automatically assigned to the Administrative Role. This user isthe default administrator used to start development mode servers.| Name | Value |_|_________________________|_________________________________|1| *User name: | weblogic |2| *User password: | ******** |3| *Confirm user password: | ******** |4| Description: | The default administration user |Select Option:1 - Modify "User name"2 - Modify "User password"3 - Modify "Confirm user password"4 - Modify "Description"5 - Discard ChangesEnter option number to select OR [Exit][Previous][Next]><--------------------- BEA WebLogic Configuration Wizard--------------------->Domain Mode Configuration:--------------------------Enable Development or Production Mode for this domain.->1|Development Mode2|Production ModeEnter index number to select OR [Exit][Previous][Next]> 1 <--------------------- BEA WebLogic Configuration Wizard --------------------->Java SDK Selection:-------------------->1|Other Java SDKEnter index number to select OR [Exit][Previous][Next]> 1<--------------------- BEA WebLogic Configuration Wizard --------------------->Java SDK Selection:-------------------"JVM Directory" = []Input new JVM Directory OR [Exit][Previous][Next]><--------------------- BEA WebLogic Configuration Wizard --------------------->Java SDK Selection:-------------------"JVM Directory" = []** You must specify a JDK location.Input new JVM Directory OR [Exit][Previous][Next]> n<--------------------- BEA WebLogic Configuration Wizard--------------------->Java SDK Selection:-------------------"JVM Directory" = []** You must specify a JDK location.Input new JVM Directory OR [Exit][Previous][Next]>/usr/local/bea/j2sdk1.4.2_12/<--------------------- BEA WebLogic Configuration Wizard--------------------->Java SDK Selection:-------------------"JVM Directory" = [/usr/local/bea/j2sdk1.4.2_12/]Input new JVM Directory OR [Exit][Previous][Next]><--------------------- BEA WebLogic Configuration Wizard--------------------->Java SDK Selection:-------------------->1|Yes2|No** Unable to determine if the directory you selected contains a valid JDK.** Do you want to proceed? [/usr/local/bea/j2sdk1.4.2_12/]Enter index number to select OR [Exit][Previous][Next]><--------------------- BEA WebLogic Configuration Wizard--------------------->Select the target domain directory for this configuration:----------------------------------------------------------"Target Location" = [/usr/local/bea/user_projects/domains] Input new Target Location OR [Exit][Previous][Next]><--------------------- BEA WebLogic Configuration Wizard--------------------->Edit Domain Information:------------------------| Name | Value |_|________|__________|1| *Name: | mydomain |Enter value for "Name" OR [Exit][Previous][Next]> oaDomain<--------------------- BEA WebLogic Configuration Wizard--------------------->Edit Domain Information:------------------------| Name | Value |_|________|__________|1| *Name: | oaDomain |Select Option:1 - Modify "Name"2 - Discard ChangesEnter option number to select OR [Exit][Previous][Next]><--------------------- BEA WebLogic Configuration Wizard--------------------->Creating Domain...0% 25% 50% 75% 100%[------------|------------|------------|------------][***************************************************]**** Domain Created Successfully! ****bash-2.05# pwd/usr/local/bea/weblogic81/common/binbash-2.05# cd ..bash-2.05# cd ..bash-2.05# cd ..bash-2.05# lsUpdateLicense.sh j2sdk1.4.2_12 logs user_projectsbeahomelist license.bea newlicense.bea utilsext_components license_scale_limited.bearegistry.xml weblogic81bash-2.05# cd user*bash-2.05# lsdomainsbash-2.05# cd doaminsbash: cd: doamins: No such file or directorybash-2.05# lsdomainsbash-2.05# cd domainsbash-2.05# lsgjjdomain oaDomainbash-2.05# cd oaDomainbash-2.05# lsDefaultAuthenticatorInit.ldiftapplications setEnv.shDefaultAuthorizerInit.ldift boot.properties start ManagedWebLogic.shDefaultRoleMapperInit.ldift config.xml start WebLogic.shSerializedSystemIni.dat fileRealm.properties stopW ebLogic.sh_cfgwiz_donotdelete rmfilestorebash-2.05#===================================================================== ===============================================================================================================solaris下weblogic创建weblogic域方法solaris下weblogic使用技巧点滴说明:服务器硬件:sun fire 280Rweblogic软件:weblogic 8.1 sp3MAIL:solarisxb@一、在solaris字符界面创建weblogic域方法:* 到weblogic的安装目录下:#cd /export/home/bea/weblogic81/common/bin* 执行./config.sh命令#./config.sh* 字符界面如下:Unable to instantiate GUI, defaulting to console mode.<-----------BEA WebLogic Configuration Wizard ------->Create or Extend a Configuration:---------------------------------Choose between creating and extending a configuration. Based on your selection, the Configuration Wizard guides you through the steps to generate a new or extend an existing configuration.->1|Create a new WebLogic configuration| Start here to create a WebLogic configuration in your projects |directory.2|Extend an existing WebLogic configuration| Start here to extend an existing WebLogic configuration. Use this |option to addapplications and services, including Database access|(JDBC) and Messaging (JMS). This option also enables you to extend |functionality by enabling WebLogic Workshop.Enter index number to select OR [Exit][Next]> 1<----------BEA WebLogic Configuration Wizard -------------------> * 选择要创建的域:Select a Domain Template:-------------------------Please select a template from the list or select another directory of templates.* [/export/home/bea/weblogic81/common/templates/domains]1|WebLogic Server Examples Domain 8.1.3.0| BEA Systems, Inc.| Create the WebLogic Server Examples domain in a directory outside of |the installedkit. The Examples domain contains a collection of|examples to show best practices for coding individual J2EE APIs.->2|Basic WebLogic Server Domain 8.1.3.0| BEA Systems, Inc.| Create a basic WebLogic Server domain without installing sample |applications.3|Basic WebLogic Workshop Domain 8.1.3.0| BEA Systems, Inc.| Create a basic WebLogic Workshop domain, without installing sample |applications. Domains created from this template will support the |WebLogic Server and WebLogic Workshop runtime functionality, including |support for J2EEapplications, Web applications, Web Services and|custom controls. Use domains created from this template for|development of WebLogic Workshop applications.4|Avitek Medical Records Sample Domain 8.1.3.0Enter index number to select OR [Down][Exit][Previous][Next]> 2<------------------- BEA WebLogic Configuration Wizard------------------->Choose Configuration Option:----------------------------*Do you want to run the wizard in express mode?->1|Yes2|NoEnter index number to select OR [Exit][Previous][Next]> 1* 创建weblogic管理用户和密码:<------------------- BEA WebLogic Configuration Wizard------------------->Configure Administrative Username and Password:-----------------------------------------------Create a user automatically assigned to the Administrative Role. This user is the default administrator used to start development mode servers.| Name | Value |_|_________________________|_________________________________|1| *User name: | weblogic |2| *User password: | |3| *Confirm user password: | |4| Description: | The default administration user |Select Option:1 - Modify "User name"2 - Modify "User password"3 - Modify "Confirm user password"4 - Modify "Description"Enter option number to select OR [Exit][Previous][Next]> 2<------------------- BEA WebLogic Configuration Wizard------------------->Configure Administrative Username and Password:-----------------------------------------------Create a user automatically assigned to the Administrative Role. This user is the default administrator used to start development mode servers."*User password:" = []Input new *User password: OR [Exit][Reset][Accept]><------------------- BEA WebLogic Configuration Wizard------------------->Configure Administrative Username and Password:-----------------------------------------------Create a user automatically assigned to the Administrative Role. This useris the default administrator used to start development mode servers.| Name | Value |_|_________________________|_________________________________|1| *User name: | weblogic |2| *User password: | ********** |3| *Confirm user password: | |4| Description: | The default administration user |Select Option:1 - Modify "User name"2 - Modify "User password"3 - Modify "Confirm user password"4 - Modify "Description"5 - Discard ChangesEnter option number to select OR [Exit][Previous][Next]> 3<------------------- BEA WebLogic Configuration Wizard------------------->Configure Administrative Username and Password:-----------------------------------------------Create a user automatically assigned to the Administrative Role. This user is the default administrator used to start development mode servers."*Confirm user password:" = []Input new *Confirm user password: OR [Exit][Reset][Accept]><------------------- BEA WebLogic Configuration Wizard------------------->Configure Administrative Username and Password:-----------------------------------------------Create a user automatically assigned to the Administrative Role. This user is the default administrator used to start development mode servers.| Name | Value |_|_________________________|_________________________________|1| *User name: | weblogic |2| *User password: | ********** |3| *Confirm user password: | ********** |4| Description: | The default administration user |Select Option:1 - Modify "User name"2 - Modify "User password"3 - Modify "Confirm user password"4 - Modify "Description"5 - Discard ChangesEnter option number to select OR [Exit][Previous][Next]><------------------- BEA WebLogic Configuration Wizard------------------->* 选择要创建域Domain的模式:选择Production Mode模式Domain Mode Configuration:--------------------------Enable Development or Production Mode for this domain.->1|Development Mode2|Production ModeEnter index number to select OR [Exit][Previous][Next]> 2<------------------- BEA WebLogic Configuration Wizard------------------->* Java环境选择:Java SDK SelectionJava SDK Selection:-------------------->1|JRockit SDK 1.4.2_04-8130 @ /export/home/bea/jrockit81sp3_142_04 2|Sun SDK 1.4.2_04 @ /export/home/bea/jdk142_043|Other Java SDKEnter index number to select OR [Exit][Previous][Next]> 2<------------------- BEA WebLogic Configuration Wizard------------------->* 选择domain的创建目录:注:目录路径不需要写domain的名称,要不目录会重。