Windows Install Clean Up 使用方法
电脑垃圾手动清理和常用快捷键
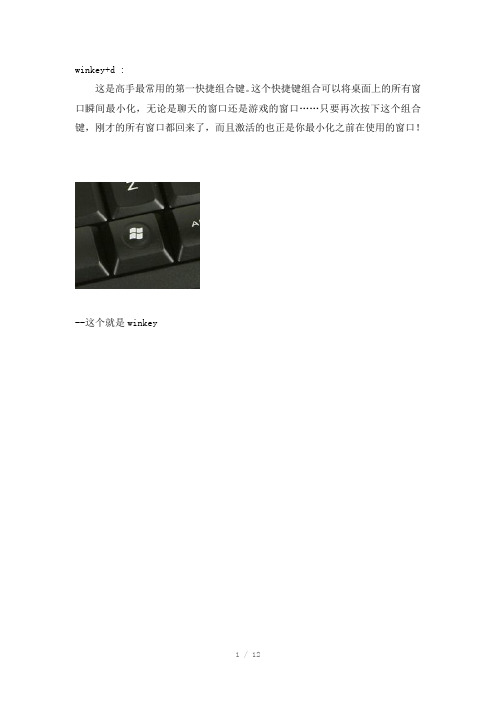
这是高手最常用的第一快捷组合键。
这个快捷键组合可以将桌面上的所有窗口瞬间最小化,无论是聊天的窗口还是游戏的窗口……只要再次按下这个组合键,刚才的所有窗口都回来了,而且激活的也正是你最小化之前在使用的窗口!--这个就是winkey不用再去移动鼠标点“开始→搜索→文件和文件夹”了,在任何状态下,只要一按winkey+f就会弹出搜索窗口。
winkey+r :在我们的文章中,你经常会看到这样的操作提示:“点击‘开始→运行’,打开‘运行’对话框……”。
其实,还有一个更简单的办法,就是按winkey + r!alt + tab :如果打开的窗口太多,这个组合键就非常有用了,它可以在一个窗口中显示当前打开的所有窗口的名称和图标●,选中自己希望要打开的窗口,松开这个组合键就可以了。
而alt+tab+shift键则可以反向显示当前打开的窗口。
winkey+e :当你需要打开资源管理器找文件的时候,这个快捷键会让你感觉非常“爽”!再也不用腾出一只手去摸鼠标了!小提示:winkey指的是键盘上刻有windows徽标的键●。
winkey主要出现在104键和107键的键盘中。
104键盘又称win95键盘,这种键盘在原来101键盘的左右两边、ctrl和alt键之间增加了两个windwos键和一个属性关联键。
107键盘又称为win98键盘,比104键多了睡眠、唤醒、开机等电源管理键,这3个键大部分位于键盘的右上方。
再补充点.....F1 显示当前程序或者windows的帮助内容。
F2 当你选中一个文件的话,这意味着“重命名”F3 当你在桌面上的时候是打开“查找:所有文件” 对话框F10或ALT 激活当前程序的菜单栏windows键或CTRL+ESC 打开开始菜单CTRL+ALT+DELETE 在win9x中打开关闭程序对话框DELETE 删除被选择的选择项目,如果是文件,将被放入回收站SHIFT+DELETE 删除被选择的选择项目,如果是文件,将被直接删除而不是放入回收站CTRL+N 新建一个新的文件CTRL+O 打开“打开文件”对话框CTRL+P 打开“打印”对话框CTRL+S 保存当前操作的文件CTRL+X 剪切被选择的项目到剪贴板CTRL+INSERT 或 CTRL+C 复制被选择的项目到剪贴板SHIFT+INSERT 或 CTRL+V 粘贴剪贴板中的内容到当前位置ALT+BACKSPACE 或 CTRL+Z 撤销上一步的操作ALT+SHIFT+BACKSPACE 重做上一步被撤销的操作Windows键+D:最小化或恢复windows窗口Windows键+U:打开“辅助工具管理器”Windows键+CTRL+M 重新将恢复上一项操作前窗口的大小和位置Windows键+E 打开资源管理器Windows键+F 打开“查找:所有文件”对话框Windows键+R 打开“运行”对话框Windows键+BREAK 打开“系统属性”对话框Windows键+CTRL+F 打开“查找:计算机”对话框SHIFT+F10或鼠标右击打开当前活动项目的快捷菜单SHIFT 在放入CD的时候按下不放,可以跳过自动播放CD。
windows 清理实用工具

一个对话框将出现,其中包含一条消息、已安装产品的列表和四个按钮。
显Hale Waihona Puke 的消息如下: 继续往下执行将会永久更改系统。您可能
需要在系统上重新安装使用 Windows Installer 技术安装的
某些或所有应用程序。如果不想
继续,请立即按“退出”按钮。选择“删除”将会永久
更改系统。
警告 - 选定的所有项都将从 Windows Installer
数据库中删除。要使这些项正常工作,必须分别重新安装
所有选定项。选择“确定”继续删除产品,选择
“取消”终止删除操作。
如果单击“确定”,将删除所有与选定程序相关的 Windows Installer 信息。这包括程序在“控制面板”的“添加/删除程序”工具中的条目。如果删除已安装程序的安装信息,该程序将无法添加或删除组件或自行进行修复。注意:如果删除安装信息,将不会删除程序自身的文件或快捷方式。在尝试使用这些文件或快捷方式之前,应重新安装程序。
如果发生以下任一问题,则会损坏 Windows Installer 配置管理信息:
- 计算机的注册表损坏。
- Windows Installer 使用的注册表设置
无意中被更改,并且此更改导致出现问题。
- 使用 Windows Installer 的程序(例如,
Microsoft Office 2003)的安装被中断。
该列表中包含已向 Windows Installer 注册的所有已安装的程序的标题。由于 Windows Installer 清理实用工具安装也使用 Windows Installer,因此 Windows Installer 清理实用工具应包含在该列表中。选择要删除的程序。(若要选择列表中的多个项目,请在按住 Shift 键或 Ctrl 键的同时选择项目。)
Win8.1 clean boot

Select Product Version:Search Microsoft support for helpA clean boot is performed to start Windows by using a minimal set of drivers and startup programs. This helps eliminate software conflicts that occur when you install a program or an update or when you run a program in Windows 8.1, Windows 8, Windows 7, or Windows Vista. You may also troubleshoot or determine what conflict is causing the problem by performing a clean boot.Why software conflicts occur?Note If you are using Windows XP, go to How to configure Windows XP to start in a "clean boot" state (/kb/310353) .How to perform a clean bootNotes•You must log on to the computer as an administrator to be able to perform a clean boot.•Your computer may temporarily lose some functionality when you perform a clean boot. When you start the computer normally, the functionality returns. However, you may receive the original error message, or experience the original behavior if the problem still exists.•If the computer is connected to a network, network policy settings may prevent you from following these steps. We strongly recommend that you do not use the System Configuration utility to change the advanced boot options on the computer unless a Microsoft support engineer directs you to do this. Doing this may make the computer unusable.Follow the following steps to perform a clean boot:Windows 8.1 and Windows 81.Swipe in from the right edge of the screen, and then tap Search . Or, if you are using a mouse, point to the lower-right corner of the screen, and then click Search .2.Type msconfig in the search box, and then tap or click msconfig .How to perform a clean boot in WindowsSign inSupportMy account By productDownloadsStore Contact us3.On the Services tab of the System Configuration dialog box, tap or click to select the Hide all Microsoft services check box, and then tap or click Disable all.4.On the Startup tab of the System Configuration dialog box, tap or click Open Task Manager.5.On the Startup tab in Task Manager, for each startup item, select the item and then click Disable.6.Close Task Manager.7.On the Startup tab of the System Configuration dialog box, tap or click OK, and then restart the computer.Windows 7 and Windows VistaWhat is next when I have a clean boot environment?After the computer is restarted, you will have a clean boot environment. Then, do one of the following, as appropriate for your situation:•If you could not install or uninstall a program or an update before you performed the clean boot, try to install or uninstall the program or update again.Note If you receive the "The Windows Installer service could not be accessed" error during the installation or uninstallation, follow How to start the Windows Installer service when system services are not loaded, and then install or uninstall the program or update again.•If the installation or uninstallation is successful, you have resolved your issue. Follow How to reset the computer to start as usual to reset your computer to the normal startup.•If the installation or uninstallation still fails, that means this issue is not caused by application or service interference. You may have to go to Microsoft Support (/) for more specific support.•If you could not run a program before you performed the clean boot, try to run the program again.•If the program runs correctly, this issue is caused by application or service interferences. Follow How to determine what is causing the issue by performing a clean boot to determine which application or service causes the issue.•If the program still does not run as expected, this issue is not caused by application or service interference. You may have to go to Microsoft Support (/) for more specific support.How to reset the computer to start normally after clean boot troubleshootingAfter you have finished troubleshooting, follow these steps to reset the computer to start normally.Windows 8.1 and Windows 81.Swipe in from the right edge of the screen, and then tap Search. Or, if you are using a mouse, point to the lower-right corner of the screen, and then click Search.2.Type msconfig in the search box, and then tap or click msconfig.3.On the General tab, tap or click the Normal Startup option.4.Tap or click the Services tab, clear the check box beside Hide all Microsoft services, and then tap or click Enable all.5.ap or click the Startup tab, and then tap or click Open Task Manager.6.In task manager, enable all of your startup programs, and then tap or click OK.7.When you are prompted to restart the computer, tap or click Restart.Windows 7 and Windows Vista1.Click Start, type msconfig.exe in the Start Search box, and then press Enter.Note If you are prompted for an administrator password or for confirmation, you should type the password or click Continue.2.On the General tab, click the Normal Startup option, and then click OK.3.When you are prompted to restart the computer, click Restart.For more informationHow to determine what is causing the problem by performing a clean bootWindows 8.1 and Windows 81.Log on to the computer by using an account that has administrator rights.2.Swipe in from the right edge of the screen, and then tap Search. Or, if you are using a mouse, point to the lower-right corner of the screen, and then click Search.3.Type msconfig in the search box, and then tap or click msconfig.4.Tap or click the Services tab, and then tap or click to select the Hide all Microsoft services check box.5.Tap or click to select the upper half of the check boxes in the Service list.6.Tap or click OK, and then tap or click Restart.7.After the computer finishes restarting, determine whether the problem still occurs.•If the problem still occurs, repeat steps 1 through 6, but clear the lower half of the check boxes in the Service list that you originally selected.•If the problem does not occur, repeat steps 1 through 6, and select only the upper half of the remaining check boxes that are cleared in the Service list. Repeat these steps until you have selected all the check boxes.•If you still experience the problem when only one service is selected in the Service list, this means that the selected service causes the problem, and you should go to step 11. If no service causes the problem, go to step 8.8.Repeat steps 1 and 3 in this section.9.Tap or click the Startup tab, and then tap or click to select the upper half of the check boxes in the Startup Item list.10.Click OK, and then click Restart.•If the problem still occurs, repeat steps 8 and 9, but clear the lower half of the checked boxes in the Startup Item list that you originally selected.•If the problem does not occur, repeat steps 8 and 9, and select only the upper half of the remaining check boxes that are cleared in the Startup Item list. Repeat these steps until you have selected all the check boxes.•If you still experience the problem after only one Startup Item is selected in the Startup Item list, this means that the selected Startup Item causes the problem, and you should go to step 11. If no Startup Item causes this problem, a Microsoft service probably causes the problem. To determine which Microsoft service may be causing the problem, repeat steps 1 through 7 without selecting the Hide all Microsoft services check box in each step.11.After you determine the startup item or the service that causes the problem, contact the program manufacturer to determine whether the problem can be resolved. Or, run the SystemConfiguration utility, and then tap or click to clear the check box for the problem item.Windows 7 and Windows VistaHow to start the Windows Installer service when system services are not loadedVideo: How to do a clean boot in WindowsAbout this articleArticle ID: 929135Last review: December 13, 2013Applies to: Windows 8.1, Windows 8.1 Enterprise, Windows 8.1 Pro, Windows 8, Windows 8 Enterprise, Windows 8 Pro, Windows 7 Enterprise, Windows 7 Home Basic, Windows 7 Home Premium, Windows 7 Professional, Windows 7 Starter, Windows 7 Ultimate, Windows Vista Home Basic, Windows Vista Home Premium, Windows Vista Ultimate, Windows Vista Business, Windows Vista Enterprise, Windows Vista Starter, Windows Vista Business 64-bit Edition, Windows Vista Enterprise 64-bit EditionGive Feedback。
WIN7 C盘空间越来越小?不用担心,手把手教你清除C盘垃圾
WIN7系统用着用着C盘会变得越来越大,可用空间变得越来越小,磁盘清理,和安全卫士怎么清也清不出这些系统深度的垃圾。
我们可以手动删除,释放C盘空间。
这样一清理下来,结果我的C盘就释放了近20个GB的空间。
以下的方法针不能说对每一个人都有效,因为每个人在电脑上用的软件也不一样,如果你也用下面的这些软件那么可以和我一起试试。
1、休眠文件 hiberfil.sys :该文件在C盘根目录为隐藏的系统文件,隐藏的这个hiberfil.sys文件大小正好和自己的物理内存是一致的,当你让电脑进入休眠状态时,Windows7在关闭系统前将所有的内存内容写入Hiberfil.sys文件。
而后,当你重新打开电脑,操作系统使用Hiberfil.sys把所有信息放回内存,电脑恢复到关闭前的状态。
可Windows7 并不会将这个文件删除,而是一直放在硬盘上,会白白地占用一部分磁盘空间,时间长了你的硬盘可就吃不消了。
有了睡眠功能就可以了,休眠功能可以选择不要的,用他的话,他可是个占硬盘大户啊。
又占空间,又要频繁读写硬盘。
Windows7下面安全删除休眠文件的方法:用管理员身份运行cmd.exe 打开命令行窗口,然后输入:powercfg -h off,运行。
注意,C盘残留的hiberfil.sys隐藏文件可以取消隐藏后,直接删除, -h off前面有个空格。
2、虚拟内存 pagefile.sys:Windows系统,包括Windows 7 ,默认设置物理内存的1.5倍大小,作为分页交换文件,如果你是系统管理的大小,那么,这个体积是自动变化的,往往越来越大。
如果你的物理内存比较少,只有2g,你可以选择保留这个文件。
如果保留这个文件,我们建议你把他放到另外一个分区里面,不要放到C盘(系统盘),不然,你到时候做Ghost 或者其他备份的时候,还是需要手动删除它。
建议你一定要指定大小,就指定成1.5倍的Ram物理内存大小即可。
如果你的内存在4G以上,你可以考虑直接关闭虚拟内存功能。
Office卸载不干净导致安装失败的一些解决办法
Office卸载不干净导致安装失败的一些解决办法Microsoft office完全卸载和删除残留文件很多人在安装Microsoft office 的时候出现错而安装失败,原因很多,但大部分都是原来安装的office 卸载不干净,还有残留文件而造成的;我们只需把这些残留文件清除干净就可以安装了。
下面是我用过的方法,说出来仅供参考方法一、用office卸载工具清除office软件2003清除工具MicrosoftFixit50416.msi2007清除工具MicrosoftFixit50154.msi2010清除工具MicrosoftFixit50450.msi2013清除工具O15CTRRemove.diagcabps:前面三个office2003、2007、2010的MicrosoftFixit清除工具不支持win8/8.1系统双击运行office卸载工具MicrosoftFixit ,按提示接受协议、下一步就可以,工具自动运行,耐心等待几分钟,结束后会自动退出,不会安装在你的电脑里。
方法二、微软自产卸载工具Windows Install Clean Up强力卸载使用方法:先解压,双击“微软自产卸载工具”Windows Install Clean Up安装,在安装向导对话框中点击Next(下一步)——单选accept the license Agreement,点击Next——再Next——Finish(完成);然后在开始菜单的所有程序找到Windows Install Clean Up,点击——在出现的对话框里找到(看看有没有)所有包含office的选项和Microsoft Software Update for Web Folders,点击变成深色,然后点击Remove.就删除了。
【如果打开时弹出警告说没有找到msvbvm60.dll,就在网上下载msvbvm60.dll (我已经放在压缩包里),把它复制到C:\windows\system32\下。
photoshop cs3卸载方法

卸载Photoshop cs3的方法(Adobe CS3 专用卸载工具)卸载方法:Adobe CS3 Clean 可用于CS3 程序因为过期,在卸载后依然不能正确安装,或者安装后仍有程序出现许可过期等问题。
首先在控制面板的"添加与卸载程序"内执行CS3 相关程序的卸载,比如大师版,再执行本工具包内wincs3clean文件夹下的CS3Clean.exe ,如果在命令行有如下提示(说明不能清理将退出) :The Microsoft Windows Installer CleanUp Utility is required to completethe cleaning. The Adobe CS3Clean script will check to see if this utility is installed on your computer. If the Windows Installer CleanUp Utility is not installed on your computer, theCS3Clean script will notify you and then quit.这时请安装Windows 清理工具后再次执行CS3 Clean。
先把PS删除,然后删除自己和mac目录下的PS相关文件,然后用这个工具打开CS3Clean程序。
会出现一个终端的屏幕第一步,要你输入计算机的权限口令,否则只能叫Admin来操作。
键入密码的时候,光标是不动的,千万不要认为它死机了。
CS3 Clean-up v1.0.4Please choose a language:e: Englishj: Japanese (日本語)>: e第二步,问你卸载的语言用英语还是日本语。
License agreementBy using software of Adobe Systems Incorporated or its subsidiaries("Adobe"); you agree to the following terms and conditions. If you donot agree with such terms and conditions; do not use the software.The terms of an end user license agreement accompanying a particularsoftware file upon installation or download of the software shallsupersede the terms presented below.The export and re-export of Adobe software products are controlled bythe United States Export Administration Regulations and such softwaremay not be exported or re-exported to Cuba; Iran; Iraq; Libya; NorthKorea; Sudan; or Syria or any country to which the United Statesembargoes goods. In addition; Adobe software may not be distributedto persons on the Table of Denial Orders; the Entity List; or theList of Specially Designated Nationals.By downloading or using an Adobe software product you are certifyingthat you are not a national of Cuba; Iran; Iraq; Libya; North Korea;Sudan; or Syria or any country to which the United States embargoesgoods and that you are not a person on the Table of Denial Orders;the Entity List; or the List of Specially Designated Nationals.If the software is designed for use with an application softwareproduct (the "Host Application") published by Adobe; Adobe grants youa non-exclusive license to use such software with the HostApplication only; provided you possess a valid license from Adobe forthe Host Application. Except as set forth below; such software islicensed to you subject to the terms and conditions of the End UserLicense Agreement from Adobe governing your use of the HostApplication. You are not permitted to redistribute the software.DISCLAIMER OF WARRANTIES: YOU AGREE THA T ADOBE HAS MADE NO EXPRESS WARRANTIES TO YOU REGARDING THE SOFTWARE AND THAT THE SOFTWARE IS BEING PROVIDED TO YOU "AS IS" WITHOUT W ARRANTY OF ANY KIND. ADOBE DISCLAIMS ALL WARRANTIES WITH REGARD TO THE SOFTWARE; EXPRESS OR IMPLIED; INCLUDING; WITHOUT LIMITATION; ANY IMPLIED WARRANTIES OF FITNESS FOR A PARTICULAR PURPOSE; MERCHANTABILITY; MERCHANTABLE QUALITY OR NONINFRINGEMENT OF THIRD PARTY RIGHTS. Some states or jurisdictions do not allow the exclusion of implied warranties; sothe above limitations may not apply to you.LIMIT OF LIABILITY: IN NO EVENT WILL ADOBE BE LIABLE TO YOU FOR ANY LOSS OF USE; INTERRUPTION OF BUSINESS; OR ANY DIRECT; INDIRECT; SPECIAL; INCIDENTAL; OR CONSEQUENTIAL DAMAGES OF ANY KIND (INCLUDING LOST PROFITS) REGARDLESS OF THE FORM OF ACTION WHETHER IN CONTRACT; TORT (INCLUDING NEGLIGENCE); STRICT PRODUCT LIABILITY OR OTHERWISE; EVEN IF ADOBE HAS BEEN ADVISED OF THE POSSIBILITY OF SUCH DAMAGES. Some states or jurisdictions do not allow the exclusion orlimitation of incidental or consequential damages; so the abovelimitation or exclusion may not apply to you.Do you agree to the above conditions? [y/n]: y第三步,问你同意以上的观点吗?键入yIt is strongly recommended that you backup all your data, includingfonts, Version Cue repositories and plug-in files, and run uninstallbefore running this script.Do you wish to cancel at this time so you can backup your data or rununinstall? [y/n]: n第四步,问你是否想取消运行移除程序。
SQL server 2005 Database services 安装失败如何解决

SQL server 2005 Database services 安装失败如何解决
SQL server 2005卸载后,重新安装时存在同名实例导致SQL server 2005 Database services 失败 ,如何如何解决呢?如果不想重装系统,可以使用下面的方法.
1.打开任务管理器,Stop 所有SQL服务
2.打开控制面板,找到“卸载程序”,用 Windows Install Clean Up 工具卸载SQL 2005组件
3.百度找到SrvInstw.exe,用SrvInstw.exe删除所有SQL服务
4.打开“运行”(所有程序->附件->运行),键入 regedit,清除注册表.
a. 将HKEY_CURRENT_USER---Software----Microsoft下的Microsoft SQL Server文件夹全部删除
b. 将HKEY_LOCAL_mACHINE---SOFTWARE---Microsoft下的Microsoft SQL Native Client ,Microsoft SQL Server, Microsoft SQL Server 2005 Redist全部删除。
5.删除残留文件
将C盘——Program File下的Microsoft SQL Server 文件夹删除。
如果无法删除就右键属性更改安全的权限.
6.重启电脑,重新安装。
alldup 删除c盘使用方法

alldup 删除c盘使用方法我们需要了解alldup是什么。
alldup是一款功能强大的文件查找和删除工具,它可以帮助我们快速找到并删除系统中的重复文件。
通过使用alldup,我们可以有效地节省磁盘空间,提高系统性能。
接下来,我们需要下载和安装alldup。
首先,在浏览器中搜索“alldup下载”,找到一个可信赖的下载来源,并下载alldup的安装程序。
下载完成后,双击安装程序并按照提示进行安装。
安装完成后,我们就可以开始使用alldup来删除C盘上的文件了。
下面是具体的操作步骤:步骤一:打开alldup。
在桌面上找到alldup的图标,双击打开程序。
步骤二:选择要扫描的文件夹。
点击“添加文件夹”按钮,然后选择C盘作为要扫描的目标文件夹。
可以选择扫描C盘的整个内容,也可以选择只扫描特定的文件夹或文件。
步骤三:设置扫描选项。
在alldup的界面上,可以看到各种扫描选项。
我们可以根据自己的需求来设置这些选项。
比如,可以选择扫描所有文件还是只扫描特定类型的文件,可以选择是否扫描子文件夹等等。
步骤四:开始扫描。
点击“开始扫描”按钮,alldup将开始扫描C 盘上的文件。
扫描的时间会根据C盘的大小和文件数量而不同,可能需要一些时间。
步骤五:查找重复文件。
扫描完成后,alldup会列出所有找到的重复文件。
我们可以根据文件名、大小、修改日期等信息来排序和筛选这些文件,以便更好地查找和管理。
步骤六:选择要删除的文件。
在alldup的界面上,可以勾选要删除的文件,也可以选择一键删除所有重复文件。
在选择删除文件之前,建议先备份这些文件,以防误删重要文件。
步骤七:删除重复文件。
点击“删除”按钮,alldup将开始删除选择的重复文件。
删除过程可能需要一些时间,取决于文件的大小和数量。
步骤八:确认删除。
在删除过程中,alldup会提示确认删除操作。
请仔细阅读提示信息,确保不会误删重要文件。
步骤九:删除完成。
当alldup删除重复文件完成后,会显示删除的结果信息。
- 1、下载文档前请自行甄别文档内容的完整性,平台不提供额外的编辑、内容补充、找答案等附加服务。
- 2、"仅部分预览"的文档,不可在线预览部分如存在完整性等问题,可反馈申请退款(可完整预览的文档不适用该条件!)。
- 3、如文档侵犯您的权益,请联系客服反馈,我们会尽快为您处理(人工客服工作时间:9:00-18:30)。
Windows Install Clean Up 使用方法
在安装会声会影X5时,大家可能会遇到安装失败的情况,失败的原因之一就是前一次的会声会影卸载不彻底,这时我们就需要Windows Install Clean Up来进行清理工作,它可以完美卸载Microsoft 的系列软件。
利用Windows Install Clean Up可以删除程序的 Windows Installer 配置信息。
那么Windows Install Clean Up应该如何使用呢?
一、Windows Install Clean Up 完成后不会自动在桌面创建快捷方式,所以我们通过点击【开始】---【所有程序】---【Windows Install Clean Up 】来进行启动。
二、打开程序,进入主界面。
三、下面我们找出如图一所示的这些文件,将它们选中,点击【remove(删除)】将它们删去。
这时,重新进行会声会影X5安装即可。
如果安装还是失败,那么再对照图二,将图二所示的文件全部选中并删除。
四、点击【Exit】退出Windows Install Clean Up 。