Electrical Hazard
电转移仪使用手册

Table of ContentsPage Section 1 Safety Information (1)1.1 Electrical Hazards (1)1.2 Mechanical Hazards (1)1.3 Other Safety Precautions (1)Section 2 Introduction (2)2.1 Overview of electroporation theory (2)2.2 Manipulation of instrument parameters (4)Section 3 Factors Affecting Electroporation (5)3.1 Cell growth (6)3.2 DNA (6)3.3 Electroporation Media (7)Section 4 MicroPulser Operating Instructions (9)4.1 Setting up the MicroPulser System (9)4.2 Operation of the MicroPulser (9)4.3 Electroporation using the MicroPulser (11)Section 5 High Efficiency Electrotransformation of E. coli (11)5.1 Preparation of electrocompetent cells (11)5.2 Electroporation (12)5.3 Solutions and reagents for electroporation (13)Section 6 Electroporation of Staphylococcus aureus (13)6.1 Preparation of electrocompetent cells (13)6.2 Electroporation (13)6.3 Solutions and reagents for electroporation (14)Section 7 Electroporation of Agrobacterium tumefaciens (14)7.1 Preparation of electrocompetent cells (14)7.2 Electroporation (15)7.3 Solutions and reagents for electroporation (15)Section 8 Electroporation of Saccharomyces cerevisiae (16)8.1 Preparation of electrocompetent cells (16)8.2 Electroporation (16)8.3 Solutions and reagents for electroporation (17)Section 9 Electroporation of Schizosaccharomyces pombe (17)9.1 Preparation of electrocompetent cells (17)9.2 Electroporation (17)9.3 Solutions and reagents for electroporation (18)Section 10 Electroporation of Dictyostelium discoideum (18)10.1 Preparation of electrocompetent cells (18)10.2 Electroporation (18)10.3 Solutions and reagents for electroporation (19)Section 11 Electroporation of Pichia pastoris (19)11.1 Preparation of electrocompetent cells (19)11.2 Electroporation (20)11.3 Solutions and reagents for electroporation (20)Appendix I References (23)Appendix II Troubleshooting Guide for the MicroPulser (24)Appendix III Product Information (27)Section 1Safety InformationRead This Information Carefully Before Using The MicroPulser.The MicroPulser meets the safety requirements of EN61010 and the EMC requirements of EN61326 (for Class B, including flicker and harmonics).1.1 Electrical HazardsThe MicroPulser produces voltages up to 3,000 volts and is capable of passing very high currents. When charged to maximum voltage, the instrument stores about 50 joules. A certain degree of respect is required for energy levels of this order. Safety system features prevent operator access to the recessed input jacks and to the recessed electrode contacts inside the sample chamber. These mechanical interlocks should never be circumvented.There is high voltage present whenever the yellow pulse button is depressed and "PLS"is shown in the light emitting diode display on the front of the instrument. If the capacitor has been partially charged but not fired (for example, when the charging cycle has been interrupted before the pulse is delivered), some charge may remain on the internal capacitor.However, the user cannot make contact due to the system safety features.1.2 Mechanical HazardsThe MicroPulser contains a patented arc-protection circuit that dramatically reduces the incidence of arcing in the cuvette when high voltage is delivered into the sample. The unit incorporates a circuit which senses the beginning of an arc and diverts current from the sample within ~5 µsec, preventing, or greatly reducing mechanical, visual, and auditory phenomena at the shocking chamber. Should an arc occur, the sample chamber is effective in containing these small discharges, but nonetheless we strongly recommend wearing safety glasses when using the instrument.Do not use the MicroPulser with samples suspended in conductive media (refer to Section 3.3 for information on sample resistance).1.3 Other Safety PrecautionsTurn the unit off when not attended.Avoid spilling any liquids onto the apparatus. Use only a paper towel or a cloth wet witheither water or alcohol to clean the outside surfaces of the MicroPulser.Use only the Bio-Rad cables supplied with the MicroPulser.Only use the shocking chamber in the assembled condition. Do not attempt to circumventthe protection of the shocking chamber or use it while disassembled.Verify the display segments periodically.Do not use the MicroPulser if obvious case damage exists that exposes part of the insideof the unit.No user-serviceable parts are contained within the MicroPulser; the case should only beopened by properly trained personnel.Warning: The MicroPulser generates, uses, and radiates radio frequency energy. If it is not used in accordance with the instructions given in this manual, it may cause interference with radio communications. The MicroPulser has been tested and found to comply with the limits for Class A computing devices (pursuant to Subpart J of Part 15 of FCC Rules) which provide reasonable protection against such interference when operated in a commercial environment.Operation of this equipment in a residential area is likely to cause interference. In this case the user will be required, at their own expense, to take whatever measure may be required to correct the interference.Section 2Introduction2.1 Overview of Electroporation TheoryThe MicroPulser system is used for the electroporation of bacteria, yeast, and other microorganisms where a high voltage electrical pulse is applied to a sample suspended in a small volume of high resistance media. The system consists of a pulse generator module, a shocking chamber, and a cuvette with incorporated electrodes (Figure 1). The sample is placed between the electrodes in the cuvette. The MicroPulser module contains a capacitor, which is charged to a high voltage; the module then discharges the current in the capacitor into the sample in the cuvette.Fig. 1. MicroPulser consisting of Pulse Generator Module, Shocking Chamber and Cuvette.The capacitance discharge circuit of the MicroPulser generates an electrical pulse with an exponential decay waveform (Figure 2). When the capacitor is discharged into the sample, the voltage across the electrodes rises rapidly to the peak voltage (also known as the initial voltage,V 0), and declines over time, t, as follows,V t =V 0[e -(t/τ)] Equation 1whereτ= R x C, the time constant, a convenient expression of the pulse length. The resistance of the circuit, R, is expressed in ohms, and the capacitance of the apparatus, C, is expressedin microfarads. According to Equation 1,τis the time over which the voltage declines to 1/e (~37%) of the peak value. The internal circuitry of the MicroPulser is designed to provide optimum electroporation of E. coli and S. cerevisiae , as well as many other microorganisms,in which the optimum transformation efficiency occurs at a time constant of approximately 5 msec. These electroporation conditions are achieved by using a 10 microfarad capacitor and by placing a 600 ohm resistor in parallel with the sample cuvette along with a 30 ohm resistor in series with the sample cuvette.Fig. 2. Exponential decay pulse from a capacitance discharge system. When the capacitor,charged to an initial voltage, V o is discharged into cells, the voltage applied to the cells decreases overtime so that at time t = τ, the voltage is (1/e) x V oof the initial value.In addition to the time constant, the electric field strength is the other instrument param -eter that is important in determining transformation efficiency. The electric field strength, E,is the voltage applied between the electrodes and is described byE = V/d Equation 2where V is the voltage applied and d is the distance (cm) between the electrodes. The strength of the electric field and the size of the cells determine the voltage drop across each cell, and it is this voltage drop that may be the important manifestation of the voltage effect in elec-troporation.V 0V 0eTime (msec)The purpose of the 30 ohm series resistor in the MicroPulser is to protect the instrument circuitry should arcing occur. Under normal operation, when samples are in high resistance media, this resistor will not affect the voltage applied to the sample. However, this resistor will significantly decrease the voltage applied to the sample if the resistance of the sample is low. The fractional drop in voltage applied to the sample is given byR 30/ (R30+Rsample)When Rsample is 600 ohms, there is a 5% voltage drop to the sample [30 / (30 + 600) =0.048]. For this reason, electroporation with the MicroPulser should not be performed in solutions with a resistance of less than ~600 ohms. This includes samples in which the growth medium was not adequately removed from the cells, DNA samples containing salt contributed by residual sodium chloride, or ligation mixtures. The MicroPulser is able to measure the resistance of the sample and will not pulse into very low resistance media.2.2 Manipulation of Instrument ParametersSeveral parameters on the MicroPulser may be altered to achieve maximum transformation efficiency. These include the field strength, E, the time constant, τ, and the width of a truncated exponential decay pulse. The field strength may be manipulated in two ways. First, voltages between 200 and 3000 V may be set directly on the MicroPulser. This parameter is the most easily controlled. The process of varying the voltage while keeping all other conditions unchanged is the basis for most electroporation optimization procedures. Second, using cuvettes with different electrode gap widths permits a means of changing the field strength. For electroporation of microorganisms, 0.1 and 0.2 cm gap cuvettes are most often used. Electroporation of E. coli is generally carried out at a voltage of 1.8 kV (E = 18 kV/cm) when electroporating cells in 0.1 cm cuvettes and at a voltage of 2.5 kV (E = 12.5 kV/cm) when electroporating cells in 0.2 cm cuvettes. These electroporation conditions are pre-programmed into the MicroPulser as programs Ec1 (V = 1.8 kV) and Ec2 (V = 2.5 kV) in the bacterial settings menu. In addition, a third program, Ec3 in the bacterial settings menu, delivers a voltage of 3.0 kV (E = 15 kV/cm in 0.2 cm cuvettes) which we have found results in even higher transformation efficiency compared to electroporation at 2.5 kV.The time constant may be altered by changing the sample resistance. The sample resistance may be manipulated in two ways. First, increasing the salt or buffer concentration of the electroporation media decreases the resistance of the sample, and vice versa, resulting in a change in the time constant. Second, the volume of the sample in the cuvette is inversely proportional to the resistance of the sample; decreasing the sample volume increases the sample resistance. This effect of volume on sample resistance is most noticeable in low resistance media. These effects are discussed further in Section 3.3.The MicroPulser also includes a means to truncate the exponential decay pulse sooner than the expected time constant as long as the voltage is greater than 600 V. When the pulse is terminated by the MicroPulser, voltage is applied to the sample only for the specified time,which may be between 1.0 and 4.0 msec. Figure 3 shows how this waveform differs from the true exponential decay pulse.Fig. 3. Truncation of an exponential decay pulse by the MicroPulser. The solid line shows the volt-age applied to the cells as a function of time during a pulse terminated after 2.5 msec. The dashed line shows the voltage that would normally be applied to the cells during a true exponential decay pulse.Section 3Factors Affecting ElectroporationThe electrical conditions for the electroporation of microorganisms have been verified through years of research (see Chang, et al ., 1992, and Nickoloff, 1995, for overviews as well as for protocols on electroporation of numerous species). For many microorganisms, opti-mum electrotransformation occurs under electrical conditions relatively similar to those used for E. coli and S. cerevisiae , two species that are most commonly used in research today. For electroporation of E. coli , conditions reported as being used most often are 0.2 cm cuvettes con-taining 40 µl of cells at a voltage of 2.5 kV and a time constant of ~5 msec. For electroporation of S. cerevisiae , conditions reported as being used most often are 0.2 cm cuvettes containing 40 µl of cells at a voltage of 1.5 kV and a time constant of ~5 msec. For many bacterial species, including Salmonella , Pseudomonas , Helicobacter , Borrelia ,Streptococcus , Lactococcus , and Enterococcus , the conditions for electroporation are identical to those used for E. coli . For many other bacterial species, altering the field strength will often result in higher electrotransformation. A similar case is found with other species of yeast.The MicroPulser is designed to deliver precisely those pulse parameters needed for the highest transformation efficiency of E. coli and S. cerevisiae . The time constant has been setV 0V 0e2.55Time (msec)at 5 milliseconds when working with high-resistance samples. For these organisms, the MicroPulser has pre-programmed settings for delivery of the correct voltage when electroporating E. coli in either 0.1 or 0.2 cm cuvettes, or when electroporating S. cerevisiae in either 0.2 or 0.4 cm cuvettes.3.1 Cell GrowthFor most bacterial species, the highest transformation efficiencies are obtained when cells are harvested in early to mid-log growth. For E.coli, as the cells reach stationary phase, the transformation efficiency will decline precipitously (Dower, 1990). In contrast, most yeast species are generally harvested in mid- to late-log growth. For S. cerevisiae, the transformation efficiency increases as much as 60-fold from early to late-log cultures (Becker and Guarente, 1991). The optimal portion of the growth phase to harvest cells is generally dependent on the cell type. When preparing competent cells of a new species it is generally best to employ conditions worked out for use with the same genus. Suggestions for factors to consider and general methods for producing electrocompetent cells are discussed in the articles by Dower et al.(1992) and Trevors et al.(1992).3.2 DNAWhile the majority of electroporation applications involve delivery of plasmid DNA to cells, it should be mentioned that nearly any type of molecule can be introduced into cells by electroporation, including RNA, proteins, carbohydrates, and small molecules. With few exceptions, when delivering autonomously replicating plasmids, the highest transformation efficiencies are obtained when electroporating supercoiled plasmid. However, electroporating plasmid that will integrate into the host genome is usually most efficient using linear plasmid. For example, Candida, Pichia, and Tetrahymena are transformed more efficently when transformed with linearized than with supercoiled integrating plasmids.In both E. coli and Listeria monocytogenes, the transformation efficiency of relaxed circular plasmid is only slightly lower than that of supercoiled plasmid (Leonardo and Sedivy, 1990, Park and Stewart, 1990). However, linear plasmid is about 103- 104-fold less efficient than the corresponding circular plasmid in both E. coli and Streptococcus pyogenes (Shigekawa and Dower, 1988, Simon and Ferretti, 1991). Electroporation efficiency per mole of plasmid generally decreases as the plasmid size increases in numerous species, including E. coli(Leonardo and Sedivy, 1990, Siguret et al., 1994), Pseudomonas aeruginosa(Dennis and Sokol, 1995), and Streptococcus thermophilus(Somkuti and Steinberg, 1988). However, in some species, including Lactococcus lactis(Holo and Nes, 1995), Enterococcus faecalis (Cruz-Rodz and Gilmore, 1990), and Clostridium perfringens(Allen and Blaschek, 1990), transformation efficiency appears to be independent of plasmid size up to 20–30 kb.Although transformation of most microorganisms has been accomplished using plasmid DNA isolated by a variety of methods, the plasmid purity has an effect on transformation efficiency. Significantly lower transformation efficiencies are generated with unpurified miniprep plasmid DNA than with plasmid DNA purified by a variety of procedures. Plasmid produced using the Bio-Rad Quantum matrix is as efficient as CsCl-purified plasmid for transformation of microorganisms.Generally, for all types of microorganisms, the frequency of transformation increases with inceasing DNA concentration in the electroporation buffer. For E. coli, the frequency of transformation (transformants/survivor) is dependent on DNA concentration over at least six orders of magnitude (10 pg/ml to 7.5 µg/ml); within this range the DNA concentration determines the probablility that a cell will be transformed. At the higher DNA concentrations, up to 80% of the survivors are transformed (Dower et al., 1988). Because the number of transformants recovered is the product of the transformation frequency and the number ofcells present, the transformation efficiency (transformants/µg DNA) increases with cell concentration over the range of 109to at least 3 x 10¹⁰cells/ml. Therefore, to obtain a high transformation frequency, use high DNA concentration. To obtain high transformation efficiency, use high cell concentration (and low DNA concentration to avoid cotransformations). In each case, a small sample volume (20–50 µl) allows economical use of DNA and cells (see Dower et al., 1988, for a detailed discussion of these factors).3.3 Electroporation MediaThe MicroPulser is designed for use with samples in high resistance media (>600 ohms). For this reason, when preparing electrocompetent cells, it is important to wash cells thoroughly to remove all traces of growth media. Failure to thoroughly remove the growth media from the cells may result in the sample arcing during electroporation. Cells should be washed at least three times with water or with non-ionic solutions, such as glucose, glycerol, sucrose, sorbitol, or polyethylene glycol. For many microorganisms, glycerol is a convenient electroporation medium, since it is recommended as a cryoprotectant for storage of cell cultures.Fig. 4. Resistance of solutions of (A) NaCl and MgCl2 and of (B) buffers of NaPO4 at pH 6.1 and 7.3 and HEPES at pH 7.5. Resistance was measured in 0.2 cm cuvettes containing either 40 µl or 200 µl of solution at room temperature.Figures 4A and B show the effect of concentration of several biologically important ionic solutions on sample resistance. Note that: (1) volume has a significant effect on sample resistance—for ionic solutions, sample resistance is inversely proportional to the volume of solution in the cuvette; (2) the resistance of a solution containing divalent ions is lower than a solution containing the same concentration of monovalent ions; (3) the resistance of a buffered solution is affected by its pH.The addition of even small concentrations of ionic compounds significantly reduces the resistance of the sample and may cause arcing. Residual salt from ethanol precipitation of DNA should be reduced by washing the DNA pellet prior to dissolving it in either water or Tris-EDTA. Table 1 shows that, although adding a solution of plasmid in 10 mM Tris, pH 8.0–1 mM EDTA to water does reduce the sample resistance, this should not result in the inability to electroporate a sample in the MicroPulser. DNA may be used directly from enzyme reactions for transformation, but the final salt concentration in the electroporation sample should be kept below ~5 meq for high voltage operation. Finally, ligation mixtures may be used for transformation, but only in very low quantities or when the ionic strength is reduced by dilution (Willson and Gough, 1988), dialysis (Heery and Dunican, 1989; Jacobs et al., 1990), or ethanol precipitation (Böttger, 1988; Zabarovsky and Winberg, 1990).Table 1. Resistance of Water in 0.2 cm Cuvettes To Which TE Has Been Added1.SAMPLE Rsample Rsample(40 µl volume)(200 µl volume) Water> 6 x 10⁵> 6 x 10⁵Water + 1 µl TE> 6 x 10535,000Water + 5 µ TE11,2008,700Water + 10 µl TE4,8504,7001The resistance of 0.2 cm cuvettes containing either 40 or 200 µl water and the indicated volume of TE (10 mM Tris, pH 8.0, 1 mM EDTA) was measured at 1000 V.Fig. 5. MicroPulser control panel.Section 4MicroPulser Operating InstructionsRefer to Figure 1 for a view of the components of the MicroPulser system and to Figure 5 for a definition of the buttons and LEDs.4.1 Setting Up The MicroPulser System1.Connect the black power cord to the rear panel of the MicroPulser Pulse GeneratorModule. Plug the cord into a wall outlet or power strip.2.Pull down the fold-down foot on the underside of the MicroPulser. Insert this foot into thetrack on the base of the shocking chamber. Insert the shocking chamber slide into theshocking chamber.3.Connect the leads from the shocking chamber to the output jacks on the front panel of theMicroPulser; polarity is not important to the electroporation process.4.Turn on the apparatus using the power switch on the right rear panel. The light emittingdiode (LED) display should illuminate and read “Ec1” and the LED next to the BacteriaSettings should be illuminated.4.2 Operation of the MicroPulser1. Selecting Pre-Programmed SettingsThe MicroPulser is pre-programmed with settings for electroporation of a number of commonly used organisms. Included under the Bacteria Settings program are the following: Mnemonic Organism ParametersVoltage Number of Time constant(kV)pulses(msec) Ec1 E. coli(0.1 cm cuvette) 1.81-Ec2 E. coli(0.2 cm cuvette) 2.51-StA S. aureus (0,2 cm cuvette) 1.81 2.5Agr A. tumefaciens(0.1 cm cuvette) 2.21-Ec3 E. coli(0.2 cm cuvette) 3.01-Included under the Fungi Settings program are the following:Mnemonic Organism ParametersVoltage Number of Time constant(kV)pulses(msec) Sc2S. cerevisiae(0.2 cm cuvette) 1.51-Sc4S. cerevisiae(0.2 cm cuvette) 3.01-ShS S. pombe(0.2 cm cuvette) 2.01-dic D. discoideum(0.4 cm cuvette) 1.02 1.0Pic P. pastoris(0.2 cm cuvette) 2.01-Pressing the "Settings" button cycles the Settings LED between "Bacteria", "Fungi", and "Manual". When the LED next to Fungi is lit, the mnemonic for the fungi programs are displayed. Pressing the "Raise" and "Lower" buttons to the left of the display LED cycles between the different fungi programs. When the mnemonic is displayed, the parameters associated with the mnemonic are automatically selected.To change from one bacteria setting to another, while the Settings LED next to Bacteria is lit, press the "Raise" and "Lower" buttons to the left of the display LED to cycle between the different programs. When the mnemonic is displayed, the parameters associated with the mnemonic are automatically selected.While a program mnemonic is displayed for either a Bacteria or Fungi Setting, simultaneously pressing both the "Raise" and "Lower" buttons shows the program parameters selected on the display LED. The display LED first shows the voltage value, then displays a "t" followed by the time in msec, then, if time and multiple pulses are associated with a program, display "P" followed by "2", indicating that two successive pulses are given. If no "t" is given the pulse is not truncated, and if no "P" is given there is a single pulse.2. Using The Micropulser in Manual ModeA.To change the voltage.Press the "Settings" button to illuminate the LED next to "Manual". The display LED now shows the voltage (in kV). Pressing the "Raise" and "Lower" buttons to the left of the display LED allows selection of the desired voltage in the range from 0.20 kV to 3.00 kV.If the instrument was just turned on, the display LED shows "0.00"B.To truncate the pulse.Press both "Raise" and "Lower" buttons simultaneously while the "Manual" LED is illuminated. The display LED now shows “t—” and indicates the pulse time that has been selected for the pulse. The default setting when the power is turned on is the standard exponential decay pulse, or no pulse truncation, which is indicated by the two dashes.Releasing only the "Lower" button results in the display LED showing the time of the truncated pulse in milliseconds. The display LED initially changes to "t1.0" and rises in0.1 msec increments to "t4.0". This permits truncating the exponential decay pulse between1–4 msec. Simultaneously pressing both "Raise" and "Lower" buttons, then releasing only the "Raise" button, results in lowering the indicated truncation time.3. Pulse FunctionPressing the "Pulse" button results in the capacitor charging to the set voltage; during this time "PLS" is shown on the display LED. A tone will sound to indicate that the pulse has been delivered. When multiple pulses are delivered by one of the built-in programs, "PLS" is shown on the display LED during the entire time and a tone sounds each time a pulse is delivered. To manually deliver multiple pulses, after the tone sounds from the first pulse, press the pulse button again.If a lower pitched tone sounds, accompanied by "Arc" being shown on the display LED, the arc prevention and quenching (ARQ) system has been actuated and the pulse has been terminated. This is usually an indication of attemped cuvette arc-over, but may also occur if the sample resistance is too low. Since the energy delivered during such an ARQ event is low, it is usually possible to pulse the sample again at parameters which will not result in an arc and still produce acceptable results. However, it is not advisable to use a sample in which two arc events have occurred.4. MeasurementsPressing the "Measurements" button results in illumination of the "Actual kV" LED. This indicates that the display LED shows the actual voltage delivered (in kV) during the last pulse. If the instrument was just turned on and no pulse has been given, the display LED shows "0.00". Pressing the "Measurements" button again results in illumination of the "Time ms" LED. This indicates that the display LED shows the time constant (in msec) of the last pulse.If the instrument was just turned on and no pulse has been given, the display LED shows"0.00". Holding the "Measurements" button toggles the display LED between the Actual voltage and the Time constant.4.3 Electroporation Using The MicroPulser1.Place the cell suspension in an electroporation cuvette and tap the liquid to the bottom ofthe cuvette. Up to 0.4 ml (400 µl) of solution may be placed in the 0.2 cm cuvette, and upto 80 µl may be placed in the 0.1 cm cuvette. Note that temperature may have a significantinfluence on transformation frequency. Electroporation of some organisms, includingE. coli and S. cerevisiae, is more efficient in chilled cuvettes.2.Insert the cuvette into the slide of the shocking chamber. Push the slide into the chamberuntil the cuvette makes firm contact with the chamber electrodes.3. To charge the capacitor and deliver a pulse, press the yellow "Pulse" button; the displayLED will show "PLS" until a tone sounds indicating that the pulse has been given. Thedisplay LED will then show the program, the time constant, or the actual volts delivered,depending on the LED selected.4. Withdraw the slide from the chamber, remove the cuvette, and process the sample.5. The time constant and the actual voltage delivered to the sample are shown on the displayLED by pressing the "Measurements" button. When the LED next to "Actual kV" isilluminated, the voltage is displayed in kilovolts. The time constant can be displayed bypressing the "Measurements" button again. The LED next to "Time ms" will beilluminated; the time constant is displayed in milliseconds.6.To turn the unit off press the power switch on the right rear panel. The sample chambermay now be safely disconnected, if desired. Never remove the sample chamber coveruntil the leads are disconnected.Section 5High Efficiency Electrotransformation of E. coliElectroporation provides a method of transforming E. coli at efficiencies as high as 109 to 1010transformants/µg, which is greater than is possible with the best chemical methods. Thefollowing protocol describes a method for for preparing and electrotransforming E. coli tohigh efficiencies. We are interested in hearing of additional strains transformed byelectroporation and including this information in subsequent versions in our Electroprotocolsmanual. Please contact your local Bio-Rad representative, access our web site at, or, in the U.S., call our Technical Services at (800) 424-6723 with anycomments or questions.5.1 Preparation of Electrocompetent CellsSee Ausubel et al.(1987) and Miller and Nickoloff (1995) for additional information.1.Inoculate 500 ml of L-broth with 1/100 volume of a fresh overnight E. coli culture.2.Grow the cells at 37 °C shaking at 300 rpm to an OD600of approximately 0.5–0.7 (the bestresults are obtained with cells that are harvested at early- to mid-log phase; the appropriate cell density therefore depends on the strain and growth conditions).。
Electrical Safety 电气安全培训英文资料

1
2
All Palabora employees and contractors shall receive awareness training regarding the content of the Palabora HSEQ and Communities policy.
ELECTRICAL EQUIPMENT
Electrical safety devices such as Earth leakage and Overload protection units shall be installed on all final distribution circuits and the setting established by qualified personnel.
Ref no.: HS-RTS-PRS – 091 Date: 05.12.2013 Rev: 3.2 Originator: Training Officer, Safety and Compliance
7
•
This workshop depends heavily on your participation and input. Please be prepared to actively participate and discuss
•
While we expect your full attention during the workshop, we do appreciate you are taking time out from your day job
•
If you have a sudden, pressing work issue, feel free to step out from the workshop for a few minutes to resolve
iec60825_1_A2_2001_01[1]
![iec60825_1_A2_2001_01[1]](https://img.taocdn.com/s3/m/37237902e87101f69e319569.png)
Page 15
3
Definitions
Page 17 Replace, in definition 3.5, the reference in brackets by " 3.7".
60825-1 Amend. 2 © IEC:2001(E)
–3–
Add the following new definition: 3.6 angle of acceptance plane angle within which a detector will respond to optical radiation, usually measured in radians. This angle of acceptance may be controlled by apertures or optical elements in front of the detector (see figure 16). The angle of acceptance is also sometimes referred to as the field of view Symbol: γ
–4–
60825-1 Amend. 2 © IEC:2001(E)
Page 19 Replace definition 3.17 as follows: 3.17 Class 1 laser product any laser product which does not permit human access to laser radiation in excess of the accessible emission limits of Class 1 for applicable wavelengths and emission durations (see 8.2 and 8.4e)) Add the following new definition 3.18: 3.18 Class 1M laser product any laser product in the wavelength range from 302,5 nm to 4 000 nm which does not permit human access to laser radiation in excess of the accessible emission limits of Class 1 for applicable wavelengths and emission durations (see 8.4e)), where the level of radiation is measured according to 9.2g), however, evaluated with smaller measurement apertures or at a greater distance from the apparent source than those used for Class 1 laser products. The output of a Class 1M product is therefore potentially hazardous when viewed using an optical instrument (see 8.2) Replace definition 3.16 as follows: 3.19 Class 2 laser product any laser product which does not permit human access to laser radiation in excess of the accessible emission limits of Class 2 for applicable wavelengths and emission durations (see 8.2 and 8.4e)) Add the following new definition 3.20 and renumber the definitions 3.17 to 3.57 to read 3.21 to 3.61: 3.20 Class 2M laser product any laser product in the wavelength range from 400 nm to 700 nm which does not permit human access to laser radiation in excess of the accessible emission limits of Class 2 for applicable wavelengths and emission durations (see 8.4e)), where the level of radiation is measured according to 9.2h), however, evaluated with smaller measurement apertures or at a greater distance from the apparent source than those used for Class 2 laser products. The output of a Class 2M product is therefore potentially hazardous when viewed using an optical instrument In definitions 3.21 and 3.22 change "(see 9.2)" to "(see 8.2)". Replace the title of definition 3.21 "Class 3A and Class 3B laser products" by "Class 3R and Class 3B laser products". In the text of definition 3.21, change "3A" to "3R". Add the following note at the end of definition 3.29:
电气安全名词术语
电气安全名词术语(最新版)编制人:__________________审核人:__________________审批人:__________________编制单位:__________________编制时间:____年____月____日序言下载提示:该文档是本店铺精心编制而成的,希望大家下载后,能够帮助大家解决实际问题。
文档下载后可定制修改,请根据实际需要进行调整和使用,谢谢!并且,本店铺为大家提供各种类型的安全管理制度,如通用安全、交通运输、矿山安全、石油化工、建筑安全、机械安全、电力安全、其他安全等等制度,想了解不同制度格式和写法,敬请关注!Download tips: This document is carefully compiled by this editor. I hope that after you download it, it can help you solve practical problems. The document can be customized and modified after downloading, please adjust and use it according to actual needs, thank you!In addition, this shop provides you with various types of safety management systems, such as general safety, transportation, mine safety, petrochemical, construction safety, machinery safety, electrical safety, other safety, etc. systems, I want to know the format and writing of different systems ,stay tuned!电气安全名词术语1基本概念1.1保安性fail-safe为防止产品本身的危险故障而设计的性能。
electrical safety

a protective measure
• Insulators 绝缘-- substances with high resistance to electricity like
glass, porcelain, plastic, and dry wood that prevent electricity from
Cover removed from wiring or breaker box
Control – Isolate Electrical Parts 控制-设置可靠的绝缘
• Use guards or barriers
• Replace covers
Guard live parts of electric equipment operating at 50 volts or more against accidental contact
• Currents more than 75 mA can cause a rapid, ineffective heartbeat -- death will occur in a few minutes unless a defibrillator is used 心颤电流
• 75 mA is not much current – a small power drill uses 30 times as much
You will get an electrical shock if a part of your body completes an electrical circuit by… 如果 身体的一部分变成了电路回路中的导体,就 会被实施电击
• Touching a live wire and an electrical ground, or
电弧分析
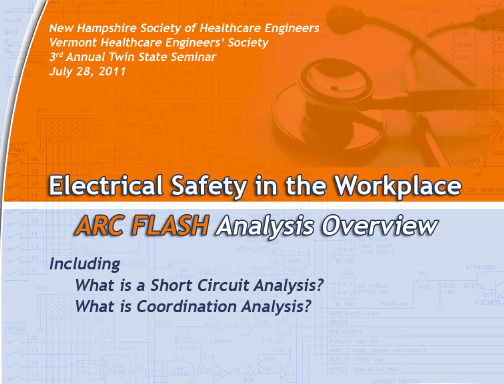
Provides minimum requirements to prevent hazardous electrical exposures to personnel and ensure compliance with regulatory requirements applicable to electrical systems
Source: W.B. Kouwenhoven, " Human Safety and Electric Shock," Electrical Safety Practices, Monograph, 112, Instrument Society of America, p. 93. November 1968.
• Focus on safety, promote training, use best practices
Electrical Hazards Consist of:
Electric Shock Arc Flash
Arc Blast
Other Hazபைடு நூலகம்rds
Electric Shock
For non-compliance, OSHA may audit a facility and issue fines Most recently: U.S. Postal Service $420,000 (pending) – single facility
A Facility’s Electrical System
Flash Protection Boundaries (FPB)
ELECTRICAL SAFETY 电气安全英文版

ELECTRICAL SAFETY1.1. Hazards. Electrical cord abuse is the most often single cause for electric shock to workers in the field. Excessive scraping, kinking, stretching, and exposure to grease and oils will damage power cables and cause premature failure and possible shock or burns. Electrical installations and equipment present the potential for shock or electrocution from contact with energized systems. Fire can be caused by short circuits, over-heated equipment, or failure of current limiters, thermal sensors, and other devices. Explosions may occur when flammable liquids, gases, or dusts are exposed to ignition sources generated by electrical equipment.1.2. Electrical Installation and Equipment. National Fire Protection Association (NFPA) 70, The National Electrical Code (NEC), are the source documents for electrical installations and equipment and shall be complied with.1.3. Receptacles. Electrical receptacles and cover plates will be free of cracks and securely mounted. Receptacles located in damp or wet locations will be protected by ground fault circuit interrupter(s) (GFCI) and meet requirements of the NEC.1.3.1. Multiple plug adapters will not be used solely as wiring to provide additional or more convenient outlets.8.3.2. Arc-fault Circuit Interrupters. Arc-fault circuit interrupters (AFCI) shall be installed to protect all new installed, extended or modified branch circuits that supply 125-volt, single-phase, 15- and 20-ampere receptacle outlets in dwelling unit bedrooms after 01 January 2002 (NEC). 1.4. Plugs. Attachment plugs will be of dead front construction. When in use, plugs will be inserted fully so no part of the prongs is exposed. The third and (or) grounding prong is a safety feature and shall be checked frequently by supervisors for security, especially on items that are unplugged frequently. The prong will not be cut off, nor will an adapter be used to allow a three-prong plug to fit a two-prong receptacle, since this negates the third wire grounding protection. This paragraph does not apply to double insulated equipment or equipment such as clocks, radios, can openers, etc., which are not normally manufactured with a grounding plug. Plugs, whether molded or clamped, shall be firmly attached to the cord to prevent pulling against wire connection points. Clamps will be nonmetallic. Also refer to paragraph 8.5.5.1.5. Flexible Cords and Extension Cords. Electrical cords shall not be subjected to electrical currents or voltages greater than their rated capacity.1.5.1. Electrical extension cords will not be used as a substitute for fixed wiring. Do not run them through holes in walls, ceilings, floors, doorways, windows, or similar openings. Do not run extension cords where concealed behind walls, dropped ceilings, or floors. Do not tape, staple, or tack extension cords to building surfaces. Extension cords shall not be spliced, coiled, or placed where they may be damaged or create a hazard. Cords will not be walked on nor will equipment be allowed to run over them. If cords must be placed in travel lanes, they will be protected by molded housings or bridges. Cords will not be kinked, stretched, or bent excessively. Practices of this nature will damage internal wire strands.1.5.2. Extension cords have been responsible for numerous fires and their use will be held to an absolute minimum. If used, they will have a single connection.1.5.3. Equipment connected by flexible extension cords will be grounded either by a three-wire cord or by a separate ground wire (except double-insulated equipment). A grommet, stress relief device, or some means of clamping approved by the NEC will be installed where cords passthrough equipment housings to prevent abrasion of the cord insulation. The means used will hold the cord firmly so there is no pull or strain put on the cords internal wiring.1.5.4. Cords used with heating appliances, such as electric irons, will be covered with flame-proof insulating material.1.5.5. Extension cords used with portable tools and equipment will be designed with three-prong plugs. Two-wire extension cords are prohibited. EXCEPTIONS: Double insulated tools and low amp devices, such as wall clocks, pencil sharpeners, tape recorders, etchers, lamps, etc., may be used with a two-prong plug. The minimum amperage rating of the extension cord will be at least equal to, but not less than, the amperage rating of the item being powered from the cord. Plugs and sockets will be designed according to the NEC.1.5.6. Cords will be inspected frequently by the user for signs or fraying, cracking, wearing, or any damage that could indicate a possible short-circuiting. Cords will be of the proper size and (or) rating for equipment it services. Defective cords will be taken out of service.1.5.7. When possible, electrical power cords used with equipment will be suspended from overhead in rigid raceways.1.5.8. Equipment connected by an extension cord will be disconnected when not in use and at the end of the work shift.1.5.9. When disconnecting cords, the plug will be pulled on rather than the cord, to avoid damaging connections.1.5.10. Electrical wiring or conduits will not be used as hangers for clothing or supports of any nature.1.6. Disconnecting Means, (Circuit Breakers and Disconnect Switches). Unless their purpose is evident circuit breakers and fuse boxes will be legibly marked to indicate their purpose. Proper identification needs to be specific. For example, the marking should not merely indicate "motor," but rather "motor, water pump"; not merely "lights," but rather "lights, front lobby." Facility Maintenance will plainly mark all electrical fuse, switch, and circuit-breaker boxes with correct voltage, current, wattage, or other ratings as appropriate.1.6.1. Circuit breakers and disconnect switches shall clearly indicate whether they are in the open (off) or closed (on) position.1.6.2. Circuit breakers, disconnect switches, and fuses shall be readily accessible to each authorized building management personnel. They will not be located where they will be exposed to physical damage or in the vicinity of easily ignitable material.1.6.3. Circuit breakers shall not be taped in the “on” position. Breakers that frequently trip are an indicator of possible electrical problems and shall be promptly reported and corrected.1.6.4. Workers will not substitute larger fuses or breakers or use bypass wires.1.7. Guarding of Live Parts. Electrical outlets, switches, junction boxes, etc., will have cover plates securely installed. Cover plates shall be free of cracks or other defects that could cause them to be ineffective. All unused openings (knock out plugs) in switch housings, junction boxes, etc., shall be securely covered. Rigid conduits will be securely attached to the box and flexible conduits shall be firmly secured by a clamping device where the conduit enters the box.1.8. Equipment Grounding:1.8.1. Frames of electrical motors, regardless of voltage, shall be grounded. All covers will be securely fastened. Motor data plates will be legible and will not be painted over.1.8.2. Exposed noncurrent-carrying metal parts of fixed equipment that may become energized under abnormal conditions shall be grounded.1.9. Restrictions. While working on or around live electrical equipment garments with exposed metallic fasteners will not be worn, nor will flammable articles such as celluloid cap visors be worn. Articles such as jewelry, earrings, rings, hair fasteners, bracelets, or key chains will also beremoved and metal framed eyeglasses will be secured by a band or cord to prevent them from falling into energized electrical circuits.1.10. Electrical Installations and Equipment:1.10.1. Facility Maintenance, EH&S and Supervisors will ensure work areas are inspected for possible electrical hazards. Sufficient workspace shall be provided and maintained around electric equipment (30 inches) to permit safe operation and maintenance of such equipment. Only qualified operators will be allowed to operate the equipment.1.10.2. Wires will be covered wherever they are joined by wire nuts or other approved methods(e.g., outlets, switches, and junction boxes).1.10.3. Parts of electrical equipment which in ordinary operation produce arcs, sparks, etc., will not be operated or used in explosive atmospheres or in close proximity to combustible materials.1.10.4. Ground Fault Circuit Interrupters (GFCI) will be used on all 125-volt, single-phase, 15-, 20-, and 30-ampere receptacle outlets at job sites when the receptacles are not a part of the permanent wiring of the building or structure. Receptacles on a two-wire, single-phase portable or vehicle-mounted generator rated not more than 5 kilowatts (kW), where the circuit conductors of the generator are insulated from the generator frame and all other grounded surfaces, shall be permitted without GFCI protection.1.10.4.1. GFCI protection shall be provided for all electrical receptacles (125 volt, single phase, 15 or 20 ampere) in bathrooms. GFCI protection shall be provided for those electrical receptacles (125 volt, single phase, 15 or 20 ampere) that serve countertop surfaces in kitchens (NEC).1.10.4.2. When GFCI protection is required for large areas, the GFCI breaker should be located in the circuit panel.1.10.4.3. Receptacles located within 6 ft of a wet bar sink are required to be GFCI protected.1.10.5. In locations requiring the use of special tools (e.g., non-sparking), only tools certified for use in those areas will be used.1.10.6. Electrical Repairs. Qualified workers may perform repairs on equipment that has been deenergized and Locked Out and Tagged Out (LOTO) utilizing FM Global’s LOTO or comparable LOTO devices. In some circumstances, shop technicians may work on low voltage control, power, and lighting circuits while energized for the purpose of testing, calibrating, troubleshooting, making minor repairs, and replacement of fuses and circuit breakers. If the voltage exceeds 300 volts, ensure a safety observer is present. Perform these tasks only when authorized by applicable manufacturer’s guides or manual s, or other approved procedures and directives. In all other cases where repairs to energized circuits or equipment are required, the work will be accomplished by qualified electricians. Install electrical equipment according to the guidance contained in the NEC.1.10.6.1. Ensure a means for making machines inoperative is provided before maintenance is performed or adjustments (or cleaning) are made to moving parts. Use one or more of the following means:1.10.6.2. Unplug the power cord when equipment is connected by plug and cord;1.10.6.3. Lock the power source, circuit breaker, or start switch in the off position when equipment is wired to a direct power source. NOTE: If existing equipment, circuit breakers, or power sources cannot be locked in the off position, place danger signs or tags on the disconnecting means warning that maintenance is in progress and the disconnecting means is not to be turned on.1.10.6.4. Ensure the safety observer is trained in CPR and equipment shut-down procedures or who is responsible for administering immediate assistance to a technician in the event of an emergency (the safety observer may be the supervisor).1.10.7. When equipment is replaced or if a renovation project is planned, make provisions to comply with the lockout requirements. NOTE: Construction & planning Section along withEH&S Department should include provisions for complying with the lockout requirements on all new construction projects/plans.1.11. Additional Electrical Equipment Requirements:1.11.1. Close rack doors at all times except as necessary to accomplish authorized repairs.1.11.2. Operators will open and close all equipment switches quickly and positively. Ensure contact between brushes and commutators or slip rings.1.12. Electronic Equipment. Operators or other shop personnel will not unplug equipment with components operating on high voltage unless technical publications authorize the removal of an electronic component such as a subassembly or module.1.12.1. Personnel will use only approved solvents for cleaning electronics equipment. Provide adequate ventilation and, when using solvents, wear approved Personal Protective Equipment (PPE) when required by the Material Safety Data Sheet (MSDS) and/or the EH&S Department. Vacuuming is considered an effective cleaning method. Use compressed air only as a last resort. If using compressed air for cleaning electrical equipment, limit air pressure to less than 30 psi, unless a lower pressure is required by manufacturer’s data, or local procedure s. Effective chip guarding (nozzle discharge tip is a diffuser type) and PPE will be used.1.12.2. Technicians will not use lead pencils, screwdrivers, or other unapproved tools to make radio frequency energy tests on any piece of electronic equipment, as serious burns can result from this practice.1.12.3. Personnel should not hold meters in their hand while performing measurements on energized circuits or equipment. When it is necessary to handhold meters or metering cables, use gloves or other effective PPE. The holder must stand on or be in contact with dry surfaces.1.12.4. Workers will keep workbenches clean at all times. When voltage is applied to equipment being repaired or tested, personnel will ensure tools not essential to the test and other equipment are removed from the bench. Ground metal workbenches used for repairing and testing of electronic equipment to a low resistance ground. Use stools made of wood, fiberglass, or other nonconducting materials when working on electrical or electronic equipment.1.12.5. Supervisors will establish procedures requiring all accessories, that are to be used with electronic and electrical equipment, are serviceable and safe to use. Establish procedures to eliminate or control all hazard potentials to a safe acceptable level.1.13. Emergency Equipment (Electrical Safety Boards). In addition to electrical PPE provided to workers, supervisors may desire to have emergency equipment available at each operating location where maintenance is performed on energized high voltage circuits. High voltage is defined as 600 volts, nominal, or more. The equipment may be displayed on a board, stored in an unlocked cabinet, or made available in a portable kit. The emergency equipment will be situated in a conspicuous and prominent location at each site, well marked, and readily accessible to personnel. If an electrical safety board is used, recommend the dimensions be 4 feet by 4 feet by one-half inch. Color coding is not mandatory; however, the recommended color is a dark green background with white letters and border. In each case, the color of lettering should be conspicuous against the darker background. The location of the equipment should also afford maximum protection against chemical, mechanical, or environmental deterioration. Emergency equipment will be inspected or tested frequently by the work place supervisor for serviceability. Emergency equipment will consist of:1.13.1. The safety operations instructions, when required by the Supervisor for the particular site.1.13.2. Cardiopulmonary resuscitation (CPR) instructions. An American Red Cross or American Heart Association Poster may be used.1.13.3. CPR facemask with disposable mouthpiece.1.13.4. Emergency phone numbers and building number will be prominently displayed.1.13.5. First aid kit, or a suitable substitute.1.13.6. Disposable gloves, which are impervious (leak proof) to body fluids, for first aid use. 1.13.7. Nonconductive cane or hook with an electrically insulated handle (with less than 180 degrees of bend). (Note: Cane should not be varnished wood as some varnishes are electrically conductive, not bare wood as it may absorb moisture and become conductive.)1.13.8. High voltage insulated lineman’s rubber electrical gloves (both inner and outer g loves) - if rescuer(s) is likely to come into contact with live wires, conductors or current carrying parts during a rescue situation. Voltage rating will be suitable for voltages encountered in the work area. Note: Electrical gloves shall be checked before use as per ASTM F 496-85 and gloves shall be tested and marked with next test date.1.13.9. A 15-foot length of rope, preferably one-half or five-eights inch hemp. (Note: synthetic rope may melt or burn quickly when exposed to an electric arc, heat or flame)1.13.10. Insulated fuse pullers (where required).1.13.11. Flashlight (nonmetallic case) or a chemical high intensity light stick in operating condition.1.13.12. Grounding stick (shorting stick) with nonconductive handle. (Note: may be omitted if available on adjacent workbenches in area)1.13.13. Snakebite kit (for remote work sites or as dictated by environmental conditions).1.13.14. Wool blanket(s), for use in extinguishing clothing fires and for keeping injured person warm to reduce effects of shock.1.13.15. Rubber insulating blanket(s), where potential exists to contact energized electrical parts during rescue.1.14. Automated External Defibrillator (AED): AED approved by the EH&S Department may be required.1.15. Consult Construction & Planning or EH&S Department whenever specific guidance on lighting is required. All fluorescent light bulbs contain toxic materials and should be managed in accordance with local disposal criteria for hazardous waste. When fluorescent lighting fixtures are used, supervisors will ensure that any stroboscopic effect with moving machinery is avoided. Control of light is important to avoid glare and harsh shadows. Soft shadows are usually acceptable, but harsh shadows should be avoided since they may obscure hazards or interfere with visibility. Supplementary lighting or additional lighting will be provided in situations where general lighting is not sufficient.1.16. Moisture Guarding. Weatherproof electrical systems will be installed where lampholders, fixtures, or receptacles are used in wet or damp locations, such as perishable storage areas (to include all refrigerated areas, both storage and food processing). Fixtures subject to moisture such as those located near steam equipment will be of vapor proof construction to prevent electrical shock or short circuits.1.17. Undervoltage Protection. Machines which are not adequately safeguarded to protect the worker during undervoltage situations shall have an undervoltage protective device installed. Undervoltage situations occur when a machine automatically resumes motion after a low voltage situation or power interruption and the operator is exposed to hazardous moving parts. Physical Plant personnel, EH&S Department and workplace Supervisors will identify those machines which require this protection and assure that undervoltage protection devices are installed where needed.1.18. Control Switches. Control switches (on and off) will be accessible to workers at their normal operating positions so they will not need to reach over moving parts of the machine toactivate the switch. Control switch stop functions will be identified by the printed word “STOP” and (or) the color red.1.18.1. Positive pressure switches will not be wedged for continuous operation. The motor “start” switch shall be protected against accidental and (or) inadvertent operation. Electrical controls shall not be blocked or otherwise obstructed.1.18.2. Interlocks will not be disconnected or bypassed. Interlocks can be disconnected during maintenance or adjustments only when prescribed by applicable instructions. During these periods, a sign stating “DANGER —INTERLOCKS DISCONNECTED” or nearest commercially available equivalent, will be placed on the equipment or nearest available equipment. Interlocks will not be permanently circumvented by operators of such equipment where interlocks are installed for safety reasons, i.e.; an interlock that prevents a machine from operating when a protective guard or panel is removed or opened.。
电气安全

Factors Influencing Severity 影响因素
• Voltage/电压。 • Frequency/频率。 • Duration/时间长短。 • Resistance/电阻。 • Current path/电路路线。
Electric Shock Hazards 电击伤害
• For electricity to pass through body you/电流经 过身体。
Reduced Risk 降低风险
• Reduce the voltage/降低电压:
– Temporary lighting can be run at lower voltages, eg 12, 25, 50 or 110 volts/临时用电使用低电压,如12,25 ,50或110伏; – Where electrically powered tools are used, battery operated are safest/使用电池供电的电器; – Portable tools are readily available which are designed to be run from a 110 volts center-tapped-to earth supply/便携工具应使用110伏并有中心接地;
Environment Effect 环境影响
• In wet surroundings. • 在潮湿的环境里; • Out of doors. • 室外; • In cramped spaces with a lot of earthed metalwork. • 大量接地金属狭窄环境;
Reduced the Risk 降低风险
• Ensure that the electrical installation is safe/保证电器安装时安全的。.
- 1、下载文档前请自行甄别文档内容的完整性,平台不提供额外的编辑、内容补充、找答案等附加服务。
- 2、"仅部分预览"的文档,不可在线预览部分如存在完整性等问题,可反馈申请退款(可完整预览的文档不适用该条件!)。
- 3、如文档侵犯您的权益,请联系客服反馈,我们会尽快为您处理(人工客服工作时间:9:00-18:30)。
2016/3/3
Electrical Safety Training
6
Electrical Hazards - Shock
How many of YOU have received an Electrical Shock?
2016/3/3
Electrical Safety Training
7
Electrical Hazards - Shock
23
Electrical Hazards - Arc Flash
• Defining the Magnitude
– Available fault current – Protection clearing time
2016/3/3
Electrical Safety Training
24
Electrical Hazards - Arc Flash
Electrical Safety Training
25
Electrical Hazards - Arc Flash
ARC FLASH/BLAST can Burn Exposed Skin Ignite Clothing Throw Shrapnel Broken Pieces Molten Metal Pressure Wave Sound
Electrical Safety Training
Electrical Hazards
2016/3/3
Electrical Safety Training
1
Electrical Hazards What is an Electrical Hazard?
2016/3/3
Electrical Safety Training
Energized Equipment
Planned Exposure
2016/3/3
Electrical Safety Training
34
Electrical Hazards
Energized Equipment
Un-Planned Exposure
2016/3/3
Electrical Safety Training
T2 143.6 F T3
No Data
356 F P1 504 lbs/sq.ft. T1 >347 F
2016/3/3
EST4-21
Electrical Safety Training
27
Electrical Hazards
Electrical Shock Arc Flash / Blast Identify the Hazard
Current =
2016/3/3
Electrical Safety Training
9
Electrical Hazards - Shock
SHOCK POTENTIAL
Milli-amps
20 PAINFUL SHOCK (Let Go Threshold) 2.0 SLIGHT SENSATION 0.2 1000 0.3 SEC. FIBRILLATION
• OSHA 1910 Subpart S
– Maybe updated – 70E-2000 Reference Document
2016/3/3
Electrical Safety Training
30
Electrical Safety Training
How We are Exposed to the Hazards
2016/3/3
Electrical Safety Training
28
Electrical Safe Work Practices
• So What do we use?
– Use’em all
2016/3/3
Electrical Safety Training
29
OSHA - 70E Update
What's the Difference between a Sensation and a Fatality?
2016/3/3
Electrical Safety Training
8
Electrical Hazards - Shock
Ohm's Law
Volts -------------Resistance
2016/3/3
Electrical Safety Training
31
Electrical Hazards
How are We Exposed? – Body Contact with Energized Parts – Tool/Material Contact with Energized Parts – Faulty Equipment Grounding – Within the Flash Boundary of an Electrical Arc
2016/3/3
Electrical Safety Training
15
Electrical Hazards - Arc Flash
2016/3/3
Electrical Safety Training
16
Electrical Hazards - Arc Flash
2016/3/3
Electrical Safety Training
2016/3/3
Electrical Safety Training
21
Electrical Hazards - Arc Flash
• Arc Flash Hazard
– Acknowledge there is a Hazard – Define the Magnitude of the Hazard – Address the Hazard
35
Electrical Hazards
Energized Equipment
Un-Planned Exposure Change of Scope
Open Door Remove Cover
2016/3/3
Electrical Safety Training
36
Electrical Hazards
2016/3/3 Electrical Safety Training 32
Electrical Hazards
How are We Exposed?
Energized Equipment
2016/3/3
Electrical Safety Training
33
Electrical Hazards
2016/3/3
EST4-20
Electrical Safety Training
26
Electrical Hazards - Arc Flash
Other Injuries Blast Impact Hearing Loss Blindness
Infrared
Sound
133 db @ 2 ft.
• Eliminate • Minimize • Protect the People exposed
2016/3/3
Electrical Safety Training
22
Electrical Hazards - Arc Flash
MCC
? Feet
EST4-16
2016/3/3
Electrical Safety Training
2
Electrical Hazards
A source of Danger that can cause Injury or Death while working near or on Energized Electrical Equipment
201y Training
13
Electrical Hazards
ARC FLASH & BLAST
2016/3/3
Electrical Safety Training
14
Electrical Hazards - Arc Flash
• Arc Flash
– An Arc Flash is the energy released as a result of an arcing fault.
Skin Temperature RISE in 0.1 Sec.
Typical Devices 120V PNL 240V PNL 1000 KVA SS / MCC 2000 KVA 3750 KVA Arc Diameter 1" 2" Distance from Arc 2' 3' 5' 10' 43 173 19 77 7 28 2 7
17
Electrical Hazards - Arc Flash
2016/3/3
Electrical Safety Training
18
Electrical Hazards - Arc Flash
2016/3/3
Electrical Safety Training
19
Electrical Hazards - Arc Flash
TEMPERATURE DATA
Curable Burn (1/10 Sec.)
Degrees
145
Cell Death (1/10 Sec.)
ARC Terminals Surface of the Sun
205
35,000 9,000
Burning Clothing
Metal Droplets Clothing Ignition