思科2960初始化配置 CONSOLE口
思科2960初始化配置 CONSOLE口
思科2960初始化配置CONSOLE口VTY(virtual type terminal)虚拟终端连接line vty 0 4 // VTY是路由器的远程登陆的虚拟端口,0 4表示可以同时打开5个会话1. 建立PC到路由器的物理连接,用RS232 CONSOLE线(随交换机带)连接路由器CONSOLE 接口和PC的COM口。
2. 在计算机上使用超级终端:打开“开始-程序-附件-通讯-超级终端—新建超级终端”,首先为新建连接设置名称。
然后,设置连接用端口,一般选择COM1,再设置连接参数,设置参数如下:每秒位数为9600,数据位为8,奇偶校验为无,停止位为1,数据流控制为Xon/Xoff。
不可搞错了!3. 等待30秒,回车,出现人机对话界面Would you like to enter the initial configuration dialog? [yes/no]: 是否按提示步骤操作% Please answer yes or no.Would you like to enter the initial configuration dialog? [yes/no]: n 输入n(自己手工设置)Press RETURN to get started!Switch> 首先看到的是用户模式Switch>en 输入en(即enable)进入特权模式Switch#conf t 进入配置模式Enter configuration commands, one per line. End with CNTL/Z.Switch(config)#hostname sw2960 给交换机命名sw2960(config)#enable secret Cisco 设置特权加密口令sw2960(config)#enable password Cisco 给交换机配置特权管理口令(明码的)sw2960(config)#line consle 0 进入控制台口(RS232)sw2960(config-line)#password Cisco 设置登录口令sw2960(config-line)#login 登录要求口令验证sw2960(config-line)#exit 退出到上级目录sw2960(config)#line vty 0 4 给交换机开启远程管理sw2960(config-line)#pass Cisco! 设置远程管理口令sw2960(config-line)#login 允许远程登陆sw2960(config-line)#exit 退出到上级目录sw2960(config)#int vlan 1 进入vlan1 接口sw2960(config-if)#no shut 开启此接口1y13w: %LINK-3-UPDOWN: Interface Vlan1, changed state to up1y13w: %LINEPROTO-5-UPDOWN: Line protocol on Interface Vlan1, changed state to upsw2960(config-if)#ip add 192.168.1.2 255.255.255.0 设置此接口地址sw2960(config-if)#exit 退出到上一层sw2960(config-if-range)#exit 退出到上一级目录sw2960(config)#show run 查看配置信息sw2960(config)#end 退到根目录sw2960#write 保存配置切记!必须保存,否则重新启动后设置丢失!4d00h: %SYS-5-CONFIG_I: Configured from console by consoleBuilding configuration...[OK] (保存好了,已经生效)重新启动交换机之后就可以通过浏览器输入IP地址进行访问或设置了,也可通过思科专业软件思科网络助理4.0中文版设置。
思科交换机2960配置
cisco 交换机2960配置配置密码:2960>en ;第一次密码为空2960h#conf t ;进入全局配置模式2960(config)#hostname swa ;设置交换机名2960(config)#enable secret aaa ;设置特权加密口令为aaa2960(config)#enable password aax ;设置特权非密口令为aax2960(config)#line console 0 ;进入控制台口(Rs232)2960(config-line)#password aa ;设置登录口令aa2960(config-line)#login ;登录要求口令验证2960(config-line)#line vty 0 4 ;进入虚拟终端virtual tty2960(config-line)#password a ;设置登录口令a2960(config-line)#login ;登录要求口令验证2960(config-line)#exit ;返回上一层2960(config)#exit ;返回上一层2960#sh run ;看配置信息2960#exit ;返回命令配置Vlan新建一个Vlan的命令Switch>enable 进入特权模式Switch#configure terminal 进入全局配置模式Switch (config)# vlan vlan-id 创建一个Vlan或者进入Vlan配置模式Switch (config-vlan)# name vlan-name 给Vlan命名(取消设置:no name) Switch (config-vlan)# mtu mtu-size 设置最大通讯量(取消设置:no mtu) Switch (config-vlan)#remote-span 开启远程流量监控(关闭:no remote-span)Switch (config-vlan)# end 回到特权模式Switch#show vlan {name vlan-name | id vlan-id} 查看当前配置Switch#copy running-config startup config 保存配置删除Vlan的命令Switch>enable 进入特权模式Switch#configure terminal 进入全局配置模式Switch (config)# no vlan vlan-id 删除VlanSwitch (config)# end 回到特权模式Switch#show vlan brief 查看删除情况Switch#copy running-config startup config 保存配置端口加入特定Vlan的命令Switch>enable 进入特权模式Switch#configure terminal 进入全局配置模式Switch (config)# interface interface-id 进入端口配置Switch (config-if)# switchport mode access 将接口的模式设为访问模式Switch (config-if)# switchport access vlan vlan-id 将端口加入指定的Vlan(恢复端口默认配置:default interface interface-id)Switch (config-if)# end 回到特权模式Switch#show running-config interface interface-id 查看端口模式Switch#show interfaces interface-id switchport 查看端口详细配置Switch#copy running-config startup-config 保存配置批量端口加入特定Vlan的命令int range fa0/1 - 10switchport access VLan V2将特定端口设为trunk2960-01(config)#default interface fastEthernet 0/1 端口恢复默认值2960-01(config)#interface fastethernet0/1 进入端口模式2960-01(config-if)#switchport mode trunk 设置端口为trunk模式2960-01(config-if)#switchport nonegotiate 将接口设置为不协商模式2960-01(config-if)end2960-01#wr启用snmpSwitch>enable 进入特权模式Switch#configure terminal 进入全局配置模式Switch (config)# snmp-server community string [view view-name] [ro | rw] [access-list-number](关闭snmp: no snmp-server)(删除团体字符: no snmp-server community string) 配置snmp团体字符并开启snmp代理服务String: 团体口令字符(所有SNMP命令中只有设置团体口令的snmp-server community是必须的,其它的都是可选的.)View: view 可以用于限定哪些MIB分支不能用本community-string存取预先用snmp-server view定义ro | rw: ro获得MIB对象信息;rw获得并可以修改MIB对象信息access-list-number:访问列表号Switch (config)#access-list access-list-number {deny |permit} source [source-wildcard] 配置拒绝或者允许访问snmp代理服务的IP地址,访问列表号为上一步指定的列表号Switch (config)#end 回到特权模式Switch#show running-config 查看配置Switch#copy running-config startup-config 保存配置cisco2960口令恢复交换机口令恢复的步骤⒈串口线连接到到交换机的console口。
cisco2960配置

Vlan
1,創建Vlan
(config)#vlan 180 //創建Vlan ID號為180
(config-vlan)#name askey //Vlan 名稱為askey
2,刪除Vlan
(config)#no vlan 180
#show vlan brief //查看交換機當前Vlan 號及Vlan 下有哪些端口
(config-line)#exec-timeout 5 0 //telnet 5分鐘超時
Show
1,開啟明文密碼加密服務
1,show run //查看交換機配置
2,show ip int brief //查看所有端口狀況
3, show int des //查看所有端口的描述
2,設置時間與時區
(config)# Clock timezone TAIWAN 8 //設置時區
(config)# Clock set 12:16:50 nov 27 2008 //設置時間(月﹐日﹐年)
#Show clock //查看交換機當前的時間
3﹐設置ntp server 實現時間同步
(config-if)# storm-control broadcast level 0.80 //控制广播包的突发百分比
(config-if)# storm-control action shutdown //暴风控制的违例时端口进入errdisable
(config-if)# storm-control action trap //产生snmp trap(抑制)消息来通告发生过量流量的情况
(config-if)#switchport access vlan 33 // 划分VLAN
cisco2960恢复出厂设置

Cisco 2960交换机密码恢复目录Cisco 2960交换机密码恢复 (1)一、准备工具 (2)二、交换机两种密码恢复 (3)2.1知道交换机密码恢复出厂设置 (3)2.2不知道交换机密码恢复出厂设置 (3)、准备工具串口线,串口・USB 线USB 一端接电脑USB 口,另一端接交换机console 口: 确保电脑有串口端口(没有的需要安装usb-232驱动);"2 GZIDC-PC>••42 DVD/CD -ROM 驱般> IDE ATA/ATAPI 担制器 >B 处理器> —瞬(COM ?□ LPT)IL-?T Prolific USB-to-Serial Comm Port (COM3)IW H W — ------- 1【竺每台电脑的串旦可能忝士榜 個其他潍打痔人体溝入「彳 芦音、视频和游戏控制器i> a 鼠^OM 他指针诙通用串行总邂制器古计算机管理]本地) ,腿該工員> ©矽计划聞 >闵剰牛襲器t> fij 共享文件夹0曼本i 蝴户和■徑冃1 国鯉莒理t>去服勢和逾用程序二、交换机两种密码恢复2. 1知道交换机密码恢复出厂设置SZswitch>enablePassword:SZswitchstartup-configErasing the nvram filesystem will remove all configuration files! Continue? [confirm] 按回车[OK]Erase of nvram: completeSZswitch#*Mar 1 00:48:40.342: %SYS-7-NV_BLOCK_INIT: Initialized the geometry of nvramSZswitch#reloadSystem configuration has been modified・ Save? [yes/no]: noProceed with reload? [confirm] hl| 车Would you like to enter the initial configuration dialog? (yes/no]: noSwitch>e nSwitch#show runBuilding configuration...2. 2不知道交换机密码恢复出厂设置Cisco交换机与路由器的密码恢复是不一样的,交换机没有电源开关(也就是说接上电源就启动了),如何恢复,但又使配置文件不变呢?使用secureCRT连接E 保存会话S 目在一个标签中打开on [ 连接」I 取消实操:首先拔掉交换机电源.在把电源插进交换机,快速按交换机MODE 键然后松开就进 入了SWITCH 模式了。
cisco2960配置

思科2960交换机配置通过Console 口登录交换机第一步:如图1-1所示,建立本地配置环境,只需将PC 机(或终端)的串口通过配置电缆与以太网交换机的Console 口连接。
通过Console 口搭建本地配置环境 1-1(若用笔记本配置,可买一根串口转USB 线,安装驱动,可方便移动配置)第二步:在PC 机上运行终端仿真程序超级终端,选择与交换机相连的串口,设置终端通信参数:传输速率为9600bit/s 、8位数据位、1位停止位、无校验和无流控,如图1-2至图1-4所示。
新建连接1-2连接端口设置1-3端口通信参数设置1-4PC Switch第三步:以太网交换机上电,终端上显示设备自检信息,自检结束后提示用户键入回车,之后将出现命令行提示符(如< Switch >),如图1-5所示。
第四步:键入命令,配置以太网交换机或查看以太网交换机运行状态。
需要帮助可以随时键入“?”,具体的配置命令请参考相关部分的内容。
1、进入系统视图模式Switch>Switch> enable(简写en)特权模式Switch#Switch# configure terminal (简写conf t)(中间空格)全局模式Switch(config)#2、为设备命名Switch(config)#hostname cisco2960 交换机命名 cisco2960cisco2960 (config) #3、配置特权使能密码cisco2960 (config)#enable password cisco 配置使能口令ciscocisco2960 (config) #cisco2960(config)#enable secret cisco2960 配置使能密码cisco2960cisco2960 (config) #4、设置虚拟局域网(配置VLAN)/*switch> enable 特权模式switch#conf t 全局模式switch (conf) #hostname cisco2960*/ 设备名 cisco2960cisco2960 (config) #vlan 10 创建/进入vlancisco2960 (config-vlan) #name vlan10 命名为vlan10Switch(config-vlan)#vlan 11 创建/进入vlanSwitch(config-vlan)#name vlan11 命名为vlan11/*cisco2960 (config-vlan) #no vlan11 */ 删除vlan11cisco2960 (config-vlan) # interface vlan 10 进入配置vlan10cisco2960 (conf-if) #ip address 192.168.10.1 255.255.255.0/*vlan10配置192.168.10.1/24的ip地址*/cisco2960 (config-vlan) # interface vlan 11 配置vlan11cisco2960 (conf-if) #ip address 192.168.11.1 255.255.255.0/*vlan11配置192.168.11.1/24的ip地址*/cisco2960(conf-if)#no shut使配置处于运行中cisco2960 (conf-if) #exit 返回上一级配置cisco2960(conf)#ip default-gateway 192.168.10.254设置网关地址cisco2960(conf) #end 返回cisco2960#write 保存配置5、进入交换机某一端口interface fastethernet 0/1以1 端口为例/*switch> enable 特权模式switch#configure terminal 全局模式switch (conf) #hostname cisco2960*/ 设备名 cisco2960cisco2960 (conf) # interface fastethernet 0/1 进入网络1 端口/*cisco2960 (conf) # interface range f0/1-10*/ 选择多个端口cisco2960 (config-if)#switchport mode access 将此端口设置接入模式cisco2960 (config-if)#switchport access vlan 10端口1设置为vlan 10接入模式/*cisco2960 (conf) # interface fastethernet 0/11 进入网络11 端口cisco2960 (config-if)#switchport access vlan 11端口11设置为vlan 11接入模式*/ cisco2960 (conf-if) #end 返回cisco2960#copy running-config startup-config 保存当前设置6、设置端口速率:(一般默认不用配置)/*switch> enableswitch#configure terminalswitch (conf) #hostname cisco2960switch (config)# interface range f0/1, f0/3, f0/5 - 10 选择端口范围端口1、3、5、6、7、8、9、10*/cisco2960 (conf) # interface range f0/1- 24*/ 设置端口1-24/*10 Force 10 Mbps operation100 Force 100 Mbps operation1000 Force 1000 Mbps operationauto Enable AUTO speed configuration*/ 速率可选方式cisco2960 (config-if) #speed auto 端口速率设为自动侦测cisco2960 (config-if) #7、设置双工模式:(一般默认不用配置)/*switch> enableswitch#configure terminalswitch (conf) #hostname cisco2960/*cisco2960 (conf) # interface range f0/1- 24*/ 设置端口1-24cisco2960 (config-if) #duplex auto | full | half 设置端口为-自动/全双工/半双工cisco2960 (config-if) #8、设置各Vlan相互访问连接/*switch> enableswitch#configure terminalswitch (conf) #hostname cisco2960cisco2960 (config)#int giga0/1 */进入汇聚千兆口1cisco2960(config-if)#switchport mode trunk ;当前端口设置为汇聚口注:将某端口分给vlan后是不能再设置trunk的,中继链路不属于任何vlan当一个端口允许多个vlan通过时,trunk allowed vlan中要添加各条vlan信息cisco2960 (config-if) # switchport trunk allowed vlan all允许所有VLAN 通过Trunk口cisco2960 (config-if) #switchport trunk allowed vlan 10, 13, 允许10,13 vlan通过cisco2960 (config-if)#switchport trunk allowed vlan add 11 添加vlan11/*cisco2960 (config-if)#switchport trunk allowed vlan remove 11 删除vlan11*/ cisco2960 (config-if) #switchport trunk allowed vlan add 12添加vlan12cisco2960 (config-if) #no shutdown 使配置处于运行中cisco2960 (config-if) #endcisco2960#copy running-config startup-config 保存当前设置9、交换机telnet 远程登录设置:switch>enswitch#configure terminalswitch (conf) #hostname cisco2960cisco2960(conf)#enable password cisco 以cisco为特权模式密码cisco2960(conf)#interface fastethernet 0/1以1 端口为telnet 远程登录端口cisco2960 (conf-if) #ip address 192.168.10.1 255.255.255.0cisco2960 (conf-if) #no shutcisco2960 (conf-if) #exitcisco2960(conf)line vty 0 4 设置0-4 个用户可以telnet 远程登陆cisco2960 (conf-line) #logincisco2960(conf-line)#password cisco以cisco为远程登录的用户密码主机设置:ip 192.168.10.123主机的ip必须和交换机端口的地址在同一网络段netmask 255.255.255.0gate-way 192.168.10.1 网关地址是交换机端口地址运行:telnet 192.168.10.1进入telnet 远程登录界面password: ciscocisco2960>enpassword: cisco10、交换机恢复出厂默认恢复命令switch> enableswitch# erase startup-configureswitch# reload11、光端口配置switch (config) #interface gigabitEthernet 0/25switch (config-if) # switchport mode accessswitch (config-if) #switchport access vlan 10switch (config-if) #no shutdownswitch (config-if) #endswitch#copy running-config startup-config注意:由于思科的交换机只自动识别自己品牌的光模块,所以如果用其他品牌的光模块,需在配置模式下输入一下两条命令,开启兼容性。
Cisoc+2960+交换机配置
Switch (config-if)# switchport access vlan vlan-id 将端口加入指定的Vlan(恢复端口默认配置:default interface interface-id)
2960#exit ;返回命令
配置Vlan
新建一个Vlan的命令
Switch>enable 进入特权模式
Switch#configure terminal 进入全局配置模式
Switch (config)# vlan vlan-id 创建一个Vlan或者进入Vlan配置模式
(关闭snmp: no snmp-server)
(删除团体字符: no snmp-server community string) 配置snmp团体字符并开启snmp代理服务
String: 团体口令字符(所有SNMP命令中只有设置团体口令的snmp-server community是必须的,其它的都是可选的.)
⒐修改口令。
#configure terminal
#enable secret
⒑保存配置。
#write
配置密码:
2960>en ;第一次密码为空
2960h#conf t ;进入全局配置模式
2960(config)#hostname swa ;设置交换机名
2960(config)#enable secret aaa ;设置特权加密口令为 aaa
2960(config)#enable password aax ;设置特权非密口令为 aax
思科2960 配置
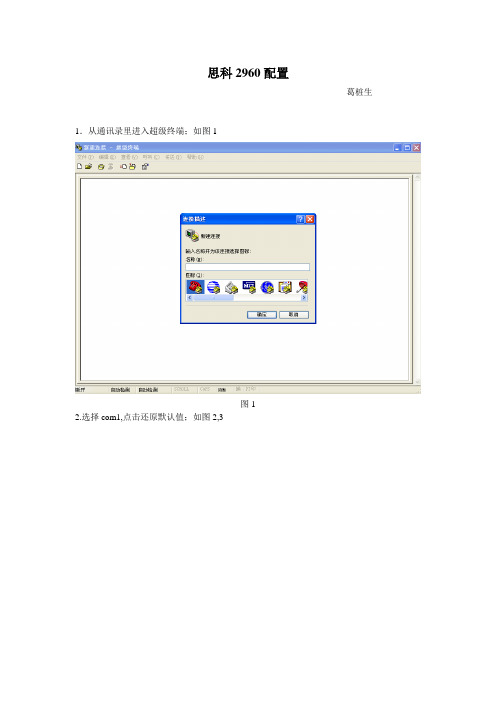
思科2960配置葛桩生1.从通讯录里进入超级终端;如图1图12.选择com1,点击还原默认值;如图2,3图2图33.连上以后自检完毕,提醒你是否进入初始配置,输入y ,进入初始配置;如图4图44.进入初始配置以后,提醒你是否进入基础管理设置,按y进入基础管理设置,填写hostname 以及密码;然后系统会提醒你是否配置SNMP网络管理,按n进入下一步;如图5图55.配置vlan1,管理地址,以及子网掩码;如图6图6 6.对以上配置进行保存,选择2保存退出;如图7图77.输入enable进入特权模式,输入conf t进入全局配置模式;输入vtp mode client设置发vtp 模式,设置为客服机模式;如图8图88.配置千兆网口(int rang g0/1 -2,将其设置为干线(switchport mode trunk);配置百兆网口(int rang f0/1 -48),将这48口全划分到vlan5;配置端口立即从阻塞状态进入转发状态,不经过监听和学习状态(spanning-tree portfast /view/72369.html)如图9图99.配置网关(ip default-gateway xxx.xxx.xxx.xxx);关闭web服务,对安全又好处;(no ip http server);如图10图1010.查看配置是否正确(show run);最后保存退出(wr); 如图11,12,13图11图12图13 11.删除配置:1.erase startup-config2.delete flash:vlan.dat3.reload 重启可重新配置;如图14图14。
CISCO catalyst 2960交换机配置方法
CISCO catalyst 2960交换机配置方法一、连接交换机1、将交换机配置电缆连接于交换机的通讯配置端口(console口)和计算机的串口(可以直接连接到SCADA服务器后面的串口上)。
2、点击Start(开始)> Programs(程序)> Accessories(附件)>Cojhunications(通讯)> HyperTerminal(超级终端),运行HyperTerminal。
3、在Connection Description对话框中,为这一连接输入一个名称(自己识别方便即可),点击“ok”。
4、在Icon对话框,点击相应的图标并确认。
5、在Connect To对话框,选择正在被使用的串口(一般为COM1口),并确认。
6、在Properties对话框配置端口如下:Bits per second: 9600Data Bits: 8Parity: NONEStop bits: 1Flow control: Xon/Xoff通讯端口默认为COM1,点击“ok”。
7、打开交换机电源。
二、配置交换机1、在新交换机上电启动后,会出现向导配置模式(若没有请在SWITCH>提示符后输入setup即可启动向导配置模式),在如下部分输入相应的值(粗斜体),并回车。
Would you like to enter the initial configuration dialog? [yes/no]: yAt any point you may enter a question mark '?' for help.Use ctrl-c to abort configuration dialog at any prompt.Default settings are in square brackets '[]'.Basic management setup configures only enough connectivityfor management of the system, extended setup will ask youto configure each interface on the systemWould you like to enter basic management setup? [yes/no]: yConfiguring global parameters:2、为交换机输入一个“host name”,可以自己先任意写一个,要便于识别就行,因为当用TFTP软件恢复之前备份的配置后,hostname也会恢复到原先的设置,在如下部分输入相应的值(粗斜体),并回车,以京海为例:Enter host name [Switch]: jh_switch01 (京海第一路交换机,即FTE网络A交换机)The enable secret is a password used to protect access toprivileged EXEC and configuration modes. This password, afterentered, becomes encrypted in the configuration.Enter enable secret(要求输入特权模式进入密令): *******The enable password is used when you do not specify anenable secret password, with some older software versions, andsome boot images.Enter enable password(要求输入特权模式进入密码): *******The virtual terminal password is used to protectaccess to the router over a network interface.Enter virtual terminal password: *******Configure SNMP Network Management? [no]: N3、下面是显示信息的一部分,太长没有完全抄录,无需操作,可压空格键完成显示。
- 1、下载文档前请自行甄别文档内容的完整性,平台不提供额外的编辑、内容补充、找答案等附加服务。
- 2、"仅部分预览"的文档,不可在线预览部分如存在完整性等问题,可反馈申请退款(可完整预览的文档不适用该条件!)。
- 3、如文档侵犯您的权益,请联系客服反馈,我们会尽快为您处理(人工客服工作时间:9:00-18:30)。
思科2960初始化配置CONSOLE口
VTY(virtual type terminal)虚拟终端连接
line vty 0 4// VTY是路由器的远程登陆的虚拟端口,0 4表示可以同时打开5个会话
1.建立PC到路由器的物理连接,用RS232 CONSOLE线(随交换机带)连接路由器CONSOLE接口和PC的COM口。
2.在计算机上使用超级终端:
打开“开始-程序-附件-通讯-超级终端—新建超级终端”,首先为新建连接设置名称。
然后,设置连接用端口,一般选择COM1,再设置连接参数,设置参数如下:
每秒位数为9600,数据位为8,奇偶校验为无,停止位为1,数据流控制为Xon/Xoff。
不可搞错了!
3.等待30秒,回车,出现人机对话界面
Would you like to enter the initial configuration dialog? [yes/no]:
是否按提示步骤操作% Please answer yes or no.
Would you like to enter the initial configuration dialog? [yes/no]:
n输入n(自己手工设置)Press RETURN to get started!
Switch>首先看到的是用户模式
Switch>en输入en(即enable)进入特权模式
Switch#conf t进入配置模式
Switch(config)#hostname sw2960给交换机命名
sw2960(config)#enable secret Cisco设置特权加密口令
sw2960(config)#enable password Cisco给交换机配置特权管理口令(明码的)sw2960(config)#line consle 0进入控制台口(RS232)
sw2960(config-line)#password Cisco设置登录口令
sw2960(config-line)#login登录要求口令验证
sw2960(config-line)#exit退出到上级目录
sw2960(config)#line vty 0 4给交换机开启远程管理
sw2960(config-line)#pass Cisco!设置远程管理口令
sw2960(config-line)#login允许远程登陆
sw2960(config-line)#exit退出到上级目录
sw2960(config)#int vlan 1进入vlan1接口
sw2960(config-if)#no shut开启此接口
1y13w:
%LINK-3-UPDOWN:
Interface Vlan1, changed state to up
1y13w:
%LINEPROTO-5-UPDOWN:
Line protocol on Interface Vlan1, changed state to up
sw2960(config-if)#ip add
192."
168."
1.2
255."
255."
255."0设置此接口地址
sw2960(config-if)#exit退出到上一层
sw2960(config-if-range)#exit退出到上一级目录
sw2960(config)#show run查看配置信息
sw2960(config)#end退到根目录
sw2960#write保存配置切记!必须保存,否则重新启动后设置丢失!
4d00h:
%SYS-5-CONFIG_I:
Configured from console by console
Building configuration...
[OK](保存好了,已经生效)
重新启动交换机之后就可以通过浏览器输入IP地址进行访问或设置了,也可通过思科专业软件思科网络助理
4."0中文版设置。
Cisco2960交换机密码破解方法
1.启用超级终端并出现连接界面。
2.拔掉交换机的电源.
3.按下交换机上的Mode按钮,与此同时,重新插上交换机的电源线.
4.当交换机左边的sys灯会慢慢的闪动,(细心的话会发现部分灯红色的闪过),按住mode按钮直到sys灯不闪动(常亮状态).否则提前松开的按钮的话会直接进入正常的启动,跳回步骤2重来.
5.可以松开Mode按钮
之后系统将显示一些指示信息:
software:
flash_init /---初始化flash文件系统---/
load_helper /---加载帮助文件---/
boot /---启动设备进入正常的模式---/步骤:
switch:
Switch:
flash_init
Switch:
dir flash:
/---查看Flash的文件名字可以用来确认文件名为config.text---/
Switch:
renameflash:
config.textflash:
oldconfig.text/---把配置文件重命名,当然你可以不改为oldconfig.text,只要文件名和原来的不相同就可以---/
Switch:
boot /---手动启动交换机---/
配置文件改过了,交换机找不到默认的config.text而出现配置的对话向导,选择n然后回车然后我们就会绕过原来的password而进入到:
Switch>
Switch>en /--可以进入特权模式--/
Switch#rename flash:
oldconfig.text flash:
config.text /---恢复交换机配置文件---/
Switch#copy flash:
config.text system:
running-config /---保存配置到DRAM里---/
Switch#config t这时就可以设置新的password为cisco
Switch(config)# enable password cisco
Switch(config)# enable secret CISCO
Switch(config)#line con 0
Switch(config)#password cisco
Switch#copy run start或用下面方法暂时清空密码,待以后再做设置
Switch(config)#no enable password /---干掉特权模式旧密码---/
Switch(config)#no enable secret /---干掉加秘密码---/
Switch(config)#exit
Switch#copy run start /---把当前配置的文件写回Flash---/
用这个方法修改密码不会把原来的配置文件内容清掉.特别是一个现成的大型网络里已经在运行的交换机,这样比较保险点.。