符号编辑器SymbolEditor2.0用户手册(doc 140页)
PSISI编辑器使用手册

FlexMedia PSI/SI编辑器使用手册杭州迪立科技有限公司目录1 软件概述 (4)2 运行环境 (4)3 菜单 (5)3.1 文件菜单 (5)3.2 SI编辑菜单 (5)3.3 PSI编辑菜单 (6)3.4 查看菜单 (6)3.5 工具菜单 (7)3.6 帮助菜单 (8)4 SI编辑 (8)4.1 网络编辑 (8)4.1.1. 网络特性编辑 (9)4.1.2. 网络的描述符编辑 (9)4.2 传输流编辑 (15)4.2.1. 传输流特性编辑 (15)4.2.2. 传输流的描述符编辑 (15)4.3 业务编辑 (21)4.3.1. 业务特性编辑 (21)4.3.2. 业务的描述符编辑 (21)4.4 事件列表编辑 (30)4.4.1. 事件特性编辑 (30)4.4.2. 事件的描述符编辑 (30)4.5 业务群编辑 (36)4.5.1. 业务群特性编辑 (36)4.5.2. 业务群的描述符编辑 (36)4.5.3. 业务群传输流列表编辑 (37)4.6 业务群传输流编辑 (37)4.6.1. 业务群传输流的描述符编辑 (37)4.6.2. 业务列表的编辑 (38)5 PSI编辑 (39)5.1 节目编辑 (39)5.1.1. 节目特性编辑 (39)5.1.2. 节目的描述符编辑 (39)5.2 基本流编辑 (43)5.2.1. 基本流特性编辑 (43)5.2.2. 基本流的描述符编辑 (43)5.3 条件接收信息编辑 (52)6 辅助工具 (52)6.1 PSI/SI打包器 (52)6.2 PSI/SI混合器 (54)1软件概述FlexMedia PSI/SI编辑器是本公司开发的符合DVB标准和国家有关标准的EPG编辑软件,可直接编辑PAT、CAT、PMT、NIT、BAT、SDT、EIT等表格信息。
适合于数字电视设备商、数字电视集成商、数字电视教育实验等编辑EPG 的使用。
软件的主界面如下:2运行环境FlexMedia PSI/SI编辑器的运行环境:z CPU:P IVz内存:256Mz硬盘:IDE 80Gz操作系统:WindowsXP、Windows2000等3菜单3.1 文件菜单z新建:建立新的PSI/SI文件。
如何使用符号编辑器(5篇可选)
如何使用符号编辑器(5篇可选)第一篇:如何使用符号编辑器如何用MathType输入角度单位发布时间:2016-03-15 在用MathType编辑公式时是可以编辑出很多数学符号的,这也是很多用户选择使用MathType的原因之一,利用它能够很好地对公式进行编辑。
但是对于一些新用户来说,有些数学符号不会编辑,比如角度单位。
下面就来介绍MathType角度单位的编辑方法。
具体操作步骤如下:1.打开MathType编辑窗口进入到MathType公式编辑区域,编辑出相应的公式。
打开MathType的方法有很多,可以直接双击MathType桌面的图标将之打开,也可以从Word中插入对象来打开,如果是对已经存在的公式进行再编辑,就可以直接双击公式进行打开。
在工作区域中编辑相应的公式2.在MathType编辑区域编辑好公式即相应的数学符号、字母、数字等,在需要输入角度单位的地方,选择“下标和上标模板”中的“上标模板”。
在数字后面使用上标模板3.将光标放到上标模板的虚框中,在MathType工具栏模板中点击选择“杂项符号”模板后,再选择“度”的符号。
此时表示角度的单位度就输入完成了。
在杂项模板中选择度模板在上标虚框中输入以上内容向大家介绍了MathType角度单位的编辑方法,其实操作并不复杂,亲用户也可以看一遍就会操作,只是需要将不同的模板进行组合输入才能得到想要的结果,这在一定程度上也需要对MathType符号模板有所熟悉,能够明确地知道一个符号需要哪些模板组合起来能够实现,当然如果只用一次点击就能输入完成是再好不过的了,但是很多数学符号并不能一次性就完成,如果想要了解更多MathType组合输入的技巧,比如摄氏度符号,可以参考教程:MathType输入摄氏度符号的两种方法。
标签: MathType角度单位,MathType符号模板,MathType组合输入如何将MathType公式加方框发布时间:2016-03-14 在编辑文档中使用MathType编辑公式是一件很方便的事情,有时候在对公式进行推导或者演示时需要对一些公式进行重点强调,我们会采用加粗改变颜色或者是加框来处理,那么将MathType公式加框怎么来实现呢?下面就来介绍具体的操作过程。
EPLAN符号编辑器

符号编辑器 符号编辑器1 编辑连接点编辑连接点................................................................................................................................................42 编辑符号库的属性编辑符号库的属性....................................................................................................................................8 3使用符号变量使用符号变量 (10)3.1 生成符号变量..................................................10 3.2 删除符号变量..................................................12 3.3 切换符号变量..................................................12 4 创建符号库创建符号库..............................................................................................................................................14 5 编辑符号库编辑符号库..............................................................................................................................................16 6 记录符号库记录符号库..............................................................................................................................................18 7导入导入//导出符号库导出符号库 (20)7.1 导入符号库....................................................20 7.2 导出符号库....................................................20 8 复制符号库复制符号库..............................................................................................................................................22 9 关闭符号库关闭符号库..............................................................................................................................................24 10 创建符号创建符号..................................................................................................................................................25 11编辑符号编辑符号..................................................................................................................................................29 11.1 在图形编辑器中插入符号........................................29 11.2在符号编辑器中编辑符号 (30)12 导入导入//导出符号导出符号........................................................................................................................................33 12.1 导入符号......................................................33 12.2导出符号 (34)13 复制符号复制符号..................................................................................................................................................37 14 删除符号删除符号..................................................................................................................................................39 15 符号定级符号定级..................................................................................................................................................40 16 检查符号检查符号.. (42)只能在特定的扩展阶段使用该功能。
texmaker:用户手册【word版】.doc
texmaker:用户手册【word版】.docTexmaker:用户手册1. 配置 Texmaker使用 Texmaker 之前,您必须配置通过“配置Texmaker”命令,在“选项”菜单中的编辑器和Latex 的相关命令(“首选项”下的MacOSX)。
配置编辑器在编译你的第一个文件,你必须设置所用的编辑器的编码(“配置Texmaker”->“编辑” - >“编辑字体编码”)。
然后,你应该使用相同的编码在你的TeX文件(例如:\ usepackage [ 拉丁 ] {} inputenc ,如果使用“ ISO-8859- 1”编码编辑器)的序言?注意:当打开一个文件,你警告说,如果该文件不能被正确使用的默认编码解码,该方案可以让您选择其他编码(没有修改默认的编码)。
配置 Latex 相关的命令Texmaker 不能编译你的文件,如果路径中的LaTeX相关的命令是错误的。
?默认设置应与近期和标准LaTeX的发行工作,但你应该要修改它们(“配置Texmaker” - >“命令”)。
要改变一个命令,只需单击按钮在相应行的末尾,并在文件浏览器中选择命令:texmaker 会自动适应该命令的语法。
?该%字符代表文件的名称不带扩展名(在“主站”模式的主控文档)和@字符将通过当前的行号被替换。
?其他参数:#将没有扩展名(甚至在“主站”模式)当前文件名被取代,!将由当前目录被替换。
备注:如果%,!,#和@字符都需要一个命令,只需使用%%,!! ,##和@@。
这些表达式将会%被替换,!,#分别启动命令之前@。
配置拼写检查拼写检查器使用中的hunspell /(版)的字典。
?要配置拼写检查器:“配置Texmaker” - >“编辑”- >“拼写字典”- > 点击按钮在该行的最后选择与文件浏览器的字典。
?警告:拼写检查开始在光标位置,而不是在文件的开头。
?期间打字,如果有错误,字是由红色下划线下划线。
对SYMBOL进行编辑
2.保存子图,并记住名称
3.TOOLS----SYMBOL------OPEN-
4.随便选择一个SYMBOL。
5.插入子图。INSERT--------SUBPICTURE--------选择所保存的子图选择合适的比例插入到图中方框内,并删除原来的SYMBOL,保留所想要的图形。
insertsubpicture选择所保存的子图选择合适的比例插入到图toolsymbolsave输入fontnumber和symbolnumber即可在相应的symbol中找到该symbol
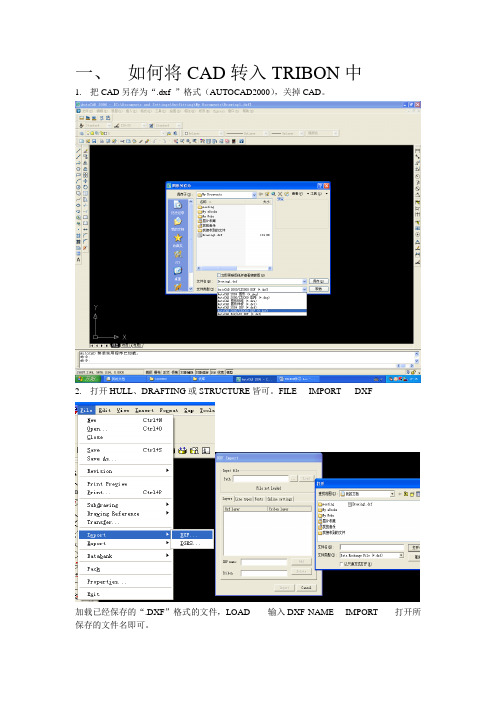
一、如何将CAD转入TRIBON中
1.把CAD另存为“.dxf”格式(AUTOCAD2000),关掉CAD。
2.打开HULL、DRAFTING或STRUCTURE皆可。FILE----IMPORT-----DXF
加载已经保存的“.DXF”格式的文件,LOAD------输入DXF NAME----IMPORT------打开所保存的文件名即可。
二、加载图形,对SYMBOL进行编辑。(如:建立船名进行放样)
6.保存图形到YMBOL中。
TOOL---SYMBOL------SAVE
输入FONT NUMBER和SYMBOL NUMBER,即可在相应的SYMBOL中找到该SYMBOL。
图形编辑器手册说明书
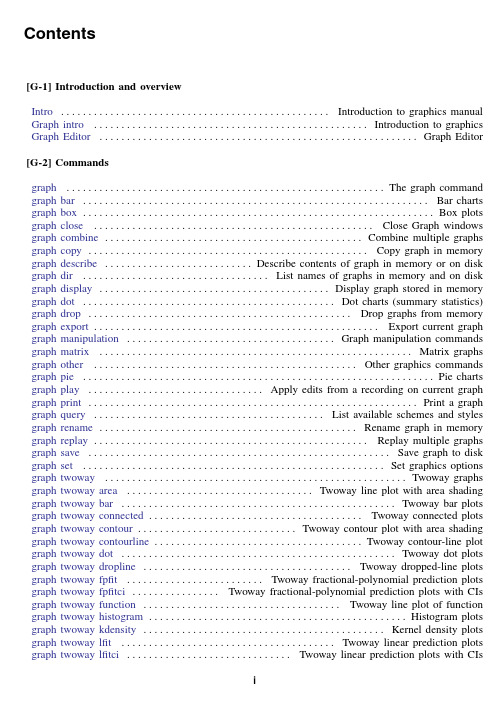
Contents[G-1]Introduction and overviewIntro.................................................Introduction to graphics manual Graph intro..................................................Introduction to graphics Graph Editor..........................................................Graph Editor[G-2]Commandsgraph..........................................................The graph command graph bar...............................................................Bar charts graph box................................................................Box plots graph close...................................................Close Graph windows graph bine multiple graphs graph copy...................................................Copy graph in memory graph describe...........................Describe contents of graph in memory or on disk graph dir..................................List names of graphs in memory and on disk graph display..........................................Display graph stored in memory graph dot..............................................Dot charts(summary statistics) graph drop................................................Drop graphs from memory graph export....................................................Export current graph graph manipulation......................................Graph manipulation commands graph matrix.........................................................Matrix graphs graph other................................................Other graphics commands graph pie................................................................Pie charts graph play................................Apply edits from a recording on current graph graph print............................................................Print a graph graph query..........................................List available schemes and styles graph rename...............................................Rename graph in memory graph replay..................................................Replay multiple graphs graph save.......................................................Save graph to disk graph set.......................................................Set graphics options graph twoway.......................................................Twoway graphs graph twoway area..................................Twoway line plot with area shading graph twoway bar..................................................Twoway bar plots graph twoway connected.......................................Twoway connected plots graph twoway contour.............................Twoway contour plot with area shading graph twoway contourline......................................Twoway contour-line plot graph twoway dot..................................................Twoway dot plots graph twoway dropline......................................Twoway dropped-line plots graph twoway fpfit.........................Twoway fractional-polynomial prediction plots graph twoway fpfitci................Twoway fractional-polynomial prediction plots with CIs graph twoway function....................................Twoway line plot of function graph twoway histogram...............................................Histogram plots graph twoway kdensity............................................Kernel density plots graph twoway lfit.......................................Twoway linear prediction plots graph twoway lfitci..............................Twoway linear prediction plots with CIsiii Contentsgraph twoway line.................................................Twoway line plots graph twoway lowess.........................................Local linear smooth plots graph twoway lpoly......................................Local polynomial smooth plots graph twoway lpolyci............................Local polynomial smooth plots with CIs graph twoway mband.......................................Twoway median-band plots graph twoway mspline.....................................Twoway median-spline plots graph twoway pcarrow................................Paired-coordinate plot with arrows graph twoway pcarrowi........................Twoway pcarrow with immediate arguments graph twoway pccapsym..............Paired-coordinate plot with spikes and marker symbols graph twoway pci.................Twoway paired-coordinate plot with immediate arguments graph twoway pcscatter...............................Paired-coordinate plot with markers graph twoway pcspike..................................Paired-coordinate plot with spikes graph twoway qfit....................................Twoway quadratic prediction plots graph twoway qfitci...........................Twoway quadratic prediction plots with CIs graph twoway rarea.......................................Range plot with area shading graph twoway rbar..............................................Range plot with bars graph twoway rcap......................................Range plot with capped spikes graph twoway rcapsym.................Range plot with spikes capped with marker symbols graph twoway rconnected................................Range plot with connected lines graph twoway rline..............................................Range plot with lines graph twoway rscatter.........................................Range plot with markers graph twoway rspike............................................Range plot with spikes graph twoway scatter.............................................Twoway scatterplots graph twoway scatteri..................................Scatter with immediate arguments graph twoway spike..............................................Twoway spike plots graph twoway tsline...............................................Twoway line plots graph use................................................Display graph stored on disk palette...........................................Display palettes of available selections set graphics..........................................Set whether graphs are displayed set printcolor..........................Set how colors are treated when graphs are printed set scheme.......................................................Set default scheme [G-3]Optionsadded line options............................Options for adding lines to twoway graphs added text options.............................Options for adding text to twoway graphs addplot option......................Option for adding additional twoway plots to command advanced options......................Rarely specified options for use with graph twoway area options.............................Options for specifying the look of special areas aspect option......................Option for controlling the aspect ratio of the plot region axis choice options................Options for specifying the axes on which a plot appears axis label options.....................................Options for specifying axis labels axis options........................................Options for specifying numeric axes axis scale options......................Options for specifying axis scale,range,and look axis title options......................................Options for specifying axis titles barlook options.....................................Options for setting the look of bars blabel option.................................................Option for labeling bars by option.........................................Option for repeating graph command cat axis label options.................Options for specifying look of categorical axis labels cat axis line options...................Options for specifying look of categorical axis line clegend option..............................Option for controlling the contour-plot legendContents iii cline options............Options for connecting points with lines(subset of connect options) colorvar options.....................Options for using levels of a variable to control color connect options.................................Options for connecting points with lines eps options.............................Options for exporting to Encapsulated PostScript fcline options...................Options for determining the look offitted connecting lines fitarea options..................Options for specifying the look of confidence interval areas gif options.....................Options for exporting to Graphics Interchange Format(GIF) jpg options........Options for exporting to Joint Photographic Experts Group(JPEG)format legend options..........................................Options for specifying legends line options...................................Options for determining the look of lines marker label options...............................Options for specifying marker labels marker options.........................................Options for specifying markers name option......................................Option for naming graph in memory nodraw option...................................Option for suppressing display of graph play option........................................Option for playing graph recordings png options...............Options for exporting to portable network graphics(PNG)format pr options............................................Options for use with graph print ps options................................Options for exporting or printing to PostScript rcap options.............Options for determining the look of range plots with capped spikes region options...........Options for shading and outlining regions and controlling graph size rspike options...........................Options for determining the look of range spikes saving option.........................................Option for saving graph to disk scale option.............................Option for resizing text,markers,and line widths scheme option...........................................Option for specifying scheme std options............................Options for use with graph construction commands svg options............................Options for exporting to Scalable Vector Graphics textbox options..............................Options for textboxes and concept definition tif options.......................Options for exporting to tagged imagefile format(TIFF) title options...............................................Options for specifying titles twoway options............................................Options for twoway graphs [G-4]Styles,concepts,and schemes addedlinestyle...................................Choices for overall look of added lines alignmentstyle.....................................Choices for vertical alignment of text anglestyle................................Choices for the angle at which text is displayed areastyle..................................................Choices for look of regions axisstyle..............................................Choices for overall look of axes bystyle.................................................Choices for look of by-graphs clockposstyle...........................Choices for location:Direction from central point colorstyle.........................................................Choices for color compassdirstyle..................................................Choices for location Concept:gphfiing gphfiles Concept:ing lines Concept:repeated options..............................Interpretation of repeated options connectstyle......................................Choices for how points are connected gridstyle..........................................Choices for overall look of grid lines intensitystyle.......................................Choices for the intensity of a color justificationstyle........................................Choices for how text is justified legendstyle................................................Choices for look of legends linealignmentstyle...............Choices for whether outlines are inside,outside,or centerediv Contents linepatternstyle...........................Choices for whether lines are solid,dashed,etc. linestyle..............................................Choices for overall look of lines linewidthstyle............................................Choices for thickness of lines marginstyle................................................Choices for size of margins markerlabelstyle...............................Choices for overall look of marker labels markersizestyle.........................................Choices for the size of markers markerstyle........................................Choices for overall look of markers orientationstyle.....................................Choices for orientation of textboxes plotregionstyle...................................Choices for overall look of plot regions pstyle................................................Choices for overall look of plot ringposstyle..............................Choices for location:Distance from plot region Schemes intro................................................Introduction to schemes Scheme economist.......................................Scheme description:economist Scheme s1..............................................Scheme description:s1family Scheme s2..............................................Scheme description:s2family Scheme sj....................................................Scheme description:sj Scheme st..............................................Scheme description:st family shadestyle.......................................Choices for overall look offilled areas size......................................................Choices for sizes of objects stylelists.........................................Lists of style elements and shorthands symbolstyle...........................................Choices for the shape of markers text.................................................................Text in graphs textboxstyle..........................Choices for the overall look of text including border textsizestyle...............................................Choices for the size of text textstyle...........................................Choices for the overall look of text ticksetstyle........................................Choices for overall look of axis ticks tickstyle......................Choices for the overall look of axis ticks and axis tick labels Glossary......................................................................... Subject and author index...........................................................Contents v Stata,Stata Press,and Mata are registered trademarks of StataCorp LLC.Stata andStata Press are registered trademarks with the World Intellectual Property Organization®of the United Nations.Other brand and product names are registered trademarks ortrademarks of their respective companies.Copyright c 1985–2023StataCorp LLC,College Station,TX,USA.All rights reserved.。
Cadence 使用手册

Cadence 使用参考手册邓海飞微电子学研究所设计室2000年7月目录概述 (1)1.1 Cadence概述 (1)1.2 ASIC设计流程 (1)第一章Cadence 使用基础 (5)2.1 Cadence 软件的环境设置 (5)2.2 Cadence软件的启动方法 (10)2.3库文件的管理 (12)2.4文件格式的转化 (13)2.5 怎样使用在线帮助 (13)2.6 本手册的组成 (14)第二章Verilog-XL 的介绍 (15)3. 1 环境设置 (15)3.2 Verilog-XL的启动 (15)3.3 Verilog-XL的界面 (17)3.4 Verilog-XL的使用示例 (18)3.5 Verilog-XL的有关帮助文件 (19)第四章电路图设计及电路模拟 (21)4.1 电路图设计工具Composer (21)4.1.1 设置 (21)4.1.2 启动 (22)4.1.3 用户界面及使用方法 (22)4.1.4 使用示例 (24)4.1.5 相关在线帮助文档 (24)4.2 电路模拟工具Analog Artist (24)4.2.1 设置 (24)4.2.2 启动 (25)4.2.3 用户界面及使用方法 (25)4.2.5 相关在线帮助文档 (25)第五章自动布局布线 (27)5.1 Cadence中的自动布局布线流程 (27)5.2 用AutoAbgen进行自动布局布线库设计 (28)第六章版图设计及其验证 (30)6.1 版图设计大师Virtuoso Layout Editor (30)6.1.1 设置 (30)6.1.2 启动 (30)6.1.3 用户界面及使用方法 (31)6.1.4 使用示例 (31)6.1.5 相关在线帮助文档 (32)6.2 版图验证工具Dracula (32)6.2.1 Dracula使用介绍 (32)6.2.2 相关在线帮助文档 (33)第七章skill语言程序设计 (34)7.1 skill语言概述 (34)7.2 skill语言的基本语法 (34)7.3 Skill语言的编程环境 (34)7.4面向工具的skill语言编程 (35)附录1 技术文件及显示文件示例 (60)附录2 Verilog-XL实例文件 (72)1.Test_memory.v (72)2.SRAM256X8.v (73)3.ram_sy1s_8052 (79)4.TSMC库文件 (84)附录3 Dracula 命令文件 (359)概述作为流行的EDA工具之一,Cadence一直以来都受到了广大EDA工程师的青睐。
艾普莱标识编辑器软件使用说明书
艾普莱标识编辑器软件使用说明书艾普莱(Eplai)标识编辑器是一款能够创建和编辑标识的软件工具。
以下是使用说明书:1. 下载和安装:访问官方网站或应用商店下载艾普莱标识编辑器,并按照安装向导完成安装过程。
2. 打开软件:双击图标或通过开始菜单打开软件。
3. 创建新标识:在软件主界面点击“新建”按钮,然后选择标识尺寸和样式。
4. 添加图像和文本:在编辑界面,可通过拖拽或点击“导入”按钮添加图像文件。
在选中的图像上点击“编辑”按钮可进行裁剪、调整大小和旋转等操作。
点击“文本”按钮可以添加文字,可选择字体、大小和颜色。
5. 调整布局:选中图像或文本后,可以通过拖拽或使用箭头键微调位置。
点击“对齐”按钮可以让图像或文本相对齐。
6. 应用特效:艾普莱标识编辑器提供多种特效供选择,如模糊、阴影和边框等。
选中图像后点击“特效”按钮,选择合适的特效并进行调整。
7. 添加图层:软件允许在一个标识中添加多个图层。
点击“图层”面板中的“添加图层”按钮,然后可以在新的图层上添加图像、文本和特效。
8. 预览和保存:点击“预览”按钮可在另一个窗口中查看标识的效果。
点击“保存”按钮选择保存格式和路径,将标识保存到本地或云存储。
9. 导出标识:在编辑完成后,点击软件主界面的“导出”按钮,选择导出格式和路径,将标识导出为常见图像格式(如PNG、JPEG等)或可编辑的文件格式(如PSD、SVG等)。
10. 打印或分享:将导出的标识打印出来,或通过电子邮件、社交媒体等方式进行分享。
以上是艾普莱标识编辑器的使用说明书,希望对您有帮助。
如果有任何问题,请查阅软件帮助文档或联系软件供应商。
- 1、下载文档前请自行甄别文档内容的完整性,平台不提供额外的编辑、内容补充、找答案等附加服务。
- 2、"仅部分预览"的文档,不可在线预览部分如存在完整性等问题,可反馈申请退款(可完整预览的文档不适用该条件!)。
- 3、如文档侵犯您的权益,请联系客服反馈,我们会尽快为您处理(人工客服工作时间:9:00-18:30)。
SymbolEditor新建一个符号库有两种方法:
从文件菜单新建符号库
第一步:选择菜单命令。
选择“文件>选择新建符号库”菜单项,如下图所示:
第二步:给出新建的符号库的名称。
完成第一步操作之后会弹出一对话框(如下图所示),在对话框中我们可以给出符号库的名称和路径。符号库的扩展名为SLB。
一般情况下,将SymbolEditor光盘插入CDROM驱动器后,位于光盘上的安装程序会自动运行。
软盘安装
直接运行软盘根目录下的安装程序。
网络下载安装
先将安装程序的ZIP压缩包从互联网上下载下来。接着,将包含在ZIP文件中的所有文件解压至您本机的任一位置。执行该位置下的安装程序即可。
欢迎您进入北京吉威数源站点下载SymbolEditor或吉威数源公司的其他资源。
通常以楷体字表示注释、提示、或警告。
本章将对SymbolEditor做一个总体的介绍。本章包括以下内容:
“关于SymbolEditor”一节,解释符号库概念,阐明使用符号库编辑器的意义,并且概括了SymbolEditor的基本功能。
“安装SymbolEditor”一节叙述如何将软件安装到您的计算机系统上。
内容简介
《Geoway SymbolEditor 2.0用户手册》由以下内容组成:
入门部分
我们主要对一些基本概念作一个介绍,让广大新用户就SymbolEditor有一个较完整的认识。
使用SymbolEditor 2.0部分
这一部分是软件使用的详细介绍部分。它跨越了SymbolEditor的整个流程,涵盖了制作符号库的各个工序。
“系统运行环境”一节给出了SymbolEditor运行的硬件和软件需求。
“作业流程”一节,为您展示做一个符号的总体流程。
地图是显示客观世界的符号化表示形式。在地图上,为了更准确和形象的描述现实世界,我们需要制作各种各样简单或复杂的地图符号,而符号库的作用是用来组织和管理这些地图符号。
不同的行业对符号的要求和规范也不尽相同。如果你想做出更加漂亮的图件,如果你想方便快速的制作国家标准或自定义符号,请使用Geoway软件系列的SymbolEditor。SymbolEditor能为你提供方便、高效、精确、快捷的输入方式,使你在符号制作中得心应手。
提供了对外部系统(GeowaySacn、AutoCAD14)符号的支持。支持GeowaySacn、AutoCAD12、14符号的导入。
提供了对类似棚房、简易房屋等特殊符号的支持。
安装
SymbolEditor的安装是通过SymbolEditor安装程序(Setup.exe)安装到本地计算机上。
CDROM光盘安装
SymbolEditor在整体上能够基本满足测绘行业不同比例尺地图对符号编辑的要求,随软件我们提供了部分比例尺(10000、5000、2000、1000、500)的符号文件。除此之外SymbolEditor还有以下几个特点:
提供高精度的符号输出。使之在图上的精度达到0.01毫米,甚至超过这个精度。
提供了电力线等符号的点符号内对线的裁剪功能。(具体见on page 66叠加点符号中的叠加点符号部分)
Geoway符号编辑器
SymbolEditor2.0用户手册
北京吉威数源软件开发有限公司
Beijing Geoway CyberTek Software Co., Ltd.
序言
欢迎大家阅读《Geoway SymbolEditor 2.0用户手册》!顾名思义,本书是一本面向用户的手册,在您购买Geoway套件的同时,也随即获得了这一本手册。印制这本书的意图,旨在让每位用户通过阅读能够将软件使用起来,并能加以充分的利用。
第三步:确定
经过以上三步操作之后,我们便新建的一个符号库!
右键菜单新建符号库
选中“符号库管理器”视图中“符号库管理器”项,然后单击右键,出现如下所示的菜单,选择新建符号库,如图所示:
其余操作请参考从文件菜单新建符号库中的描述。
在经过了以上三步操作之后,便新建了一个符号库。
如果符号库新建成功,会在符号库管理器中出现对应的节点,如下图所示:
附录部分
本书最后有两个附录:
常用快捷键(热键)—— 软件中最常使用到的一些快捷键;
与吉威数源联系 —— 怎样与我们联系。
本书的约定
在本书中有许多注释、提示、和警告。注释是对正文的补充;提示可以使实际操作更容易;警告使读者避免出错。它们通常以楷体字印刷,以示区别。
请注意本书使用的许多格式约定:
级联菜单系列中的各下拉选项之间用“>”符号隔开;
系统运行环境
硬件:
CPU主频:PⅡ233MHz以上;
内存:64M Byte以上;
硬盘空闲空间:20M以上;
软件:
操作系统:Windows NT 4.0(Service Pack 5)以上;
一次
在SymbolEditor中,一次作业的流程如下图所示:
本章叙述SymbolEditor中文件操作各命令细节。如创建、保存符号等。
然后:在“描述信息”文本框中给出符号文件的简单描述。该描述信息将在“符号库管理器”中符号文件节点作为相应的符号文件的简单描述。
再次:给出符号文件的比例尺。
第三步:确定。
右键菜单新建符号文件
选中“符号库管理器”视图中“符号库管理器”项,然后单击右键,出现如下所示的菜单,选择新建符号库,如图所示:
其余操作请参考从文件菜单新建符号库中的描述。
在经过了以上三步操作之后,便新建了一个符号文件。
从文件菜单新建符号文件
第一步:选择菜单命令。
选择“文件>选择新建符号文件”菜单项,弹出如下图所示对话框:
第二步:给出符号文件的各种信息。
首先:在“符号路径”和“文件名”文本框中给出符号文件的路径和文件名称。符号文件的扩展名为SYM。
本章包括以下内容:
符号库的组织结构
符号库文件的操作
符号文件的操作
打印操作
其它
在SymbolEditor中,符号库、符号文件与符号的关系如下图所示:
图中:符号库(*.slb),是具有一定逻辑关系的符号文件的索引;符号文件(*.sym)实际记录了同一种比例尺下的点线面符号,每一个符号有其唯一的ID号与其对应。