电动冲击钻设计说明书
佳普电锤电钻使用说明书

佳普电锤电钻使用说明书摘要:一、引言二、佳普电锤电钻的产品特点三、使用说明1.准备工作2.操作步骤3.注意事项四、清洁与维护五、常见问题及解决方法六、结语正文:一、引言佳普电锤电钻是一款集电锤和电钻功能于一体的电动工具,广泛应用于家庭装修、家具制作等领域。
为了帮助用户更好地使用该产品,我们特地提供了详细的使用说明书。
二、佳普电锤电钻的产品特点佳普电锤电钻具有以下几个产品特点:1.强大的动力:采用高性能电机,提供强劲的动力输出,满足各种钻孔需求。
2.良好的便携性:轻巧的设计,携带方便,让您轻松应对各种作业场景。
3.双重功能:既可实现电锤的冲击钻孔,又可作为电钻进行普通的钻孔作业。
4.安全性能:采用双重绝缘设计,有效防止触电事故的发生。
三、使用说明1.准备工作在使用佳普电锤电钻之前,请确保电源电压与产品铭牌上的电压相符,以免发生危险。
同时,确保电锤电钻的电池充满电,并检查工具是否完好无损。
2.操作步骤(1)电锤模式:在需要进行冲击钻孔时,将电锤电钻切换至电锤模式。
此时,工具的前端会带有冲击力,可以轻松击碎混凝土、砖石等硬质材料。
(2)电钻模式:在需要进行普通钻孔时,将电锤电钻切换至电钻模式。
此时,工具的前端只有旋转力,可以精确地钻孔。
3.注意事项(1)在使用过程中,请确保电源线不会被绊倒,以免发生意外。
(2)避免在潮湿的环境中使用,以免引发触电事故。
(3)使用完毕后,请及时关闭电源,并进行清洁和维护。
四、清洁与维护1.使用完佳普电锤电钻后,应立即清除表面的灰尘和杂物。
2.定期检查电锤电钻的电池性能,如发现电池性能下降,请及时更换。
3.避免将电锤电钻暴露在高温、潮湿的环境中,以免影响其使用寿命。
五、常见问题及解决方法1.问题:电锤电钻无法正常工作。
解决方法:检查电源电压是否正常,电池是否充足电,如有问题,请及时处理。
2.问题:电锤电钻钻孔效果不佳。
解决方法:检查钻头是否磨损,需要时更换新的钻头。
3.问题:电锤电钻发热严重。
【最新2018】bosch电钻说明书-实用word文档 (6页)

本文部分内容来自网络整理,本司不为其真实性负责,如有异议或侵权请及时联系,本司将立即删除!== 本文为word格式,下载后可方便编辑和修改! ==bosch电钻说明书篇一:博世电钻的操作规程注意事项篇二:博世电动工具10.8充电钻说明书小尺寸,大功率。
采用锂电技术的 14.4 伏和 18 伏基本机型充电式电钻/起子机不仅设计紧凑,而且性能卓越、速度高、使用时间长。
经销商团队(bss)中的翘楚,年销售额均名列前茅。
公司主营进口、国产专业电动工具、气动工具、五金手动工具、机电设备等业务,资源丰富,业务娴熟,为国内知名电动工具、机电设备供应商。
g = 专业级 ( gbh 2-22 re )p = 家用级 ( pbs 75a )第二、三位字母表示机器的种类bm = 电钻(gbm 350 re)sb = 冲击钻(gsb 13 re)bh = 电锤 (gbh 2-22 re)sh = 电镐(gsh 388 x )sr = 充电式起子机 (gsr 9.6-2)ws = 角磨机 ( gws 7-125 )st = 曲线锯 ( gst 65e )ho = 电刨(gho 10-82)hg = 热风枪(ghg 500-2)dm = 云石机(gdm 13-34)第四位后数字表示机器的主要参数公斤级别( gbh 2-22 s)功率 ( gbm 350 re )最大加工直径(gbh2-26re)几挡机械调速 ( gbm13-2 re )电压(充电工具)(gsr9.6- 1 )锯割能力 ( gst54 e )盘片直径( gws14-150ci )后缀字母这款机器所具有的功能r = 正反转 ( gsb 550 re )e = 电子无级调速 ( gsb 550 re )a = 吸尘功能 ( gss 280 a )p = 摆动功能 ( gst 85 pbe )b = 弧型手柄 ( gws24-180b )v = 电压(充电工具) ( gsr 7.2 v )c = 恒速控制 ( gws 8 – 100 ce )l = 长臂直磨机 ( ggs 27 l )s = 平钻功能 ( gbh2-24dsr )d = 凿击功能 ( gbh 5 – 38 d )f = 夹头更换( gbh4dfe )x = 六角钻/凿头 ( gbh5-38x )[2]经验丰富:五百强信赖的合作伙伴,在电动工具行业经营15年以上,对市场及产品有着独特的认识,可以为客户提供专业的产品技术咨询、产品维修保养等服务;专业团队:拥有一个经验丰富的专业团队,能与客户保持紧密接触,紧跟产品市场。
博世GSR 180-LI专业无绳冲击钻使用说明书

Manuals+— User Manuals Simplified.BOSCH GSR 180-LI Professional Cordless Impact Drill Instruction ManualHome » Bosch » BOSCH GSR 180-LI Professional Cordless Impact Drill Instruction ManualSR 180-LI Professional Cordless Impact DrillInstruction ManualContents1 GSR 180-LI Professional Cordless ImpactDrill2 Safety Instructions3 Product Description and Specifications4 Assembly5 Operation6 Maintenance and Service7 Documents / Resources7.1 ReferencesGSR 180-LI Professional Cordless Impact DrillSafety InstructionsGeneral Power Tool Safety WarningsWARNING: Read all safety warnings, instructions, illustrations and specifications provided with this power tool.tool in unexpected situations.Dress properly. Do not wear loose clothing or jewellery.Keep your hair and clothing away from moving parts. Loose clothes, jewellery or long hair can be caught in moving parts.If devices are provided for the connection of dust extraction and collection facilities, ensure these are connected and properly used. Use of dust collection can reduce dust-related hazards.Do not let familiarity gained from frequent use of tools allow you to become complacent and ignore tool safety principles. A careless action can cause severe injury within a fraction of a second.Power tool use and careDo not force the power tool. Use the correct power tool for your application. The correct power tool will do the job better and safer at the rate for which it was designed.Do not use the power tool if the switch does not turn it on and off.Any power tool that cannot be controlled with the switch is dangerous and must be repaired.Disconnect the plug from the power source and/or remove the battery pack, if detachable, from the power tool before making any adjustments, changing accessories, or storing power tools.Such preventive safety measures reduce the risk of starting the power tool accidentally.Store idle power tools out of the reach of children and do not allow persons unfamiliar with the power tool or these instructions to operate the power tool. Power tools are dangerous in the hands of untrained users.Maintain power tools and accessories. Check for misalignment or binding of moving parts, breakage of parts and any other condition that may affect the power tool’s operation.If damaged, have the power tool repaired before use. Many accidents are caused by poorly maintained power tools.Keep cutting tools sharp and clean. Properly maintained cutting tools with sharp cutting edges are less likely to bind and are easier to control.Use the power tool, accessories and tool bits etc. in accordance with these instructions, taking into account the working conditions and the work to be e of the power tool for operations different from those intended could result in a hazardous situation.Keep handles and grasping surfaces dry, clean and free from oil and grease.Slippery handles and grasping surfaces do not allow for safe handling and control of the tool in unexpected situations.Battery tool use and careRecharge only with the charger specified by the manufacturer. A charger that is suitable for one type of battery pack may create a risk of fire when used with another battery pack.Use power tools only with specifically designated battery e of any other battery packs may create a risk of injury and fire.When battery pack is not in use, keep it away from other metal objects, like paper clips, coins, keys, nails, screws or other small metal objects, that can make a connection from one terminal to another.Shorting the battery terminals together may cause burns or a fire.Under abusive conditions, liquid may be ejected from the battery; avoid contact. If contact accidentally occurs, flush with water. If liquid contacts eyes, additionally seek medical help. Liquid ejected from the battery may cause irritation or burns.Do not use a battery pack or tool that is damaged or modified. Damaged or modified batteries may exhibitunpredictable behaviour resulting in fire, explosion or risk of injury.Do not expose a battery pack or tool to fire or excessive temperature. Exposure to fire or temperature above 130°C may cause explosion.Follow all charging instructions and do not charge the battery pack or tool outside the temperature range specified in the instructions. Charging improperly or at temperatures outside the specified range may damage the battery and increase the risk of fire.ServiceHave your power tool serviced by a qualified repair person using only identical replacement parts. This will ensure that the safety of the power tool is maintained.Never service damaged battery packs. Service of battery packs should only be performed by themanufacturer or authorized service providers.Safety information for drills and screwdriversSafety instructions for all operationsWear ear protectors when impact drilling. Exposure to noise can cause hearing loss.Hold the power tool by insulated gripping surfaces, when performing an operation where the cutting accessory or fasteners may contact hidden wiring. Cutting accessory or fasteners contacting a “live” wire may make exposed metal parts of the power tool “live” and could give the operator an electric shock.Safety instructions when using long drill bitsNever operate at higher speed than the maximum speed rating of the drill bit. At higher speeds, the bit is likely to bend if allowed to rotate freely without contacting the workpiece, resulting in personal injury.Always start drilling at low speed and with the bit tip in contact with the workpiece. At higher speeds, the bit is likely to bend if allowed to rotate freely without contacting the workpiece, resulting in personal injury.Apply pressure only in direct line with the bit and do not apply excessive pressure. Bits can bend causing breakage or loss of control, resulting in personal injury.Additional safety warningsHold the power tool securely. When tightening and loosening screws be prepared for temporarily high torque reactions.Secure the workpiece. A workpiece clamped with clamping devices or in a vice is held more secure than by hand.Use suitable detectors to determine if there are hidden supply lines or contact the local utility company for assistance. Contact with electric cables can cause fire and electric shock. Damaging gas lines can lead to explosion. Breaking water pipes causes property damage.Always wait until the power tool has come to a complete stop before placing it down. The application tool can jam and cause you to lose control of the power tool.In case of damage and improper use of the battery, vapours may be emitted. The battery can set alight or explode. Ensure the area is well ventilated and seek medical attention should you experience any adversemoisture.Switch the power tool off immediately if the application tool becomes blocked. Be prepared for highinjury.Please observe the illustrations at the beginning of this operating manual.Cordless Drill/DriverGSR 180-LI GSB 180-LI Article number 3 601 JF8 1.. 3 601 JF8 3..Rated voltage V=1818No-load speed – First gear min 0–5000–500– Second gear min 0–1 9000–1 900Impact rate min –0–27 000Max. torque, hard/soft screwdriving applicatio n according to ISO 5393 Nm 54/2154/21Max. drilling diameter (first and second gear)– Wood mm 3535– Steel mm 1010– Masonry mm–10Tool holder1.5–13 1.5–13Max. screw diametermm 1010Weight according to EPTA-Procedure 01:2014 kg 1.6–2.6 1.7–2.7Recommended ambient temperature during c harging°C 0 to +350 to +35Permitted ambient temperature during operation and during storage°C–20 to +50–20 to +50Recommended rechargeable batteries1GBA 18V…ProCORE18V…GBA 18V…ProCORE18V…Recommended battery chargers 1GAL 18…GAX 18…GAL 36…GAL 18…GAX 18…GAL 36…Depends on battery in useMeasured at 20−25 °C with rechargeable battery 2.0 Ah. Limited performance at temperatures <0 °CNoise/vibration informationNoise emission values determined according to EN 62841-2-1.Typically, the A-weighted noise level of the power tool is: Sound pressure level 88 dB(A); sound power level 99dB(A). Uncertainty K = 5 dB.Wear hearing protection!A)-1-1A)-1B)A)C) A)B)C)GSR 180-LI GSB 180-LIVibration total values a (triax vector sum) and uncertainty K determined according to EN 62841-2-1.Drilling into metal:a m/s <2.5<2.5Km/s 1.51.5Impact drilling into concrete:ah m/s –11Km/s –1.5The vibration level and noise emission value given in these instructions have been measured in accordance with a standardised measuring procedure and may be used to compare power tools. They may also be used for a preliminary estimation of vibration and noise emissions.The stated vibration level and noise emission value represent the main applications of the power tool. However, if the power tool is used for other applications, with different application tools or is poorly maintained, the vibration level and noise emission value may differ. This may significantly increase the vibration and noise emissions over the total working period.To estimate vibration and noise emissions accurately, the times when the tool is switched off or when it is running but not actually being used should also be taken into account. This may significantly reduce vibration and noise emissions over the total working period.Implement additional safety measures to protect the operator from the effects of vibration, such as servicing the power tool and application tools, keeping their hands warm, and organising workflows correctly.AssemblyRemove the battery from the power tool before carrying out work on the power tool (e.g. maintenance,changing tool, etc.). The battery should also be removed for transport and storage. There is risk of injury from unintentionally pressing the on/off switch.Charging the BatteryU se only the chargers listed in the technical data. Only these chargers are matched to the lithium-ion battery of your power tool.Note: The battery is supplied partially charged. To ensure full battery capacity, fully charge the battery in the charger before using your power tool for the first time.The lithium-ion battery can be charged at any time without reducing its service life. Interrupting the charging process does not damage the battery.The lithium-ion battery is protected against deep discharge by the “Electronic Cell Protection (ECP)”. When the battery is discharged, the power tool is switched off by means of a protective circuit: The application tool no longer rotates.Do not continue to press the On/Off switch after the power tool has automatically switched off. The battery can be damaged.Follow the instructions on correct disposal.Removing the Batteryh h 2222Battery model GBA 18V…Battery model ProCORE18V…You can press the gear selector switch (5) with the power tool off or on. You should not do this at full load or maximum torque, however.Gear I:Low speed range; for working with a large drilling diameter or for screwdriving.Gear II:High speed range; for working with a small drilling diameter.Temperature-dependent overload protectionIn normal conditions of use, the power tool cannot be overloaded. If the power tool is overloaded or the battery temperature is not kept within the permitted range, the power tool switches off and the LED on the power tool flashes. Allow the power tool to cool down before you carry on working.Working AdviceAlways slide the gear selector switch or turn the mode selector switch as far as it will go. Otherwise, the power tool may become damaged.Only apply the power tool to the screw/nut when the tool is switched off. Rotating tool inserts can slip off.Working in especially dusty environments can lead to failure of the power tool. If the power tool suddenly fails, remove the carbon brushes and check them (see section “Replacing the carbon brushes”).An auxiliary tool can be used to remove the screwdriver bit or universal bit holder.Maintenance and ServiceMaintenance and CleaningRemove the battery from the power tool before carrying out work on the power tool (e.g. maintenance, changing tool, etc.). The battery should also be removed for transport and storage. There is risk of injury from unintentionally pressing the on/off switch.To ensure safe and efficient operation, always keep the power tool and the ventilation slots clean.Replacing the carbon brushes (see figure C)Check the length of the carbon brushes around every 2–3 months and replace both carbon brushes if required. Never replace only a single carbon brush.Note: Only use carbon brushes supplied by Bosch and intended specifically for your product.– Unscrew the caps (6) using a suitable screwdriver.– Replace the spring-loaded carbon brushes (14) and screw on the caps again.If the battery is no longer working, please contact an authorised after-sales service centre for Bosch power tools. After-Sales Service and Application ServiceOur after-sales service responds to your questions concerning maintenance and repair of your product as well as spare parts. You can find explosion drawings and information on spare parts at: The Bosch product use advice team will be happy to help you with any questions about our products and their accessories.In all correspondence and spare parts orders, please always include the 10‑digit article number given on the nameplate of the product.Great BritainRobert Bosch Ltd. (B.S.C.)P.O. Box 98Broadwater ParkNorth Orbital RoadDenham UxbridgeUB 9 5HJDisposalfriendly recycling.Do not dispose of power tools and batteries/rechargeable batteries into household waste!Only for EU countries:AccordingEU Declaration of ConformityCordless Drill/DriverArticle numberWe declare under our sole responsibility that the stated products comply with all applicable provisions of the directives and regulations listed below and are in conformity with the following standards.Management Head of Product CertificationRobert Bosch Power Tools GmbHDocuments / ResourcesBOSCH GSR 180-LI Professional Cordless Impact Drill [pdf] Instruction ManualReferencesInvented for life | Bosch GlobalPočetna strana | Bosch u SrbijiSkånevik Ølen Kraftlag ASЕлектроінÑтрументи Bosch | Bosch ProfessionalÐлектроинÑтрументы Bosch | Bosch ProfessionalBosch Power Tools | Bosch Power ToolsLocation selection | Bosch Power ToolsЕлектроинструменти на Bosch | Електроинструменти на BoschService worldwideElektrické nářadí Bosch | Elektrické nářadí BoschBosch Elektrowerkzeuge und Zubehör | Bosch ElektrowerkzeugeBosch el-værktøj | Bosch el-værktøjBosch-sähkötyökalut | Bosch-sähkötyökalutOutillage électroportatif Bosch | Outillage électroportatif BoschΗλεκτρικά εργαλεία Bosch | Ηλεκτρικά εργαλεία BoschBosch elektromos kéziszerszámok | Bosch elektromos kéziszerszámok Elektronarzędzia Bosch | Elektronarzędzia BoschScule electrice Bosch | Scule electrice BoschBosch električni alati | Bosch električni alatibosch-pt.ruElektrické náradie Bosch | Elektrické náradie BoschInvented for life | Bosch GlobalAna Sayfa | Bosch TürkiyePočetna | Bosch u HrvatskojDomov | Bosch v SlovenijiSerwis elektronarzÄ™dzi Bosch | Bosch ProfessionalManuals+,。
科麦斯kms001冲击钻说明书
科麦斯kms001冲击钻使用说明书一、产品简介科麦斯kms001冲击钻是一款高效、多功能的电动工具,适用于各种钻孔和冲击作业。
本说明书旨在向用户提供科麦斯kms001冲击钻的使用说明、安全提示、构造、安装步骤、使用方法、维护和保养方法、常见问题及解决方法以及联系方式和售后服务等方面的信息。
二、安全性提示在使用科麦斯kms001冲击钻之前,请务必阅读以下安全提示,确保使用过程的安全:1.请勿在潮湿或雨天使用冲击钻,以防触电危险。
2.确保冲击钻的电源插头和电源线无破损,以防漏电危险。
3.请在额定功率范围内使用冲击钻,以防电机过热引起火灾。
4.严禁将冲击钻对着人体或动物使用,以防造成伤害。
5.使用冲击钻时,请佩戴防护眼镜和手套,以防飞溅物伤害。
三、冲击钻构造科麦斯kms001冲击钻的主要组成部分包括:1.电机:驱动冲击钻运转的核心部件。
2.齿轮箱:通过齿轮将电机动力传递到冲击钻头部。
3.钻夹头:用于安装钻头,可正反方向旋转。
4.手柄:提供操作舒适性,并包含开关和控制按钮。
5.电源线:连接电机和电源的导线。
6.电源插头:与电源插座连接的部件。
四、安装步骤以下是科麦斯kms001冲击钻的安装步骤:1.将钻头插入钻夹头,并锁定。
2.将钻夹头与手柄连接,并锁紧。
3.将电源线连接到冲击钻的电机。
4.将电源插头插入电源插座。
五、使用方法在使用科麦斯kms001冲击钻时,请按照以下步骤进行操作:1.将钻头对准钻孔位置,握紧手柄,按下开关按钮。
2.保持冲击钻稳定,逐渐加大压力,以确保钻孔顺利。
3.根据需要,调整冲击钻的速度和旋转方向。
4.完成钻孔后,请先关闭开关按钮,再松开手柄。
六、维护和保养为了保持科麦斯kms001冲击钻的良好状态,请按照以下方法进行维护和保养:1.定期清理冲击钻表面的灰尘和杂物。
2.检查电源线是否有磨损或断裂,如有需要及时更换。
3.检查钻夹头是否松动或磨损,并定期更换钻头。
4.定期润滑齿轮箱和轴承,确保机械运转顺畅。
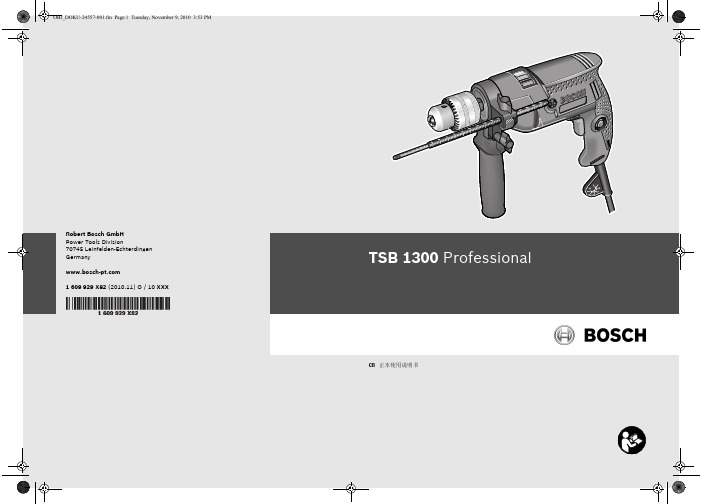
TSB 1300 Professional 说明书
OBJ_BUCH-1372-001.book Page 2 Tuesday, November 9, 2010 3:49 PM2 |1 609 929 X82 | (9.11.10)Bosch Power ToolsOBJ_BUCH-1372-001.book Page 3 Tuesday, November 9, 2010 3:49 PM4 | 中文1 609 929 X82 | (9.11.10)Bosch Power Tools安全规章电动工具通用安全警告阅读所有警告和所有说明! 不遵照以下警告和说明会导致电击、着火和/或严重伤害。
保存所有警告和说明书以备查阅。
在所有下列的警告中术语 "电动工具" 指市电驱动(有线)电动工具或电池驱动(无线)电动工具。
1)工作场地的安全a)保持工作场地清洁和明亮。
混乱和黑暗的场地会引发事故。
b)不要在易爆环境,如有易燃液体、气体或粉尘的环境下操作电动工具。
电动工具产生的火花会点燃粉尘或气体。
c)让儿童和旁观者离开后操作电动工具。
注意力不集中会使你失去对工具的控制。
2)电气安全a)电动工具插头必须与插座相配。
绝不能以任何方式改装插头。
需接地的电动工具不能使用任何转换插头。
未经改装的插头和相配的插座将减少电击危险。
b)避免人体接触接地表面,如管道、散热片和冰箱。
如果你身体接地会增加电击危险。
c)不得将电动工具暴露在雨中或潮湿环境中。
水进入电动工具将增加电击危险。
d)不得滥用电线。
绝不能用电线搬运、拉动电动工具或拔出其插头。
使电线远离热源、油、锐边或运动部件。
受损或缠绕的软线会增加电击危险。
e)当在户外使用电动工具时,使用适合户外使用的外接软线。
适合户外使用的软线将减少电击危险。
f)如果在潮湿环境下操作电动工具是不可避免的,应使用剩余电流动作保护器(RCD )。
使用RCD 可减小电击危险。
3)人身安全a)保持警觉,当操作电动工具时关注所从事的操作并保持清醒。
电动钻使用说明书

电动钻使用说明书尊敬的用户:感谢您选择我们的产品。
为了方便您正确并安全地使用我们的电动钻,我们准备了以下使用说明。
请您仔细阅读,并按照描述的方法来操作。
一、产品概述我们的电动钻是一款高性能的电动工具。
它具有以下特点:1. 功能强大:电动钻可以进行打孔、打磨、旋转等多种操作,适用于各种材料,如木材、金属、混凝土等。
2. 安全可靠:采用了先进的安全保护装置,如过载保护、电流保护等,确保用户的安全使用。
3. 操作简便:电动钻具有人性化的设计,操作简单、便捷。
二、安全须知在使用电动钻之前,请确保您已经仔细阅读并理解以下安全须知:1. 电源接入:使用前,请确认电动钻的电源适配器已正确接入交流电源,并且确保电源稳定可靠。
2. 个人保护:在使用电动钻时,请佩戴符合相关标准的防护眼镜、手套和耳罩等个人防护装备,以确保您的安全。
3. 工作环境:使用电动钻时,要确保工作环境干燥通风,并远离易燃、易爆等危险物品。
4. 脱离电源:在开始维修、清洁、更换配件等操作之前,请务必先将电动钻断开与电源的连接。
三、操作指南为了使您更好地操作我们的电动钻,以下是一些使用技巧和操作指南:1. 选择合适的钻头:根据需要,选择合适的钻头进行操作。
钻头的直径和材质要根据工作需求来选择。
2. 安装钻头:用配套工具打开电动钻的钻头夹紧装置,安装钻头,并确保其牢固。
3. 调节转速:根据不同的工作需求,通过电动钻上的调速钮来调节转速。
要根据具体工作材料和工作方式来选择合适的转速。
4. 握紧电动钻:握紧电动钻的手柄,保持稳定。
在操作时要保持垂直,力量均匀。
5. 开始操作:确认一切准备就绪后,按下电源开关,缓慢开始操作。
注意避免将电动钻的钻头与物体发生剧烈碰撞。
四、维护保养为了保持电动钻的良好工作状态,并延长使用寿命,以下是一些建议的维护保养方法:1. 清洁:使用完毕后,请用干净的布擦拭电动钻的表面,并注意不要让水或其他液体进入电动钻内部。
2. 润滑:定期将适量的润滑油滴入电动钻的轴承部分,以保持良好的工作状态。
说明书 电钻
备忘录
002
总制造商
株式会社牧田
日本国爱知县安城市住吉町
YYYOCMKVCEQO
装配
安装或拆卸钻头
注意 • 对工具进行任何装配操作前 请务必确
认工具已关闭且已拔下电源插头
安装顶部把手 辅助手柄
1. 钻机卡盘
1
将顶部把手牢固安装在工具上
安装背部把手
规格因国家而异
1. 弹簧片 2. 后把手
3. 套筒
安装钻头时 应将钻头装入卡盘 尽量将其推 到底 用手旋紧卡盘 将卡盘键依次放入三个 孔中并顺时针旋紧 请务必均匀旋紧三个卡 盘孔
开关操作
注意 • 插上工具电源插头之前 请务必确认开
关扳机能够正常工作 松开时能回到 OFF 关闭 位置
注意
• 只有当机器完全停下来的时候才能改变 旋转的方向 在机器停止之前改变旋转 方向可能会损坏机器
1. 开关扳机
2. 逆时针旋转
1
3. 顺时针旋转
2 3
开关可反向操作实现顺时针或逆时针旋转 扣起开关扳机的下部即可使工具顺时针方向 转动 而扣起开关扳机的上部即可使工具逆 时针方向转动 松开开关扳机工具即停止
避免人体接触接地表面 如管道 散热片和冰 箱 如果你身体接地会增加电击危险
不得将电动工具暴露在雨中或潮湿环境中 水 进入电动工具将增加电击危险
不得滥用电线 绝不能用电线搬运 拉动电动 工具或拔出其插头 使电线远离热源 油 锐 边或运动部件 受损或缠绕的软线会增加电击 危险
当在户外使用电动工具时 使用适合户外使用 的外接软线 适合户外使用的软线将减少电击 危险
将闲置不用的电动工具贮存在儿童所及范围之 外 并且不要让不熟悉电动工具或对这些说明 不了解的人操作电动工具 电动工具在未经培 训的用户手中是危险的
易锐冲击钻说明书

易锐冲击钻说明书一、产品简介易锐冲击钻是一种高性能的电动工具,专为钻孔和冲击钻孔而设计。
它采用先进的技术和材料制造,具有强大的钻孔能力和耐用性。
易锐冲击钻适用于木材、金属和混凝土等多种材料的钻孔任务,可以满足各种施工和维修需求。
二、产品特点1. 强大的动力驱动:易锐冲击钻采用高性能电动机驱动,转速高、扭矩大,能够轻松应对各种硬质材料的钻孔任务。
2. 多功能设计:易锐冲击钻具有钻孔和冲击钻孔两种功能,可根据具体需求进行切换。
冲击钻孔功能适用于较硬的材料,提高钻孔效率。
3. 调速功能:易锐冲击钻配备了可调节的转速控制,用户可以根据需要选择合适的转速,以适应不同材料的钻孔要求。
4. 人性化设计:易锐冲击钻采用人性化设计,握把舒适,操作方便,减轻使用者的疲劳感。
同时,设有安全锁定装置,确保使用时的安全性。
5. 高精度钻孔:易锐冲击钻配备了精密的钻头夹紧装置,确保钻头的稳定性和准确性,使得钻孔结果更加精确。
三、使用方法1. 在使用易锐冲击钻之前,请确保电源已经关闭,并且电源线已经插好。
2. 根据需要,选择合适的钻头,并将其插入钻头夹紧装置中。
3. 根据具体要求,选择钻孔模式或冲击钻孔模式,并通过转速调节按钮调整转速。
4. 将易锐冲击钻的钻头对准要钻孔的位置,并用力握住握把,保持稳定。
5. 按下电源开关,开始进行钻孔或冲击钻孔操作,注意保持稳定的力度和角度。
6. 钻孔完成后,松开电源开关,待钻头完全停止转动后,再取出钻头。
四、注意事项1. 使用易锐冲击钻时,请务必佩戴好防护眼镜和手套,以防止钻屑或碎片溅入眼睛或手部。
2. 在使用易锐冲击钻进行钻孔或冲击钻孔时,请确保工作区域干燥、清洁,并远离易燃物品。
3. 在操作易锐冲击钻时,请保持握把干燥、清洁,并避免使用过程中的滑动或扭曲。
4. 使用易锐冲击钻时,请确保电源线不会被绊倒或缠绕在其他物体上,以免发生危险。
5. 在使用易锐冲击钻之前,请仔细阅读并遵守产品说明书中的安全操作规范和警示。
- 1、下载文档前请自行甄别文档内容的完整性,平台不提供额外的编辑、内容补充、找答案等附加服务。
- 2、"仅部分预览"的文档,不可在线预览部分如存在完整性等问题,可反馈申请退款(可完整预览的文档不适用该条件!)。
- 3、如文档侵犯您的权益,请联系客服反馈,我们会尽快为您处理(人工客服工作时间:9:00-18:30)。
电动冲击钻设计说明书电动冲击钻设计目录第一章前言................ 3第二章冲击钻的基本方案. .................. 51. 产品功能要求............ 52. 传动机构方案及比较. ............... 53. 电动冲击钻结构简图. ............... 8第三章整体结构设计............1. 电机的选择错误! 未定义书签2、齿轮的计算。
.. 错误! 未定义书签第四章主要零部件参数及结构设计. 104.1 主传动轴设计 .......... 104.1.1 主轴的结构设计[10] . ... 114.1.2 主轴的校核. ............. 124.2.传动齿轮设计......... 134.2.1 针式齿轮设计说明. .... 134.2.2 按齿面接触度强计算[2] . 134.2.3 按齿根弯曲强度设计[2] 164.2.4 几何尺寸计算. ........... 184.2.5 验算.......... 19第五章主要零部件的选材、热处理及工艺分析21电动冲击钻设计第六章设计总结............. 22致谢................... 23参考文献................ 25第一章前言冲击钻作为电动工具的一种,我们有必要介绍电动工具的现状和发展趋势。
电动工具是一种机械化工具,它结构轻巧、携带使用方便。
无论在我们的日常生活中,还是在生产中都是个不可或缺的重要角色。
我国电动工具行业一向靠外贸出口作可靠支撑。
近十年来,除1996 年比电动冲击钻设计1995 年在外贸出口数量和金额略有下降外,其余年份均呈大幅度上升态势。
2000 年,全行业的外贸出口出现了历史最高峰-- 无论增长幅度还是绝对值,均创历史新高,外贸出口数量高达8500 万台,外贸出口金额12.25 亿美元,二者均比1999 年增长50%以上。
虽然今年以来,我国电动工具行业的外贸出口却遭遇较大挫折,与去年同期相比,外贸出口数量和金额仅呈微略增势,“跑”出了近五年来最慢速度。
今年我国电动工具外贸出口的这种大幅回落将较大地影响全年的行业生产经营效果,给完成全年生产经营目标带来了更加艰巨的任务。
但是我国加入W TO 后许多重大工程的新建和续建、房地产业的继续发展以及基本建设等给电动工具行业的发展提供了有利条件, 西部大开发也带动了电动工具市场的进一步扩大。
从电动工具市场反馈的信息可以看出,2002 年国内电动工具产品销售出现了以下一些新的特点。
首先,许多电动工具生产企业的积极性比以往更加高涨,推动了电动工具产品质量水平不断提高,无论外观造型还是内在性能,都有明显改善。
另一方面,各生产厂家大力挖掘内部潜力,降低生产成本,来增强自身的竞争力。
由于竞争的日趋激烈,我国许多以内销为主的电动工具企业更加注意产品的更新和新产品的设计开发。
如冲击钻,体积小、重量轻,外型更加美观。
认知自己的不足,现在生产企业都走设计更新的路。
沿着这个方向发展,我国的电动工具行业的前景将无限光明。
电动冲击钻设计第二章冲击钻的基本方案1. 产品功能要求电动冲击钻是一种常用的电动五金工具,主要用于坚硬而脆性较大的材料如石材、水泥墙、瓷砖等的钻孔.工作中除钻削外还应有定的冲击力才能顺利地钻出孔来。
实现电动冲击钻功能的传动机构方案很多,带动话头旋转的方式主要由电动机通过齿轮传动系统完成,而实现钻头的冲击运动有多和方式。
下面仅对电冲击机构的方案选择作一简要分析比较。
2. 传动机构方案及比较方案一:曲柄滑块冲击机构1 本方案为实现钻孔及冲击功能,采用了一个带套筒的齿轮9, 如图Ⅲ- 1 所示.钻头13通过花键连接装在套筒齿轮9 前端的花键槽12内使钻头13与齿轮9 连成一体。
电动机 1 转动,通过齿轮6、齿轮7、齿输8,带动齿轮9 转动,使钻头13旋转进行钻孔。
同时由曲柄轮4、连杆5和撞头滑块10组成曲柄滑块冲击机构。
曲柄轮4(带蜗轮)通过蜗杆机构3 经由.齿轮6、齿轮2 将电动机r 输出.的动力传递给撞头滑块10。
撞头滑块10 撞击撞杆11,撞杆11.再撞击钻头13 实现冲击运动。
钻头13 受冲击时可在花键槽12 内移动。
电动冲击钻设计该方案结构较为复杂,对安装精度要求较商,不然会发生撞头滑块在套筒内卡死的现象。
同时连杆5的连接轴销在冲击力较大时易折断勺。
方案二:偏心凸轮冲击机构该方案采用偏心凸轮5作为冲击发生件,撞头8 作为凸轮机构从动杆;如图Ⅲ-2 所示。
与方案一相同,也是通过蜗轮4:蜗杆3将电动机1的动力传递给予蜗轮4同轴的偏心,凸轮5 0 ‘电动机转动,,凸轮机构工作,撞买8来回移动,撞击撞杆'12 0 撞头8与偏心凸轮5接触T的顶部做成半球状,以减少工作时韵摩擦6弹簧9的作用是使撞头8 在工作中与偏心凸轮5 保持可靠的接触。
该方案对安装精度要求不高,工作毡比较安全可靠,但存在凸轮遑扔冲击,哏口非有效冲击较大。
偏心凸轮轴销易掼等缺点。
电动冲击钻设计方案三:圆盘凸轮冲击机构由圆盘凸轮16、从动杆8(撞头)组成圆盘凸轮冲击机构,这是一种变形的圆盘凸轮机构,如图Ⅲ-3 所示。
将圆盘凸轮6做成斜面圆柱状,从动杆8 不直接与圆盘凸轮6 接触. 而是通。
过拨盘5 拨动从动杆8(撞头)作往复直线运动。
电动机1 通过一对啮合的齿轮。
2、3直接电动冲击钻设计将动力传递给予从动齿轮3同轴的圆盘凸轮6 和套筒齿轮9的驱动齿,齿轮7,完成整个运劫及动力传递。
弹簧4的作用是工作中使拨盘5 紧贴圆盘轮6表面。
该方案结构简单,减弱凸轮机构易产生的硬性冲击,工作安全可靠。
方案三与前两个方案相比,省去了用于改变运动方向f 螺杆机构,简化了传动路线,结构紧凑且工作硬性冲击小,工作可靠。
通过以上分析,选用方案三进行电动冲击钻结构设计。
3. 电动冲击钻结构简图根据所选方案画出冲击钻结构简图,如图皿-4 所示:结构简图清楚地反映了电动冲击钻工作原理、各零件结构关系和装配关系及电钻造型韵基本轮廓,依此可进行零部件结构设计和霹观遣型设计。
第三章整体结构设计电动冲击钻设计电动冲击钻设计第四章主要零部件参数及结构设计4.1 主传动轴设计轴的设计也和其它零件的设计相似,包括结构设计和工作能力计算两方面。
轴的结构设计是根据轴上零件的安装、定位以及轴的制造工艺等方面的要求,合理地确定轴的结构形式和尺寸。
轴的工作能力计算指的是轴的强度、刚度和振动稳定性等方面的计算。
电动冲击钻设计由于主轴在满足强度、刚度的情况下,要有一定的防腐蚀能力,这就要求合理的选择材料。
轴的材料主要是碳钢和合金钢。
钢轴的毛坯多数是用轧制圆钢和锻件,有的则直接用圆钢。
合金钢比碳钢具有更高的机械性能和更好的淬火性能。
因此,在传递大动力,并要求减小尺寸与质量,提高轴颈的耐磨性,以及处于高温或低温条件下工作的轴,常采用合金钢。
初步选择主轴的材料为40Cr 。
4.1.1 主轴的结构设计[10]轴的结构设计包括定出轴的合理外形和全部结构尺寸。
轴的结构主要取决于以下因素:轴在机器中的安装位置及形式;轴上安装的零件的类型、尺寸、数量以及和轴联接的方法;载荷的性质、大小、方向及分布情况;轴的加工工艺等。
其主要考虑的问题如下:1) 、定轴上零件的装配方案拟定轴上零件的装配方案是进行轴的结构设计的前提,它决定着轴的基本形式。
由于钻具的外形特点为圆筒形,这样就存在三种装配方案:一种是零件在主轴从上到下进行装配;一种是零件在主轴上从下到上进行装配;还有一种是零件从主轴两端进行装配。
分析可知,前两种装配方案对加工精度和装配工艺要求很高,且存在主轴在一个方向上存在过多阶梯的情况,影响轴的强度。
最后一种装配方案能从主轴的两端分别进行装配,轴的径向尺寸变化不大,这对轴的结构将大大简化,提高了轴的强度。
根据以上分析,选择零件从主轴上两端进行装配的方案。
同时综合考虑现行的加工水平,为了减少加工的成本,主轴采用分段加工制造。
初步拟订整个钻具的主轴分三段,各段装配完后用法兰盘连接。
2) 、轴上零件的定位为了防止轴上零件受力时发生沿轴向或周向的相对运动,轴上零件除了有游动或空转的要求者外,都必须进行轴向和周向定位,以保证其准确的工作位置。
1.零件的轴向定位轴上零件的轴向定位是以轴肩、套筒、圆螺母、轴端挡圈和轴承端盖来保证电动冲击钻设计的。
对钻具来说,其工作时受到的轴向力很大,且变化较大。
这样安装其上的齿轮将用轴肩来进行定位。
由于整个结构采用对称的形式,不能很好地解决装配问题,故轴肩通过焊接的方法加工出来。
由资料得,定位轴肩的高度h=(0.07~0.1)d,其中d 为与零件相配处轴径尺寸。
对下端太阳轮的轴肩高度h=(0.07 ~0.1) 150=10.5~15mm,取12mm。
上端中心传动齿轮处h=(0.07~0.1) 150=10.5~15mm,取12mm 。
2.零件的周向定位周向定位的目的是限制轴上零件与轴发生相对转动。
齿轮与轴的周向定位均采用矩形花键连接。
为了保证齿轮与轴配合有良好的对中性,故选择齿轮轮毂与轴的配合为H7/n6 ;推力轴承与轴的定位是借过渡配合来保证的,其值径尺寸公差为m6。
4.1.2 主轴的校核进行轴的强度校核计算时,应根据轴的具体受载及应力情况,采用相应的计算方法,并恰当的选其许用应力。
分析主轴的载荷分布情况可知,主传动轴主要是受钻具电机的旋转扭矩,故采用扭矩强度校核电动冲击钻设计前已选定轴的材料为40Cr 调质钢,查得[ 1 ]=70Mpa,因此ca[ 1],故初定的结构参数在安全范围内。
4.2.传动齿轮设计4.2.1 针式齿轮设计说明1)齿轮机构的类型很多,但直齿圆柱齿轮传动乃是最简单、最基本,但是对于本设计而言,其维修不方便,故在本设计中采用针式齿轮传动。
但为了计算方便,其计算设计过程采用等效方法,用圆柱齿轮的设计计算方法计算、校核针式齿轮的强度。
2)该机构为一般工作机器,速度不高,但其工作环境恶劣,参考相关资料选用9 级精度。
3)与常规齿轮一样,针式齿轮的工作部分的齿轮材料采用20CrMnTi,为了减少制造成本,其他的固定部分采用铸钢。
4)初选中心太阳轮齿数Z1 =30,而一般i=1 ~3,参考桩工机械查齿轮传动比经验值,取i=1.56 行星齿轮齿数Z2 =ixZ 1=30X1.56=47.两啮合齿轮齿数互质。
4.2.2 按齿面接触度强计算[2]由设计计算公式进行试算, 即:(1)确定公式内的各计算数值表3 传动齿轮计算—1设计计算项目设计依据设计结果轴的扭剪应力电动冲击钻设计电动冲击钻设计[σ H] 1=1248MPa[σ H] 2=543.2MPa 2)计算表 4 传动齿轮计算— 2接触疲劳许用 应力 [ σ H ]=KHN1 H lim1,取s失效概率为 1%,安 全系数 S=1电动冲击钻设计计算载荷系数K= k A k v K H a K H 使用系数k A kA=1.5动载系数k v k v=1.06 载荷分布系数K Ha , K F K H a= K F=1.42 2 3K H 1.15 0.18(1 0.6 d2) d20.31 10 3b =1.21K F 1.24K=2.69修正后分度圆直径d1d1 d1t 3 K K t d1=337mm模数m m d1Z1m=11.23mm4..按齿根弯曲强度设计[2]由式(10-5) 得弯曲强度的设计公式为:1)确定公式内的各计算数值表5 传动齿轮计算—3项目设计计算设计计算依设计计算结果电动冲击钻设计)设计计算对比计算结果,由齿面接触疲劳强度计算的模数 m 大于由齿根弯曲疲劳强度3 2 276 2.3 1061 3020.01667 6.17电动冲击钻设计计算的模数,由于齿轮模数m的大小主要取决于弯曲强度所决定的承载能力,仅与齿轮直径(即模数与齿轮的乘积)有关,可取由弯曲强度算得的模数6.17. 并就近圆整为标准值m=8mm按, 接触强度算得分度圆直径d1 337 mm,算出中心太阳轮的齿数: Z1 33742.125。