产品版本发布说明书(模板)
6000-W防火墙 WAF 2.5 版本说明说明书
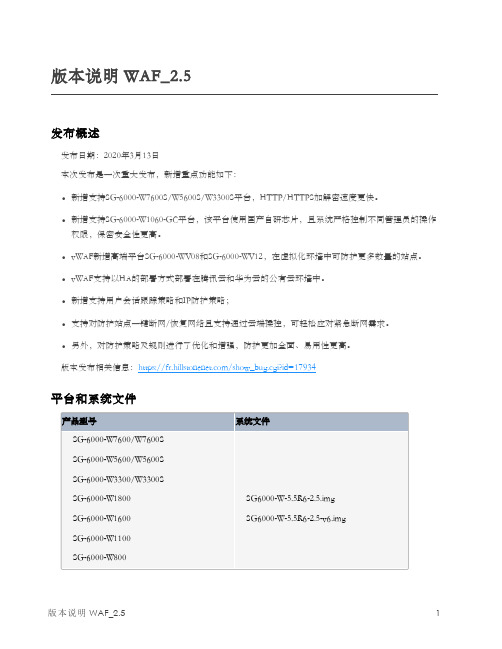
版本说明WAF_2.5发布概述发布日期:2020年3月13日本次发布是一次重大发布,新增重点功能如下:l新增支持SG-6000-W7600S/W5600S/W3300S平台,HTTP/HTTPS加解密速度更快。
l新增支持SG-6000-W1060-GC平台,该平台使用国产自研芯片,且系统严格控制不同管理员的操作权限,保密安全性更高。
l vWAF新增高端平台SG-6000-WV08和SG-6000-WV12,在虚拟化环境中可防护更多数量的站点。
l vWAF支持以HA的部署方式部署在腾讯云和华为云的公有云环境中。
l新增支持用户会话跟踪策略和IP防护策略;l支持对防护站点一键断网/恢复网络且支持通过云端操控,可轻松应对紧急断网需求。
l另外,对防护策略及规则进行了优化和增强,防护更加全面、易用性更高。
版本发布相关信息:https:///show_bug.cgi?id=17934平台和系统文件新增功能已解决问题已知问题浏览器兼容性以下浏览器通过了WebUI测试,推荐用户使用:l IE11l Chrome获得帮助Hillstone Web应用防火墙设备配有以下手册:请访问https://进行下载。
l《Web应用防火墙_WebUI用户手册》l《Web应用防火墙_CLI命令行手册》l《Web应用防火墙_硬件参考指南》l《Web应用防火墙典型配置案例手册》l《Web应用防火墙日志信息参考指南》l《Web应用防火墙SNMP私有MIB信息参考指南》l《vWAF_WebUI用户手册》l《vWAF_部署手册》l《WAF(W1060-GC)_WebUI用户手册》l《WAF(W1060-GC)_硬件参考指南》l《WAF(W1060-GC)_扩展模块参考指南》服务热线:400-828-6655官方网址:https://。
PHPCMS V9 产品说明书

PHPCMS V9 内容管理系统产品白皮书上海盛大网络发展有限公司2010年10月关于本文档PHPCMS V9是 PHPCMS 出品的一款基于PHP技术和AJAX技术的企业级网站内容管理系统,旨在帮助用户解决日益复杂与重要的Web内容的创建、维护、发布和应用。
本文档概要地介绍了PHPCMS V9各项特性与功能,是用户熟悉和掌握PHPCMS V9的良好参考资料。
读者对象本文档的读者为PHPCMS V9的使用者。
使用者应具备以下基础知识:熟悉Microsoft Internet Explorer或Mozilla Firefox的使用;熟悉Windows或Linux/Unix操作系统;熟悉Mysql数据库,及数据库相关知识 .熟悉HTML基本知识和相关的HTML页面制作方法。
用户反馈感谢您使用PHPCMS 开源软件的产品。
如果您发现本文档中有错误或者产品运行不正常,或者您对本文档有任何意见和建议,请及时与我们联系。
您的意见将是我们做版本修订时的重要依据。
联系地址上海盛大网络发展有限公司:北京市朝阳区西坝河西里18号正通时代创意中心6号楼邮编:100083电话:(010)52752688传真:(010)52752888商务QQ:1561683312,1115940351 Email:zhangqing.zack@目录1公司简介12产品概述产品简介5全新框架5门户级站群系统6多发布点 6 数据表分离6强大的内容模型6模版制作方便6银行级的安全保障措施7优秀的用户体验7千万级的数据承载能力7 3功能模块文章7专题10评论14投票15广告位17附件管理18全站搜索20会员系统21站群功能24多发布点27信息采集27数据备份29 SSO(单点登陆)30支付系统(在线充值)31 4技术架构4.1运行环境334.2架构介绍334.3安全机制34 5购买方式5.1购买流程345.2价格体系355.3购买说明361 公司介绍Phpcms网站管理系统是国内主流CMS系统之一,曾多次被新浪、网易、电脑报等IT媒体报道。
产品技术要求模板

医疗器械产品技术要求编号:医学影像处理软件120XX-XX-XX发布20XX-XX-XX实施成都数浪信息科技有限公司2医疗器械产品技术要求编号:医学影像通讯与存储系统1 产品型号规格及其划分说明1.1 软件型号规格XX1.2 发布版本产品发布版本:V1.0产品完整版本:V1.0.01.3 版本命名规则本公司软件产品命名规则为V X.Y.Z•X:为发行版本,表示重大增强类软件更新,初始值为1,当软件进行了重大增强类软件更新,该号码加1,Y和Z归0。
•Y:为子版本号,表示轻微增强类软件更新,初始值为0,当软件进行了轻微增强类软件更新,该号码加1,Z归0。
•Z:为修正版本号,表示纠正类软件更新,初始值为0,当软件进行了纠正类软件更新,该号码加1。
1.4 产品适用范围产品用于人体诊查图像、数据的管理、查看、传输和贮存,不包括自动诊断部分。
2 性能指标2.1 通用要求2.1.1 处理对象3针对医学影像(包括核磁、CT、超声、X光机、胃肠机、CR、DR、乳腺机、PET、DSA、牙片机、彩色多普勒超声、内窥镜、阴道镜、耳鼻喉镜、胃镜、肠镜等设备产生的图像)进行处理。
2.1.2 最大并发数系统运行的网络环境在100M/1000M局域网情况下,支持并发读取影像数据的最大用户数为50。
2.1.3 数据接口产品通过DICOM标准接口与医疗设备进行影像传输,支持通过标准HL7或数据库接口与第三方系统交互,支持模拟视频信号接口。
2.1.4 特定软硬件所需软件环境最低配置如下:4模块功能菜单子菜单描述备注UniwebViewer 功能按钮【上一个检查】快速打开上一个病人的检查影像。
【下一个检查】快速开启下一个病人的检查影像。
【窗口靠左半部显示】实现UniWeb Viewer视窗靠左半边显示。
【窗口靠右半部显示】实现UniWeb Viewer窗口靠右半边显示。
【窗口靠上半部显示】实现UniWeb Viewer视窗靠上半边显示。
CDMDI-100H产品技术说明书
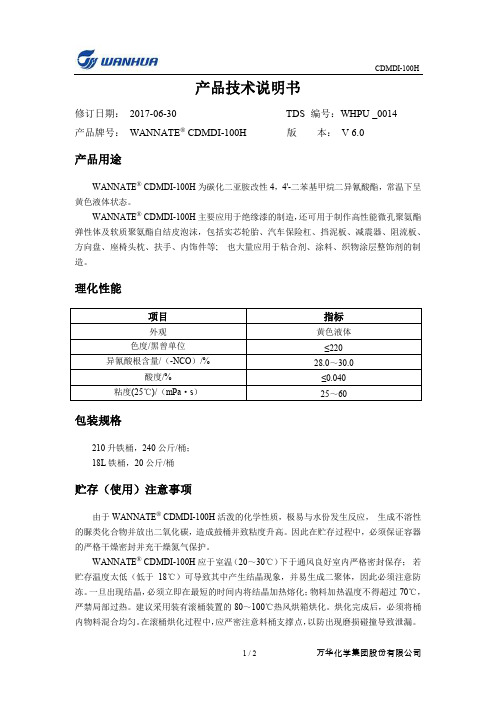
产品技术说明书修订日期:2017-06-30 TDS 编号:WHPU _0014产品牌号:WANNATE® CDMDI-100H 版本:V 6.0产品用途WANNATE® CDMDI-100H为碳化二亚胺改性4,4'-二苯基甲烷二异氰酸酯,常温下呈黄色液体状态。
WANNATE® CDMDI-100H主要应用于绝缘漆的制造,还可用于制作高性能微孔聚氨酯弹性体及软质聚氨酯自结皮泡沫,包括实芯轮胎、汽车保险杠、挡泥板、减震器、阻流板、方向盘、座椅头枕、扶手、内饰件等; 也大量应用于粘合剂、涂料、织物涂层整饰剂的制造。
理化性能包装规格210升铁桶,240公斤/桶;18L铁桶,20公斤/桶贮存(使用)注意事项由于WANNATE® CDMDI-100H活泼的化学性质,极易与水份发生反应,生成不溶性的脲类化合物并放出二氧化碳,造成鼓桶并致粘度升高。
因此在贮存过程中,必须保证容器的严格干燥密封并充干燥氮气保护。
WANNATE® CDMDI-100H应于室温(20~30℃)下于通风良好室内严格密封保存;若贮存温度太低(低于18℃)可导致其中产生结晶现象,并易生成二聚体,因此必须注意防冻。
一旦出现结晶,必须立即在最短的时间内将结晶加热熔化;物料加热温度不得超过70℃,严禁局部过热。
建议采用装有滚桶装置的80~100℃热风烘箱烘化。
烘化完成后,必须将桶内物料混合均匀。
在滚桶烘化过程中,应严密注意料桶支撑点,以防出现磨损碰撞导致泄漏。
应避免于50℃以上长期存放,以免生成不溶性固体并使粘度增加。
保质期自生产之日起,在按规定贮存条件贮存的情况下,WANNATE® CDMDI-100H的贮存期为6个月。
有关安全环保方面的信息,请参阅我公司产品的安全数据说明书或与我公司客户服务中心联系。
版本信息首次发布日期:2013年6月6日版本号:V 1.0第一次修订日期:2015年2月6日版本号:V 2.0 修订原因:产品精细化需要第二次修订日期:2015年5月5日版本号:V 3.0 修订原因:公司地址变更第三次修订日期:2015年8月18日版本号:V 4.0 修订原因:公司TDS版本统一第四次修订日期:2016年5月31日版本号:V 5.0 修订原因:产品执行标准变更第五次修订日期:2017年6月30日版本号:V 6.0 修订原因:公司VI、TDS模板变更本资料所给出的指标、数据乃基于我们现有的技术知识水平和实践经验,仅供参考。
百胜软件 BSERP BSERP-3.10-081020-DRP 用户说明书

1编号:BSERP-3.10-081020-DRP 产品名称:BSERP 子系统名称:DRP发布版本号: 3.10 版本制定日期:2008-10-20编制部门:产品研发部编制人员:郭晋芳1新增功能1.1单据中配码价格刷新1.1.1业务背景目前很多鞋业客户使用ERP产品。
他们在做单据的时候经常由于价格不能确定,但是单据先做出来审核掉,要求增加配码价格刷新功能,并且配码价格刷新后,明细数据中的价格也要做相应刷新。
1.1.2功能描述在配码输入页的快捷菜单中加入价格刷新。
若配码的价格刷新为单品或整单,则同时刷新普通明细价格。
1.1.3操作说明以商品进货单的配码输入页面为例,鼠标点右键弹出快捷菜单,可以看到新增加的“价格刷新”,选中后弹出价格刷新的界面,分单行、单品、整单3种方式。
见下面2张图所示。
1编号原则:BSERP-VNo-YYNNDD-XXX,其中BSERP:产品简称,VNo:产品基础版本号,YYNN:发布年月日,XXX:模块号1.1.4相关功能说明1.2分销中单据增加配码EXCEL导入功能1.2.1业务背景目前很多鞋客户使用ERP,配码不支持EXCEL导入,造成要重复录入一些单据,带来工作效率低的问题,希望增加配码EXCEL 导入功能。
1.2.2功能描述增加配码EXCEL导入功能。
1.2.3操作说明对于支持配码输入的业务单据,打开某业务单据,点击EXCEL,选择导入→配码,进行配码导入。
以批发销货订单为例:1.2.4相关功能说明带有配码输入的各业务单据。
1.3条码对照表增加EXCEL导入功能1.3.1业务背景客户为代理商,总部会定期新品发送给代理商,条码中为国际码,没有内部码,建议增加EXCEL导入功能。
1.3.2功能描述增加EXCEL导入功能。
1.3.3操作说明基础档案→商品信息→条码对照表,点击“导入”进行条码导入。
1.3.4相关功能说明1.4配码负库存控制没有控制在配码库存帐,增加配码负库存控制1.4.1业务背景目前系统中负库存控制只控制到明细的库存帐,没有控制到配码库存帐,这样在配码发货的时候要发的配码没有库存,而明细又满足库存条件的时候,单据是可以保存验收的。
山石云·格版本说明说明书

Version2.7.5TechDocs|版本说明《版本说明》包含了云·格2.6.2版本以及后续版本的版本说明,主要介绍了各版本的新增功能、已解决问题及已知问题等内容。
l v2.6.2l v2.6.2l v2.6.2.1l v2.6.2.3l v2.6.2.4l v2.6.2.6l v2.6.2.8l v2.6.2.9l v2.6.2.11l v2.6.2.12l v2.6.2.13l v2.7l v2.7l v2.7.0.2l v2.7.0.3l v2.7.1l v2.7.1l v2.7.2l v2.7.2l v2.7.3l v2.7.3l v2.7.3.1l v2.7.4l v2.7.5v2.6.2版本升级说明若需升级,请对照您的现有版本和目标版本,参考以下升级说明:系统要求VMware基础平台l CloudHive版本可部署于VMware vSphere5.5、6.0、6.5和6.7。
l各虚拟机模块资源规格要求如下:o vSOM虚拟机需要2个vCPU、2GB内存和12GB硬盘。
说明:当云•格管理资源大于64个物理服务器时,建议扩展vSOM的vCPU和内存规格以提高处理效率。
vCPU最大可扩展至4个,内存最大可扩展至8GB。
o vSCM虚拟机需要2个vCPU、6.5GB内存和17GB硬盘。
o vSSM虚拟机目前支持两种规格:vSSM-02和vSSM-04。
vSSM-02虚拟机需要2个vCPU、4GB内存(开启Jumbo Frame时,需要6G内存)和5GB硬盘。
vSSM-04虚拟机需要4个vCPU、8GB内存(开启Jumbo Frame时,需要10G内存)和5GB硬盘。
o vDSM虚拟机需要2个vCPU、4GB内存和5GB硬盘。
l需要提前预留1~5个全局VLAN ID,并把每台主机的数据接口连接的交换机接口都配置成可透传预留的全局VLAN ID的Trunk模式。
VMware NSX平台l已经安装VMware vCenter、VMware vSphere和VMware NSX(需用户自行购买),版本要求如下:o VMware vCenter:6.0、6.5和6.7o VMware ESXi:5.5、6.0、6.5和6.7o VMware NSX:6.2.x、6.3.x和6.4.x说明:要使云•格达到较高性能,需同时满足以下版本要求:o VMware vCenter:6.0Update2及以上、6.5或6.7o VMware ESXi:6.0Update2及以上、6.5或6.7o VMware NSX:6.3.2及以上或6.4.xl各虚拟机模块资源规格要求如下:o vSOM虚拟机需要2个vCPU、2GB内存和12GB硬盘。
产品版本发布说明书-模板V2.0.0
版本号:V2.0开
金睛数据反爬服务平台
版本发布说明书
中网数据(北京)股份有限公司
二零一七年三月
软件版本发布说明书
软件系统全称及英文全称
金睛数据反爬服务平台/GoldenEye
软件系统简称及英文简称
金睛/GOL
版本发布申请人
本次版本发布类型
□ 对内发布(发布给公司内部进行内部系统或回归测试。)
□ 对外发布(发布给市场、或客户使用)
基础版本(内部版本号)
发布时间
本次发布版本(内部版本号)
发布时间
外部版本(对外发布的版本号,与内部版本无关但是对应,一般由市场部来定义)
发布时间
新增功能说明
序号
功能需求编号
功能名称
描述
**是否通过测试
修复缺陷说明
序号
缺陷号
所属功能模块(或编号)
缺陷简要描述
**是否修正
**公司测试负责人(具体意见、签字、日期):
参考该项目的《测试报告》,见上面应提交的附件信息,给出下面的审批结论:
□测试通过
□测试基本通过,但是还需改进这些地方:
□测试不通过
负责人签字/日期:
**本项目直接负责上级(具体意见、签字、日期):
上级领导根据上面提交的所有附件的完备性,以及配置管理负责人和测试负责人的签署意见,给出最后的审批意见。
配置项最低提交物审计报告
[给出附件的正确名称,并指明在SVN中放置的具体地点]
**版本发布审批
**公司配置管理负责人(具体意见、签字、日期):
参考该项目的《配置项最低提交物审计报告》,见上面应提交的附件信息,给出下面的审批结论:
□满足最低提交物要求
软件产品规格说明书模板
软件产品规格说明书模板一、产品概述1.1产品名称:XXX软件1.2产品版本:V1.01.3产品功能:XXX软件是一款面向XXX领域的专业XXX软件,具有XXX、XXX、XXX等丰富的功能模块,可以满足用户在XXX方面的各种需求。
1.4产品定位:XXX软件定位于为XXX领域的XXX人士提供高效、便捷、全面的XXX解决方案,帮助用户提高工作效率,降低成本,提升竞争力。
1.5产品优势:XXX软件具有以下几个方面的优势:-具备XXX领域的专业知识和经验,能够为用户提供专业化的解决方案;-丰富的功能模块,可以满足不同用户的多样化需求;-便捷的操作界面,用户友好的交互体验;-稳定可靠的软件性能,保障用户工作的顺畅进行。
1.6产品目标:XXX软件的目标是成为XXX领域的领先品牌,为用户提供最优质的XXX解决方案,成为用户信赖的长期合作伙伴。
二、产品功能2.1 XXX功能模块:- XXX模块:实现XXX功能,XXX特点;- XXX模块:实现XXX功能,XXX特点;- XXX模块:实现XXX功能,XXX特点;2.2 XXX功能模块:- XXX模块:实现XXX功能,XXX特点;- XXX模块:实现XXX功能,XXX特点;- XXX模块:实现XXX功能,XXX特点;2.3 XXX功能模块:- XXX模块:实现XXX功能,XXX特点;- XXX模块:实现XXX功能,XXX特点;2.4 XXX功能模块:- XXX模块:实现XXX功能,XXX特点;- XXX模块:实现XXX功能,XXX特点;- XXX模块:实现XXX功能,XXX特点;2.5 XXX功能模块:- XXX模块:实现XXX功能,XXX特点;- XXX模块:实现XXX功能,XXX特点;- XXX模块:实现XXX功能,XXX特点;2.6 XXX功能模块:- XXX模块:实现XXX功能,XXX特点;- XXX模块:实现XXX功能,XXX特点;三、产品技术参数3.1软件平台:支持Windows、Mac、Linux等多个操作系统平台3.2开发语言:采用XXX语言开发3.3数据库:支持XXX数据库3.4硬件环境:最低配置为XXX,推荐配置为XXX3.5软件接口:支持XXX、XXX等接口3.6网络要求:需要联网使用,支持XXX网络四、产品使用说明4.1安装说明:用户可以通过XXX方式进行安装,XXX步骤。
产品公告.pdf_1700915024.0752504说明书
Product Announcement:This product is certificated to meet RoHS Directive and Lead-Free produced definition. Using approved critical components only is recommended when the situation to replace defective parts. Vender assumes no liability express or implied, arising out of any unauthorized modification of design or replacing non-RoHS parts. Service providers assume all liability.Qualified Repairability:Proper service and repair is important to the safe, reliable operation of all series products. The service providers recommended by vender should be aware of notices listed in this service manual in order to minimize the risk of personal injury when perform service procedures. Furthermore, the possible existed improper repairing method may damage equipment or products. It is recommended that service engineers should have repairing knowledge, experience, as well as appropriate product training per new model before performing the service procedures.NOTICE:! To avoid electrical shocks, the products should be connected to an authorized power cord, and turn off the master power switch each time before removing the AC power cord.! To prevent the product away from water or expose in extremely high humility environment. ! To ensure the continued reliability of this product, use only original manufacturer’s specified parts.! To ensure following safety repairing behavior, put the replaced part on the components side of PWBA, not solder side.! To ensure using a proper screwdriver, follow the torque and force listed in assembly and disassembly procedures to unscrew screws.! Using Lead-Free solder to well mounted the parts.! The fusion point of Lead-Free solder requested in the degree of 220°C.1. Important Safety Notice2. Exploded view diagram with list of items3. Wiring Connectivity DiagramInterface boardDPUp Down Down Down Downstream stream stream stream streamport port port port portUSB Board (23"&27'': 16:9 1920*1080LED Driver AC INPUT PANELPower BoardHDMI VGAFKKey Board4.1 Disassembly Procedures:Remove the monitor stand base:1. Place the monitor on a soft cloth or cushion.2. Press and hold the stand-release button.3. Lift the stand up and away from the monitor.Use a Philips-head screwdriver to remove 4pcsscrews for unlocking mechanisms. Remove DP cap.(No.1~4 screw size=M4x10; Torque=12±0.5kgfxcm)2323413124Wedge your fingers between the rear cover and the middle bezel on the corners of the top side of the monitor to release the rear cover, then use one hand to press the middle bezel, the other hand to pull up carefully the rear cover in order of arrow preference for unlocking mechanisms of rear cover..Lift the rear cover up carefully. Disconnect the USBFFC cable from the connector of the interface board, and then remove the rear cover.Tear off two pieces of the aluminium foils for unfixing the bracket chassis base .Use a Philips-head screwdriver to remove one screwfor unlocking the USB board unit, then release the USB board unit and put it aside.(No.1 screw size=M3x6, Torque=4±0.5kgfxcm)Unplug the panel power cable from the connector of the panel module, then release the function bytearing the tapes on the back of the cable, and then release the cable from the hooks of the middle bezel.1aluminum foilaluminum foilNecessary repair and test equipment:1. Philips-head screwdriver 2. Hex-head screwdriverTake away the bracket chassis module and then put the bracket chassis module on a protective cushion.Lift up the panel module for releasing the front bezelaway from the panel module.Use a proper tool to release the function key cablefrom the connector, then pull the function key cable high for releasing the function key cable.Use a Philips-head screwdriver to remove 2pcs screws for unlocking the bracket with the panel.Push the earing-lock, and disconnect the LVDS cable from the connector of LCD panel module.(No.1~2 screw size=M3x2.8, Torque=4~5kgfxcm)Use a Philips-head screwdriver to remove 13pcsscrews for unlocking the middle bezel with the unit. (No.1~11 screw size=M3x4, T orque=3~4kgfxcm; No.12~13 screw size=M1.6x1.7, T orque=0.6~1kgfxcm)210411138659721312Take away the .middle bezel then u se a Philips-headscrewdriver to remove 3pcs screws for unlocking the function key board with the middle bezelUse a Hex-head screwdriver to remove two screws for unlocking the D-Sub connector.(No.1~2 screws size=M3x8, Torque=6±0.5kgfxcm) ( No.3~4 screw size=M3x8, Torque=6~7kgfxcm)Use a Philips-head screwdriver to removescrews for unlocking the AC power outlet.twoRemove the interface board and power board from the bracket chassis module carefully, and disconnectall the cables.Remove the Mylar from the hooks of the bracket. Use a Philips-head screwdriver to remove six screws for unlocking the circuit board, release all the cables from the hooks.(No.1~5 screw size=M3x7.5, Torque=6±0.5kgfxcm; No. 6 screw size=M4x8, Torque=6±0.5kgfxcm)346251Take a mylar to insert the hooks of the bracket to cover the power board.Panel preparation: Examine the panel surfaceaccording to inspection criteria. Turn over the panel to place the screen faced down for later assembling.Turn over a power board and put the power boardinto the bracket chassis, locate the panel power cable into the hook of the bracket chassis.Place a bracket chassis base on a protective cushion.Take a interface board, connect a LVDS cable to the connector of the interface board, then connect the cable of the power board to the connector of the interface board. Turn over the interface board andlocate it into the bracket. Use a Philips-head screwdriver to tighten six screws for locking the power board and interface board.(No.1~5 screw size=M3x7.5, Torque=6±0.5kgfxcm; No.6 screw size=M4x8, Torque=6±0.5kgfxcm)34625Put the bracket chassis module on the back of LCDmodule, then lift up the panel with bracket and take1pcs front bezel to assemble with the panel module.1Use a Hex-head screwdriver to tighten two Hex Nutsfor locking the D-Sub connector.(No.1~2 screw size=M3x8, Torque=6±0.5kgfxcm)(No.3~4 screw size=M3x8, Torque=6~7kgfxcm;Use a Philips-head screwdriver to tighten two screws for locking the AC power outlet.2143Connect LVDS cable to the connector of panel. Usea Philips-head screwdriver to tighten 2pcs screws forlocking the bracket with the panel.(No.1~2 screw size=M3x2.8, Torque=4~5kgfxcm)Connect the function key cable to the connector ofthe board. Fix the function key cable with adhesivetapes on the back of the cable.Connect the panel lamp cable to the connector ofthe panel, locate the cable into the hooks of themiddle bezel, then stick 2pcs aluminum foil to fix thebracket chassis base as the picture below shown.aluminum foilTake a function key board and a middle bezel, thenfix the middle bezel with a fixture, and locate thefunction keyboard into the hooks of the bezel Use aPhilips-head screwdriver to tighten 3pcs screws forlocking the function key board with the middle bezel ,then assemble the middle bezel with the front bezel..(No.1~3 screw size=M2x2.4, Torque=0.8±0.2kgfxcmaluminum foil 312Adjust the middle bezel , then use a Philips-headscrewdriver to tighten 13pcs screws for locking themiddle bezel with the assembled unit.(No.1~11 screw size=M3x4, T orque=3~4kgfxcm;No.12~13 screw size=M1.6x1.7, T orque=0.6~1kgfxcm)210411138659721Use a Philips-head screwdriver to tighten 4pcsscrews for locking rear cover with the assembled unit.(No.1~4 screw size=M4x10; Torque=120.5kgfxcm)±Move the assembled rear cover close to the panel unit, then connect the USB FFC cable to the connector of interface board. Put down the rear cover and push the rear cover on the positions marked as the picture below shown formechanisms engagement.Take a USB board, a USB hub and a connect cable. Connect the cable to the USB board, then locate the USB board into the USB hub. Stick 1pcs aluminum foil on one side of the USB hub, then locate the USB unit into the hook of a rear cover. Use a Philips-head screwdriver to tighten one screw for locking the USB unit with the rear cover.(No.1 screw size=M3x6, Torque=4±0.5kgfxcm)2341L video signal to the monitor ift up the monitor, then provide power supply and a, then turn on the monitor for functionality check.Stick 2pcs labels on the specific positions as the picture below shown. Fit the two tabs on the upperpart of the stand into the grooves on the back of the monitor, and then press the stand so that themonitor mounting area snaps onto the stand.15. Trouble Shooting InstructionsWARNING: Before you begin any of the procedures in this section,follow the Safety instructions.Self-testYour monitor provides a self-test feature that allows you to check whether your monitor is functioning properly. If your monitor and computer are properly connected but the monitor screen remains dark, run the monitor self-test by performing the following steps:1.Turn off both your computer and the monitor.2.Unplug the video cable from the back of the computer.3.Turn on the monitor.The floating dialog box should appear on-screen (against a black background), if the monitor cannot sense a video signal and is working correctly. While in self-test mode, the power LED remains white. Also, depending upon the selected input, one of the dialogs shown below will continuously scroll through the screen.oror4.This box also appears during normal system operation, if the video cablebecomes disconnected or damaged.5.Turn Off your monitor and reconnect the video cable; then turn On both yourcomputer and the monitor.If your monitor screen remains blank after you use the previous procedure, check your video controller and computer, because your monitor is functioning properly.Built-in diagnosticsYour monitor has a built-in diagnostic tool that helps you determine if the screen abnormality you are experiencing is an inherent problem with your monitor, or with your computer and video card.NOTE: You can run the built-in diagnostics only when the video cable isunplugged and the monitor is in self-test mode.To run the built-in diagnostics:1.Ensure that the screen is clean (no dust particles on the surface of thescreen).2.Unplug the video cable(s) from the back of the computer or monitor. Themonitor then goes into the self-test mode.3.Press and hold Button 1 on the front panel for 5 seconds. A gray screenappears.4.Carefully inspect the screen for abnormalities.5.Press Button 1 on the front panel again. The color of the screen changes tored.6.Inspect the display for any abnormalities.7.Repeat steps 5 and 6 to inspect the display in green, blue, black, white, andtext screens.The test is complete when the text screen appears. To exit, press Button 1 again. If you do not detect any screen abnormalities upon using the built-in diagnostic tool, the monitor is functioning properly. Check the video card and computer.No Video/Power LED on No picture or nobrightness•Increase brightness & contrastcontrols via OSD.•Perform monitor self-test featurecheck.•Check for bent or broken pins in thevideo cable connector.•Run the built-in diagnostics.•Ensure that the corr ect input source isselected in the Input Source menu.Poor Focus Picture is fuzzy,blurry, or ghosting •Perform Auto Adjust via OSD.•Adjust the Phase and Pixel Clock controls via OSD.•Eliminate video extension cables.•Reset the monitor to factory settings.•Change the video resolution to the correct aspect ratio.Shaky/Jittery Video Wavy picture orfine movement•Perform Auto Adjust via OSD.•Adjust the Phase and Pixel Clockcontrols via OSD.•Reset the monitor to factory settings.•Check environmental factors.•Relocate the monitor and test inanother room.Missing Pixels LCD screen hasspots •Cycle p ower O n-Off.•Pixel that is permanently Off is a natural defect that can occur in LCD technology.•For more information on Dell Monitor Quality and Pixel Policy, see DellSupport site at: http:///support/monitors.Common problemsThe following table contains general information about common monitor problems you might encounter and the possible solutions:Common symptomsWhat youexperiencePossible solutionsNo Video/Power LED off No picture•Ensure that the video cableconnecting the monitor and thecomputer is properly connected andsecure.•Verify that the power outlet isfunctioning properly using any otherelectrical equipment.•Ensure that the power button ispressed fully.•Ensure that the corr ect input source isselected in the Input Source menu.Stuck-on Pixels LCD screen hasbright spots •Cycle p ower On-Off.•Pixel that is permanently off is a natural defect that can occur in LCD technology.•For more information on Dell Monitor Quality and Pixel Policy, see DellSupport site at: http:///support/monitors.Brightness Problems Picture too dim ortoo bright•Reset the monitor to factory settings.•Perform Auto Adjust via OSD.•Adjust brightness & contrast controlsvia OSD.Geometric Distortion Screen notcentered correctly•Reset the monitor to factory settings.•Perform Auto Adjust via OSD.•Adjust horizontal & vertical controlsvia OSD.•When using HDMI/DisplayPort input,the positioning adjustments are notavailable.Horizontal/ Vertical Lines Screen has one ormore lines•Reset the monitor to factory settings.•Perform Auto Adjust via OSD.•Adjust the Phase and Pixel Clockcontrols via OSD.•Perform monitor self-test featurecheck and determine if these lines arealso in self-test mode.•Check for bent or broken pins in thevideo cable connector.•Run the built-in diagnostics.•When using HDMI/DisplayPort input,the Pixel Clock and Phaseadjustments are not available.Synchronization Problems Screen isscrambled orappears torn•Reset the monitor to factory settings.•Perform Auto Adjust via OSD.•Adjust the Phase and Pixel Clockcontrols via OSD.•Perform monitor self-test featurecheck to determine if the scrambledscreen appears in self-test mode.•Check for bent or broken pins in thevideo cable connector.•Restart the computer in the safemode.Safety Related Issues Visible signs ofsmoke or sparks•Do not perform any troubleshootingsteps.•Contact D e ll i mmediately.Intermittent Problems Monitormalfunctions on &off•Ensure that the video cableconnecting the monitor to thecomputer is connected properly and issecure.•Reset the monitor to factory settings.•Perform monitor self-test featurecheck to determine if the intermittentproblem occurs in self-test mode.Missing Color Picture missingcolor •Perform monitor self-test feature check.•Ensure that the video cableconnecting the monitor to thecomputer is connected properly and is secure.•Check for bent or broken pins in the video cable connector.Product specific problemsCommon symptomsWhat youexperiencePossible solutionsScreen image is too small Image is centeredon screen, butdoes not fill entireviewing area•Check t he Aspect Ratio setting in theDisplay menu OSD.•Reset the monitor to factory settings.No Input Signal when user controls are pressed No picture, theLED light is white•Check the signal source. Ensure thecomputer is not in the power savingmode by moving the mouse or pressingany key on the keyboard.•Check whether the signal cable isplugged in properly. Re-plug the signalcable if necessary.•Reset the computer or video player.Wrong Color Picture color notgood •Change the settings of the Preset Modes in the Color menu OSDdepending on the application.•Adjust R/G/B value under Custom Color in Color menu OSD.•Run the built-in diagnostics.Image retention from a static image left on the monitor for a long period of time Faint shadowfrom the staticimage displayedappears on thescreen••Alternatively, use a dynamicallychanging screensaver.Set the screen to turn o after a fewminutes of screen idle time. These canbe adjusted in Windows Power Optionsor Mac Energy Saver setting.The picture does not fill the entire screen The picture cannotfill the height orwidth of the screen•Due to different video formats (aspectratio) of DVDs, the monitor may displayin full screen.•Run the built-in diagnostics.NOTE: When choosing HDMI/DisplayPort mode, the Auto Adjustfunction will not be available.Universal Serial Bus (USB) specific problemsCommon symptomsWhat youexperiencePossible solutionsUSB interface is not working USB peripheralsare not working•Check that your monitor is turned On.•Reconnect the upstream cable to yourcomputer.•Reconnect the USB peripherals(downstream connector).•Switch Off and then turn On themonitor again.•Reboot the computer.•Some USB devices like externalportable HDD require higher electriccurrent; connect the device directly tothe computer system.Super Speed USB 3.0 interface is slow Super Speed USB3.0 peripheralsworking slowly ornot working at all•Check that your computer is USB 3.0-capable.•Some computers have USB 3.0, USB2.0, and USB 1.1 ports. Ensure that thecorrect USB port is used.•Reconnect the upstream cable to yourcomputer.•Reconnect the USB peripherals(downstream connector).•Reboot the computer.Wireless USB peripherals stop working when a USB 3.0 device is plugged in Wireless USBperipheralsresponding slowlyor only working asthe distancebetween itself andits receiverdecreases•Increase the distance between theUSB 3.0 peripherals and the wirelessUSB receiver.•Position your wireless USB receiver asclose as possible to the wireless USBperipherals.•Use a USB-extender cable to positionthe wireless USB receiver as far awayas possible from the USB 3.0 port.。
山石智·感-智能内网威胁感知系统 版本说明说明书
Version3.4sBDS版本说明本手册包含了sBDS_3.0版本以及后续版本的版本说明,主要介绍了各版本的新增功能、已知问题等内容。
l版本说明sBDS3.4l版本说明sBDS3.3l版本说明sBDS3.2l版本说明sBDS3.1l版本说明sBDS3.0版本说明sBDS3.4发布概述发布日期:2021年9月30日本次发布主要增强威胁检测能力,支持Web攻击检测功能以及配置检测规则以增强Web攻击检测能力;支持对FTP/Telnet/POP3/IMAP/SMTP协议的密码进行密码强度检测,帮助用户进行密码管理,避免弱密码锁导致的安全隐患;并且支持360IOC的C2特征库以及优化了沙箱检测功能。
同时,在连接智源、系统管理等方面均有所增强。
版本发布相关信息:https:///show_bug.cgi?id=24767平台和系统文件新增功能已知问题版本说明sBDS3.3发布概述发布日期:2021年6月8日本次发布主要重点优化了WebUI页面风格,使用了全新样式;在威胁检测功能方面,针对不同检测引擎产生的威胁日志,优化外发的威胁日志信息内容,增加扫描次数、文件md5信息、黑名单IP/域名等内容;支持对MPLS协议报文、VXLAN协议报文的进行解析,并且对该报文中的威胁的检测;优化入侵检测特征库,目前已支持30000+条特征规则;针对sBDS设备以及威胁探针系列设备,优化与智源平台连接功能,自定义数据上送配置,以及支持发送NetFlow信息、MetaData信息至V2.0R4及以上版本的智源平台。
版本发布相关信息:https:///show_bug.cgi?id=23310平台和系统文件新增功能已知问题版本说明sBDS3.2发布概述发布日期:2021年3月8日本次发布主要优化了联动设备配置,包括增加通过HTTP和HTTPS方式与防火墙设备进行联动、支持同时与多个防火墙设备进行联动、支持连通性测试以及启用或禁用联动设备;优化了告警规则的联动设备配置、威胁事件管理分析签名处理的阻断配置;优化风险减缓措施展示页面,支持通过“阻断IP”和“阻断服务”列表查看下发给联动设备的所有联动策略信息;支持导入和导出内网资产。
- 1、下载文档前请自行甄别文档内容的完整性,平台不提供额外的编辑、内容补充、找答案等附加服务。
- 2、"仅部分预览"的文档,不可在线预览部分如存在完整性等问题,可反馈申请退款(可完整预览的文档不适用该条件!)。
- 3、如文档侵犯您的权益,请联系客服反馈,我们会尽快为您处理(人工客服工作时间:9:00-18:30)。
**公司配置管理负责人(具体意见、签字、日期):
参考该项目的《配置项最低提交物审计报告》,见上面应提交的附件信息,给出下面的审批结论:
□满足最低提交物要求
□不满足最体提交要求,还缺少这些文档:
负责人签字/日期:
**公司测试负责人(具体意见、签字、日期):
参考该项目的《测试报告》,见上面应提交的附件信息,给出下面的审批结论:
□测试通过
□测试基本通过,但是还需改进这些地方*本项目直接负责上级(具体意见、签字、日期):
上级领导根据上面提交的所有附件的完备性,以及配置管理负责人和测试负责人的签署意见,给出最后的审批意见。
□同意版本发布(上述要求都满足,所以满足版本发布要求)
□同意版本紧急发布(虽然上述要求不满足,但是因为市场要求或别的更重要的原因,必须紧急发布新的版本。需要承担一定的质量风险)
□不同意版本发布
负责人签字/日期:
注:如果在“本次版本发布类型”选择了“对外发布”版本,则标记了“**”的输入项必须由有关负责人进行录入和签署;其他所有项都为必填项,所以不再用另外的标记注明。
注:如果质量组没有参与该项目的系统测试,必须在此说明项目组出具的交叉测试报告(及缺陷分析报告,可以含在交叉测试报告当中);如果质量组有参与该项目的系统测试,必须在此说明质量组出具的系统测试报告(及缺陷分析报告,可以含在系统测试报告当中)。
配置项最低提交物审计报告
[给出附件的正确名称,并指明在SVN中放置的具体地点]
发布时间
新增功能说明
序号
功能需求编号
功能名称
描述
**是否通过测试
修复缺陷说明
序号
缺陷号
所属功能模块(或编号)
缺陷简要描述
**是否修正
安装手册(或系统部署维护手册)附件
[给出附件的正确名称,并指明在SVN中放置的具体地点]
**测试报告附件
(包含缺陷分析报告)
[给出附件的正确名称,并指明在SVN中放置的具体地点]
<XX系统>
产品版本发布说明书
软件版本发布说明书
软件系统全称及英文全称
软件系统简称及英文简称
版本发布申请人
本次版本发布类型
□ 对内发布(发布给公司内部进行内部系统或回归测试。)
□ 对外发布(发布给市场、或客户使用)
基础版本(内部版本号)
发布时间
本次发布版本(内部版本号)
发布时间
外部版本(对外发布的版本号,与内部版本无关但是对应,一般由市场部来定义)