阿姆瑞特防火墙常用操作手册
防火墙操作

系统设置
路由:当网络情况涉及到两个或两个以上路由路径时,需 要进行多个出口路由配置将采用该路由规则设置(详细配 置请参照第三章,案例三); 时间控制:各条安全规则设置生效的时间段,默认情况下 是所有时段; 继续处理:检查下一条安全规则,若遇到“终止”结束检 , 查; 进站:当通过防火墙的IP包中的发送主机IP为防火墙外网 地址,接收主机IP为防火墙内网地址,则该IP包处于进站状 态; 出站:当通过防火墙的IP包中的发送主机IP为防火墙内网 地址,接收主机IP为防火墙外网地址,则该IP包处于出站状 态.
谢谢!
谢谢!!
系统设置
动态规则 动态规则是根据用户网络安全的实际情况由IDS动 态生成的,无需用户手动设置。
系统设置
统计规则
系统设置
文本过滤 用于对某些端口的关键字的过滤
系统设置
URL过滤 用于过滤URL中的关键字
系统设置
模块设置
模块设置分为《功能模块》以及《防御模块》。选 中该模块时,防火墙系统会自动启用该模块功能。 URL过滤:完成内核层的URL过滤功能。 文本过滤:完成内核层的文本过滤功能。 流量控制:完成流量控制功能。 管理限制:防火墙通过“8887”端口管理。启用 “管理限制”功能后,平时该管理端口处于关闭状态, 管理时,需用BDKEY端口控制软件打开。
打开端口
三、进入防火墙设置管理界面 选择添加的防火墙管理钥匙,点击“防火墙” 菜单中的“管理”项,或者点击“”按钮, BDKEY自动启动IE浏览器,打开防火墙设置管 理界面,用户即可注册进入防火墙。
打开端口
系统设置
系统设置
一、系统设置 展开系统设置菜单,内容包括: 网络设置 密码修改 登陆尝试 系统升级 联动设置 双极热备 关闭系统 路由管理 域名设置 时钟设置 管理限制 系统设置
阿姆瑞特防火墙常用操作手册

阿姆瑞特防火墙常用操作手册
一、阿姆瑞特防火墙控制台安装
1、打开阿姆瑞特防火墙安装包,找到“FineTune”文件夹,运行Setup.exe,安装管理控制
台。
2、启动控制台,输入控制台账号、密码:“admin、manager”。
进入后创建一个防火墙控制
账号。
3、点击确认,将退出控制台。
再用创建的防火墙控制账号,登录控制台。
4、在下图中出现的界面,在窗口上点击鼠标直至完成,出现控制台界面。
4、导入防火墙。
选择创建的防火前路径
5、连接防火墙。
连接防火墙后,先下载防护墙配置
这样防火墙的上传就完成了。
Fortinet FortiGate 与 FireMon 部署指南说明书

DEPLOYMENT GUIDEFortinet FortiGate and FireMonFortinet FortiGate and FireMonOverview . . . . . . . . . . . . . . . . . . . . . . . . . . . . . . . . . . . . . . . . . . . . . . . . . 3 Deployment Prerequisites (3)FireMon Configuration (4)Fortinet Configuration (7)Summary . . . . . . . . . . . . . . . . . . . . . . . . . . . . . . . . . . . . . . . . . . . . . . . . .12FireMon Configuration1. From the Administration screen, click Device.2. From the Devices screen, click Create > Fortinet.3. Choose FortiGate Firewall or FortiGate Firewall VDOM if your deployment has VDOMs.4. For VDOMs, be sure to input the correct VDOM name in the device property section.5. Under General Properties, give the device a name and enter the IP Address.6. Under Device Settings, enter the password for the Admin user then re-enter the password.7. Click Save when done.8. Please note: The Admin user will need to be configured with the super_admin profile on the FortiGate.The next screen should look like this.If you plan on using Policy Optimizer, make sure to check the box to enable the License.9. Then go to Workflow.10. Under Policy Planner, click Create > Access Request.11. Give it a Name, then click Save.The Workflow screen shout now look like the image below.12. Do the same for the Policy Optimizer configuration.Note: If adding FortiGate firewalls via FortiManager, do this from Devices > Management Stations. The Admin user will need access to all VDOMs enabled.Fortinet Configuration1. Ensure all Firewall rules are set to Log All Sessions.If not, enable this for each rule under Logging Options.2. Configure FortiGate to send Syslog to the FireMon IP address.3. Under Log & Report, click Log Settings.4. Enable Send Logs to Syslog.5. Enter the IP Address or FQDN of the FireMon server.6. Select the desired Log Settings.7. Click Save.Note: If the primary Syslog is already configured, you can use the CLI to configure additional Syslog servers.8. The configuration is now complete. Go back to the Devices screen in the FireMon interface. It should look like the imagebelow once logs are received and the configuration has been retrieved.9. You can initiate a manual retrieval of the configuration by clicking the box on the far right.Security Manager Dashboard Views.Security Manager Policy Views11Security Manager Security & Compliance ViewsCopyright © 2021 Fortinet, Inc. All rights reserved. Fortinet , FortiGate , FortiCare and FortiGuard , and certain other marks are registered trademarks of Fortinet, Inc., and other Fortinet names herein may also be registered and/or common law trademarks of Fortinet. All other product or company names may be trademarks of their respective owners. Performance and other metrics contained herein were attained in internal lab tests under ideal conditions, and actual performance and other results may vary. Network variables, different network environments and other conditions may affect performance results. Nothing herein represents any binding commitment by Fortinet, and Fortinet disclaims all warranties, whether express or implied, except to the extent Fortinet enters a binding written contract, signed by Fortinet’s General Counsel, with a purchaser that expressly warrants that the identified product will perform according to certain expressly-identified performance metrics and, in such event, only the specific performance metrics expressly identified in such binding written contract shall be binding on Fortinet. For absolute clarity, any such warranty will be limited to performance in the same ideal conditions as in Fortinet’s internal lab tests. Fortinet disclaims in full any covenants, representations, and guarantees pursuant hereto, whether express or implied. Fortinet reserves the right to change, modify, transfer, or otherwise revise this publication without notice, and the most current version of the publication shall be applicable.October 7, 2021 3:55 PMMacintosh HD:Users:austin:Dropbox (Red Rider):Clients:Fortinet:Solution Brief Updates:Working Group 5:DG-Fortinet-and-Firemon-102021:DG-Fortinet-and-Firemon-10202191828-A-0-EN Security Manager Security & Change ViewsSummaryFireMon helps keep Fortinet firewalls running smoothly with a complete configuration management solution, including fullsupport for the FortiGate line of network security platforms and appliances. FireMon monitors each appliance, capturing event and traffic logs in real time. All change events trigger a full configuration capture including detailed change history and a full audit trail of operations. Fortinet devices can be monitored directly or indirectly if another event collection system is in place.Solution Guide: https:///content/dam/fortinet/assets/alliances/firemon-integration-brief-for-fortinet.pdfFortiGate 5.6 Handbook: https:///uploaded/files/3999/fortios-handbook-56.pdf。
阿姆瑞特防火墙初始配置文档

一、阿姆瑞特防火墙的初始配置。
1.将防火墙的串口和计算机的串口通过串口电缆相连接。
2.在PC机上进入到WINDOWS的界面,打开“程序”→“附件”→“通讯”→“超级终端”。
3.对我们建立的超级终端进行描述,在“name”选项中为这个连接起一个名字,例如:“firewall”,在“icon”中为我们建立的这个连接选择一个图标。
点击”ok”确定我们建立的连接。
4.单击“ok”后,出现“connect to”的窗口,在“connect using”中选择使用的pc机上的串口。
有的pc机上有多个串口,com1代表使用的是pc机上的串口一。
选择相应的串口后点击“ok”4.设置串口的属性。
在“bits per second”选项中选择“9600”,”Flow Control”选择“none”,然后点击”ok”5.打开阿姆瑞特防火墙电源,在出现启动界面时按任意键,将进入启动菜单。
如果防火墙已经启动,请重新开启电源。
会出现阿姆瑞特防火墙串口配置界面,6.选择2“Setup Base Configuration”进行防火墙的基本设置,在这个设置中可以配置防火墙接口的IP地址。
例如选择“INT:Fast Ethernet interface 10/100”接口后回车。
7.进入INT端口的设置,输入IP地址:192.168.0.1,Netmask:255.255.255.0(#是光标提示符),输入完毕后,按CTRL+S键保存。
8. 输入ip地址和子网掩码保存后,系统提示是否重新启动内核,输入字母“y”进行确认。
9.系统重新启动后,可以看到防火墙每个接口的情况,我们可以看到INT接口已经有了我们刚才配置的IP地址。
10.在pc机上通过命令行ping 防火墙,可以ping通。
说明网络设置、物理连线都没有问题。
就可以安装防火墙管理器,对防火墙进行管理。
二、管理器的安装。
1.将随防火墙配置的软件放在host的光驱中,光驱会自动运行,出现安装选项。
ASA防火墙新版本8.4-工程实用手册

ASA防火墙新版本8.4-工程实用手册注意,现在思科ASA防火墙已经升级到8.4,从8.3开始很多配置都有颠覆性的不同,特别是NAT配置很不一样,使用了object /object-group的新方式这里为了大家工程实施起来方便,特别总结了如下NAT应用,希望能够帮助大家。
ASA 8.3 NAT 转化新语法:Topology :L100 200.0.9.10 R1 ---.2----192.168.1.0----.1---ASA----.1----10.10.10.0---.2---R2 L100 100.1.64.1The order of operations works as configured by each section. In order:1. Manual Nat2. Auto Nat3. After AutoDynamic NAT/PAT场景一:所有内网流量访问外网时都转换为接口的公网地址,此环境适用于仅有一个公网地址的小型办公室。
Object network inside-outside-allSubnet 0.0.0.0 0.0.0.0Nat (inside,outside) dynamic interface原有的语法nat (inside) 1 0 0 global (outside) 1 interface验证:ciscoasa(config)# show nat detailAuto NAT Policies (Section 2)1 (inside) to (outside) source dynamic inside-outside-all interfaceSource - Origin: 0.0.0.0/0, Translated: 10.10.10.1/24ciscoasa(config)# show xlate1 in use, 4 most usedFlags: D - DNS, i - dynamic, r - portmap, s - static, I - identity, T - twiceTCP PAT from inside:192.168.1.2/18523 to outside:10.10.10.1/18124 flags ri idle 0:00:20 timeout 0:00:30ciscoasa(config)# show conn1 in use, 1 most usedTCP outside 100.1.64.1:23 inside 192.168.1.2:18523, idle 0:00:00, bytes 117, flags UIO 场景二所有内网流量访问外网时都转换为特定的公网地址,此环境适用于的小型办公室或分支办公室。
防火墙操作手册
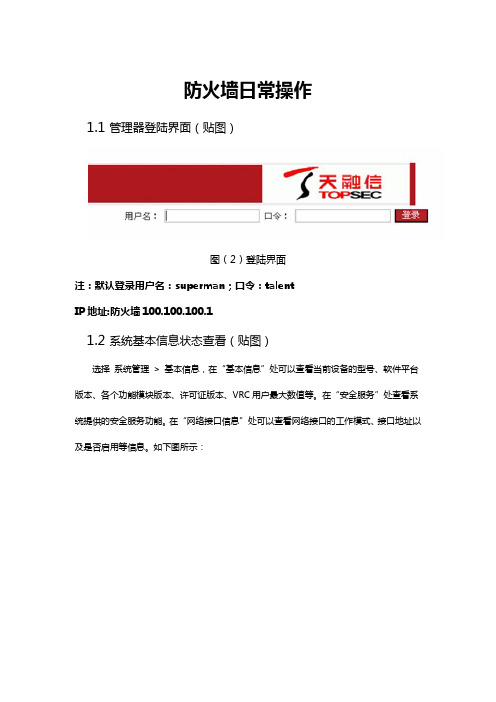
防火墙日常操作1.1 管理器登陆界面(贴图)图(2)登陆界面注:默认登录用户名:superman;口令:talentIP地址:防火墙100.100.100.11.2 系统基本信息状态查看(贴图)选择系统管理> 基本信息,在“基本信息”处可以查看当前设备的型号、软件平台版本、各个功能模块版本、许可证版本、VRC用户最大数值等。
在“安全服务”处查看系统提供的安全服务功能。
在“网络接口信息”处可以查看网络接口的工作模式、接口地址以及是否启用等信息。
如下图所示:图(3)基本信息1.3 运行信息查看运行信息指的是当前系统CPU、内存等系统资源的占用情况以及当前通过防火墙建立的连接信息。
1)选择系统管理> 运行信息,用户可以在“系统状态”页签查看设备的系统日期、设备当前CPU占用情况、内存的使用情况以及当前系统不间断运行的时间。
2)在“当前连接”页签可以查看当前(用户访问此菜单时刻)通过防火墙建立的连接信息。
每一条连接信息包括如下内容:当前连接正在建立还是已经拆除连接、当前连接所使用的协议、连接的源/目的地址和端口号、该连接是否应用源NAT/目的NAT 策略、该连接建立过程中源地址发送的数据报文个数、目的地址发送的数据报文的个数等信息。
当连接数量较多时,可以在“条数”处选择一次查看多少条连接信息:可选30、100或1000。
也可以通过点击“上一页”和“下一页”翻页查看信息。
点击“刷新”按钮可以在界面显示最新的连接信息。
在“源IP”、“源端口”、“目的IP”、“目的端口”和“协议”处可以输入一个或多个查询参数,并点击“查找”按钮,则在下面会显示查询的结果信息。
当输入多个查询参数时,同时满足这些条件的连接信息才会显示在列表中。
也可以点击某条连接信息对应的删除图标删除该条连接信息。
点击“清空连接表”一次性删除所有的连接信息。
点击“端口->服务名”按钮,可以实现对目的端口的识别功能,对常见知名端口翻译为对应的协议,如监控中看到TCP:80的可自动识别为HTTP协议。
阿姆瑞特 QoS 用户手册说明书

阿姆瑞特流量分析整形产品用户手册北京阿姆瑞特软件有限公司2018年11月版目录第一部分:前言 (4)声明 (4)产品应用差异说明 (4)意见反馈 (4)第二部分:网络规划 (5)产品亮点与应用 (5)产品规格 (6)第三部分:网络部署 (7)网桥接入 (7)基本配置 (7)流量控制配置 (10)连接数控制配置 (16)http管控配置 (18)网关接入 (20)基本配置 (21)接口设置 (23)策略路由设置 (25)负载均衡设置 (27)端口映射设置 (29)DNS管控配置 (30)DHCP配置 (33)PPPOE认证配置 (34)Web认证配置 (45)应用分流配置 (48)PPPOE代拨网关 (51)研发背景及应用场景 (51)正确理解PPPOE代拨 (51)PPPOE代拨的基本配置: (52)代拨路由策略 (52)代拨DNS重定向策略 (53)游戏快线 (53)基本配置 (54)旁路接入 (54)基本配置 (54)第四部分:应用商店 (56)DDNS服务 (57)共享检测 (58)第五部分:设备维护 (59)维护基本原则 (59)如何获取技术支持 (60)接口维护 (61)安全维护 (63)配置备份 (65)第一部分:前言声明版权:本文的内容是阿姆瑞特流量分析整形产品用户手册。
文中的资料、说明等相关内容归北京阿姆瑞特软件有限公司所有。
本文中的任何部分未经北京阿姆瑞特软件有限公司(以下简称“阿姆瑞特”)许可,不得转印、影印或复印、发行。
修订:北京阿姆瑞特软件有限公司保留不预先通知客户而修改本文档所含内容的权利。
责任:北京阿姆瑞特软件有限公司对于您的使用或不能使用本产品而发生的任何损害不负任何赔偿责任,包括但不限于直接的、间接的、附加的个人损害或商业损失或任何其它损失。
产品应用差异说明本文挡的开发过程是基于阿姆瑞特QoS AmFlow 10.00.00。
本文档描述的部分内容可能跟您购买的设备有差异,其原因可能是您购买的设备版本低于或者高于阿姆瑞特QoS AmFlow 10.00.00。
AngellPRO防火墙产品手册

专注安全追求卓越AngellPRO防火墙产品手册西安安智科技有限公司地址:西安雁翔路99号交大科技园博源大厦二层电话:(+86-29) 83399616/17/18/19传真:(+86-29) 83399620E-mail:services@版权声明1. 权利归属本文档中提及的AngellPRO的所有权和运作权归西安安智科技有限公司(以下简称安智科技),安智科技提供的服务将完全按照其发布的版权声明以及相关的操作规则严格执行。
AngellPRO是安智科技的商标。
因AngellPRO所产生的一切知识产权归安智科技,并受版权、商标、标签和其他财产所有权法律的保护。
2. 其它产品说明本文档中所提及的所有其他名称是各自所有者的品牌、 产品、商标或注册商标。
3. 授权声明任何组织和个人对安智科技产品的拥有、使用以及复制都必须经过安智科技书面的有效授权。
4. 服务修订安智科技保留可能更改本文档中所包含的信息而不需预先告知用户的权利;如果该信息非从安智科技接收,它们将有被更改或变更的可能,安智科技不需对用户或第三方负责。
5. 特别提示用户对该信息的使用承担风险,并须在"原封不动"条件下使用。
安智科技对此不作任何类型的担保,不论是明确的或隐含的,包括商业性和某个特定目的适应性的保证。
6. 有限责任安智科技仅就产品信息预先说明的范围承担责任,安智科技对引起使用或传播的任何损害(包括直接的、间接的、偶然的、附加的、重要的或特殊的以及继起的损害)不负任何责任(即使已经建议安智科技这些损害的可能性)。
7. 管理用户对信息和服务的使用是根据所有适用于安智科技的国家法律、地方法律和国际法律标准的。
8. 目的本声明仅为文档信息的使用而发表,非为广告或产品背书目的。
9. 服务安智科技在产品发布前完全检查过对 Internet 资源的链接和地址,但是 Internet 不断变化的性质使安智科技不能保证资源内容的连续性或存在性。
- 1、下载文档前请自行甄别文档内容的完整性,平台不提供额外的编辑、内容补充、找答案等附加服务。
- 2、"仅部分预览"的文档,不可在线预览部分如存在完整性等问题,可反馈申请退款(可完整预览的文档不适用该条件!)。
- 3、如文档侵犯您的权益,请联系客服反馈,我们会尽快为您处理(人工客服工作时间:9:00-18:30)。
阿姆瑞特防火墙常用操作手册
一、阿姆瑞特防火墙控制台安装
1、打开阿姆瑞特防火墙安装包,找到“FineTune”文件夹,运行Setup.exe,安装管理控制
台。
2、启动控制台,输入控制台账号、密码:“admin、manager”。
进入后创建一个防火墙控制
账号。
3、点击确认,将退出控制台。
再用创建的防火墙控制账号,登录控制台。
4、在下图中出现的界面,在窗口上点击鼠标直至完成,出现控制台界面。
4、导入防火墙。
选择创建的防火前路径
5、连接防火墙。
连接防火墙后,先下载防护墙配置
这样防火墙的上传就完成了。