
东芝笔记本维修手册Satellite_A10_Series(英文)
FIELD REPLACEABLE UNIT DOCUMENTATIONSatellite TMA10 Seriesnot connected to the unit and the environment in which you are working on is protected fromElectro-Static Discharge(ESD).A10 SeriesBATTERY PACK REMOVAL1. Turn the computer upside down as shown.2. Slide the battery release lever in the direction of the arrow.3. Lift out the battery pack assy .HDD REMOVAL1. Turn the computer upside down.2. Remove two M2.5x16 black flat head screws securing HDD slot cover and pull out the cover ..4. Separate the battery pack from the battery cover.OPTIONAL PC CARD REMOVAL 1. Press the eject button of the PC Card you want to remove.2. Press the extended eject button to pop the PC card out slightly.3. Grasp the PC Card and pull it outNOTE : Before removing any PCMCIA device, make sure it is “STOPPED” in the PC Card Manager.A10 SeriesBattery packBattery cover6. Remove four M3x4 brass flat head screws securing the HDD bracket to the drive.4. Slowly spread out the memory clips and pull the memory module out of the connector on a 45 degree angle.3. Remove one M2.5x5 black flat head screw securing the HDD assembly.4. Grasp the HDD bracket handle and pull to disconnect the HDD assembly.5. Lift the HDD assembly out of the HDD bay.MEMORY MODULE REMOV AL1. Turn the computer upside down.2. Remove one M2.5x4 black flat head screwsecuring the memory cover.3. Lift out the cover .A10 SeriesM2.5x5 black flat head screwHDD assyHDD bracket handleM3x4 brass flat head screwsM2.5x4 black flat head screwMemory moduleMemory clipsWIRELESS LAN CARD REMOVAL1. Turn the computer upside down.2. Remove one M2.5x4 black flat head screw securing the Mini PCI slot cover.3. Lift out the PCI slot cover .4. Peel off the glass tapesecuring the mini coax cables.5. Disconnect thewhite mini coax cable from main connector and the black mini coax cable from aux connector.6. Gently press out the Mini PCI slot clips and pull theMini PCI card out of the connector on a 30 degree angle.MODEM BOARD REMOVAL1. Remove one M2.5x4 black flat head screw securing the modem slot cover.2. Insert your finger nail or the case separator into the notched side of the cover and lift up to release the latch securing the modem slot cover.3. Remove two M2x4 black screws securing the modem board.4. Gently lift up the modem board to disconnect it from the system board and disconnect the MJ harness from JP1 on the modem board.A10 SeriesMini PCI cardPCI clipsWhite mini coax cable Black mini coax cableModem slot cover M2.5x4 black flat head screws ModemMJ Harness1. Turn the computer upside down.2. Remove two M2.5x5 black flat head screws and one M2.5x16 black flat head screw securing the modem cover.3. Remove the modem cover .COOLING MODULE REMOVALCOOLING MODULE REMOVAL1. Disconnect the fan cable fromPJ8770 on the system board.2. Remove two M2.5x5 black flat head screws securing the fan.3. Lift out the fan..2. Lift out the CPU .A10 SeriesM2.5x5 black flat head screwsCooling module brace Cooling module1. Remove M2x6 brass screws securing the cooling module brace.2. Lift out the cooling module brace .3. Lift out the cooling module .CPUClose PJ8770FanFan cable1. Open the display panel.2. Using the case separator, unlatch the keyboard holder as shown above.KEYBOARD REMOVAL3. Remove two M2.5x2.8 black flat head screwssecuring the keyboard.4. Remove one M2.5x2.8 black flat head screw securing the keyboard holder plate.5. Lift out the keyboard holder plate .6. Lift out the keyboard and set it on the palm rest.7. Remove one M2.5x8 black flat head screw securing the keyboard support plate.8. Lift out the keyboard support plate .KEYBOARD REMOVALKeyboard9. Lay the keyboard as shown above.10. Disconnect the keyboard cable from PJ3200 on the system board.11. Lift out the keyboard .A10 SeriesKeyboard holderKeyboard holder plateM2.5x4 black flat head screwM2.5x8 black flat head screwKeyboard support plateKeyboard cableA10 SeriesCD-R/W/DVD-ROM DRIVE REMOVAL1. Turn the computer upside down.2. Remove one M2.5x5 black flat head screw securing the CD-R/W/DVD-ROM drive.drive bay.5. Remove two M2x1.7 brass screws securing the CD-R/W/DVD-ROM drive bracket and lift out the bracket6. Remove one M2x3 silver screw securing the side bracket and lift out the bracket.CD-R/W/DVD-ROM drive CD-R/W/DVD-ROM DRIVE REMOVAL1. Turn the computer upside down and remove the following twenty screws:- 7 M2.5x5 black flat head screws - 13 M2.5x16 black flat head screwsCD-R/W/DVD-ROM driveM2.5x5 black flat head screw M2x1.7 brass screwsM2x3 silver screwSide bracketCD-RW/DVD drive bracketM2.5x16 black flat head screwsA10 SeriesTOP COVER REMOVAL1. Disconnect the LCD/FL cable from PJ5600 on the system board.2. Lift up the plastic insulator covering the Left/Right speaker cables and disconnect the Left/Rightspeaker cables from PJ6000/PJ6001.3. Remove one M2.5x8 black flat head screw securingtop cover and lift out the top cover assembly .TOUCH PAD ASSEMBLY REMOVAL1. Disconnect the touch pad cable from PJ3201 on the system board.2. Remove one M2.5x5 black flat head screw securingthe touch pad assembly.3. Lift out the touch pad assembly .PJ2004Touch pad assembly cableBAT CON HOLDER REMOVAL 1. Remove two M2.5x8 black flat head screw securing the bat con holder.2. Lift out the bat con holder from the system board.M2.5x8 black flat head screwsSYSTEM BOARD REMOVAL1. Peel off the glass tape securing the RTC battery cable.2. Remove two M2.5x5 black flat head screw securing the system board.3. Lift up the system boardfrom the right hand side and lift it out.A10 SeriesDC-IN JACK/RTC BATTERY REMOVAL1. Peel off the glass tape securing the DC-In jack/ RTC battery harness.2. Disconnect the DC-In jack harness from PJ8800 on the system board.3. Disconnect the RTC battery harness fromPJ8790 on the system board .RTC battery harnessDC-InJack harnessPJ8800Glass tapeFL INVERTER AND 14” LCD REMOV ALFIELD REPLACEABLE UNIT DOCUMENTATIONSatellite TMTOSHIBATough Enough for Today’s World14” DISPLAY MASK REMOVAL1. Removedisplay assembly using a pair of fine-tipped tweezers.2. Remove two M2.5x6 black flat head screws securing the display mask.3. There are 24 latches securing the display mask .Carefully insert your fingers between the mask and the LCD panel and pry open the latches starting from the bottom six latches , to the five latches on the right andleft sides , ending with the six top latches .1. Remove one M2x4 brass flat head screwsecuring the FL inverter board.2. Carefully lift up the FL inverter board anddisconnect the LCD /FL cable from CN1 and the FL cable from CN2..3. Remove four mask seals to expose four screws securing the LCD module assembly.4. Remove four M2X4 brass flat head screws securing the LCD module assembly.5. Carefully rotate out the top of the LCD module enough to access the display cable.6. Peel off the tape securing the LCD/FL cable and disconnect the cable.7. Remove four M2x3 silver flat head screws securing the left/right LCD brackets.A10 SeriesLatch。
东芝笔记本电脑维修手册 Tecra_A1_Series
FIELD REPLACEABLE UNIT DOCUMENTATIONTecra TMnot connected to the unit and the environment in which you are working on is protected fromElectro-Static Discharge(ESD).A1 SeriesBATTERY PACK REMOVAL1. Turn the computer upside down as shown.2. Slide the battery release lever in the direction of the arrow.3. Lift out the battery pack assy .HDD REMOVAL1. Turn the computer upside down.2. Remove two M2.5x16 black flat head screws securing HDD slot cover and pull out the cover ..4. Separate the battery pack from the battery cover.OPTIONAL PC CARD REMOVAL 1. Press the eject button of the PC Card you want to remove.2. Press the extended eject button to pop the PC card out slightly.3. Grasp the PC Card and pull it outNOTE: Before removing any PCMCIA device, make sure it is “STOPPED” in the PC Card Manager.Battery packBattery cover A1 Series6. Remove four M3x4 brass flat head screws securing the HDD bracket to the drive.4. Slowly spread out the memory clips and pull the memory module out of the connector on a 45 degree angle.3. Remove one M2.5x5 black flat head screw securing the HDD assembly.4. Grasp the HDD bracket handle and pull to disconnect the HDD assembly.5. Lift the HDD assembly out of the HDD bay.MEMORY MODULE REMOVAL1. Turn the computer upside down.2. Remove one M2.5x4 black flat head screwsecuring the memory cover.3. Lift out thecover .M2.5x5 black flat head screwHDD assyHDD bracket handleM3x4 brass flat head screwsM2.5x4 black flat head screwMemory moduleMemory clipsA1 SeriesWIRELESS LAN CARD REMOVAL1. Turn the computer upside down.2. Remove one M2.5x4 black flat head screw securing the Mini PCI slot cover.3. Lift out the PCI slot cover .4. Peel off the glass tape securing the mini coax cables.5. Disconnect the white mini coax cable from main connector and the black mini coax cable from aux connector.6. Gently press out the Mini PCI slot clips and pull the Mini PCI card out of the connector on a 30 degree angle.MODEM BOARD REMOVAL1. Remove one M2.5x4 black flat head screw securing the modem slot cover.2. Insert your finger nail or the case separator into the notched side of the cover and lift up to release the latch securing the modem slot cover.3. Remove two M2x4 black screws securing the modem board.4. Gently lift up the modem board to disconnect it fromthe system board and disconnect the MJ harnessfrom JP1 on the modem board.Mini PCI cardPCI clipsWhite mini coax cableBlack mini coax cableModem slot cover M2.5x4 black flat head screws ModemMJ Harness M1 Series1. Turn the computer upside down.2. Remove two M2.5x5 black flat head screws and one M2.5x16 black flat head screw securing the modem cover.3. Remove the modem cover .COOLING MODULE REMOVALCOOLING MODULE REMOVAL1. Disconnect the fan cable from PJ8770 on the system board.2. Remove two M2.5x5 black flat head screws securing the fan.3. Lift out thefan ..2. Lift out the CPU .M2.5x5 black flat head screwsCooling module brace Cooling module1. Remove M2x6 brass screws securing the cooling module brace.2. Lift out the cooling module brace .3. Lift out the cooling module .CPUClose PJ8770FanFan cableA1 Series1. Open the display panel.2. Using the case separator, unlatch the keyboard holder as shown above.KEYBOARD REMOVAL3. Remove two M2.5x2.8 black flat head screws securing the keyboard.4. Remove one M2.5x2.8 black flat head screw securing the keyboard holder plate.5. Lift out the keyboard holder plate .6. Lift out the keyboard and set it on the palm rest.7. Remove one M2.5x8 black flat head screw securing the keyboard support plate.8. Lift out the keyboard support plate .KEYBOARD REMOVALKeyboard9. Lay the keyboard as shown above.10. Disconnect the keyboard cable from PJ3200 on the system board.11. Lift out the keyboard .Keyboard holderKeyboard holderplateM2.5x4 black flat head screwM2.5x8 black flat head screwKeyboard support plateKeyboard cableA1 SeriesCD-R/W/DVD-ROM DRIVE REMOVAL1. Turn the computer upside down.2. Remove one M2.5x5 black flat head screw securing the CD-R/W/DVD-ROM drive.drive bay.5. Remove two M2x1.7 brass screws securing the CD-R/W/DVD-ROM drive bracket and lift out the bracket6. Remove one M2x3 silver screw securing the side bracket and lift out the bracket.CD-R/W/DVD-ROM drive CD-R/W/DVD-ROM DRIVE REMOVAL1. Turn the computer upside down and remove the following twenty screws:- 7 M2.5x5 black flat head screws - 13 M2.5x16 black flat head screwsCD-R/W/DVD-ROM driveM2.5x5 black flat head screw M2x1.7 brass screwsM2x3 silver screwSide bracketCD-RW/DVD drive bracketM2.5x16 black flat head screwsA1 SeriesTOP COVER REMOVAL1. Disconnect the LCD/FL cable from PJ5600 on the system board.2. Lift up the plastic insulator covering the Left/Right speaker cables and disconnect the Left/Rightspeaker cables from PJ6000/PJ6001.3. Remove one M2.5x8 black flat head screw securing top cover and lift out the top cover assembly.TOUCH PAD ASSEMBL Y REMOVAL1. Disconnect the touch pad cable from PJ3201 on the system board.2. Remove one M2.5x5 black flat head screwsecuring the touch pad assembly.3. Lift out the touch pad assembly .PJ2004Touch pad assemblycableBAT CON HOLDER REMOVAL 1. Remove two M2.5x8 black flat head screw securing the bat con holder.2. Lift out the bat con holder from the system board.M2.5x8 black flat head screwsSYSTEM BOARD REMOVAL1. Peel off the glass tape securing the RTC battery cable.2. Remove two M2.5x5 black flat head screw securing the system board.3. Lift up the system boardfrom the right hand sideand lift it out.A1 SeriesDC-IN JACK/RTC BATTERY REMOVAL1. Peel off the glass tape securing the DC-In jack/ RTC battery harness.2. Disconnect the DC-In jack harness from PJ8800 on the system board.3. Disconnect the RTC battery harness fromPJ8790 on the system board .RTC battery harnessDC-InJack harnessPJ8800Glass tapeA1 SeriesFL INVERTER AND 14” LCD REMOV ALFIELD REPLACEABLE UNIT DOCUMENTATIONTOSHIBATough Enough for Today’s World14” DISPLAY MASK REMOVAL1. Removedisplay assembly using a pair of fine-tipped tweezers.2. Remove two M2.5x6 black flat head screws securing the display mask.3. There are 24 latches securing the display mask .Carefully insert your fingers between the mask and the LCD panel and pry open the latches starting from the bottom six latches , to the five latches on the right andleft sides , ending with the six top latches .1. Remove one M2x4 brass flat head screwsecuring the FL inverter board.2. Carefully lift up the FL inverter board anddisconnect the LCD /FL cable from CN1 and the FL cable from CN2..3. Remove four mask seals to expose four screws securing the LCD module assembly.4. Remove four M2X4 brass flat head screws securing the LCD module assembly.5. Carefully rotate out the top of the LCD module enough to access the display cable.6. Peel off the tape securing the LCD/FL cable and disconnect the cable.7. Remove four M2x3 silver flat head screws securing the left/right LCD brackets.LatchTecra TMA1 Series。
笔记本电脑维修手册(清晰版)
笔记本电脑维修指导手册
前言
本手册的编写宗旨是:规范维修工程师在进行电脑产品维修过程中的行为, 并为判断及定位故障提供通用的一般方法。我们非常希望这本手册能为广大维修 工程师的维修工作提供帮助,并成为广大工程师的伙伴。
IT技术及网络的发展,使得维修过程日益复杂。维修经验是一个不断积累 的过程,编写这本手册也就是试图将电脑运行过程中所遇到的各种故障加以归 纳,并将优秀工程师的处理经验加以总结和提炼,使之形成联想维修工程师的共 同财富。我们希望,对于刚刚接触维修工作不久的你,或有一定维修经验但希望 进行总结提高的你,这本手册都可以对你在理清解决故障的思路和方法方面有所 帮助。
二、拆卸时需要的注意事项 1、首先拆卸笔记本时需要绝对细心,对准备拆装的部件一定要仔细观察,明确拆
卸顺序、安装部位,必要时用笔记下步骤和要点。 2、当使用合适的工具,如镊子,钩针等工具。但使用时也要小心,不要对电脑造
成人为损伤。 3、拆卸各类电缆(电线)时,不要直接拉拽,而要明确其端口是如何吻合的,然
笔记本电脑维修指导手册
求及电源 DC 板是否正常。 1。7、先通病,后特殊
根据笔记本电脑故障的共同特点及各个机器型号特有的故障现象,先排除带 有普遍性和规律性的常见故障,然后再去检查特殊的故障,以便逐步缩小故障范 围,由面到点,缩短修理时间。 1。8、先外围,后内部
由于笔记本电脑本身在拆装方面的特殊性,可能不同的机型在拆装同一部件 的难度差别非常大,因此,我们在维修的时候要灵活运用,不能一味墨守成规, 在检测的时候要从简单易查的部件开始,本着解决问题的思路,灵活运用,更好 的为客户服务。,
笔记本电脑维修指导手册
二零零三年一月
笔记本电脑维修指导手册
英语版笔记本电脑使用说明书

Protection requirements for electromagnetic compatibility in [Article 3.1b] Testing for electromagnetic compatibility in [EN 301 489-1] & [EN 301] Testing according to [489-17] Effective use of the radio spectrum as in [Article 3.2] Radio test suites according to [EN300 328-2]
● Do not remove any batteries from the computer while it is powered on. ● Do not continue to use a battery that has been dropped, or that appears damaged (e.g. bent or twisted)
● EN 61000-3-3 — “Electromagnetic compatibility (EMC) - Chapter 3: Limits - Section 3: Limits on the voltage fluctuations and flicker in low-voltage power supply systems for equipment with rate current up to and including 16 A.”
CE Mark Warning
This is a Class B product, in a domestic environment, this product may cause radio interference, in which case the user may be required to take adequate measures.
维修手册英文版
Maintaining Guide Manualof the Air Disc BrakeContentCATALOGUE1. Summarize2. Maintaining description2.1 Safety briefing during maintaining2.2 Breaking function check2.2.1 Clearance check2.2.2 Adjuster check2.3 Brake pads check2.4 Rotor check3. Brake pads replacement4. Brake replacement5. Dust cap replacement5.1 Dust cap & bushing replacement5.2 Screw dust cap replacement6. Rotor check/replacement6.1 Rotor check6.2 Rotor replacement7. Brake chamber replacement7.1 Brake chamber removal7.2 Brake chamber installation8. Adjuster replacement9. Troubleshooting10. Exploded view11. List of mounting & maintaining toolsBrief introduction of YOUFINYOUFIN was established on May 20th, 1998. It is a Sino-Foreign joint-venture enterprise registered in Wuhan Economic and T echnological Development Zone with multi-investors among which private investors dominate. It is a professional company engaged in manufacturing disc brakes and serving the principal automobile manufacturers by providing modularized supply. The main prod ucts cover hydraulic disc brakes and air disk brakes in close to thirty sizes.YOUFIN developed the air disc brake autonomously and patented the product. So far we are the only manufacturer in China that can mass produce air discs to be used in long distance coaches and inner city buses. It is evaluated that the quality of our products is close to the advanced international level in field use. The product development is part of the National T orch Plan and is also sponsored by the Small and Medium-sized Enterprise T echnical Innovation Foundation of Chinese Ministry of S&T.Our Air Disc Brake products are on an absolute leading position in China and the same international level as far as the key technology is concerned.1. SummarizeYOUFIN Air Disc Brake has four sizes (16’’, 17.5’’19.5’’, 22.5’’). It can satisfy different vehicles. The brakes have compact structure; automatically wear compensation and can easily changing the brake pad.2. Maintaining descriptionSafety briefing during maintainingIt’s most important to ensure safety driving and breaking by goodcharacteristics of the brake.Observe brake pad and rotor wear limits. When they warned already to assigned smallest thickness, it need replace immediately, otherwise, it may cause the accident. The pads scorches, grinds or greases must replace immediately.Every pad on each bridge must replace at the same time.When services the brake, the vehicle must park in smooth gound and the wheel withstand with the block/ stone prevent rolls.Note:●Must guarantee it does not occur with careless brake. When replace brakepad don’t make the brake, otherwise, it will hurts the body!●Do not use the compressed air or other cleaning up equipment clean thebrake, in order to avoid injures the body.●Be sure your hands and fingers place outside the caliper, in order to avoidinjures the body.●When moves and installs the brake should have some assistance, avoids ittoo heavy to hurts the body.●When take off the brake to make maintenance, it must fix on the clamp withhigh strength bolt, in order to avoid hurts the body.●Only allowed genuine YOUFIN kits and pads permitted by YOUFIN. Duringthe first 50 miles driving after new pad replacement, should avoid promptlybrake and brake at a long distance, Prevent overhigh temperature.●Allowed genuine YOUFIN kits and brake pads permitted by YOUFIN.●Only can use the recommendation kits in service. Screws the bolt/nutaccording to the request moment of force.Brake Function checkClearance checkProcess:●T ake off the hexagon bolt (39), loosen the pad retainer (38).●Remove pad retainer (38) from caliper.●Remove 3pcs of pad clip (37).●Move the cable (40) to the side.●Push the caliper towards the wheel and check the clearance with tune-upgauge.0.5mm ≤ clearance ≤ 1.2mmNote: Insert tune-up gauge between the caliper (1) and the brake pad (35). Should check the adjuster while the clearance is out of standard.Adjuster checkProcess:●Remove the rubber cap (12).●Turn hexagon head (22) clockwise by wrench to ensure clearance larger than3mm. (Or remove the brake pad and the push board)Note:a. Need enough room (3mm<clearance) for turn adjuster preventing un-fit.b. Never force to adjust the hexagon head (22) and/or the adjuster!Push the pressure arm 5 times in small increments and observe the hexagon head (22). While the adjuster is in good condition, hexagon head (22) must rotate clockwise.c. As the regulated quantity increase, rotation angle decreases.If the adjuster hexagon head (22):a) Not running at allb) Only running at first pushc) Running, but stopped in the middleWhile considers adjuster failed. Y ou should replace the brake on the basis of section 4 or change the adjuster in accordance with section 8.●Keep the clearances at 1mm (section 3) after adjuster check is finished.●Reinstall the rubber cap (12).Brake pads wearing check●Scorches, grinds and greased brake pad must replaces immediately.●Brake pads at the same bridge must replace at the same time.●Brake pad and pad clip must replace at the same time.Rotor checkProcess:●Remove the brake pad according to section 3.●T est thickness of the rotor.Note: Observe the brake pads and the rotor attrition situation. Excessive attrition of the rotor and the brake pads will reduce their potency and causes the brake fail!CAUTION: Rotors on the same bridge must replace at the same time. Single side rotor replacement is unacceptable. Recommend installs new brake pads whilereplace the new rotors.Rotor Dimension limitsRotor jumpiness (↗) check:2.4.1 Process:●Installs division indicator on the bracket (dial guage).●Measure jumpiness (↗) through turns the wheel. Jumpiness (↗) should lessthan 0.15.●Replaces the rotor to satisfy the request of section 6.●Modified brake pad should fulfil the specific requirements in section 3.2.4.2 Rotor test:At each change of Pads check the Rotor for grooves and cracks.The diagram at the right shows possible conditions of the surface.A = Small cracks spread over the surface are allowedB = Cracks less than 0.02in. (0.5mm) wide, running in a Radial direction, are allowedC = Grooves (circumferential) less than 0.06in. (1.5mm) wide are allowedD = Cracks in the vanes are not allowed and the Rotor MUST BE REPLACED.a = Pad contact area3. Brake Pad replacementNote: Do not use the pipe spanner/ board die! Keep your hands and fingers outside the caliper avoid the hurts of body!Brake Pad dismantle process:●T ake off hexagon bolt (39) from the Pad Retainer with spanner.●Remove the pad retainer from caliper (1).●T ake off the pad clip (37), which is above the pads (35,36) and push board (19).●Remove the sensor on brake pad.●T ake off the push board (19) & the brake pads (35,36).●Adjust hexagon head to make tappet back to the initial position.●Clean the pad groove & push board and anchor surface with brush.Note: Don’t hurt the dust cap (5 & 10). Be sure of no grease on installation surface!●Check the adjuster on the basis of section 2.2.2.Note: Fix the key while checking & turning the adjuster cap to avoid screw rotate.●Check the rotor according to section 2.4.3.2 Brake pad installing process:●Need enough room between the caliper & the rotor to insert brake pad.●Insert push board (19) at the place the caliper combine with the adjust screw.Note: Push board must on the bracket supporting surface. Adjust screw pin must in groove. Otherwise it will do harm to Adjuster mechanism. Ensure the dust cap untwisted by rotate the adjust screw.●Insert the cable sensor to pad groove. Fix cable on bearing (40).Note: The sensor contactor must face the brake disc and installs at the correctposition. Attention the wire trend to prevents the friction.●Insert new pad (36) at side of the push board.●Push caliper toward the wheel until the pad touch the rotor.Insert the brake padat wheel side.Note: Don’t adjust hexagon head violently.Note: Turn the adjuster counter-clockwise to decrease the clearance between pads.Don’t install the retainer before adjustment.Note: Check the rubber cap (12), be sure it is correctly seated.4. Brake replacementNote: Don’t use pipe wrench. Ensure your hands and fingers outside the caliperavoid hurt your body!Note: The Brake will supplies in assembly.CAUTION: The left brake and the right brake cannot exchange. Arrow direction on the brake is same as the forward direction of the wheel.4.1 Brake removal process:●Remove brake pad (see Section 3).●Release nut on the caliper, take of brake chamber.●Remove brake assessment from the bridge.●Check brake pad on the basis of section 2.3.●Check rotor on the basis of section 2.4.4.2 Brake installing process:●Install the new brake over rotor on the bridge. Screwed bolt with the spanner.Note: The right install order of the bolt is screwed both side symmetry.●T ake down the flange protection cap on the brake chamber.Note:Air chamber installment position. Open the scupper faces the ground, and stops other mouths.●Install brake pad and push board on the basis of section 3.●Install the air chamber and tighten with spanner.●Adjust the clearance.5. Guide Pin dust cap replacementNote: Do not use the pipe spanner/ board die! Keep your hand & finger outside the caliper, in order to avoid injuries.Note: When replaces all dust cap of guide bushing, section 5.1 & 5.2 should unify to avoids repetitive work. Single bushing replacement according to 5.1 and 5.2 corresponding work orders.5.1. Dust cap & bushing replacement●T ake off the brake pad according to section 3.●Loosen the chamber bolt and remove the brake chamber from caliper.●Remove the caliper assessment from bridge.●T ake off the steel cap (11) from guide bushing (8 & 9) by suitable tools.Dismantle caliper (1) from the bracket (2).Note: Don’t hurt the hole, the lid while open the steel cap with tools.●Loosen the bolt (6 & 7); separate the caliper (1) from the bracket (2).Note: When caliper moves, it may hurt body.●Cleaning up the bracket bonding plane●Take off the guide pin (8&9) on caliper (1). Then remove the dust cap (5).●Presses out bushing 4 with mandril from caliper1.●Cleans up the guide pin hole of caliper.Installing process:●Long guide pin hole must press in two new bushings. Short guide pin holepress in one.●Guarantee the size in drawing.●Greases between them and the bushing●Install new dust cap in the guide pin hole.Note: Cleans up the guide pin hole and grease the edge of dust cap before install for easy installation. Ensure the dust cap installs steadily, without crease and inside the ring groove of the caliper.●Install long/short guide pin to each hole and dust cap upside set in guide pinring groove.●Put the caliper (1) on the bracket (2) and plug guide pin (8&9) in guide hole.●Plug new bolt (6&7) (long one for pin 8, short one for pin 9) and screwed onbracket (2) with spanner.Note: Assembly must be careful, don’t damage the dust cap (5). First, screws bolt on long pin (8), and then screws bolt on short pin (9).When service maintenance, remove the guide pin (8&9) and replace by new bolt (6&7)!●Move the caliper on guide pin (8,9) forward and backward to check whether thecaliper can move freely.●Put on new copper cap on caliper (1) hole and push it in with correct kits. Note: Avoids the hurts of surface.●Raising the guide pin dust cap (5) carefully for cancel the air pressure.●Install brake across the rotor on bridge. Screwed bolt with the spanner.Note: Correct install process of the hexagon bolt.●Install brake pads and adjust clearance. Implemented section 3, notice theexplanation.●Cleaning the install flange on caliper and grease inside the pressure arm ballsocket before reinstall the brake chamber.●Install the brake chamber and screwed with spanner.Note: After the installation of brake chamber, the lowest chamber hole face theground must open, other mouths stop up.5.2. Screw dust cap replacementNote: If only replace the screw dust cap, does not need to remove the caliper andthe air chamber.Process:●Remove brake pad and push board according to section 3.●Push the caliper towards to brake chamber.●T ake off screw dust cap (10) from the ring groove on adjust screw (21).●T ake down from dust cap base with screwdriver.●Check screw thread.●Turning the adjust bolt for 30mm clockwise with the spanner.●Inspection thread corrosion and whether is damaged.●Turning it clockwise, feeling its lubrication and check the adjust screw thread.●Clean the base of caliper dust cap (10). (Arrow pointed)●Push new dust cap (10) on adjust screw. Install it on the base with kits. Observes itinstalls whether arrived.●Grease on the edge of dust cap (10) and install it on the base of adjust screw (21).Note: Guarantees the dust cap steadily in place and does not have the corrugation in the adjust screw ring groove.Installation process:●Install the brake pad and adjust the clearance (see Section 3).6. Rotor check/replacement6.1 Rotor check Check the rotor (Section 2.4) If the rotor reached the minimumthickness, it must be replaced.6.2 Rotor replacementNote: Generally recommend use new brake pad while install new/machined rotor.6.2.1 Uninstall the rotor:●R emove the brake pad. (see section 3)●T ake off the brake chamber. (see section 7)●T ake down brake from bridge. (see section 4)●T ake off the wheel and the rotor.(Refer to V ehicle Manufacture’srecommendations)6.2.2 Rotor installation:●I nstall the wheel and rotor. (refer to V ehicle Manufacture’s recommendations)●D egrease the rotor.●T urn the wheel and check the installed rotor (Section 2.4).●A djust ABS sensor refer to V ehicle Manufacture’s recommendations.●I nstall the brake (see Section 4).●I nsert pad (see Section 3).●I nstall brake chamber (see Section 7).7. Brake chamber replacementNote: Don’t use pipe wrench! Ensure your hands and fingers outside the caliperavoid hurts body!Note: Can only use the chamber assigned by the Vehicle Manufacture.7.1. Brake chamber removal:●Bleeds off the compressed air.●Remove the upper air pipe of brake chamber.●Remove the chamber from caliper.7.2. Brake chamber installation:Note: According to the brake installment position, only can open the scupperunderneath.●Cleans the sealing plane of the pressure are ball socket (arrow) and caliper beforethe brake chamber installation.●Screwed the chamber mounting nut alternately with spanner in torque ratingrequired by the air chamber supplier.●Connection the air pipe.Note: Never twist the braking line, place it originally avoid fiction with other sets.While exist air leak, finds the leakage and check the connection.●Function and performance examination.8. A djuster replacement8.1 A djuster removal●Remove brake pad (see Section 3).●Remove brake chamber (see Section 7).●T ake off brake (see Section 4).●T ake off upper bolt by hexagon wrench.●Remove adjuster and other parts in the caliper.Note: Don’t hurt the screw dust cap.8.2 A djuster installation●Grease inside the caliper.●Put the return spring (18) at each side.●Install the needle assembly and the adjuster.●Puts the washer and top head, screwed the bolt with spanner according to theopposite angle principle.Note: Guarantee the bolt tighted the moment of force.9. Troubleshooting11. List of mounting & maintaining toolsYOUFIN is in the process of logo replacement, new logo will put into practice gradually. It with the original logo is still the YOUFIN’s product. Final interpret right for the logo belongs to YOUFIN.。
东芝 Satellite M100 系列 笔记本电脑 说明书

Satellite M100东芝Satellite M100 系列笔记本电脑用户手册版权版权«=OMMS=东芝公司版权所有。
保留所有权利。
根据版权法,未经东芝公司事先书面许可,不得以任何方式翻印本手册。
对使用本手册所含信息而导致的专利侵权后果,本公司将不承担任何责任。
《东芝=p~íÉääáíÉ=jNMM=系列笔记本电脑用户手册》OMMS=年=Q=月第一版音乐、电影、计算机程序及数据库等的所有权和版权受版权法保护。
对上述已获版权的材料的复制仅限于个人或家庭使用目的。
如果超出上述限制,在未获版权所有者许可的情况下复制(包括转换数据格式)或修改上述材料,以及通过网络传输或分发上述材料,将造成对版权或个人权利的侵害,并可能因此遭到损害索赔和L或承担刑事责任。
使用本产品来复制已获版权的作品或进行其他活动时,请务必遵守版权法。
请注意,如果出于营利目的在咖啡厅或宾馆等地使用本产品的屏幕模式切换功能(如宽屏模式、宽屏缩放模式等)显示放大的图片L视频或公开展示这些材料,可能会侵害所有者受版权保护的权利。
声明本手册之准确性已经过验证和复核。
其中所含关于=p~íÉääáíÉ=jNMM=系列笔记本电脑的说明和描述,在本手册出版时是准确的。
但是,以后的电脑及手册可能变动,恕不另行通知。
对由电脑和手册之间的错误、遗漏或差异直接或间接引起的损失,东芝概不承担责任。
商标f_j=是注册商标,f_j=m`、lpLO和mpLO=是=fåíÉêå~íáçå~ä=_ìëáåÉëë=j~ÅÜáåÉë`çêéçê~íáçå(国际商用机器公司)的商标。
东芝DP1608.2008.2508中文维修手册_部分1
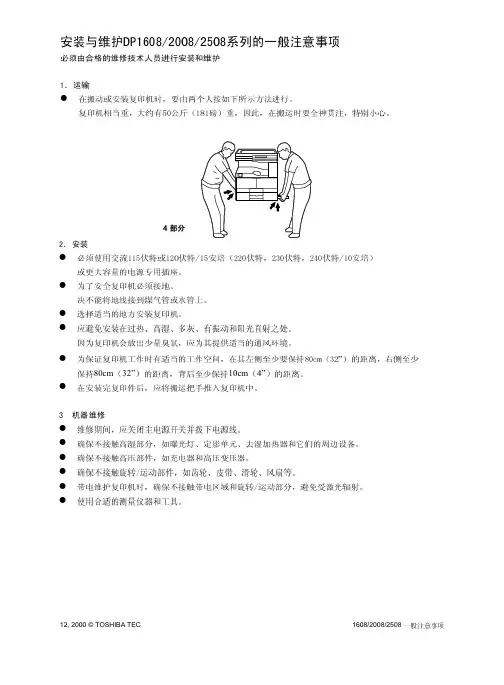
7 14 17
6 8 9
!
A3-A5-R FOLIO LD-ST-R COM
64-80g/m
17-21 lbs
-
-
A3-A5-R FOLIO LD-ST-R COM
64-80g/m 17-21 lbs 80-163g/m 21-43 lbs
OHP /
1608/2008/2508
2 - 15
1608/2008/2508
5
CL 1 RGST-CLT
B-1
CL 2
OCF-CLT
B-1
CL 3
PU-CLT
B-3
6
THM 1 FUS-THM
D-1
THM 2 HEA1-THM
D-1
1
THM 3 HEA2 THM
D-1
2
THM 4 SCN-THM
DБайду номын сангаас2
1
ASD/AUD/CND//SAD
FUS
PWA-F-FUS
AC
PWA
A-1
PWA
ACD/AUD/CND/D/SAD
12, 2000 © TOSHIBA TEC
2 - 17
1608/2008/2508
2.4
2.4.1
2.4.2
PFU PFP ADU SFB OCT
1608/2008/2508
2 - 18
10, 2000 © TOSHIBA TEC
PFP
16
16
16
-
12
12
12
-
13
13
13
-
11
11
11
东芝笔记本维修手册Satellite_A20_Series(英文版)
东芝笔记本维修⼿册Satellite_A20_Series(英⽂版)FIELD REPLACEABLE UNIT DOCUMENTATIONSatellite TMA20 Seriesmake sure that the main battery and AC adaptor is not connected to the unit and the environment in which you are working on is protected fromElectro-Static Discharge(ESD).A20 SeriesOPTIONAL PC CARD REMOVAL1. Press the eject button for the PC card you want to remove.2. Press the extended eject button to pop the PC Card out.3. Grasp the PC card and remove it.SELECT BAY REMOVAL1. Turn the computer upside down.2. Slide the release lever in the direction of the arrow.3. Pull out the select bay drive .1. Turn the computer upside down as shown.2. Slide the battery release lever in the direction of the arrow.3. Lift out the battery .NOTE : Before removing any PC Card device, make sure it is “STOPPED” in the PC Card manager.DV-R/-RW DRIVE DISASSEMBL Y1. Remove five M2x3 silver flat head screws securing the base cover and lift out the cover .2. Remove two M2x8 silver screws securing the connector cover.3. Remove the connector cover and the connector from the DVD-R/-RW drive.DVD-R/-RW M2x3 silver flat head screwsConnector cover M2x8 silver screwsConnectorBase coverA20 SeriesRelease leverSelect bay deviceEject buttonPC card1. Turn the computer upside down.2. Remove one M2.5x4 black flat head screw securing HDD cover.3. Remove the HDD cover .HDD REMOVALA20 Series1. Peel off the plastic insulator covering the modem board.2. Remove two M2x4 flat head silver screws securing the modem board3. Disconnect the modem board from PJ2900 on the system board and then the modem cable from JP1 on the modem board. MODEM BOARD REMOVAL4. Grasp the HDD bracket handle and pull to disconnect the HDD assembly.5. Lift the HDD assembly out of the HDD bay.6. Remove four M3x4 brass flat head screwssecuring the HDD bracket to the drive.7. Lift out the HDD .HDD coverboardM2x4 flat head silver screwsM3x4 Flat head screwsHDD bracketHDD bracket HDD4. Remove two M2x18 black screws securing theCPU fin.5. Lift out the CPU Fin.1. Insert a flat head screwdriver to the CPU lockand rotate it counter-clockwise to unlock the CPU.2. Lift out the CPU.CPU FIN REMOVAL1. Turn the computer upside down.2. Remove two M2.5x6 black flat head screwssecuringthe CPU fin cover.3. Lift out the CPU fin cover.A20 SeriesCPU coverCPU finCOOLING FAN REMOVALCPU1. Remove M2.5x4 black flat head screws securingthe FAN cover.2. Lift out the FAN cover.A20 SeriesCOOLING FAN REMOV AL 1. Remove two M2.5x6 black flat head screws securing the cooling fan.2. Lift out the cooling fan.Cooling FANKEYBOARD REMOVAL1. Turn the computer right side up and open the display panel.2. Using the case separator , unlatch thekeyboard holder at the top of the keyboard.Keyboard holderKeyboard KEYBOARD REMOVAL3. Remove two M2.5x4 black flat head screws securing the keyboard.4. Remove one M2.5x4 black flat head screw securing the keyboard holder plate and lift out the plate. Keyboard holder plate5. Lift out the keyboard and set it as shown above.6. Remove the oneM2.5x6 black flat head screw securing the keyboard support plate and lift out the plate.M2.5x6 black flat head screwsKEYBOARD REMOVAL 7. Set the keyboard as shown above..8. Disconnect the keyboard cable from PJ123 on the system board.9. Lift out the keyboard .A20 SeriesKeyboard MEMORY MODULE REMOV AL1. Lift up the plastic insulator covering the memory slot.2. Spread the memory clipsoutward and pull the memory module out of the connector on a 30degree angle.Memory moduleMemory clipsPlasticinsulator1. Remove two M2.5x4 black flat head screws securing the sensor switch board.2. Disconnect theswitch board cable from PJ2027 on the back side of the switch board.3. Lift out the switch board .switch board1. Lift up the plastic insulator covering the wireless LAN card.2. Disconnect the black and white coax from the wireless LAN card.3. Spread the Mini-PCI connector clipsand pull the Wireless LAN card out of the connector about 30 degree angle.Black coax cableWhite coax cable Wireless LAN cardA20 SeriesTOUCH PAD REMOVAL 1. Disconnect the touch pad cable from PJ2004 on the system board.2. Remove one M2.5x4 black flat head screw securing the touch pad.3. Lift out the touch pad .1. Turn the computer upside down.2. Disconnect the sub fan cable from PJ8770.2. Remove twenty three screws securing the bottom cover: - 5 M2.5x4 black flat head screws - 10 M2.5x6 black flat head screws - 8 M2.5x20 black screwsM2.5x4 black flat head screws M2.5x20 black screwsM2.5x6 black flat head screws3. Turn the computer right side up.4. Peel off the glass tape . Disconnect the LCD/FL cable from PJ5000/PJ5001 and Left/Right speaker cables fromPJ3003/PJ3002 on the system board.5. Remove four M2.5x6 black flat head screws securing the top cover and lift out the top cover.M2.5x6 black flat head screwsPJ5000/PJ5001Left/Right speakercable PJ3002Touch pad M2.5x4 black flat head screw FRONT MEMBRANE SWITCH REMOVAL1. Disconnect the membrane switch cable from PJ2025 on the system board.2. Remove two M2.5x4 black flat head screws securing the front membrane switch assembly.3. Lift out the front membrane switch assembly .Membrane cablePJ2025Sub fan cable PJ8770SOUND BOARD REMOVAL1. Remove one M2.5x6 black flat head screw securing the sound board.2. Gently lift up the sound board and disconnect the two sound I/F cablesfrom PJ2901/2902 on the sound board..A20 Series1. Disconnect the RTC battery cable from PJ9999 on the system board.3. Lift out the RTC battery .1. Disconnect the USB board cable from PJ2029 on the USB board.2. Remove two M2.5x6 black flat head screws securing the USB board.3. Lift out the USB board and disconnect the USB harness.RTC batteryRTC cablePJ9999M2.5x6 black flat head screwsUSB board Sound I/F cables1. Disconnect the DC IN jack from PJ8800 and the switch board cable from PJ2026 on the system board.2. Disconnect the sound I/F cables from PJ2903/2904 and the USB board cable from PJ2028 on the system board.SYSTEM BOARD REMOVALSound I/F cables DC-In jack PJ2028PJ2903PJ2026Switch board cableUSB harness PJ40021. Remove one M2.5x6 black flat head screw securing the plastic brace and the system board.2. Remove two M2.5x6 black flat head screws securing the system board.3. Gently lift up the system board from the right hand side and lift it out of the bottom cover.SYSTEM BOARD REMOVALA20 SeriesPlastic braceA20 SeriesFL INVERTER AND 15” LCD REMOV AL15” DISPLAY MASK REMOVALFL inverter board.2. Carefully lift up the FL inverter board anddisconnect the LCD /FL cable from CN1 and the FL cable from CN2.3. Remove four M2X5 silver flat head screws securing the LCD module assembly.4. Carefully rotate out the top of the LCD module enough to access the display cable6. Peel off the tape securing the LCD/FL cable and disconnect the cable.7. Remove four M2x3 silver flat head screws securing the left and right LCD brackets and separate the brackets Mask sealsDisplay maskLCD1. Remove two mask seals at the bottom corners of the display assembly using a pair of fine-tipped tweezers.2. Remove two M2.5x6 black flat head screws securing the display mask.3. There are 23 latches securing the display mask .Carefully insert your fingers between the mask and the LCD panel and pry open the latches starting from the bottom six latches , to the five latches on the right and left sides , ending with the six top latches .。
东芝笔记本电脑使用手册说明书
Safety.book Page 1 Friday, March 24, 2017 4:35 PMђ㣓⭫㝇 ⭞⭞ 䈭䰻䈱Safety.book Page 2 Friday, March 24, 2017 4:35 PMSafety.book Page 3 Friday, March 24, 2017 4:35 PM3目录简介 (5)安全使用电脑、组件和附件 (6)电源 (6)通信 (12)主机 (14)系统/外设 (20)如何更舒适地使用电脑 (25)良好的工作姿势 (25)使用外接键盘、鼠标或显示器操作电脑 (26)打字方式 (27)休息及变换工作任务 (27)移动过程中使用电脑的提示 (27)搬运电脑 (27)寻求额外的帮助 (28)检查清单 (28)您购买的电脑系统可能会带有包含最先进的数据存储技术的可刻录和/或可擦写光盘驱动器及相关软件。
同其它新技术一样,您必须先阅读并遵循随附的或以电子方式提供的相关用户指南和/ 或手册中所有的设置及使用指引。
如果不这样做,该产品可能不能正常运行并且您可能会丢失数据或遭受其它损害。
东芝、其附属公司及供应商并不保证本产品的所有运转都不受干扰或无错误。
您同意对由于使用本产品而引起的任何商业、利润、程序、数据或可移动存储媒体的损害或损失,即使已经被告知此可能性,东芝、其附属公司及供应商不应承担任何责任。
为求准确,出版时东芝公司已反复验证提供的信息,但是该信息有可能加以改动,恕不另行通知。
该使用指南或其它的任何书面材料及信息中的描述仅仅是一般性的指导,而不是向您承诺的任何保证。
对任何直接或间接地由于使用指南条款中技术或印刷的错误或遗漏引起的损害,东芝公司不承担任何责任。
在任何情况下,不管是基于民事侵权或与此相关的合同还是其他方面的理由,由于使用指南、其他信息或使用引起的任何意外的、因果的、特殊的或典型的损害,东芝公司不承担任何责任。
Safety.book Page 4 Friday, March 24, 2017 4:35 PM4商标Wi-Fi是Wi-Fi Alliance的注册商标。
东芝复印机维修手册
东芝复印机维修手册东芝复印机维修代码大全同时按0和1键打开电源面板指示灯全部点亮,按清除/停止键解除同时按0和2键打开电源机器进入老化方式,显示AG,同时按09键解除同时按0 3或04键打开电源机器进入输入/输出检查方式,显示CH,输入不同的代码可以启动不同的部件,例如03-33暴光灯检查同时按0和6键打开电源强制启动《定影器不加热》同时按0和7键打开电源自动进稿器老化方式,显示AG,按09退出按03/04键同时打开电源,进入输入/输出检查状态显示CH,退出同时按09键1主电机ON 11 OFF2供纸辊离合器ON 12 OFF3定位辊离合器ON 13 OFF6调色剂电机ON 16 OFF7冷却风扇ON 17 OFF10 总计数器按P键20扫描电机按P键移动50% 再按P键200%21 镜头电机按P键移动50%在按P键200%22 反光镜电机按P键移动50%再按P键200%31转印输出按P键ON再按P键OFF32 分离输出按P键ON再按P键OFF33嚗光灯输出按P键ON再按P键OFF34预转印偏压按P键ON再按P键OFF40 上纸盒电机按P键ON再按P键OFF41 上纸盒供纸离合器按P键ON再按P键OFF43 下纸盒电机按P键ON再按P键OFF44 下纸盒供纸离合器按P键ON再按P键OFF以上是检测代码,一般只使用03/04 05 08,老化方式机器空运转。
1、更换载体同时按05, 打开电源开关, 面板显示AJ, 键入调整模式N按复印允镜鼻爸担?自动)调整,键入修改值,按插入键将修改值存入内存,按3+4 复印--0 TD传感器自动调整--键入0,按复印键鼓和显影器工作大约2分钟面板显示数开始自动改变短时间后显示数停止改变。
--显示值=24(2.4±0.5v), 按插入键存入内存,按09退出---------------- ----------------退出自诊断05 模式: 键入"09"----------清除保养信号------同时按08, 打开电源开关, 面板显示AD, 键入调整模式N按复印键显示当前值,进行(自动)调整,键入修改值,按插入键将修改值存入内存,按3+4 复印----69--PM(保养周期)间隔设定--范围: 0~999,999 缺省值=0---------- 79--当前PM计数显示----范围: 0~999,999 缺省值=0---- 当79显示的数值达到69设定的数值时保养信号出现,重新设定保养周期可消除保养信号----------------退出自诊断08 设定模式: 键入"09"关于此项的补充0+5开机东芝复印机部分调整代码1 手动曝光调整100% 范围0~255 标准1282 手动曝光调整154% 范围0~255 标准1283 手动曝光调整50% 范围0~255 标准1284 手动曝光调整200% 范围0~255 标准1285 自动曝光调整100% 范围0~255 标准1286 自动曝光调整154% 范围0~255 标准1287 自动曝光调整50% 范围0~255 标准1288 自动曝光调整200% 范围0~255 标准12814 图像曝光调整100% 范围0~255 标准12815 图像曝光调整154% 范围0~255 标准12816 图像曝光调整50% 范围0~255 标准12817 图像曝光调整200% 范围0~255 标准12838 栅偏压输出范围0~255 标准12839 转印电压调整范围0~255 标准12840 分离偏压调整范围0~255 标准12842 栅偏压调整范围0~255 标准128* 49 自动曝光自动调整* 0 自动墨粉调整设置成24* 90 自动墨粉调整范围0~255 标准128 (表示自动墨粉传感器的调整量)0+8开机* 69 PM计数器设置方式0-999,999 初始值0 0:PM计数器无效否则PM请求79 当前PM计数器值0-999,999东芝复印机曝光量调整代码按0、5开机1--手动100%曝光量调整----范围: 0~255, 缺省值=128-------- 2--手动154%曝光量调整----范围: 0~255, 缺省值=128-------- 3--手动50%曝光量调整----范围: 0~255, 缺省值=128-------- 4--手动200%曝光量调整----范围: 0~255, 缺省值=128-------- 5--自动100%曝光量调整----范围: 0~255, 缺省值=128-------- 6--自动154%曝光量调整----范围: 0~255, 缺省值=128-------- 7--自动50%曝光量调整----范围: 0~255, 缺省值=128-------- 8--自动200%曝光量调整----范围: 0~255, 缺省值=128--------------------9--曝光量上限调整----范围: 0~255, 缺省值=255--------10--曝光量下限调整----范围: 0~255, 缺省值=0--------14--照片100%曝光量调整----范围: 0~255, 缺省值=128-------- 15--照片154%曝光量调整--范围: 0~255, 缺省值=128-------- 16--照片50%曝光量调整--范围: 0~255, 缺省值=128--------17--照片200%曝光量调整----范围: 0~255, 缺省值=128----C1--主电机锁住------------------------C21--光学系统没能完成初始化,光学系统锁住------------------------ C26--曝光灯烧坏------------------------C32--开箱(UA)TD传感器自动调整失败------------------------ C41--电源接通时,定影热敏电阻异常或者定影灯开路------------------------C43--在预热期间,或者在预热完成后定影热敏电阻异常------------------------C44--在预热期间,或者在预热完成后定影灯开路------------------------C54--分页器-和主CPU通信错误------------------------C55--自动进稿器ADF-和主CPU通信错误------------------------C71--ADF主电机锁住------------------------C72--由定位传感器检测出的不良调整------------------------C73--EEPROM初始化不良------------------------C81--分页器输纸电机异常------------------------C82--分页器斗移位电机异常------------------------C83--分页器上限错误------------------------C84--分页器下限错误------------------------C85--分页器原位传感器错误------------------------C86--分页器移位传感器错误------------------------C94--在(CH,AJ)模式时,光学系统没能完成初始化,光学系统锁住--------------------E1--机内卡纸------E2--定影附近卡纸------E3--电源ON时有纸保留在复印机内------E4--复印期间前门盖被打开------E5--对位辊附近卡纸------E14--下纸盒进纸卡纸------E71--ADF原稿进稿部分卡纸------E72--ADF原稿传输部分卡纸------E73--ADF原稿排出部分卡纸------E75--ADF 2合1(第2张在原稿传输部分)卡纸------E81--分页器输纸部分复印纸到达时间超过卡纸,纸未到达传感器------E82--分页器输纸部分复印纸等待时间超过卡纸,纸停在传感器------1568的误码表“清除卡纸”或“检修请求”符号一闪一闪时,同时按下:“CLEAR/STOP”和“8”键,会显示以下错误码:1.复印机纸路卡纸错误代码内容备考E01复印机机体内卡纸包括旁送卡纸(旁送LED亮)E02定影器附近卡纸E03打开电源时机内卡纸E05未到达定位开关卡纸在PFU供纸通过传输辊之后还是由PPC 供纸之后?2.在供纸部分卡纸错误代码内容备考 E14下纸盒卡纸(PFU)纸未到达传输辊3.在ADF传输路径中卡纸错误代码内容备考 E71在ADF原稿供纸部分卡纸E72在ADF原稿传输部分卡纸E73在ADF原稿排纸部分卡纸E752合1(第2张原稿在供纸部分卡纸)4。
东芝 Satellite M100 系列 笔记本电脑 说明书
VCCI B 级管制信息
加拿大规章内容(仅在加拿大)
本数码仪器发射的无线电噪音不超出加拿大电信局无线电干扰规定中列 出的 B 级限制。 请注意加拿大电信局 (DOC) 的规定中指出,您如果没有经过东芝公司 书面许可,对本仪器做出任何变化或修改,东芝公司将剥夺您使用本仪 器的权利。 本 B 级数码仪器符合加拿大对产生干扰的设备的所有规定。
iv
用户手册
用户手册
调制解调器注意事项
入网许可声明
本设备已获得 [Commission Decision - CTR 21] 入网许可,可在全欧洲作 为个人终端连接公众交换网 (PSTN)。 但是,由于各个国家或地区提供的 PSTN 不同,该入网许可并不保证本 设备在任何 PSTN 的终端一定能成功运行。如出现问题,用户手册
用户手册
若出现问题
如果您的电话设备不能正常操作,您应该立即将之从电话线上断开,以 免对电话网络造成损害。电话公司发现此类问题,可以暂停服务,如有 可能,电话公司会提前通知您;而如未能提前通知,他们也会尽快与您 联系。在这种情况下,您有机会修正问题,并获知您有权向 FCC 提出 投诉。您的调制解调器所有的修理必须由东芝公司或其授权的专业机构 进行。
3 本调制解调器与电话线的连接使用标准电话插口类型,型号 USOC RJ11C。加拿大工业部 (IC) 对本设备的注册编号如下: Canada: 1353 11026A
澳大利亚与新西兰用户的注意事项
澳大利亚用户
连接到澳大利亚电信网络的调制解调器必须获得澳大利亚电信管理局 (Austel) 许可。此调制解调器设计了一种专用配置,以确保当设定其国 家为“澳大利亚”时,能符合 Austel 标准;反之此时若采用其它国家 或地区的设定,则会导致此设备运行不符合澳大利亚的电信标准。为了 验证国家或地区设定正确,请输入 ATI 指令显示当前设定。要将本设 备的国家或地区永远设定为“澳大利亚”,输入以下命令序列: