LTE modem 配置介绍
LTE Modem LM1200 Quick Start 使用说明书

Quick Start1. Connect the USB cable to the power port on themodem and to the provided power adapter.2. Plug the power adapter into an indoor poweroutlet.Note: We recommend connecting the USBcable only to the power adapter that came in the package. Connecting the USB cable to a USB port on a computer might not work correctly.The Power LED lights solid amber and then lights solid green.The modem searches for the mobile broadband network available from the nano SIM, which might take several minutes.3. Check the Signal Strength LED .• Green : The LTE connection is good.• Amber : The LTE connection is weak. Try adifferent location, such as near a window.• Red : The nano SIM card isn’t inserted correctly,or the modem can’t automatically connect to the LTE network (see Add and activate a custom APN profile).You can connect a router or a computer (with an Ethernet port) to the LM1200 LAN port. Connecting a WiFi router lets you use WiFi to access the LTE network from a computer or WiFi device.1. Connect the Ethernet cable to the LM1200 LANport and the WAN or Internet port on your router.network as its main (primary) Internet connection.2. For Internet access, connect your computer orWiFi device to the router.Power(USB Type C port)Gigabit Ethernet portsNano SIMcard slotReset button Power on your LM1200 modemConnect the LM1200 LAN portNETGEAR, Inc.350 East Plumeria Drive San Jose, CA 95134, USA NETGEAR INTERNATIONAL LTD Floor 1, Building 3University Technology Centre Curraheen Road, Cork, T12EF21, IrelandJuly 2021For regulatory compliance information including the EU Declaration of Conformity, visit https:///about/regulatory/.See the regulatory compliance document before connecting the power supply.For NETGEAR’s Privacy Policy, visit https:///about/privacy-policy.By using this device, you are agreeing to NETGEAR’s Terms and Conditions at https:///about/terms-and-conditions. If you do not agree, return the device to your place of purchase within your return period.Regulatory and Legal© NETGEAR, Inc., NETGEAR and the NETGEAR Logo are trademarks of NETGEAR, Inc. Any non-NETGEAR trademarks are used for reference purposes only.You can log in to your LM1200 modem to view and change its settings from a computer or a device that is connected to the modem with an Ethernet cable or WiFi.1. Launch a web browser from the connectedcomputer or device.2. In the address field of the web browser, enterhttp://192.168.5.1.3. In the Sign In field, enter the default password,and click the Sign In button.See the modem label for the default password.Note: While the password that you enter is unique to your modem and is secure, we recommend that you change it to a password that you want to use.Manage your LM1200 modemIf the LM1200 modem does not automatically connect to your mobile broadband network, contact your mobile service provider for the APN profile that they require. Then log in to the modem and enter the custom APN profile settings.1. Launch a web browser from a computer or mobiledevice that is connected to the modem.2. In the address field of the web browser, enterhttp://192.168.5.1.The limited Dashboard page displays.3. In the Sign In field, enter the password, and clickthe Sign In button.See the modem label for the default password.4. Select Settings > Network > APN .The APN page displays.5. Click the Add button.The New APN section opens on the page.Add and activate a custom APN profile6. Enter the settings for the new APN profile.Use the information that your mobile serviceprovider gave you. If your mobile service provider did not specify some settings, leave the default settings.7. Click the Save button.The new APN profile displays on the page, but is not yet the active profile.8. Select the radio button next to the APN profilethat you just added.The modem now uses the selected APN profile to establish a connection with your mobile broadband service provider’s network.If you still cannot get an Internet connection, contact your mobile broadband service provider to verify the information for the APN profile.The LEDs on the LM1200 modem indicate its status and activity.LEDDescriptionPower• Solid amber : The modem is starting up.• Solid green : The modem is powered on.• Blinking amber : Device error.Ethernet LAN • Solid amber : A device is connecting to this port.• Green : A device is connected to this port.Ethernet WAN • Solid amber : A device is connected to this port.•Solid green : Full data connectivity.Signal Strength• Green : The LTE connection is good. Blinking indicates data traffic.• Amber : The LTE connection is weak. Blinking indicates data traffic.• Red : The modem can’t connect to the LTE network.LEDsVisit /support to get your questions answered and access the latest downloads.You can also check out our NETGEAR Community for helpful advice at .Support and CommunityWith this setup, your wired modem (cable, DSL, orfiber) provides the primary Internet access. If the wired Internet connection isn’t working, the LM1200 modem provides a failover Internet connection through the LTE network.1. Connect the Ethernet cable to the LM1200 LANport and the WAN or Internet port on your router.2. Use another Ethernet cable (not included) toconnect your wired modem (cable, DSL, or fiber) to the LM1200 WAN port.3. failover.For information about how to set up WAN failover, see the LM1200 user manual.Optional: set up WAN failover for a wired modem。
LTE基站传输带宽配置分析

LTE基站传输带宽配置分析LTE(Long Term Evolution)是第四代移动通信技术,它具有更高的速度、更低的时延和更大的接入能力。
在LTE系统中,基站传输带宽的配置是非常重要的,它直接影响到网络的性能和用户的体验。
首先,需要明确LTE系统中的传输带宽是指通过无线链路传输的频率资源。
LTE系统中的传输带宽可以分为两种:上行传输带宽(UL Bandwidth)和下行传输带宽(DL Bandwidth)。
上行传输带宽是指从用户设备向基站传输数据的频谱资源,下行传输带宽是指从基站向用户设备传输数据的频谱资源。
LTE系统中的传输带宽配置是有限的,最常见的传输带宽配置有以下几种可能:1.1.4MHz:这是LTE系统中最小的传输带宽配置,主要用于覆盖较小的区域或低密度的用户场景。
由于带宽较窄,传输速率相对较低,适合于低速率的应用场景。
2.3MHz:这是一种中等带宽配置,适用于一般的城区覆盖。
传输速率相对较高,可以支持更多的用户同时接入。
3.5MHz:这是一种常见的带宽配置,广泛应用于不同的场景。
传输速率更高,可以支持更多的用户同时接入,适用于较为拥挤的城区或繁忙的商业区。
4.10MHz:这是一种较大的带宽配置,主要用于高密度的用户场景或需要更高速率的应用场景。
传输速率非常高,可以支持大量的用户同时接入,适用于人流密集的地区或高速移动场景。
5.20MHz:这是LTE系统中最大的带宽配置,一般用于需要极高速率和大容量的场景,如繁忙的市中心、火车站或机场等。
传输速率非常高,可以支持大规模的用户同时接入。
在进行LTE基站传输带宽配置时,需要综合考虑以下几个因素:1.覆盖范围:传输带宽的配置应根据基站的覆盖范围进行选择。
覆盖范围越大,传输带宽应选择较大的配置。
2.用户密度:传输带宽的配置应根据用户密度进行选择。
用户密度越大,传输带宽应选择较大的配置,以支持更多的用户同时接入。
3.应用需求:不同的应用对传输带宽的需求不同,传输带宽的配置应根据应用需求进行选择。
SLK-M200-LTE说明书
SMA母头接口
串口
RS232-DB9接口
USB
USB2.0接口
电源
Supply voltage range: 5~35V DC
尺寸
75*51*16MM
指示灯
Power(只要通电此灯就会常亮)
DATA(正确插入SIM卡,注册到网络之后快闪)
RING(有来电闪烁,无来电灭)
短消息:
SMS
• Point to point MO and MT
SLK-M200-LTE说明书
产品简介:
LTE Modem,也叫做LTE调制解调器,它是一种实现LTE(分组交换)通信的调制解调的设备,它是在随着无线数据业务的快速发展,越来越多的设备开始要求具备无线通讯能力的这种背景下诞生的。许多从来没有的应用从理想变成了现实,如无线上网、远程监控﹑远程数据采集等。
•TD-SCDMA B34/B39
•UMTS/HSDPA/HSPA+ B1/B8
•CDMA 1X/EVDO BC0
•GSM/GPRS/EDGE 900/1800 MHz
SLK-M200-LTE-H(EU)
欧洲版本
•FDD-LTE B1/B3/B5/B7/B8/B20
•Dual-Band UMTS/HSDPA/HSPA+ B1/B5/B8
•Dual-Band UMTS/HSDPA/HSPA+
B1/B5
速率(理论速度,实际与当地运营商有关系)
速率
•LTE CAT4
- Uplink up to 50Mbps
- Downlink up to 150Mbps
•HSPA+
- Uplink up to 5.76 Mbps
4g lte wifi modem user 说明书

4G LTE WIFI MODEM User manual1.Brief IntroductionThis device is designed for WIFI users to get access to internet via GPRS/EDGE/UMTS/HSPA/LTE.In order to connect to high speed network easily and fast,it uses the standard USB port.2.LED indicator lightsLED indicator lights can show the device working status device visually.Color of thelight Networkregistered3-secondflashing2-secondflashing1-secondflashingGreen4G LTENetworkregistered,notconnectedWIFI started,networkregistered,notconnectedWIFI started,Networkregistered andconnectedBlue HSPA+Networkregistered,notconnected WIFI started,networkregistered,notconnectedWIFI started,Networkregistered andconnectedPurple EVDOYellow GSM/EDGE/CDMA1XNetworkregistered,notconnectedWIFI started,networkregistered,notconnectedWIFI started,Networkregistered andconnectedRed Network notregisteredNetwork notregistered(check(U)SIM status)WIFI started,Network notregistered3.install/uninstall driverInstall·plug4g WIFI modem to computer via USB port,open”mycomputer”,run the CD driver to install the software(if the computer has display the CD automatically,the installation UI will pop up)·Click”next step”to install the software·Driver software installation completeUninstall·Click start menu,choose”4G LTE WIFI”-Uninstall4G LTE WIFI·Click”next step”to uninstall4WIFI connectionSearching network to find SSID:4G-UFI-XXX,Click connect,input password:1234567890,and confirm.(see detailed information on the label on the device)5WEB UI descriptionLog on WEB UIDouble click shortcut icon on the desk.1.Connect to WIFI,open you browser,input”http://192.168.199.1”to open WEB UI.(IE,QQ Browserrecommended)2.Detailed information(operator,connection status,flow usage, WIFI,SSID)of the device can be seen on the home page.3.Input password:admin to enter management page(English/Chinese language optional)4.Choose advanced setting icon to enter the setting page.work modeAuto mode searching sequence4GLTE HSPA/EVDO GSM/1X(Auto mode is default mode)6.Connecting network configuration files,common APN already built in,add extra APN,click“New”to add and save.7.Wireless network:Modify parameter(SSID,channel,password, etc)8.System setting:Modify WEB UI logging password,restore factory setting,resetting the device information.6.FAQ1.What OS does this device support?Windows XP,Windows Vista,Windows7Windows82.Can not install the software?Reasons as below:1.if the auto-installation has not completed,please check if the anti-virus and security software are running,if yes,please close them and do the installation again;for the software that can not be forbidden,please close the monitoring software,open it after installation.2.For some PC,the installing time maybe long because of the different configuration.Thus,when installing,be patient,do not cancel it,nor plug out the device.If still not succeed,please uninstall the driver and install it again.3.SIM card not resigsteredReasons as below:1.local signal is not stable2.software is old version3.hardware problemYou can:1.Try to log on at another place.2.update the software3.check the hardware or change another device to connectagain4.Why prompt”can not connect to configuration files”?Please add a configuration file manually.5.Can not connect to internet?Please make sure the configuration files and setting correct.6.Connecting and data exchange too slow?Please check local network signal strength.7.Fail to send messages?Please make sure message center number is correct.8.Can not receive message?Please check(U)SIM memory full or not.9.Why only save a few names when add contacts?The input character is longer than(U)SIM card10.Does this support roaming?It depends on the telecom operator,please consult the local operator or service apartment.。
F2X16 V2 系列 IP MODEM 使用说明书
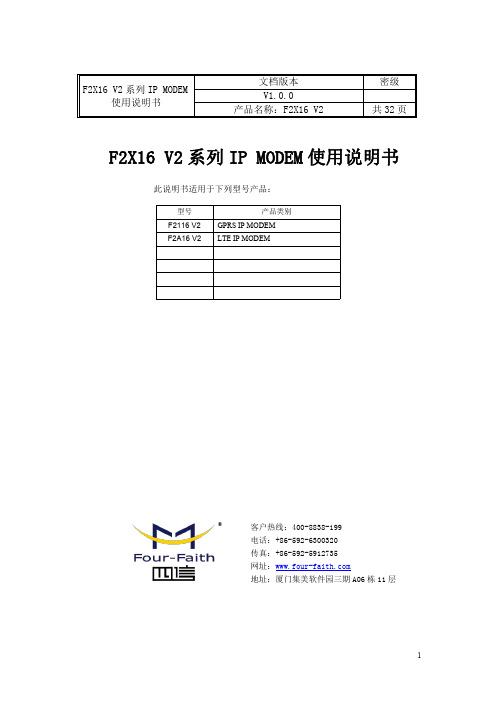
F2X16V2系列IP MODEM 使用说明书此说明书适用于下列型号产品:客户热线:400-8838-199电话:+86-592-6300320传真:+86-592-5912735网址:地址:厦门集美软件园三期A06栋11层F2X16V2系列IP MODEM使用说明书文档版本密级V1.0.0产品名称:F2X16V2共32页型号产品类别F2116V2GPRS IP MODEM F2A16V2LTE IP MODEM文档修订记录日期版本说明作者2020-02-24V1.0.0初建ZDM2/31著作权声明本文档所载的所有材料或内容受版权法的保护,所有版权由厦门四信通信科技有限公司拥有,但注明引用其他方的内容除外。
未经四信公司书面许可,任何人不得将本文档上的任何内容以任何方式进行复制、经销、翻印、连接、传送等任何商业目的的使用,但对于非商业目的的、个人使用的下载或打印(条件是不得修改,且须保留该材料中的版权说明或其他所有权的说明)除外。
商标声明Four-Faith、四信、、、均系厦门四信通信科技有限公司注册商标,未经事先书面许可,任何人不得以任何方式使用四信名称及四信的商标、标记。
3/31/314注:不同型号配件和接口可能存在差异,具体以实物为准。
目录第一章产品简介 (6)1.1产品概述 (6)1.3工作原理框图 (7)1.4产品规格 (8)第二章安装 (10)2.1概述 (10)2.2开箱 (10)2.3安装与电缆连接 (10)2.4电源说明 (13)2.5指示灯说明 (13)第三章参数配置 (14)3.1配置连接 (14)3.2参数配置方式介绍 (14)3.3参数配置详细说明 (14)3.3.1配置工具运行界面 (15)3.3.2设备上电 (16)3.3.4中心服务 (22)3.3.5串口 (23)3.3.6无线拔号 (24)3.3.7全局参数 (26)3.3.8设备管理 (27)3.3.9其它功能项 (28)第四章数据传输试验环境测试 (29)4.1试验环境网络结构 (29)4.2测试步骤 (29)5/316/31第一章产品简介1.1产品概述F2X16V2系列IP MODEM 是一种物联网无线数据终端,利用公用蜂窝网络为用户提供无线长距离数据传输功能。
LTE基站入门基站设备及配置

L TE基站入门基站设施与配置目录1LTE基站概括基站观点基站是挪动通讯中构成蜂窝小区的基本单元,主要达成挪动通讯网和挪动通讯用户之间的通讯和管理功能,从狭义上就能够把基站理解成一种无线电收发信电台。
换句话说,你的手机信号从哪里来,手机能上网、打电话都是因为你的手机(专业术语称为终端UE)驻留在一个基站上,在基站信号的覆盖范围内。
基站不是孤立存在的,它不过属于网络架构中的一部分,它是连结挪动通讯网和用户终端的桥梁基站一般由机房,信号办理设施,室外的射频模块、收发信号的天线、GPS、各样传输线缆等等构成。
下边将以基站接收信号,从室外到室内这样的次序给大家介绍一下基站。
基站室外设施(1)第一需要经过室外的天线接收信号,天线也是我们在室外判断能否四周有基站最显然的标记。
天线的形状以下列图所示,近似扁平的长方体。
天线有好多不一样的安装方式,下边列举了一些天线安装在不一样地方的照片,当你看见这些天线,那么这个天线邻近就应当有我们的基站了。
天线的各样安装场景(2)天线接收的信号送往射频单元进行办理,远端射频模块(RemoteRadioUnit),简称RRU。
接收信号时,RRU将天线传来的射频信号(射频信号就是经过调制的,拥有必定发射频次的电波)转变成光信号,传输给室内办理设施;发送信号时,RRU将从机房传来的光信号转成射频信号经过天线放大发送出去。
自然这不过简单地解说了RRU功能,其实RRU对收发信号还有好多其余办理,在后边的模块介绍里会介绍。
RRU有好多种类,在后边的模块介绍里会详尽给大家列举。
(3)接收的信号经过射频模块 RRU办理后,经过光缆传入机房内的信号办理模块。
(4)室外还实用于系统定位和供给时钟同步的信号的GPS模块,因为长的像蘑菇,也称GPS蘑菇头。
基站室内设施(1)基站设施一般状况下,除了天线、射频办理单元RRU、GPS蘑菇优等设施安装在铁塔、抱杆等室外环境,其余的设施是安装在特定的机房内的,假如目前建站的地方处在野外或没有适合的建筑作为机房,则使用一体化机柜,下边经过照片给大家展现一下机房和一体化机柜。
意法·爱立信推出LTE Modem和应用处理器高集成平台

功 能 ,并 且 拥 有 速 率 可 达 2 . 5 G H z的 e Q u a d M 应 用 处 理 T 器 。N o v a T h o r L 8 5 8 0将 在 2 0 1 3年 的 一 季 度 提 供 样 片 。
进 的高 集成 L T E MO d Ap平 台 平 台 上 ,带 来 非 常 卓 越 的 性 能 和无 可 比拟 的优异 功耗 。”
表现 , 证实了 F D— S OI技 术 的 突 破 性 , 这 让 下 一 代 高 性 能L T E平 台 , 能够 充 分 地 从 我 们 突 破 性 的技 术 和 设 计 中
2 0 1 3年 1月 7 日 , 全 球 领 先 的 移 动 平 台 和 半 导 体 厂 商意法 ・ 爱 立 信 在 全 球 最 大 规 模 的 拉 斯 维 加 斯 消 费 电
子 展 上 推 出 全 球 最 快 、最 低 功 耗 的 高 集 成 L T E智 能 手 机 平 台 。N o v a T h o r M T L 8 5 8 0 Mo d A p是 一 款 支 持 L T E 多 模 基于 N o v a T h o r L 8 5 4 0的 设 计 , N o v a T h o r L 8 5 8 0 突 出
了 F D— S O1技 术 的 优 势 并 结 合 创 新 的 技 术 在 增 强 性 能 的 同 时 保 持 低 功 耗 。对 于 最 终 用 户 而 言 , N o v a T h o r L 8 5 8 0
的优 势 包 括 : ( I ) C P U运 行 速 度 提 升 3 5 % , 图 形 处 理 器
LTE基站设备配置说明-1.21

1、硬件配置到双载波能力,将来平滑升级; 2、软件处理能力采用RRC连接数唯一指标
8T8 R
2T2 R
S1 S11 S111 S1 S11 S111 S1111 S11111 S111111 独立RRU
20 20 20 20 20 20 20 20 20
TD LTE基站设备
三、配置要求
1、单用户峰值吞吐率须达到下行80Mbps 、上行30Mbps。 2、单载扇峰值吞吐率须达到下行80Mbps、上行30Mbps(64QAM)及20Mbps(
12
目录
第一部分 第二部分 设备主要衡量指标 配置模型及要求
LTE FDD基站设备
LTE FDD SDR基站设备 TD LTE 基站设备 安装辅材 重点功能软件
第三部分
网管配置
服务 各厂商设备能力及配置清单
安装辅材
一、安装辅材配置原则
1、标准站型中配置常见安装方式,特殊安装方式根据具体需求选配; 2、采用选配方式时,需要注意扣除标配中被替代的安装件
能力指标:支持20M载波个数、吞吐量能力、同时RRC连接数能力、信令能力
带宽:工作带宽OBW、瞬时工作带宽IBW; RRU Ir接 口 收发通道:1T1R、2T2R、2T4R、8T8R 功率配置:每通道10W、20W、40W、60W、80W Ir接口数、Ir接口规格(10G、6G、5G、2.5G等) ;
6
目录
第一部分 第二部分 设备主要衡量指标 配置模型及要求
LTE FDD基站设备
LTE FDD SDR基站设备 TD LTE 基站设备 安装辅材 重点功能软件
第三部分
网管配置
- 1、下载文档前请自行甄别文档内容的完整性,平台不提供额外的编辑、内容补充、找答案等附加服务。
- 2、"仅部分预览"的文档,不可在线预览部分如存在完整性等问题,可反馈申请退款(可完整预览的文档不适用该条件!)。
- 3、如文档侵犯您的权益,请联系客服反馈,我们会尽快为您处理(人工客服工作时间:9:00-18:30)。
置去检查
• MIPI配置中中单软多硬部分不用要全部配成bandNone,否则会有不预 期的问题(建议配bandnone)
• TRX 频段不可以超过10个 • TRX频点要从低到高排列,开始频点和截至频点要是频段的开始频率和
• MIPI命令下发格式是每50nS一位2进制数的数据格式
MML1_rf文件夹需要配置的文件和修改方法 mml1_custom_rf.h
• 配置打开关闭Clock buffer
mml1_custom_mipi.h
• 配置PA、主集和分集上的ASM的USID——建议不要改ASM0/ASM1主 分集的定义,只修改USID值(方便后续MIPI.C文件配置)
lte_custom_rf.h
• 配置BPI部分,与2G/3G时配置方法相同,这里所有用到的BPI全部都 一次配完,BPI口选择遵循方便走线的原则来
• 配置TRX端口——TRX端口按照接线方式配就好,可以一只文件中把 所有要做的band的TRX端口都配
lte_custom_rf.h
• 配置Band indicator,需要做哪几个band就配置哪几个band,不需要做 的band一定配置成bandnone,否则会有特定场景下搜网问题
• 以上就是所有MML1中需要修改的东西,其他的不用动,默认就好
EL1_rf文件夹需要配置的文件和修改方法 lte_custom_mipi.h文件
• 配置打开mipi enable
• 下面的timing在on-off power、through put、EVM第一个flag偏大等问 题时可以做调试使用:
• TPC data——TX data是设置PA状态,真正的发射是在TPC data这边 配置
• TPC EVENT TPC data保持默认即可,即使不做这些频段或做这些频段 都不要动这里的设置,没有的复制其他频段的不过来即可
Байду номын сангаас
lte_custom_mipi.c——TX
• TPC PA section data
• 端口选择配置,band indicator配置都不需要遵循顺序,但是建议按照频 段大小顺序来填写,方便后面出问题时检查配置文件。
lte_custom_rf.h
• 如果需要做BAND28,或B38/40 bypass时配置band split • 配置B28时需要注意西面END1频点需要与MIPI配置中频点对应
• LTE 配置中,lte_custom_mipi.c是重点要配置的地方,下面 介绍mipi.c配置,共分四个部分介绍:
• 1、初始化 • 2、RX配置 • 3、TX配置 • 4、isolation配置
• 文档中尽可能只介绍要修改的地方,不需要修改的地方不 做介绍或文档中指出
lte_custom_mipi.c——初始化
• 需要做B38/40 bypass时只需要配置SPLIT,
lte_custom_rf.h
• BAND28B的BPI配置在如下位置配置
• B40 bypass的BPI配置在如下位置做配置
• lte_custom_rf.h文件配置完成,其他地方默认即可
lte_custom_mipi.c
• 以上所有文件按照上面修改即可,其他没有提到的地方默 认不需要修改。
量虽然很大,但是会降低吞吐率 • 5、通过meta中NVram手动修改mipi data做实验即可
• 3G • PR1/PR2/PR2B配成RX控制逻辑; • PR3配成idle mode. • PT1配成RX逻辑 • PT2/PT2B配置成TX控制逻辑; • PT3配置成idle mode.
QA
• 编译不过时: • 1、首先检查是否MTK release的modem文件是否有语法结构方面的变
截止频率 • TX data部分的电流设置成最小电流
QA
• MIPI不通时: • 1、首先检查电流是否有起来,是从哪一级不通 • 2、检查不通的那一级的焊接问题(换一个板子试一下,或换一个走同
一个器件的频段试一下) • 3、排除是BPI还是MIPI器件不通 • 4、检查配置是否正确(RX重点检查RX data内容、TX重点检查TPC
• 只需要修改上图中红色部分,ASM大部分都是7F是隔离模式,检查一 下ASM的规格书将隔离模式的data值填到此处即可
• W和2G部分同样方法配置即可。
2G/3G BPI的配置规则
2G: • PR1,PR3, • PR2配成RX控制逻辑 • PT1,PT2,PT3配成idle mode; • PT2B配成GMSK TX控制逻辑:PDATA_GMSK; • PT2M1_G8/PT2M2_G8全部配成8PSK TX(G8配8PSK) • PT2M1_8G/PT2M2_8G全部配成GMSK TX(8G配GMSK)
LTE modem introduction
硬件一部/射频 谭杰
LTE modem需要配置到的文件总览
需要准备的文件
• 原理图 • 所有器件的规格书 • 软件提供的MTK release的原始modem包
• 需要修改配置的部分全部在文中用红色标记标出,修改红色标记的部 分,其他地方保持默认即可。
lte_custom_mipi.c——TX(B1为例)
• TX EVENT定义,与TX data对应关系:
• TX event部分不需要修改,保持默认即可
lte_custom_mipi.c——TX(B1为例)
• TX data
• 需要修改的只有上面两个红色框中内容内容(一般第一个框中内容默认 就是对的,只需要检查一遍即可),按照器件规格书和我们硬件接线方 式修改即可,其他地方不需要修改保持默认即可
data内容),排查一下是否有漏做1C 38初始化动作导致mipi命令下不 下去的问题 • 5、通过meta中NVram手动修改mipi data和BPI data做实验直至所有 band打通
QA
• ON-OFF power fail时: • 1、首先检查是否TX data电流设置是最小电流设置 • 2、尽量降低TX data中电流设置来改善 • 3、当改TX data时没法满足时在考虑改timing来改善 • 4、优化到刚刚好过spec并有2dB余量即可(spec -48.5),改太大余
lte_custom_mipi.c——RX(B1为例)
• RX EVENT定义,与RX data对应关系:
• RX event部分不需要修改,即使分集没有用到MIPI器件也不要修改这 里,保持默认即可
lte_custom_mipi.c——RX(B1为例)
• RX data
• 需要修改的只有上面的红色框中内容,按照器件规格书和我们硬件接线 方式修改即可,其他地方不需要修改保持默认即可,分集如果没有mipi 器件分集也不用动,保持默认即可(建议不要注释掉分集部分的mipi内 容,否则检查不仔细就会出问题)
lte_custom_mipi.c——TX
• TPC data——TX data是设置PA状态,真正的发射是在TPC data这边 配置
• TPC EVENT TPC data保持默认即可,即使不做这些频段或做这些频段 都不要动这里的设置,没有的复制其他频段的不过来即可
lte_custom_mipi.c——TX
• 一般这里保持默认即可,不用修改,只需要对一下0x1的设置是否是对 的即可
• 没有的频段直接从其他频段复制过来即可,修改频点和修改0x1的配置 即可。
lte_custom_mipi.c——isolation配置
• LTE需要做自校准,自校准时不可以接收到外接的任何干扰信号,导致 自校准精度下降,因此需要配置隔离模式给LTE做自校准调用
• 首先下1C 38,原因是MTK的MIPI是normal mode,因此要下1C 38做 初始化,否则MIPI器件下不进去命令,然后紧接着就是1C B8原因是因 为做初始化后并不一定所有场景都是初始化后就有TRX要收发,因此做 完初始化后要做1C B8动作保持低功耗模式。
• 保持默认即可,不用修改