
RPP-200A微库仑滴定仪说明书
六、Cl 滴定池使用说明
1、滴定池结构 滴定池分池体、池盖、参考侧臂,阴极侧臂及搅拌子五个部分。
2、电解液 取 700 毫升的冰醋酸(分析纯或以上),加入 300 毫升的去离子水,混合摇匀
泰州市中环分析仪器有限公司
6
RPP-200A 微库仑滴定仪使用说明书
即可。 3、电极电镀的具体方法
(1)银电镀液的配制: 4g 氰化银+4g 氰化钾+6g 碳酸钾+100ml 去离子水
打开阴极室活塞,使电解液充满阴极室,除去气泡并关闭活塞,倾斜池体, 小心地顺着池壁放入搅拌子,盖上池盖,调整好电极位置,反复用新鲜电解液冲 洗滴定池,使电解液的液面高出铂片约 5mm。 4、滴定池维护与常见故障排除
(1)硫滴定池应在阴凉无空气污染处保存; (2)电解池内要时刻保持储有一定量的电解液,并使铂片在液面以下; (3)切不可拔动参考电极; (4)电解液要经常配制,保持新鲜; (5)若无去离子水,可用二次蒸馏水代替,阻值应在 2 兆欧以上; (6)要时刻保持电解池清洁 ; (7)任何情况下,不得用手碰铂电极; (8)清洗时不要让洗液或丙酮渗入参考侧臂,否则要重新安装电解池。
5、氯电解池的维护
泰州市中环分析仪器有限公司
7
RPP-200A 微库仑滴定仪使用说明书
(1)氯滴定池应在阴凉无空气污染处保存; (2)池盖电极应始终保持在液面以下; (3)切不可拔动参考电极; (4)参考电极臂应无气泡; (5)AgAc 见光分解,氯电解池一定要严格避光保存 ; (6)要时刻保持电解池清洁; (7)任何情况下,不得用手碰铂电极; (8)长期不用,应用硅胶垫堵住排气口,取出搅拌子。因氯电解池的测量电 极和电解阳极有极易脱落的镀层,最好不要长期搁置。)
(5)池盖电极镀银电流为 2mA,时间为 16 小时。然后将镀好的池盖电极置于 装有 10%NaCl 的电镀池中并接电镀单元阳极,铂丝接阴极,调节电渡电流 10mA, 电镀 4 分钟,此时电镀表面出现一层紫色镀层。
(6)镀好的参考电极待装,池盖电极置于 70%冰醋酸中。
注意:氰化银、氰化钾有剧毒,没有良好的通风设备及安全措施,不得进行电镀!! 氰 化银、氰化钾绝对不能与任何酸混合。
炉使用。地线接地电阻不大于 5Ω。 3、气源
仪器所用气体为普通氮气和氧气,气体管道使用不锈钢管或聚四氟乙烯管, 用丙酮清洗后,再用氮气吹扫 10 分钟,以确保气体管道的清洁。
注意:操作高压气体或钢瓶时,应严格遵守有关的安全规则,易燃易爆气体要格外当心! 气路一定要干净!
4、由于仪器专业性较强,本公司将派专业技术人员为您安装调试! 确认仪器的电气连接正常后,依次打开温控电源,主机电源,搅拌器电源,
仪器原理如下图:
仪器原理图 用已知浓度的标准样品来标定仪器,调整仪器到正常的工作状态,将末知浓 度的样品注入裂解炉,跟据标准样品的转化率即可算出样品的浓度。
泰州市中环分析仪器有限公司
1
RPP-200A 微库仑滴定仪使用说明书
二、技术指标
1、测量范围: S: 0.02mg/L~10000mg/L~百分含量 Cl: 0.1mg/L~10000mg/L~百分含量
进样器电源和电脑电源。打开有
图标的应用程序,出现如下图所示界面:
泰州市中环分析仪器有限公司
3
RPP-200A 微库仑滴定仪使用说明书
工作站初始界面图
根据提示按
下联机键,使工作状态处于平衡档如图标
所示,采集电解池偏压,待显示稳定后按工作档
,使仪器进
入工作状态。
注意:如电解池偏压很稳定则进入下面的操作。电解池偏压不稳应检查搅拌器或主机地 线是否可靠连接。
1、滴定池的结构
滴定池分池体、池盖、参考侧臂,阴极侧臂及搅拌子五个部分。
2、电解液的配制
取 0.5gKI,0.6gNaN3 溶于约 500ml 去离子水中,加入 5ml 冰醋酸,再用去
泰州市中环分析仪器有限公司
5
RPP-200A 微库仑滴定仪使用说明书
离子水稀释至 1000ml。
注意:配制电解液所用试剂均为优级纯,去离子水的阻值要求 2 兆欧以上,配好的电解 液用棕色瓶在阴暗凉爽处放置!(S 电解液不能长期保存)
(2)将电镀池用洗液浸泡十分钟,然后依次用自来水、去离子水冲洗,最后 用丙酮洗净吹干。
(3)把电镀池放在搅拌器上,调节搅拌速度使搅拌子平稳转动以使电镀液产 生轻微旋涡为宜,参考电极接电镀单元阴极并放入电镀池中心室,银棒接电镀单 元阳极,放入电解池侧臂。
(4)调节电镀电流 2mA,电镀 45 分钟。镀好的电极应有一层均匀的白色发亮 的沉淀物,如露铂应重镀。
3、滴定池的安装 用新鲜的铬酸洗液浸泡整个滴定池 5-10 分钟,然后分别用自来水、去离子
水洗净吹干,将侧臂活塞涂以少许润滑脂并用橡皮筋固定,关闭两侧活塞,将滴 定池充满电解液,打开参考臂活塞,让电解液流入参考侧臂以驱除气泡,待气泡 除尽后,让电解液充满参考电极室,用小勺轻轻在侧臂放入 20-40 目的碘,用通 针赶尽气泡,在参考电极的磨口上涂以少许真空硅脂将铂丝小心地插入碘中,注 意不要把铂丝弄弯,此时要仔细检查参考电极室,保证参考电极的铂丝全部埋在 碘中,并保证整个参考电极侧臂没有残留气泡,否则必须重装,确信无误后,用 橡皮筋固定好,参考电极静置 24 小时后方可使用。
仪器原理:样品被载气带入裂解管中和氧气充分燃烧,其中的硫或氯定量地
转化为 SO2 或 HCl。SO2 或 HCl 被电解液吸收并发生如下反应: SO2+H2O +I2 =SO3 +2H++2IHCL+Ag+=AgCl↓+H+
反应消耗电解液中的 I2 或 Ag+,引起电解池测量电极电位的变化,仪器检测 出这一变化并给电解池电解电极一个相应的电解电压,在电极上电解出 I2 或 Ag+, 直至电解池中 I2 或 Ag+恢复到原先的浓度,仪器检测出这一电解过程所消耗电量, 推算出反应消耗的 I2 或 Ag+的量,从而得到样品中 S 或 Cl 的浓度。
八、常见故障排除
常见故障分为仪器和化试两个部分。 1、仪器故障。
泰州市中环分析仪器有限公司
8
RPP-200A 微库仑滴定仪使用说明书
仪器故障是指仪器硬性损坏或非正常使用造成仪器的损坏。前者一般指仪器
因使用时间太长达到使用寿命或部分元件老化损坏。后者则指由于操作失误或不
可抗拒的外力使仪器损坏。
对因使用时间太长达到使用寿命的仪器我们建议用户报废,因为这种仪器即
4、滴定池的安装
(1)用新鲜的铬酸洗液浸泡整个滴定池 5-10 分钟,然后分别用自来水、去离
子水洗净吹干,将侧臂活塞涂以少许润滑脂并用橡皮筋固定。
(2)参考臂装醋酸银,所用醋酸银应为白色或浅灰色,深灰色的醋酸银不能
用。
(3)滴定池的安装,关闭两侧活塞,将滴定池充满电解液,充满参考电极室,
无腐蚀性气体房间。放置仪器的工作台应能承受约 60Kg 的重量,有足够的仪器 操作及安装附件的空间。环境温度应为 5-30℃,当温度超出此限时,建议装空 调,最大相对湿度不能超过 80%,电源要易于开关。
注意:仪器绝对不能在有易爆、易燃的危险区域操作,因为仪器要使用氮气和氧气并有 高温单元。
2、电源 仪器使用 220V±10%,50Hz 双相电源,一相接主机电源,另一相供温控裂解
石英裂解管结构示意图
7、电解池,其结构示意图如下图所示,根据不同测量要求分为 S 电解池和 CL 电解池(详见“电解池的操作”)。
泰州市中环分析仪器有限公司
2
RPP-200A 微库仑滴定仪使用说明书
电解池示意图
四、安装和调试
1、安装环境 仪器应安装在通风良好、温度变化范围不大、周围无剧烈振动、无阳光直射、
2、仪器准确度: A:浓度为 0.1~1.0 mg/L 的样品绝对误差:≤±0.1 B:浓度为 1.0~10 mg/L 的样品相对误差: ≤10% C:浓度为 10 mg/L 以上的样品相对误差: ≤5%
三、仪器组成
1、仪器主要由主机、温度气体流量控制单元、搅拌器、进样器、计算机、打印 机等部分组成。 2、主机是进行数据采集、计算和分析控制的单元,是整个仪器的核心,要求接 地良好。 3、搅拌器是放置电解池的装置,外壳应保持良好的接地,避光和屏蔽。 4、进样器能自动把样品注入石英裂解管中,它可以自由调节进样速度和行程, 满足不同样品的分析要求。固态样品和气态样品的分析需选配相对应的进样器。 5、计算机和打印机是对分析数据进行处理存贮并输出的设备。 6、石英裂解管裂解管,其结构示意图如下图所示:
使暂时可修复使用,但它会在短时间内多次出现不同的故障。给使用者和维修者
带来极大的不便。
有些仪器因为生产工艺或检验过程的缺陷导致个别元器件的损坏可由我厂
在保修期内及时给予维修。
对由于操作失误或因外因而损坏的仪器只要经过及时的维修一般都可正常
使用。
常见仪器故障如下所示:
(1)裂解炉不升温或超温:
裂解炉不升温有几种现象,应分别处理。
七、仪器操作注意事项
1、微机的操作应遵循电脑操作规程。 2、偏压过高,降偏压时要先将仪器的采样电阻调小,然后每次适当降 1-5mV, 不可一次降得太多。平衡键按下后采集的偏压总比电解池实际偏压要有一点偏 差,属正常现象。仪器走基线时若出现下漂现象,可重新调整偏压。 3、仪器出现异常偏压时要仔细检查接线是否接反,有无虚焊,电解池侧臂是否 有气泡等。 4、搅拌器开关门要小心,切勿震动过大损坏裂解管或电解池。 5、气体压力不宜过大,一般分压在 0.2MPa 即可。 6、有些样品不宜用库仑法分析,切勿污染裂解管和电解池。 7、多次做样后,要用鲜新电解液冲洗电解池,防止污染,裂解管隔一段时间要 反烧。 8、电解池在没有接气之前不可给加热带加热! 9、做完分析后要等到裂解炉温度降到达 300°C 以下才能关闭风扇,以免因温度 太高损坏仪器!
RPA-200使用说明书
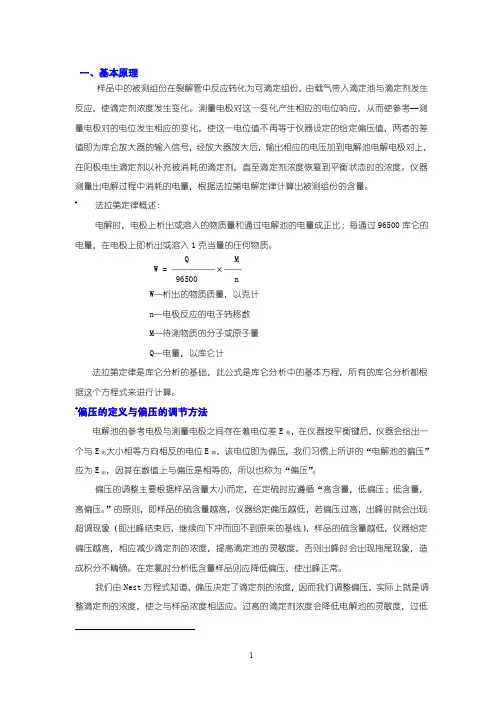
一、基本原理样品中的被测组份在裂解管中反应转化为可滴定组份,由载气带入滴定池与滴定剂发生反应,使滴定剂浓度发生变化。
测量电极对这一变化产生相应的电位响应,从而使参考━测量电极对的电位发生相应的变化,使这一电位值不再等于仪器设定的给定偏压值,两者的差值即为库仑放大器的输入信号,经放大器放大后,输出相应的电压加到电解池电解电极对上,在阳极电生滴定剂以补充被消耗的滴定剂,直至滴定剂浓度恢复到平衡状态时的浓度。
仪器测量出电解过程中消耗的电量,根据法拉第电解定律计算出被测组份的含量。
#法拉第定律概述:电解时,电极上析出或溶入的物质量和通过电解池的电量成正比;每通过96500库仑的电量,在电极上即析出或溶入1克当量的任何物质。
Q MW = ─────×──96500 nW─析出的物质质量,以克计n─电极反应的电子转移数M─待测物质的分子或原子量Q─电量,以库仑计法拉第定律是库仑分析的基础,此公式是库仑分析中的基本方程,所有的库仑分析都根据这个方程式来进行计算。
*偏压的定义与偏压的调节方法电解池的参考电极与测量电极之间存在着电位差E测,在仪器按平衡键后,仪器会给出一个与E测大小相等方向相反的电位E偏,该电位即为偏压,我们习惯上所讲的“电解池的偏压”应为E测,因其在数值上与偏压是相等的,所以也称为“偏压”。
偏压的调整主要根据样品含量大小而定,在定硫时应遵循“高含量,低偏压;低含量,高偏压。
”的原则,即样品的硫含量越高,仪器给定偏压越低,若偏压过高,出峰时就会出现超调现象(即出峰结束后,继续向下冲而回不到原来的基线),样品的硫含量越低,仪器给定偏压越高,相应减少滴定剂的浓度,提高滴定池的灵敏度,否则出峰时会出现拖尾现象,造成积分不精确。
在定氯时分析低含量样品则应降低偏压,使出峰正常。
我们由Nest方程式知道,偏压决定了滴定剂的浓度,因而我们调整偏压,实际上就是调整滴定剂的浓度,使之与样品浓度相适应。
过高的滴定剂浓度会降低电解池的灵敏度,过低滴定剂浓度又会影响电流效率,不能保证样品的完全反应,因此,偏压的调节至关重要,希望您能熟练掌握这一点小小的技巧。
ky200微库仑滴定仪操作步骤
KY-200微库仑硫氯测定仪操作规程1.准备工作①将洁净的石英管用硅胶垫堵住其进样口,放入裂解炉内,并将氧②调节进样器的高度及远近,使进样器对准石英管进样口。
③打开氧气、空气钢瓶总阀,调节压力位0.1帕。
④依次打开微库仑硫测定仪主机、计算机、温度流量控制器、进样器的电源。
2. 联机操作桌面上打开“微库仑分析系统”应用软件,按任意键后进入,单击“联机” 图标,联机正常后,主窗体左下方显示“联机状态”。
3. 温度设置单击“参数设置”栏,指向“温控参数设置”,弹出“温度设置”对话框。
分别设定三段所需的温度值(以分析硫含量为例:稳定段设为700℃,燃烧段设为800℃,汽化段设为600℃)。
选择“升温”状态,单击“确定”4. 冲洗安装电解池①②用对应的电解液冲洗中心室、侧臂和阴极臂,阴极臂只需冲洗一到两次,侧臂需冲洗三次以上,且从第二次冲洗时,要放上池盖电极③调整池盖电极位置,使测量电极和电解阳极与气体毛细管入口方向平行。
并保证电解液液面在铂电极以上5 mm④把准备好的滴定池置于搅拌器内平台上,调节搅拌器的高度,使滴定池毛细管入口对准石英管出口,并用铜夹子夹紧,调整电解池位置,开启搅拌器电源,使搅拌子转动平稳。
⑤将库仑放大器的电极连接线按标记分别接到滴定池的参考、测量、阳极、阴极的接线柱上,并拧紧以保证接触良好。
5. 测试修改偏压①单击菜单栏中的“工作控制”项,选中“平衡档”,使仪器处于平衡档。
后在弹出的对话框中选择“偏压测试与测定”,点击“开始测量”按钮,仪器自动采集电解池偏压,待偏压稳定后,单击“确定”②将仪器处于工作档时,修改偏压和测定样品。
若要修改电解池偏压,单击“偏压测试与测定”,在弹出对话框中,删除原有偏压值,6. 选择工作参数单击“参数设置”项,然后指向“其它参数设定”,单击该项,弹出“测量参数设定”对话框。
选择分析元素、元素状态、含量单位及标样/样品,输入操作员姓名代号,最后按“确定”键。
库仑滴定法测定水中微量铬
库仑滴定法测定水中微量铬一、实验目的与要求1:掌握通用库仑仪分析测试的原理与方法; 2:熟悉通用库仑仪的基本操作技术。
二、实验原理在H2SO4溶液中,电解Fe作为滴定剂,库仑滴定剂与样品溶液中的Cr反应,根据所消耗电量直接计算铬含量,也可用校正曲线法计算铬含量。
库伦分析是以测量电解过程中被测物质在电极上发生电化学反应所消耗的电量为基础的分析方法,分为控制点位库仑法和控制电流库仑法(库仑滴定)。
根据法拉第定律,物质在电极上析出产物的质量m与通过电解池的电量Q成正比,即3+6+m= QM/(Fn)式中,M为物质的摩尔量(g・mol),Q为电量(1C=1A・s);F为法拉第常量(1F=96487C);n为电极反应中转移的电子数。
在电解滴定过程中,电解阴极上发生如下反应:Fe+e=Fe产生的库仑滴定剂Fe与溶液中的Cr反应:Cr+3Fe→Cr+3 Fe在化学计量点以前,溶液中没有过量的Fe,无可逆电对存在,因而在两个指示电极回路中无电流通过。
终点时Cr全部反应完,有微量的Fe过剩,在指示阳极上发生氧化反应:6+6+-13+-2+2+6+2+3+3+2+2+Fe―e= Fe在两个指示电极之间维持0.2V左右的电位差,此时指示回路中出现电流突跃,指示终点到达,自动电位滴定仪自动断开电解回路。
三:实验仪器与试剂 1、库仑滴定仪2、电解液:由水、H2SO4(浓)、0.5 mol・LFe2(SO4)3溶液按体积45:17:5配制-12+-3+3、K2Cr2O7标准溶液:称取0.1414gK2Cr2O7,用水溶解,转移至500ml容量瓶中,用水稀释至刻度4、待测定的水溶液四:实验步骤(1)按照自动电位滴定仪使用说明连接好电解池和搅拌器,调好仪器;(2)终点控制方式选择“电位下降法”,即按下主机上“电流、电位”互锁琴键的“电位”挡,“上升、下降”互锁琴键的“下降”挡;(3)将盛有电解液(70mL)的电解池置于搅拌器上(电解池内放入搅拌子),并向电解池内加入Cr样品溶液。
NICHIRYO Le 微量滴定器使用手册说明书

Digital micro pipette for liquid handlingUser’s Manual*SB-NLE002ER 2022/6/10SB-NLE001ER 2022/4/15 Thank you very much for purchasing NICHIRYO Le. Please read this manual carefully before using this device. Safety PrecautionsPlease read this manual carefully and have sufficient understanding of the contents and instructions, especially concerning matters of safety, prior touse.The notes stated here is for the safety of the user, and for the correct usage of the product.Contents marked with “Danger Level Symbols” are matters that require the user’s utmost attention, not only for using Nichiryo Le properly, but also to prevent users from injuries or death, harm to others, and/orproperty damage.After reading this manual, please keep it in a noticeable and accessible place for ‘users of the device’ to refer to at any time.Any serious incidents that has occurred in relation to the equipment shall be reported to the manufacturer and to the competent authority of theMember State in which the user and/or the patient is established. Danger LevelsDANGERWARNINGCAUTIONCaution on disposal of this productWhen disposing the pipette body and tips (including adhering liquid), pleaseDigital micro pipette for liquid handlingTable of Contents1. Product overview 31.1 Features 31.2 Standard Accessories (Included) 31.3 Main illustration 32. Information on safety 42.1 Intended Use 42.2 Warnings for Intended Use 42.3 Material information 53. Operation/Operating procedure 63.1 Volume setting 63.2 Aspiration of liquid (Forward technique) 73.3 Dispensing the liquid 83.4 Recommendation for accurate pipetting (Technique) 94. Maintenance 104.1 Cleaning104.2 Disassembling 104.3 Reassembling 114.4 Sterilization135. Specifications (Accuracy/Precision) 136. Volume measurement 147. Troubleshooting 168. Replacement Parts List 178.1 Consumables 178.2 Spare parts list171. Product overview 1.1 FeaturesThe newly designed curvature and roundness in shape is ergonomic, and mitigates the user’s fatigue and stress levels from long periods of use. Easy to read digital indicator.The sample volume can easily be set by simply rotating the push button.A wide range of sampling volume can be covered by five models, from 1μL to 1,000μL. Patented body construction shields the hand temperature permeating through the body and inner workings of the device, which increases the accuracy of the volume measurements.The tip can be removed without direct contact, by simply pressing the tip ejector.1.2 Standard accessories (Included)When unboxing the package, check that all of the items above are included for the respective model.1.3 Main illustrationPush button Ejector buttonEjector pipeMain bodyVolume indicator2. Information on Safety2.1 Intended UseNichiryo Le, used in conjunction with pipette tips recommended by Nichiryo, are designed and constructed for low-contamination transfer of liquids, especially for samples from the human body and for reagents within the scope of an in-vitro diagnostic application in order to allow the in-vitro diagnostic medical device to be used as intended. Therefore, Nichiryo Le is subjected to the accessories of in-vitro diagnostic medical devices under Regulation (EU) 2017/746. The accessories is treated as in-vitro diagnostic medical devices in their own right under Regulation (EU) 2017/746. Nichiryo Le are intended for operation by qualified staff.2.2 Warnings for intended useWhen handling radioactive substances or infectious substances, always check and confirm the information first, and follow guidelines on their safety procedures.When using harmful liquids to the human body, be very careful in the handling of the substances.Never touch or come into direct contact with the used chips.Never touch filters directly that are contaminated by harmful or toxic substances.When liquids that are harmful to the human body adheres and/or contamination occurs, use appropriate measures to clean and decontaminate the device before continuing its use.This product is not intended for use on living organisms.Do not eject the tip with liquid inside of it. Do not eject the tip towards anybody.Do not expel or dispense any liquids towards anybody.Depending on the splashed liquid, there is danger of causing injuries to the human body.Please protect yourself in accordance with the general procedure of danger prevention, such as wearing protective clothing, protective glasses and gloves.DANGERWARNINGDo not use the pipette for any other purpose, use only for pipetting and liquid dispensing. Do not modify the pipette, modification can lead to accidents.Do not stab the tip into the human body, or eject the tip towards anyone. The tip is very sharp and extremely dangerous.The filter replacement tool tip is very sharp and can be dangerous. Please handle it with caution.Since the main body of the pipette becomes extremely hot right after autoclaving and drying. In this state, please do not touch it directly with your hands. It can lead to accidents and burn injury.Do not use the pipette for any purpose other than pipetting and liquid dispensing, such as stirring liquid with this product. It can lead to loosening of the tip, the tip dropping off, liquid adhesion and contamination to the main unit of the device and accidents and/or injury.During operation and maintenance, if any worn, missing or broken parts are detected, discontinue use immediately. Order and replace the part or parts, before use.2.3 Material informationThe use of highly reactive chemicals may damage the device. Pleaseacknowledge the following materials that are used, and do not use liquids that will violate them.Material of external parts Polypropylene (PP) Polyetherimide (PEI)Polyphenylenesulfide (PPS) Polycarbonate(PC) Nitrile rubber (NBR) Stainless steelCAUTIONCAUTION3. Operation/Operating procedureUsers of the device are required to strictly observe the following in orderfor the pipette to keep its excellent accuracy, precision and original performance. Do not expose pipette to direct sunlight when using it, or for 2 hours prior to use,otherwise the pipette may lose its accuracy. Avoid working with pipettes in a high temperature, low temperature, low humidity environment, or when the temperature difference between the environment including the main body of the device and the liquid is large, accuracy and precision may not be guaranteed.This Pipette can be used in a stable environment between +4°C and +40°C, butthe specifications may vary. Just prior to use, avoid touching the tip or nozzle cylinder as much as possible.If they are warmed up, accuracy may not be obtained.Original Nichiryo tips are recommended. Nichiryo Le is calibrated with the originalNichiryo tip, if you use other tips (Premium Tip), deviations in original factory set-tings may occur, and accuracy will not be guaranteed.Depending on the frequency of use, the pipette should be cleaned and the airtightchamber should be maintained according to the manual.3.1 Volume setting1) Turn the push button to set the volume indicator to a desired liquid volume.When setting the liquid volume, set the indicator’s minimum graduation scale to the triangle point marker in the lower part of the volume indicator (Fig. A). Please refer to the volume indicator and minimum graduation unit for each model to set the measurement volume accordingly. The volume indicator numbers are colored in black, or in red, to indicate the position of the decimal point. For 10μL and 20μL models; scale units are in (μL), the integer is indicated in black, and the decimal is indicated in red. For 100μL and 200μL models; the scale units are in (μL), there is only integer, and is indicated in black. For 1000 μL(1mL) model, scale unit is in (mL), the integer is indicated in red, the decimal is indicated in black.2) To increase the volume setting, turn the push button till it passes the designated volumesetting by at least 1/3 of a rotation of the push button dial, and then dial back to set the designated volume.3) To decrease the volume setting, simply turn it to the designated volume directly.Do not exceed the specified liquid volume limit, otherwise the pipette may bedamaged or deteriorate in its quality.Never rotate the push button dial more than 1/3 of a turn at maximum volumesetting. Damage to the device can occur, but also accuracy/precision may be impired.CAUTION 1000uL (2uL)NLE-1000Minimum scale 1mL (0.02mL) Minimum graduation unitPipette type1000μL *3.2 Aspiration of liquid (Forward technique)1) Attach a new tip to the nozzle end.It is recommended that tips are directly picked up from the rack. Do not twistthe pipette when fixing tip on.Please be sure to mount the tip on the main nozzle securely. Failure to do somay cause the tip to drop off and liquid to splash .Do not perform pipetting with less liquid than the set volume. If the quantity of liquid isless than the set volume, it may cause the liquid to spray into the main body, and the pipette may be damaged or deteriorate in its quality.2) Press down the push button fully to the first stop position “b” (Fig. B) – ①.3) Hold the pipette vertically and immerse the tip 2mm. to 3mm. below the surface of the liquid (Fig. C) - ①.4) To aspirate the set volume of liquid into the tip, release the push button slowly and let the push button go back to the initial position naturally. It takes 1 second to aspirate the liquid. During this operation, stop to wait for the suction process of the liquid to be totally completed, making sure that the liquid is drawn up into the tip with certainty (Fig. C) -②.5) Draw the tip of the pipette carefully vertically upward and away from the liquid surface, then touch the tip to the side of the tube to remove excess droplet adhering to the outside of the tip. (Fig. C) - ③Do not aspirate when the push button is at ‘position ④’ (Fig. B).We recommend using the forward technique as the operation method of thisdevice for pipetting. Nichiryo Le has been calibrated with the forward method, and precision may not be obtained when dispensing by any other means.Always change the tip when using different liquids to avoid cross-contamination.Please operate the push button slowly and gently.Sudden release of the push button, can lead to the aspiration of the liquid into the nozzle cylinder; not only precise accuracy will not be obtained, but also the quality of the device will be impaired. Due to the larger base volume measurements of models, 1000μL, there is a higher chance of the above to occur. To eliminate this possible situation thatleads to inaccuracy, precision failure or contamination. When using the pipette, be sure to always attach and use a tip. Failure to do so, willlead to liquid entering the inside of the device’s nozzle cylinder and cause serious malfunctions Never turn the device sideways or upside down with liquid in the tip. Liquid can enterinside the device’s nozzle cylinder , which can cause ※contamination and breakdown.※Cross-contamination with the entered liquid remaining inside the main body of the devicecan also occur, when switching liquids thereafter. CAUTIONCAUTION3.3Dispensing the liquid1) Touch the end of the tip against the inside wall of the recipient tube at a slight angle.2) Press the push button down slowly and smoothly to the first stop “position b” (Fig. B)-③. Wait for a second, then press the push button down to the second stop “position c” (Fig. B)-④to expel the last droplet of liquid from the tip (Fig. C) –④and ⑤.3) Keep the push button compressed. Remove the last droplet by slightly touching and running the end of the tip up against the inner wall of the tube, then move the tip of the pipette vertically straight up and out of the tube.4) Press the ejector button to detach the tip to dispose (Fig. C)-⑥.We recommend the tip to be disposed of after each use.lead to contamination/cross-contamination due to adhesion and deposits fromprior use.abcEjector buttonFig. BabC3.4 Recommendation for accurate pipetting (Technique)In addition to the previously mentioned operations of pipetting, the following technique maximizes the performance of the pipette.1)Pre-Rinsing the tipHigher precision can be obtained by performing the pre-rinsing of the tip. When using a fresh pipette tip for the first time and before sampling, it is important to pre-rinse the tip at least two to three times with the target solution before pipetting. Repeat the aspiration and discharge to the position of the 1st stop consecutively for two to three times.When strict precision is required, this method is recommended for all kinds of liquid handling. Pre-rinsing is a fast and easy way to increase the accuracy.2) Handling of High Density Solutions / Viscous SolutionsAfter aspirating the liquid into the tip, wait for 2 to 3 seconds before removing the tip slowly from the surface of the liquid. When dispensing, wait 2 to 3 seconds at the first stop position before pushing into the second stop position.3)Small volume dispensingEspecially for volumes less than 50 μL, please operate the pipette slowly and smoothly.Also, please pay close attention to the effect of evaporation loss, due to temperature and humidity.4. Maintenance4.1 CleaningWhen Nichiryo Le’s exterior is soiled, please use 70% ethanol on a clean soft cloth to wipe it off. Also, if any symptom that is described in the "7. Troubleshooting" section occurs, disassemble and inspect the device (each part), and then check and follow theprocedures in the ‘Troubleshooting Table’ to identify and isolate, correct and/or fix the situation or problem.Use of highly reactive liquids, may damage the device. After using a highly reactive liquid or/and if contamination occurs, perform the disassembly and cleaning of the device, accordingly to the following method in this manual.In order to keep and use Nichiryo Le in its best condition, we recommend theuser carries out; periodic checks and maintenance, and volume inspection/calibration of the device.4.2 Disassembling1) Remove the ejector pipe.While pressing the ejector button, shift the ejector pipe to the right (clockwise turn) and remove it from the ejector shaft (Refer to Fig. D). 2) Remove the bottom nut.While holding the nozzle cylinder firmly, turn the bottom nut counterclockwise and detach it from the body. 3) Remove each part.Remove and disassemble each part in the nozzle cylinder in the following order, first spring, plunger, first spring holder, second spring holder, O-ring. Once disassembled, carry out inspection and cleaning of the airtight section. When needed, please replace parts.Please be careful not to lose any small parts during disassembly.When removing the nozzle cylinder, the internal parts may spring out and apart from the reaction of the loaded spring inside, be mindful of this point, and take precautions when unscrewing and taking apart the nozzle cylinder.Depending on the Model, the specification of the O-ring retainer will be different.CAUTIONCAUTION4.3 Reassembling✱ Assembly is done in the exact reverse order of disassembly. (Refer to Fig. E).1)Set the O-ring onto the O-ring retainer.2) With the plunger tip facing upward, attach and assemble each part in the following order,first spring, first spring holder, stroke pipe, second spring, O-ring retainer, O-ring. Then, insert the assembly into the nozzle cylinder.3) The whole assembled nozzle cylinder is then attached onto the main body. Turn the bottom nut clockwise slowly and carefully.4) Attach the ejector pipe. Press the ejector button to expose shaft, attach and rotate the ejector pipe counterclockwise.After reassembling, perform several tests to inspect the pipette’s function/reliability.When screwing the nozzle cylinder into/onto the main body, hold the partsvertically as a visual reference, and slowly turn to let the threads bite togethercorrectly. If screwed in an offset way or with force, the O-ring will be unseated,stripping of the threads and/or damage to the casing can occur, all of which, willcause leakage.Circled Numbers in (Fig. E) corresponds to Parts Numbers in the replacement parts list. 7. Stroke pipeClockwise turn:LoosenCounterclockwise turn:TightenPress ejector button4.4 SterilizationThe nozzle cylinder and the ejector pipe can be autoclaved at 121°C for 20 minutes. Also, ethanol on a soft clean cloth can be used to wipe the outer body.Only autoclave the nozzle cylinder and the ejector pipe.Subjecting other parts to the autoclave will lead to deformation and damage. Do not use UV sterilization.UV rays will cause deterioration and malfunction to the device5. Specifications (Accuracy/Precision)affected by the user’s sampling skill s, and/or by various factors and conditions. ・ Tips used: Premium Tip (BMT2)・ Measurement temperature: Between 20°C to 25°C ・ Relative humidity: above 50%・ Measurement medium: distilled water ・Barometric pressure, 101kPaVolume measurement is in accordance with ISO 8655-6. CAUTION *6. Volume Measurement1)In order to avoid influence from temperature differences, ready the pipettes for inspection, the distilled water, the balance and tips 2 to 3 hours before use, in the environ where the measurement is to be conducted to attain temperature equilibrium. ※The measurement room should be in a controlled temperature between 20°C to25°C, and the measurement should be held where there is no direct influence from wind blowing from an air-conditioner, heater or fan.Please use the Nichiryo Original Premium Tip Series (volume compatible ones), and besure to install it on the pipette from the rack.2)Using distilled water as the sample, aspirate and dispense the volume to be calculated inside the weighing vessel on the balance. Please use a vessel with a lid for theweighing vessel inside the balance. Also, include a small amount of distilled water in thevessel, prior to adjusting the balance and measurement. 3)Read the mass (mg) measured with the balance, and then convert it with the"Z correction Factor for Distilled Water[table2]" to obtain the dispensed measured volume (μL).4)Add together the 10 volumes delivered and divide the sum by 10 to provide the mean volume.Calculate the systematic error e s [%] with the equation below.5)Calculate the random error CV [%] with the equation below. Where n is the number of measurements, in this case n=10 .Zm V i i ni V V 1i101sss100V V V es s V e : selected volume: systematic error [%]1100CV 12i n V V V ni CV : random error [%]: VolumeZm V ii : Measured mass: Z correction factor: Mean volumeV *When the pipette cannot be fixed after examining and conducting the above mentioned procedure, immediately stop using the pipette and ask us or our agent to repair it.Before bring the pipette for repair, be sure to check whether it has been contaminated with microbes, and/or harmful or toxic substance.8. Replacement parts list8.1 Consumables*8.2 Spare parts listplease indicate the volume size of your device, when placing your order.Please note that the specifications of the accessories may be changed without notice. Always check our website for the latest specifications and information.※Copying/Reprinting the manual in whole or in part without permission, is prohibited by law.MemoInformation on repair or servicing, when contacting your local distributor.Authorized Representative :Emergo Europe B.V. Prinsessegracht 202514 AP, The Hague The NetherlandsManufacturer :Head office & Factory2760-1 Nishikata, Koshigaya-Shi, Saitama 343-0822, JapanTEL: +81-48-989-1301 FAX: +81-3-6273-7944Tokyo office (Sales Division)PMO Kandaiwamoto-cho Ⅱ 4F, 2-2-4 Iwamoto-cho Chiyoda-ku, Tokyo 101-0032 JapanTEL: +81-3-5829-4539 FAX: +81-3-5829-4504URL: http://www.nichiryo.co.jp/ E-mail:*******************.jp。
微库仑仪器使用说明

微库仑仪器使用说明一.工作原理TCS型微库仑分析是应用微库仑滴定原理,由零平衡工作方式的库仑设计的库仑放大器与滴定池和适宜的电解液组成了一种闭环负反馈系统。
一起的工作原理如下:滴定池中的参考电极供给一个恒定的参考电位,并与测量电极组成指示电极对产生一电压信号。
这一信号与外加给定偏压反向串联后加在库仑放大器的输入端。
当两电压值相等时,放大器输入为零,输出也为零,在电解电极对之间没有电流通过,仪器显示器是一条平滑的基线。
当样品由注射器注入裂解管,样品中的被测物质反应转化为可滴定离子,并由载气带入滴定池,消耗电解液中的滴定剂。
滴定剂浓度的变化使滴定池中的指示电极对的电位发生变化,其值的变化送入微机控制的微库仑放大器,经放大后电解电极对(阴、阳极)上,在阳极上电生出滴定离子,以补充消耗的滴定剂。
上述过程随着滴定离子的消耗连续进行,直至无消耗滴定离子的物质进入,并已电生出足够的滴定离子,使指示电极对的值又重新等于给定偏压值,仪器恢复平衡。
在消耗——补充滴定离子的过程中,测量电生滴定剂时的电量,依据法拉第定律进行数据处理,则可计算出样品含量。
二.主要技术指标1、发生电流:最大:±2mA2、放大器输出电压:最大:±30v3、给定偏压范围:0~400mv,连续可调4、分析范围:⑴硫:0.2mg/L~5000mg/L⑵氯:0.5 mg/L~5000mg/L5、控温范围及精度:室温~1000℃,±1%±5℃6、重复性误差:⑴试样浓度<1.0mg/L时,重复性误差不大于50%⑵1.0mg/L≤试样浓度≤10mg/L时,重复性误差不大于10%⑶试样浓度>10mg/L时,重复性误差不大于5%三.仪器的组成及附件说明仪器由计算机、微库仑仪主机、温度流量控制器、搅拌器、进样器等组成。
1、主机仪器主机是信号放大器和数据处理的关键部件。
其前面板左下方有电源指示灯,后面板有串行口、温控口、电源插口和电源开关。
瑞士万通自动滴定仪说明书

■■■■■■■■■■■■■■■■■■■■■■
目录
目录
1 引言
1
1.1 Titrando 系统 ........................................................................ 1
1.2 仪器描述 ................................................................................. 2
3.4 3.4.1 3.4.2 3.4.3 3.4.4 3.4.5 3.4.6
连接 USB 设备 ..................................................................... 16 常规 ...................................................................................... 16 连接 USB 集线器 .................................................................. 16 连接打印机 .......................................................................... 17 连接天平 .............................................................................. 17 连接 PC 键盘(仅针对带 Touch Control 时的操作) ........... 19 连接条形码读取器 ............................................................... 19
RPP-200A微库仑滴定仪测定微量硫影响因素分析
RPP-200A微库仑滴定仪测定微量硫影响因素分析安志华;刘兰英【摘要】建立了用RPP-200A微库仑滴定仪测定低含量硫的分析方法.RPP-200A 微库仑滴定仪本身具有操作简单易行、测定结果重复性好等特点,充分发挥其优势依赖于对其性能的了解和正确的操作条件.合理处理样品,使硫质量浓度在5~100 ng/μL范围内,提高温度并降低氧气分压,同时减少重金属及氯离子对硫测定的干扰,能有效地提高硫转化率,进而提高分析准确度.通过对增益、偏压、氧气流量、氮气流量、进样量等参数进行调整,建立了低质量浓度硫的分析方法.同时提出了基线过高或基线噪音过大、峰拖尾、转化率偏低、转化率偏高等故障出现时的解决方案.【期刊名称】《上海化工》【年(卷),期】2015(040)003【总页数】4页(P20-23)【关键词】微库仑滴定仪;微量硫;回收率;影响因素;方法建立【作者】安志华;刘兰英【作者单位】中国神华煤制油化工有限公司榆林化工分公司陕西榆林719300;中国神华煤制油化工有限公司榆林化工分公司陕西榆林719300【正文语种】中文【中图分类】TQ533当前在微量硫含量测定领域中,所用仪器可分为进口仪器和国产仪器,相对来说进口仪器价格昂贵(如耶拿公司的multiEA5000S价格约60万元),配件、维护费用高,国产仪器价格就便宜很多(如泰州市中环分析仪器有限公司RPP-200A微库仑滴定仪价格不到10万元),配件、维护费用也低很多。
但是如果用国产仪器替代进口仪器,其稳定性、灵敏度,试验数据的再现性、精密度都不尽如人意。
我们进行了大量试验,以优化操作条件,使国产仪器达到最优效果。
1.1 方法原理试样由载气带入燃烧管与氧气混合并燃烧,碳氢化合物燃烧生成二氧化碳和水,其中微量硫大部分转化为二氧化硫(少部分生成三氧化硫),燃烧产物随后进入滴定池,与电解液中的碘三离子发生如下反应:由于电解液中被消耗,指示电极对间的电位差发生变化,随即电解电极对有相应电流通过,在阳极表面发生如下反应:当电解产生的恢复到测定前的浓度时,电解电极停止工作。
微库仑操作规程
微库仑硫氯含量滴定仪操作规程一、气源要求1、纯度要求:提供普通气源要求在99.95﹪以上,含水量小于5ppm 。
普通氧气纯度≥99.95﹪,普通氮气纯度≥99.95﹪。
2、气体种类:反应气或燃烧气是氧气,为裂解氧(燃烧氧),载气是高普通氮气。
3、流量设置裂解氧:100~250ml/min(100 ml/min)氮气:200~250ml/min(200 ml/min)4、流量控制①气源总压≥5MPa,太小会影响分析重复性。
②分压控制在0.2~0.4MPa之间。
分压小于0.2MPa时会引起流量不足,造成重复性不好;太大气路管线易脱落。
二、仪器环境要求1.电源要求:交流220V±22V,频率50Hz±0.5Hz的电源,并有良好的接地。
2.温度要求:室温在16~27℃,且相对稳定,湿度25%~75%,仪器应避免光线直射,为使分析系统正常稳定的工作,建议使用空调房间。
3. 硫电解液的配制称取0.5克碘化钾,0.6克迭氮化钠放入500毫升的去离子水中,加入5毫升的冰醋酸,再用去离子水稀释到1000毫升的棕色瓶中避光阴凉处保存。
氯电解液的配制将700毫升的冰醋酸与300毫升的二次蒸馏水混合贮于密闭玻璃瓶中三、操作程序⑴开机顺序打开温度流量控制器(后面板上)的电源开关,先打开气源的总阀,再调节减压阀旋钮,使两路气体的分压保持在0.2~0.4MPa之间,并查看各路气体的流量是否为所设定的流量范围;依次打开计算机,液体进样器的电源开关,启动仪器的应用程序,打开主机开关〔2〕操作步骤点击“联机操作”图标,在“参数设置”的下拉菜单中选择“温度参数设置”,其中汽化段:600,燃烧段:800,稳定段:700,点击升温,确定。
点击“参数设置”的下拉菜单中的“测量参数设置”,选择你所需要测量的参数,如固体还是液体,硫还是氯,标样还是样品,在“灵敏度选择”中,含量必须选择“低”档位,“放大倍数”为硫:100-500,氯:2000-2400,根据峰行选择,拖尾就增大,“积分点阻”视含量大小而定,含量越大,积分电阻越小(即积分电阻越大,峰形越高)。
微库仑硫测定仪安全操作及保养规程
微库仑硫测定仪安全操作及保养规程微库仑硫测定仪广泛应用于石化、化工、矿业等行业中精确测定液体或气体中的微量硫含量,但在使用过程中,由于操作不规范或保养不当等原因,可能存在安全隐患,因此加强对微库仑硫测定仪的安全操作和保养十分必要。
一、设备的基本结构和原理微库仑硫测定仪由针型电极、传感器、电容阻抗检测电路、信号放大电路等部分组成。
在检测中,样品经过预处理后进入电容间隙,形成电容环境,并在电容环境下测量不同频率电信号的电容阻抗,进而计算出样品中硫成分的含量。
二、安全操作规程1.设备运输和移动•承运设备时,应尽量避免颠簸碰撞,设备要放置水平。
•在使用和移动前,应检查设备各部件是否完整,紧固是否到位。
2.设备的安装和调试•设备在安装前,必须检查空气供应、电源供应等是否稳定,保证工作环境符合要求。
•安装后,仪器要严格按照说明书的要求进行调试,并且在使用前进行灵敏度和准确度的检验。
•设备调试完成后,要对设备作出相应的标识,防止误操作。
3.设备操作•操作人员必须经过专业培训并获得操作证才能进行操作。
•在操作过程中,不可随意改变设备内部的部件和接口。
•在设备工作过程中,禁止进行任何到接触电极、电容板的行为,避免设备损坏或造成人员触电。
•避免使用酸性、碱性溶液等危险性物质对设备造成腐蚀或损坏。
•操作完毕后,必须完全停机并关闭电源。
三、设备保养规程1.表面清洁•设备表面可用稀释后的清洁剂、水和干净的软布进行清洗。
不可使用有机溶剂、酸性、碱性溶剂进行清洗。
•避免设备表面长期暴露在阳光下,以免造成设备老化。
2.保养•仪器设备一般每三个月换一次电极头。
•设备使用后应该关闭电源,避免非正常情况下操作。
•设备每年彻底检查一次,以保证设备的正常运行。
四、总结对于微库仑硫测定仪的操作与保养而言,运输和移动、安装及调试、操作、保养四个方面约束性非常紧,这些要点的遵循是对设备正常运行和操作人员安全的保障。
因此,在使用中应严格按照规程进行,保证设备的稳定运行和提高操作人员的安全意识。
ky200微库仑滴定仪操作步骤
KY-200微库仑硫氯测定仪操作规程1.准备工作①将洁净的石英管用硅胶垫堵住其进样口,放入裂解炉内,并将氧②调节进样器的高度及远近,使进样器对准石英管进样口。
③打开氧气、空气钢瓶总阀,调节压力位0.1帕。
④依次打开微库仑硫测定仪主机、计算机、温度流量控制器、进样器的电源。
2. 联机操作桌面上打开“微库仑分析系统”应用软件,按任意键后进入,单击“联机” 图标,联机正常后,主窗体左下方显示“联机状态”。
3. 温度设置单击“参数设置”栏,指向“温控参数设置”,弹出“温度设置”对话框。
分别设定三段所需的温度值(以分析硫含量为例:稳定段设为700℃,燃烧段设为800℃,汽化段设为600℃)。
选择“升温”状态,单击“确定”4. 冲洗安装电解池①②用对应的电解液冲洗中心室、侧臂和阴极臂,阴极臂只需冲洗一到两次,侧臂需冲洗三次以上,且从第二次冲洗时,要放上池盖电极③调整池盖电极位置,使测量电极和电解阳极与气体毛细管入口方向平行。
并保证电解液液面在铂电极以上5 mm④把准备好的滴定池置于搅拌器内平台上,调节搅拌器的高度,使滴定池毛细管入口对准石英管出口,并用铜夹子夹紧,调整电解池位置,开启搅拌器电源,使搅拌子转动平稳。
⑤将库仑放大器的电极连接线按标记分别接到滴定池的参考、测量、阳极、阴极的接线柱上,并拧紧以保证接触良好。
5. 测试修改偏压①单击菜单栏中的“工作控制”项,选中“平衡档”,使仪器处于平衡档。
后在弹出的对话框中选择“偏压测试与测定”,点击“开始测量”按钮,仪器自动采集电解池偏压,待偏压稳定后,单击“确定”②将仪器处于工作档时,修改偏压和测定样品。
若要修改电解池偏压,单击“偏压测试与测定”,在弹出对话框中,删除原有偏压值,6. 选择工作参数单击“参数设置”项,然后指向“其它参数设定”,单击该项,弹出“测量参数设定”对话框。
选择分析元素、元素状态、含量单位及标样/样品,输入操作员姓名代号,最后按“确定”键。