vinten三脚架使用说明
照相机三脚架的使用与操作技巧

照相机三脚架的使用与操作技巧引言照相机三脚架是摄影中常见的辅助工具,它可以稳定相机,提供更清晰、稳定的拍摄效果。
在摄影过程中,正确使用三脚架可以提高拍摄质量,并帮助摄影师更好地掌握构图、曝光等技巧。
本文将介绍照相机三脚架的使用与操作技巧,帮助读者更好地利用三脚架进行摄影。
选择合适的三脚架在选择三脚架时,要考虑以下几点:1.重量和稳定性三脚架的稳定性直接影响拍摄效果,因此选择重量适中且稳定性较好的三脚架是必要的。
一般来说,铝合金材质的三脚架具有较好的平衡性和重量比,是不错的选择。
2.高度和可调节性三脚架的高度应能够满足不同拍摄场景的需求,因此应选择可以灵活调节的三脚架。
一些三脚架还提供水平仪和云台等功能,可以更好地调整拍摄角度和方向。
3.便携性对于需要频繁移动的摄影师来说,选择便携性较好的三脚架是明智之选。
一些三脚架可以折叠或收缩,方便携带和存储。
4.价格和品质价格和品质是选择三脚架时需要综合考虑的因素。
建议选择符合自己预算且性价比较高的三脚架品牌。
设置和调整三脚架1.放置稳定在使用三脚架之前,应先寻找一个平稳的地面。
避免放在不平整的地面上,以确保三脚架的稳定性。
2.展开和调整支腿将三脚架的支腿展开,并根据需要调整支腿的高度。
应确保每个支腿的高度和角度相同,以保持平衡。
3.固定支腿调整好支腿的高度后,使用螺旋锁或快速锁等装置将支腿固定。
确保支腿紧固牢固,不松动。
4.调整云台云台是三脚架上用于固定相机的部件。
调整云台的角度和方向,使相机可以根据需要在水平和垂直方向上移动。
5.安装相机将相机安装在云台上,根据需要调整相机的方向和角度。
确保相机紧固,并避免相机晃动。
使用技巧1.避免触摸相机在拍摄时,应尽量避免触摸相机,以防止相机晃动。
使用快门线或遥控器来触发快门,可以避免手部震动对照片的影响。
2.利用水平仪许多三脚架上都配备了水平仪,用于帮助调整三脚架的水平。
确保水平仪的气泡在中央位置,可以帮助我们拍摄出水平的照片。
三脚架 使用方法

三脚架使用方法三脚架使用方法。
三脚架是摄影器材中常见的辅助工具,它可以帮助摄影师稳定相机,拍摄出清晰、稳定的照片或视频。
正确的使用三脚架可以提高摄影作品的质量,下面我们来详细介绍三脚架的使用方法。
首先,选择合适的三脚架。
在市面上有各种不同材质和尺寸的三脚架,如铝合金、碳纤维等。
选择三脚架时,需要考虑自己的使用需求,比如需要携带方便的轻便型三脚架,还是需要承重能力强的大型三脚架。
接下来,正确地设置三脚架。
首先打开三脚架的腿部,调整三脚架的高度和角度,确保相机可以稳固地放置在上面。
在设置三脚架的过程中,需要注意地面的平整程度,以及周围环境的稳定性,避免因为地面不平或者外部干扰导致三脚架不稳定。
然后,安装相机到三脚架上。
通常三脚架的顶部会有一个快拆板或者螺丝孔,可以直接安装相机底部的快拆板或者螺丝。
安装相机时需要确保相机与三脚架的连接牢固,避免摄影过程中出现相机脱落的情况。
接着,调整相机的构图和角度。
利用三脚架的稳定性,可以更加轻松地调整相机的构图和角度,确保拍摄到想要的画面。
在调整构图和角度的过程中,可以利用三脚架上的水平仪来确保相机的水平度,避免拍摄出歪斜的照片或视频。
最后,使用遥控器或者定时器进行拍摄。
为了避免因为手动按下快门按钮而导致的相机晃动,可以使用遥控器或者定时器来控制相机的拍摄,确保拍摄出清晰、稳定的照片或视频。
总之,正确地使用三脚架可以提高摄影作品的质量,希望以上介绍的三脚架使用方法能够帮助到大家。
在实际使用中,需要根据自己的实际情况和需求来选择合适的三脚架,并且熟练掌握三脚架的设置和使用方法,才能更好地发挥三脚架的作用。
三角架使用方法

三角架使用方法一、引言三角架是摄影中常用的辅助工具,它可以提供稳定的支撑,帮助摄影师拍摄清晰、稳定的照片。
本文将介绍三角架的使用方法,包括三角架的结构、调整和稳固三角架的技巧。
二、三角架的结构三角架由三根脚、中央柱和云台组成。
脚是三角架的支撑部分,通常由铝合金或碳纤维制成,具有轻巧和耐用的特点。
中央柱是连接脚和云台的部分,可以调节三角架的高度。
云台是相机的支撑部分,通常具有水平旋转和垂直倾斜的功能。
三、调整三角架的高度1. 解开三角架上的扣紧螺丝,将中央柱拉出到所需高度,并扣紧螺丝固定中央柱。
2. 调整脚的高度,使其与地面保持水平。
如果地面不平,可以调节脚上的伸缩杆来平衡。
四、调整云台1. 在云台上固定相机,确保相机与云台连接牢固。
2. 使用云台上的旋钮或手柄,调整相机的水平角度。
3. 调整云台的倾斜角度,以满足拍摄需求。
可以通过旋转云台上的手柄或松紧螺丝来实现。
五、稳固三角架的技巧1. 选择平稳的拍摄地点,避免摇晃和震动。
2. 扣紧三角架上的螺丝,确保三角架的稳定性。
3. 在使用长焦距镜头或拍摄长曝光照片时,使用遥控器或定时器来避免手持相机引起的模糊。
六、三角架的使用注意事项1. 在户外使用三角架时,注意防止被风吹倒。
可以使用挂重物的方法增加三角架的稳定性。
2. 在拍摄斜向或倾斜的景物时,可以调整三角架的脚的高度不一致,使相机保持水平。
3. 镜头的重心与云台的重心要保持一致,以防止相机倾斜或滑动。
七、总结三角架是摄影中不可或缺的工具之一,它可以提供稳定的支撑,帮助摄影师拍摄清晰、稳定的照片。
通过正确调整三角架的高度和云台,以及采取稳固的技巧,可以获得更好的拍摄效果。
在使用三角架时,需要注意选择平稳的拍摄地点,并遵循使用注意事项,以确保安全和稳定的拍摄环境。
八、参考资料1. 《摄影三脚架的使用方法》2. 《三角架的选择与使用》3. 《如何正确使用三角架》4. 《摄影三角架的调整方法》5. 《如何稳固摄影三角架》6. 《三角架的使用技巧与注意事项》7. 《摄影三角架的选购与使用技巧》以上是关于三角架使用方法的介绍,希望对摄影爱好者们有所帮助。
Vinten ENTripod Flowtech 75 100 三脚架用户指南说明书

User GuidePart No. V4150-0001V4160-0001Tripod75 100Copyright © 2018All rights reserved.Original Instructions: EnglishAll rights reserved throughout the world. No part of this publication may be stored in a retrieval system, transmitted, copied or reproduced in any way, including, but not limited to, photocopy, photograph, magnetic or other record without the prior agreement and permission in writing of the Vitec Group Plc.DisclaimerThe information contained in this publication is believed to be correct at the time of printing. Vitec Production Solutions Ltd reserves the right to make changes to the information or specifications without obligation to notify any person of such revision or changes. Changes will be incorporated in new versions of the publication.We are making every effort to ensure that our publications are updated on a regular basis to reflect changes to product specifications and features. Should this publication not contain information on the core functionality of your product, please let us know. You may be able to access the latest revision of this publication from our website.Vitec Production Solutions Ltd reserves the right to make changes to product design and functionality without notification.TrademarksAll product trademarks and registered trademarks are the property of The Vitec Group Plc.All other trademarks and registered trademarks are the property of their respective companies.Published by:Vitec Production Solutions LtdSupports Technical Publications Department Email:*************************************Other languages available DE. For download please visit /flowtechVideo tutorials are available, if required please contact ********************** for further details.ContentsSafety (2)Warning symbols used in these instructions (2)Health and Safety (2)Mounting and Installation (2)About this guide (3)Intended use (3)Warranty (3)Extended warranty (3)Operating Elements . . . . . . . . . . . . . . . . . . . . . . . . . 4 Optional Accessories (5)Installation (6)Setting up the Tripod (6)Attach Optional Mid-Level Spreader (7)Attach Optional Mid-Level Spreader flowtech 1008 Operation of Mid-Level Spreader flowtech 100 (8)Attach Optional Ground Spreader flowtech (10)Operation of Ground Spreader (11)Using Locks When no Spreader Used (14)No Spreader Mode (14)Spreader Mode (14)Opening Tripod Legs (15)Alternative Locking Method (17)Close Tripod Legs........................18Accessories (18)Fit Supplied Attachment Mount (18)Fit Optional Carry Strap (19)Attach Optional Rubber Feet (19)Fit Carry Handle (S2051-1057) (20)Maintenance (20)Cleaning (20)Flush the Tripod (20)Hinge Lock Cleaning (21)Checking brake force (22)Adjusting brake force (22)Friction Adjustment (23)Specification (24)2SafetyImportant information on the safe installation and operation of the product. Read this information before operating the product. For your personal safety, read these instructions. Do not operate the product if you do not understand how to use it safely. Save these instructions for future reference.Warning symbols used in these instructionsSafety cautions are used in these instructions. These safetyinstructions must be followed to avoid possible personal injury and possible damage to the product.Health and Safety!WARNING! Where there is a risk of personal injury or injury to others, comments appear supported by the warning triangle symbol.Where there is a risk of damage to the product, associated equipment, process or surroundings,comments appear supported by the word ‘CAUTION ’.!WARNING! Risk of personal injury or injury to others. All personnel must be fully trained and adhere to correct manual handling techniques and Health & Safety regulations. It is the responsibility of the local organisation to enforce safe working practices at all times.Mounting and Installation!WARNING! Do not exceed the maximum payload capacity.!WARNING! Tripod spike feet can be dangerous, take care when handling. Always place tripod on the ground before releasing quick release levers.!WARNING! Risk of finger entrapment. Avoid trapping fingers when operating the tripod.!WARNING! Trip hazard. Set the tripod footprint to suit the shooting environment.!WARNING! Toppling hazard. Do not leave unattended. Keep out of reach of children.!WARNING! When in use always lock the tripod leg clamps to prevent the tripod collapsing.!WARNING! When releasing the quick release levers, be prepared to support the weight of any attached payload. The levers are only sufficiently locked when in the fully closed (down) position.!CAUTION! Always hold the payload securely when making adjustments to the tripod height or footprint.!CAUTION! Do not place your foot or heavy weight onto the spreader.!CAUTION! Always remove the camera before transporting.About This Guide About this guideThis user guide is an important part of the product and is aimed at thepersonnel who operate and maintain the tripod. It contains informationabout the tripod and its proper use and serves to safeguard users andtheir equipment.Intended useThis tripod has been designed for professional use in televisionstudios and outside locations for supporting fluid heads and cameras.Any use above and beyond this purpose is deemed improper and willvoid the warranty.WarrantyThe product is covered by a one year warranty.The warranty will be invalidated if:• The tripod is improperly installed or used in a manner contrary tothis user guide.• The tripod housing is opened by unauthorised personnel.We reserve the right to make changes to the product based ontechnological advances.Extended warrantyPlease register at for an extended warranty period.34Operating ElementsOptional Accessories6InstallationSetting up the Tripod1. The legs are secured using magnetic catches. Pull the legs fromthe bottom to separate.Note! If preferred this step may be performed after step 3.2. Place the tripod on the ground. Lift the quick release levers fullyand raise the tripod to the required height.3. With the correct height achieved, lower the quick release levers tolock the legs in position.!WARNING! The legs are only sufficiently locked when the locking levers are in the fully closed (down) position.Attach Optional Mid-Level Spreader!CAUTION! Ensure the latching pins are fully engaged with the locating holes in the tripod. Failure to attach correctlycould result in damage to the equipment4. Unlock the spreader arms to allow the arms to extend as required.spreader. (See page 14 for lock operation).InstallationCleaning.After each use, brush off any dirt or debris, if necessary wash downwith clean water.78InstallationAttach Optional Mid-Level Spreader flowtech 100!CAUTION! Ensure the latching pins are fully engaged with the locating holes in the tripod. Failure to attach correctly could result in damage to the equipmentOperation of Mid-Level Spreader flowtech 1001. Press and hold the arm release button (as below).2. Extend the inner arm to the required length and release thebutton.Installation The spreader has 4 x locking positions 50, 40, 30 and 0°1. Rotate the adjustment cap on top of the spreader, anticlockwise toInstallationAttach Optional Ground Spreader flowtech 75 / 100 Array !CAUTION! Ensure the ground spreader legs are all the same length before attempting to fold the tripod with thespreader attached. Failure to observe this procedure couldlead to damage of the Ground SpreaderThe tripod is delivered with the Hinge Lock in the OFFposition for use with a spreader.(See page 14 for lock operation).Ground Spreader shown in thestored position10InstallationClosing Tripod with Ground Spreader Attached12Cleaning.After each use, brush off any dirt or debris, if necessary wash downwith clean water.1315Opening Tripod LegsThe first position at 20° is likely to be the most used position.1. Press the lock button to engage the lock. (No Spreader Mode)Pull the leg outward and it will stop at the 20° lock position.InstallationTo select the 46° or 72° position, disengage the lock.a. b.16Installation3. Move the leg past the 20° position.4. Engage the Lock Slider by pushing the Hinge Lock Button.5. Continue pulling the leg until it stops at the 46° lock position.6.7.17InstallationAlternative Locking Method1. An alternative method would be to release the Hinge Lock, andfully open the leg to 90°!WARNING! Risk of finger entrapment. Avoid trapping fingers when operating the tripod.3. Move the leg towards the body. As the leg passes each lock point,an audible click will be heard, the leg is prevented from opening past this point again without disengaging the lock first.2.18InstallationClose Tripod Legs1. The legs may be closed with or without the Lock being engaged.2. Ensure the tripod legs are fully collapsed before moving theminward.!WARNING! Risk of finger entrapment. Avoid trappingfingers when closing the tripod.Fit Supplied Attachment Mount1. There are three accessory docks. These can be used to dock thesupplied attachment mount, Variable Friction Arm etc..2. Offer the accessory to the docking point on the tripod head.3. Insert the screw and tighten clockwise using a 5mm Hex key,tighten firmly.4. Follow the same procedure to attach optional accessories to theremaining mounting points if required.Accessories1920Cleaning !CAUTION! Do not use solvent or oil based cleaners, abrasives or wire brushes to remove accumulations of dirt as these will damage the protective surfaces. Use clean water only.During normal use the only cleaning required is a periodic wipe-down with a lint-free cloth. Any dirt that accumulates during storage or periods of non-use may be removed with a vacuum cleaner. Particular attention should be paid to the ball base of the e out-of-doors under adverse conditions will require special attention. Salt spray should be washed off with fresh water at the earliest opportunity. Sand and dirt acts as an abrasive and should be removed using a semi-stiff brush or vacuum cleaner.If exposed to extreme conditions, sand or grit could enter the tripod. This will require flushing to remove any contaminants.Flush the Tripod 1. Place the tripod in a bucket of clean, 30 cm deep water.2. Release the quick release levers and extend tripod fully.3. Keeping the feet in the water, collapse and extend the tripod repeatedly, forcing water through the leg sections until the leg moves freely with no sign of sticking or contamination.4. If required turn the tripod upside down and repeat.5. Wipe down the outer surface with a clean dry cloth.AccessoriesMaintenance Fit Carry Handle (S2051-1057)To attach the handle to one of the accessory docks.1. Using a small screwdriver, lever the plug from the top of the2. Using the supplied Hex key, align the mounting screw in the handle with the accessory dock and tighten clockwise, as shown below. Ensure the handle is secure. Insert the plug back into thehandle, ensuring the groove is uppermost and it is firmly pushed21Maintenance The Hinge lock is designed so that sand or other debris may be worked out of the hinge lock mechanism.Repeatedly operate the button and hinge slider, combined with blowing out the debris until the mechanism operates smoothly.Should this procedure fail to sufficiently clear the debris, follow the instructions below to disassemble the mechanism for cleaning.Hinge Lock Cleaningand push the hinge slider towards the bowl and lift out. 4. 5. Use compressed air and a soft brush to remove any debris.7. Once the lock is clean assembly is a reversal of steps 2 - 4.!Caution! When replacing the M4 lock screw, offer it to the thread and turn anticlockwise until you hear / feel a clickthen tighten clockwise. This will prevent the screw frombeing cross threaded.22Adjusting brake force 1. Lift the quick release lever to clear the adjustment screw. Using a 2.5mm or 3/32” hex key, turn clockwise to increase the brake force.2. 10 full turns = 2 kg (4.4 lb) of additional brake force.MaintenanceChecking brake forcePeriodically check the effectiveness of the leg brake force and adjust if necessary.1. Extend the middle and lower sections to 20 cm each.2. Place a rubber mat or similar on a set of scales to prevent damage and skidding. Stand one leg on a set of scales and applya vertical downward force.75 mm Tripod 100 mm TripodH Maximum OperationalHeightOn Mid-Level Spreader 157 cm(61.81 in.)155 cm(61.00 in.)H Minimum OperationalHeightOn Mid-Level Spreader 63 cm(24.8 in.)52 cm(20.47 in.)H Maximum OperationalHeightOn Ground Spreader 158 cm(62.2 in)159 cm(62.5 in)H Minimum OperationalHeightOn Ground Spreader 41 cm(16.4 in)43 cm(16.9 in)When used without rubber feet the tripod height will decrease by up to 1.8 cm.Material CarbonFibre Carbon FibreExtensions X2X2 SpecificationTechnical specifications are subject to change without notice.Publication No. V4150-4983/3。
三脚架的折叠方式有哪些?
三脚架的折叠方式有哪些?三脚架是摄影中常见的辅助设备,它能够提供稳定的支撑,使拍摄更加精准和稳定。
然而,对于初次接触三脚架的人来说,折叠三脚架可能会成为一大挑战。
那么,下面我们就来了解一下三脚架的折叠方式,帮助读者更好地掌握使用技巧。
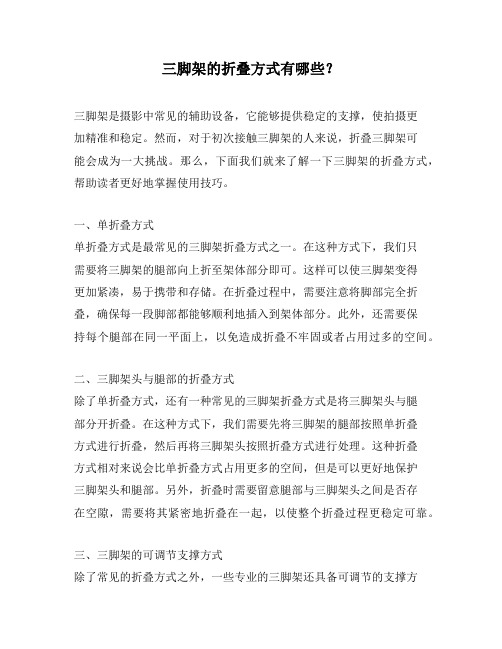
一、单折叠方式单折叠方式是最常见的三脚架折叠方式之一。
在这种方式下,我们只需要将三脚架的腿部向上折至架体部分即可。
这样可以使三脚架变得更加紧凑,易于携带和存储。
在折叠过程中,需要注意将脚部完全折叠,确保每一段脚部都能够顺利地插入到架体部分。
此外,还需要保持每个腿部在同一平面上,以免造成折叠不牢固或者占用过多的空间。
二、三脚架头与腿部的折叠方式除了单折叠方式,还有一种常见的三脚架折叠方式是将三脚架头与腿部分开折叠。
在这种方式下,我们需要先将三脚架的腿部按照单折叠方式进行折叠,然后再将三脚架头按照折叠方式进行处理。
这种折叠方式相对来说会比单折叠方式占用更多的空间,但是可以更好地保护三脚架头和腿部。
另外,折叠时需要留意腿部与三脚架头之间是否存在空隙,需要将其紧密地折叠在一起,以使整个折叠过程更稳定可靠。
三、三脚架的可调节支撑方式除了常见的折叠方式之外,一些专业的三脚架还具备可调节的支撑方式,以满足不同拍摄环境的需求。
例如,一些三脚架可以实现对脚部和中央柱的伸缩调节,以适应不同高度和角度的拍摄需求。
同时,还有一些三脚架可以实现快速调节和收缩,方便快速切换拍摄场景和需求。
四、三脚架的抗风性能在使用三脚架时,往往需要考虑到拍摄环境的风力情况。
一些高级的三脚架设计了特殊的结构和材质,以提升其抗风性能。
例如,在脚部采用更加稳定的三角形结构,或者使用了较重的材质,以增加三脚架的稳定性和抗风性能。
此外,还有一些三脚架设计了风速传感器,可以自动调整支撑的稳定性,提供更加安全的拍摄环境。
总结:通过以上四种折叠方式的介绍,相信读者对于三脚架的折叠方式已经有了初步的了解。
在使用三脚架时,选择合适的折叠方式对于拍摄的成功至关重要。
三脚架安全操作及保养规程
三脚架安全操作及保养规程三脚架是数码相机、摄像机等器材拍摄过程中不可或缺的三脚架。
它可以稳固地支撑设备,保证拍摄时机位的稳定性和准确性,是拍摄过程中的必需品。
但是,在使用三脚架时需要注意安全,以减少设备的损坏和人身伤害情况的发生,同时还需要合理保养三脚架,以延长使用寿命。
本文将为大家详细介绍三脚架的安全操作和保养规程。
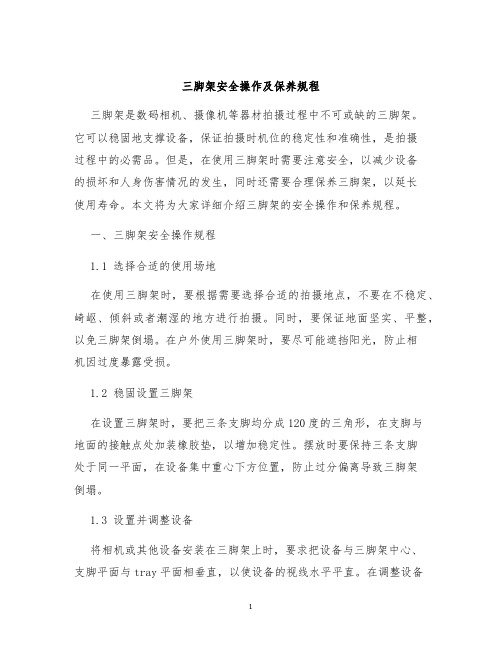
一、三脚架安全操作规程1.1 选择合适的使用场地在使用三脚架时,要根据需要选择合适的拍摄地点,不要在不稳定、崎岖、倾斜或者潮湿的地方进行拍摄。
同时,要保证地面坚实、平整,以免三脚架倒塌。
在户外使用三脚架时,要尽可能遮挡阳光,防止相机因过度暴露受损。
1.2 稳固设置三脚架在设置三脚架时,要把三条支脚均分成120度的三角形,在支脚与地面的接触点处加装橡胶垫,以增加稳定性。
摆放时要保持三条支脚处于同一平面,在设备集中重心下方位置,防止过分偏离导致三脚架倒塌。
1.3 设置并调整设备将相机或其他设备安装在三脚架上时,要求把设备与三脚架中心、支脚平面与tray平面相垂直,以使设备的视线水平平直。
在调整设备时,要逐步调整角度,避免猛烈调整造成设备的损坏和三脚架的不稳定。
1.4 注意使用时间和保证安全在使用三脚架时,要尽量保持安全,不得超过规定使用重量,每小时拍摄时间不宜超过 2 小时,亦不宜加以超力使用,以免设备和三脚架损坏,带来安全问题。
1.5 妥善收起三脚架在拍摄完成后,要及时拆卸设备,并将三脚架和配件收拾妥当,放在阴凉、干燥通风处,避免日光直射和潮湿导致三脚架和配件损坏。
二、三脚架保养规程2.1 定期检查在使用三脚架的过程中,要经常检查它的支脚和连接螺纹等部件是否松动,需要进行适当的调整和维护,以保持三脚架的稳定功能。
2.2 维护连接部件连接螺纹是三脚架的主要连接部件,需要经常进行维护和清理,确保没有杂质和脏物,合适的润滑剂,并且要避免过度涂抹,防止油脂淤积和油泥污渍。
2.3 维护支脚和三脚架的各个部件在日常使用中,要注意对支脚和三脚架的滑动部位做适当的保养和清理,擦拭时使用棉布和专门的清洁剂进行擦拭。
Vinten Vision Blue 摄像头支撑系统说明书

402Follow Us!VINTEN VISION BLUE CAMERA SUPPORT SYSTEMS The Vision blue head is designed to provide system and a standard long slot Vision AS cam-era plate with 1/4" screw and pin assembly. It is avail-able in 2 system combinations, combining a 2-stage aluminum Pozi-Loc tripod and case with either a floor or lightweight mid-level spreader. Both systems include the 3819-3 tripod which has a height range of 21.7" - 66.7", transport length of KINOTEHNIK LCDVFE ELECTRONIC also features focus assist via color peaking, user adjustable exposure assist zebras, COMELY COMELYCRANE 85 AND Smoother, lighter, easier to oper-ate; Two new cranes are the result of more than 10 years of production, testing and refining. The ComelyCrane 85 has a reach of over 7' on a 10"vertical yoke. On a standard sturdy tripod such as the Manfrotto 028 or 117 tripod, that allows the operator to get smooth cinematic shots 13' above ground. The ComelyCrane 121 has a reach of 10' 1" from the fulcrum – 3' longer than theComelyCrane 85, lifting the camera 16' above ground. No tripod head is required. These are made from high-grade aluminum with steel fixed rod tilting assembly. Both have a durable black powder coat finish. The ComelyCrane 85 breaks down to 56", while the ComelyCrane 121 breaks down to 62". The two sup-plied weight bars can also be used as crane handles. Both are removable and adjustable to side and top positions. Both models include RCA cable, weight caddy, clamps, monitor and microphone mount, and sturdy vinyl carry bag.This is an effective, yet simple one-piece design that takes the strain off a cam-eraman’s wrist, hands and back with a counterbalanced and padded shoulder support. CameraRibbons are made in the USA and are fabricated from a single to be one of the most versatile and cost-effective light-weight jibs. It can carry up to 44 lbs. and fits into a portablewaterproof HPRC case on wheels. This jib weighs only 33 lbs, folds down to 47” in length, and allows shooting from absolute ground level to 78” in height with a maximum extension of 67”. The rear part of the arm, which holds the counterweights, is extendable, providing accurate camera balance; the typical counterweight kit is 44 lbs. of rubberized gym weights. Fluid head and tripod not included.ITEM DEscrIpTIon K102 3 section compact jib A107 Flat base adapter for JIBO A109 T-bar for JIBO L502 Cartoni 2 Stage aluminum tripod commercial Lease-To-own financing for businesses available!contact your sales pro for details.403varizoom dv media rig The DV Media Rig prosupport is the most sophisticated shoulder supportavailable for professional MiniDV cameras. Uniquecal adjustment and articulating weight balance systemallow for perfect balance and comfort. Also includedis a rotating accessory mount and extra plush shoulderprIcE....Universal stabilizing shoulder support system ...................................373.75varizoom vz rock Lens/zoom controLLersThe VZ Rock Series of controllers offer the finestdegree of zoom control with a wide-sweep rocker forpause button. The VZ Rock has a power on/off switch,auto/manual focus switch, data toggle button, and anedit search button and is compatible with Sony andsions are compatible with Panasonic cameras such asDVX100/100A/100B, HVX200, DVC30, DVC60 and DVC80. The LE (limited editions) addvarizoom QuickJib Jib arms and kits A perfect balanceof quality and economy in a well thought-out design. Uses industrialpowder coating and anodizing for durability and stainless steel fasten-ers throughout. Brake system utilizes a heavy-duty plate that is securelymounted to the pivot section. QuickJib will mount to any 100mm tripod,although it is recommend to use only non-telescoping legs for safety.The QuickJib has a reach of 5 ft, the QuickJib2 reaches 9.5 ft. Kits areprIcEvarizoom vz-LsP and vz-1 camera suPPortsLightweight, ergonomic, and stable shooting for your videoneeds. The aluminum VZ-1 prosumer shoulder brace allows you to bend thesupport into the desired position, with multi-point adjustment. The bottomC-bracket provides additional support for your camcorder while restingon a flat surface. The professional VZ-LSP features an abdomen pad,adjustable shoulder rest, and precision elevation. Shoulder and abdomensupport carries the weight of the camera, eliminating stress and fatigue.vz-steaLth vz-steaLth-Lx vz-Pro-LprIcEvocas camera rigs Availablein kits for many popular cinema andvideo cameras and DSLRs, or buildyour own custom kit out all of the indi-vidually available parts. Manufacturedfrom black anodized aluminum, stain-less steel and carbon fiber. Accessories such as carbon fiber matte boxes, followfocus units, hand grips, and triggers are available. Most kits available in with 15mmand 19mm rod versions.ITEM dEscrIpTIon prIcE0255-2010 .......MB-255 matte box with 15mm bar adapter .......................................1046.700430-2015 .......MB-435 matte box kit with swing away bracket ................................2376.000255-3900 .......Handheld kit with 15mm rails and offset bracket..............................1690.200255-4900 .......Handheld kit underneath, 15mm rails ...............................................1381.500255-3320 .......Handheld kit for Blackmagic Cinema Camera ...................................1942.200350-1000 .......Baseplate with rubber shoulder pad forPMW-F5/F55 including dovetail plate ................................................1114.200350-1100 .......Top grip handle for PMWF5/F55 ...........................................................735.300350-2001 .......Universal shoulder mount with flat base, 15mm .................................883.800350-2000 .......Universal shoulder mount with dove tail plate, 15mm.......................1106.100390-0104 .......Wooden hand grip left ..........................................................................586.800390-0115 .......Wooden handgrip right with built-in trigger (cable sold separately) ...801.900500-2300 .......Manual follow focus kit for 15mm rails .............................................1404.90four interchangeable gears. Note: A receiver power cable404Follow Us!JonYJib JonYJib2 camera crane What sets this jib apart from others is its ability to telescope and nest within itself. It does not require unsightly or bulky cantilever stabilization wires that other jibs in this range require. Its light-weight, octagonal, aluminum extension sections start at the tail and progressively get smaller in diameter as you get closer to the camera. Available in 4 versions (9ft, 12ft, 15ft and 18ft) consisting of 3ft sections. Store unused sections in the tail as ballast, lightening your counterweight demand. The pivot point is pre-drilled to mount an optional Anton Bauer Gold Mount plate kit that, with your batteries, can feed an optional passive 12V power distribution box at the tail. The pivot point is also pre-drilled to mount the included LCD monitor mounting bracket or a monitor platform for 5"-9" CRT monitors. All come with 100mm mount-ing hub and have 2 selectable fulcrum points (except the 9ft version which has 3). The distribution box can feed 12V power to the motorized pan and tilt head, zoom and focus controls, the monitor and the camera.ITEM dEscrIpTIon prIcE JonYJIB2-09..........................9' jib with LCD monitor mount .......................................1672.76JonYJIB2-12..........................12' jib with LCD monitor mount .....................................2113.13JonYJIB2-15..........................15' jib with LCD monitor mount .....................................2619.05JonYJIB2-18..........................18' jib with LCD monitor mount .....................................3123.75JJ-BATT-KIT-A ........................Battery kit for Anton Bauer Gold Mount ...........................310.86JonYJIB-poWEr-BoX ............12V power distribution box ..............................................193.16JonYJIB-WIrInG-KIT20.........20' wiring kit with pan and tilt, zoom and focus,video and power extension cable .....................................198.45ikan tiLta camera rigs Offers a range of dedi-cated camera rigs for models from Canon, Sony, RED and Blackmagic. Rigs are manufactured from black anodized aluminum and stainless steel. Accessories such as car-bon fiber matte boxes follow focus units and other rig accessories are available. Most kits available with 15mm rods.ITEM dEscrIpTIon prIcE TT-0506-15 ....Dovetail shoulder mount kit, 15mm rails ...............................................899.10Es-T06 ...........Canon C300/C500 rig with baseplates, 15mm rails ..............................899.10Es-T07 ...........Blackmagic Cinema Camera rig with wooden handles, 15mm rails ......899.00TT-03-TL .........Shoulder mount kit w/follow focus for DSLR cameras, 15mm rails........899.10MB-T03 ..........4"x4" carbon fiber matte box, swing away .............................................719.00MB-T05 ..........4"x4" lightweight matte box, swing away ..............................................449.00FF-T03 ...........Follow focus with hard stops, 15mm .....................................................539.00FF-T05 ...........Single-sided cinema follow focus, 15mm and 19mm ..........................1034.00manfrotto sYmPLa moduLar video rigs A profes-sional modular rig system that provides stable support, holds essen-tial accessories, and offers great versatility. It is comfortable, safe and simpler and faster to set up than other rigs. Has multiple attachment points for monitors, batteries, light-mod-ifiers or accessories. Compatible with all Manfrotto heads. Shoulder Support System allows support of camera equipment on your shoulder, with swivel-joint handles. The Flexible Mattebox adds a flexible mattebox to hold (4) 4" filters and protects the lens from stray light. TheLong Lens Support reduces the vibrations generated while shooting with long lenses. Call your salesperson for assistance with choosing kits or individual components.ITEM dEscrIpTIon prIcE MVA511WK ................Shoulder support system, complete kit .......................................599.99MVA512WK ................Flexible mattebox system, complete kit .......................................599.99MVA512W ..................Long lens support system, complete kit ......................................399.99mva511Wk manfrotto camera remote controLs These camera remote controls feature professional zoom wheels or knobs for finer adjustments and smoother progres-sions. The MVR901ECEX has a zoom direction switch, RET push button and fast zoom button. The MVR901ECLA and MVR901ECPL support the LANC protocol for Canon and Sony cameras and can control zoom and focus speed. The MVR901EPEX and MVR901EPLA have standard pan bars.ITEM dEscrIpTIon prIcE MVr901EcEX ............Remote control for Sony PMW-EX cameras ..................................229.99MVr901EcLA .............Advanced remote control for Lanc cameras ................................229.99MVr901EcpL ............Advanced remote control for Lanc and Panasonic cameras ........159.99MVr901EpEX ............Remote control with pan bar for Sony PMW-EX cameras ............329.99MVr901EpLA .............Remote control with pan bar with Lanc ......................................279.99MVr901ApcL ............Clamp accessory for tripod arms ..................................................49.99mvr901ecLasteadicam merLin 2 dv camera stabiLizing sYstem This camera stabilizer is for DSLRs and camcorders used as handheld, a monopod, or with optional SOLO Arm and Vest Kit. The SOLO Stabilizer includes a quick-release plate with 1/4”-20 and 3/8”-16 camera screws. The SOLO weighs only 4.3lb but can support up to a 10lbs payload. The SOLO Arm and Vest makes extended shooting nearly effortless and provides comfort and extra stability for extended productions and long continuous shots. The Arm and vest also increase the payload to 15lbs. For easier setup and balancing, the prIcE The Steadicam Pilot HD Series stabilizer systems are state-of-the-art, lightweight, affordable and designed especially for the modern breed of lightweight cameras from 2 to 9 pounds (0.9 to 4.1kg). Video profes-sionals need add only battery and camera of choice as all other required The Steadicam Pilot HD stabilizer systems are designed with a lightweight Iso-Elastic Arm and ultra-low profile vest, lightweight sled with CarbonLite expandable or aluminum fixed post, low mass gimbal and offers advanced The Pilot HD/SDI systems come with an expandable carbon fiber post. The low mode kit allows you to flip the post 180° and shoot lower to the ground. Batteries and battery chargers are sold separately. For more information on Steadicam system prIcE mvr911eccmmanfrotto dsLr remotes for canon dsLrs These true electronic remote controls allow direct control of the camera body by using the USB port on the camera. By circumventing the need for any physical contact with cam-era, these remotes allow lenses to be swapped easily with-out extra hardware or adjustment. Nothing jolts the camera unexpectedly during focus. The Clamp-on Remote allows 3-step, ultra-precise focus speed, Focus Memory settings,Live View, Auto Focus, and Live View Digital Zoom control, Video recording start/stop, Photo shutter and more. The Deluxe Remote adds a LCD screen, which relays general information from the camera. Both are compatible with most Canon DSLRs.ITEM dEscrIpTIon prIcE MVr911Eccn ............Clamp-on remote control for Canon DSLRs .................................379.99MVr911EJcn .............Deluxe remote control for Canon DSLRs ......................................699.99We offer over 700 brands, low prices and outstanding service.Wooden camera camera kits and accessories Wooden Camera designs and builds affordable camera accessories and kits for all of the major camera manufacturers, such as Sony, Canon and Blackmagic. They offer individual components, such as handles, base plates with rails and EVF mounts, to fullcamera kits. Go to for more parts and accessories.ITEM dEscrIpTIon prIcE BMc-KIT-pro ............Wooden Camera – BMC Kit (Pro) ...............................................1177.92A-BoX-BMc ...............Wooden Camera - A-Box (BMC) ...................................................191.04Wc-165300...............Wooden Camera - Quick Kit (C100, C300, C500) ........................887.30Wc-165500...............Wooden Camera - Quick Kit (F55, F5)..........................................995.60Wc-165900...............Wooden Camera - Quick Kit (FS700) ...........................................887.30。
单反相机三脚架的使用方法
单反相机三脚架的使用方法单反相机三脚架的使用方法相机三脚架的使用方法或许很多入门级别的影友认为使用三脚架很简单没什么技巧,但事实上三脚架的使用如果注意到以下个点细节对新入门的影友们有一定的帮助。
下面小编介绍几个三脚架的使用方法,希望可以帮助大家!一.选择三脚架的第一要素就是要考虑到三脚架和相机兼容的问题。
买三脚架的途径很多在传统的摄影器材专卖店码、网站购买、电脑城、商场电器数码城,但是不管用任何方所购买三脚架,最重要的就是要清楚的确认三脚架和相机安装能够兼容的,这也最重要的一点,买一只不兼容的三脚架回来就没有任何意义了。
二.在每次进行摄像前先观察好地形环境,找个不受干扰以及展开相机三脚架比较安全的地方,不要以为用上世界上最好的三脚架就可以随意展开三脚架就能保证安全了,如果地形环境对展开三脚架不利,三脚架放在一个不安全的地方,人流量大走动频繁的地方,这样三脚架都有可能会被碰翻。
三.三脚架买回来使用前一定要先熟悉三脚架的展开以及收合的操作方式。
展开三脚架前先将其中一只脚管往外拉出25度后松开全部的板扣或者旋钮让脚架自动下滑到底后在将全部的板扣旋钮锁紧,其他两条脚管做同样的展开动作。
三条脚管展开后务必检查好所以板扣旋钮是否锁紧到位这点非常重要,如果没锁紧很容易发生相机侧翻。
三脚架展开接着是检查云台和三脚架基座是否锁紧,云台快装板先进行拆卸锁紧检查看看是否牢固,检查云台球体锁紧度、中轴的`伸缩锁紧度是否正常。
确保这些细节都安全了才可以将心爱的相机镜头架上并在次检查快装板是否套进轨道锁紧到位,相机和快装板的螺丝是否锁紧。
四.在拍摄前先校正取景器和目标物的高度是否合适,发现工作高度不理想时可以先调整三脚架与目标物的距离以及摆放的位置后在进行中轴微调工作高度,调整到恰当的工作高度。
五.前面工作都完成后就可以放心的调整相机对摄影目标拍摄需要的效果进行颜色、时间、像素等这些相机的参数调整。
所以说在这个时候就起到非常重要的辅助。
- 1、下载文档前请自行甄别文档内容的完整性,平台不提供额外的编辑、内容补充、找答案等附加服务。
- 2、"仅部分预览"的文档,不可在线预览部分如存在完整性等问题,可反馈申请退款(可完整预览的文档不适用该条件!)。
- 3、如文档侵犯您的权益,请联系客服反馈,我们会尽快为您处理(人工客服工作时间:9:00-18:30)。
vinten三脚架使用说明
1、使用vinten三脚架,可以先把三脚架上的快装板安装在vinten上。
vinten本身会有一个螺丝孔,只要把快装板和vinten上的螺丝孔用螺丝拧紧固定好即可。
vinten安装了快装板,在使用三脚架的时候更加方便。
2、首先,我们取出vinten三脚架,接下来不是先安装vinten,而且先要调整好三脚架。
把三脚架放在一个平整的位置,然后固定好角度。
三脚架上有不同角度的限位槽,根据地形和要拍摄的风景,确定好角度,而且三个角度要相同。
3、角度调整好之后,接下来就是调节三脚架的长度,三脚架分为好几节,确定好高度之后,一节一节的调整三脚架的高度,待调整到制定高度的时候,用三脚架固定螺丝拧紧就可以了。
4、调整好角度和高度之后,接下来就需要调节云台了,月台分为三维云台和球形云台,其中三维云台是使用最普遍的。
而球形云台的特点是便携,它有一个是水平转动旋钮和两个球固定旋钮,这个可以根据自己的需要调节。
5、如果想要水平拍摄,需要调节三脚架云台上的水平仪,调整好之后再安装vinten。
6、如果想要选择角度拍摄的话,那么可以先把快装板从三脚架上卸
下来,然后把快装板安装在vinten上。
在调整好角度之后,将固定装有快装板的vinten,这样不但方便,而且不会影响调整好的角度。