手簿X3操作指导说明书-1
Soundbook X3 使用手册
Soundbook X3 使用手册[Q]:What kind of audio sources can I use with the Soundbook X3?[A]: The Soundbook X3 is designed specifically for use with today's most popular Bluetooth devices, including Smartphone's, tablets and laptops. In addition, the soundbook X3 includes an auxiliary input for connection to an MP3 or similar portable player.[Q]:Soundbook X3支持什么类型的音源?[A]:Soundbook X3是专为与当今最流行的蓝牙设备包括智能手机,平板电脑和笔记本电脑的使用而设计的。
此外,Soundbook X3还包括一个辅助性的输入功能,用于连接MP3或其他的便携式播放设备。
[Q]:How do I commence Pairing?[A]:For simple and secure pairing your audio device must be in close proximity to the Soundbook X3 - within a range of 1 metre.1.Turn on the Soundbook X32.Press the power/input button until BLUE is displayed3.Go into your settings, select and turn on Bluetooth. Scan for new Bluetooth devices and nominate 'Bayan SB X3'. You will not be prompted for a pass code for pairing. (Note: Bluetooth audio connectivity can vary between devices so it can be beneficial to firstly consult with your audio source user manual for pairing instructions if unsure)[Q]:我要怎么开始连接配对?[A]:想简单、安全地配对连接您的音频设备,您需要在离Soundbook 一米之内的范围,将音源设备靠近Soundbook X3。
手簿 操作指导说明书
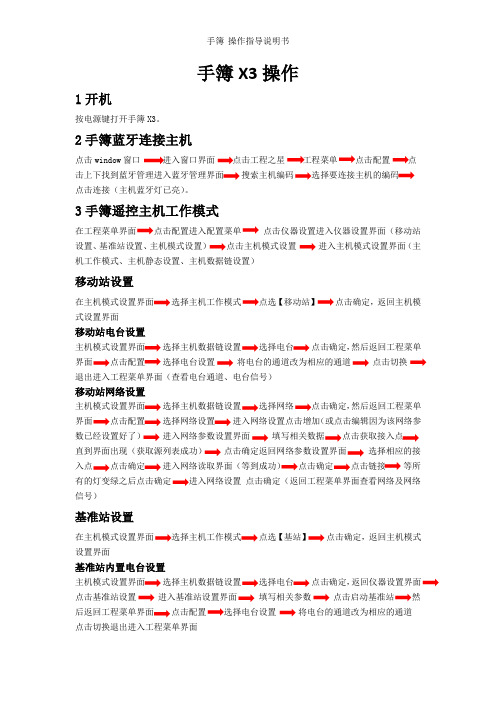
手簿X3操作1开机按电源键打开手簿X3。
2手簿蓝牙连接主机点击window窗口进入窗口界面工程菜单击上下找到蓝牙管理进入蓝牙管理界面搜索主机编码选择要连接主机的编码点击连接(主机蓝牙灯已亮)。
3手簿遥控主机工作模式点击仪器设置进入仪器设置界面(移动站设置、基准站设置、主机模式设置)点击主机模式设置进入主机模式设置界面(主机工作模式、主机静态设置、主机数据链设置)移动站设置选择主机工作模式【移动站】点击确定,返回主机模式设置界面移动站电台设置主机模式设置界面选择电台点击确定,然后返回工程菜单点击配置选择电台设置将电台的通道改为相应的通道点击切换退出进入工程菜单界面(查看电台通道、电台信号)移动站网络设置主机模式设置界面选择网络然后返回工程菜单点击配置进入网络设置点击增加(或点击编辑因为该网络参数已经设置好了)进入网络参数设置界面点击获取接入点直到界面出现(获取源列表成功)点击确定返回网络参数设置界面选择相应的接点击确定进入网络读取界面(等到成功)点击链接等所有的灯变绿之后点击确定点击确定(返回工程菜单界面查看网络及网络信号)基准站设置在主机模式设置界面点选【基站】点击确定,返回主机模式设置界面基准站内置电台设置主机模式设置界面选择电台点击确定,返回仪器设置界面点击基准站设置进入基准站设置界面填写相关参数然点击配置将电台的通道改为相应的通道点击切换退出进入工程菜单界面基准站外挂电台设置选择主机数据链设置返回主机模式设置界面,退出进入工程菜单界面。
4新建工程在工程菜单界面点击工程选择SD卡、输入工程名(一般以日期)确定;返回工程菜单界面点击配置选择工程设置在工程设置界面输入天线高、选择杆高点击确定;返回工程菜单界面点击配置坐标系统配置坐标系统选择编辑界面点击增加(或点击编辑、或点选已有的坐标文件再确定)输入参数系统名称、椭球名、中央子午线、以及四参数和七参数5求参数单点校正在工程菜单界面选择校正向导选择基站架在未知点上(如果基站在已知点上则选择基站架在已知点上下一步再输入基站的坐标与高程)下一步改点的坐标与高程(或从文件中调用)使水泡居中确定求参数选择求转换参数进入求转换参数的界面,点击增加输入点名及坐标、高程(或从坐标管理库调用选择需要选择的点再点击确定)点击确定如果是从坐标库选点(点选坐标管理选点在坐标管理库中选择所需的点再点击确定)如果是读取当前点坐标(也就是采集当下该点的坐标设置好天线高)如果是直接直接输入大地坐标(就是在手簿上输入相应的经度、纬度、高程、天线高)6测量测量:在工程菜单界面点击测量点测量:点击点测量撑好对中杆至水泡居中则按ent 键输入点名杆高再按ent键控制测量:点击控制测量点击设置输入相关参数点击确定其它如点测量点放样:点击点放样点击目标从坐标管理库中选择相应的点点击确定之后在手簿屏幕显示相应的距离再按照屏幕上的显示查找目标点线放样:点击点放样点击目标在直线放样库界面点击增加输入线名起点坐标与终点坐标和起点里程再点击确定在直线放样库中选择需要放样的直线再点击确认之后看屏幕上显示的方位及距离再按照屏幕上的显示查找目标线。
第2章 CorelDRAW X3基础操作
调整标尺位置 在CorelDRAW X3中,标尺可放置在工作区中的任何位置,其操作方法是:将鼠 标移动到标尺原点上,按住<Shift>键的同时,按下鼠标左键拖动标尺,标尺将被 拖动到指定的位置上
2.辅助线
辅助线是用来帮助用户在绘图过程中对图形进行准确定位的虚线,辅助线可设置 成水平、垂直和倾斜三种方式。 辅助线的显示和隐藏 辅助线同标尺工具一样,可在界面中将其显示和隐藏。展开“查看”菜单,在 “辅助线”命令前出现复选标记,说明添加的辅助线已经显示在工作区中,否则 将被隐藏。 辅助线的设置 辅助线可设置成水平、垂直和倾斜方向。通过“选项”对话框,可以在工作区中 精确地添加所需要的辅助线,同时还可以对其进行修改设置。 倾斜辅助线 使用挑选工具单击辅助线节点,当显示出倾斜手柄时,将鼠标移动到倾斜手柄处 按下鼠标左键不放,按顺时针或逆时针方向任意拖动鼠标,即可对辅助线进行旋 转操作。
3.网格
网格是由均匀分布的水平和垂直线组成的,它的功能与其他的辅助工具一样, 也是帮助用户在绘图过程中精确地对齐和定位对象。用户可根据绘图的需要, 对网格进行自定义设置。
频率:是以每一毫米的行数来指定网格间隔。 间隔:是以每条网格线之间的距离来指定网格间隔。 按线显示网格:该选项处于默认的选取状态,默认状态下的网格是由线条来组成。 按点显示网格:按点的形式来显示网格。
CorelDRAW X3基础操作
模块一
文件的基本操作
模块二
模块三 模块四 模块五 模块六
文件的导入与导出
文件的保存 版面的设置 辅助绘图工具的应用与设置 视图的显示设置
文件的基本操作
1.新建文件
在介绍CorelDRAW X3的欢迎窗口时,用户已经知道了创建新的图形文件 和在模板文件的基础上建立新的文件的操作方法,下面将向读者介绍新建文件 的其他操作方法。 (1)进入CorelDRAW X3的工作界面后,执行“文件→新建”命令。 (2)在编辑窗口中按下组合键Ctrl+N,或者单击常用工具栏中的“新建” 按钮,即可快速地新建一个空白的图形文件。 (3)执行“文件→从模版新建”命令,弹出“根据模板新建”对话框,其 操作方法与通过欢迎窗口中的“从模板新建”命令相同。
讯舟x3手机使用说明书

Tip: Programmable keys start with key number 1-1 at the top-left corner on page 1; top to bottom, left to right, ending with key 3-32 on page 3.Note: The Missed Calls icon on the Home screen will show thenumber of missed calls.Note: A Record DSS key needs to be programmed.Call HistoryThis presents a list of the last 1000 dialed, answered, and missed calls to/from your extension.1. Press CallLog soft key.2. Scroll to (using navigation keys) and select the desired call by pressing theOK key.3. Press either Dial soft key to dial the number or Option soft key to Add orDelete the number.RecordingThis feature allows you to record a call. All users have access to this feature. Recordings are located with your system administrator. 1. While on an active call, press the Record DSS key.2. To end the recording, press the Record DSS key or hang up.Status IndicatorThe programmable feature/DSS keys flash to indicate that you have either a new incoming call or a new voice mail message. The DSS key will stay lit (red) during an active call. The DSS key will flash (yellow) when a call is on hold.Redial1.Press Redialkey and last incoming call will be dialed.PhonebookAccess Phonebook:1. Press Contacts fixed key, Contact soft key or Menu > Phonebook > LocalContacts.2. Press 1 on keypad for Local Contacts then 1 again for All Contacts .3. To dial an entry, press Dial soft key or pick up handset or press Headsetor Speaker . Add new entry:1. Press Contacts fixed key or Contact soft key > 1 Contacts > press Add .2. Enter name and number, then press OK soft key.IntercomTo send a quick announcement to someone without ringing his/her phone, press Intercom feature/DSS key and enter the extension you want to call. If the other user's phone is idle, it will auto-answer via the speakerphone. Intercom applies to internal calls made from ESI SIP phones.Personalizing your ePhoneProgramming Feature/DSS keys from the Phone1. Press Menu soft key.2. Scroll to and select Basic > 6 Keyboard > 1 DSS Key Settings .3. Scroll to the desired DSS key.4.Drop down to the next line and scroll to choose the desired key "Type" (Memory Key, Line, Key Event, BLF List, Action URL,XMI Browser, MCAST Listening, Line, Key Event, Dtmf, URL, MCAST Paging ) and enter the associated i nformation. 5.Press OK .Programming a Speed Dial keyA speed dial key can be programmed for phone numbers or extensions that you dial most often.1. Press Menu soft key. Scroll to and select Basic , then 6 Keyboard .2. Select 1 DSS Key Settings and use the navigation keys to scroll to thedesired Side DSSkey to program. Scroll down to Type then select Memory Key for an internal number or Dtmf for an external number. 3. Enter the desired name and number and press OK .Programming Feature/DSS keys from the ConsoleFor eSIP systems, use the Communicator Console. For eCloud systems, use the eConsole dashboard.Voice Mailbox OptionsHere you can change your greetings, record your name and you can change the password for your voicemail.1. Access your voice mailbox by pressing the Voice Mail key.2. Enter your password and press #. The system will then tell you the number ofmessages you have.eSIP eCloudFunctionDial 0 - Mailbox OptionsDial 1 - Record your Unavailable Message Dial 2 - Record your Busy MessageDial 3 Dial 5, then 2Record your NameDial 4 - Record your Temporary GreetingDial 5 Dial 5, then 1Change your Password Dial * # Return to the Main Menu- Dial 6 Change Greeting - Dial 1 For New Messages - Dial 2 For Old Messages -Dial 3To Send MessagesGetting Started with theESI ePhoneX ™for ESI eSIP Evolution Series™ & ESI eCloud PBX ™Copyright © 2019, Estech Systems, Inc. (ESI). ESI systems are protected by various US patents, granted and pending. For more information on ESI and its products, visit .#0455-0256 Rev. ANote: Check the back of your phone to determine if you are on eSIP or eCloud: If part number is 5000-0919, you're on eSIP. If part number is 5000-0923, you're on eCloud.Note: Unconditional forward is synonymous to Call Forward Always.will show the number of missed voice mails.) on the home screen Note: The VM icon (Welcome to the ESI ePhone4xThe following icons are referenced throughout this guide:Feature Icon FeatureIconCall ForwardMute Conference- Contacts DND Redial DSS KeySpeaker Headset Transfer HoldVoice MailGetting Started Placing an external call1. Lift the handset or press Speaker key or Headset key.2. Enter the phone number and press # or Dial soft key to dial immediately, or wait for the phone to send the number automatically.3.To end the call, press End or either replace the handset or press Speakerkey or Headset key.Answering a call•Lift the handset, or press Speaker key or Headset key. Pressing the Answer soft key will connect you to the call through the speaker.• Pressing the Headset key will connect your call through the headset. •If auto-answer is enabled, you'll automatically connect to the inbound call through the speaker.Adjust Phone PreferencesPress Menu soft key then scroll to and select Basic . From there, you can program Screen Settings, Ring Settings, Voice Volume and more.HoldWhile on an active call, press Hold key or Hold soft key. To return to the held call, press the Hold key, the line DSS key, or the Resume soft key.Connecting to a second inbound callIf you receive a second call while you're on an active call, the display will split and you will hear a beep, indicating a new call:1. Press line 2 DSS key or press Answer soft key.To return to previous call:1.Press Line 1 or select Resume soft key.Call transfer1. While on an active call, press Transfer key or XFER soft key.2.Dial the number to which you want to transfer the call (or press aprogrammable feature/DSS key to which that number has been assigned). 3. To make a "blind" transfer, press Transfer key or XFER soft key and hangup or press End soft key.To make a supervised transfer, wait for the call to be answered by the transfer-to- destination. After confirming that the person will accept the call, simply press Transfer key or XFER soft key, select the number to transfer from the list, press OK and hang up to complete the transfer.Key System FeaturesSome keys mentioned herein may need to be assigned to a programmable feature/ DSS key. For more details, consult your System Administrator.Three-way Conference1. Call the first participant of the conference call and when he/she answers, pressConference soft key, 1st caller is put on hold.2. Call the second participant and, when he/she answers, press Conference soft key. This will join all three participants (counting you).3.To end the three-way conference call, hang up or press End soft key.Call Forwarding1. Press Menu > Features > 1 Call Forward.2. Select the line, the type of Forward, toggle to Enabled (using navigation keys), enter the destination number and OK . Once enabled, the Call Forward activated icon will appear on the display (top right corner).3.To disable call forwarding, select Menu soft key > Features > 1 Call Forward. Then select Disabled and save.Call ParkCall Park places a call in a holding state but can be picked up by any phone on the system. • Press Park DSS key to park the call. An announcement will state where thecall is located (i.e. 10,11). • To retrieve the parked call, dial the park number followed by # (i.e. 10#, 11#).Mute & Do Not Disturb (DND)Mute - While on a call, press Mute key to disable outbound audio via the microphone in your phone's speaker, handset, or (optional) headset. The screen will display the Mute activated icon to indicate that muting is enabled. To disable, press Mute key again. (Mute will automatically disable when you hang up the call.)DND - When the phone is idle, you can put the phone in DND (do-not-disturb) mode by following these steps:1. Press DND soft key, or go to Menu > Features > 4 DND.2. Select the Mode and Type , and press OK soft key.This sends incoming calls directly to voice mail. The DND activated icon will appear on-screen to indicate that DND is enabled. To disable, repeat the above steps.Voice Mail (VM)1.To access your voice mail messages, press the Voice mail key, or Menu > Message > 1 Voice Message.2. Select the line and press Play soft key or pick up the handset.3. At the prompt, enter your password, then press #. The system will tell youhow many messages you have. (This is displayed on your idle LCD screen - i.e. MWI: 2).Select the desired voice mail message and follow the prompts to repeat, forward, delete, reply, hear the next message, or save the message.Call QueueA call queue is created during system programming. While on an active call, press Transfer key or XFER soft key, then Call Queue DSS key to place the call in queue. To retrieve the calls from the queue login to the queue using the Agent Login/out key.Agent Login/LogoutThis feature allows an agent to log into and out of an automatic call distribution (ACD) queue to manage incoming calls. • To log in, press pre-programmed DSS key. To log out, press pre-programmed DSS key again.When your phone is idle, theHome Screen shows date/time & new voice mailmessage counts.The left and right side of the screen displays a list of programmable feature/DSS keys. There are 10 keys .The 4 keys along the bottom row are Soft keys.OK key Navigation keysNote: Steps 1 & 2 can be reversed.。
RTK手簿使用教程
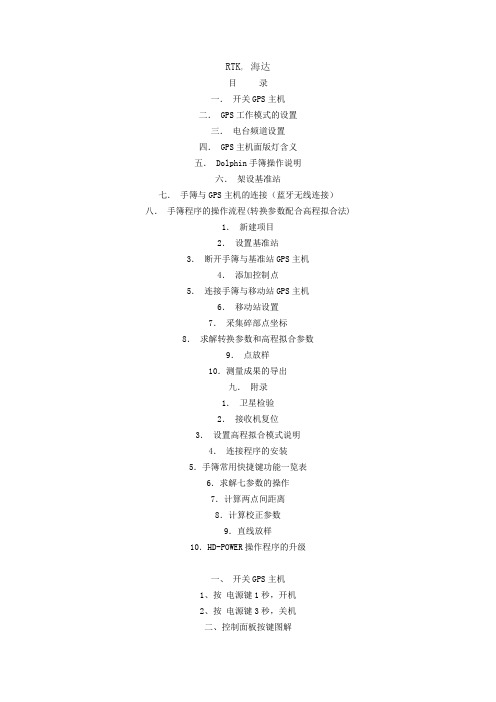
RTK, 海达目录一.开关GPS主机二. GPS工作模式的设置三.电台频道设置四. GPS主机面版灯含义五. Dolphin手簿操作说明六.架设基准站七.手簿与GPS主机的连接(蓝牙无线连接)八.手簿程序的操作流程(转换参数配合高程拟合法)1.新建项目2.设置基准站3.断开手簿与基准站GPS主机4.添加控制点5.连接手簿与移动站GPS主机6.移动站设置7.采集碎部点坐标8.求解转换参数和高程拟合参数9.点放样10.测量成果的导出九.附录1.卫星检验2.接收机复位3.设置高程拟合模式说明4.连接程序的安装5.手簿常用快捷键功能一览表6.求解七参数的操作7.计算两点间距离8.计算校正参数9.直线放样10.HD-POWER操作程序的升级一、开关GPS主机1、按电源键1秒,开机2、按电源键3秒,关机二、控制面板按键图解主机控制面板有按键两个:F键(功能键)和电源键,指示灯3个,分别为电源、卫星、状态。
按键和指示灯的功能和含义分别是:V8 CORS RTK 系统面板控制和指示说明图2 主机控制面板按键图工作方式: ●亮○灭方式卫星灯(单绿灯)信号灯(双灯之绿灯)基准站● ○移动站○ ●静态● ●数据链:类型卫星灯(单绿灯)信号灯(双灯之绿灯)内置UHF ● ○内置GSM ○ ●外挂● ●电台频道:频道电源灯(单红灯) 卫星灯(单绿灯)信号灯(双灯之绿灯)数据灯(双灯之红灯)0 ○ ○ ○ ○1 ● ○ ○ ○2 ○ ● ○ ○3 ● ● ○ ○4 ○ ○ ● ○5 ● ○ ● ○6 ○ ● ● ○7 ● ● ● ○8 ○ ○ ○ ●9 ● ○ ○ ●A ○ ● ○ ●B ● ● ○ ●C ○ ○ ● ●D ● ○ ● ●E ○ ● ● ●F ● ● ● ●控制面板操作说明:一、功能键操作说明:1、双击 F (间隔>0.2S,小于1S),进入“工作方式”设置,有“基站”、“移动站”、“静态”三种工作模式选择。
天宝TSC3手簿软件说明书

天宝TSC3手簿软件说明书介绍常规测量.8简介.8与其它应用程序交互操作12一般操作.12关于常规测量屏幕按钮和图标的说明,请看:.12任务菜单..13状态栏.13状态行.15Trimble CU 和 Trimble VX Spatial Station 或 Trimble S Series 全站仪按键.16Trimble TSC2/TSC3 功能键.17Trimble TSC3 控制器概述..17Trimble Tablet 概述18控制器键盘功能..19常规测量按钮23输入象限方向角..24计算器.25Windows 资源管理器 / 文件资源管理器..25Trimble 控制器 - 总体操作26用蓝牙技术从 Trimble TSC2 控制器完成打印31 电源指示器32接上和取下 Trimble CU 控制器33法律注意事项.34疑难问题解答.34任务修复向导.37任务操作.37任务37文件管理..39任务属性..41检查任务..42点管理器..45坐标视图..52QC图53存储点.53地图55筛选58使用公共任务地图59选择点.63表面和体积64自动平移..64单位65时间/日期.66坐标几何设置.67链接文件..71活动地图..73F2CAD 工具栏77偏移线.81计算交会..81使用要素库82使用文件名属性..85使用描述域91任务间的复制.91键入..92键入菜单..92键入点.93键入线.93键入弧.94键入 - 定线..98键入注释..99坐标几何计算..100坐标几何菜单100坐标几何 - 计算反算..101 坐标几何 - 计算点.101坐标几何 - 计算 + 划分区域.108 坐标几何 - 计算体积..109坐标几何 - 计算方位角110坐标几何 - 计算平均值113弧解..114三角解119坐标几何 - 划分线.120坐标几何 - 划分弧.122坐标几何 - 变换124坐标几何 - 导线129尺量距离.130计算器131弹出菜单控制134测量 - 一般135测量和放样菜单.135开始测量.135建立连接.136综合测量.137GNSS 测量137常规测量.138测量点145测量代码.146放样 - 概述.151快速固定.152地形点152检查点153F3结束测量.154测量 - 常规仪器..154在常规测量中测量地形点..155测站设立.156多后视点建站159多后视点建站或后方交会中的测回162测站高程.165后方交会.166参考线法.170测回..171测量 3D 轴..174多后视点建站、后方交会和测回选项.176 连续地形 - 常规178扫描..180表面扫描.185角度和距离..187平均观测值..187角度偏移、水平角偏移和垂直角偏移.188距离偏移量..189双棱镜偏移..190圆形对象.191远程对象.191常规仪器 - 改正192目标细节.194棱镜常数.199用两个盘测量一个点199GDM CU 程序.202高级测量支持204测量 - 校正205校正..205为点校正配置测量形式.206校正-人工207校正-自动208测量 - GNSS209启动基准站接收机..210基准站选项..217为流动站接收机安置设备..218 流动站选项..222测量天线高度225天线.ini文件227RTK初始化方法..228RTK 测量.231在一个无线电频率上运行几个基准站.233用拨打GSM连接方式开始实时测量235F4用 GPRS 互联网连接方式开始实时测量..235重拨基准站..236开始广域 RTK 测量.237RTK 和 Infill 测量238RTK 和数据记录.239快速静态测量240PPK 测量.241后处理初始化时间..242RT 差分测量.243广域增加系统 WAAS 和欧洲全球导航覆盖服务 EGNOS.244 快速点244用激光测距仪测量点245连续地形点..245快速静态点..248观测控制点..248RTK 点播.249测量 - 综合250综合测量.250综合测量流动站 - 综合测量杆253 测量 - 放样254放样 - 配置显示模式.254放样 - 使用图形显示.256放样 - 选项.257放样点细节..257放样点260放样线266放样弧269放样 - 定线.273放样数字地形模型(DTM).278精确和粗略模式 - GNSS 放样.279 测量配置280配置菜单.280测量形式.281测量类型.281常规仪器配置282常规仪器类型285激光测距仪..290回声测深仪..291重复点限差..292要素库293GNSS 电台296流动调制解调器概述299把测量形式基准站或流动站电台配置为流动调制解调器300 GNSS 联系301F5流动调制解调器拨号测量配置.302流动调制解调器互联网测量配置..303连接到互联网309蓝牙..312罗盘..322在控制器之间传送文件.323语言..323声音事件.324模板..324仪器.324仪器菜单.325卫星..326接收机文件..327位置..328接收机状态..329接收机设置..330导航到点.330网络/参考测站状态.331GNSS 仪器功能..331测站设立细节332激光指示器..332电子整平.334EDM 设置.335转到..336操纵杆337视频..338跟踪光341自动锁定、FineLock 和长范围 FineLock 技术.342 GPS 搜索.350仪器设置.354电台设置.356仪器调整.358Survey Basic360仪器功能.362数据输出.363坐标系统366坐标系统.366定制坐标系统数据库366只比例系数..368投影..369地面坐标系统369项目高度.370无投影/无基准..370播发 RTCM370F6水平平差.372垂直平差.372坐标系统.372选项软键.380坐标显示设置382投影网格.382移位网格.383文件传送383导入/导出菜单..383在控制器与办公室计算机之间传送文件..383 在外部设备之间发送和接收 ASCII 数据.398 导入和导出固定格式文件..403导出自定格式文件..405导入自定义格式文件409数据库查寻规则410数据库搜索规则.410附录A416常规测量软件执行的计算.416应用到 GNSS 位置的转换..416椭球计算.422常规仪器计算422用常规观测记录的标准误差429弧段计算.429术语.430术语..430F7介绍常规测量简介欢迎使用常规测量软件版本 1.50 的帮助。
手簿X3操作指导说明书-1
手簿X3操作
1开机
按电源键打开手簿X3。
2手簿蓝牙连接主机
点击window窗口进入窗口界面点击工程之星工程菜单点击配置点击上下找到蓝牙管理进入蓝牙管理界面搜索主机编码选择要连接主机的编码点击连接(主机蓝牙灯已亮)。
3手簿遥控主机工作模式
3.1
3.1.1
的通道改为相应的通道点击切换
3.1.2
络设置点击增加
点
(等到成功)
3.2
3.2.1
点击基准站设置进入基准站设置界面填写相关参数点击启动基准站然后返回工程菜单界面点击配置选择电台设置将电台的通道改为相应的通道点击切换退出进入工程菜单界面
3.2.2基准站外挂电台设置
主机模式设置界面选择主机数据链设置选择外置点击确定,返回主机模式设置界面,退出进入工程菜单界面。
4新建工程
在工程菜单界面点击工程选择新建工程选择SD卡、输入工程名(一般以日期)确定;返回工程菜单界面点击配置选择工程设置在工程设置界面输入天线高、选择杆高点击确定;返回工程菜单界面点击配置坐标系统配置
坐标系统选择编辑界面点击增加(或点击编辑、或点选已有的坐标文件再确定)输入参数系统名称、椭球名、中央子午线、以及四参数和七参数点击确定。
5求参数
5.1单点校正
在工程菜单界面点击输入选择校正向导选择基站架在未知点上(如果基站在已知点上则选择基站架在已知点上下一步再输入基站的坐标与高程)下一步输入移动站改点的坐标与高程(或从文件中调用)使水泡居中点击校正确定
5.2求参数
工程菜单界面点击输入选择求转换参数进入求转换参数的界面,点击增加输入点名及坐标、高程(或从坐标管理
6
点放样:
线放样:。
戴尔 axix x3 用户指南说明书
Dell™ Axim™ X3用户指南型号:HC02Uw w w.d e l l.c o m|s u p p o r t.d e l l.c o m注、注意和警告注:注表示可以帮助您更好地使用计算机的重要信息。
注意:注意表示可能会损坏硬件或导致数据丢失,并告诉您如何避免此类问题。
警告:警告表示可能会导致财产损失、人身伤害甚至死亡。
缩写词和缩略词有关缩写词和缩略词的完整列表,请参阅第 143 页的“词汇表”。
____________________本说明文件中的信息如有更改,恕不另行通知。
©2003-2004Dell Inc.。
版权所有,翻印必究。
未经 Dell Inc. 书面许可,严禁以任何形式进行复制。
本文中使用的商标:Dell、DELL徽标、Axim、TrueMobile、Dimension、Inspiron、OptiPlex、Latitude、Dell Precision、PowerApp、PowerVault和DellNet是 Dell Inc. 的商标;Intel、Pentium和Celeron是 Intel Corporation 的注册商标,XScale和StrataFlash 是 Intel Corporation 的商标;Microsoft、Windows和ActiveSync 是 Microsoft Corporation 的注册商标,Mobile是 Microsoft Corporation 的商标;EMC是 EMC Corporation 的商标;Bluetooth是 Bluetooth SIG, Inc. 拥有的商标,并许可 Dell Inc. 使用。
本说明文件中述及的其它商标和产品名称是指拥有相应商标和产品名称的公司或其制造的产品。
Dell Inc. 对其它公司的商标和产品名称不拥有任何所有权。
型号:HC02U2004 年 1 月P/N U1459Rev. A02目录警告:安全说明 (9)一般原则 (9)电源 (11)电池 (12)乘飞机旅行 (13)EMC 说明 (13)符合人机工程学的操作习惯 (14)防止静电损害 (15)电池的处理 (15)查找信息 (16)1关于您的设备正面、侧面和背面视图 (18)正面视图和侧面视图 (18)背面视图 (20)使用电池 (21)安装和取出电池 (21)为电池充电 (22)连接至计算机 (23)使用支架 (23)使用同步电缆 (26)目录3使用安全数字内存卡 (27)执行重启动 (28)软重启动 (28)硬重启动 (28)2使用 Mobile2003 软件设备按钮和手写笔 (32)今日屏幕 (32)状态图标 (34)程序 (35)程序按钮 (35)切换栏 (36)导航栏和命令栏 (37)弹出式菜单 (38)查找和组织信息 (39)备份数据 (40)3输入信息使用输入面板输入文本 (42)使用软键盘键入文本 (44)字母识别器 (44)块识别器 (45)誊写器 (45)编辑键入的文本 (45)4目录在屏幕上书写 (46)编辑写入文本 (47)在屏幕上绘图 (49)创建图形 (49)编辑图形 (50)录制信息 (51)使用我的文本 (51)4调整设置个人选项卡 (54)系统选项卡 (54)连接选项卡 (55)5使用 Microsoft® ActiveSync®关于 ActiveSync (58)安装和使用 ActiveSync (59)6日程安排和通讯关于 Microsoft®Pocket Outlook (62)日程表 (62)使用摘要屏幕 (64)创建会议请求 (64)目录5联系人 (65)查找联系人 (66)使用摘要屏幕 (66)任务 (67)便笺 (68)收件箱 (70)同步电子邮件信息 (70)直接连接至电子邮件服务器 (71)使用信息列表 (71)撰写信息 (73)管理电子邮件信息和文件夹 (74)通知 (76)7添加和删除程序使用 Microsoft® ActiveSync®添加程序 (78)从 Internet 下载程序 (79)将程序添加到“Start”(开始)菜单 (80)使用设备上的文件资源管理器 (80)使用计算机上的 ActiveSync (80)删除程序 (81)6目录8使用配套程序Microsoft Pocket Word (84)Pocket Excel (86)使用 Pocket Excel 的技巧 (88)MSN Messenger (89)设置 (89)使用联系人 (90)与联系人交谈 (90)Windows® Media Player for Pocket PC (91)Microsoft Reader (91)使用书库 (92)阅读书籍 (93)使用 Reader 的功能 (94)删除书籍 (95)9使用 Microsoft® Pocket Internet Explorer移动收藏夹 (98)节省内存 (99)移动收藏夹文件夹 (99)收藏夹链接 (100)使用 AvantGo 频道 (100)浏览移动收藏夹和 Web (101)目录710建立连接使用红外线 (104)使用蓝牙 (105)使用 Wi-Fi (802.11b) (105)创建调制解调器连接 (107)创建以太网连接 (108)创建 VPN 连接 (109)终止连接 (110)直接连接至电子邮件服务器 (111)获得有关连接的帮助 (111)11附录规格 (114)管制通告 (117)无线管制信息 (119)无线电许可 (119)与 Dell 联络 (120)词汇表 (143)索引 (145)8目录警告:安全说明遵循以下安全原则有助于确保您的人身安全并防止您的设备和工作环境受到潜在的损害。
POCO X3 Pro用户指南说明书
Thank you for choosing POCO X3 ProLong press the power button to turn on the device.Follow the on-screen instructions to configure the device.For more information, visit our official website:/global/service/userguideMIUI (for POCO)POCO X3 Pro comes pre-installed with MIUI (for POCO), our customized Android-based OS which provides frequent updates and user-friendly features based on suggestions from over 200 million active users worldwide. For more information, please visit SIM Card Tray:Nano-SIM Nano-SIM Nano-SIM Micro SDAbout Dual SIM:• Dual 4G SIM is offered by select telecom operators and may not be available in all regions.• Supports dual nano-SIM cards. When using both SIM card slots, either card can be set as the primary card.• VoLTE is only supported by telecom operators in certain regions.• System may be automatically updated for optimal network performance. For details, please refer to the system version in use on the device.• Please do not insert non-standard SIM cards into the SIM card slot. They may damage the SIM card slot.• WARNING: Do not disassemble this device.RF Exposure InformationThis mobile phone has been designed to comply with applicablesafety requirements for exposure to radio waves as per the relevant Indian SAR standard (refer to Office Memorandum No.18-10/2008-IP, Government of India, Ministry of Communications and IT, Department of Telecommunications, Investment Promotion), which state that the SAR level for mobile device shall be limited to 1.6 Watt/Kg, averaged over a mass of 1 gram of body tissue.Usage adviceIt is recommended to use a wireless handsfree system (headphone, headset) with a low-power Bluetooth emitter when making a call.It is recommended to use a mobile device with a Specific Absorption Rate (SAR) that complies with the applicable safety requirements.For children, adolescents and pregnant women, it is recommended to keep each call short or to send a text message instead.Use the mobile device in an area with good signal quality.For persons utilizing active medical implants, it is recommended that the mobile device be kept at least 15cm away from the implant during use.Important safety informationIndia SAR 1 g limit: 1.6 W/Kg,SAR Head: 0.809 W/Kg, Body: 0.645 W/Kg (distance 15 mm).E-WastePOCO products are in conformity with the requirements of the reductionof hazardous substances of the E-Waste (Management) Amendment Rules, 2018.The content of hazardous substance with the exemption of the applications listed in SCHEDULE II of the E-Waste Rules:1. Lead (Pb) – not over 0.1% by weight;2. Cadmium (Cd) – not over 0.01% by weight;3. Mercury (Hg) – not over 0.1% by weight;4. Hexavalent chromium (Cr6+) – not over 0.1% by weight;5. Polybrominated biphenyls (PBBs) – not over 0.1% by weight;6. Polybrominated diphenyl ethers (PBDEs) – not over 0.1% by weight.For E-Waste information, please refer to the link below:/in/service/recycling_guidePOCO WARRANTY NOTICEThis limited warranty shall apply to POCO products. For handsets and accessories defects under normal use circumstances and at the discretion of the company, POCO shall provide free of charge repair and/or replacement services within the warranty period.Handsets Limited WarrantyWarranty Period Scope of Warranty Warranty service Hardware product 1 yearLabor and parts Carry in POCO original battery, charger and other accessories packaged with the product6 months • The Limited Warranty starts from the day the customer receives the product, limited to 10 days from the date of invoice.• During the warranty period, if any accessory defect is inspected and confirmed by Xiaomi authorized service center, free replacement service shall be provided.1. This limited warranty is only valid in India, and the product is not eligible for any international warranty service. To the fullest extent permitted by law, warranty service only be performed by Xiaomi or Xiaomi authorized service centers.2. Xiaomi may conduct diagnostic tests on customers’ products to identify the causes of failures / defects. Before returning any unit for service, customer should back up data and remove any confidentialand/or personal information from the product. Xiaomi is not responsible for damage or loss of any program, data, or removable storage media.3. Prior to contact Xiaomi service agent, please ensure the following information is at hand: -Model, serial number, and IMEI number if available. -Customer’s full address and contact information. -Purchase order number, a copy of the customer’s original invoice/receipt. 4. This warranty does not cover the following cases: -The product serial number, IMEI number or warranty seal is illegible or has been removed, erased, defaced, altered, and/or tampered. Any accessory or external part of the product has been missing. -Any damage occurs in/on outer surface of the product, including but not limited to cracks, dents or scratches on the exterior cases, screens, camera lenses, buttons and other attachments. -General maintenance, password reset assistance, cleaning, application update/installation, product demonstration, or any other service other than repair/replacement. -Deterioration of the product caused by normal usage and tearing, including but not limited to rust or stains. -Any other circumstances that are contradictory or are not in compliance with business ethics.5. Xiaomi will determine whether a product is “Out of Warranty” at the company’s discretion according to the standards listed below. Repair of Out of Warranty products shall be separately quoted by the Xiaomi service center and respective service shall be provided upon service fee payment.-Violation of the warranty terms, invalidate warranty, expired warranty,or other reason.-During the warranty period, in the event of violation which defined ascustomer induced damage, such as self-repairs, exposure to water,damage caused by misuse, alternation, failure to comply with product manual, etc.Handsets Defects ListItem Performance DefectsMobile Phone Screen failure including no display / abnormal displayPhone does not start, unable to log or make callsPhone does not vibrate or ring Abnormal shutdownPoor contact with SIM cards Button failureNo sound or abnormal sound volume Shell crack damage due to structural or material factorsCharger The orginal charger doesn’t workBattery Mobile phone doesn‘t work after fullcharge or does not accept charge Data Cables Does not workFor more detail, please call hotline: 1800-572-7626Official Website: www.poco.inServiceEmailAddress:*******************Twitter: @POCOSupportXiaomi Communications Co., Ltd.Brand: POCO Model: M2102J20SI© Xiaomi Inc. All rights reserved.。
X3-操作指南
X3-操作指南X3重聚-操作指南攻略内容驾驶飞船中的操作U - Auto Pilot自动驾驶(靠港) 开/关选取飞船时,会自动尾随目标。
选取太空站时,会自动靠港(有些太空站当你名声值不够高时,不允许你靠港)Auto Pilot注意事项:某些星系的AI route有问题,你如果一进该星系就开启Auto Pilot,它会让你去撞传送门,小则船身受伤,大则撞到Game Over所以最好是离开传送们一段距离再开Auto Pilot快捷键F - 查看货舱物品清单O - 打开货舱门(会关闭护罩)Shift + E - Eject 弹射离开飞船Shift + H - HUD 开/关,关掉可以让游戏流畅很多,但是玩的下去吗Z - 加速X - 减速TAB - 引擎全开(需配备Boost Extenstion)<-BackSpace - 引擎停止Q - 向左翻滚E - 向右翻滚·左Alt - 望远镜功能,按住Alt会一直放大,松开后会自动回复正常(需配备Video Enhancement Goggles)·J - 加速功能(需配备SETA extension),时间及飞行速度都变快,可在OPTION中调整加速倍速,我是选10X·Shift + J - 使用Jump Drive(需要有足够的Energy Cells才能跳跃到选取的星系)以下都是要在你的扫描仪范围内才侦测的到(Triplex Scanner的扫描范围最广)·i - 识别所选取的目标物·t - 侦测正前方的目标物(当前方无目标时,会持续闪动扫描。
当有目标物进物扫描范围时,并自动将它当成目标)·PageUp (或滚轮向上) - 下一个目标物·PageDown (或滚轮向上) - 上一个目标物Shift + t - 侦测离自己最近的敌人,并自动将它当成目标Home - 下一个敌人目标物End - 上一个敌人目标物Insert - 下一个你拥有的飞船/卫星Delete - 上一个你拥有的飞船/卫星呼叫菜单的操作Enter - 呼叫快速选单右方数字键盘Enter - 呼叫主要选单Shift + O(这是殴) - 呼叫OPTION选单Shift + S - 呼叫存档选单Shift + L - 呼叫读档选单 (任何太空站都可以储存进度。
- 1、下载文档前请自行甄别文档内容的完整性,平台不提供额外的编辑、内容补充、找答案等附加服务。
- 2、"仅部分预览"的文档,不可在线预览部分如存在完整性等问题,可反馈申请退款(可完整预览的文档不适用该条件!)。
- 3、如文档侵犯您的权益,请联系客服反馈,我们会尽快为您处理(人工客服工作时间:9:00-18:30)。
手簿X3操作
1开机
按电源键打开手簿X3。
2手簿蓝牙连接主机
点击window窗口工程菜单点击上下找到蓝牙管理进入蓝牙管理界面搜索主机编码选择要连接主机的编码
点击连接(主机蓝牙灯已亮)。
3手簿遥控主机工作模式
点击仪器设置进入仪器设置界面(移动站设置、基准站设置、主机模式设置)点击主机模式设置进入主机模式设置界面(主机工作模式、主机静态设置、主机数据链设置)
3.1移动站设置
选择主机工作模式【移动站】点击确定,返回主机模式设置界面
3.1.1移动站电台设置
主机模式设置界面选择电台点击确定,然后返回工程菜单点击配置选择电台设置将电台的通道改为相应的通道点击切换
退出进入工程菜单界面(查看电台通道、电台信号)
3.1.2移动站网络设置
主机模式设置界面选择网络然后返回工程菜单点击配置进入网络设置点击增加(或点击编辑因为该网络参数已经设置好了)进入网络参数设置界面点击获取接入点
直到界面出现(获取源列表成功)点击确定返回网络参数设置界面选择相应的接点击确定进入网络读取界面(等到成功)点击链接等所有的灯变绿之后点击确定点击确定(返回工程菜单界面查看网络及网络信号)
3.2基准站设置
在主机模式设置界面点选【基站】点击确定,返回主机模式设置界面
3.2.1基准站内置电台设置
主机模式设置界面选择电台点击确定,返回仪器设置界面点击基准站设置进入基准站设置界面填写相关参数然
点击配置将电台的通道改为相应的通道点击切换退出进入工程菜单界面
3.2.2基准站外挂电台设置
选择主机数据链设置返回主机模式设置界面,退出进入工程菜单界面。
4新建工程
在工程菜单界面点击工程选择SD卡、输入工程名(一般以日期)确定;返回工程菜单界面点击配置选择工程设置在工程设置界面输
点击配置
坐标系统选择编辑界面点击增加(或点击编辑、或点选已有的坐标文件再确定)输入参数系统名称、椭球名、中央子午线、以及四参数和七参数
5求参数
5.1单点校正
在工程菜单界面选择校正向导选择基站架在未知点上(如果基站在已知点上则选择基站架在已知点上下一步再输入基站的坐标与高程)下一步
改点的坐标与高程(或从文件中调用)使水泡居中确定
5.2求参数
选择求转换参数进入求转换参数的界面,点击增加
输入点名及坐标、高程(或从坐标管理库调用选择需要选择的点再点击确定)点击确定
如果是从坐标库选点(点选坐标管理选点在坐标管理库中选择所需的点再点击确定)如果是读取当前点坐标(也就是采集当下该点的坐标设置好天线高)
如果是直接直接输入大地坐标(就是在手簿上输入相应的经度、纬度、高程、天线高)
6测量
测量:在工程菜单界面点击测量
点测量:点击点测量撑好对中杆至水泡居中则按ent 键输入点名杆高再按ent键控制测量:点击控制测量点击设置输入相关参数点击确定其它如点测量
点放样:点击点放样点击目标从坐标管理库中选择相应的点点击确定之后在手簿屏幕显示相应的距离再按照屏幕上的显示查找目标点
线放样:点击点放样点击目标在直线放样库界面点击增加输入线名起点坐标与终点坐标和起点里程再点击确定在直线放样库中选择需要放样的直线再点击确认之后看屏幕上显示的方位及距离再按照屏幕上的显示查找目标线。