
Oracle VM Virtualbox 教程(佳佳作品)
1、在桌面或者开始菜单里面点击快捷方式,运行VirtualBox。
2、在打开的 Oracle VM VirtualBox Manager 里面,点击左面第一个按钮“新建”,出来
新建虚拟电脑向导,点击“下一步”——
3、在这一步“虚拟电脑名称和系统类型”窗口里面,输入你为这个虚拟机起的名字,操作
系统和版本里面选择你自己想装的系统!
4、在接下来的虚拟电脑(虚拟机)的内存设定里面,选择1024MB即可。
可以根据自己电
脑的情况进行设定,(我电脑3G内存。
个人习惯XP用512 WIN 7用1024)
5、在这一步里面,是要为虚拟电脑创建可引导的硬盘了,虚拟的,默认20GB,足够了,直
接下一步即可,当然以后如果反悔还可以创建完毕后重新在设置的,来吧,下一步——
6、在虚拟硬盘类型这一步里面,有动态扩展和固定大小两个选项,选择动态扩展的比较好,
这样其实并不会完全占用你指定的例如20GB的硬盘空间,而是根据实际需要不断的扩充。
默认就是动态扩展,不用动,继续下一步——
7、接下来的一步,是指定虚拟硬盘所在位置和空间大小,这儿有必要提醒一下,如果你当
初把VirtualBox安装在C盘,它会默认把虚拟机占用的文件也放到C盘,你可以点击位置右面的那个资源管理器图标按钮,指定你存放虚拟机硬盘文件的位置。
例如我放在E盘
8、这一步提示你新的虚拟机的虚拟硬盘创建完毕,这一步直接点击完成即可:
9、在完成上面的步骤后,Oracle VM VirtualBox Manager 里面就多了这个您指定名称为
WIN 7的虚拟机了。
10、下面进行的就是虚拟机的设定:在Oracle VM VirtualBox Manager里面点击下刚
才建好的WIN 7虚拟机,然后点下上面的黄色图标“设置”,或者右键菜单里面点击设
置也可以(快捷键是Ctrl+S)—
11、在主板这里:启动里有把软驱去掉(现在还有谁用软驱哦!)
12、在出来的设置页面里面,主要是设置两个项目,一个是系统,一个是显
示,先在左面切换到系统设置,在处理器这里,如果是双核CPU设1,如果
是4核以上就设2喽!
13、在硬件加速这里双选(默认)
14、下面到显示了:在显卡设置里—显存就先128M吧!相信现在显卡都512以上了吧!
128用在虚拟机里是没问题的了。
(按照自己的配置设定!不过显存大点虚拟机里面才会快!相信你也不想虚拟机里面卡死吧)(3D加速和2D加速都选上吧!特别在虚拟机里面安装WIN 7,没3D 2D的加速里面会卡死的)
15、好了,现在我们来启动吧!
16、首次运行向导:下一步就可以了这里物理设备G是指光驱,不过我是用ISO 文件
安装的
下一步——完成。
好了,下面就是装系统了。
这个熟悉吧!呵呵
PS:按右ctrl键可以切换键鼠的两种状态,即虚拟机模式,真实电脑模式。
不懂就Q我哈!
佳佳作品。
VirtualBox虚拟机网络配置教程

VirtualBox虚拟机网络配置教程第一章:介绍VirtualBox虚拟机网络配置概述VirtualBox是一款功能强大的开源虚拟化软件,它允许用户在一台物理计算机上运行多个虚拟机,从而实现虚拟化环境的搭建。
在使用VirtualBox时,网络配置是一个重要的方面。
在本教程中,我们将重点介绍VirtualBox虚拟机网络的不同模式及其配置方法。
第二章:NAT模式NAT(Network Address Translation)模式是VirtualBox默认的网络模式。
在NAT模式下,虚拟机与主机以及其他虚拟机之间实现了网络通信。
同时,VirtualBox也会为虚拟机分配一个IP地址,在虚拟机内部使用该IP地址进行网络通信。
配置NAT模式的方法如下:1. 打开VirtualBox,选择要配置网络的虚拟机,点击设置。
2. 在“网络”选项卡中,选择“NAT”模式。
3. 确定更改,并启动虚拟机。
第三章:桥接模式桥接模式允许虚拟机直接与物理网络中的其他设备通信。
在桥接模式下,虚拟机会获得物理网络的独立IP地址,可以像物理计算机一样使用网络服务。
配置桥接模式的方法如下:1. 打开VirtualBox,选择要配置网络的虚拟机,点击设置。
2. 在“网络”选项卡中,选择“桥接网卡”模式。
3. 选择要使用的物理网络适配器,并确定更改。
4. 启动虚拟机,它将获得与物理网络相同的IP地址。
第四章:仅主机模式仅主机模式允许虚拟机与主机进行网络通信,而不与其他设备通信。
在这种模式下,虚拟机与主机共享同一个IP地址,但可以通过网络进行通信。
配置仅主机模式的方法如下:1. 打开VirtualBox,选择要配置网络的虚拟机,点击设置。
2. 在“网络”选项卡中,选择“仅主机”模式。
3. 启动虚拟机,它将与主机共享同一个IP地址。
第五章:内部网络模式内部网络模式允许虚拟机之间进行通信,但与主机以及物理网络中的其他设备隔离。
在内部网络模式下,虚拟机可以通过虚拟网络进行通信,而不会受到外部网络的干扰。
教程--用Oracle VM VirtualBox虚拟机安装winxp操作系统

下面,开始体验虚拟机上安装操作系统首先,安装Virtualbox,这一步骤一如你以往安装各种替他软件,此处就不再赘言。
打开安装好的Virtualbox,点击新建按钮,进入进入创建新建虚拟电脑的向导输入虚拟电脑的名称(名称随意),然后选择系统类型,这里我们安装的是xp,所以系统类型选择Microsoft Windows--Windows xp,如果我们这里需要安装ubuntu,那么这里我们应该选择linux--ubuntu。
下一步,为虚拟电脑分配内存。
分配内存要量力而行,我的电脑是主流配置2G内存,在这里,我分配了404MB的内存给虚拟电脑,如果你的电脑是1G内存,那你就要少分一些内存,因为如果分出去的内存太多,电脑会卡。
选择虚拟硬盘,这里需要创建新的虚拟硬盘。
虚拟硬盘类型选择动态扩展,这样,创建的虚拟电脑在开始的时候只占用一小部分硬盘空间,而只在需要时增加硬盘占用。
位置为Virtualbox默认的保存位置,一般不需要改动,如果想要建立在别的地方,请自行输入位置到这里,一个新的虚拟电脑就基本配置完了,但这只是配置,真正的安装还没有开始。
选择刚刚配置好的名为xp的虚拟电脑,点击开始进入运行向导选择安装介质,这里需要用到我们之前下载的xp光盘镜像,这一步很重要,很多人忽视这一步结果怎么也无法运行。
之后就进入了我们比较熟悉的xp安装界面。
什么?你不熟悉?好吧,我会顺便教你安装xp操作系统。
熟悉的人请选择性跳过。
这里很明显,单击回车。
同意许可协议不用说了吧,点F8。
虚拟电脑中只虚拟出一个磁盘,所以会有10G的未划分空间(就是刚才配置时选择的初始10G硬盘)给你,这里不用纠结,直接回车。
这里选择格式化方式,文件系统用NTFS格式的,格式化方式当然选择第一个比较快的。
开始格式化,到这里,安装进入傻瓜式自安装,现在你的双手可以离开键盘,去干点别的,喝杯茶上个厕所什么的。
它正在从光盘镜像往电脑复制文件之间会有一次重新启动,不用管它,继续喝你的茶。
Dell CentOS 6.4安装Oracle VM VirtualBox 操作文档

一、D ell CentOS 6.4安装Linux操作系统1、进入Dell CentOS 6.4 BIOS设置1)服务器机器上架,接通显示器、键盘、电源插头、制作网线(四个独立的网卡)2)阅读随机开箱包装中的《服务,保修与操作系统安装指南》手册,找到如何从光驱启动段落:“您最多按两下<F11>就足够了,否则键盘可能会被锁死,...”3)服务器上电后,按提示,选择<:F11>功能键,进入服务器BIOS设置界面。
可能需要等待N秒,选择DVD Driver 引导启动,按<Enter>键。
4)将操作系统安装盘放入服务器光驱设备中,并合上光驱。
5)稍后,服务器重新启动。
进入安装界面。
2、DVD光驱引导操作系统安装1)服务器引导进入安装界面其中:Install or upgrade an existing system 安装或升级现有的系统Install system with basic video driver 安装过程中采用基本的显卡驱动Rescue installed system 进入系统修复模式Boot from local drive 退出安装从硬盘启动Memory test 内存检测注:详细出处参考:/os/78318.html选择第二选项,按<Enter>键。
之后,屏幕会打印出Loading ….Loading ….之后,进入光蝶介质检查界面2)光蝶介质检查界面通过光标键←→选择下一步骤:OK 进行介质检查SKIP 掉过检查,直接进入引导界面选择SKIP ,系统会提示FOUND DISC IMAGING之后进入引导界面3)引导界面鼠标左单击<Next>键,系统进入语言选择界面4)语言选择界面通过按光标键↑↓,选择Chinese(Simplified)(中文(简体))后鼠标左单击<Next>键。
系统进入键盘布局选择界面5)键盘布局选择界面通过按光标键↑↓,选择U.S.English 后鼠标左单击<Next>键。
VirtualBox配置教程
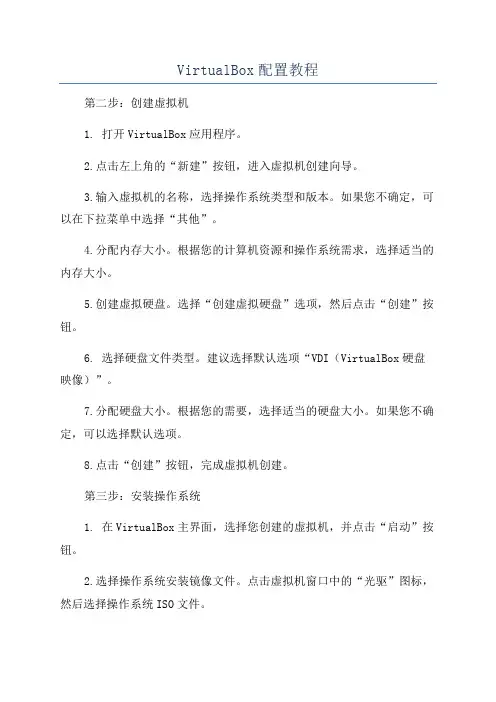
VirtualBox配置教程第二步:创建虚拟机1. 打开VirtualBox应用程序。
2.点击左上角的“新建”按钮,进入虚拟机创建向导。
3.输入虚拟机的名称,选择操作系统类型和版本。
如果您不确定,可以在下拉菜单中选择“其他”。
4.分配内存大小。
根据您的计算机资源和操作系统需求,选择适当的内存大小。
5.创建虚拟硬盘。
选择“创建虚拟硬盘”选项,然后点击“创建”按钮。
6. 选择硬盘文件类型。
建议选择默认选项“VDI(VirtualBox硬盘映像)”。
7.分配硬盘大小。
根据您的需要,选择适当的硬盘大小。
如果您不确定,可以选择默认选项。
8.点击“创建”按钮,完成虚拟机创建。
第三步:安装操作系统1. 在VirtualBox主界面,选择您创建的虚拟机,并点击“启动”按钮。
2.选择操作系统安装镜像文件。
点击虚拟机窗口中的“光驱”图标,然后选择操作系统ISO文件。
3.点击“启动”按钮,开始安装操作系统。
4.按照操作系统安装过程的提示,完成操作系统的安装。
根据不同的操作系统,可能需要您输入安装选项和设置。
第四步:配置虚拟机1. 在操作系统安装完成后,通过点击VirtualBox主界面中的“设置”按钮,进入虚拟机配置页面。
2.配置网络适配器。
在“网络”选项卡中,选择适当的网络模式。
如果您只需要虚拟机与主机进行通信,选择“NAT”模式即可。
3.配置共享文件夹。
在“共享文件夹”选项卡中,点击“添加新的共享文件夹”按钮,并选择要共享的文件夹。
4.配置其他选项。
根据您的需求,您可以配置其他选项,例如音频设置、显示设置等。
第五步:使用虚拟机1. 启动虚拟机。
在VirtualBox主界面,选择您的虚拟机,并点击“启动”按钮。
2.使用虚拟机。
在虚拟机中,您可以像使用一台独立计算机一样使用操作系统和应用程序。
在使用VirtualBox时,还有一些高级配置和功能可供您利用。
例如,您可以创建快照来保存虚拟机状态,并随时恢复至该快照状态;您还可以设置虚拟机的共享剪贴板,以便在主机和虚拟机之间共享剪贴板内容。
VirtualBox配置教程(全程图解)
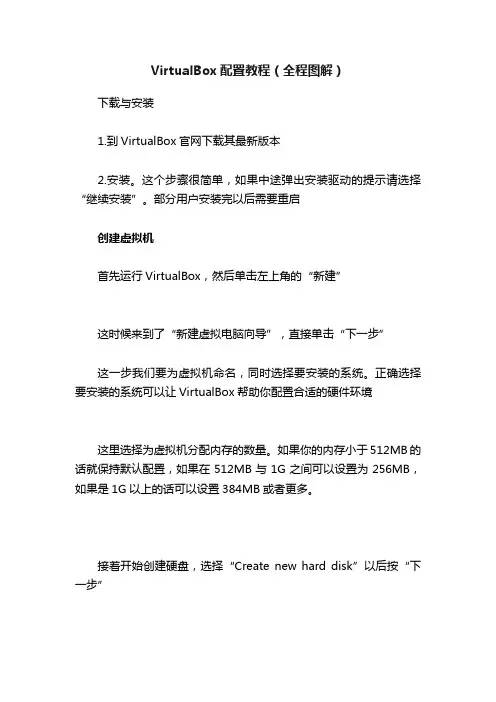
VirtualBox配置教程(全程图解)下载与安装1.到VirtualBox官网下载其最新版本2.安装。
这个步骤很简单,如果中途弹出安装驱动的提示请选择“继续安装”。
部分用户安装完以后需要重启创建虚拟机首先运行VirtualBox,然后单击左上角的“新建”这时候来到了“新建虚拟电脑向导”,直接单击“下一步”这一步我们要为虚拟机命名,同时选择要安装的系统。
正确选择要安装的系统可以让VirtualBox帮助你配置合适的硬件环境这里选择为虚拟机分配内存的数量。
如果你的内存小于512MB的话就保持默认配置,如果在512MB与1G之间可以设置为256MB,如果是1G以上的话可以设置384MB或者更多。
接着开始创建硬盘,选择“Create new hard disk”以后按“下一步”这时我们来到了“新建虚拟硬盘向导”,直接单击“下一步”这里我们需要选择创建的磁盘类型。
如果你的硬盘不是大的用不完的话请选择“动态扩展”这里我们要选择存放硬盘镜像的地点以及硬盘镜像的大小。
如果你的虚拟机只是用来打包软件的话那么默认的10G空间足够用了最后确认硬盘信息,点击“完成”再确认虚拟电脑的信息,点击“完成”这时我们已经成功的创建了一个虚拟机了,接下来我们要开始配置这个虚拟机安装操作系统选择刚才创建的虚拟机,然后单击上方的“开始”这时会弹出“首次运行向导”,单击“下一步”这里选择要通过什么介质安装。
如果你要通过光盘安装的话直接在“介质位置”选择你光盘的盘符就行了。
这里我们使用光盘镜像安装,选择下面的“虚拟介质”,然后单击右边的文件夹图标这时我们来到了“虚拟介质管理器”,单击上方的“注册”选择光盘镜像所在的位置,然后单击“打开”选择刚才添加的光盘镜像,然后单击“选择”在这里单击“下一步”继续最后确认信息,然后单击“完成”接着我们将进入安装系统的步骤。
和正常安装的方法一样,这里不再多做说明了。
安装驱动/配置文件共享当我们安装好系统就要为其安装驱动了。
Oracle VM VirtualBox 2.0 用户手册说明书

Oracle VM VirtualBoxOracle VM VirtualBox is an open source, cross-platform, virtualization software that allows multiple operating systems to run concurrently on a single device. Developers use VirtualBox to deliver code faster by running and testing different operating systems on their laptop. IT teams and solution providers use VirtualBox to reduce operational costs and shorten the time needed to securely deploy applicationson-premises and to the cloud. Designed for IT professionals and developers, Oracle VM VirtualBox runs on Windows, macOS, Linux, and Oracle Solaris systems and is ideal for testing, developing, demonstrating, and deploying solutions across multiple platforms on a single device.Easy to Use, Fast and Powerful, Extensive Platform Coverage Designed for use on systems ranging from ultra-books to high-end server class hardware, Oracle VM VirtualBox is lightweight and easy to install and use. Yet, under the simple exterior lies an extremely fast and powerful virtualization engine. With a formidable reputation for speed and agility, Oracle VM VirtualBox contains innovative features to deliver tangible business benefits such as significant performance improvements, a more powerful virtualization system and a wider range of supported guest operating system platforms. Key benefitsLower operation costs by reducing the number of required desktop and server configurationsSimplify development environments by running the same solution on any x86 laptopAutomate deployments to the cloudFast track application development, quality assurance and testingEasily create secure and encrypted workspaces Enable remote workers to access restricted applications securelySimplify software distribution by embedding applications inside a VirtualBox VMRun almost any type of application on existing machinesBuild a multi-tier demonstration system on a single portable machineExtend the lifetime and usefulness of existing computersRun legacy platforms and applications on modern hardwareImage Caption 1. Oracle VM VirtualBox Manager screen.Easy to useImport from Oracle Cloud Infrastructure - The Oracle VM VirtualBox Manager now supports importing Oracle Cloud Infrastructure Instances to Oracle VM VirtualBox and get the same running as Virtual Machines. This functionality facilitates the experience of using VirtualBox as the development platform for the cloud.Easily export to Oracle Cloud Infrastructure - The Oracle VM VirtualBox Manager supports exporting of virtual machines to Oracle CloudInfrastructure as Emulated or Paravirtualized Instances and allowing thecreation of multiple virtual machines without re-uploading of the sameVirtual Machine (VM).Support for Nested Virtualization - Nested virtualization enables a hypervisor, such as Oracle VM VirtualBox or KVM to be installed, on anOracle VM VirtualBox guest. VMs can then be created and run in the guest VM.VirtualBox Guest Additions - Installed inside the guest virtual machine, the Guest Additions provide a more natural user experience. For example, guest windows can be easily resized to arbitrary resolutions, made full-screen or even operate in seamless mode. Data can be copied and pasted to and from, and between, concurrently running machines and the host platform. This functionality is controllable as bi-directional, uni-directional, or disabled.Guest Control File Manager - The Guest Control File Manager enables a guest VM user to transfer files between the guest and host.VirtualBox Manager - The Oracle VM VirtualBox Manager supports virtual machines moving on local storage.Virtual Machine Cloning Process - Options while cloning virtual machines include retaining the hardware UUID, MAC address policy, and disk image names.Cloud Profile Manager - A tool that enables and configure details of your Oracle Cloud Infrastructure service account to be configured usingVirtualBox.Shared Folders–A host platfor m’s filesystem can be shared with the guest to facilitate cross-platform computing.Multi-touch support– Hosts supporting multi-touch interfaces can deliver this capability to their guests.Flexible Networking options– Oracle VM VirtualBox offers a rich range of networking models from easy-to-use NAT networking, to fully functionalBridged networking, and specialist Internal and Host-only networking.IPv6– IPv6 is offered as an option in most networking modes alongside IPv4. Key FeaturesAvailable for Windows, macOS, Linux and Oracle Solaris host operating systemsSupports a wide range of guest platformsShort learning curve graphical user interfacePowerful, scriptable command-line interfaceImport and export virtual machines using OVF/OVA standardsExport Virtual Machines to Oracle Cloud Infrastructure Import Instances from Oracle Cloud InfrastructureShared folders between guest and hostSeamless, resizable, and full screen window display modes Video and 3D (OpenGL, DirectX) accelerationMultiple virtual screen support Powerful and flexible networking optionsUSB 1.1/2.0/3.0 and serial ports NVMe, SAS, SATA, SCSI and IDE storage controllersBuilt-in iSCSI initiatorBuilt-in Remote Display Server Multi-generational branched snapshotsLinked and full clones Controllable copy and paste Screen-recording facilityDisk image encryptionHiDPI supportDrag and drop supportVirtual Media Manager– Oracle VM VirtualBox supports the widest range of virtual disk formats from its own native (.vdi) format to those offered byMicrosoft (.vhd), VMware (.vmdk), and Parallels (.vdd). Oracle VM VirtualBox GUI allows conversions between formats.Video Capture– A built-in recording mechanism of the guest’s screen contents. Easy to start and stop, recording one or more virtual screens to the standard webm format.Performance and Power HighlightsIntel and AMD hardware support– Harnessing the latest in chip-level support for virtualization, Oracle VM VirtualBox supports recent AMD and Intelprocessors bringing faster execution times for everything from Windows to Linux and Oracle Solaris guests.3D Graphics support– Support for displaying 3D graphics in a guest has been improved; VBoxSVGA and VMSVGA are the new virtual graphicalinterface that boosts 3D performances.Bi-Directional Drag and Drop support– On all host platforms, Windows, Linux, and Oracle Solaris guests support “drag and drop” of content betwe en the host and the guest. The “drag and drop” feature transparently allowscopying or opening of files, directories, and more.Disk Image Encryption– VirtualBox allows data stored in hard disk images to be encrypted transparently for the guest. VirtualBox uses the AES algorithm and supports 128 or 256-bit data encryption keys.High-performance storage I/O subsystem– Oracle VM VirtualBox offers a wide range of virtual storage controllers including NVMe, SAS, SATA, SCSI, and IDE controllers. VirtualBox utilizes an asynchronous I/O virtual disksubsystem to achieve high-performance whilst maintaining high dataintegrity.Built-in iSCSI Initiator– Oracle VM VirtualBox includes an iSCSI initiator that allows virtual disks to exist as iSCSI targets. The guest sees a standardstorage controller while disk accesses are translated into iSCSI commands and sent across the network.Remote Display Protocol– The unique built-in VirtualBox Remote Display Protocol (VRDP) enables powerful remote, graphical access to the console of the guest. Microsoft RDP-capable clients can connect to one or more remote monitors, with USB device redirection when using rdesktop-based clients.VRDP is also accessible over IPv6.Serial and USB connections– External devices can be connected to guests, with specific USB devices selected by a powerful filter mechanism.VirtualBox supports USB 1.0, USB 2.0 and USB 3.0 devices.Virtual webcam– On hosts with cameras, VirtualBox exposes a virtual webcam allowing guests running apps such as Skype or Google Hangouts to use the host camera. Related ProductsThe following products complement Oracle VM VirtualBox:∙Oracle Linux∙Oracle VirtualizationRelated Services∙Oracle VM VirtualBoxEnterprise - CommercialLicenses and SupportHigh-Definition audio– Guests enjoy the rich audio capabilities of an Intelhigh-definition audio card.Full ACPI support–The host’s power status is fully available to the guest andACPI button events can be sent to the guest to control the lifecycle of thevirtual machine.Multi-generational and branched snapshots– Snapshots allow a user torevert to previous known states. Take a snapshot before installing software,then revert to the snapshot to recover the pre-installation state.Guest automation– The guest automation APIs allow host-based logic todrive operations in the guest including update of the Guest Additions.Web services– A Web service API enables remote control of VirtualBox byauthorized clients.Oracle VM VirtualBox licensing and support∙Commercially supported platforms– Oracle VM VirtualBox enables the option to install and run a broad range of host and guest platforms. Oracle offers commercial support for the most popular guest operating systems, providing customers with expert help when they need it.∙VirtualBox Licensing Terms and FAQ– Please read Personal Use and Evaluation License (PUEL) and FAQ to clarify Extension Pack usage on VirtualBox.Please refer to the User Manual for complete information on the use of these and other new features in Oracle VM VirtualBox.Connect with usCall +1.800.ORACLE1 or visit . Outside North America, find your local office at: /contact. /oracle /oracleCopyright © 2020, Oracle and/or its affiliates. All rights reserved. This document is provided for information purposes only, and the contents hereof are subject to change without notice. This document is not warranted to be error-free, nor subject to any other warranties or conditions, whether expressed orally or implied in law, including implied warranties and conditions of merchantability or fitness for a particular purpose. We specifically disclaim any liability with respect to this document, and no contractual obligations are formed either directly or indirectly by this document. This document may not be reproduced or transmitted in any form or by any means, electronic or mechanical, for any purpose, without our prior written permission.This device has not been authorized as required by the rules of the Federal Communications Commission. This device is not, and may not be, offered for sale or lease, or sold or leased, until authorization is obtained. Oracle and Java are registered trademarks of Oracle and/or its affiliates. Other names may be trademarks of their respective owners.Intel and Intel Xeon are trademarks or registered trademarks of Intel Corporation. All SPARC trademarks are used under license and are trademarks or registered trademarks of SPARC International, Inc. AMD, Opteron, the AMD logo, and the AMD Opteron logo are trademarks or registered trademarks of Advanced Micro Devices. UNIX is a registered trademark of The Open Group. 0120Disclaimer: This document is for informational purposes. It is not a commitment to deliver any material, code, or functionality, and should not be relied upon in making purchasing decisions. The development, release, timing, and pricing of any features or functionality described in thisdocument may change and remains at the sole discretion of Oracle Corporation.。
VirtualBox配置教程(全程图解)
VirtualBox配置教程(全程图解)下载与安装2.安装。
这个步骤很简单,如果中途弹出安装驱动的提⽰请选择“继续安装”。
部分⽤户安装完以后需要重启创建虚拟机⾸先运⾏VirtualBox,然后单击左上⾓的“新建”这时候来到了“新建虚拟电脑向导”,直接单击“下⼀步”这⼀步我们要为虚拟机命名,同时选择要安装的系统。
正确选择要安装的系统可以让VirtualBox 帮助你配置合适的硬件环境这⾥选择为虚拟机分配内存的数量。
如果你的内存⼩于512MB的话就保持默认配置,如果在512MB与1G之间可以设置为256MB,如果是1G以上的话可以设置384MB或者更多。
接着开始创建硬盘,选择“Create new hard disk”以后按“下⼀步”这时我们来到了“新建虚拟硬盘向导”,直接单击“下⼀步”这⾥我们需要选择创建的磁盘类型。
如果你的硬盘不是⼤的⽤不完的话请选择“动态扩展”这⾥我们要选择存放硬盘镜像的地点以及硬盘镜像的⼤⼩。
如果你的虚拟机只是⽤来打包软件的话那么默认的10G空间⾜够⽤了最后确认硬盘信息,点击“完成”再确认虚拟电脑的信息,点击“完成”这时我们已经成功的创建了⼀个虚拟机了,接下来我们要开始配置这个虚拟机安装操作系统选择刚才创建的虚拟机,然后单击上⽅的“开始”这时会弹出“⾸次运⾏向导”,单击“下⼀步”这⾥选择要通过什么介质安装。
如果你要通过光盘安装的话直接在“介质位置”选择你光盘的盘符就⾏了。
这⾥我们使⽤光盘镜像安装,选择下⾯的“虚拟介质”,然后单击右边的⽂件夹图标这时我们来到了“虚拟介质管理器”,单击上⽅的“注册”选择光盘镜像所在的位置,然后单击“打开”选择刚才添加的光盘镜像,然后单击“选择”在这⾥单击“下⼀步”继续最后确认信息,然后单击“完成”接着我们将进⼊安装系统的步骤。
和正常安装的⽅法⼀样,这⾥不再多做说明了。
安装驱动/配置⽂件共享当我们安装好系统就要为其安装驱动了。
选择虚拟机窗⼝上⽅的“设备”-“安装增强功能”这时在虚拟机内会弹出安装向导。
Oracle VM VirtualBox 设置本机与虚拟机共享文件
在安装完成后,做一个连接
ln -s /usr/src/kernels/2.6.18-194.26.1.el5-i686 /usr/src/linux
注意:一定要进行这此项操作,否则 VirtualBox 客户端增强功能在安装的过程中同样会报错。其中“2.6.18-194.26.1.el5-i686”是内核的版本号,不同的版本可能会不一样,你要根据你自己的系统内核填入。#uname -r 可以查看内核版本。
/sbin/mount.vboxsf: mounting failed with the error: Protocol error
原因分析可以看Tips on running Sun Virtualbox的Shared Folder on a Linux Guest节。
可能是没有载入内核模块 vboxfs ,先查看下:
#lsmod | grep vboxsf
如果没有结果返回,说明 vboxsf没有载入,执行
#sudo modprobe vboxsf
正常的话mount -t vboxsf winshare /mnt/share共享文件夹应该可以访问了
#cd /mnt/share
Oracle VM VirtualBox 设置本机与虚拟机共享文件
环境:主机操作系统是Windows 7,虚拟机是CentOs5.5(RedHat Enterprise版本相同),虚拟机是VirtualBox 3.2.12。
1. 安装增强功能包(Guest Additions)
安装好CentOs5.5后,运行CentOs5.5并登录。然后在VirtualBox的菜单里选择"设备(Devices)" -> "安装增强功能(Install Guest Additions)"。
Oracle VM VirtualBox 安装教程
下一步Hale Waihona Puke 内存大小下一步 创建虚拟硬盘
创建
下一步
下一步 动态分配并指定文件路径
指定路径
完成
正常安装操作系统并作如下更改
进入虚拟系统后更改 IP 地址
于本机设定
设定 VirtualBox Host-Only Network IP 地址
EPDM 学习教程 1. 本机系统模拟安装 2. 下载 Oracle VM VirtualBox,于本机生成虚拟机,具体教程如下 下载安装软件
开始安装,双击软件包
点击“NEXT”
点击“NEXT”
点击“NEXT”
点击“YES”
点击“Install”
安装完成
新建虚拟电脑 电脑名称,类型,版本确定
下载oraclevmvirtualbox于本机生成虚拟机具体教程如下下载安装软件开始安装双击软件包点击next点击next点击next点击yes点击install安装完成新建虚拟电脑电脑名称类型版本确定下一步内存大小下一步创建虚拟硬盘创建下一步下一步动态分配并指定文件路径指定路径完成正常安装操作系统并作如下更改进入虚拟系统后更改ip地址于本机设定设定virtualboxhostonlynetworkip地址
Oracle_VM_VirtualBox下载及安装教程 2
基于 Oracle VM VirtualBox的Windows XP虚拟机安装与配置编辑者:个人宿醉注:安装路径必需是全英文的,装好才显示中文。
要不然装出来是英文的哦。
、如图:2一.安装Oracle VM VirtualBox1、先下载VirtualBox 最新版本:/wiki/Downloads 。
2、清理你的计算机,停止不必要的程序,准备VirtualBox 安装程序。
3、安装。
找到下载的安装程序VirtualBox-4.2.12-84980-Win.exe 如下图:点击进行安装, 选择安装路径:如果中途弹出安装驱动的提示请选择“继续安装”。
二.创建虚拟机1、首先运行VirtualBox,然后单击左上角的“新建”。
双击快捷键2、接下来给虚拟机取名,同时选择要安装的系统版本(注:取的名为系统名时自动识别版本)。
33、接下来就是为虚拟机分配内存的大小。
最小内存为512MB ,本例为1G 。
根据自己的内存而定。
以下保持默认。
4、到这里要选择存放硬盘镜像的位置以及硬盘虚拟空间的大小。
<本例40G>45、点击创建完成。
接下来开始设置。
效果如下图所示。
6、现在对“显示”、“存储”、“共享文件夹”进行设置。
其余的保持默认。
设置显存大小并勾上扩展特性的两项。
(显存大小设置在100左右即可<本例120MB>)6.1.2 添加Windows XP 镜像文件。
图中步骤2是打开文件位置。
5接下来是添加Windows XP镜像文件成功。
6.1.3 设置共享文件夹。
图中步骤2是打开已建好的共享文件夹。
如下图:6.1.4下图为添加共享文件夹成功点击确定。
到这里创建虚拟机完成。
三.设置虚拟机IP拨号,以方便系统装完后,设置系统IP拨号,当然,系统装完后,再弄这步也可以。
右键---设置。
如下图:网络--网卡1--连接方式选(桥接网卡)--高级模式--混杂模式--全部允许--接入网线上打勾如下图:6四.开始安装虚拟机操作系统1、单击左上角的“启动”。