戴尔g5基本操作方法
G5 5000 服务手册说明书

G5 5000服务手册注意、小心和警告:“注意”表示帮助您更好地使用该产品的重要信息。
:“小心”表示可能会损坏硬件或导致数据丢失,并告诉您如何避免此类问题。
:“警告”表示可能会导致财产损失、人身伤害甚至死亡。
© 2020 Dell Inc. 或其子公司。
保留所有权利。
Dell、EMC 和其他商标均是 Dell Inc. 或其子公司的商标。
其他商标可能是其各自所有者的商标。
章 1: 拆装计算机内部组件 (5)安全说明 (5)拆装计算机内部组件之前 (5)静电放电— ESD 保护 (6)ESD 现场服务套件 (6)运输敏感组件 (7)拆装计算机内部组件之后 (7)章 2: 卸下和安装组件 (8)建议工具 (8)螺钉列表 (8)G5 5000 的主要组件 (9)拆卸和重新组装 (10)左盖 (10)前盖 (11)3.5 英寸硬盘驱动器 (13)LED 子板 (16)机箱风扇 (17)内存模块 (20)无线网卡 (21)固态驱动器/英特尔傲腾 (24)币形电池 (26)图形卡 (27)电源按钮 (29)处理器风扇和散热器部件 (31)稳压器散热器 (33)处理器 (35)电源装置 (38)系统板 (41)章 3: 驱动程序与下载 (50)章 4: 系统设置程序 (51)BIOS 概览 (51)进入 BIOS 设置程序 (51)导航键 (51)一次性引导菜单 (51)系统设置选项 (52)系统密码和设置密码 (56)分配系统设置密码 (57)删除或更改现有的系统设置密码 (57)实时时钟 (RTC) 重设 (58)清除 BIOS(系统设置)和系统密码 (58)目录3章 5: 故障排除 (59)找到戴尔计算机的服务编号或快速服务代码 (59)SupportAssist 诊断程序 (59)系统诊断指示灯 (59)启用英特尔傲腾内存 (60)禁用英特尔傲腾内存 (60)恢复操作系统 (61)刷新 BIOS(USB 闪存盘) (61)刷新 BIOS (61)从 F12 一次性引导菜单刷新 BIOS (62)WiFi 重启 (62)弱电释放 (63)章 6: 获取帮助和联系戴尔 (64)4目录拆装计算机内部组件安全说明遵循以下安全原则可防止您的计算机受到潜在损坏并确保您的人身安全。
戴尔电脑使用说明书
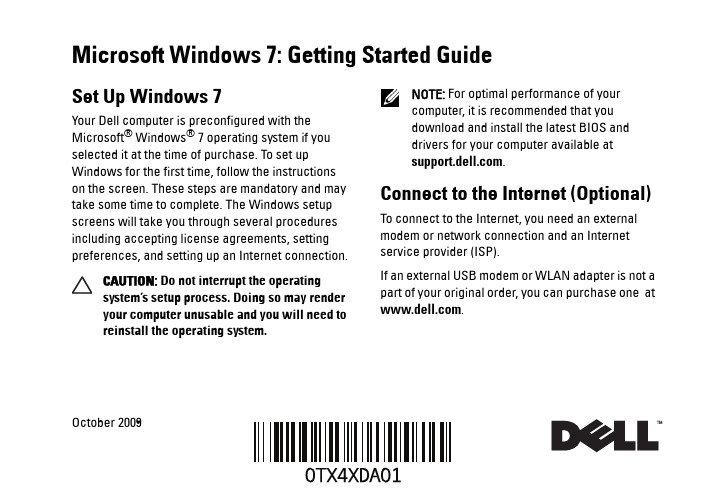
Microsoft Windows 7: Getting Started GuideSet Up Windows 7Your Dell computer is preconfigured with the Microsoft® Windows® 7 operating system if you selected it at the time of purchase. To set up Windows for the first time, follow the instructionson the screen. These steps are mandatory and may take some time to complete. The Windows setup screens will take you through several procedures including accepting license agreements, setting preferences, and setting up an Internet connection.CAUTION: Do not interrupt the operatingsystem’s setup process. Doing so may renderyour computer unusable and you will need toreinstall the operating system.NOTE: For optimal performance of yourcomputer, it is recommended that youdownload and install the latest BIOS anddrivers for your computer available at.Connect to the Internet (Optional) To connect to the Internet, you need an external modem or network connection and an Internet service provider (ISP).If an external USB modem or WLAN adapter is not a part of your original order, you can purchase one at .October 2009Setting Up a Wired Connection•If you are using a dial-up connection, connectthe telephone line to the optional external USB modem and to the telephone wall connectorbefore you set up your Internet connection. •If you are using a DSL or cable/satellite modem connection, contact your ISP or cellulartelephone service for setup instructions.To complete setting up your wired Internet connection, follow the instructions in “Setting Up Your Internet Connection.”Setting Up a Wireless Connection Before you can use your wireless Internet connection, you need to connect to your wireless router.To set up your connection to a wireless router:1Ensure that wireless is enabled on yourcomputer.2Save and close any open files, and exit any open programs.3Click Start→ Control Panel→Network and Sharing Center→Connect to a network.4Follow the instructions on the screen tocomplete the setup.Setting Up Your Internet Connection ISPs and ISP offerings vary by country. Contact your ISP for offerings available in your country.If you cannot connect to the Internet but have successfully connected in the past, the ISP might have a service outage. Contact your ISP to check the service status, or try connecting again later. Have your ISP information ready. If you do not have an ISP, the Connect to the Internet wizard can help you get one.To set up your Internet connection:1Save and close any open files, and exit any open programs.2Click Start→Control Panel3Click Network and Sharing Center→Set up a new connection or network→Connect to the Internet.23The Connect to the Internet window appears. NOTE: If you do not know which type ofconnection to select, click Help me choose or contact your ISP .4Follow the instructions on the screen and use the setup information provided by your ISP to complete the setup.Windows 7 Basic FeaturesCustomizing the DesktopYou can customize your desktop to change the appearance, resolution, wallpaper, screensaver, or other features of your desktop.To customize your desktop:1Right-click an open area of the desktop.2Click Personalize , to open the Change the visuals and sounds on your computer window and learn more about your customization options.Transferring Information to a New ComputerTo transfer information to a new computer:1Click Start→ Control Panel.2In the search box, type Transfer and then click Transfer files from another computer .3Follow the instructions on the Windows Easy Transfer wizard.Backing Up Your DataIt is recommended that you periodically back up files and folders on your computer.To back up files:1Click Start → Control Panel → System and Security → Backup and Restore.2Click Set up backup....3Follow the instructions on the Configure Backup wizard.4Reinstalling Windows 7The reinstallation process may take about 1 to 2hours to complete. After you reinstall the operating system, you must also reinstall thedevice drivers, virus protection program, and other software.To reinstall Windows 7:1Save and close any open files and exit any open programs.2Insert the Operating System disc.3Click Exit if the Install Windows message appears.4Restart the computer.5When the DELL logo appears, press <F12> immediately. NOTE: If you wait too long and the operating system logo appears, continue to wait until you see the Microsoft Windows desktop; then, shut down your computer and try again.NOTE: The next steps change the boot sequence for one time only. On the nextstart-up, the computer boots according to the devices specified in the system setup program.6When the boot device list appears, highlight CD/DVD/CD-RW Drive and press <Enter>.7Press any key to Boot from CD-ROM .Follow the instructions on the screen to complete the installation.__________________Information in this document is subject to change without notice.©2009Dell Inc.All rights reserved. Printed in the U.S.A.Reproduction of these materials in any manner whatsoever without the written permission of Dell Inc. is strictly forbidden.Trademarks used in this text: Dell and the DELL logo are trademarks of Dell Inc; Microsoft , and Windows are either trademarks or registered trademarks of Microsoft Corporation in the United States and/or other countries.Other trademarks and trade names may be used in this document to refer to either the entities claiming the marks and names or their products. Dell Inc. disclaims any proprietary interest in trademarks and trade names other than its own.。
戴尔笔记本电脑使用说明书.pdf_1700840703.9113853
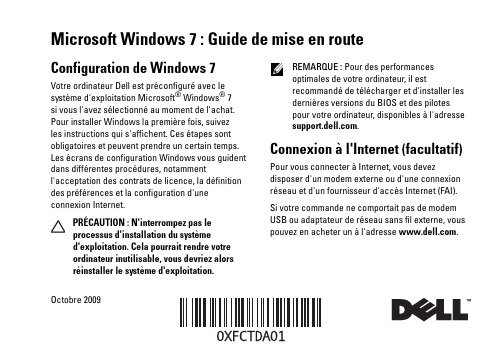
Microsoft Windows 7: Guide de mise en routeConfiguration de Windows 7Votre ordinateur Dell est préconfiguré avec lesystème d'exploitation Microsoft® Windows® 7si vous l'avez sélectionné au moment de l'achat.Pour installer Windows la première fois, suivezles instructions qui s'affichent. Ces étapes sontobligatoires et peuvent prendre un certain temps.Les écrans de configuration Windows vous guidentdans différentes procédures, notammentl'acceptation des contrats de licence, la définitiondes préférences et la configuration d'uneconnexion Internet.PRÉCAUTION: N'interrompez pas leprocessus d'installation du systèmed'exploitation. Cela pourrait rendre votreordinateur inutilisable, vous devriez alorsréinstaller le système d'exploitation.REMARQUE: Pour des performancesoptimales de votre ordinateur, il estrecommandé de télécharger et d'installer lesdernières versions du BIOS et des pilotespour votre ordinateur, disponibles à l'adresse.Connexion à l'Internet (facultatif)Pour vous connecter à Internet, vous devezdisposer d'un modem externe ou d'une connexionréseau et d'un fournisseur d'accès Internet (FAI).Si votre commande ne comportait pas de modemUSB ou adaptateur de réseau sans fil externe, vouspouvez en acheter un à l'adresse .Octobre 2009Configuration d'une connexion filaire•Si vous utilisez une connexion d'accèsàdistance, branchez une ligne téléphonique au modem externe USB en option sur votreordinateur et à la prise téléphonique muraleavant de configurer la connexion Internet. •Si vous utilisez une connexion DSL ou modemcâble/satellite, contactez fournisseur d'accèsInternet (FAI) ou opérateur téléphonique mobile pour obtenir des instructions de configuration. Pour terminer la configuration de votre connexion Internet filaire, suivez les instructions de la section «Configuration de votre connexion Internet». Configuration d'une connexion sans filAvant de pouvoir utiliser votre connexionàl'Internet sans fil, vous devez vous connecteràvotre routeur sans fil.Pour configurer votre connexion à un routeur sans fil:1Assurez-vous que le réseau sans fil est activé sur votre ordinateur.2Enregistrez et fermez tous les fichiers ouverts et quittez tous les programmes en coursd'exécution.3Cliquez sur Démarrer → Panneau deconfiguration→Centre Réseau et partage→Connexion à un réseau.4Pour effectuer la configuration, suivez les instructions qui s'affichent à l'écran. Configuration de la connexion Internet Les fournisseurs d'accès Internet (FAI) et leurs offres varient selon les pays. Prenez contact avec votre fournisseur d'accès Internet pour connaître les offres disponibles dans votre pays.Si vous ne pouvez pas vous connecter à Internet alors que vous l'avez déjà fait auparavant, il est possible que le fournisseur d'accès Internet subisse une interruption de services. Contactez votre FAI pour vérifier l'état du service ou essayez de vous connecter ultérieurement.2Assurez-vous de disposer des informations fournies par votre fournisseur d'accès Internet (FAI). Si vous ne disposez pas d'un FAI, l'assistant ConnexionàInternet peut vous aider à en trouver un.Pour configurer votre connexion Internet:1Enregistrez et fermez tous les fichiers ouverts et quittez tous les programmes en coursd'exécution.2Cliquez sur Démarrer→Panneau deconfiguration.3Cliquez sur Centre Réseau et partage→Configurer une connexion ou un réseau→ConnecteràInternet.La fenêtre Connexion à Internet s'affiche.REMARQUE: Si vous ne savez pas quel typede connexion choisir, cliquez sur Commentchoisir ou prenez contact avec votre FAI.4Suivez les instructions à l'écran pour utiliser les informations de configuration fournies par votre FAI et terminez la configuration.Fonctionnalités de base de Windows 7Personnalisation du bureauVous pouvez personnaliser votre bureau pour en modifier la présentation, la résolution, l'arrière-plan, l'écran de veille ou d'autres fonctions.Pour personnaliser votre bureau:1Cliquez avec le bouton droit sur une zone vide du bureau.2Cliquez sur Personnaliser, pour ouvrir la fenêtre Modifier les effets visuels et les sons de votre ordinateur et en savoir plus sur les options depersonnalisation.Transfert d'informations vers un nouvel ordinateurPour transférer des informations vers un nouvel ordinateur1Cliquez sur Démarrer→Panneau deconfiguration.342Tapez dans la case de rechercher Transfert puis cliquez sur Transférer des fichiers d'un autre ordinateur .3Suivez les instructions de l'assistantWindows Easy Transfer .Sauvegarde de vos donnéesNous vous conseillons de régulièrementsauvegarder les fichiers et dossiers qui figurent sur votre ordinateur.Pour sauvegarder des fichiers :1Cliquez sur Démarrer → Panneau de configuration → Système et sécurité→ Sauvegarde et restauration .2Cliquez sur Sauvegarder et restaurer....3Suivez les instructions de l'assistant Configurer la sauvegarde .Réinstallation de Windows 7Le processus de réinstallation peut prendre de 1à2heures. Après avoir réinstallé le système d'exploitation, vous devez réinstaller les pilotes de périphériques, le programme antivirus ainsi que d'autres logiciels.Pour réinstaller Windows 7:1Enregistrez et fermez tout fichier ouvert et quittez tous les programmes d'application en cours d'exécution.2Insérez le disque Operating System .3Cliquez sur Quitter si le message Installer Windows apparaît.4Redémarrez l'ordinateur.5Lorsque le logo DELL apparaît, appuyez immédiatement sur <F12>. REMARQUE : Si vous attendez trop longtemps et que le logo du système d'exploitation apparaît, patientez jusqu'à ce que le bureau de Microsoft Windows s'affiche ; éteignez alors votre ordinateur et faites une nouvelle tentative.REMARQUE: La procédure ci-dessousmodifie la séquence de démarrage pour unseul démarrage. Au démarrage suivant,l'ordinateur démarre en fonction despériphériques définis dans le programme deconfiguration du système.6Lorsque la liste des périphériques d'amorçages'affiche, sélectionnez Lecteur CD/DVD/CD-RWet appuyez sur <Entrée>.7Appuyez sur une touche pour sélectionner Bootfrom CD-ROM (Démarrer sur CD-ROM).Suivez les instructions qui s'affichent pourterminer l'installation.__________________Les informations de ce document sont sujettes à modification sanspréavis.©2009Dell Inc.Tous droits réservés. Imprimé en Irlande.La reproduction de ce document de quelque manière que ce soit sansl'autorisation écrite de Dell Inc. est strictement interdite.Marques utilisées dans ce document: Dell et le logo DELL sont desmarques de Dell Inc; Microsoft et Windows sont des marques ou desmarques déposées de Microsoft Corporation aux Etats-Unis et dansd'autres pays.Les autres marques et noms de produits pouvant être utilisés dans cedocument sont reconnus comme appartenant à leurs propriétairesrespectifs. Dell Inc. rejette tout intérêt dans l'utilisation des marqueset des noms commerciaux ne lui appartenant pas.56。
戴尔笔记本快捷键大全

热键:F n+F1进入待命或是休眠状态F n+F 2 无线网络功能/蓝牙切换键F n+F3开启m a i l程序F n+F4开启I n t e r n e t浏览器F n+F5调暗液晶显示屏幕亮度F n+F6调亮液晶显示屏幕亮度F n+F7液晶显示屏幕背光光源开关F n+F8切换为液晶屏幕显示,外接显示器F n+F9触控板锁定/数字触控板功能启动/关闭F n+F10静音开关F n+F12提高音量F n+S p a c e P o w e r4G e a r省电预设模式切换F n+I n s数字键盘功能开启/关闭F n+D e l开启/关闭设定『锁定卷页』功能F n+C S p l e n d i d靓彩模式切换F n+T开启P o w e r4p h o n e F n+V启动摄像头F n+↑停止键F n+↓播放/暂停键F n+←至前一段F n+→至后一段一、常见用法:F 1显示当前程序或者w i n d o w s 的帮助内容。
F 2 当你选中一个文件的话,这意味着“重命名”F 3 当你在桌面上的时候是打开“查找:所有文件”对话框F10或A L T 激活当前程序的菜单栏w i n d o w sC T R L+E S C打开开始菜单C T R L+A L T+DE L E T E在w i n9x 中打开关闭程序对话框D E L E T E删除被选择的选择项目,如果是文件,将被放入回收站S H I F T+D E L E T E删除被选择的选择项目,如果是文件,将被直接删除而不是放入回收站C T R L+N新建一个新的文件打开“打开文件”对话框C T R L+P 打开“打印”对话框C T R L+S 保存当前操作的文件C T R L+X 剪切被选择的项目到剪贴板C T R L+I N S E R T或C T R L+ C 复制被选择的项目到剪贴板S H I F T+I N S E R T粘贴剪贴板中的内容到当前位置ALT+BACKSPACE或CTRL+Z撤销上一步的操作ALT+SHIFT+BACKSPACE重做上一步被撤销的操作Windows键+M最小化所有被打开的窗口。
Dell Precision R5500 设置和功能信息说明书

Dell Precision R5500设置和功能信息关于警告警告: “警告”表示可能会造成财产损失、人身伤害甚至死亡。
正面视图和背面视图图 1: 正面视图和背面视图1.电源按钮、电源指示灯2.系统识别按钮3.系统识别指示灯4.驱动器活动指示灯5.网络链路完整性指示灯(2 个)6.诊断指示灯(4 个)B 2.0 接口(2 个)8.CD/DVD 驱动器9.硬盘驱动器托盘(6 个)10.扩充卡插槽B 2.0 接口(4 个)12.网络适配器连接器(2 个)13.网络链路完整性指示灯14.网络活动指示灯15.串行连接器16.输出连接器17.输入/麦克风连接器18.系统识别指示灯19.系统识别按钮20.远程系统识别指示灯连接器Regulatory Model: E15S Regulatory Type: E15S0012011 – 0421.辅助电源托架(可选)22.电源连接器快速设置警告: 开始执行本节中的任何步骤之前,请阅读计算机附带的安全信息。
有关其它最佳实践信息,请访问 /regulatory_compliance。
备注: 如果您没有订购某些设备,则这些设备不会包含在内。
1.将滑轨和计算机安装在机架中。
请参阅有关安全说明中的机架安装说明文件和在机架中安装计算机的安装说明。
图 2: 安装机架警告: 机架安装系统的其他说明:•您的机架套件经核准适用于随附的机箱。
您必须自行确保将设备安装至任何其他机架符合所有的适用标准。
对于将设备安装在任何其他机架,Dell 不提供任何保修且概不负责。
•将设备安装在机架之前,请先安装所有前侧和侧面稳定架。
若未安装稳定架,可能会使机架翻倒。
•请务必从下往上安装,并先安装最重的项目。
•请勿使对机架供电的交流电源分支电路超载。
•请勿踩在机架中的任何组件上。
:系统可能有多条电源线。
为降低触电的风险,在开始维修系统之前,需要由经过培训的维修技术人员拔下所有电源线。
2.连接网络电缆(可选)。
戴尔 Latitude D520 用户指南.pdf_1700751735.2079167说明书
Dell™ Latitude™ D520 用户指南计算机概览查找信息使用电池使用显示屏使用键盘和触摸板使用多媒体使用插卡设置网络确保计算机的安全故障排除系统设置程序重新安装软件添加和更换部件Dell™ QuickSet携带计算机旅行获得帮助规格附录词汇表单击左侧的链接,即可获得有关计算机特性和操作方法的信息。
有关计算机附带的其它说明文件的信息,请参阅查找信息。
注、注意和警告缩写词和缩略词有关缩写词和缩略词的完整列表,请参阅词汇表。
如果您购买的是 Dell™ n Series 计算机,则本说明文件中有关 Microsoft ® Windows ® 操作系统的所有参考信息均不适用。
此文档中的信息如有更改,恕不另行通知。
© 2006 Dell Inc 。
版权所有,翻印必究。
未经 Dell Inc. 书面许可,严禁以任何形式进行复制。
本文中使用的商标:D e l l 、D E L L 徽标、Inspiron 、Dell Precision 、Dimension 、OptiPlex 、Latitude 、PowerEdge 、PowerVault 、PowerApp 、ExpressCharge 、Dell TravelLite 、Undock & Go 和 Dell OpenManage 是 Dell Inc. 的商标;C o r e 是 Intel Corporation 的商标,I n t e l 、Pentium 和 Celeron 是 Intel Corporation 的注册商标;Microsoft 、Outlook 和 Windows 是 Microsoft Corporation 的注册商标;Bluetooth 是 Bluetooth SIG Inc. 拥有 的注册商标,并授权 Dell 使用;E M C 是 EMC Corporation 的注册商标;能源之星是美国环保局的注册商标。
Dell PowerEdge T105 系统 硬件用户手册说明书
Dell™ PowerEdge™ T105系统硬件用户手册w w w.d e l l.c o m|s u p p o r t.d e l l.c o m注、注意和警告注:“注”表示可以帮助您更好地使用计算机的重要信息。
注意:“注意”表示可能会损坏硬件或导致数据丢失,并告诉您如何避免此类问题。
警告:“警告”表示可能会导致财产损失、人身伤害甚至死亡。
____________________本说明文件中的信息如有更改,恕不另行通知。
©2007-2009Dell Inc.。
版权所有,翻印必究。
未经 Dell Inc.书面许可,严禁以任何形式进行复制。
本文中使用的商标:Dell、DELL徽标、Inspiron、Dell Precision、Dimension、OptiPlex、Latitude、PowerEdge、PowerVault、PowerApp、PowerConnect、XPS和Dell OpenManage是 Dell Inc. 的商标;Microsoft、MS-DOS、Windows和Windows Server是Microsoft Corporation 在美国和/或其它国家和地区的商标或注册商标;Red Hat是 Red Hat, Inc. 的注册商标;UNIX是 The Open Group 在美国和其它国家和地区的注册商标;EMC是EMC Corporation 的注册商标。
本说明文件中述及的其它商标和产品名称是指拥有相应商标和产品名称的公司或其制造的产品。
Dell Inc. 对其它公司的商标和产品名称不拥有任何所有权。
2009 年 3 月P/N JN551Rev. A01目录1关于系统 (9)您可能需要的其它信息 (9)在系统启动过程中访问系统配置 (10)前面板部件和指示灯 (11)背面板部件和指示灯 (13)连接外部设备 (14)NIC 指示灯代码 (14)电源设备指示灯 (15)诊断指示灯 (15)系统信息 (17)警告信息 (26)诊断程序信息 (26)警报信息 (26)2使用系统设置程序 (27)进入系统设置程序 (27)响应错误信息 (27)使用系统设置程序 (28)退出系统设置程序 (29)系统设置程序选项 (29)目录3主屏幕 (29)“Memory Information”(内存信息)屏幕 (31)“CPU Information”(CPU 信息)屏幕 (32)“SATA Configuration”(SATA 配置)屏幕 (32)“Integrated Devices”(集成设备)屏幕 (33)“System Security”(系统安全保护)屏幕 (34)“Exit”(退出)屏幕 (35)系统密码和设置密码功能 (35)使用系统密码 (35)使用设置密码 (38)禁用已忘记的密码 (38)3安装系统组件 (39)建议使用的工具 (39)系统内部组件 (40)打开主机盖 (41)合上主机盖 (41)驱动器前挡板 (42)卸下驱动器前挡板 (42)装回驱动器前挡板 (43)卸下驱动器前挡板上的插件 (43)在驱动器前挡板上装回插件 (44)卸下和插入驱动器挡片插件 (44)软盘驱动器 (45)卸下软盘驱动器 (45)安装软盘驱动器 (47)4目录光盘驱动器和磁带驱动器 (49)卸下光盘驱动器或磁带驱动器 (49)安装光盘驱动器或磁带驱动器 (52)硬盘驱动器 (56)硬盘驱动器安装原则 (56)卸下硬盘驱动器 (56)安装硬盘驱动器 (57)扩充卡 (61)卸下扩充卡 (61)安装扩充卡 (63)SAS 控制器扩充卡 (64)内存 (66)内存模块升级套件 (66)内存模块安装原则 (66)对具有 8 GB 配置的内存定址(仅适用于Microsoft® Windows® 操作系统) (67)卸下内存模块 (68)安装内存模块 (68)微处理器 (70)卸下处理器 (70)更换处理器 (72)冷却风扇 (73)卸下冷却风扇 (73)装回冷却风扇 (75)系统电池 (77)卸下系统电池 (77)安装系统电池 (78)目录5电源设备 (79)卸下电源设备 (79)安装电源设备 (80)机箱防盗开关 (81)卸下机箱防盗开关 (81)安装机箱防盗开关 (82)挡板(仅部件维修过程) (83)卸下挡板 (83)装回挡板 (84)I/O 面板部件(仅部件维修过程) (85)卸下 I/O 面板部件 (85)装回 I/O 面板部件 (86)系统板(仅部件维修过程) (88)卸下系统板 (88)安装系统板 (89)4排除系统故障 (91)安全第一 — 为您和您的系统着想 (91)启动例行程序 (91)检查设备 (92)排除外部连接故障 (92)排除视频子系统故障 (92)排除键盘故障 (92)排除鼠标故障 (93)解决串行 I/O 问题 (94)解决串行 I/O 设备问题 (94)排除 USB 设备故障 (95)6目录排除 NIC 故障 (96)排除受潮系统的故障 (97)排除受损系统的故障 (97)排除系统电池故障 (98)排除电源设备故障 (99)解决系统冷却问题 (100)排除风扇故障 (100)排除系统内存故障 (101)排除软盘驱动器故障 (103)排除光盘驱动器故障 (104)排除外部 SCSI 磁带驱动器的故障 (105)排除硬盘驱动器故障 (106)解决 SAS 控制器或 SAS RAID 控制器问题 (107)排除扩充卡故障 (108)排除微处理器故障 (110)5运行系统诊断程序 (111)使用 Dell PowerEdge Diagnostics (111)系统诊断程序功能 (111)何时使用系统诊断程序 (112)运行系统诊断程序 (112)系统诊断程序检测选项 (112)目录7使用自定义检测选项 (113)选择要检测的设备 (113)选择诊断程序选项 (113)查看信息和结果 (113)6跳线和连接器 (115)系统板跳线 (115)系统板连接器 (116)禁用已忘记的密码 (118)7获得帮助 (121)获得帮助 (121)联机服务 (122)订单状态自动查询服务 (123)支持服务 (123)Dell 企业培训与认证 (123)订单相关问题 (123)产品信息 (123)退回项目以要求保修或退款 (123)致电之前 (124)与 Dell 联络 (126)词汇表 (155)索引 (167)8目录关于系统本节介绍了物理、固件和软件接口部件,它们提供了系统的必备功能,确保系统能够正常运行。
Dell PowerVault 500 系统硬件用户手册说明书
Dell™ PowerVault™ 500 系统硬件用户手册关于系统使用系统设置程序 安装系统组件 排除系统故障 运行系统诊断程序 跳线和连接器 获得帮助 词汇表注、注意和警告本说明文件中的信息如有更改,恕不另行通知。
© 2007 Dell Inc.。
版权所有,翻印必究。
未经 Dell Inc. 书面许可,严禁以任何形式进行复制。
本文中使用的商标:D e l l 、D E L L 徽标、PowerEdge 、PowerVault 、PowerApp 、PowerConnect 、X P S 和 Dell OpenManage 是 Dell Inc. 的商标;I n t e l 是 Intel Corporation 在美国和其它国家和地区的注册商标;Microsoft 、M S-D O S 和 Windows 是 Microsoft Corporation 在美国和/或其它国家和地区的注册商标。
本说明文件中述及的其它商标和产品名称是指拥有相应商标和产品名称的公司或其制造的产品。
Dell Inc. 对其它公司的商标和产品名称不拥有任何所有权。
注:“注”表示可以帮助您更好地使用计算机的重要信息。
注意:“注意”表示可能会损坏硬件或导致数据丢失,并告诉您如何避免此类问题。
警告:“警告”表示可能会导致财产损失、人身伤害甚至死亡。
表1-2. 前面板 LED 指示灯、按钮和连接器1 驱动器状态指示灯(绿色和琥珀色)2 绿色驱动器活动指示灯表 1-3列出了 RAID 硬盘驱动器的驱动器指示灯显示方式。
根据系统中发生的驱动器事件的不同,显示方式也不同。
例如,硬盘驱动器出现故障时,显示方式为“驱动器故障”。
选择要卸下的驱动器后,显示方式为“准备卸下驱动器”,然后为“准备插入或卸下驱动器”。
更换驱动器后,显示方式为“准备运行驱动器”,然后为“驱动器联机”。
注:对于非 RAID 配置,只有驱动器活动指示灯是活动的。
戴尔G5 15设置和规格说明书
Dell G5 15设置和规格注、小心和警告注: “注”表示帮助您更好地使用该产品的重要信息。
小心: “小心”表示可能会损坏硬件或导致数据丢失,并说明如何避免此类问题。
警告: “警告”表示可能会造成财产损失、人身伤害甚至死亡。
© 2018 Dell Inc. 或其子公司。
保留所有权利。
Dell、EMC 和其他商标是 Dell Inc. 或其附属机构的商标。
其他商标可能是其各自所有者的商标。
2018 - 10Rev. A011 设置您的计算机 (5)2 创建适用于 Windows 的 USB 恢复驱动器 (7)3 Dell Visor 耳机 (8)4 视图 (9)正面 (9)左 (9)右 (10)基座 (11)显示器 (12)底部 (12)5 规格 (14)计算机型号 (14)系统信息 (14)尺寸和重量: (14)操作系统 (14)内存 (14)端口和接口 (15)通信 (15)无线 (15)音频 (16)存储时 (16)英特尔 Optane 内存 (16)介质卡读取器 (16)键盘 (17)摄像头 (17)触摸板 (17)触摸板手势 (17)电源适配器 (18)混合电源 (18)电池 (18)显示器 (19)视频 (19)计算机环境 (19)6 键盘快捷方式 (21)7 Intel Optane 内存 (23)启用 Intel Optane 内存 (23)禁用 Intel Optane 内存 (23)目录38 戴尔对接站功能 (24)9 获取帮助和联系 Dell (25)自助资源 (25)联系 Dell (25)4目录设置您的计算机1连接电源适配器,然后按下电源按钮。
注:为了节省电池电量,电池可能进入省电模式。
打开电源适配器,并按电源按钮以打开计算机。
2 完成操作系统设置。
对于 Ubuntu :按照屏幕上的说明完成设置。
有关配置 Ubuntu 安装的更多信息,请参阅知识库文章 SLN151664,网址:/support 。
戴尔计算机使用手册说明书
Me and My Dell面向 Inspiron、G 系列、XPS 和 Alienware 计算机1 月 2021 年Rev. A08注意、小心和警告:“注意”表示帮助您更好地使用该产品的重要信息。
: “小心”表示可能会损坏硬件或导致数据丢失,并告诉您如何避免此类问题。
: “警告”表示可能会导致财产损失、人身伤害甚至死亡。
© 2011-2021 Dell Inc. 或其子公司。
保留所有权利。
Dell、EMC 和其他商标是 Dell Inc. 或其附属机构的商标。
其他商标可能是其各自所有者的商标。
目录章 1: 设置计算机 (7)连接到互联网 (7)使用 LAN 连接互联网 (7)使用 WLAN 连接互联网 (7)使用 WWAN 连接互联网 (8)设置音频 (8)配置 5.1 和 7.1 音频 (9)连接 5.1 扬声器 (9)连接 7.1 扬声器 (10)设置打印机 (10)Windows 10 和 8.1 (10)Windows 7 (10)设置网络摄像头 (11)集成网络摄像头 (11)外部网络摄像头 (11)设置蓝牙 (11)连接多个显示器 (11)Windows 10 (11)Windows 8 (12)Windows 7 (12)章 2: 关于您的计算机 (13)电源适配器 (13)电池 (13)币形电池 (13)触摸板 (14)显示器 (14)触摸屏 (14)3D (14)无线显示 (14)摄像头 (15)网络摄像头 (15)3D 摄像头 (15)Intel RealSense 3D 摄像头 (15)无线显示 (15)键盘 (15)物理键盘 (15)屏幕键盘 (16)键盘连接类型 (17)服务标签和快速服务代码 (17)找到您计算机上的标签 (17)存储设备 (17)内部存储设备 (18)可移除存储设备 (18)3芯片组 (20)处理器 (20)计算机风扇 (21)散热器 (21)散热膏 (21)视频卡 (21)电视调谐器 (22)扬声器 (22)2.1 音频 (23)5.1 音频 (23)7.1 音频 (23)网络摄像头 (23)网络 (23)局域网 (23)无线局域网 (23)无线广域网 (24)无线个人局域网 (24)调制解调器 (24)路由器 (24)网络接口控制器 (24)无线局域网适配器 (24)无线广域网适配器 (24)蓝牙 (24)近场通信 (25)章 3: 使用计算机 (26)为电池充电 (26)使用键盘 (26)键盘快捷方式 (26)Windows 8.1 和 Windows RT 的键盘快捷方式 (27)自定义键盘 (28)在笔记本电脑上使用数字键盘 (29)使用触摸板 (29)触摸板手势 (29)使用触摸屏 (30)触摸屏手势 (31)使用蓝牙 (32)将蓝牙设备与您的计算机配对 (33)使用网络摄像头 (33)章 4: 端口和接口 (35)音频 (35)音频端口类型 (35)USB (36)USB 端口 (36)USB 标准 (36)eSATA (37)4DisplayPort (37)HDMI (38)SPDIF (38)章 5: 软件和应用程序 (39)Absolute (39)Dell SupportAssist (39)PC 检查 (39)Quickset (40)NVIDIA 3D 应用程序 (40)章 6: 还原操作系统 (42)系统恢复选项 (42)Dell Backup and Recovery (42)Dell Backup and Recovery Basic (43)Dell Backup and Recovery premium (43)Dell Factory Image Restore (44)系统还原 (45)Windows 10 (45)Windows 8.1 (46)Windows 7 (46)操作系统光盘 (46)系统重装介质 (47)章 7: 故障排除 (48)基本故障排除步骤 (48)诊断程序 (48)预引导系统评估 (48)增强型 PSA (48)LCD BIST (49)哔声代码 (49)章 8: BIOS (51)更改 BIOS 设置 (51)进入 BIOS 设置程序 (51)重设 BIOS 密码 (51)Boot Sequence (52)章 9: 获取帮助和联系戴尔 (53)章 10: 参考资料 (54)计算机维护 (54)Power management(电源管理) (54)配置电源设置 (54)配置电源按钮行为 (55)Dell Power Manager (55)5人机工程学说明 (56)Dell 与环境 (57)法规合规性政策 (58)6设置计算机设置程序根据您的计算机而有所不同。
- 1、下载文档前请自行甄别文档内容的完整性,平台不提供额外的编辑、内容补充、找答案等附加服务。
- 2、"仅部分预览"的文档,不可在线预览部分如存在完整性等问题,可反馈申请退款(可完整预览的文档不适用该条件!)。
- 3、如文档侵犯您的权益,请联系客服反馈,我们会尽快为您处理(人工客服工作时间:9:00-18:30)。
戴尔g5基本操作方法
戴尔G5是一款游戏笔记本电脑,以下是一些基本操作方法:
1. 开机和关机:
- 按下电源按钮启动电脑,长按电源按钮即可关机。
2. 屏幕操作:
- 使用触摸板或鼠标在桌面上单击图标或双击打开文件和应用程序。
- 使用触摸板向上或向下滚动,查看网页或文档的其他内容。
- 使用触摸板或鼠标拖动窗口,改变其位置或大小。
3. 键盘操作:
- 使用键盘输入文字、数字或符号。
- 使用键盘快捷键,例如Ctrl+C复制、Ctrl+V粘贴等。
- 使用功能键(Fn)+其他按键,可以调节音量、屏幕亮度等。
4. 网络连接:
- 若要连接Wi-Fi网络,点击右下角的网络图标,选择可用的Wi-Fi网络并输入密码。
- 若要连接有线网络,将网线插入电脑的网络接口。
5. 外部设备连接:
- 可以通过USB接口连接打印机、鼠标、键盘等外部设备。
- 通过HDMI接口可连接外部显示器或电视。
6. 软件设置:
- 可以在“设置”菜单中调整电脑的各种设置,如背光键盘、触摸板灵敏度等。
- 可以安装和卸载应用程序,管理电脑上的软件。
以上是戴尔G5游戏笔记本电脑的一些基本操作方法,具体细节可能会根据具体型号和操作系统版本而有所不同,建议查看电脑的用户手册以获取更详细的操作指南。