spring注解注入示例详解
SpringBootApplication注解原理及代码详解

SpringBootApplication注解原理及代码详解1、SpringBoot 启动main()@SpringBootApplicationpublic class TomcatdebugApplication {public static void main(String[] args) {SpringApplication.run(TomcatdebugApplication.class, args);}}1.1 @SpringBootApplication 注解,其实主要是@ComponentScan,@EnableAutoConfiguration,@SpringBootConfiguration三个注解@ComponentScan 注解:spring⾥有四⼤注解:@Service,@Repository,@Component,@Controller⽤来定义⼀个bean.@ComponentScan注解就是⽤来⾃动扫描被这些注解标识的类,最终⽣成ioc容器⾥的bean.可以通过设置@ComponentScan basePackages,includeFilters,excludeFilters属性来动态确定⾃动扫描范围,类型已经不扫描的类型. 默认情况下:它扫描所有类型,并且扫描范围是@ComponentScan注解所在配置类包及⼦包的类@SpringBootConfiguration 注解:@SpringBootConfiguration继承⾃@Configuration,⼆者功能也⼀致,标注当前类是配置类,并会将当前类内声明的⼀个或多个以@Bean注解标记的⽅法的实例纳⼊到spring容器中,并且实例名就是⽅法名。
demo 说明:(1)注⼊spring ioc bean@SpringBootConfigurationpublic class Config {@Beanpublic Map createMap(){Map map = new HashMap();map.put("username","gxz");map.put("age",27);return map;}}(2)调⽤:public static void main( String[] args ){//⽅式1 获取contextConfigurableApplicationContext context = SpringApplication.run(App.class, args);context.getBean(Runnable.class).run();context.getBean("createMap"); //注意这⾥直接获取到这个⽅法beanint age = (int) map.get("age");System.out.println("age=="+age);//⽅式2. 使⽤@Autowired注解,应⽤bean// @Autowired// Map createMap}@EnableAutoConfiguration 注解@EnableAutoConfiguration作⽤:从classpath中搜索所有的META-INF/spring.factories配置⽂件,然后将其中key为org.springframework.boot.autoconfigure.EnableAutoConfiguration的value加载到spring容器中。
springboot中@EnableAsync与@Async注解使用
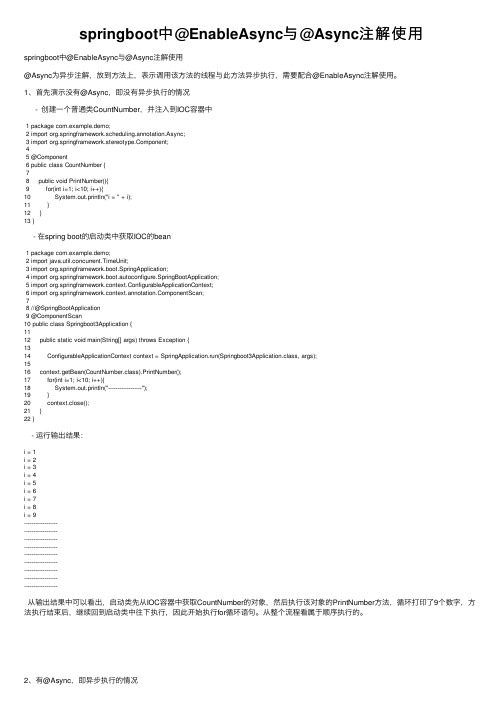
springboot中@EnableAsync与@Async注解使⽤springboot中@EnableAsync与@Async注解使⽤@Async为异步注解,放到⽅法上,表⽰调⽤该⽅法的线程与此⽅法异步执⾏,需要配合@EnableAsync注解使⽤。
1、⾸先演⽰没有@Async,即没有异步执⾏的情况- 创建⼀个普通类CountNumber,并注⼊到IOC容器中1 package com.example.demo;2 import org.springframework.scheduling.annotation.Async;3 import ponent;45 @Component6 public class CountNumber {78 public void PrintNumber(){9 for(int i=1; i<10; i++){10 System.out.println("i = " + i);11 }12 }13 }- 在spring boot的启动类中获取IOC的bean1 package com.example.demo;2 import java.util.concurrent.TimeUnit;3 import org.springframework.boot.SpringApplication;4 import org.springframework.boot.autoconfigure.SpringBootApplication;5 import org.springframework.context.ConfigurableApplicationContext;6 import ponentScan;78 //@SpringBootApplication9 @ComponentScan10 public class Springboot3Application {1112 public static void main(String[] args) throws Exception {1314 ConfigurableApplicationContext context = SpringApplication.run(Springboot3Application.class, args);1516 context.getBean(CountNumber.class).PrintNumber();17 for(int i=1; i<10; i++){18 System.out.println("------------------");19 }20 context.close();21 }22 }- 运⾏输出结果:i = 1i = 2i = 3i = 4i = 5i = 6i = 7i = 8i = 9------------------------------------------------------------------------------------------------------------------------------------------------------------------从输出结果中可以看出,启动类先从IOC容器中获取CountNumber的对象,然后执⾏该对象的PrintNumber⽅法,循环打印了9个数字,⽅法执⾏结束后,继续回到启动类中往下执⾏,因此开始执⾏for循环语句。
Spring注解【非单例】
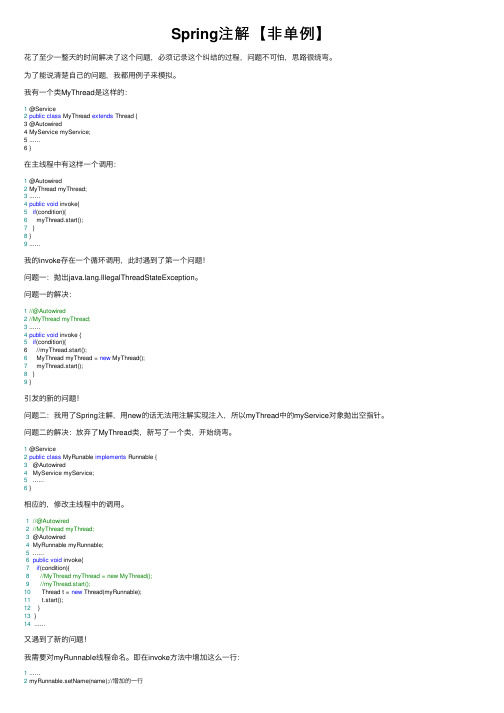
Spring注解【⾮单例】花了⾄少⼀整天的时间解决了这个问题,必须记录这个纠结的过程,问题不可怕,思路很绕弯。
为了能说清楚⾃⼰的问题,我都⽤例⼦来模拟。
我有⼀个类MyThread是这样的:1 @Service2public class MyThread extends Thread {3 @Autowired4 MyService myService;5 ......6 }在主线程中有这样⼀个调⽤:1 @Autowired2 MyThread myThread;3 ......4public void invoke{5if(condition){6 myThread.start();7 }8 }9 ......我的invoke存在⼀个循环调⽤,此时遇到了第⼀个问题!问题⼀:抛出ng.IllegalThreadStateException。
问题⼀的解决:1//@Autowired2//MyThread myThread;3 ......4public void invoke {5if(condition){6 //myThread.start();6 MyThread myThread = new MyThread();7 myThread.start();8 }9 }引发的新的问题!问题⼆:我⽤了Spring注解,⽤new的话⽆法⽤注解实现注⼊,所以myThread中的myService对象抛出空指针。
问题⼆的解决:放弃了MyThread类,新写了⼀个类,开始绕弯。
1 @Service2public class MyRunable implements Runnable {3 @Autowired4 MyService myService;5 ......6 }相应的,修改主线程中的调⽤。
1//@Autowired2//MyThread myThread;3 @Autowired4 MyRunnable myRunnable;5 ......6public void invoke{7if(condition){8//MyThread myThread = new MyThread();9//myThread.start();10 Thread t = new Thread(myRunnable);11 t.start();12 }13 }14 ......⼜遇到了新的问题!我需要对myRunnable线程命名。
Spring为什么不推荐使用@Autowired注解详析

Spring为什么不推荐使⽤@Autowired注解详析⽬录引⾔Spring的三种注⼊⽅式属性(filed)注⼊构造器注⼊set⽅法注⼊属性注⼊可能出现的问题问题⼀问题⼆问题三spring建议使⽤@Resource代替@Autowired使⽤@RequiredArgsConstructor构造器⽅式注⼊总结引⾔使⽤IDEA开发时,同组⼩伙伴都喜欢⽤@Autowired注⼊,代码⼀⽚warning,看着很不舒服,@Autowired作为Spring的亲⼉⼦,为啥在IDEA中提⽰了⼀个警告:Field injection is not recommended想搞清楚这个问题之前,⾸先先了解⼀下依赖注⼊的⼏种⽅式Spring的三种注⼊⽅式属性(filed)注⼊这种注⼊⽅式就是在bean的变量上使⽤注解进⾏依赖注⼊。
本质上是通过反射的⽅式直接注⼊到field。
这是我平常开发中看的最多也是最熟悉的⼀种⽅式。
@AutowiredUserDao userDao;构造器注⼊将各个必需的依赖全部放在带有注解构造⽅法的参数中,并在构造⽅法中完成对应变量的初始化,这种⽅式,就是基于构造⽅法的注⼊。
⽐如:finalUserDao userDao;@Autowiredpublic UserServiceImpl(UserDao userDao) {erDao = userDao;}set⽅法注⼊通过对应变量的setXXX()⽅法以及在⽅法上⾯使⽤注解,来完成依赖注⼊。
⽐如:private UserDao userDao;@Autowiredpublic void setUserDao (UserDao userDao) {erDao = userDao;}属性注⼊可能出现的问题问题⼀基于 field 的注⼊可能会带来⼀些隐含的问题。
来我们举个例⼦:@Autowiredprivate User user;private String company;public UserDaoImpl(){pany = user.getCompany();}编译过程不会报错,但是运⾏之后报NullPointerExceptionInstantiation of bean failed; nested exception is org.springframework.beans.BeanInstantiationException: Failed to instantiate [...]: Constructor threw exception; nested exception is ng.NullPointerExceptionJava 在初始化⼀个类时,是按照静态变量或静态语句块 –> 实例变量或初始化语句块 –> 构造⽅法 -> @Autowired 的顺序。
SpringAOP示例与实现原理总结——传统springaop、基于切面注入、基于@Asp。。。

SpringAOP⽰例与实现原理总结——传统springaop、基于切⾯注⼊、基于@Asp。
⼀、代码实践1)经典的Spring Aop经典的spring aop,是基于动态代理技术的。
实现⽅式上,最常⽤的是实现MethodInterceptor接⼝来提供环绕通知,创建若⼲代理,然后使⽤ProxyBeanFactory配置⼯⼚bean,⽣成拦截器链,完成拦截。
⽰例如下:1package demo.spring;23import org.aopalliance.intercept.MethodInterceptor;4import org.aopalliance.intercept.MethodInvocation;5import org.junit.Test;6import org.junit.runner.RunWith;7import org.springframework.beans.factory.annotation.Autowired;8import org.springframework.test.context.ContextConfiguration;9import org.springframework.test.context.junit4.SpringJUnit4ClassRunner;1011 @RunWith(SpringJUnit4ClassRunner.class)12 @ContextConfiguration("classpath:spring-config.xml")13public class TraditionalSpringAopDemo {14 @Autowired15private Service proxy;1617 @Test18public void test() {19 proxy.execute("hello world!");20 }21 }2223interface Service {24void execute(String str);25 }2627class ServiceImpl implements Service {28 @Override29public void execute(String str) {30 System.out.println("execute invoke: " + str);31 }32 }3334class Interceptor1 implements MethodInterceptor {35 @Override36public Object invoke(MethodInvocation methodInvocation) throws Throwable {37 System.out.println("interceptor1,before invoke");38 Object ret = methodInvocation.proceed();39 System.out.println("interceptor1,after invoke");40return ret;41 }42 }4344class Interceptor2 implements MethodInterceptor {45 @Override46public Object invoke(MethodInvocation methodInvocation) throws Throwable {47 System.out.println("interceptor2,before invoke");48 Object ret = methodInvocation.proceed();49 System.out.println("interceptor2,after invoke");50return ret;51 }52 }xml⽂件配置:1<?xml version="1.0" encoding="UTF-8"?>2<beans xmlns="/schema/beans"3 xmlns:xsi="/2001/XMLSchema-instance"4 xmlns:context="/schema/context"5 xmlns:aop="/schema/aop"6 xsi:schemaLocation="/schema/beans /schema/beans/spring-beans.xsd /schema/context /schema/context/sprin 78<context:component-scan base-package="demo.spring"/>910<bean class="demo.spring.ServiceImpl" id="service"></bean>11<bean class="demo.spring.Interceptor1" id="interceptor1"></bean>12<bean class="demo.spring.Interceptor2" id="interceptor2"></bean>13<bean class="org.springframework.aop.framework.ProxyFactoryBean" id="proxy">14<property name="target" ref="service"/>15<property name="interceptorNames">16<list>17<value>interceptor1</value>18<value>interceptor2</value>19</list>20</property>21</bean>22</beans>结果:interceptor1,before invokeinterceptor2,before invokeexecute invoke: hello world!interceptor2,after invokeinterceptor1,after invoke可以看到拦截链的执⾏过程与拦截器顺序的关系。
springboot使用自定义注解注入参数值
springboot使用自定义注解注入参数值在Spring Boot中,我们可以使用自定义注解来注入参数值,以简化代码编写和提高可读性。
通过自定义注解,我们可以将一些通用的参数值注入到方法中,而不需要重复的代码。
```javaimport ng.annotation.*;String value(;```接下来,我们需要创建一个注解处理器来实现参数的注入逻辑。
我们可以使用Spring Boot提供的接口HandlerMethodArgumentResolver,并实现其中的resolveArgument和supportsParameter方法。
```javaimport org.springframework.core.MethodParameter;importorg.springframework.web.bind.support.WebDataBinderFactory;importorg.springframework.web.context.request.NativeWebRequest;importorg.springframework.web.method.support.HandlerMethodArgumentReso lver;importorg.springframework.web.method.support.ModelAndViewContainer;public class CustomValueArgumentResolver implements HandlerMethodArgumentResolverpublic boolean supportsParameter(MethodParameter parameter) returnparameter.getParameterAnnotation(CustomValue.class) != null;}public Object resolveArgument(MethodParameter parameter, ModelAndViewContainer mavContainer,NativeWebRequest webRequest, WebDataBinderFactory binderFactory) throws ExceptionCustomValue customValue =parameter.getParameterAnnotation(CustomValue.class);String value = customValue.value(;return value;}```最后,我们需要配置Spring Boot,以便它能够使用我们自定义的注解处理器。
SpringCloud之@FeignClient()注解的使用方式

SpringCloud之@FeignClient()注解的使⽤⽅式⽬录@FeignClient()注解的使⽤@FeignClient标签的常⽤属性如下SpringCloud服务间互相调⽤@FeignClient注解我在FEIGN-CONSUMER在FEIGN-CONSUMER这是项⽬中的Controller层@FeignClient()注解的使⽤由于SpringCloud采⽤分布式微服务架构,难免在各个⼦模块下存在模块⽅法互相调⽤的情况。
⽐如service-admin服务要调⽤service-card 服务的⽅法。
@FeignClient()注解就是为了解决这个问题的。
@FeignClient()注解的源码要求它必须在Interface接⼝上使⽤。
( FeignClient注解被@Target(ElementType.TYPE)修饰,表⽰FeignClient注解的作⽤⽬标在接⼝上)@RequestLine与其它请求不同,只需要简单写请求⽅式和路径就能达到请求其它服务的⽬的。
@FeignClient(value = "feign-server",configuration = FeignConfig.class) //需要⼀个配置⽂件public interface TestService {@RequestLine("POST /feign/test") //对应请求⽅式和路径String feign(@RequestBody UserDO userDO);}@EnableFeignClients@SpringBootConfigurationpublic class FeignConfig {@Beanpublic Contract contract(){return new feign.Contract.Default();}}@FeignClient标签的常⽤属性如下value: 服务名name: 指定FeignClient的名称,如果项⽬使⽤了Ribbon,name属性会作为微服务的名称,⽤于服务发现url: url⼀般⽤于调试,可以⼿动指定@FeignClient调⽤的地址decode404:当发⽣http 404错误时,如果该字段位true,会调⽤decoder进⾏解码,否则抛出FeignExceptionconfiguration: Feign配置类,可以⾃定义Feign的Encoder、Decoder、LogLevel、Contractfallback: 定义容错的处理类,当调⽤远程接⼝失败或超时时,会调⽤对应接⼝的容错逻辑,fallback指定的类必须实现@FeignClient标记的接⼝fallbackFactory: ⼯⼚类,⽤于⽣成fallback类⽰例,通过这个属性我们可以实现每个接⼝通⽤的容错逻辑,减少重复的代码path: 定义当前FeignClient的统⼀前缀此外还要求服务的启动类要有@EnableFeignClients 注解才能使Fegin⽣效。
Springboot中@Value的使用详解
Springboot中@Value的使⽤详解Springboot通过@Value注解将配置⽂件中的属性注⼊到容器内组件中(可⽤在@Controller、@Service、@Configuration、@Component等Spring托管的类中)1.普通字符串注⼊例:yml中存在key:name: zs@Value注⼊@Value("${name}")public String name;当yml中的name没有对应值时,即yml中为:name:此时字符串name的值为""可设置注⼊属性的默认值(当配置⽂件中没有此key时,此默认值⽣效),语法:@Value("${name:zch}")public String name;// 此时,若配置⽂件中没有name这个key,变量name的值为zch2.常⽤的int、boolean类型例:yml中存在key:port: 8888flag: true@Value注⼊@Value("${port}")public int port;@Value("${flag}")public boolean flag;3.数组类型例:yml中存在key:id: 1,2,3@Value注⼊@Value("${id}")public int[] idArray;当yml中id没有对应值时,数组idArray为⾮null空数组,长度为04.list类型例:yml中存在key:id: 1,2,3@Value注⼊@Value("#{'${id}'.split(',')}")public List<String> idList;当yml中id没有对应值时,集合idList长度为1,存在值"" (原本以为是空集合,造成bug,特记录) 5.map类型例:yml中存在key:user: "{name: 'zs',age: '23'}" #注意此值⽤双引号包裹@Value注⼊@Value("#{${user}}")public Map<String,String> userInfo;当yml中user没有对应值是,启动报错#{}表⽰使⽤SpEL表达式,(此处是来⾃未来的⽂章超链接,正在路上)以上就是本⽂的全部内容,希望对⼤家的学习有所帮助,也希望⼤家多多⽀持。
- 1、下载文档前请自行甄别文档内容的完整性,平台不提供额外的编辑、内容补充、找答案等附加服务。
- 2、"仅部分预览"的文档,不可在线预览部分如存在完整性等问题,可反馈申请退款(可完整预览的文档不适用该条件!)。
- 3、如文档侵犯您的权益,请联系客服反馈,我们会尽快为您处理(人工客服工作时间:9:00-18:30)。
一、各种注解方式1.@Autowired注解(不推荐使用,建议使用@Resource)@Autowired可以对成员变量、方法和构造函数进行标注,来完成自动装配的工作。
@Autowired的标注位置不同,它们都会在Spring在初始化这个bean时,自动装配这个属性。
要使@Autowired能够工作,还需要在配置文件中加入以下Xml代码1.<beanclass="org.springframework.beans.factory.annotation.AutowiredAnnotationBeanPostProcessor"/>2. @Qualifier注解@Autowired是根据类型进行自动装配的。
例如,如果当Spring上下文中存在不止一个UserDao类型的bean时,就会抛出BeanCreationException异常;如果Spring上下文中不存在UserDao类型的bean,也会抛出BeanCreationException异常。
我们可以使用@Qualifier配合@Autowired来解决这些问题。
如下:1). 可能存在多个UserDao实例Java代码1.@Autowired2.@Qualifier("userServiceImpl")3.public IUserService userService;或者Java代码1.@Autowired2.public void setUserDao(@Qualifier("userDao") UserDao userDao) {erDao = userDao;4.}这样,Spring会找到id为userServiceImpl和userDao的bean进行装配。
2). 可能不存在UserDao实例Java代码1.@Autowired(required = false)2.public IUserService userService;3. @Resource注解JSR-250标准注解,推荐使用它来代替Spring专有的@Autowired注解。
@Resource的作用相当于@Autowired,只不过@Autowired按byType自动注入,而@Resource默认按byName 自动注入罢了。
@Resource有两个属性是比较重要的,分别是name和type,Spring将@Resource注解的name属性解析为bean的名字,而type属性则解析为bean的类型。
所以如果使用name属性,则使用byName的自动注入策略,而使用type属性时则使用byType自动注入策略。
如果既不指定name也不指定type属性,这时将通过反射机制使用byName 自动注入策略。
要使@Autowired能够工作,还需要在配置文件中加入以下: Xml代码1.<beanclass="monAnnotationBeanPostProcessor"/>@Resource装配顺序:a.如果同时指定了name和type,则从Spring上下文中找到唯一匹配的bean进行装配,找不到则抛出异常b.如果指定了name,则从上下文中查找名称(id)匹配的bean进行装配,找不到则抛出异常c.如果指定了type,则从上下文中找到类型匹配的唯一bean进行装配,找不到或者找到多个,都会抛出异常d.如果既没有指定name,又没有指定type,则自动按照byName方式进行装配(见2);如果没有匹配,则回退为一个原始类型(UserDao)进行匹配,如果匹配则自动装配;4. @PostConstruct(JSR-250)注解在方法上加上注解@PostConstruct,这个方法就会在Bean初始化之后被Spring容器执行(注:Bean初始化包括,实例化Bean,并装配Bean的属性(依赖注入))。
它的一个典型的应用场景是,当你需要往Bean里注入一个其父类中定义的属性,而你又无法复写父类的属性或属性的setter方法时,如:Java代码1.public class UserDaoImpl extends HibernateDaoSupport implements UserDao{2.3.private SessionFactory mySessionFacotry;4.5.@Resource6.public void setMySessionFacotry(SessionFactory sessionFacotry)7. {8.this.mySessionFacotry = sessionFacotry;9. }10.11.@PostConstruct12.public void injectSessionFactory()13. {14.super.setSessionFactory(mySessionFacotry);15. }16.}这里通过@PostConstruct,为UserDaoImpl的父类里定义的一个sessionFactory私有属性,注入了我们自己定义的 sessionFactory(父类的setSessionFactory方法为final,不可复写),之后我们就可以通过调用 super.getSessionFactory()来访问该属性了。
5. @PreDestroy(JSR-250)注解在方法上加上注解@PreDestroy,这个方法就会在Bean初始化之后被Spring容器执行。
其用法同@PostConstruct。
和@PostConstruct 区别在于:@PostConstruct注释的方法将在类实例化后调用,而标注了 @PreDestroy 的方法将在类销毁之前调用。
6. @Component注解 (不推荐使用)只需要在对应的类上加上一个@Component注解,就将该类定义为一个Bean了。
Spring 还提供了更加细化的注解形式:@Repository、@Service、@Controller,它们分别对应存储层Bean,业务层Bean,和展示层Bean。
目前版本(2.5)中,这些注解与@Component的语义是一样的,完全通用,在Spring以后的版本中可能会给它们追加更多的语义。
所以,我们推荐使用@Repository、@Service、@Controller来替代@Component。
7.@Scope注解在使用XML定义Bean时,我们可能还需要通过bean的scope属性来定义一个Bean的作用范围,我们同样可以通过@Scope注解来完成这项工作:Java代码1.@Scope("session")2.@Component()3.public class UserSessionBean implements Serializable{4. ... ...5.}二、配置启用注解(注意以下配置需要使用spring2.5的头文件,在spring3.0中不适用)1.使用简化配置Spring2.1添加了一个新的context的Schema命名空间,该命名空间对注释驱动、属性文件引入、加载期织入等功能提供了便捷的配置。
我们知道注释本身是不会做任何事情的,它仅提供元数据信息。
要使元数据信息真正起作用,必须让负责处理这些元数据的处理器工作起来。
AutowiredAnnotationBeanPostProcessor和CommonAnnotationBeanPostProcessor就是处理这些注释元数据的处理器。
但是直接在Spring配置文件中定义这些Bean显得比较笨拙。
Spring为我们提供了一种方便的注册这些BeanPostProcessor的方式,这就是,以下是spring的配置。
Xml代码1.<beans xmlns="/schema/beans"xmlns:xsi="/2001/XMLSchema-instance"xmlns:context="/schema/context"2.xsi:schemaLocation="/schema/beans3. /schema/beans/spring-beans-2.5.xsd4. /schema/context5./schema/context/spring-context-2.5.xsd">6.<context:annotation-config/>7.beans>将隐式地向Spring容器注册了AutowiredAnnotationBeanPostProcessor 、CommonAnnotationBeanPostProcessor 、PersistenceAnnotationBeanPostProcessorRequiredAnnotationBeanPostProcessor这4个BeanPostProcessor。
2.使用让Bean定义注解工作起来Xml代码1.<beans xmlns="/schema/beans"xmlns:xsi="/2001/XMLSchema-instance"xmlns:context="/schema/context"2.xsi:schemaLocation="/schema/beans3. /schema/beans/spring-beans-2.5.xsd4. /schema/context5./schema/context/spring-context-2.5.xsd">6.<context:component-scan base-package="com.kedacom.ksoa"/>7.beans>这里,所有通过元素定义Bean的配置内容已经被移除,仅需要添加一行配置就解决所有问题了——Spring XML配置文件得到了极致的简化(当然配置元数据还是需要的,只不过以注释形式存在罢了)。
的base-package属性指定了需要扫描的类包,类包及其递归子包中所有的类都会被处理。
还允许定义过滤器将基包下的某些类纳入或排除。
Spring支持以下4种类型的过滤方式:过滤器类型 | 表达式范例 | 说明注解 | org.example.SomeAnnotation | 将所有使用SomeAnnotation注解的类过滤出来类名指定 | org.example.SomeClass | 过滤指定的类正则表达式 | com\.kedacom\.spring\.annotation\.web\..* | 通过正则表达式过滤一些类AspectJ表达式 | org.example..*Service+ | 通过AspectJ表达式过滤一些类以正则表达式为例,我列举一个应用实例:Xml代码1.<context:component-scan base-package="com.casheen.spring.annotation">2.<context:exclude-filter type="regex"expression="com\.casheen\.spring\.annotation\.web\..*"/>3.context:component-scan>值得注意的是配置项不但启用了对类包进行扫描以实施注释驱动Bean定义的功能,同时还启用了注释驱动自动注入的功能(即还隐式地在内部注册了AutowiredAnnotationBeanPostProcessor和CommonAnnotationBeanPostProcessor),因此当使用后,就可以将移除了。