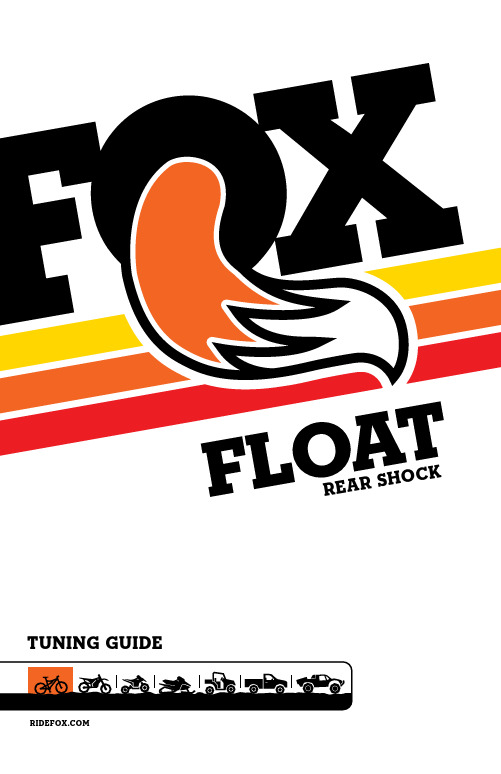
FOX FLOAT RP2 后避震
FOX Snow Float 3 和 Zero 系列悍马手册说明书

Quick Switch Compression KnobQUICK SWITCH WITH COMPRESSION EXPLAINEDThe Quick Switch Compression adjust feature gives you the ability to easily adjustthe shock’s compression damping with three easy clicks. Adjustments are made by turning the adjuster knob on the body cap located on the end of the shock absorber. The Quick Switch Compression adjuster has three clicks of adjustment. The factory setting is in the second, middle click. The performance of the shock at this setting is close to the performance of the non-adjustable shock and is a good all-around setting. For firmer compression, turn the knob clockwise. For softer compression, turn theCompression damping affects how quickly the shock reaches full bottom-out. Adjusting the compression affects how quickly the shocks compress when bumps orThe optimum compression setting usually requires the least amount of damping possible without bottoming out the shock. Firmer compression damping will typically be felt as harsh at slow speeds but plush at high speeds, large g-outs, and jumps. Firmer compression damping on ski shocks may provide more stability when cornering on the trail but can also make it more difficult to get the sled leaned over when boon docking. Switching a rear shock to Lockout mode (if equipped) will increase ski pressure, improve traction in deep snow, and improve transfer on top of the snow. The benefits of Lockout mode can provide superior stability when riding deep off-trail snow, hill climbing, and boon docking.Do not leave the rear track shock in Lockout mode when riding on the trail.This can create extremely high internal pressures.。
FOX 后避震器调节说明书
TUNING GUIDE R E A R S HO C KSag settingTo achieve the best performance from your FOX suspension, adjust the air pressure to attain your proper sag setting. Sag is the amount your suspension compresses under your weight and riding gear. Sag range should be set to 25–30% of total shock travel . Watch the sag setup video at /sagsetup 1. Turn the 3-position lever to the OPEN mode.2. Start by setting the shock air pressure (psi) to match yourweight in pounds. With the air pump attached to the shock valve, slowly cycle your shock through 25% of its travel 10 times as you reach your desired pressure. This will equalize the positive and negative air chambers and will change theDo not exceed 300 psi, the maximum FLOAT 3. Remove the pump.4. Sit still on the bike in your normal riding position, using a wall or a tree for support.5. Pull the sag indicator o-ring up against the rubber air sleeve seal.6. Carefully dismount the bike without bouncing.7. Measure the distance between the sag indicator o-ring and the rubber air sleeveseal. Compare your measurement to the ‘Suggested Sag Measurements’ table.8. Add or remove air pressure until you reach your desired sag measurement.OPENMEDIUMFIRMFLOATSAG RANGE25-30%RUBBER AIR Your shock has a 4 digit ID code on the shock body. Use this number on the Help page at to find out more information about your shock, including shock trav el.compression ADJUSTmentsOPENMEDIUMFIRM Open mode adjust is useful to control shock performance during rider weight shifts, G-outs, and slow inputs.Open mode adjust provides 3additional fine tuning adjustments for the OPEN mode.Lift the open mode adjuster, rotate it to the 1, 2, or 3 position, and press it in to lock the position. It is recommended to make these adjustments with the 3-position lever in the Medium or Firm mode. Setting 1 will have a more plush feel and setting 3 will have a firmer feel.The 3-position lever is useful to make on-the-fly adjustments to control shock performance under significant changes in terrain, and is intended to be adjusted throughout the ride.Use the OPEN mode during rough descending, the MEDIUM mode for undulating terrain, and the FIRM mode for smooth climbing.*OPEN MODE ADJUST13Set the open mode adjust to setting 1.Begin with the 3-position lever in the OPEN mode.*Factory Series and Performance Elite Series shocks onlyFLOATAir Pressure (psi)Recommended Rebound Setting<100Open (counter-clockwise)100-12011120-14010140-1609160-1808180-2007200-2206220-2405240-2604260-2803280-300Closed (clockwise) rebound ADJUSTmentThe rebound adjustment is dependent on the air pressure setting. For example, higher air pressures require slower rebound settings. Use your air pressure to find your rebound setting.Turn your rebound knob to the closed position (full clockwise) until it stops. Then back it out (counter-clockwise) to the number of clicks shown in the table below.Rebound controls the rate ofspeed at which the shockextends after compressing.LEAST AMOUNT OFREBOUND DAMPING,SHOCK REBOUNDSFASTESTMOST AMOUNT OFREBOUND DAMPING,SHOCK REBOUNDSSLOWESTCLOSED(CLOCKWISE) OPEN(COUNTER-CLOCKWISE)11109876543Additional tuning optionsVolume SpacersChanging volume spacers in the shock is an internal adjustment that allows you to change the amount of mid stroke and bottom out resistance.If you have set your sag correctly and are using full travel (bottoming out) too easily, then you could install a larger spacer to increase bottom out resistance.If you have set your sag correctly and are not using full travel, then you could install a smaller spacer to decrease bottom out resistance.Installation procedure and tuning options are available online at: /ownersmanualsSHOCK TRAVELS H O C K F O R C Etypical air spring curvesFLOAT NOTESSEE ADDITIONAL INFORMATION AND VIDEOS: /floatdpssetup605-00-139 REV B。
阿尔诺特 2018-2023 哈雷戴维森 SOFTAIL 后悬架系统安装手册说明书
SOFTAIL/FXDR系列警告:安装完毕之前,不要为空气悬架系统充气。
在产品两端被摩托车车架和/或适当的悬架元件支撑前,为空气悬架系统充气可能会造成严重人身伤害及/或损坏空气悬架系统。
空气弹簧的最高建议充气压力是200 psi。
祝贺您购买Arnott®阿尔诺特摩托车空气悬架系统。
在不考虑负载的情况下,该系统能够将摩托车保持在恒定水平,从而增强车辆的稳定性、操控性和性能表现。
我们非常自豪能够以行业最具竞争力的价格为您提供这款阿尔诺特公司的优质产品。
感谢您对我公司和此款产品的信任!正确的安装可以让您体验和领会到本系统优势。
在为您的摩托车安装上这些组件之前,请先花一点时间阅读本安装说明。
拆卸和安装空气悬架产品应由完全合格的、具有自动化系统工程师(ASE)资格的专业人员完成。
安装新空气悬架系统时,还应了解所有必要的安全措施。
这包括适当地升高和固定摩托车,并释放储能,防止人身伤害或财产损失。
阿尔诺特注重产品质量。
如您对阿尔诺特的任何产品存有疑问或困难,请与阿尔诺特联系,正常工作时间请致电800-251-8993,或发送电子邮件至****************************。
(欧洲请致电+31(0)737850580,或发送电子邮件至*********************)。
“提升骑乘乐趣”TÜV证书下载链接:ARNOTTCYCLES.EU/PAGES/TUV-CERTIFICATES按照TÜV相关规定,阿尔诺特摩托车套件必须加装空气压力表。
建议使用阿尔诺特数字压力表K-3114或K-3115搭配。
已获得认证的摩托车套件SOFTAIL/FXDR系列20-15878 – 充气工具包,哈雷-戴维森SOFTAIL包含:零件清单数量零件编号描述121-3110微型继电器组件,配线束121-77154毫米VOSS接头配件包121-7271线束扎带配件包121-7272护线套管121-2698通用型保险丝座装配工具包121-12062SOFTAIL打气泵总成120-12211SOFTAIL安装套件111-MC-SOFTAIL3MC-3585及3586 – 安装手册21-15824-B - SOFTAIL SHOCK KIT CONTAINS:零件清单数量零件编号描述121-15820减震器总成,黑色物料清单MC-3585 - 哈雷-戴维森SOFTAIL系列,黑色把手开关套件包含:零件清单数量零件编号描述129-9749把手开关,黑色SOFTAIL/FXDR系列20-15878–充气套件,哈雷-戴维森SOFTAIL包含:零件清单数量零件编号描述121-3110微型继电器组件,配线束121-77154毫米VOSS接头配件包121-7271线束扎带配件包121-7272护线套管121-2698通用型保险丝座配件包121-12062SOFTAIL打气泵总成120-12211SOFTAIL安装套件111-MC-SOFTAIL3MC-3585及3586 - 安装手册21-15824-B – SOFTAIL减震器套件包含:零件清单数量零件编号描述121-15820减震器总成,黑色物料清单MC-3586 - 哈雷-戴维森SOFTAIL,铬色把手开关套件包含:零件清单数量零件编号描述129-9750把手开关,铬色SOFTAIL/FXDR系列基本信息:阅读本手册即表示您同意相关通用条款、免责和无损害协议约定的条款,全文见。
自行车后避震器气压参考表

自行车后避震器气压参考表摘要:I.自行车后避震器简介A.定义和作用B.常见类型II.自行车后避震器气压参考表A.气压对避震器性能的影响B.常见自行车后避震器气压参考值C.气压调整方法及注意事项III.自行车后避震器气压选择建议A.根据骑行场景选择气压B.考虑个人舒适度C.参考专业建议正文:I.自行车后避震器简介A.自行车后避震器是安装在自行车后轮轴上的减震器,主要作用是缓解骑行过程中来自地面的冲击,提高骑行舒适度。
B.常见的自行车后避震器类型有:气压避震器、油压避震器、弹簧避震器等。
II.自行车后避震器气压参考表A.自行车后避震器的气压对其性能有很大影响。
气压过高,避震器会过硬,导致舒适度降低;气压过低,避震器会过软,影响骑行稳定性。
B.常见的自行车后避震器气压参考值如下:- 山地车:40-60psi- 公路车:50-70psi- 城市自行车:30-50psiC.调整自行车后避震器气压时,应注意以下事项:- 使用专业的气压表测量气压。
- 调整气压时,建议先将避震器放气,然后逐渐充气,直至达到合适的气压。
- 不同品牌、型号的避震器可能有不同的气压要求,请参考产品说明书进行调整。
III.自行车后避震器气压选择建议A.根据骑行场景选择气压。
例如,山地车在复杂路况下骑行时,可选择较高的气压,以提高骑行稳定性;公路车在平坦路面上骑行时,可选择较低的气压,以提高舒适度。
B.考虑个人舒适度。
不同人对避震器硬度的适应度不同,可以根据个人喜好进行微调。
C.参考专业建议。
FOX 直接替代摇动杆系列汽车潜波液摇动杠说明书
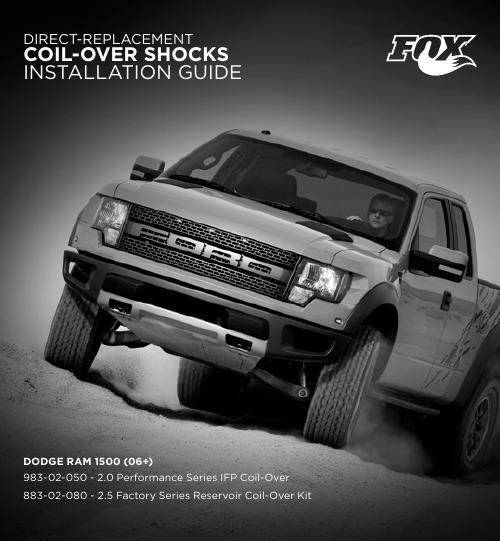
DODGE RAM 1500 (06+)983-02-050 - 2.0 Performance Series IFP Coil-Over 883-02-080 - 2.5 Factory Series Reservoir Coil-Over KitdIReCt-RePlaCementcOil-OvER shOcks InStallatIOn guIdethank you for choosing FOX direct-replacement shocks for your vehicle. FOX products are designed, tested, and manufactured by the finest professionals in the industry.FOX recommends that you become completely familiar with the handling characteristics of your modified vehicle before operating it under rigorous conditions, helping to avoid potential rollover situations and other loss ofcontrol events. FOX further recommends that you use appropriate protective equipment at all times when operating your vehicle.to achieve the best performance and product longevity, periodic service and maintenance is required. Please refer to the Service and upgrades section for more information.iNsTAllATiON GuiDEDODGE RAM 1500 (06+)2.0 Performance Series IFP Coil-Over: 983-02-0502.5 Factory Series Reservoir Coil-Over Kit: 883-02-080 750 vernon way suite 101. el cajon, ca 92020 usa 10943 WhEATlANDs AvE. suiTE B. sANTEE, cA 92071 usAWARNiNGs• FOX direct-replacement shocksshould always be installed as a pair for maximum performance.• Proper installation and serviceprocedures are essential for the safeand reliable installation of chassisparts, requiring the experience andtools specially designed for thispurpose. Installation and maintenance procedures for this product mustbe performed by a qualified servicetechnician, to avoid potentially unsafevehicle handling characteristics,which may result in SeRIOuSInJuRY or deatH.• modifying your vehicle’s suspension will change the handling characteristics of your vehicle. under certain conditions, your modified vehicle may be moresusceptible to loss of control or rollover, which can result in SeRIOuS InJuRYor deatH. thoroughly familiarizeyourself with the modified vehiclehandling characteristics before anyrigorous vehicle operation. Wearbody protective gear includinghead protection when appropriate.Installation of vehicle roll bars or cageis highly recommended.• FOX direct-replacement shocks aregas-charged and are highly pressurized.Placing shocks in a vise or clamp,applying heat, or attempting to openor service the shock without the proper tools and training can result in SeRIOuS InJuRY or deatH. do not attempt tomodify, puncture or incinerate a FOXdirect-replacement, coil-over shockabsorber.• any attempt to misuse, misapply,modify, or tamper with any FOXproduct voids any warranty and mayresult in SeRIOuS InJuRY or deatH.GuiDEliNEs• always use a chassis lift for theinstallation of shocks, and make certain that the raised vehicle is securelyattached to the lift to prevent thevehicle from slipping, falling, or moving during the installation process.• dO nOt install any FOX productwithout the necessary special tools,expertise and chassis lift, or you willsubject yourself to the risk of SeRIOuS InJuRY or deatH. If you elect to1.800.FOX.SHOX(369.7469)*********************************1not use a chassis lift (which electionmay result in SeRIOuS InJuRY ordeatH), ensure that the vehicle ison level ground, that all tires on theground during installation are blockedto prevent vehicle movement, that atleast two tires are on the ground at alltimes, and that adequately secured jackstands are used to support the vehicle.neVeR get under the vehicle until youhave checked to ensure that the vehiclewill be stable during installation.• FOX direct-replacement shocks aredesigned to fit your vehicle’s shockmounts with no modifications with theexception of reservoir placement onspecific models and applications.2 750 vernon way suite 101. el cajon, ca 92020 usaiNsTRucTiONsmedium-strength thread-lock (blue loctite) is recommended on all bolts.1. Please read the installation guidelinesfor instructions on how to properly lift and secure the vehicle.2. Record the front vehicle ride heightto ensure proper lift is attained afterkit is installed. You will be able tomake preload adjustments if neededonce the shock assembly is installed(spanner wrench required).3. Remove both front wheels.4. disconnect sway bar at the lowercontrol arm on both sides. (Fig. 1 -Step 1)5. disconnect both outer tie rod endsfrom spindle steering arm. (Fig.1 - step2)6. disconnect both upper control armsfrom spindle steering arm. Be careful not to damage any electric wires orbrake lines. (Fig.1 - Step 3)7. Remove the (3) top nuts that securethe stock shock assembly to thevehicle. dO nOt remove center nut;doing so will release the spring fromthe stock assembly and could result in SeRIOuS InJuRY or deatH!8. Remove the (1) bolt and nutconnecting the shock to the lowercontrol arm. (do not discard bolt andnut as it will be used with your newFOX coil-over kit)9. Remove the stock shock assembly.You may need to use a pry bar to lowerthe suspension enough to remove the Fig. 1 - Passenger Side1.800.FOX.SHOX(369.7469)*********************************3stock shock. Be careful not to damage any brake lines or electrical wires.10. Install the new coil-over assembly.With remote reservoir models makesure that the hoses are facing outward and towards the front of the vehicle.(Fig.2) Connect the top shock hatto the vehicle using the bolts andwashers provided or with Performance Series models connect the top shockhat to the vehicle using the nuts andwashers provided. tighten all threebolts/nuts to 24 ft*lbs. (you will needto remove the outer center bolt toinstall the reservoir bracket in step 12)11. Connect the shock assembly tothe lower control arm, reusing thestock bolt and nut. torque to factoryspecifications.12. On the external reservoir models,install the reservoir bracket by placing on top of the vehicle coil-over bucketand align the bracket center hole withthe outer center hole of the shock tophat, install supplied bolt and torque to24 ft*lbs.13. On the external reservoir models,install the reservoir onto reservoirbracket using two supplied clamps.utilize the slots in the bracket to locate clamps. do not feed clamps throughthe slots in the brackets.14. Reconnect upper control arm tosteering knuckle on both sides andtorque to factory specifications.15. Reconnect the sway bar on both sidesand torque to factory specifications.16. Reconnect the outer tie rod onboth sides and torque to factoryspecificationsFig. 2: Passenger side 750 vernon way suite 101. el cajon, ca 92020 usa 417. Check that the suspension has properclearance by steering completely inboth directions.18. Reinstall both front wheels and torqueto factory specifications.19. Set the vehicle back on the groundand drive it back and forth severalfeet to allow the suspension to settle.now measure the new ride-heightand make adjustments if necessary.to adjust the ride height, first jackup the vehicle, then loosen the toplock ring, and then adjust the mainspring retainer. Once your height is set, retighten the top lock ring against themain spring retainer.20. It is highly recommended that youhave your wheel alignment checked. FOX liMiTED WARRANTyFOX Factory, Inc., a California corporation having offices at 130 Hangar Way, Watsonville, Ca 95076 (“FOX”), makes the following lImIted WaRRantY with respect to its suspension products:lImIted One (1) YeaR WaRRantY On SuSPenSIOn PROduCtSSubject to the limitations, terms and conditions hereof, FOX warrants, tothe original retail owner of each newFOX suspension product, that theFOX suspension product, when new,is free from defects in materials and workmanship. unless otherwise required by law, this warranty expires one (1)year from the date of the original FOX suspension product retail purchasefrom an authorized FOX dealer or froma FOX authorized Original equipment manufacturer where FOX suspensionis included as original equipment ona purchased vehicle. If law requires a warranty duration of greater than one (1) year, then, subject to the other provisions hereof, this warranty will expire at the end of the minimum warranty period required by such law.1.800.FOX.SHOX(369.7469)*********************************5TERMs OF WARRANTythis warranty is conditioned on the FOX suspension product being operated under normal conditions and properly maintained as specified by FOX. this warranty is only applicable to FOX suspensions purchased new from an authorized FOX source and is madeonly to the original retail owner of the new FOX suspension product and is not transferable to subsequent owners. this warranty is void if the FOX suspension product is subjected to abuse, neglect, improper or unauthorized repair, improper or unauthorized service or maintenance, alteration, modification, accident or other abnormal, excessive, or improper use.Should it be determined by FOX in its sole and final discretion, that a FOX suspension product is covered by this warranty, it will be repaired or replaced, by a comparable model, at FOX’ssole option, which will be conclusiveand binding. tHIS IS tHe eXCluSIVe RemedY undeR tHIS WaRRantY.anY and all OtHeR RemedIeS and damageS tHat maY OtHeRWISeBe aPPlICaBle aRe eXCluded, InCludIng, But nOt lImIted tO, InCIdental OR COnSeQuentIal damageS OR PunatIVe damageS.this limited warranty does not apply to normal wear and tear, malfunctions or failures that result from abuse, improper assembly, neglect, alteration, improper maintenance, crash, misuse or collision. this limited warranty gives the consumer specific legal rights. the consumer may also have other legal rights which vary from state to state or country to country. Some states and countries do not allow the exclusion or limitation of incidental or consequential damages or warranties, and if dictated by law the above limitationsor exclusions may not apply to you. If itis determined by a court of competent jurisdiction that a certain provision of this limited warranty does not apply, such determination shall not affect any other provision of this limited warranty and all other provisions shall remain in full effect. 750 vernon way suite 101. el cajon, ca 92020 usa 6151.800.FOX.SHOX(369.7469)*********************************7Heat-Reducing design» Cold-forged, metal-impacted 6061 t6 aluminum shock body dissipates heat three times faster than aconventional steel body shock. the 2.0 Performance Series shock runs as cool as a 2.5 diameter shock on the same application.» FOX formulated race shock oildeveloped for ultimate performance at variable temperatures.2.0 Performance SerieS IFP ShockReplace youR stock sHocks witH Race-winning tecHnologyvisiT /DODGE TO FiND FOX OFFERiNGs FOR yOuR DODGE 750 vERNON WAy suiTE 101. El cAjON, cA 92020 usA8race Performance For your daIly drIverapplication- specific ValVing» during development we rigorously tested to maximize offroad performance by utilizing the same proprietary deburred valve shims and high-flow piston design that is found in FOX race products. tougH finisH» CnC machined aluminum components are type II hard anodized to a scratch- and fade-free black finish.» Heavy-duty 5/8" chrome shafts are induction case hardened to over 55 Rockwell C, virtually eliminating scratches caused by roost and debris.fade-fRee peRfoRmance» the Internal Floating Piston (IFP) design separates shock oil from the high-pressure nitrogen charged gas chamber, eliminating oil aeration and cavatation, whileproviding a predictable ride — capableof handling the roughest conditions with fade-free performance.1.800.FOX.shOX(369.7469)*********************************9Pn 605-01-060 Jul Y 2011Pn 605-01-078 ReV a JanuaRY 20131personal profile2 let us know whichproducts you own3and product 750 vernon way suite 101. el cajon, ca 92020 usa1.800.fox.sHox(369.7469)*********************************。
2015年欧版车配置资料 -均可预定

2015欧版车
13580元
车名One-Sixty 7 600(160-7号):整车铝合金 VPP软尾车架,前避震SUNTOUR 160行程,后避震 ROCK SHOK MONARCH;SHIMANO 615齿盘,DEORE变
速套件,shimano M506刹车,重约12.6KG。
2015欧版车
12800元
MERIDA 2015年欧版车 配置资料简介
2015欧版车
12680元
车名One-Eighty 6 500(180-6号):整车铝合 金VPP软尾车架,前避震MAROCCHI 180行程, 后避震ROCK SHOK KAGE;FSA齿盘,sram-X3指 拨,X4后拨,shimanoM506刹车,重约13KG。
混合套件,shimanoT445刹车系统。
2015欧版车
68800元
车名Reacto Team-E(瑞克多-车队版-E):整 车碳纤维CF4超轻车架,ROTOR FLOW NOQ功率齿 盘shimanoDA DI2电子22段变速系统,Fulcrum
Red Wind H50一体轮组,整车重约7KG。
2015欧版车
9980元
车名Ride 4000(莱德-4000):整车碳纤维CF2 车架,shimano105 22速变速套件;Fulcrum Racing Sport一体轮组。
2015欧版车
12800元
车名Ride Disc 5000(莱德 碟刹-5000):整车 碳纤维CF2碟刹车架,shimanoUT 22速变速套件 ;带有彦豪油碟的公路车,明年度新型车款。
2015欧版车
25800元
车名Reacto DA LTD(瑞克多-DA限量版):整车 碳纤维CF3车架,Rotor 3D30 NOQ 功率牙盘 ;shimano DA机械22速套件,FSA Trimax visionT42一体轮组,重约7.8KG。
ROK工作室原创-单车后避震原理基础与进阶
索引一,后胆的基本知识1.后胆外部各部分名称2.后胆的规格表示法3.气压设置以及预压4.踩踏平台(低速压缩阻尼)调节功能的使用5.回弹调节6.后胆/前叉的调教:二,后胆结构和工作原理–基础篇1.后胆的种类2.后胆内部结构3.主气室的工作原理4.阻尼的意义及工作原理。
5.调节原理6.IFP气室介绍7.踩踏平台揭秘-低速压缩阻尼。
8.RL后胆9.踩踏平台调节机构(FOX RP系列,CTD,Rockshox RT3等等) 三,常见故障以及维护的概念1.基本概念。
2.关于维护周期3.常见故障分析4.部分案例图片四,后胆结构和工作原理–进阶篇1.大气室版后胆2.DRCV的特点3.PIGGYBACK 后胆原理和普通后胆比较4.DHX 的IFP调节机构5.高速压缩阻尼– BoostValve与Shim五,后胆相关特性的更深入研究1.SHIM2.IFP 气室体积、气压,对初段及末段的影响3.阻尼油-运动粘度4.后胆线性特征与车架线性特征正文前言相对于前叉来说,单车后避震(以下简称“后胆”)对不少玩家来说还是比较新鲜的玩意儿。
原因无他,软尾也是近几年在国内才开始兴起,大家对后胆的原理、功能、调教方法还不熟悉,而且后胆相比前叉,结构精细一点,维护难度也稍高一点。
因此,在大多数玩家眼中,后胆总有一层神秘的面纱,至于后胆厂商宣传的种种功能,更是云里雾里,对于不少东西,都是一知半解,人云亦云。
就拿最基本的来说,很多车友找我维护完后胆之后,都会问我: “我体重是XXX, 后胆该打多少气压?”这说明不少车友还缺乏对于后胆的一些基本常识。
更糟糕的是,多数人对避震器都没有任何维护意识,本人接触过的不少后胆都是严重缺乏保养,直到功能已经失效,甚至损坏,车主才想起来要求助。
本文针对后胆的一些基本知识、原理进行阐述,基本上是立足于扫盲与进阶,希望对大家有用。
由于时间关系,本文不可能面面俱到,如有错漏,欢迎交流、指正。
一,后胆的基本知识1.有些车友买了软尾回来,还搞不清楚后胆的各部分名称,现在以FOX CTD为例,标示后胆外部各部分名称和功能。
山地车避震介绍
XCR与epicon (神叉)都是一个公司的产品,做工很定没的说,所谓的神叉,在每个年代玩车人心中都有个心仪的前叉。
这个型号和品牌是玩车人从价格性能的比较上给他的命名。
其实您说的这两款叉子区别不大,如果从重量上来说,xcr 比神叉重一些。
叉子型材和工艺都是一样的。
一、美国1、FOX(前叉/后SHOCK):的确是很会做避震的一家厂,是曾经的圣物,现如今烂大街了。
FOX的地位在国内可谓深入人心,如今可说是最受欢迎,用得最多的SHOCK牌子之一,无论是XC还是DH AM还是飞坠,都能看到它的身影,就是价格稍高。
2、ROCK SHOX(前叉/后SHOCK):SRAM旗下的避震品牌(据说也是当代避震叉的创始者)02年被SRAM收购。
在中国山地车爱好者中也有着相当的地位,其SID BOXXER等系列在世界级比赛中屡见不鲜,成为经典。
07年增加的TOTOM等大行程高强度的叉子也受到欢迎,现在这个牌子的东西很多都是在台湾司普做了。
3、MANITOU (前叉/后SHOCK):这个不用多介绍了,深入人心的后置叉桥设计,让人一眼就能认出来。
CB上用其XC叉R7系列的有很多,其后SHOCK在DH等大行程车辆上也很多见。
主要技术:SPV TPC等。
4、CANNONDALE (前叉LEFTY/HEAD SHOCK/架子):都是很特殊很有特色的左撇子叉子,在国内也可谓深入人心,本品牌主业是做整车的,避震是他整车里的副业,2007底该公司被美国太平洋车业收购。
LEFTY左仔分为SPEED和MAX两个系列,分别为气和簧叉,与很多大厂如FOX,MANITOU合作,诞生了有TPC SPV 智锁功能的lEFTY ,再加上内部特殊的4道磙子润滑系统,可算是非常好的叉子了,可惜因为头管特殊在大多情况下只能用在C记自己的车上,除非有转接装置。
HEAD SHOCK就是头管避震,是LEFTY出现以前的老产品了,避震系统做在头管里头,这样叉子的反映可以很灵敏,也可以做的很轻(一般在1200克左右),可惜因为头管特殊,只能用大头管架子,且不能转接。