FM Acoustics FM-155前级放大器
Soulution720前级710后级

Soulution 720前级710后级Soulution 720前级+710后级000作为Hi-End音响界的新秀,瑞士Soulution推出的产品不多,却有著硬底子真功夫。
在聆听篇当中,我们已经从赖英智的字里行间,神游Soulution 720前级与710后级搭配Eventus Nebula喇叭所重现的美声,接下来让我们看看720前级与710后级,究竟里面装了什麼好料,值得不凡身价。
先讲Soulution 720前级Soulution 720这部面板只有二个旋钮的重量级前级扩大机(重达30 公斤,很多功率后级的重量还比它轻呢!),搭配一个可以藏在掌心的迷你遥控器,除了媲美第一流瑞士钟表的金属加工外,第一眼实在不清楚它有什麼特别。
Soulution 720前级外观简洁典雅,光从外观很难想像其技术之高超,但金属加工的光泽与质地,则是绝对第一流的水准,完全符合瑞士精致工业的内涵。
根据厂方的介绍,内建唱头放大线路的720前级采非平衡结构,因为越少的零件才能达到最低失真的要求,不过720前级仍提供XLR输入与输出方便用家搭配,当然建议使用RCA接线最好。
720前级看似简单却有丰富聪明的功能,每组输入都能更改命名,调整3/6/9dB的增益,另外有调整频宽的特殊设计。
放在High时频宽不设限制,放在Mid时200kHz时衰减3dB,放在Low时20kHz衰减3dB,以数位讯源连接时建议放在最高1MHz的频宽。
由於Soulution连DC都能放大,所以使用时面板显屏中偶会有红灯亮起,这是侦测到线路中有DC直流存在的警示,如果直流高於15mV,保护线路便会启动一枚交连电容到放大线路,以策安全,当直流降低,15秒后保护线路又会自动关闭。
从完善复杂的保护线路,到720使用的WBT新型Nextgen插座,我们可以知道设计者的用心。
Soulution 720前级采用视讯用的放大晶体,一方面频响响应性能高,一方面能降低输出阻抗,输出峰值电流达到3安培。
野马系列多功能有源音箱的前置放大器

V l R1
vRl 2 vR1 3
 ̄ 7 {cI I I C T
混 响集 成 电路 。其 中 ,1 、8 为电源 电 脚 脚
压 输 入 端 ,接 + v  ̄ 电源 ;3 、4 为 5I压 脚 脚 接 地 端 , 接 电源 负极 :6 为压 控 震 荡 器 脚 震 荡频 率调 节 电位 器 接 线端 ,调 节 电位 器
延 迟
E 2 、R 3 出 与原 来B 3 射极 原 直达 信 C7 4输 G发
号 进 行 混合 ( 即混 响 )后进 入 I 3 C 的另 一
l 陌 两卜 豫 3 丽 音量控 垫 制
l ! R8 同 卜 V 兰 制 ! 音量控
1{ s . v z R9 c 制 r
缺 乏 资料 ,给许 多用 户 和 维 修者 带 来 了许 信 号从3 1 入 ,经R 、E 9 入 双 运放 集 进 入 V 7 R 6、 R 7 C 4 C 5 C 6 K输 5 C进 R、 5 5 、 2 、 2 、E 4 、
多不便 ,我 根据 产 品 电路 实物 将 其前 置 放 成 块 I 1 一 个 放 大 器 3 进 行 放 大 , 放 V 6 2 、C 3 R 4 C 6 5 组 成 的 C的 脚 R 、C 2 2 、 5 、E 4 、R 5 大 器 的 电路 绘 出 ,连 同其 工 作原 理 一并 介 大 后 的信 号 由1 输 出 ,再 进 入 双 运 放 集 衰 减 式 音调 控 制 电路进 行 高 、低 音调 控 制 脚 绍 如 下 , 以供广 大业 余 爱 好 者维 修参 考 或 成 块 I 2 一 个 放 大 器 3 进 行 跟 随放 大 后 由E 2 耦 合至 B 3 5 、R 0 t的 脚 C9 G 、R 9 6 组成 的 射 进 行 仿 制 。前 置 放 大 器共 有 7 双 运 放 集 个 成 块及 其 外 围元 件和 辅 助 电 路元 件 组成 。
价格不可理喻贵到伤天害理的世界顶级HIEND音响品牌及厂家定稿版

价格不可理喻贵到伤天害理的世界顶级H I E N D音响品牌及厂家HUA system office room 【HUA16H-TTMS2A-HUAS8Q8-HUAH1688】价格不可理喻世界顶级Hi-End名厂超高档的Hi-Fi音响产品我们称之为Hi-End器材,无论是音箱、功放或CD机、LP系统、线材,都有Hi-End产品。
这类产品都无视主流市场的需求和普通用户的购买力、不向材料成本妥协、以追求极致的音乐还原能力和整体品位为目标。
这类品牌一般都集中在北欧的一些国家和美国。
下面我们就介绍几个世界顶级的Hi-End名厂。
瑞士FM Acoustics瑞士的FM Acoustics可能是目前世界最顶级的HI-END品牌,不过就算是经验丰富的老烧也不一定听过FM Acoustics的音响器材,因为FM旗下产品的价格都让人无法接受,那么FM的发烧器材的价格到底在一个什么水平上呢?据说一个立体声后级的价格就得近6万美元,25周年纪念版的单声道后级2011(总共只生产25对)要价12.5万美元。
瑞士FM Acoustics的Resolution Series前级:FM255MKII瑞士FM Acoustics的Resolution Series前级:FM 266MKIIFM Acoustic本是专业广播级音响产品的瑞士厂家,在进军Hi-End领域后,所有产品都是人工精密制造的,视音响器材为艺术品般雕琢,FM所有的研发工作与产品制作都在厂内自己进行,与现代工业时兴的管理方式正好相反,FM采购的所有元器件都是向内进行而非向外进行,因为FM认为,只有每个环节的每个细节都处在持续的、严格的品质控制措施之下,准确性和质量方能得到真正的保证。
瑞士GOLDMUND(高文)瑞士在音响方面的顶级品牌太多了,除了常人难得一见的FM之外,还有大名鼎鼎的Goldmund(高文),这是一家做传统唱机起家的企业,其经典产品便是发烧友梦寐以求的名器,不过因为其让人望而却步的价格,见过Goldmund产品的发烧友都犹如凤毛麟角。
FM111单声道功率放大器试听
FM111单声道功率放大器试听FMAcoustics是许多发烧友心目中"仰之弥高"的超级铭器,仅有少数玩家得以鉴赏和把玩.特别在经济较为发达的国家也不例外.道理很简单,如同汽车中的劳斯莱斯一样,体现出高贵及财富的一种象征,或许只能被少数人所拥有的.仅这一点FMAcoustics器材好坏不是我们去评价的了,FMAcoustics家族最近又在不断推出不同于以往的新产品,这次笔者有幸听到的在中国香港市场上刚登场的型号为FM111的单声道功率放大器,及由统一个品牌的前级放大器,扬声器所组成的音响系统.不仅继承和发展了FMAcoustics的112璜代醵,IIIIlHFi&Home'lrhealer一贯风格,特别是其高贵文雅的音质表现让人陶醉难以自拔.看到这套组合的价格或许有些惊讶,说它是名副其实的Hi—End实际上一点都不假.香港百搭音响公司展厅内鉴赏到了这一系统的表现,不仅使我想起几十年前在日本发烧时的感想……东京秋叶原电器街的Y AMAGlW A店,向来都是社长,老板光顾的电器店(今天已搬至马路对面数百米远的新址.原址已被SOFTMAP电器店所占据,搬迁原因讲起来要一定时间日后再议),店内5楼当时有个约800m的世界顶级音响器材的展示区,其中由大小不同的4间试(视)听室组成,最小的约8m,记得在以前笔者所写的文章中有提起过,最大的要数外面的器材展厅大厅.那是1991年的冬天,笔者第一次在这里二号大的试听室内接触到了FMAcoustics,此时刚刚踏入Hi—End器材领域的我,一头埋在JBL,MK和W ADIA等器材中,看到FM Acoustics这迷人的声音和其完全不符的平淡的外观设计,始终感觉难以接受的器材风格,至今为止在Hi—End道路上一FMAcousticsFM111单声道功率放大器试听●文/摄影张国棵路走过方才感觉到FM的天才魅力为时已晚,特别是此次来港试听,深深的感觉到经历了这么多年来对音响文化的成熟了解,凭座落在自己试听室中的器材价值,完全有条件可以容纳数套FMAcoustics系统,但却放弃没能接受.在生活中.所谓的名牌就是名牌,没有好和不好只有喜欢或适合那个牌子而已,然而,FM Acoustics作为音响器材中的劳斯莱斯,同其他品牌的器材就不同了.来自于瑞士的FMAcoustics,不用讲大家也明白精密机械加工的手表业的产地,这种精密机械加工业所造就的音响器材也是如此超级的精致细腻.坐在香港百搭音响公司的试听室里,眼前放着4台FM 111单声道功率放大器,外观同20年前看到的依然是如此的简朴,稍有出入仅表现在正面面板上山峰的图案标记勾起了人们对瑞士这个国家的认识.据介绍得知此次到港的FM111后级功率放大器,除了在电路设计上略有小改后并有所提高以外, 放大器的推动力毫不逊色于其他放大器, 这也是此次聆听所了解到最为可喜的一面,从FM111就能够让人回忆起过去想必也是相当不容易的一件事.FM111单声道放大器作为FMAcoustics家族成员,这部设计精巧的单声道后级确实拥有惊人的实力.扬声器阻抗完全不受限制,即便阻抗在1欧姆以下,FM111照样能正常的推动,由于FMAcoustics设计了较强的保护线路,即便短路内部的微电脑监控线路启动,随时保护放大器始终出于正常的输出状态,安心使用,此次聆听的系统与FMAcoustics独家研制的FM XS一3R扬声器,及FM266前级所组成.与家族中其它放大器相比.体积小了一圈的FM111,更加显得精巧高贵,不仅融入了大哥级别的FM2011等成熟的技术,听感上的驱动力又仿佛提升了好几倍,同多年前登场的FMResolution系列放大机器材明显有了不同的感受,可能也是这些年来对FM还没有更进一步的认识和探讨, 这次的聆听实在是难得的机会,对FM器材再次得到了认识,毫无戏言FM真正的是Hi—End器材,难怪在日本拥有FM器材的几乎都是重量级拥有财富的发烧友.H+一Fi&Hometheaterl璜代叠■*m11FM111单声道后级基本上继承了Resolution系列,一样采用FMAcoustics自家独特先进的A类放大器设计,开机时设置有延迟装置,大约数秒钟后即进入正常的工作状态.FMAcoustics功放一贯以来都是在开机10s内进入正常运行状态, 同其它品牌的器材不同,FMAcoustics的看家本领之一,是免除了大部分器材所谓的开机预热过程.从FM111放大器的技术指标上来看,输出功率在8Q状态下可达到230W,4Q的阻抗可达到360W,而114瑰代毒相mIHt—R&Hom.eate,当2Q阻抗时可以达到50OW出,小小的身材发挥出无比绝.频率响应范围也在1Hz~于0.2dB),谐波失真低于0[比一110dB.输入阻抗为40k积丰富的内涵.真是让人五体1973年成立的FMAco今已有37年的历史.当初以目标而专攻放大器的设计,!登上了民用Hi—End器材领域一台FM600A或FM800A,如劳斯莱斯的奢华,在日本当比喻的.进入到80年后,又FM300A的后级功放和FM24C此时FMAcoustics系列被确认Hi—End中的奢华产品,国者此年代对音响器材的追求场还在收录音机年代.改革开音响器材领先一步优先的进A FMAcoustics的器材至今对它解的爱好者可能也不是很多. FMAcoustics器材,仅靠聆来评价它可能还是远远不够限完美的一面,虽然笔者也算的发烧友,拥有了不少Hi—E FMAcoustics的器材对我来讲是心目中永远的一个偶像.似乎是要戴着手套来触摸的器材.在我所了解的FMAcoustics除了登场过限量版的FM2011后,还有过FM411/611/811立体声放大器,前级FM266,268等很多系列.在这次聆听过程中,笔者在百搭存放CD的柜中选了数张CD唱片,其中人声,JAZZ乐,弦乐等是一直以来自己喜欢的曲目.喜欢音响到了一定的时候,大家拥有爱听的CD唱片几乎是类似的,在这里找到几张平时自己爱听的唱片,因为较为熟悉的曲目播放更容易感受到系统的不同之处.在这套由FM111,FM266, FMXR一3R组成的顶级奢华系统,听感上的第一感觉就是非常的松弛,轻松自如,清晰透彻的乐曲表现与其它品牌器材的组合聆听有些不同.特别是人声的表现,中,低频厚实.这种厚实感也是笔者初次体验到的那种难以用语言来表达的感受. 喉咙的气息声清晰可见,仿佛近在咫尺.甜润柔和让人陶醉.JAZZ乐的表现也相当不错,乐器定位准确无误,整个空间被萨克斯的演奏所包围了,弦乐曲的演奏细腻,真实,仿佛在现场演奏一般,拨动琴弦的感觉如同就在眼前……本刊前几期有介绍过FM系列与MAGlCO扬声器搭配的试听报告,很多读者对此反响高涨,这次笔者再次受邀来到百搭音响公司聆听了全套的FM组合, 不仅大开眼见,时隔20年笔者再遇FM Acoustics依然如此的爱慕和羡慕,好像百搭公司已经知道似的,器材刚到港即来电邀请了,是否与FM有缘份?这次试听系统推动扬声器的是4台单声道FM111. 除此以外也可以搭配2台立体声后级功率放大器组合,前级也可选择FM的155, 245,255,或268.如选购扬声器FMXR一3R.全套还包含有专用的喇叭线,分频器及相关的连接线,另外再赠送一副平衡信号线.可见为了满足用户的需求.几乎考虑得相当完美,难怪FM是发烧友的顶级器材,一种财富和地位的象征,据介绍已有两套系统被北京的爱好者所订购了.相信拥有的爱好者必定会物有所值,我们也期待能进入到用户家中进行采访, 谈谈使用FM器材的心情,希望百搭音响能创造机会早日到来这一天.■HrFi&HooleTheatel—I理代蠹_*m11。
MX155 七通道预置放大器混音器(云合同者系列)操作手册说明书
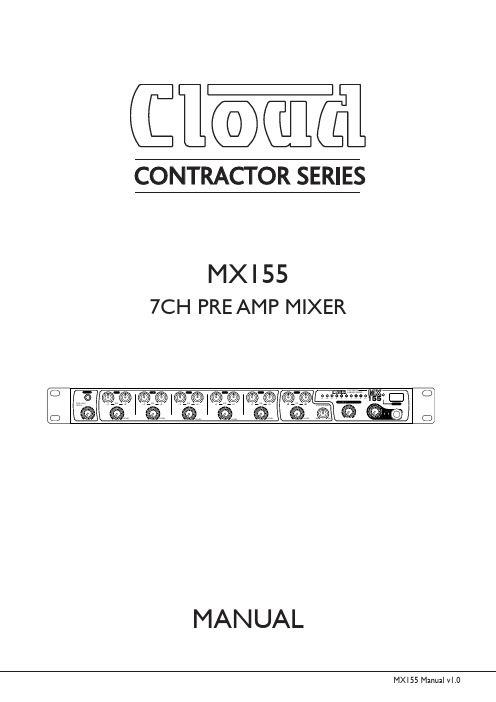
CONTRACTOR SERIESMX1557CH PRE AMP MIXERMANUALThank you for choosing Cloud Contractor Series for your sound system. T o make sure that this product meets your expectations and provides long-term, reliable performance, please read and follow this instruction manual carefully. IMPORTANT SAFETY INSTRUCTIONS•Read these instructions and all markings on the product. Keep these instructions.•Heed all warnings and instructions, both in this manual and on the product.•Clean only with a dry cloth. Unplug from AC supply before cleaning.•Do not use this product near water and avoid any exposure to water.•Before connecting this product to any AC supply, make sure to check whether the AC mains voltage and frequency match the indication on the product and its packaging.•Only connect this product to an AC supply with sufficient power handling, protective earth connection, ground-fault (earth-fault) protection and overload protection.•Disconnect the product from the AC supply during thunderstorms or longer periods of being unused.•Make sure any heat sink or other cooling surface, or any air convection slot , is exposed•sufficiently to free air circulation and is not blocked.•Do not operate this product in environmental temperatures exceeding 35 degrees Celsius and/or 85% relative humidity.•Position the product in a safe and stable place for operation, out of reach of unauthorized persons.•Make sure any cable connections to and from the product are neither subject to potentially•destructive mechanical impact nor present any risk of stumbling or other accident risk to people.•Audio equipment may generate sound pressure levels sufficient to cause permanent hearing damage to persons. Always start up at low volume settings and avoid prolonged exposure to sound pressure levels exceeding 90 dB.•Do not open this product for service purposes. There are no user-serviceable parts inside.•Warranty will be void in any case of unauthorized service by the user or other not authorized persons.•T ake any precaution required by local law, applicable regulations or good business practice to avoid injury of people or material damage by use of this product.ATTENTION! Read manual before installation and operation.DANGER!Safety hazard.Risk of injury or death.WARNING!Hazardous voltage.Risk of severe or fatalelectric shock.WARNING!Fire hazard.OverviewGeneralThe MX155 is a mic/line mixer with 5 multi-purpose mic/line inputs, one dedicated microphone input and talkover feature. All inputs feature EQs and Gain control. The balanced output is provided on a Phoenix-compatible connector. Remote muting and emergency signal replay facilitate the use in installed sound systems.Health adviceThis unit produces and absorbs electromagnetic radiation. T he strength of radiation and the sensitivity for disturbing interference matches the CE and FCC requirements. A corresponding sign is printed on the backside of the unit. Any change or modification may affect the behavior of the unit concerning electromagnetic radiation, with the CE requirements eventually not to be met any more. The manufacturer takes no responsibility in this case.Functional adviceThis unit is immune to the presence of electromagnetic disturbances – both conducted and radiated - up to a certain level. Under peak conditions, the unit is classified to show a “class C” performance criteria and may encounter temporary degradation or loss of function which may need manual help to recover. In such case, disconnect the AC power from the unit and reconnect it again to recover.Environmental adviceThis unit is built to conform to the ROHS standards and the WEEE directive 2002/96/EC of the European Parliament and of the Council of the European Union. Under these regulations, the product shall not be discarded into regular garbage at the end of its life, but shall be returned to authorized recycling stations.UnpackingPlease check that the box contains the following items:Main parts: 1 pc. MX155 main unit 1 pc. Mains cable 1 pc. Operation manualIf any part is missing, please contact your dealer immediately for replacement.AC mains voltage settingIf the AC mains voltage of your power outlet and the setting of the AC supply voltage on your unit do not match, contact your dealer, contractor or a qualified service workshop to change the setting of the AC voltage selector. The AC voltage selector switch is located on the side panel of the unit, close to the AC inlet.WARNING After unpacking, and before plugging the AC cord in the wall outlet, check whether the AC mains voltage and frequency is the same as this product is specified for (see rear panel of product). Whenever the specified voltage or your AC plug should not match the local conditions, do NOT plug the AC cord into the wall outlet and contact your dealer immediately.AC VoltageControls and ConnectionsConnections - RearOutput SectionInput SectionControls - FrontInput SectionOutput Section1213151614181917202123242627252822Functional DescriptionThe MX155 is a mic/line mixer with 5 multi-purpose mic/line inputs, one dedicated microphone input and talkover feature. All inputs feature EQs and Gain control. The balanced output is provided on a Phoenix-compatible connector. Remote muting and emergency signal replay facilitate the use in installed sound systems.1A C inlet and fuse holder. Use the supplied AC cord to connect the unit to AC mains. Make sure voltage and frequency stated and set on the unit comply with your local AC supply. The fuse can be accessed by the small drawer at the AC inlet. T o change the fuse, unplug the AC cord first, pull out the fuse drawer and replace the fuse ONLY with a fuse of SAME voltage and rating. If the fuse blows again after replacement, hand over the unit to qualified service personnel.2Stereo Main output. This is a balanced terminal block output.3M ono switch for main output. Sums the left and right channel to a mono signal when pressed.4M aximum level setting for Stereo Main output. This control allows to limit the maximum level at the outputs (2) in order to match the connected sound system. Adjustments made on this control will not be displayed by the output level meter(25). Adjustments shall be made with a small screw driver. Note that the total angle is 300 degrees; do not apply excessiveforce with the screw driver.5T alkover threshold adjustment for Stereo Main output. This controls allow to set the level at which the talkover is enabled.The amount of damping which is applied once the talkover is active (DPG) is set by a front panel control (23). Adjustments shall be made with a small screw driver. Note that the total angle is 300 degrees; do not apply excessive force with the screw driver.6R ecord output. T his is an unbalanced stereo output carrying the same signal as the main outputs (2), but not influenced by the main volume control (24). T his is normally used for recording the output to an external tape, CD or memory device. 7M usic Mute input. T his is a terminal block input which allows to remotely mute the main output by simply shorting the contacts.8E mergency input. This is an auto-sensing, balanced terminal block input which allows the connection to an emergency evacuation system. Once a signal is present on this input, the main output signal will be muted and the emergency message/ signal from this input will become audible instead. Note that the unit can be set to include or exclude the microphone signals from this muting process, please see section “microphone emergency priority setting”.9E mergency volume control. This control allows to set the level with which the signal fed into the emergency input (8) will be replayed at the main output (2).10P riority microphone input “MIC”. This is a balanced input with adjustable priority over other signals by means of the talkover controls (5) and (23). Phantom power can be enabled or disabled depending on the connected microphone type, see section “microphone phantom power setting”.11G AIN control for priority microphone input. “MIC” This allows the sensitivity (input gain) for input (10) to be adjusted to match different microphone output levels.12M ICROPHONE input for CH1/2/3/4/5. T hese are balanced Phoenix-compatible connectors, which can be internally set to either carry phantom power or not, thus these inputs can be used both with condenser and dynamic microphones.Please see section “microphone phantom power setting”. The signal of these inputs is controlled by the front panel controls (19)/(20).13L INE input for CH1/2/3/4/5. These RCA connectors provide inputs for line-level signals to the assigned channels.14S OURCE selector switch for CH1/2/3/4/5. Allows to switch the input source between the connected LINE signal (13) or microphone signal (12) of the respective channel.15G AIN control for input channels 1/2/3/4/5. This allows the sensitivity (input gain) for every input to be adjusted, so that sources of different output level can be mixed at properly balanced levels.16L INE input for FOH/AUX channel. This is a Phoenix-compatible balanced stereo input specifically designed to allow the connection of the output of a stage mixer or any other balanced audio source at larger distance, in order to use the connected sound system for the replay of such source‘s signal. This is useful in applications where, e.g., apart from stereo source replay also live music is performed over the same sound system, or where a source signal from a different room/ area needs to be replayed. The volume of this input is controlled by a rotary front-panel control (18). Note that this input is disabled when a connector is inserted into the front-panel AUX IN jack (17).17A UX Input for FOH/AUX channel. This is a 3.5mm TRS stereo socket which allows to connect sources like MP3 players etc. without removing the mixer from its mounting position. Once a plug is inserted, the rear panel balanced line inputs for this channel (16) are disabled and the connected source is active.18V OLUME control for FOH/AUX channel. Controls the volume of the signal inserted in the balanced rear-panel input (16) or the front-panel TRS input (17) respectively.19V OLUME controls for channels 1/2/3/4/5. Control the volume of the signal inserted in the rear-panel microphone inputs(12)or line inputs (13) depending on the setting of the source selector switch (14). The maximum attainable volume isadjustable by the rear-panel gain control (15).20E QUALIZER for channels 1/2/3/4/5. Allows the adjustment of the tonal balance for the respective input in two frequency bands with an adjustment range of ±12dB.21V OLUME control for priority microphone channel. Controls the volume of the signal inserted in the rear-panel priority microphone input (10). The maximum attainable volume is adjustable by the rear-panel gain control (11).22E QUALIZER for priority microphone channel. Allows the adjustment of the tonal balance for the priority microphone in two frequency bands with an adjustment range of ±12dB.23T alkover Damping Control. This control determines the amount of level reduction applied to the program signal when the priority microphone is spoken into. Being fully turned clockwise, once speaking into the microphone, the program signal is completely suppressed. Being turned fully counter-clockwise, the talkover function is off. Any position in between allows seamless adjustment of the amount of reduction applied to the program signal. The threshold level from which on this function is enabled can be set by the rear panel sensitivity level control (5).24M AIN (stereo) output level control. Determines the main output level present at output (2).25M AIN (stereo) output level meter. Displays the output level of the stereo main output (2). Note that the level limitation applied by means of the rear-side maximum level control (4) is not displayed on this meter.26P FL level. Determines the signal volume at the headphone output (27). Always set this control to minimum before putting on headphones, as sudden high-volume impact may damage your ears. See further health advice below.27H eadphone output. A ¼” TRS connector to connect headphones. T urn the PFL level (26) down before plugging in any headphones.28P ower switch. Switches the unit on and off. Make sure to switch the unit off when not in use.Internal SettingsWARNING - DANGER Changing the internal settings requires to open the unit. Prior to opening the unit, the unit shall be disconnected from any AC supply. Any work on an open unit shall be expedited only by qualified, certified personnel.T o make the settings, locate and set the jumpers on the rear PCB as show below.CH1-5 MIC PHANTOM POWER:MIC INPUT PHANTOM POWER:ONOFF (DEFAULT)EMERGENCY MIC PRIORITY:OFF (DEFAULT)ONOFF (DEFAULT)ONA.Microphone phantom power settingWhile most applications will work well with dynamic microphones, on certain occasions the use of a condenser microphone may be required. T o supply the necessary voltage to the microphone, the MX155 provides an internal option to activate phantom power, separately for the priority microphone and for all other microphone inputs (CH1...CH5). Please note that the phantom power settings for channels 1-5 can only be made globally, not individually. Open the unit and locate the rear PCB as shown above. Set the jumpers as required.B.Microphone emergency priority settingIn the case of an external emergency signal muting the unit’s outputs, an internal jumper can be set to either mute the connected microphones (”off”) as well or to to keep them active (so that aside of a emergency message broadcasted, additional instructions can be given by a local microphone - “on”). T o make the setting, locate and set the jumper on the rear PCB as shown above.OperationA.ConnectionsFor connecting this unit to AC mains, please note:•Check whether the AC mains voltage and frequency is the same as this product is specified for (see rear panel of product). Whenever the specified voltage or your AC plug should not match the local conditions, do NOT plug the AC cord into the wall outlet and contact you dealer immediately.•Do not operate this unit without the line cord earth ground connected. T o do so may increase the risk of electric shock and increase line cord conducted emissions.For making audio signal connections, always remember that good and reliable connections are a basic requirement for good sound and reliable operation. Bad soldering of cables can result in intermittent audio signals or temporarily lost ground connections, hence always use good cables. In case of doubt about making proper connections, please see check the standard pin assignments required for proper operation in the following section of this manual.B.Powering upFollowing a proper power-up sequence protects your equipment – specifically speakers – and your ears. Follow the below procedure:•T urn down all output volume controls of any equipment in your audio system.•Switch on your audio sources first (T uners, CD Players, PCs with soundcards, T apedecks, etc.).•Switch on the audio mixer•Switch on any audio processor between the mixer and the amplifier(s) [if any].•Switch on the amplifier(s).•T urn up the audio level on your sources if such controls are provided.•Set the audio output of your mixer to a low level.•Set the audio output of any audio processor between the mixer and the amplifier(s) to a medium level [if any such processors].•T urn up the volume controls of your amplifier(s) slowly.•Make adjustments to all volume settings as needed.For switching off, follow the inverse sequence – always switch off your amplifier(s) first, then any processors between mixer and amplifier(s), then the mixer, then the sources.eApart from using good equipment, good sound comes from using it correctly. Level setting mistakes are one of the common reasons why even good equipment may not perform as desired. For setting levels, please be reminded that two guidelines need to be followed:•Avoid distortion by leaving some headroom. Never overrun any audio equipment’s inputs. Level meters and displays allow you to make sure that signals do not enter critical levels.•Avoid unnecessary amplification by using as little attenuation as possible. For example, if you turn down the input gain ofa mixer to minimum, and then increase the main output of the mixer to maximum to drive your amplifier properly, youwill create unnecessary noise, as you first dispose of some already existing signal level, and then later apply amplification (tainted with noise) to make it up.WARNING - HEAL TH RISK Excessive volume levels on headphones or other sound systems may cause hearingdamage. Always turn the volume control to minimum when you switch the unit on, and avoid prolonged exposure to sound pressure levels exceeding 90dB.ConnectionsThe MX 155 uses the connector types below, for which the pin assignment must comply with the following specification. Always make sure to use good connectors and cables to ensure proper operation. Balanced connections are to be preferred over unbalanced connections where applicable and feasible. Avoid unbalanced connections exceeding 2m of cable length.T echnical SpecificationsSignal/Noise ................>82dBu (unwgtd 22Hz-22KHz)Crosstalk Damping...........>65dB (Line)THD......................<0.03% (Line)Frequency response..........20Hz – 20 kHzAC IN ....................115V/230~ 50/60HzPower consumption..........max. 20WDimensions.................W483 x H44.5 x D152.0mmWeight ....................2.30 kgBlock DiagramMaintenance and WarrantyWhile we have chosen the best components to make this product as rugged and reliable as possible, some parts in audio products (potentiometers, faders, switches) are subject to wear which is a matter of operation cycles, and not of time. While providing a full time-based warranty according to the country’s of purchase requirements on the function of the electronic circuitry, we hence have to limit the warranty on such electro-mechanical parts to 90 days from the date of purchase.In many cases, malfunction of electro-mechanical parts occurs due to dust contamination, which may require cleaning of such parts. As the inside of such parts is not accessible, a common practice is to use cleaning fluids in the shape of sprays. Please be reminded that many of such fluids contain chemicals which may wash away the dust but at the same time corrode or damage contact surface and may cause cosmetic damage to other parts. We hence explicitly exclude any claims for exchange of damaged part due to mechanical or chemical impact. www.cloudusa.proCONTRACTOR SERIES。
电解电容的参数
浅谈电源滤波用电解电容‧梁中锷‧2005-08-25在音响组件中,电容器(capacitor)被广泛运用,平滑滤波、反交连、高频补偿、提供直流回授、隔阻直流、抑制米勒效应…等,随处可见。
但若依功能及制造材料、制造方法细分,那可不是一朝一夕能说得明白。
所以缩小范围,本文只谈电解电容,而且只谈电源平滑滤波用的铝质电解电容。
每台音响机器都要吃电源─除了被动式前级,既然需要供电,那就少不了将AC转换成DC的整流及「滤波」这两个动作。
我们现在习用的滤波电容,正式的名称应是:铝箔干式电解电容器。
就我的观察,除加拿大Sonic Frontiers真空管前级,曾在高压稳压线路中选用PP塑料电容做滤波外,其它机种一概都是采用铝箔干式电解电容;因此网友有必要对它多做了解。
面对电源稳压线路中担任电源平滑滤波的电容器,你首先想到的会是什么?容量?耐压?电容器的封装外皮上一定有容量标示,那是指静电容量;也一定有耐压标示,那是指工作电压或额定电压。
工作电压(working voltage)简称WV,为绝对安全值;若是surgevoltage(简称SV或Vs),就是涌浪电压或崩溃电压;,超过这个电压值就保证此电容会被浪淹死─小心电容会爆!根据国际IEC 384-4规定,低于315V时,Vs=1.15×Vr,高于315V时,Vs=1.1×Vr。
Vs 是涌浪电压,Vr是额定电压(rated voltage)。
电容器的电荷能量是以Q=CV来表示,Q是库伦,C是静电容量,V是电压;故当电压值不变时,加大静电容量就能增高电荷能量。
请注意,电容器的容量单位应是F(farad),可是因计量太高造成数值偏低,故多改用μF,1F=一百万μF。
国外也有用mF表示μF,其实mF不十分贴切,但机械式打字机上没有μ键,故用m代表micro。
有了静电容量及工作耐压两个参数,若你正在选购电容,接下来你会考虑什么?直觉上是价钱。
嗯,这个参数很重要,而且数值愈低愈佳。
重温音响品牌McIntosh半个世纪的辉煌
重温音响品牌McIntosh半个世纪的辉煌1950 推出麦景图前级放大器AE-11951 麦景图在纽约冰咸顿市进厂1953 推出A116功率放大器及C108前级1957 推出首部麦景图调谐器MR551959 成功制造首部麦景图立体声前级放大器C201960 成功制造首部麦景图立体声前级放大器C2401962 推出第一部调谐/前级放大器MX110,经典作品MC275真空管功率放大器及C22真空管前级同年推出1964 带邻市场把晶体管前级晶体化,推出划时代的C24前级1967 推出真空管告别作品MC3500后级,正式宣示晶体管年代的来临,包括MC2500、MC2100、MC2105及MC25051369 第一部晶体管调谐器MR73诞生1970 首批麦景图扬声器诞生,包括ML1、ML2及ML41972 MR78调谐器线路获专利1973 麦景图扬声器及均衡系统获专利1975 举世知名的“Power guard”微电脑傍路监察多重保护电路获专利,并成功推出一部设有“Power guard”电路的MC2251980 推出MC2500功率放大器及XRT20扬声器系统,而XRT20扬声器系统于同年荣获专利1985 推出第一部CD机MCD70001992 推出MC1000单声道旗舰级功率放大器及XR290极品扬声器系统1994 推出一系列麦景图高级汽车音响1995 推出MA6800及MA6400合并式放大器、CR12多区域遥控系统控制中心1997 推出世界首创全新分体概念前级C100、首部麦景图有源低音SL1及MAC-3杜比数码环绕声解码器1998 推出AC3/DTS解码器MSD41999 推出杜比数码DTS-THX MX132控制中心,MVP831 DVD机,MC2000 50周年纪念限量型真空管后级放大器2000 全系列真平衡后级放大器正式面世--MC202、MC352、M602,C100前级技术启承产品--C41,C42,合并式放大器MA6500,分体式CD系统MDA700解码器及MCD751转盘。
价格不可理喻 贵到伤天害理的----世界顶级HI-END音响品牌及厂家

价格不可理喻世界顶级Hi-End名厂超高档的Hi-Fi音响产品我们称之为Hi-End器材,无论是音箱、功放或CD机、LP系统、线材,都有Hi-End产品。
这类产品都无视主流市场的需求和普通用户的购买力、不向材料成本妥协、以追求极致的音乐还原能力和整体品位为目标。
这类品牌一般都集中在北欧的一些国家和美国。
下面我们就介绍几个世界顶级的Hi-End名厂。
瑞士FM Acoustics瑞士的FM Acoustics可能是目前世界最顶级的HI-END品牌,不过就算是经验丰富的老烧也不一定听过FM Acoustics的音响器材,因为FM旗下产品的价格都让人无法接受,那么FM 的发烧器材的价格到底在一个什么水平上呢?据说一个立体声后级的价格就得近6万美元,25周年纪念版的单声道后级2011(总共只生产25对)要价12.5万美元。
瑞士FM Acoustics的Resolution Series前级:FM255MKII瑞士FM Acoustics的Resolution Series前级:FM 266MKIIFM Acoustic本是专业广播级音响产品的瑞士厂家,在进军Hi-End领域后,所有产品都是人工精密制造的,视音响器材为艺术品般雕琢,FM所有的研发工作与产品制作都在厂内自己进行,与现代工业时兴的管理方式正好相反,FM采购的所有元器件都是向内进行而非向外进行,因为FM认为,只有每个环节的每个细节都处在持续的、严格的品质控制措施之下,准确性和质量方能得到真正的保证。
瑞士GOLDMUND(高文)瑞士在音响方面的顶级品牌太多了,除了常人难得一见的FM之外,还有大名鼎鼎的Goldmund (高文),这是一家做传统唱机起家的企业,其经典产品便是发烧友梦寐以求的名器,不过因为其让人望而却步的价格,见过Goldmund产品的发烧友都犹如凤毛麟角。
Goldmund一九七八年成立于法国,两年之后迁移到瑞士。
因为瑞士向来以钟表业等高精密工业闻名于世,当地人已经从制作钟表的传统中,培养出高精确度的精神,并且当地的文化熏陶和艺术培训非常的浓厚、极高的人均GDP和完善的社会福利使得HI-END产业得到了最好的发展温床。
- 1、下载文档前请自行甄别文档内容的完整性,平台不提供额外的编辑、内容补充、找答案等附加服务。
- 2、"仅部分预览"的文档,不可在线预览部分如存在完整性等问题,可反馈申请退款(可完整预览的文档不适用该条件!)。
- 3、如文档侵犯您的权益,请联系客服反馈,我们会尽快为您处理(人工客服工作时间:9:00-18:30)。
一生一世的承诺FM Acoustics FM-155前级
瑞士FM Acoustics的老总Mr Manuel Huber便是一位完美主义者。
据Manuel表示,FM所采用的零件全都以人工精密配对,所有零件的误差率不超过0.1%!反观其他著名发烧厂家,所使用的零件误差率高达5 ~ 20%!FM除了使用极高质量的金属膜电阻(故障率是一千四百万份之一)之外,每一个零件在装配之前都得经过“魔鬼”式的测试。
当零件安装完毕后,每一块模件及线路板都得再次经过检验、测试与调校。
在组装器材时,亦不断地重复测试与调校。
在整个装配过程中,每一个部件都得经过3 ~ 7次的测试。
器材完成后,再重新测试、调校、“长煲”及通过耐震测试。
你可以想像,在人工极为高昂的瑞士,如此耗时费事的制作方式,是一种多么“奢侈”的行为!Manuel如此执着的目的,只为了在他百年之后,世人还记得在音响史上,曾有人为了个人的梦想、热情及信念,制作过毫不妥协的器材。
由于FM Acoustics的产量非常稀少,因此价格高昂,一般人难得一闻,全球许多发烧音响杂志甚至连测试的机会都没有,更增添了它的神秘感!
在我的发烧系统里,正是以FM Acoustics的FM 255作为监听前级。
其实,在我下槌FM 255之前,曾使用FM 155长达一年之久。
因此,对这两部前级可说了若指掌。
FM 155的售价为$9,500,而FM 255的售价则高达$30,000!虽然两者的价格相差三倍,但FM 255的表现不见得比FM 155好了三倍。
其实,在发烧音响里,价格与表现就有如金字塔,最贵及最难取得的是最后那5 ~ 10%的表现。
据FM Acoustics的总代理表示,FM 155“只卖”$9,500其实是割肉求售的“亏本”价,目的是为了让喜爱FM器材的发烧友有一亲芳泽的机会。
FM 155是FM Acoustics特地用来打江山的型号,其制作方式及零件的选择与配对完全与FM 255无异。
FM 155相当小巧,纯铝外壳加上香槟色的面板,相当精致美观。
其面板上只有两只旋钮及四个按钮,非常简洁。
它虽然“只卖”$9,500大元,但却身轻如燕。
在连接粗硬的讯号线时,甚至会将它凌空拔起!
FM 155虽然比其他同价前级袖珍得多,但其音乐气质及音响却令许多同价前级相形见拙!它的音乐背景非常宁静,细节丰富,音响和谐。
以大音量听各位所熟悉的歌曲Stimela时,音色自始至终保持不变,完全没有粗糙刺耳的现象。
FM 155的动态非常态凌厉,在重现“火车”音型的节奏时,动态毫无压缩地暴起暴落,极富张力!歌手在电光火石间,突如其来地对着话筒怒号、狂吹,瞬态表现之迅速,令人目瞪口呆!当你从惊怵中回过神来时,一切已成为过去,留下的是一脸的愕然。
能够将突发性音响重现得如此传神的前级,少矣!
以FM 155听古典音乐又是一番不同的感受。
它的音色清新纯净,没有刻意的浓妆艳抹,令人久听而不腻,是一种充满了文化气息的音响。
Manuel坚持零件及模件必需精确配对、严格测试及确保所有零件在不同的频段具有划一的表现,这一片苦心得到了丰富的回报。
环顾发烧音响市场,万元前级比比皆是。
但对零件的选择与配对吹毛求疵得有如FM Acoustics者,绝无仅有!在这个不在乎天长地久的时代里,一生一世的承诺对厂家及消费者已是一种传奇。
如果你与Manuel一样,坚持完美,FM 155长达二十五年的保用期是你唯一的选择
FM ACOUSTICS公司的产品最大特点就是“贵”,而且贵的有些让人无法接受。
不过自从这家公司进军HIFI器材市场二十年来用户却只增不减,看来并不是所有用户都认为它是贵的没有道理。
FM115单声道后级就售价800多万日元,折合人民币将近70万元,的确是贵得吓人了。
FM115其实是FM771的升级版本,它基本上继承了FM771设计概念
FM115的设计要点是要排除信号放大传送时的极限,已经时间误差,令到动态压缩和动态变形得到解除,从而获得优良的直通率。
它采用完全平衡设计、三级推挽放大电路,无电流反馈。
由信号入口到出口用的都是纯A级放大线路结构,而且输出端还采用了独特的加强型A级线路。
而且FM115虽然只是一个声道,但却享有FM771的电源容量,可谓能量充沛啊
FM ACOUSTICS FM115单声道后级背板
FM115背板的左边是被称为“FORCE PLUG200”的专用附属扬声器端子。
右边是平衡连接输出端子,装备了一组第三角为热端的XLR端子。
而其旁边的是用来调整输入平衡的旋钮。
FM ACOUSTICS FM115单声道后级内部结构
FM115内部零件的配置合理而简洁。
环形电源变压器位于机框前面的中间部分,放大线路板在中央,散热片在后侧,各个部分的空间非常宽敞,放大线路采用全段完全平衡的分立式结构。
拆下顶板和面板以后,由前面望过去的内部状况。
电容器等用带子固定,其他零件之固定在线路板上。
电源变压器的前后侧也没有屏蔽物。
线路板采用了防震的设计,用两根支柱支撑,和底板保持有一段距离
瑞士的FM Acoustics可能是目前世界最顶级的HI-END品牌,笔者相信,就算是经验丰富的老烧也不一定听过FM Acoustics的音响器材,因为这个家伙的价格实在是贵的离谱,曾经有资深玩家说过这样一句让人记忆深刻的话:“如果说Krell,
Cello等顶级器材的价格贵到没有天理,那FM Acoustics的价格简直就是伤天害理!”据说一个立体声后级的价格就得近6万美元,25周年纪念版的单声道后级2011(总共只生产25对)要价12.5万美元;其音箱的价格据说已经达到了“恶贯满盈”的地步,听过的人更是凤毛麟角。
其貌不惊人的一切产品都能买一辆不错的奔驰轿车(档次不一)。
FM Acoustic原来是专做广播级专业音响产品的瑞士厂家,进军Hi-end领域后,一不做二不休,拿出瑞士名表的制造精神,所有产品都以人手精密制造,视音响器材为艺术品般雕琢,FM所有的研发工作与产品制作都在厂内自己进行,与现代工业时兴的管理方式正好相反,FM采购的所有元器件都是向内进行而非向外进行,因为FM认为,只有每个环节的每个细节都处在持续的、严格的品质控制措施之下,准确性和质量方能得到真正的保证
20萬港元的FM acoustics 222 Mk III 唱頭放大;前級當然是絕配FM acoustics 268,身價60萬港元;後級同樣是身價60萬港元的FM acoustics 811 Mk II。
所以單單一套FM acoustics 前後級,就價值$120萬港元了。