干货!思科网络设备配置命令大全
思科路由器命令大全(完整版)
思科路由器命令大全(完整版)思科路由器命令大全(完整版)本文档旨在提供思科路由器命令的详细说明和使用指南,包括路由器配置、网络管理、安全性设置等内容。
每个章节都详细介绍了不同的命令和参数,以帮助用户更好地理解和使用思科路由器。
1:路由器基本配置1.1 主机名设置1.2 用户名和密码设置1.3 IP 地址和子网掩码配置1.4 默认网关配置2:接口配置2.1 以太网接口配置2.2 串行接口配置2.3 子接口配置2.4 虚拟局域网 (VLAN) 配置3:路由协议配置3.1 静态路由配置3.2 动态路由配置3.2.1 RIP 配置3.2.2 OSPF 配置3.2.3 BGP 配置4:网络管理4.1 SNMP 配置4.2 NetFlow 配置4.3 Syslog 配置4.4 路由器时间设置5:安全性配置5.1 访问控制列表 (ACL) 配置5.2 VPN 配置5.3 防火墙配置5.4 AAA 配置附件:本文档附带的附件包括示例配置文件、命令输出示例等,以帮助读者更好地理解和应用文档中的内容。
法律名词及注释:本文档所涉及的法律名词及其注释如下:1:主机名:指路由器的主机标识名称,用于在网络中识别路由器。
2:用户名和密码:用于登录和管理路由器的凭证信息。
3: IP 地址:网络协议中用于唯一标识设备的数字地址。
4:子网掩码:用于标识 IP 地址中网络部分和主机部分的分界线。
5:默认网关:用于转发网络流量的下一跳路由器。
6:以太网接口:用于连接局域网设备的物理接口。
7:串行接口:用于连接广域网设备的物理接口。
8:子接口:在一个物理接口上创建多个逻辑接口,用于实现VLAN 分隔等功能。
9:虚拟局域网 (VLAN):用于将局域网划分成多个逻辑网络的技术。
10:静态路由:手动配置的路由表项,用于指定数据包传输的路径。
11:动态路由:根据路由协议动态学习和更新的路由表项,用于自动路由选择。
12: RIP:路由信息协议,一种距离向量路由协议。
思科模拟器网络设备常见命令大全
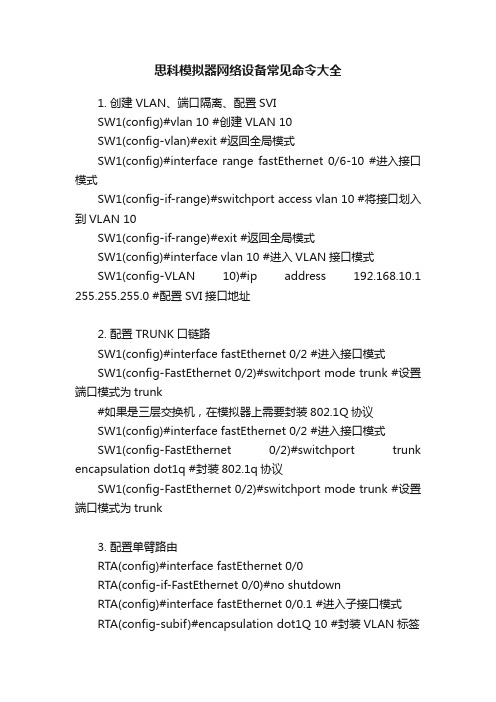
思科模拟器网络设备常见命令大全1. 创建VLAN、端口隔离、配置SVISW1(config)#vlan 10 #创建VLAN 10SW1(config-vlan)#exit #返回全局模式SW1(config)#interface range fastEthernet 0/6-10 #进入接口模式SW1(config-if-range)#switchport access vlan 10 #将接口划入到VLAN 10SW1(config-if-range)#exit #返回全局模式SW1(config)#interface vlan 10 #进入VLAN接口模式SW1(config-VLAN 10)#ip address 192.168.10.1 255.255.255.0 #配置SVI接口地址2. 配置TRUNK口链路SW1(config)#interface fastEthernet 0/2 #进入接口模式SW1(config-FastEthernet 0/2)#switchport mode trunk #设置端口模式为trunk#如果是三层交换机,在模拟器上需要封装802.1Q协议SW1(config)#interface fastEthernet 0/2 #进入接口模式SW1(config-FastEthernet 0/2)#switchport trunk encapsulation dot1q #封装802.1q协议SW1(config-FastEthernet 0/2)#switchport mode trunk #设置端口模式为trunk3. 配置单臂路由RTA(config)#interface fastEthernet 0/0RTA(config-if-FastEthernet 0/0)#no shutdownRTA(config)#interface fastEthernet 0/0.1 #进入子接口模式RTA(config-subif)#encapsulation dot1Q 10 #封装VLAN标签RTA(config-subif)#ip address 192.168.10.1 255.255.255.0 #配置子接口IP地址RTA(config-subif)#no shutdown #启用子接口4. 配置静态路由RA(config)#ip route 192.168.2.0 255.255.255.0 192.168.1.2 #配置到非直连网段静态路由RA(config)#ip route 192.168.3.0 255.255.255.0 192.168.1.2 #配置到非直连网段静态路由5. 配置RIP V2路由RA(config)#router rip #启用RIP路由进程RA(config-router)#version 2 #定义RIP版本号RA(config-router)#network 192.168.0.0 #宣告直连路由RA(config-router)#network 192.168.1.0 #宣告直连路由RA(config-router)#no auto-summary #关闭自动汇总6. 配置RIP路由协议认证RA(config)#key chain ruijie #配置密钥链RA(config-keychain)#key 1 #配置密钥IDRA(config-keychain-key)#key-string 12345 #配置密钥值RA(config-keychain-key)#exitRA(config-keychain)#exitRA(config)#interface fastEthernet 0/0RA(config-if)#ip rip authentication mode md5 #配置验证方式为MD5RA(config-if)#ip rip authentication key-chain ruijie #配置接口启用RIP验证7. 配置OSPF单区域路由RA(config)#router ospf #启用OSPF路由进程RA(config-router)#network 192.168.0.0 0.0.0.255 area 0 #宣告直连路由RA(config-router)#network 192.168.1.0 0.0.0.255 area 0 #宣告直连路由8. 配置OSPF多区域路由RA(config)#router ospf #启用OSPF路由进程RA(config-router)#network 192.168.1.0 0.0.0.255 area 0 #宣告直连路由RA(config-router)#network 172.16.1.0 0.0.0.255 area 1 #宣告直连路由RA(config-router)#network 172.16.2.0 0.0.0.255 area 1 #宣告直连路由Router(config-router)# area 1 stub no-summary #完全stub 过滤路由ip access-list standard acl_1deny 3.3.3.0 0.0.0.255permit anyrouter ospf 10distribute-list acl_1 in9. 配置OSPF协议认证(1)明文验证RA(config)#interface fastEthernet 0/0RA(config-if-FastEthernet 0/0)#ip ospf authentication #启用接口的明文验证RA(config-if-FastEthernet 0/0)#ip ospf authentication-key 123 #配置明文验证的密码(2)暗文验证RB(config)#interface fastEthernet 0/1RB(config-if-FastEthernet 0/1)#ip ospf authentication message-digest #启用接口的MD5验证RB(config-if-FastEthernet 0/1)#ip ospf message-digest-key 1 md5 aaa #配置MD5验证的密钥ID和密钥10.访问控制列表(1)标准访问控制列表RB(config)#access-list 10 permit 192.168.1.0 0.0.0.255RB(config)#access-list 10 deny 192.168.2.0 0.0.0.255RB(config)#interface fastEthernet 0/0RB(config-if-fastEthernet 0/0)#ip access-group 10 out(2)扩展访问控制列表RB(config-ext-nacl)#permit tcp 192.168.2.0 0.0.0.255 host 192.168.4.2 eq ftpRB(config-ext-nacl)#permit tcp 192.168.2.0 0.0.0.255 host 192.168.4.3 eq wwwRB(config-ext-nacl)#deny ip 192.168.2.0 0.0.0.255 192.168.4.0 0.0.0.255RB(config-ext-nacl)#permit ip any anyRB(config)#interface fastEthernet 0/0RB(config-if-FastEthernet 0/0)#ip access-group 100 in #接口应用访问控制列表11.NAT(1)静态NATRA(config)#ip nat inside source static 192.168.100.4 68.1.1.4 RA(config)#ip nat inside source static 192.168.100.6 68.1.1.6 RA(config)#interface fastEthernet 0/0RA(config-if-FastEthernet 0/0)#ip nat inside #定义接口为内部接口RA(config-if-FastEthernet 0/0)#exitRA(config)#interface serial 2/0RA(config-if-Serial 2/0)#ip nat outside #定义接口为外部接口(2)动态NATRA(config)#interface fastEthernet 0/0RA(config-if)#ip nat insideRA(config-if)#exitRA(config)#interface serial 2/0RA(config-if-Serial 2/0)#ip nat outsideRA(config)# access-list 10 permit 192.168.1.0 255.255.255.0 RA(config)# access-list 10 permit 192.168.2.0 255.255.255.0 RA(config-std-nacl)#exitRA(config)#ip nat inside source list 10 interface serial 2/0 overload12.远程登录SW1(config)#enable password 123456 #配置enable密码SW1(config)#line vty 0 4 #进入线程配置模式SW1(config-line)#password 123456 #配置Telnet密码SW1(config-line)#login #启用Telnet的用户名密码验证13.DHCP服务SW1(config)#ip dhcp pool vlan10 #设定地址池名称SW1(dhcp-config)#network 192.168.10.0 255.255.255.0 #配置DHCP地址池SW1(dhcp-config)#dns-server 68.1.1.6 #配置DNS地址SW1(dhcp-config)#default-router 192.168.10.1 #配置网关SW1(dhcp-config)#exitSW1(config)#ip dhcp excluded-address 192.168.10.160192.168.10.200 #配置排除地14.生成树协议SWA(config)#spanning-tree mode pvst/rapid-pvst #开启生成树协议或者快速生成树SWA(config)#spanning-tree vlan 10 priority 4096 #优先级为4096,默认为32768多生成树SW1(config)#spanning-tree #启用生成树协议SW1(config)#spanning-tree mode mstp #定义为MSTP模式SW1(config)#spanning-tree mst 1 priority 4096 # SW1设为实例1的根核心要配SW1(config)#spanning-tree mst configuration #进入MSTP配置模式SW1(config-mst)#instance 1 vlan 10 #创建实例1SW1(config-mst)#instance 2 vlan 20 #创建实例2SW1(config-mst)#name aaa #定义区域名称aaaSW1(config-mst)#revision 1 #定义配置版本号为115.VRRP服务RB(config)#interface fastEthernet 0/0RB(config-if-FastEthernet 0/0)#vrrp 1 ip 52.1.1.254 #启用VRRP进程RB(config-if-FastEthernet 0/0)#vrrp 1 priority 120 #定义接口VRRP优先级RB(config-if-FastEthernet 0/0)#vrrp 1 preempt #启用抢占模式15.配置EIGRP路由router(config)#router eigrp 1router(config-router)#network A.B.C.Drouter(config-router)#no auto-summary #在主类边界关闭自动汇总,默认开启16.配置BGP路由router(config)#router bgp 100router(config-router)#network 15.1.1.0 mask 255.255.255.0 #传递网络router(config-router)#neighbor {ip-address} remote-as 100 #配置邻居router(config-router)#auto-summary #在主类边界开启自动汇总(只发布主类要开启)默认关闭r1(config-router)#aggregare-address 10.1.1.0 215.255.255.0 #路由汇总17.路由重分发redistribute protocol [ metric metric-value] [ match internal | external nssa-external type] [route-map map-tag] #RIP redistribute protocol [ metric metric-value ] [ metric-type {1|2} ] [ tag tag-value ] [ route-map map-tag ] #OSPFredistribute connected [ metric metric-value ]redistribute connected [ subnets ] [ metric metric-value ] [ metric-type { 1 | 2 } ] [ tag tag-value ] [ route-map map-tag ] redistribute static [ metric metric-value ]redistribute static [subnets ][ metric metric-value ] [ metric-type { 1 | 2 } ] [ tag tag-value ] [ route-map map-tag ] default-information originate [ route-map route-map-name ] default-information originate [ always ] [ metric metric-value ] [ metric-type type-value ] [ route-map map-name ]18.策略路由route-map name [ permit | deny ] [sequence-number ]match ip address { access-list-number | name } [ …access-list-number | name ]set ip next-hop ip-address […ip-address ]ip policy route-map route-map-name #在接口上配置策略路由19.端口聚合SW1(config)#interface port-channel 1 #创建聚合端口1SW1(config)#interface range fastEthernet 0/23-24 #进入一组接口SW1(config-if)#channel-group 1 mode on #将接口配置成AP 的成员端口SW1(config)#interface port-channel 1 #进入聚合接口模式SW1(config-if)#switchport mode trunk #将聚合端口配置为干道模式SW1(config)#port-channel load-balance dst-mac #配置基于目的MAC地址流量平衡。
思科路由器(CiscoRouter)常用配置命令大全
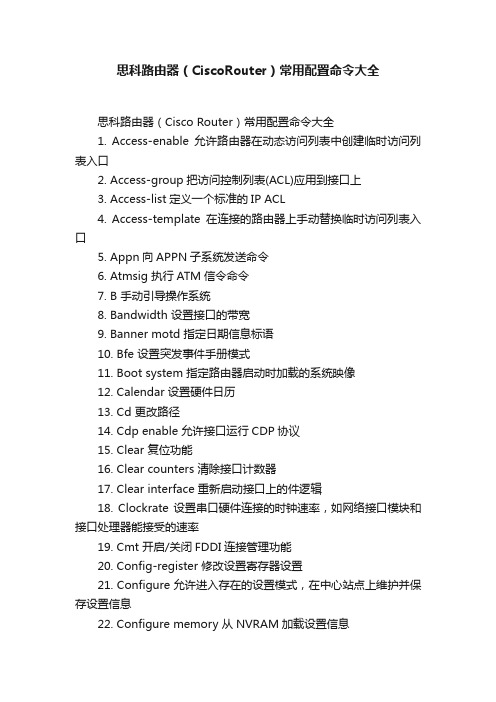
思科路由器(CiscoRouter)常用配置命令大全思科路由器(Cisco Router)常用配置命令大全1. Access-enable允许路由器在动态访问列表中创建临时访问列表入口2. Access-group把访问控制列表(ACL)应用到接口上3. Access-list定义一个标准的IP ACL4. Access-template在连接的路由器上手动替换临时访问列表入口5. Appn向APPN子系统发送命令6. Atmsig 执行ATM信令命令7. B 手动引导操作系统8. Bandwidth 设置接口的带宽9. Banner motd 指定日期信息标语10. Bfe 设置突发事件手册模式11. Boot system 指定路由器启动时加载的系统映像12. Calendar 设置硬件日历13. Cd 更改路径14. Cdp enable 允许接口运行CDP协议15. Clear 复位功能16. Clear counters 清除接口计数器17. Clear interface 重新启动接口上的件逻辑18. Clockrate 设置串口硬件连接的时钟速率,如网络接口模块和接口处理器能接受的速率19. Cmt 开启/关闭FDDI连接管理功能20. Config-register 修改设置寄存器设置21. Configure 允许进入存在的设置模式,在中心站点上维护并保存设置信息22. Configure memory 从NVRAM加载设置信息23. Configure terminal 从终端进行手动设置24. Connect 打开一个终端连接25. Copy 复制设置或映像数据26. Copy flash tftp 备份系统映像文件到TFTP服务器27. Copy running-config startup-config 将RAM中的当前设置存储到NVRAM28. Copy running-config tftp 将RAM中的当前设置存储到网络TFTP服务器上29. Copy tftp flash 从TFTP服务器上下载新映像到Flash30. Copy tftp running-config 从TFTP服务器上下载设置文件31. Debug 使用调试功能32. Debug dialer 显示接口在拨什么号及诸如此类的信息33. Debug ip rip 显示RIP路由选择更新数据34. Debug ipx routing activity 显示关于路由选择协议(RIP)更新数据包的信息35. Debug ipx sap 显示关于SAP(业务通告协议)更新数据包信息36. Debug isdn q921 显示在路由器D通道ISDN接口上发生的数据链路层(第2层)的访问过程37. Debug ppp 显示在实施PPP中发生的业务和交换信息38. Delete 删除文件39. Deny 为一个已命名的IP ACL设置条件40. Dialer idle-timeout 规定线路断开前的空闲时间的长度41. Dialer map 设置一个串行接口来呼叫一个或多个地点42. Dialer wait-for-carrier-time 规定花多长时间等待一个载体43. Dialer-group 通过对属于一个特定拨号组的接口进行设置来访问控制44. Dialer-list protocol 定义一个数字数据接受器(DDR)拨号表以通过协议或ACL和协议的组合来控制控制拨号45. Dir 显示给定设备上的文件46. Disable 关闭特许模式47. Disconnect 断开已建立的连接48. Enable 打开特许模式49. Enable password 确定一个密码以防止对路由器非授权的访问50. Enable password 设置本地口令控制不同特权级别的访问51. Enable secret 为enable password命令定义额外一层安全性(强制安全,密码非明文显示)52. Encapsulation frame-relay 启动帧中继封装53. Encapsulation novell-ether 规定在网络段上使用的Novell 独一无二的格式54. Encapsulation PPP 把PPP设置为由串口或ISDN接口使用的封装方法55. Encapsulation sap 规定在网络段上使用的以太网802.2格式Cisco的密码是sap56. End 退出设置模式57. Erase 删除闪存或设置缓存58. Erase startup-config 删除NVRAM中的内容59. Exec-timeout 设置EXEC命令解释器在检测到用户输入前所等待的时间60. Exit 退出所有设置模式或关闭一个激活的终端会话和终止一个EXEC61. Exit 终止所有设置模式或关闭一个活动的对话和结束EXEC62. format 格式化设备63. Frame-relay local-dlci 为使用帧中继封装的串行线路启动本地管理接口(LMI)64. Help 获得交互式帮助系统65. History 查看历史记录66. Hostname 使用一个主机名来设置路由器,该主机名以提示符或缺省文件名的方式使用67. Interface 设置接口类型并且输入接口设置模式68. Interface 设置接口类型和进入接口设置模式69. Interface serial 选择接口并且输入接口设置模式70. Ip access-group 控制对一个接口的访问71. Ip address 设定接口的网络逻辑地址72. Ip address 设置一个接口地址和子网掩码并开始IP处理73. Ip default-network 建立一条缺省路由74. Ip domain-lookup 允许路由器缺省使用DNS75. Ip host 定义静态主机名到IP地址映射76. Ip name-server 指定至多6个进行名字-地址解析的服务器地址77. Ip route 建立一条静态路由78. Ip unnumbered 在为给一个接口分配一个明确的IP地址情况下,在串口上启动互连网协议(IP)的处理过程79. Ipx delay 设置点计数80. Ipx ipxwan 在串口上启动IPXWAN协议81. Ipx maximum-paths 当转发数据包时设置Cisco IOS软件使用的等价路径数量82. Ipx network 在一个特定接口上启动互连网数据包交换(IPX)的路由选择并且选择封装的类型(用帧封装)83. Ipx router 规定使用的路由选择协议84. Ipx routing 启动IPX路由选择85. Ipx sap-interval 在较慢的链路上设置较不频繁的SAP(业务广告协议)更新86. Ipx type-20-input-checks 限制对IPX20类数据包广播的传播的接受87. Isdn spid1 在路由器上规定已由ISDN业务供给商为B1信道分配的业务简介号(SPID)88. Isdn spid2 在路由器上规定已由ISDN业务供给商为B2信道分配的业务简介号(SPID)89. Isdntch-type 规定了在ISDN接口上的中心办公区的交换机的类型90. Keeplive 为使用帧中继封装的串行线路LMI(本地管理接口)机制91. Lat 打开LAT连接92. Line 确定一个特定的线路和开始线路设置93. Line concole 设置控制台端口线路94. Line vty 为远程控制台访问规定了一个虚拟终端95. Lock 锁住终端控制台96. Login 在终端会话登录过程中启动了密码检查97. Login 以某用户身份登录,登录时允许口令验证98. Logout 退出EXEC模式99. Mbranch 向下跟踪组播地址路由至终端100. Media-type 定义介质类型101. Metric holddown 把新的IGRP路由选择信息和正在使用的IGRP路由选择信息隔离一段时间102. Mrbranch 向上解析组播地址路由至枝端103. Mrinfo 从组播路由器上获取邻居和版本信息104. Mstat 对组播地址多次路由跟踪后显示统计数字105. Mtrace 由源向目标跟踪解析组播地址路径106. Name-connection 命名已存在的网络连接107. Ncia 开启/关闭NCIA服务器108. Network 把一个基于NIC的地址分配给一个和他直接相连的路由器把网络和一个IGRP的路由选择的过程联系起来在IPX路由器设置模式下,在网络上启动加强的IGRP109. Network 指定一个和路由器直接相连的网络地址段110. Network-number 对一个直接连接的网络进行规定111. No shutdown 打开一个关闭的接口112. Pad 开启一个X.29 PAD连接113. Permit 为一个已命名的IP ACL设置条件114. Ping 把ICMP响应请求的数据包发送网络上的另一个节点检查主机的可达性和网络的连通性对网络的基本连通性进行诊断115. Ping 发送回声请求,诊断基本的网络连通性116. Ppp 开始IETF点到点协议117. Ppp authentication 启动Challenge握手鉴权协议(CHAP)或密码验证协议(PAP)或将两者都启动,并且对在接口上选择的CHAP和PAP验证的顺序进行规定118. Ppp chap hostname 当用CHAP进行身份验证时,创建一批似乎是同一台主机的拨号路由器119. Ppp chap password 设置一个密码,该密码被发送到对路由器进行身份验证的主机命令对进入路由器的用户名/密码的数量进行了限制120. Ppp pap sent-username 对一个接口启动远程PAP支持,并且在PAP对同等层请求数据包验证过程中使用sent-username和password121. Protocol 对一个IP路由选择协议进行定义,该协议能是RIP,内部网关路由选择协议。
思科命令大全(完整版)

思科命令大全(完整版)1.设置主机名/系统名IOS:witch(config)#hotname"hotname"CLI:witch(enable)etytemnamename-tring2.设置登录口令IOS:witch(config)#enablepawordlevel1pawordCLI:witch(enable)etpawordwitch(enable)etenalbepa3.设置远程访问IOS:witch(config)#interfacevlan1witch(config-if)#ipaddreip-addrenetmakwitch(config-if)#ipdefault-gatewayip-addreCLI:witch(enable)etinterfacec0ip-addrenetmakbroadcat-addre witch(enable)etinterfacec0vlanwitch(enable)etiproutedefaultgateway4.启用和浏览CDP信息IOS:witch(config-if)#cdpenablewitch(config-if)#nocdpenableCLI:witch(enable)etcdp{enable|diable}module/port5.查看Cico邻接设备的CDP通告IOS:witch#howcdpinterface[typemodle/port]witch#howcdpneighbor[typemodule/port][detail]CLI:witch(enable)howcdpneighbor[module/port][vlan|duple某|capabilitie|detail]6.端口描述IOS:witch(config-if)#decriptionecription-tring CLI:witch(enable)etportnamemodule/numberdecription-tring 7.设置端口速度IOS:witch(config-if)#peed{10|100|auto}CLI:witch(enable)etportpeedmoudle/number{10|100|auto}witch(enable)etportpeedmoudle/number{4|16|auto}8.设置以太网的链路模式IOS:witch(config-if)#duple某{auto|full|half}CLI:witch(enable)etportduple某module/number{full|half}9.配置静态VLANIOS:witch#vlandatabaewitch(vlan)#vlanvlan-numnamevlawitch(vlan)#e某itwitch#configureteriminalwitch(config)#interfaceinterfacemodule/numberwitch(config-if)#witchportmodeaccewitch(config-if)#witchportaccevlanvlan-numwitch(config-if)#endCLI:witch(enable)etvlanvlan-num[namename]witch(enable)etvlanvlan-nummod-num/port-lit10.配置VLAN中继线IOS:witch(config)#interfaceinterfacemod/portwitch(config-if)#witchportmodetrunkwitch(config-if)#witchporttrunkencapulation{il|dotlq}witch(config-if)#witchporttrunkallowedvlanremovevlan-litwitch(config-if)#witchporttrunkallowedvlanaddvlan-litCLI:witch(enable)ettrunkmodule/port[on|off|deirable|auto|nonegotiate] Vlan-range[il|dotlq|dotl0|lane|negotiate]11.配置VTP管理域IOS:witch#vlandatabaewitch(vlan)#vtpdomaindomain-nameCLI:witch(enable)etvtp[domaindomain-name]12.配置VTP模式IOS:witch#vlandatabaewitch(vlan)#vtpdomaindomain-namewitch(vlan)#vtp{ever|cilent|tranparent}witch(vlan)#vtppawordpawordCLI:witch(enable)etvtp[domaindomain-name][mode{ever|cilent|tranparent}][pawordpaword] 13.配置VTP版本IOS:witch#vlandatabaewitch(vlan)#vtpv2-modeCLI:witch(enable)etvtpv2enable14.启动VTP剪裁IOS:witch#vlandatabaewitch(vlan)#vtppruningCLI:witch(enable)etvtppruningenable15.配置以太信道IOS:witch(config-if)#portgroupgroup-number[ditribution{ource|detination}]CLI:witch(enable)etportchannelmoudle/port-rangemode{on|off|deirable|auto}16.调整根路径成本IOS:witch(config-if)#panning-tree[vlanvlan-lit]cotcotCLI:witch(enable)etpantreeportcotmoudle/portcotwitch(enable)etpantreeportvlancotmoudle/port[cotcot][vlan-lit]17.调整端口IDIOS:witch(config-if)#panning-tree[vlanvlan-lit]port-priorityport-priorityCLI:witch(enable)etpantreeportpri{mldule/port}prioritywitch(enable)etpantreeportvlanpri{module/port}priority[vlan] 18.修改STP时钟witch(config)#panning-tree[vlanvlan-lit]ma某-ageecondCLI:witch(enable)etpantreehellointerval[vlan]witch(enable)etpantreefwddelaydelay[vlan]witch(enable)etpantreema某ageagingtiame[vlan]19.启用或禁用PortFat特征IOS:witch(config-if)#panning-treeportfatCLI:witch(enable)etpantreeportfat{module/port}{enable|diable}20.启用或禁用UplinkFat特征IOS:witch(config)#panning-treeuplinkfat[ma某-update-ratepkt-per-econd]CLI:witch(enable)etpantreeuplinkfat{enable|diable}[rateupdate-rate][all-protocoloff|on]为了将交换机配置成一个集群的命令交换机,首先要给管理接口分配一个IP地址,然后使用下列命令:witch(config)#cluterenablecluter-name21.为了从一条中继链路上删除VLAN,可使用下列命令:witch(enable)cleartrunkmodule/portvlan-range22.用howvtpdomain显示管理域的VTP参数.23.用howvtptatitic显示管理域的VTP参数.24.在Catalyt交换机上定义TrBRF的命令如下:witch(enable)etvlanvlan-name[namename]typetrbrfbridgebridge-num[tp{ieee|ibm}]25.在Catalyt交换机上定义TrCRF的命令如下:witch(enable)etvlanvlan-num[namename]typetrcrf{ringhe某-ring-num|decringdecimal-ring-num}parentvlan-num26.在创建好TrBRFVLAN之后,就可以给它分配交换机端口.对于以太网交换,可以采用如下命令给VLAN分配端口:witch(enable)etvlanvlan-nummod-num/port-num27.命令howpantree显示一个交换机端口的STP状态.28.配置一个ELAN的LES和BUS,可以使用下列命令:ATM(config)#interfaceatmnumber.ubintmultiointATM(config-ubif)#laneerber-buethernetelan-name29.配置LECS:ATM(config)#lanedatabaedatabae-nameATM(lane-config-databade)#nameelan1-nameerver-atm-addrele1-nap-addreATM(lane-config-databade)#nameelan2-nameerver-atm-addrele2-nap-addreATM(lane-config-databade)#name...30.创建完数据库后,必须在主接口上启动LECS.命令如下:ATM(config)#interfaceatmnumberATM(config-if)#laneconfigdatabaedatabae-nameATM(config-if)#laneconfigauto-config-atm-addre31.将每个LEC配置到一个不同的ATM子接口上.命令如下:ATM(config)#interfaceatmnumber.ubintmultipointATM(config)#laneclientethernetvlan-numelan-num32.用howlaneerver显示LES的状态.33.用howlanebu显示bu的状态.34.用howlanedatabae显示LECS数据库可内容.35.用howlaneclient显示LEC的状态.36.用howmodule显示已安装的模块列表.37.用物理接口建立与VLAN的连接:router#configureterminalrouter(config)#interfacemediamodule/portrouter(config-if)#decriptiondecription-tringrouter(config-if)#ipaddreip-addrubnet-makrouter(config-if)#nohutdown38.用中继链路来建立与VLAN的连接:router(config)#interfacemodule/port.ubinterface router(config-ig)#encapulation[il|dotlq]vlan-number router(config-if)#ipaddreip-addreubnet-mak39.用LANE来建立与VLAN的连接:router(config)#interfaceatmmodule/portrouter(config-if)#noipaddrerouter(config-if)#atmpvc105qaalrouter(config-if)#atmpvc2016ilnirouter(config-if)#interfaceatmmodule/port.ubinterfacemultipointrouter(config-if)#ipaddreip-addreubnet-makrouter(config-if)#laneclientethernetelan-numrouter(config-if)#interfaceatmmodule/port.ubinterfacemultipointrouter(config-if)#ipaddreip-addreubnet-namerouter(config-if)#laneclientethernetelan-namerouter(config-if)#...40.为了在路由处理器上进行动态路由配置,可以用下列IOS命令来进行:router(config)#iproutingrouter(config)#routerip-routing-protocolrouter(config-router)#networkip-network-numberrouter(config-router)#networkip-network-number41.配置默认路由:witch(enable)etiproutedefaultgateway42.为一个路由处理器分配VLANID,可在接口模式下使用下列命令:router(config)#interfaceinterfacenumberrouter(config-if)#mlrpvlan-idvlan-id-num43.在路由处理器启用MLSP:router(config)#mlrpip44.为了把一个外置的路由处理器接口和交换机安置在同一个VTP域中:router(config)#interfaceinterfacenumberrouter(config-if)#mlrpvtp-domaindomain-name45.查看指定的VTP域的信息:router#howmlrpvtp-domainvtpdomainname46.要确定RSM或路由器上的管理接口,可以在接口模式下输入下列命令:router(config-if)#mlrpmanagement-interface47.要检验MLS-RP的配置情况:router#howmlrp48.检验特定接口上的MLS配置:router#howmlrpinterfaceinterfacenumber49.为了在MLS-SE上设置流掩码而又不想在任一个路由处理器接口上设置访问列表:etmlflow[detination|detination-ource|full]50.为使MLS和输入访问列表可以兼容,可以在全局模式下使用下列命令:router(config)#mlrpipinput-acl51.当某个交换机的第3层交换失效时,可在交换机的特权模式下输入下列命令:witch(enable)etmlenable52.若想改变老化时间的值,可在特权模式下输入以下命令:54.确定那些MLS-RP和MLS-SE参与了MLS,可先显示交换机引用列表中的内容再确定:witch(enable)howmlinclude55.显示MLS高速缓存记录:witch(enable)howmlentry56.用命令howinarp显示ARP高速缓存区的内容。
思科交换机路由器命令大全
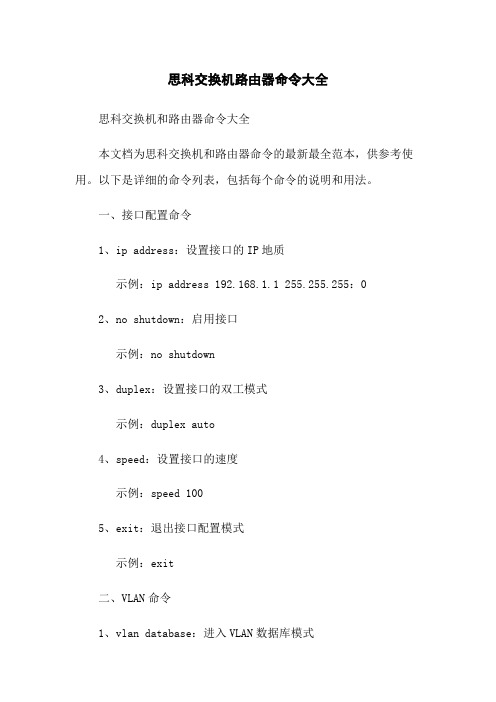
思科交换机路由器命令大全思科交换机和路由器命令大全本文档为思科交换机和路由器命令的最新最全范本,供参考使用。
以下是详细的命令列表,包括每个命令的说明和用法。
一、接口配置命令1、ip address:设置接口的IP地质示例:ip address 192.168.1.1 255.255.255:02、no shutdown:启用接口示例:no shutdown3、duplex:设置接口的双工模式示例:duplex auto4、speed:设置接口的速度示例:speed 1005、exit:退出接口配置模式示例:exit二、VLAN命令1、vlan database:进入VLAN数据库模式示例:vlan database2、vlan id name:创建VLAN并设置名称示例:vlan 10 name VLAN-103、vlan id:删除VLAN示例:no vlan 104、show vlan:显示VLAN信息示例:show vlan5、exit:退出VLAN数据库模式示例:exit三、路由命令1、ip route:设置静态路由示例:ip route 192.168.2:0 255.255.255:0 192.168.1.22、router rip:启用RIP路由协议示例:router rip3、network:将网络添加到RIP路由表中示例:network 10:0:0:04、redistribute:将静态路由或其他路由协议添加到RIP路由表中示例:redistribute static5、exit:退出路由配置模式示例:exit四、ACL命令1、access-list:创建标准或扩展ACL示例:access-list 10 permit 192.168.1:0 0:0:0.2552、ip access-group:应用ACL到接口示例:ip access-group 10 in3、show access-lists:显示ACL信息示例:show access-lists4、exit:退出ACL配置模式示例:exit五、SNMP命令1、snmp-server community:设置SNMP团体字符串示例:snmp-server community public RO2、snmp-server enable traps:启用SNMP陷阱示例:snmp-server enable traps3、snmp-server host:配置SNMP陷阱接收主机示例:snmp-server host 192.168.1.1004、exit:退出SNMP配置模式示例:exit六、SSH命令1、ip ssh version:设置SSH协议版本示例:ip ssh version 22、crypto key generate rsa:RSA密钥对示例:crypto key generate rsa3、username:创建新的本地用户示例:username admin privilege 15 password password1234、exit:退出SSH配置模式示例:exit七、其他命令1、show running-config:显示当前配置示例:show running-config2、copy running-config startup-config:将当前配置保存到启动配置中示例:copy running-config startup-config3、reload:重新启动设备示例:reload4、exit:退出CLI命令行模式示例:exit本文档涉及附件:1、无附件本文所涉及的法律名词及注释:1、ACL(Access Control List):访问控制列表,用于控制网络流量的进出。
Cisco设备配置基本命令详解全

Cisco设备配置基本命令详解交换机支持的命令:switch: ;交换机的ROM状态1.rommon> ; 路由器的ROM状态hostname> ;用户模式hostname# ;特权模式hostname(config)# ;全局配置模式hostname(config-if)# ;接口状态交换机口令设置:switch>enable ;进入特权模式switch#config terminal ;进入全局配置模式switch(config)#hostname <hostname> ;设置交换机的主机名switch(config)#enable secret xxx ;设置特权加密口令switch(config)#enable password xxa ;设置特权非密口令switch(config)#line console 0 ;进入控制台口switch(config-line)#line vty 0 4 ;进入虚拟终端switch(config-line)#login ;允许登录switch(config-line)#password xx ;设置登录口令xxswitch#exit ;返回命令交换机VLAN设置:switch#vlan database ;进入VLAN设置switch(vlan)#vlan 2 ;建VLAN 2switch(vlan)#no vlan 2 ;删vlan 2switch(config)#int f0/1 ;进入端口1switch(config-if)#switchport access vlan 2 ;当前端口加入vlan 2 switch(config-if)#switchport mode trunk ;设置为干线switch(config-if)#switchport trunk allowed vlan 1,2 ;设置允许的vlan switch(config-if)#switchport trunk encap dot1q ;设置vlan 中继switch(config)#vtp domain <name> ;设置发vtp域名2.switch(config)#vtp password <word> ;设置发vtp密码switch(config)#vtp mode server ;设置发vtp模式switch(config)#vtp mode client ;设置发vtp模式交换机设置IP地址:switch(config)#interface vlan 1 ;进入vlan 1switch(config-if)#ip address <IP> <mask> ;设置IP地址switch(config)#ip default-gateway <IP> ;设置默认网关switch#dir flash: ;查看闪存交换机显示命令:switch#write ;保存配置信息switch#show vtp ;查看vtp配置信息switch#show run ;查看当前配置信息switch#show vlan ;查看vlan配置信息switch#show interface ;查看端口信息switch#show int f0/0 ;查看指定端口信息2. 路由器支持的命令:路由器显示命令:router#show run ;显示配置信息router#show interface ;显示接口信息router#show ip route ;显示路由信息router#show cdp nei ;显示邻居信息router#reload ;重新起动路由器口令设置:router>enable ;进入特权模式router#config terminal ;进入全局配置模式router(config)#hostname <hostname> ;设置交换机的主机名router(config)#enable secret xxx ;设置特权加密口令router(config)#enable password xxb ;设置特权非密口令router(config)#line console 0 ;进入控制台口router(config-line)#line vty 0 4 ;进入虚拟终端router(config-line)#login ;要求口令验证router(config-line)#password xx ;设置登录口令xxrouter(config)#(Ctrl+z) ;返回特权模式router#exit ;返回命令路由器配置:router(config)#int s0/0 ;进入Serail接口router(config-if)#no shutdown ;激活当前接口router(config-if)#clock rate 64000 ;设置同步时钟router(config-if)#ip address <ip> <netmask> ;设置IP地址router(config-if)#ip address <ip><netmask> second ;设置第二个IP router(config-if)#int f0/0.1 ;进入子接口router(config-subif.1)#ip address <ip><netmask> ;设置子接口IP router(config-subif.1)#encapsulation dot1q <n> ;绑定vlan中继协议router(config)#config-register 0x2142 ;跳过配置文件router(config)#config-register 0x2102 ;正常使用配置文件router#reload ;重新引导路由器文件操作:router#copy running-config startup-config ;保存配置router#copy running-config tftp ;保存配置到tftprouter#copy startup-config tftp ;开机配置存到tftprouter#copy tftp flash: ;下传文件到flashrouter#copy tftp startup-config;下载配置文件ROM状态:Ctrl+Break ;进入ROM监控状态rommon>confreg 0x2142 ;跳过配置文件rommon>confreg 0x2102 ;恢复配置文件rommon>reset;重新引导rommon>copy xmodem:<sname> flash:<dname> ;从console传输文件rommon>IP_ADDRESS=10.65.1.2 ;设置路由器IPrommon>IP_SUBNET_MASK=255.255.0.0 ;设置路由器掩码rommon>TFTP_SERVER=10.65.1.1 ;指定TFTP服务器IPrommon>TFTP_FILE=c2600.bin ;指定下载的文件3.rommon>tftpdnld ;从tftp下载rommon>dir flash: ;查看闪存内容rommon>boot ;引导IOS静态路由:ip route <ip-address> <subnet-mask> <gateway> ;命令格式router(config)#ip route 2.0.0.0 255.0.0.0 1.1.1.2 ;静态路由举例router(config)#ip route 0.0.0.0 0.0.0.0 1.1.1.2 ;默认路由举例动态路由:router(config)#ip routing ;启动路由转发router(config)#router rip ;启动RIP路由协议。
2024版思科网络交换机配置命令详细总结归纳

VLAN间路由配置
01 02 03 04
使用`interface`命令进入三层接口配置模式,如`interface vlan 10`进入 VLAN 10的三层接口。
源端口和目的端口散列
同时考虑数据包的源端口和目的端口进行负载均衡。
配置负载均衡策略
在全局配置模式下使用`port-channel load-balance`命令进行配置。
端口聚合故障排除技巧
01
检查物理连接
确保所有参与聚合的物理端口都已 正确连接。
03
检查交换机配置
确认交换机的配置是否正确,包括 聚合模式、聚合组号等。
限制登录用户
指定允许通过SSH远程登录的用户或用户组。
交换机日志与审计功能启用
启用日志功能
将交换机操作记录到日志文件中,方便后续 审计和分析。
远程日志服务器
将日志文件发送到远程日志服务器进行集中 存储和管理。
配置日志级别
根据需要设置日志记录的详细程度(如信息、 警告、错误等)。
审计功能
启用审计功能,对特定操作进行实时监控和 记录。
思科网络交换机配置命令详细 总结归纳
目 录
• 交换机基本配置 • VLAN配置与管理 • 生成树协议(STP)配置与优化 • 端口聚合(EtherChannel)配置与应用 • 交换机安全性设置与加固 • 交换机性能监控与故障排除
01
交换机基本配置
交换机登录与访问控制
1 2
通过控制台端口登录 使用终端仿真软件通过控制台端口连接到交换机, 输入用户名和密码进行登录。
思科路由器常用配置命令大全
Frame-relay local-dlci 为使用帧中继封装的串行线路启动本地管理接口(LMI)
Help 获得交互式帮助系统
History 查看历史记录
Hostname 使用一个主机名来配置路由器,该主机名以提示符或者缺省文件名的方式使用
Exec-timeout 配置EXEC命令解释器在检测到用户输入前所等待的时间
Exit 退出所有配置模式或者关闭一个激活的终端会话和终止一个EXEC
Exit 终止任何配置模式或关闭一个活动的对话和结束EXEC
思科路由器常用配置命令大全(三)
Ipx network 在一个特定接口上启动互联网数据包交换(IPX)的路由选择并且选择封装的类型(用帧封装)
Ipx router 规定使用的路由选择协议
Ipx routing 启动IPX路由选择
Ipx sap-interval 在较慢的链路上设置较不频繁的SAP(业务广告协议)更新
Ip address 设置一个接口地址和子网掩码并开始IP处理
Ip default-network 建立一条缺省路由
Ip domain-lookup 允许路由器缺省使用DNS
Ip host 定义静态主机名到IP地址映射
Ip name-server 指定至多6个进行名字-地址解析的服务器地址
Ping 把ICMP响应请求的数据包发送网络上的另一个节点检查主机的可达性和网络的连通性对网络的基本连通性进行诊断
Ping 发送回声请求,诊断基本的网络连通性
Ppp 开始IETF点到点协议
Ppp authentication 启动Challenge握手鉴权协议(CHAP)或者密码验证协议(PAP)或者将两者都启动,并且对在接口上选择的CHAP和PAP验证的顺序进行规定
- 1、下载文档前请自行甄别文档内容的完整性,平台不提供额外的编辑、内容补充、找答案等附加服务。
- 2、"仅部分预览"的文档,不可在线预览部分如存在完整性等问题,可反馈申请退款(可完整预览的文档不适用该条件!)。
- 3、如文档侵犯您的权益,请联系客服反馈,我们会尽快为您处理(人工客服工作时间:9:00-18:30)。
干货!思科网络设备配置命令大全础配置1思科设备管理基础命令enable 从用户模式进入特权模式configure terminal 进入配置模式interface g0/0进入千兆以太网接口g0/0ip address 172.16.0.1 255.255.0.0配置接口的 ip 地址no shutdown 开启接口line vty 0 4进入虚拟终端 vty 0 - vty 4password CISCO配置认证密码login 用户要进入路由器,需要先进行登录exit 退回到上一级模式enable password CISCO配置进入特权模式的密码,密码不加密end 直接回到特权模式show int g0/0 显示 g0/0 接口的信息hostname Terminal-Server 配置路由器的主机名enable secret ccielab 配置进入特权模式的密码,密码加密no ip domain-lookup 路由器不使用 DNS 服务器解析主机的 IP地址logging synchronous 路由器上的提示信息进行同步,防止信息干扰我们输入命令no ip routing 关闭路由器的路由功能ip default-gateway 10.1.14.254 配置路由器访问其他网段时所需的网关show line 显示各线路的状态line 33 48 进入 33-48 线路模式transport input all 允许所有协议进入线路int loopback0 进入 loopback0 接口ip host R1 2033 1.1.1.1 为 1.1.1.1 主机起一个主机名alias exec cr1 clear line 33 为命令起一个别名privilege exec level 0 clear line把命令 clear line 的等级改为 0,在用户模式下也可以执行它banner motd 设置用户登录路由器时的提示信show ip int brief 查看接口状态2VLAN相关命令vlan X 创建VLAN Xname SPOTO 将VLAN X命名为SPOTOexit 退出当前模式interface e0/0 进入以太网接口e0/0switchport mode access 将二层接口设置为接入模式switchport access vlan X 将接口划入vlan Xinterface e0/1switchport trunk encapsulation dot1q trunk链路封装协议为 802.1qswitchport mode trunk 将二层接口配置模式为 trunkswitchport trunk allow vlan X trunk接口单独放行某个 vlan。
Show vlan 查看设备vlan信息3VTP相关配置命令vtp domain SPTO 配置VTP域名vtp mode server 修改模式(默认为 server)vtp pass SPOTO 配置密码VTP密码vtp version 2 修改版本vtp pruning 开启VTP修剪功能show vtp status 查看VTP信息4Ethernetchannel相关配置命令interface ran ge e0/0 -1 批量进入接口channel-pro lacp 启用 lacp 协议channel-group 1 mode active 捆绑组 1 模式:主动interface port-channel 1 进入逻辑链路show etherchannel summary 查看捆绑组5HSRP(Cisco 私有)/VRRP配置命令spandby/vrrp 10 ip 192.168.1.254 设置虚拟网关spandby/vrrp 10 priority110 修改优先级为 110(默认100)spandby/vrrp 10 preempt 开启抢占track 10 interface e0/0 line_protocol 启用链路检测standby/vrrp 10 track 10 decrement 20 如果断开则自降优先级级 20 show hsrp/vrrp brief 查看 hsrp/vrrp 状态6STP配置命令spanning-tree cost 10 修改接口开销值spanning-tree vlan x cost 10 针对一个 vlan 修改开销值spanning-tree vlan x priority 0 或spanning-tree vlan x root priority 将设备设置为vlan x的主根桥spanning-tree vlan x priority 4096 或spanning-tree vlan x root secondary 将设备设置为vlan x的备份根桥show spanning-tree brief 查看生成树状态7MSTP配置命令spanning-tree mode mst 修改生成树模式为MSTPspanning-tree mst conf 进入MSTP配置模式instance 1 vlan 10,20 创建实例1并将vlan10、20纳入实例1instance 2 vlan 30,40 创建实例2并将vlan30、40纳入实例2spanning-tree mst 1 priority 0 配置实例 1 为根桥spanning-tree mst 2 priority 4096 配置实例 2 为备根桥show spanning-tree mst 1 查看实例路由配置一、静态路由Ip route x.x.x.x(网段) x.x.x.x( 子网掩码) x.x.x.x/出接口(下一跳) (尽量用下一跳地址,出接口会产生 ARP 消息)默认路由:Ip route 0.0.0.0 0.0.0.0 x.x.x.x(下一跳)黑洞路由:IP route x.x.x.x x.x.x.x null 0 将不需要的流量丢弃到 null 0(黑洞接口)Loopback 接口:Interface loopback 0Interface loopback 1Interface loopback 2BFD双向转发检测:Interface ethernet0/0Bfd interval 50 min_rx 50 multiplier 3接口开启BFD检测,50ms发送一次探测帧,3次超时Ip route static bfd e0/0 x.x.x.xIp route 1.1.1.1 255.255.255.255 e0/0 x.x.x.x 静态路由联动BFDShow bfd neighboor 查看BFD邻居二、动态路由Rip:Router rip启动 rip 进程Version 2 指定版本 2Network x.x.x.x宣告网段No auto-summary 关闭自动汇总重点Default-information originate默认路由下发Redistribute static静态路由重分布EIgrp (cisco 私有):Router eigrp 1 同区域同 AS 号Network x.x.x.x x.x.x.x (反掩码)宣告网段No auto-summary关闭自动汇总Ospf :Router-id x.x.x.x 设置 routeIDRouter ospf 1 启动 ospf 进程为 1Network x.x.x.x x.x.x.x area 0宣告网段,这里区域为 0Ip ospf network x.x.x.x 接口下更改 ospf 网络类型Show ip ospf nei 查看 ospf 邻居Show ip ospf interface brief 查看接口关于 ospf 的信息Show ip route ospf 查看 ospf 路由Show ip ospf database查看 ospf 链路状态数据库Debug ip ospf adj 查看 ospf 邻居关系建立过程Debug ip ospf hello查看 ospf hello 包Debug ip ospf events 查看 ospf 相关事件DHCP:Service dhcp 开启 dhcp (默认开启)IP dhcp pool name 设置地址池名称Network 192.168.1.0 255.255.255.0 指定可分配网段Default-router 192.168.1.254 下发网关Dns-server 8.8.8.8 下发 dnsip dhcp excluded-address 192.168.1.254 排除这个地址不做分配Pc端:interface e0/0Ip add dhcp地址通过DHCP方式获取DHCP 中继:Int vlan xIp add x.x.x.x x.x.x.xIp helper-address 192.168.1.254 (dhcp 服务器上的接口) 指向 dhcp 服务器Show ip dhcp pool name查看 dhcp 地址池三、ACL 访问控制列表标准 ACL:1-99 “No access-list 一条”将会删除整个 ACL 列表。
Access-list 1 deny x.x.x.x x.x.x.x 拒绝某网段通过Access-list 1 permit any 允许所有通过Inter e0/0Ip access-group 1 in 进接口下调用配置了 ACL 一定要在接口下调用,否则不生效,或者接口下调用了,全局下没有这个ACL 也不生效。
扩展 ACL:100-199 “No access-list 一条”将会删除整个 ACL 列表。
Access-list(100-199) per/deny 协议(IP 代表所有 TCP/IP 协议)x.x.x.x(源地址) 反掩码端口号(选加) x.x.x.x(目的) 反掩码(不加默认为 0.0.0.0)端口号(选加)Access-list 100 deny(拒绝或允许) tcp(协议) any(源地址) host(精确主机,)x.x.x.x (不加反掩码默认为 0.0.0.0)eq 23 或者 access-list 100 deny tcp any x.x.x.x 0.0.0.0 eq 23 拒绝所有的 TCP 协议访问 x.x.x.x 的 23端口Access-list 100 permit ip(所有 TCP/IP 协议) any(源) any(目的)允许所有Int e0/1进入接口Ip access-group 1 out 调用在出接口Show ip access-list 编号查看 ACLShow ip access-list int vlan xShow run | sec access-list 查看 ACL 配置字符命名 ACLIp access-list standard(标准)/extended(扩展) name创建命名 ACL,如果name 用数字命名,则会进入到数字 ACL 下,并不是字符命名 ACL。