Kubit PointCloud 处理软件说明书
Revit Point Cloud 数据使用指南说明书

AS322316Get to the Point - A users guide to sourcing and using Point clouds for RevitKris McIsaacJacobsLearning Objectives·understand how a clients requirements may affect the capture and use of point clouds [Learning·Brief your surveyors to provide a fit for purpose point cloud·Utilize Point Cloud data inside the Revit modelling environment to produce fit for purpose models·Create Revit families to improve existing conditions modelling from point cloudsDescriptionPoint clouds are now very common but often they are provided without proper consideration of the end use or end users of the data. This class will demonstrate briefing processes for both your clients and surveyors to ensure the captured data is fit for your purposes and tips and tricks for using the data efficiently in Revit to produce models to satisfy any intended use SpeakerKris McIsaacJacobs Project Technology - Buildings and InfrastructureIntroductionPointcloud technology has been around for some time and has become mainstream in the last 5-10 years, however without being specific about the requirements and expectations from a laser survey the use of pointclouds in design or engineering processes can be less than ideal. Pointclouds are typically generated by Laser scanners. These can vary in size and capability from small portable devices to large mobile systems mounted to a vehicle. As such the eventual output can also vary. By understanding these variations and the capabilities of the equipment we can work with our surveyors to produce the most suitable data from a laser survey.Even with smaller more affordable systems most point clouds are still provided by surveyors. It is critical to communicate the requirements of the survey to ensure the received data will be fit for purpose.With many advantages over traditional survey methods and modern hardware and software able to quickly process and read point cloud data it is becoming business as usual for many surveyors to produce.This presentation focuses on developing a brief of client requirements, conveying these requirements to the surveyors and then working with the received files to produce existing conditions 3D Revit models.Client requirements and briefIt is critical to determine the key requirements of the eventual deliverables to ensure the survey captures critical items or areas. Different clients / users will have different requirements from the existing conditions models. Some may focus on fixtures and fittings while others may require detailed structural steel connections.By documenting these requirements, you can successfully brief the surveyors to capture the right data as well as the modelers who will be converting from point cloud to Revit. This brief can then be used to audit the models before handover.Failing to fully understand the future model use can lead to re-work, additional site survey or a less than ideal deliverableFigure 1- example survey briefSurvey BriefSurveyors naturally have their own typical workflows which may not align perfectly with your requirements. Without specific briefing they may capture as much of a space or asset with the least number of scans as possible. This may result in critical details or items being missed or not captured with the right amount of detail and at the other end of the spectrum, they might work on a 2mm tolerance with very rigid controls which will take longer than needed and potentially waste a stack of money.Tips:·Discuss and create a plan of the space or asset and look at potential scan locations.Use a floor plan if possible. Look for potential obstructions·Specify in writing what the key requirements are and explain what you will do with the models·Discuss Point Cloud format and consider density and accuracy.·For architectural projects a coloured point cloud is very usefulFigure 2- I have no affiliation to Leica or any other hardware brands. This was just a nice image from google (also noaffiliation to them)USING POINT CLOUDS IN REVITRevit has been able to natively link Point clouds since Version 2012. Autodesk has their own proprietary point cloud format (RCS / RCP). If not already in this format it will have to be converted. Revit 2018 and previous will do this conversion if you try to link any other point cloud format.Since 2019 this functionality has been removed and the conversion to an Autodesk format needs to be done in Autodesk Recap. Recap can also be used to crop the point cloudCOORDINATESCoordinates need to be considered. You can’t acquire coordinates from a point cloud and it will not display correctly if a large distance from the origin. If coordinates have not already been established in your Revit model an accompanying CAD plan from the Surveyor can be used to set coordinates and then the point cloud can be linked directly using Shared coordinates.If coordinates have been established before the point cloud survey the details of this coordinate system should be provided to the surveyor to allow them to align the point cloud to match. The point cloud should then link using shared coordinatesIf coordinates have not been established and no CAD file is available, the point cloud can be linked to a temporary Revit model origin to origin. Create some geometry near the point cloud location (likely a long way from the origin and a bit jumpy). Save this file and link to your actual model using centre to centre. Manually position the link as desired and acquire the coordinates. Remove this link once coordinates are acquired and link the point cloud directly using shared coordinatesIdeally this should be discussed in the initial briefing with your surveyor however in some cases you may receive a previously completed point cloud or were not involved in the engagement process. In some cases, the point cloud is provided with an arbitrary datum point. This is typically near enough to 0,0,0 to link into Revit and align manuallyMODEL DETAIL AND ACCURACYTraditional LOD definitions do not fit the point cloud to existing conditions model workflow. These describe data graphically and non-graphically that we cannot necessarily know from a point cloud such as the layers behind a wall finish, fire ratings or even the finish and material that is visible apart from the colour.Instead look at the model in terms of detail and accuracy. Detail relates to the amount of geometry and intricacy of a model or component whereas accuracy relates to any deflection, skew or deformation of the model or componentExample: A row of timber windows in a turn of the century church. Detail may include the sash profiles, chamfers and hardware whereas accuracy will determine the tolerances before modelling sag and skew of the frames or any differences between each instance.Project North / Scope boxesSetting Project North for rectilinear projects can make modelling processes more efficient however the client may want the model to be handed over without a project North established. An alternative is to create scope boxes to rotate the views to align with the structre or asset.As with traditional surveys you don’t get nice straight lines. You need to find the longest straightest thing you can to establish Project North rotation or a scope box. Draw a few reference planes on straight bits of wall and see what looks good.TIP:Raise the bottom view range up from the floor to better help you see the wall face.TIP:Even once a North rotation or scope box has been established many parts of the model may not align perfectly. Depending on the agreed tolerances you may be required to model these deviations. Using the snap override “SO” will allow you to model items such as walls slightly off axis. Sometimes zooming right in to the object is required to see the best fit with the points Levelsas above, things are not always straight or flat. Floors can sag, floor finishes can give you slightly different results depending on where you cut. A good idea on a multi-level building is to cut through a stair well or lift shaft and find the floor levels adjacent. Often floor to floor heights are consistent and round numbers (+ a few millimeters)Figure 3 - floor to floor heights are often consistent on multi-level structures (except this one that I chose as an example)GridsNo row of columns is every perfectly straight or square. This really is a best fit situation but like levels, grid to grid will often be consistent. Most of the time the grid spacing is a common and round number so you can lay the grids out, lock the dimensions and nudge them as needed to get a good fit.Keep in mind that grids for existing structure can’t really be used to measure from as they don’t actually exist in the real world.Make sure to model the columns as close as possible to the survey as these will likely be measured from. Also, think about grid linings, will this be stripped off during reno / demolition? That won’t help your dimensions much.PhasingYour scan is typically an existing condition record. You can apply a phase to the point cloud link so put it on the existing phase. Set your views to existing and model on the existing phase. It is a good idea to audit phasing before handing over the modelViewsthe one thing you need to do to model with point clouds is chop, chop, chop. Use lots of temporary section and plan views.Don’t bother with view templates, at least not ones that control view range. And use the section box a lot.In plan raising the bottom clip up from the floor and above the majority of furniture to isolate just the walls or columns can help with wall layouts. Section range can be kept very small to see the exact alignment of an item that is being cut such as steel profilesWhen modelling large flat surfaces like walls or ceilings place them as best as I can in plan but always view them in 3D and nudge them back and forward to get a good mix of geometry and dots. It can also be a good way to identify deflectionIf your model needs to be handed over with some specific views use a filter in the browser to turn them off while modelling. It just makes it easier to bounce around your working viewsRevit FamiliesNatively you can’t link point clouds into the family editor. As such, modelling component families for use with point clouds is more difficult. Some 3rd party software may be able to help. Another option is to use in-place families, especially with more decorative buildings. Like with conventional Revit, if it is a one off it will likely be ok. Just make sure it is on the correct category and properly namedEven with one off items you can convert the in-place family to a component for reuse. Some people will try to copy and paste the geometry from the project to the family but that doesn’t always go as planned. The better method is to save the family out from the in-place editorIn-place to Component workflow:·First, model the in-place family using the point cloud as a reference.·While still in the family editor mode select all the geometry and group it (gp).·Before finishing the family and exiting the family editor find the group in the browser and right click save as RFA.·Now finish or cancel the family.·This has converted the in-place family to a component.·Before loading the new family into your project open the newly created rfa in the family editor.·You will find that the geometry is at the same elevation as the project so it may need to be moved back down (or up) to the base level.·You can now update the family as desired with additional geometry, parameters, detail linework or even parametric controls and load into your projectSystem FamiliesAs with modelling in-place families you also need to consider the detail and accuracy required from system families. Generally, there is no way of knowing what is under the visible surface so generic single layer families of various thicknesses can be used. In some cases, a paint finish can be applied or if visible from both sides and obviously a monolithic structure a specific family type can be used.Due to Revit’s preference for straight and flat surfaces modelling deviations and skew can be a little harder. In many cases a small amount of deviation is acceptable, but it is important to identify what items, categories or locations may have specific acceptable tolerancesComponent familiesAgain, detail and accuracy requirements should be discussed and documented before modelling commences. This will determine how much of your existing library can easily fit into an existing conditions workflow. Are your current doors flexible enough to satisfy the end user of the model for example? Consider instance Vs type for parametrically adjustable items. It is often easier to use grips and stretch to fit however many families are type based.SummaryThe key to producing fit for purpose existing conditions models using point clouds is to understand the client or end users’ requirements for these models and ensure this information is communicated to the surveyors and modelers.Being specific about what areas or items to focus on will ensure the surveyors maximise their time on site and provide a point cloud with all the necessary data to easily convert to a 3D model.Those same requirements along with detail and accuracy requirements will inform the modelers on what needs to be produced and can be used to audit the deliverables prior to hand over.。
Kubit软件介绍

KubitPointCloud软件集成在AutoCAD平台下,保证了点云数据的精确性,以及用户的操作性。
功能特点(1)在AutoCAD中显示、分析、处理数以亿计的三维点。
(2)简洁、高效的操作命令。
如:自动拟合线、拟合面、快速定义用户坐标系。
(3)独有的切片功能,令绘图更加快速、准确。
(4)通过拟合线功能,自动对点云进行跟踪捕捉,生成平立面图。
(5)高效直观的“层”管理器,可以为每一块数据进行色彩区分、显示/隐藏,即使再多的站点也可以有效进行管理,对机器内存收放自如。
(6)快速截面功能,瞬间截取所需截面效果,自动拟合线,用于建筑剖面结构图,隧道截面图、等高线图。
(7)使用点云生成高分辨率的正射影像,使绘图更加简便、高效。
生成的正射影像图还可以用于数字化存档。
(8)PointCloud提供了一种绝佳的绘图功能-图像真实绘图,结合了点云的三维空间优势及照片的高分辨率优势,通过匹配在点云上的照片直接进行绘图,相应的线会直接绘制在真实的位置上,不再因为点云的密度而丢失掉细节。
(9)PointCloud可以使Faro Scene、RiscanPro与AutoCAD实时传输,同时打开两个软件就可以根据扫描的点云影像实时绘图(10)PointCloud支持在南方cass软件下运行,对点云数据进行地形图的绘制。
(11)高程地图图例使用更改颜色命令,用户可能会通过当前用户坐标系的XY平面的距离对截面进行着色。
通过这种方式,点云高程地图的创建就无需定义任意的切片了。
(12)平面物体形变分析(13)3D模型和Kubit平面命令,生成空间三面体。
因此相交点和选择的三个平面相交线是可见的。
此命令使通过平面方式生成3D线框模型变得更加简单。
库云设备远程监控平台使用手册V1.1
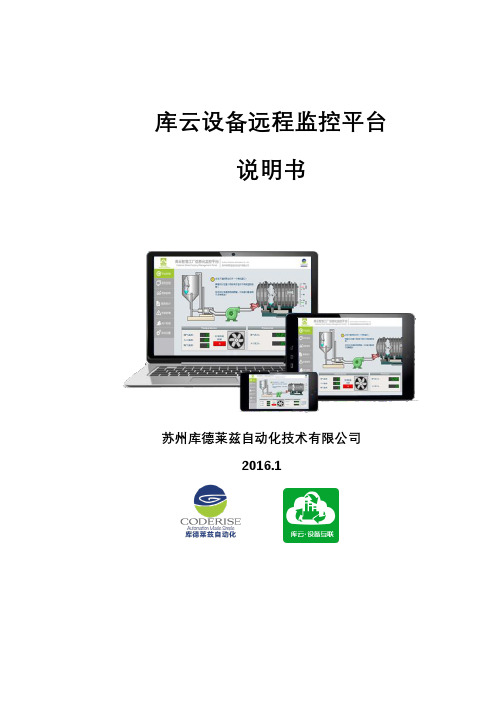
库云设备远程监控平台说明书苏州库德莱兹自动化技术有限公司2016.1目录第一章平台介绍 (3)第二章准备工作 (3)2.1运行环境 (3)2.2下载客户端 (3)第三章功能详解 (4)3.1进入平台 (4)3.2登录界面 (4)3.3进入【平台总览】 (5)3.4实时监控 (6)3.5图表趋势 (8)3.6报表统计 (11)3.7设备管理 (12)3.8告警管理 (12)3.9售后管理 (15)3.10权限管理 (16)第四章附录 (18)第一章平台介绍库云平台具有灵活的可配置性、线性可扩展性及海量数据监控等技术优势,实时获取和监控设备的运行状态和海量数据。
即时发现、诊断和修复设备,确保各生产设备及其子系统处于最佳运行状态,解决其对设备的远程监控和维修维护问题。
通过本系统,设备厂家可以对所售出的设备进行全面有效的信息采集、监控、维护和升级。
本系统也可与ERP、PDM 等系统做对接,提升数据传输的时效性和信息系统的集成化。
第二章准备工作2.1运行环境●操作系统:Windows XP/Vista/7/8/Server 2008/Server 2012Ubuntu Linux 12.04+Mac OS X以及其他正常运行Java SE 6+的系统●JAVA运行环境:由于平台需要JAVA运行环境支持,在进入演示平台之前请根据自身电脑操作系统环境,选择安装JRE(Java Runtime Environment,即Java运行环境)。
本文第四章附录有Windows 32位及64位JRE安装包,用户可自行选择安装。
2.2下载客户端客户端链接位于本文第四章附录中,点击即可下载。
我们采用JNLP技术,您只需下载1Kb的瘦客户端即可。
无需繁琐的安装、调试。
第三章功能详解3.1进入平台下载完客户端后,双击名为【showtime】客户端图标,进入库云信息化云平台,如图3.1所示。
图3.1 桌面图标初次使用,会有一个加载项目的过程,jnlp客户端需要从服务器调用所需资源和数据,并初始化系统、脚本等,如图3.2、图3.3。
pCloud 云存储用户指南说明书
Getting started with pCloudCongratulations!By joining pCloud you've just made the t step to having a mo e o ganized digital life! Use pCloud to sto e all you es and keep them secu e in one place. It is time to fo get about having you e catte ed a ound ultiple devices, sha ng es as an email attachment o osing you data because of a ha d d ve malfunction.Table of Contents1.Access your pCloud anywhere2.Add les to pCloud3.Shar les, regardless of their size Learn how to have you es a ways with you from:Ea up oad es from:Send an e or fo der to your friends or co eagues from:a web browserdesktop computer mobile device a web browserdesktop computer mobile devicea web browserdesktop computer mobile deviceeful tips4.Collaborate with others Grant access to any of your fo ders from:a web browserdesktop computer mobile device 5.Personalize your links More great things you can do with pCloudpCloud is available virtually for any popular browser. Get quick and easy access to your digital content, preview older versions of you es, sharethem with others and more.Access your pCloud anywhere You can access y ays:Go to pCloud WebpCloud's app for Desktop is called pCloud Drive for a good reason - itserves as a virtual hard drive on your computer! This means that you can access and edit your pCloud es as any othe e on your computer butwithout them actually taking space on your disk.DownloadpCloud’s Desktop ApplicationAvailable forWindows macOS LinuxWith pCloud’s Mobile apps all you es will be in your pocket, wherever you go.You can use it to automatically back up your Camera Roll and free up phone spacefor more photos and videos.pCloud’s Mobile AppsAvailable foriOS AndroidStream your personal videos, listen to your favorite music or preview documents, on the go.Add Files to pCloud1.Web2. Click “Browse For Files” and select the you want to upload or simply drag and drop them into the browser.1.Open and click on “Upload” button. This will open the Upload manager.There are miltiple ways to save your files in pCloud:2.Desktop Files will appear with green checkmarks once fully uploaded.3.Mobile AppsTap the + (plus) icon (iOS – at the top / Android – at the bottom of Open the pCloud AppBonus:To always have a copy of the photos and videos from your Camera Roll, turn on Automatic Upload fr assured no important memoryevShare les, regardless of their sizeWebre s rA a w n the r nDesktopyou want to sha e.The link will be automatically copied to your clipboard. A notification will appear. After you click it, you will open the link settings, which will allow you to modify the link.Mobile AppFind a e/fo der you want to share and tap on the Share icon next to it.rChoossuggested apps to share, orcop ard.Collaborate with othersYou want to share you es with teammates or friends, work on them together and track changes in rea-t ime? You can do this with any fo der in your account with the option 'Invite to Fo der'. Set access permissions, type the e of the peop e you want to invite and p oud w end them an in invite with a nk to join your fo der (even if they don't have p oud account yet). Here is how to start co aborating:Webck the 'Share' button next to the fo der you want to c aborate on. Choose 'Invite to Fo der'.e you want to share yDesktopClick the 'Share' button next to the folder you want to collaborate on. Choose 'Invite to Folder'.Invite some people to your folder via email.Mobile AppTap on the Share icon next to the folder you want to share.Select “Invite to Folder” fromthe menu.Type in the emails of the peopleyou want to invite.You will receiv your folder and starPersonalize your linksWebEasily add a single Branding template to all your Download linksIf you'd like to apply a certain look for all your links (both new and existing),.Locate the General Branding setting and click "Add"re is so ore you do wit pCloud! Here are just a few exa ples:U T ve m Use Upload li to r i e es fro s, if ey do a e a pCloud u e s re xt to folder you e r i e es i (for de top ri sele “S re”) se Upload li Create e li s re a e ail o ess i app pCloud S ve y rom r y Cfor C ro e, Firefox or ra sa e e or text fro t e web dir ly to pCloud H y e Use loud to ost stati websites wi Publi Folder feature es wi a , but you。
Kaspersky Endpoint Security Cloud 产品说明书

Sales PlaybookStraightforward protection for our customers’ businesses – wherever they’re heading.Pursue the opportunitySMB customers are always happy to avoid overheads associated with activities not directly related to revenuegeneration. Migrating IT to the cloud, adopting remote working and enabling mobile devices for work all helps cut costs and save resources. But keeping all this secure is a challenging task for a business with perhaps only a single IT professional and almost certainly a limited budget.So our message to SMBs is – Kaspersky Endpoint Security Cloud provides a single solution for all your organization’sIT security needs. Users can work safely on any device, at work or at home, from remote offices and in the field, while our cloud-based console means your security can be easily managed from anywhere, anytime.And selling in Kaspersky Endpoint Security Cloud is just the start – be ready to offer additional services that will boost your customer’s security while increasing your revenue and profits.Communicate the ideaWhile any business is vulnerable to cybersecurity risks, smaller organizations sometimes neglect security because what’s on offer looks too complicated for their current levels of expertise.We need to explain that security can be far easier and more agile than they’ve come to expect. This doesn’t mean making any compromises in terms of performance or capabilities – with KES Cloud, customers benefit fully from our cutting edge technologies – but without any hassle or labour intensive tuning. Our aim here is to spark customer interest, with the support of the materials provided.Find your approachThis playbook has been designed to help you reach out to businesses with 25-250 users, and to build their interest inKaspersky Endpoint Security Cloud. Assets have been created to support you at different steps along way as you interact with SMB IT professionals, helping them to ensure their busy business owner or MD makes the right purchasing decision with Kaspersky.You can win the competition and open doors to new opportunities, where EDR is a ‘must have’ and build strong customer relationships, helping them to raise their skills level with cybersecurity training.Assets to fire up the conversationWe’re dedicated to keeping our SMB customers safe from cyberthreats wherever they may be located and whatever IT challenges they face. Below are some thoughts and a short directory of assets designed to help you guide your customerstowards a successful purchase.Pre-trial(start the conversation)(demonstrate product value)(decision-making: make it happen and upsell to upper tier)TrialPost-trial123Start the conversationMain goal: showing customers why they should consider purchasing KES Cloud, and how they could benefit from its introduction.Customer conversations:- W hat if we told you there was a way you could guarantee your security, just using a web browser?- F ind out how to keep the business, and everyone in it, safe anywhere and everywhere – at the office, on the move and in the cloud.- K aspersky does cloud securitydifferently – it’s like having your own world-class IT Security Officer right there on-side.- Y ou can protect all the business’s devices in minutes – with a single straightforward solution.- W hat do you do to meet data regulation compliance?You can instantly run a scan to find personal data and credit cards in your MS Office 365 storage.Assets for use as follow-ups:1. Kaspersky Endpoint SecurityCloud Intro — video2. How to protect your company’sdevices in minutes: video 3. Product Datasheet: link 4. Feature list: link5. Meeting GDPR compliance anddata integrity: link6. Tips and tricks for MSPs: linkTrialMain goal: Making sure customers gain maximum value during the trial period, and explore all the cool features of KES Cloud.Free 30-day trial at Customer conversations:- H ow much time do you spendpatching devices? We can automate this process for you.- D o people in your office use external devices such as flash drives? See how you can take this under control to avoid a data breach.- I f your users ever work remotely, or in the field, you’ll need a plan for securing data on lost or stolen devices.’Assets for use as follow-ups:1. How to configure protectivefeatures – Patch Management, Encryption Management, Device Control and Web Control: video Customer conversations:- Y our users have almost certainly been installing their own choice of software onto your system without consulting you. - H ow can you fully secure yournetwork, when you don’t know what’s running on it?- F ind out what cloud services are being run without your knowledge, and take back control.- T rial Kaspersky Endpoint Security Cloud now for free – and see what you discover!Assets for use as follow-ups:2. How to discover and blockShadow IT in your office: video 3. Cloud Discovery datasheet: link 4. Data Discovery datasheet: link 5. Awake your cybersecurity analystwith EDR capabilities: videoPost-trial – closing the dealMain goal: Closing the deal and – ideally –selling in the Plus and even the Pro tier.Customer conversations:- C hoosing the right security will save the business time and money – and we can help you prove it. - H elp your MD to understand why upgrading your solution to protect against the latest threats makes sound financial sense. - Y our MD needs to know that choosing security built for agility frees up the business to grow safely, and unconstrained.- W e have the ammunition to ensure that your IT security recommendations are carried through.Assets for use as follow-ups:1. How to convince your bossto choose KES Cloud: sample letter 1, letter 22. Competitive battlecard to see offthe competition and win the deal: link3. Upsell your customer to KES CloudPlus and Pro: linkAppendixAdditional Resources for Kaspersky Endpoint Security Cloud - C ustomer sales presentation - W atch product demo: video - U se the script for your demos (En): link - K aspersky Endpoint Security Cloud online help© 2022 AO Kaspersky Lab.Registered trademarks and service marks are the property of their respective owners.Cyber Threats News: IT Security News: IT Security for SMB: /businessIT Security for Enterprise: /enterpriseWe are proven. We are independent. We aretransparent. We are committed to building a safer world, where technology improves our lives. Which is why we secure it, so everyone everywhere has the endless opportunities it brings. Bring on cybersecurity for a safer tomorrow.Know more at /about/transparency。
MapCloud1.0用户手册

MapCloud1.0⽤户⼿册MapCloud软件使⽤⼿册上海华测导航技术有限公司中国上海⽬录第⼀章MapCloud软件概述 (1)1.1LT系列掌上GIS应⽤解决⽅案 (1)1.2GIS数据采集软件MapCloud概要介绍 (1)第⼆章软件使⽤向导 (2)第三章常⽤功能介绍 (16)3.1图层属性查看与编辑功能 (16)3.2采集设置 (18)3.3登录CORS中⼼ (19)3.4点校正功能 (20)3.5⼯程属性 (24)3.6导⼊底图功能 (24)3.7任务管理功能 (25)3.8对象管理功能 (26)3.9标签专题图功能 (28)3.10导航放样功能 (29)第四章各功能亮点操作 (32)4.1编辑功能 (32)4.2量算功能 (39)4.3导航功能 (41)4.4采集功能 (43)4.5软件主要操作界⾯展⽰ (45)第五章 LTSet (46)附1:联系⽅式 (49)MapCloud软件使⽤⼿册第⼀章 MapCloud软件概述1.1LT系列掌上GIS应⽤解决⽅案LT Series(GIS⼿簿)+ MapCloud(GIS数据采集软件)+ LandTour office(桌⾯数据处理软件)1.2GIS数据采集软件MapCloud概要介绍MapCloud软件是专门为掌上GIS数据采集终端设计开发的⼀款可加载⼤容量底图数据,进⾏“带图作业、内外业⼀体化”的⼀款GIS解决⽅案软件,具有数据采集、属性管理、存储、编辑、查询、导航、量算等功能。
采⽤⼈机交互设计,简易操作逻辑,直观界⾯显⽰,兼容市场上各种GIS平台,为地理信息数据采集、巡检、地图数据应⽤,提供成熟完善解决⽅案。
图⽚菜单结构,界⾯简洁、直观MapCloud软件采⽤图⽚菜单的结构,改变了传统的菜单式显⽰⽅式,更加直观的显⽰软件的整体功能设计,界⾯简洁,突出了软件操作的便携性。
独有的秒级加速引擎技术,从引擎算法上解决了现代产业发展中存在的⼤容量地图数据加载快速显⽰的瓶颈问题,真正的把海量影像图和电⼦地图装载到外业移动设备上,达到流畅显⽰各类地图的效果,反应时间不会超过1秒。
COBOL应用程序云化指南说明书
COBOL to cloudStart your application modernization journeyIs cloud part of your organization’s desired business strategy?Taking your COBOL applications to the cloud shouldn’t be difficult or costly. COBOL and mainframe applications are uniquely portable and easy to redeploy to many new platforms. This includes cloud and virtual environments. And in most cases, it can happen without code changes.Retaining the business value of COBOL applications means you can innovate from a position of strength. You’ve built the business case—new market forces, customer demand, reducing cost and risk. By taking COBOL applications to a cloud or virtual environment, you are now aligning with the next generation of infrastructure modernization, giving you a powerful platform from which to compete.There are things you can do to get ready—now.Major organizations such as APRA AMCOS, DWP, and FIS have already stepped into the cloud. You can too—by developing a Destination Cloud strategy with OpenText™.3COBOL in the CloudVirtualize with Visual COBOLCOBOL’s inherent portability enables applications to be easily deployed to new platforms including Windows ®, UNIX ®, Linux ® on Intel ®, Linux ® on IBM Z ®, .Net, the Java ® Virtual Machine, containers, and the cloud.Moving COBOL applications to the cloud is as easy as deploying a current app to an alternative operating environment. Micro Focus ™ Visual COBOL by OpenText enables an easy option for deploying applications to alternative virtual environments–VMware, Microsoft ® Hyper-V ®, or other cloud-based virtualization solutions.Moving to a virtual environment enables the consolidation of multiple application workloads on a single hardware stack. This offers many benefits, including improved operational efficiency, flexibility, visibility, and cost reductions.4Leverage the power of industry-standarddevelopment toolsCOBOL in the CloudDeployed your COBOL applications to a virtual or hosted environment? It is time to determine how best to support them going forward.Developers working with Visual COBOL operate within a modernintegrated development environment (IDE) to maintain and modernize business-critical COBOL applications. Visual Studio, Visual Studio Code or Eclipse enables COBOL applications to be combined with C#, Java, and other modern languages within the cloud. It is where older applications meet new technologies to future-proof your business systems.Cloud integration with SCM systems such as Team Foundation Server provides simple and efficient application source control. Visual COBOL for Visual Studio, Visual Studio Code, or Eclipse are fully-integrated toolsets that deliver efficient enterprise application development. They ensure your first moves in the cloud are giant strides rather than baby steps. Put your best foot forward when working with COBOL applications by using Visual COBOL.5Host your virtualizedapplications offsiteCOBOL in the CloudApplication virtualization is just the first step on the road to the cloud. Your next move? Taking your COBOL applications to an offsite virtualization environment— or Infrastructure as a Service.Major cloud infrastructure service providers include Amazon Web Services, Microsoft Azure and Google Cloud.Infrastructure as a Service transfers the hardware and software resource management responsibility to your cloud infrastructure services provider so you can focus on the business rather than managing an application infrastructure. Other benefits include simplified installation, configuration, management, and licensing. Taking your COBOL applications to the cloud through your preferred infrastructure services provider is easy thanks to Visual COBOL.6Step into the cloud with a ModernizationAssessmentCOBOL in the CloudFor organizations with COBOL investments, cloud computing offers new application services and capabilities that help meet increased user demand while balancing cost. The cloud is a chance to innovate faster and with less risk.Continuous modernization is the key to this journey. This strategy enables your organization to quickly re-use and extend the value within your COBOL and mainframe applications while taking the path to the cloud that is right for your organization. Get started on your modernization journey today. 。
山石云·格版本说明说明书
Version2.7.5TechDocs|版本说明《版本说明》包含了云·格2.6.2版本以及后续版本的版本说明,主要介绍了各版本的新增功能、已解决问题及已知问题等内容。
l v2.6.2l v2.6.2l v2.6.2.1l v2.6.2.3l v2.6.2.4l v2.6.2.6l v2.6.2.8l v2.6.2.9l v2.6.2.11l v2.6.2.12l v2.6.2.13l v2.7l v2.7l v2.7.0.2l v2.7.0.3l v2.7.1l v2.7.1l v2.7.2l v2.7.2l v2.7.3l v2.7.3l v2.7.3.1l v2.7.4l v2.7.5v2.6.2版本升级说明若需升级,请对照您的现有版本和目标版本,参考以下升级说明:系统要求VMware基础平台l CloudHive版本可部署于VMware vSphere5.5、6.0、6.5和6.7。
l各虚拟机模块资源规格要求如下:o vSOM虚拟机需要2个vCPU、2GB内存和12GB硬盘。
说明:当云•格管理资源大于64个物理服务器时,建议扩展vSOM的vCPU和内存规格以提高处理效率。
vCPU最大可扩展至4个,内存最大可扩展至8GB。
o vSCM虚拟机需要2个vCPU、6.5GB内存和17GB硬盘。
o vSSM虚拟机目前支持两种规格:vSSM-02和vSSM-04。
vSSM-02虚拟机需要2个vCPU、4GB内存(开启Jumbo Frame时,需要6G内存)和5GB硬盘。
vSSM-04虚拟机需要4个vCPU、8GB内存(开启Jumbo Frame时,需要10G内存)和5GB硬盘。
o vDSM虚拟机需要2个vCPU、4GB内存和5GB硬盘。
l需要提前预留1~5个全局VLAN ID,并把每台主机的数据接口连接的交换机接口都配置成可透传预留的全局VLAN ID的Trunk模式。
VMware NSX平台l已经安装VMware vCenter、VMware vSphere和VMware NSX(需用户自行购买),版本要求如下:o VMware vCenter:6.0、6.5和6.7o VMware ESXi:5.5、6.0、6.5和6.7o VMware NSX:6.2.x、6.3.x和6.4.x说明:要使云•格达到较高性能,需同时满足以下版本要求:o VMware vCenter:6.0Update2及以上、6.5或6.7o VMware ESXi:6.0Update2及以上、6.5或6.7o VMware NSX:6.3.2及以上或6.4.xl各虚拟机模块资源规格要求如下:o vSOM虚拟机需要2个vCPU、2GB内存和12GB硬盘。
pointcloud2解析 距离
pointcloud2解析距离
在Pointcloud2中,每个点都包含了其在3D空间中的位置信息和其他属性信息。
要计算点之间的距离,可以使用以下步骤:
1. 首先,从Pointcloud2消息中提取点的数据。
可以使用点云库(如PCL)或自定义代码来完成此操作。
通常,点云数据存储在点云消息的“data”字段中,以二进制格式存储。
2. 解析点云数据并将其转换为点的坐标。
Pointcloud2消息中的数据是按行存储的,每个点的坐标之间可能有其他属性数据。
根据点云的类型(例如XYZ坐标、XYZRGB坐标等),解析出所需的坐标数据。
3. 使用解析出的点的坐标计算点之间的距离。
可以使用欧几里得距离公式或其他距离度量公式来计算点之间的距离。
例如,对于3D 空间中的两个点P1(x1,y1,z1)和P2(x2,y2,z2),欧几里得距离可以通过以下公式计算:
distance = sqrt((x2 - x1)^2 + (y2 - y1)^2 + (z2 - z1)^2)
其中sqrt表示平方根运算。
4. 重复步骤2和步骤3,以计算所有点之间的距离。
请注意,Pointcloud2消息中可能还包含其他属性数据,如点的颜色、法线等。
如果需要使用这些属性来计算点之间的距离,可以将其解析出来并应用相应的计算方法。
KubitPointCloud处理软件说明书
KubitPointCloud处理软件说明书Important ImportantBefore starting PointCloud/PointSense, you have to include it into AutoCAD.In case there is already a previous version of PointCloud/PointSense installed, please remove it from your AutoCAD environment like it is described in the manual.1.) Embedding the current version of PointCloud/PointSense into AutoCAD 1.) Embedding the current version of PointCloud/PointSense into AutoCADAutoCAD 2007 AutoCAD 2007 -- 2012: 2012:Load the application file for PointCloud/PointSense: Enter the following command in the AutoCAD command line: apploadA dialogue will appear. In the upper part of this dialogue select the file PCLoarder.arx from the installation folder of PointCloud/PointSense and confirm the selection with the button Load .A license wizard will support you finding or extending your license. If you have no dongle, please request a trial and follow the instructions of the wizard.For customers with a dongle type "Aladdin Hardlock" (e.g. USB Dongle blue or green, PC Card "Aladdin")For customers with a dongle type "Aladdin Hardlock" (e.g. USB Dongle blue or green, PC Card "Aladdin")Select option Configure and repeat license search. Switch to “Aladdin” and start searching. If the dongle is not yet activated for the current version please request the activation code in the PointCloud/PointSense License management under Options... → extend current license .For customers with a dongle type "WIBU CodeMeter" (e.g. USB dongle silver For customers with a dongle type "WIBU CodeMeter" (e.g. USB dongle silver--grey, Expresscard/SDcard, Softlock "CodemeterAct")"CodemeterAct")If your dongle is not yet activated for the current version, choose the option to extend current license and follow the instructions.After closing the license wizard leave the dialogue "Load/Unload Applications" by pressing the button Close.2.) Loading the menu 2.) Loading the menuIf necessary enter the command "PCMENU" in the AutoCAD command line. Depending on the settings for your workspace the toolbar, the menu entries or - in AutoCAD 2010 and higher - the ribbon for PointCloud/PointSense appear.In order to guarantee an optimal introduction into the work with PointCloud/PointSense please read the manual carefully.You find the manual in the installation folder of PointCloud/PointSense or as an entry in the menu/ ribbon.Because the manual is a PDF file you need the Adobe Reader.。
- 1、下载文档前请自行甄别文档内容的完整性,平台不提供额外的编辑、内容补充、找答案等附加服务。
- 2、"仅部分预览"的文档,不可在线预览部分如存在完整性等问题,可反馈申请退款(可完整预览的文档不适用该条件!)。
- 3、如文档侵犯您的权益,请联系客服反馈,我们会尽快为您处理(人工客服工作时间:9:00-18:30)。
Important Important
Before starting PointCloud/PointSense, you have to include it into AutoCAD.
In case there is already a previous version of PointCloud/PointSense installed, please remove it from your AutoCAD environment like it is described in the manual.
1.) Embedding the current version of PointCloud/PointSense into AutoCAD 1.) Embedding the current version of PointCloud/PointSense into AutoCAD
AutoCAD 2007 AutoCAD 2007 -- 2012: 2012:
Load the application file for PointCloud/PointSense: Enter the following command in the AutoCAD command line: appload
A dialogue will appear. In the upper part of this dialogue select the file PCLoarder.arx from the installation folder of PointCloud/PointSense and confirm the selection with the button Load .
A license wizard will support you finding or extending your license. If you have no dongle, please request a trial and follow the instructions of the wizard.
For customers with a dongle type "Aladdin Hardlock" (e.g. USB Dongle blue or green, PC Card "Aladdin")For customers with a dongle type "Aladdin Hardlock" (e.g. USB Dongle blue or green, PC Card "Aladdin")
Select option Configure and repeat license search. Switch to “Aladdin” and start searching. If the dongle is not yet activated for the current version please request the activation code in the PointCloud/PointSense License management under Options... → extend current license .
For customers with a dongle type "WIBU CodeMeter" (e.g. USB dongle silver For customers with a dongle type "WIBU CodeMeter" (e.g. USB dongle silver--grey, Expresscard/SDcard, Softlock "CodemeterAct")"CodemeterAct")
If your dongle is not yet activated for the current version, choose the option to extend current license and follow the instructions.
After closing the license wizard leave the dialogue "Load/Unload Applications" by pressing the button Close.
2.) Loading the menu 2.) Loading the menu
If necessary enter the command "PCMENU" in the AutoCAD command line. Depending on the settings for your workspace the toolbar, the menu entries or - in AutoCAD 2010 and higher - the ribbon for PointCloud/PointSense appear.
In order to guarantee an optimal introduction into the work with PointCloud/PointSense please read the manual carefully. You find the manual in the installation folder of PointCloud/PointSense or as an entry in the menu/ ribbon.
Because the manual is a PDF file you need the Adobe Reader.。