爱普生投影仪液晶组调重合教程
Epson Pro EX9240 EX9230 投影仪设置指南说明书

Quick SetupIMPORTANT: Before using this product, make sure you read these instructions and the safety instructions in the online User’s Guide.Note: These illustrations show the Pro EX9240, but the instructions are the same for the EX9230 unless otherwise noted.ContentsMake sure your projector box includes all of these parts (wireless LAN modulecover not included with Pro EX9240):Connect the projectorChoose from the following connections. See the sections below or the onlineUser’s Guide for details.ComputerHDMI portConnect one end of an HDMI cable to one of the projector’s HDMI ports andthe other end to an HDMI port on your computer.Computer portComputer port and thesheet). You can also connect an audio cable.USB portConnect the square end of a USB cable to the projector’s USB-B (square) port.Connect the flat end of the cable to any USB port on your computer.Windows Vista® or later: After turning on the projector, follow the on-screeninstructions to install the Epson® USB Display software (EMP_UDSE.EXE; onlyon first connection). If the software screen does not display automatically, openMy Computer, Computer, or This PC, then double-click EPSON_PJ_UD.OS X 10.7.x or higher: After turning on the projector, the setup folder forUSB Display appears in the Finder. Double-click USB Display Installer andfollow the on-screen instructions to install the Epson USB Display software(only on first connection).Video deviceConnect multiple video devices and use the Source Search button on theprojector or remote control to switch between them.RCA video cable(composite video)USB deviceConnect a supported digital camera, USB flash drive, or USB storage device tothe projector’s USB-A(flat) port.If you connect a digital camera, USB flash drive, or USB storage device, you canuse the projector’s PC Free feature. See the online User’s Guide for details.Turn on your equipment1 T urn on your computer or video source.2 P lug in the projector. The power light on the projector turns blue.3 O pen the A/V Mute slide all the way.4 P ress the power button on the projector or remote control. Theprojector beeps, the Status light flashes blue, and then stays on.Note: To shut down the projector, press the power button twice.5 U se the arrow buttons on the remote control to highlight any of theoptions on the Home screen that appears, then press to select it.You can switch between projection sources and quickly access variousadjustment options from this screen.6 T he default language of the menu system is English. To select anotherlanguage, press the Menu button on the projector or remote control.Select Extended and press . Select Language and press . Select yourlanguage and press . Press the Menubutton to exit the menu system.Adjust the image1 I f you don’t see an image, press the Source Search button on theprojector or remote control to select the image source.Note: If you still see a blank screen or have other display problems, seethe troubleshooting tips on the back of this sheet.2 T3 T4 T5 I6 YUsing the remote controlInstall the batteries as shown (two AA batteries).Choose which sourceto displayon and offmenusdisplay Access the HomescreenNavigate projectormenusFor more information on using the remote control, see the online User’s Guide.Setting up a wirelessconnectionFollow these steps to set up the projector for a wireless network connection.To project wirelessly, you need to install the optional wireless LAN module forthe EX9230 (part number V12H005A02).Note: The light on the wireless LAN module turns on when the module isinstalled and operating. The light flashes when the module is communicatingover the network.Select wireless network settings1 P ress the Menu button on the remote control.2 S elect the Network menu and press .3 S elect On as the Wireless LAN Power setting.4 S elect Network Configuration and press .5S elect the Wireless LAN menu and press.6S elect one of the following as the Connection Mode setting: •Q uick for a direct connection to a computer, tablet, or smartphone. •A dvanced to connect your projector to a router or access point.7 Select any other settings on the Wireless LAN menu as necessary. See the online User’s Guide for details.8When you are finished, select Complete and follow the on-screen instructions to save your settings and exit the menus.Install the optional softwareIf you connected a computer to the projector, you can download and installoptional software to perform various tasks wirelessly, such as monitoring or controlling your projector and projecting from multiple computers.You can download the optional software and its manuals from the Epson website, as described in “Where to get help.”Using web remoteYou can use a standard web browser to control the projector through the network. A virtual remote control on your computer screen lets you perform many of the same functions as you can with the physical remote control.1Open your web browser and enter the IP address of the projector you want to monitor in the browser’s address box.If you’re not sure what the IP address of the projector is, turn the projector on and select Net. Info. - Wireless LAN from the Networkmenu to display the IP address of the projector. (Do not enter the leading zeroes.)2 E nter EPSONWEB as the user name and admin as the password, then click OK . The Epson Web Control menu opens.3 S elect Basic Control . If you see a login screen, enter EPSONREMOTE as the user name and guest as the password.4Use the on-screen buttons to operate the projector, as you would using the remote control. See the online User’s Guidefor details.Select image sourceAdjust volumeSearch for sourcesTurn off pictureand soundUsing the Epson iProjection appYou can project wirelessly from a mobile device (iOS, Android™, or Chromebook™) using the Epson iProjection™ app and a QR code.1Use the following QR code to download and install the Epson iProjection app.2 If you connected the projector to a network wirelessly, make sure to connect your mobile device to the same network.3 Press the LAN button on the remote control to display a QR code on the projector screen.4S tart Epson iProjection on your mobile device.5U se the QR code reader feature to read the QR code displayed.6F ollow the app instructions to connect your device to the projector. For more information on setting up and using this app, visit/iprojection (U.S.) or www.epson.ca/iprojection (Canada).Mirroring a mobile deviceIf your mobile device (laptop, smartphone, or tablet) supports Miracast ®, you can project or mirror your device’s screen wirelessly (Pro EX9240). You do not need any additional software to use this feature.Note: Some restrictions apply. See the online User’s Guide for details.Select screen mirroring settings1 P ress the Menu button on the remote control.2 Select the Network menu and press.3S elect On as the Screen Mirroring setting.4 S elect Screen Mirroring Settingsand press . Press again.5Select any of the Screen Mirroring Settings options as necessary. See the online User’s Guide for details.6When you finish selecting settings, select Set and follow the on-screen instructions to save your settings and exit the menus.Connect your device1 Press the LAN button on the remote control. You see the Screen Mirroring standby screen.2Use the Miracast function on your device to search for the projector. You see a list of available devices.Note: See your device’s documentation for details on using its Miracast function.3If you see a PIN entry screen on your device, enter the PIN code displayed on the Screen Mirroring standby screen or at the bottom right of the projected image.The projector displays the image from your device once a connection is established.Caution: It may take some time to establish a connection. Do not disconnect the projector’s power cord while it is connecting to your device. Doing so may cause your device to freeze or malfunction.Troubleshooting• If you see a No signal message after turning on the projector, make sure your computer or video device is properly connected.•I f you see a blank screen, check the following: •Make sure the A/V Mute slide is open. • Make sure the power light on the projector is blue and notflashing.•P ress the power button to wake the projector from standby or sleep mode, if necessary.• If you see a blank screen when a computer is connected, check the following:• On some Windows ® laptops, you may need to hold down the Fn key and press F7 or the function key that lets you display on an external monitor. It may be labeled CRT/LCD or have an icon such as .On Windows 7 or later, hold down the Windows key and press P at the same time, then click Duplicate .• If you’re using a Mac laptop, open System Preferences and select Displays . Click the Arrangement tab and select the Mirror Displays checkbox.• If the projector does not respond to remote control commands, make sure the batteries in the remote control are installed correctly. Replace the batteries if necessary.RegistrationRegister today to get product updates and exclusive offers. You can register online at /webreg .Where to get helpManualsFor more information about using the projector, you can view or download the online manuals from the Epson website, as described below.Internet supportVisit /support (U.S.) or www.epson.ca/support (Canada) and search for your product to download software and utilities, view manuals, get FAQs and troubleshooting advice, or contact Epson.Telephone support servicesTo use the Epson PrivateLine ® Support service, call (800) 637-7661. This service is available for the duration of your warranty period. You may also speak with a support specialist by calling (562) 276-4394 (U.S.) or (905) 709-3839 (Canada). Support hours are 6 AM to 8 PM , Pacific Time, Monday through Friday, and 7 AM to 4 PM , Pacific Time, Saturday. Days and hours of support are subject tochange without notice. Toll or long distance charges may apply.EPSON is a registered trademark, EPSON Exceed Your Vision is a registered logomark, and Epson iProjection is a trademark of Seiko Epson Corporation.PrivateLine is a registered trademark of Epson America, Inc.Windows is a registered trademark of Microsoft Corporation in the United States and/or other countries. Mac and OS X are trademarks of Apple Inc., registered in the U.S. and other countries.Android and Chromebook are trademarks of Google LLC.General Notice: Other product names used herein are for identification purposes only and may be trademarks of their respective owners. Epson disclaims any and all rights in those marks.This information is subject to change without notice. © 2020 Epson America, Inc., 3/20CPD-58866Optional accessoriesFor a list of optional accessories, see the online User’s Guide .You can purchase screens or other accessories from an Epson authorized reseller. To find the nearest reseller, call 800-GO-EPSON (800-463-7766). Or you can purchase online at (U.S. sales) or www.epsonstore.ca (Canadian sales).。
EPSON 多媒体液晶投影仪 说明书
1使用说明书请妥善保管此说明书。
请确保先阅读此产品的相关资料,再按照其中的要求安装及使用此产品。
如通过查询此产品的相关资料和爱普生(中国)有限公司主页,仍无法解决问题,请您联系爱普生客户服务热线(800-810-9977)解决。
2说明书中的符号的意义f 安全指示使用说明书和投影机上都使用了符号,指出可能对用户或他人造成的伤害以及财产受损的风险,以便您能够安全、正确地使用投影机。
指示及其含义如下。
请确保在阅读说明书之前正确理解这些指示。
f 一般信息指示警告此符号指示一些信息,若忽视这些信息,则可能由于错误操作而导致死亡或人身伤害。
小心此符号指示一些信息,若忽视这些信息,则可能由于错误操作而导致人身伤害或物品损坏。
注意列示了如果不采取足够的措施可能引起投影机的损坏和人身伤害的内容。
q记述了方便用户使用的一些相关资讯。
s指明可以找到相关主题详细资讯的所在页。
g表示该符号前有下划线的用语在用语解说中作了说明。
请参阅“附录”中的“用语解说”部分。
s 第123页表示操作方法和操作顺序。
请按照编号顺序进行所需的操作。
[(名称)]指示遥控器或控制面板上按钮的名称。
实例:[Esc] 按钮“(菜单名称)”表示配置菜单选项。
实例:“图像”-“亮度”步骤3目录投影机的功能 (5)所有型号的共有特性 (5)EB-G5350 / G5150 特性 (6)各部件的名称和作用 (7)前面 / 上面 (7)底面 (9)后面 (10)控制面板 (12)遥控器 (13)有用功能校正投影图像中的失真 (16)使用 Quick Corner 校正失真 (16)切换投影图像 (18)自动探测外来信号,并切换投影图像(源搜索) (18)直接从遥控器切换 (19)提高投影的功能 (20)选择投影质量(选择颜色模式) (20)暂时隐藏图像和声音(A/V 无声) (21)暂停图像(静止) (21)改变长宽比 (22)光标功能(指示器) (26)放大部分图像(E 变焦) (27)使用多台投影机时目标投影机的限制 (28)设定投影机识别号 (29)检查投影机识别号 (29)设置遥控器识别号 (30)为多台投影机校正颜色(多屏幕调节颜色调节) (31)校正步骤概要 (31)校正方法 (31)安全功能 (33)管理用户(密码保护) (33)限制操作(操作锁) (35)防盗锁 (36)配置菜单使用配置菜单 (38)功能一览表 (39)图像菜单 (39)信号菜单 (40)设定菜单 (42)扩展菜单 (44)网络菜单(只适用于 EB-G5300 / G5200W / G5100) (46)网络菜单(只适用于 EB-G5350 / G5150) (48)信息菜单(只适用于显示) (60)重设菜单 (61)故障排除使用帮助 (63)解决问题 (64)读懂指示灯 (64)看了指示灯仍不明白时 (67)附录安装方法 (77)清洁 (78)清洁投影机表面 (78)清洁镜头 (78)清洁空气过滤器 (78)更换消耗品 (81)更换遥控器电池 (81)更换灯泡 (82)更换空气过滤器 (85)选购件和消耗品 (87)运输注意事项 (89)在附近移动 (89)运输时 (89)保存用户标识 (90)使用无线 LAN 接入点进行 WPS(Wi-Fi Protected Setup)连接(仅适用于 EB-G5350 / G5150) (92)连接设定方式 (92)屏幕尺寸和距离 (96)EB-G5350 / G5300 / G5150 / G5100 的投影距离 (96)EB-G5200W 的投影距离 (97)连接到外部设备 (98)连接到外部监视器 (98)连接到外部扬声器 (98)拆卸和连接投影机镜头单元 (99)拆卸 (99)连接 (99)目录4连接和拆卸 USB 设备(只适用于 EB-G5350 / G5150) (101)连接 USB 设备 (101)读懂 USB 指示灯 (101)拆卸 USB 设备 (101)插入和弹出 SD 卡(只适用于 EB-G5350 / G5150) (102)插入 (102)读懂 SD 卡访问指示灯 (102)拆卸 (103)连接 LAN 电缆 (104)使用 USB 电缆连接和投影(只适用于 USB Display EB-G5350 / G5150) (105)连接 (105)读懂邮件通知功能的问题 (108)ESC/VP21 命令 (109)命令表 (109)电缆配线 (110)读懂网络投影机(只适用于 EB-G5350 / G5150) (111)关于 PJLink (112)受支持的监视器显示一览表 (113)受支持的监视器显示(适用于 EB-G5350 / G5300 / G5150 / G5100) (113)受支持的监视器显示(适用于 EB-G5200W) (116)规格 (119)投影机一般规格 (119)随附软件的操作条件 (121)外形尺寸图 (122)用语解说 (123)索引 (125)5投影机的功能所有型号的共有特性f位于中心的镜头可容易地对准屏幕和投影机,因为镜头位于投影机的中心。
爱普生投影仪液晶组调重合教程(一)
爱普生投影仪液晶组调重合教程(一)爱普生投影仪液晶组调重合教程概述本教程旨在指导用户正确调整爱普生投影仪的液晶组重合,以获得最佳投影效果。
步骤1.准备工作–关闭投影仪并待其完全冷却后进行操作。
–确保投影室充分明亮,以便更好地进行调整。
–准备一张调整用的测试图片。
2.进入菜单–打开投影仪,并按下遥控器上的“菜单”按钮。
3.导航至调整选项–在菜单界面上找到“画面”、“图像”或类似的选项,按下遥控器上的“确认”或“Enter”按钮进入该选项。
4.进入液晶组调整子菜单–在“画面”或“图像”菜单中,找到“液晶组调整”、“像素对齐”或类似的子菜单选项,并进入。
5.选择调整模式–在液晶组调整菜单中,选择合适的调整模式,例如“水平调整”、“垂直调整”或“像素移动”。
6.基准调整–根据菜单中的指示,使用遥控器上的方向键或数字键盘,微调液晶组的位置,直到重叠达到最佳状态。
–注意:每次微调后,请等待几秒钟以使调整生效。
7.进行高级调整–如果基准调整尚未达到完美结果,则可以尝试进入高级调整菜单进行更精细的调整。
–在高级调整菜单中,可以进行单个像素的微调和其他相关参数的调整,以优化图像质量。
8.保存并退出–在完成所有调整后,在菜单中找到“保存”或“确认”选项,并按下遥控器上的相应按钮保存设置。
–退出菜单界面,并等待投影仪重新显示图像。
9.测试效果–使用测试图片或常见投影内容,观察图像是否完全重合、无偏移或色差。
–如果调整结果满意,说明液晶组调整已完成。
注意事项•在进行液晶组调整时,请小心操作,避免对投影仪造成损坏。
•在调整过程中,留意投影仪的温度,避免过热或过冷情况下进行设置。
•如果无法达到满意的调整效果,建议咨询专业人士或售后服务部门的技术支持。
以上是关于爱普生投影仪液晶组调重合的详细教程,请按照步骤进行操作,以获得最佳投影效果。
EPSON EB-Z8050W投影机 操作指南

投影机操作指南简介高效使用投影机 (5)通过网络连接进行各种屏幕传送(EasyMP Network Projection) (5)利用 Windows Vista 的网络投影功能进行投影 (5)从远程位置监视、配置和控制投影机 (5)安装软件 (6)提供的软件 (6)安装 (6)使用 EasyMP Network Projection 进行连接EasyMP Network Projection 概述 (9)EasyMP Network Projection 的主要功能 (9)两种连接模式 (9)高级连接 (9)快速连接(必须先安装可选的无线 LAN 单元) (9)连接步骤 (10)准备连接 (11)准备计算机 (11)对于 Windows (11)对于Macintosh (11)连接网络中的投影机并投影 (12)操作投影机 (12)操作计算机 (12)使用连接屏幕 (14)使用工具条..................................................16EasyMP Network Projection 的有用功能仅投影 PowerPoint 幻灯片(演示模式) (19)使用多屏幕调节显示 (20)调节虚拟显示器的示例 (21)在使用多屏幕显示功能之前的步骤 (21)设定虚拟显示器 (22)启用虚拟显示器驱动程序(仅限 Windows) (22)调节虚拟显示器 (22)指派要投影的图像 (26)投影指派的图像 (26)连接不同子网上的投影机连接不同子网上的投影机 (29)通过指定 IP 地址和投影机名称进行搜索(仅限高级连接) (30)使用配置文件执行搜索 (31)制作配置文件 (31)通过指定配置文件进行搜索 (32)管理配置文件 (33)设置 EasyMP Network Projection 操作使用设置选项 (36)设定每一个项目 (36)常规设置选项卡 (36)调节参数选项卡 (37)音频输出选项卡............................................37使用网络投影机功能投影图像使用网络投影机 (39)使用计算机设定、监视和控制投影机使用网络浏览器更改设定 (Web 控制) (41)显示 Web 控制 (41)输入投影机的 IP 地址 (41)投影机设置 (41)无法使用网络浏览器设定的配置菜单项目 (41)只能在网络浏览器中设定的项目 (41)使用邮件通知功能报告问题 (42)使用 SNMP 进行管理 (43)附录连接限制 (45)支持的分辨率 (45)显示色彩 (45)连接数量 (45)其它 (45)使用 Windows Vista 时 (45)从 Windows 照片库投影时的限制 (45)Windows Aero 中的限制 (46)疑难排解 (47)与网络功能有关的问题 (48)无法使用 EasyMP Network Projection 连接 (48)使用 EasyMP Network Projection 建立连接时,投影的图像保持不变,并且投影机不能与另一台计算机建立连接。
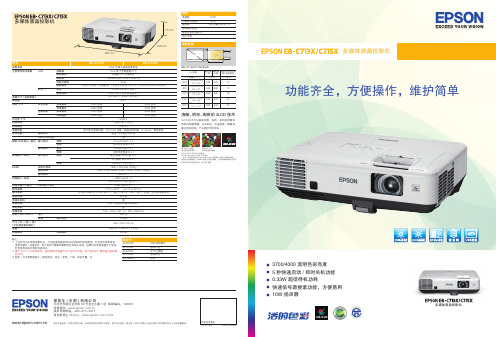
爱普生 EB-C713X C715X 多媒体液晶投影机 说明书
快速四角调整功能
支持快速四角调 整功能,特别对 于吊顶用户的画 面调整更加方 便。
A/V Mute 滑盖
■ 在演示过程中,如果需要在电子白板上书写,暂停使用 投影机,只需要通过简单的关闭或开启滑盖,就可以使投 影机快速休眠或重新启动,既方便快捷又节能环保,同时 避免了板书时投 影 光 线 的 干 扰, 让您的教学更加 方便高效。
60"/
122cmx91cm 47"×35"
169
275
10
80"/
163cmx122cm 63"×47"
226
368
13
100"/
203cmx152cm 79"×59"
283
460
16
150"/
305cm×229cm 120"×90"
426
692
24
200"/406cm×305cm 1来自1"×118"
垂直 -30 度到 +30 度
有
D-sub 15pin x 2
立体声迷你接口 x 2
D-sub 15pin x 1
立体声迷你接口 x 1
复合视频 :RCA( 黄 )×1
S- 视频 :Mini Din×1
RCA×1 ( 白/红 )
1280 x 720 dots (720p)
480i / 576i / 480p / 576p / 720p / 1080i / 1080p
*2 基于 ISO21118 标准制定,该标称值代表量产时产品的平均值,而产品的出厂最低值为标称值 的 80%。
*3 亮度、对比度数据基于:颜色模式:动态、变焦:广角、自动光圈:开。
投影机校正方法范文
投影机校正方法范文投影机是一种常用的影像设备,广泛应用于会议、教育和娱乐等场所。
但是由于环境、设备和信号等因素的影响,投影机在使用过程中可能会出现图像倾斜、变形等问题。
为了获得清晰、稳定的投影效果,需要对投影机进行校正。
本文将介绍几种常用的投影机校正方法。
1.水平和垂直校正水平和垂直校正是最基本的投影机校正方法。
投影机通常配备水平和垂直校正按钮或菜单,通过微调图像的水平和垂直位置,使图像对齐于屏幕。
注意,只有当投影机和屏幕之间保持垂直时,才能获得最佳的图像效果。
2.齐次矩阵校正齐次矩阵校正是通过软件对投影机进行校正的方法。
首先,需要使用校正工具(如投影画面校正软件)生成校正图像,并将其显示在屏幕上。
然后,通过调整投影仪的参数(如水平、垂直、倾斜、畸变等),使投影图像与校正图像重合。
最后,保存校正参数,以便后续使用。
3.校正物体校正物体是一种专门设计的校正工具,通常包括水平和垂直标尺、倾斜标尺和畸变标尺等。
使用校正物体的方法是将其放置在屏幕中央,调整投影机的参数,使图像的各个部分与标尺对齐。
通过调整参数,可以实现图像的水平、垂直、倾斜和畸变校正。
4.手动校正手动校正是指通过调整投影机的镜头位置和角度来校正图像。
首先,需要将投影机放置在适当的位置和角度,使光线垂直射向屏幕。
然后,通过移动镜头和调整焦距等参数,调整图像的大小、形状和位置,使其与屏幕完全对齐。
5.自动校正自动校正是一种现代化的校正方法,它通过投影机上的传感器和算法自动检测图像的倾斜和畸变,并自动调整参数以进行校正。
一般来说,自动校正功能会在投影机的设置菜单中提供,用户只需按下相应的按钮,投影机会自动进行校正,无需人工干预。
总结起来,投影机校正可以分为水平和垂直校正、齐次矩阵校正、校正物体、手动校正和自动校正等方法。
根据不同的场景和需求,选择合适的校正方法可以帮助我们获得清晰、稳定的投影效果。
投影机液晶片调整方法
投影机液晶片调整方法投影机液晶片调整方法前期准备:1、螺丝刀一堆2、302哥俩好,短暂固定液晶片3、镊子一把,调整液晶片4、导线若干5、计算机一台,设置到800*600分辨率,打开画图软件画几个十字叉。
这个用来对准象素点。
步骤:第一步:把主板移开液晶片难调整一个重要的问题是,投影的主板盖到上面,挡了调整位置,所以第一步是要把主板移开。
由于主板间有对插口,所以对所有对插口用导线加长相连(需要烙铁),这样主板移开了,点灯后,三片式液晶片露在眼前了。
第二步:固定绿片三片式液晶片中,首先固定绿片(每个是4只锥形螺丝固定的,上紧即可)第三步:调整蓝色和绿色对齐而后断开红色液晶片数据线,只调整蓝色和绿色的对齐。
这里有个技巧,把蓝色的液晶片固定螺丝中的一颗锥形的换成平底的,这样才能在半紧状态下移动液晶片(否则根本移动不了)。
将另外三片式颗打松,只用这一颗在半紧状态下,调整。
开机投“十”字叉画面,利用镊子移动蓝色液晶片与绿色基本对齐,此处可能左右,上下偏差几个象素。
而后进行细调的方法是,用螺丝刀放到液晶片上,用镊子等轻的工具,轻轻敲打螺丝刀,对液晶片位置,进行细微移动,如此反复。
一直到蓝色液晶片与绿色对齐。
第四步:重复调整对齐后,开机运行热平衡后,观察没有变化。
上302固定液晶片,关机,取下液晶片,上302稳定固定,再固定另外三片式螺丝。
接下来,断开蓝色投影线。
上红色与绿色调整。
第五步:试机最后3线全上,试机,完全修复。
总结:以上便是三片式液晶片调整方法,十分简单易懂。
希望能给大家有用的信息,不用因为一些小的问题就去送修。
大家在日常。
Epson爱普生EX31投影仪英文版说明书

Epson爱普生EX31投影仪英文版说明书一、产品概述1. 高分辨率:提供清晰、细腻的图像质量,让您享受更佳的视觉体验。
2. 高亮度:即使在明亮的环境下,也能呈现明亮、清晰的图像。
3. 多种连接方式:支持HDMI、VGA、USB等多种连接方式,方便您连接各种设备。
二、安装与设置1. 安装投影仪:将投影仪放置在平稳的表面上,确保通风良好,避免过热。
2. 连接电源:将电源线插入投影仪的电源接口,并连接到电源插座。
3. 连接设备:使用HDMI、VGA或USB线将投影仪与您的设备(如电脑、电视等)连接。
4. 调整投影角度:使用投影仪的调整杆,将投影图像调整到合适的尺寸和位置。
三、操作指南1. 开机与关机:按下投影仪的电源按钮,打开或关闭投影仪。
2. 菜单设置:按下菜单按钮,进入投影仪的设置菜单,您可以在这里调整图像、声音、网络等设置。
3. 信号源切换:按下信号源按钮,切换不同的输入信号源,如HDMI、VGA等。
4. 音量调节:使用音量按钮,调节投影仪的音量大小。
四、维护与保养1. 清洁镜头:定期使用干净的软布清洁投影仪的镜头,避免灰尘和污垢影响图像质量。
2. 更换灯泡:当投影仪的灯泡寿命到期时,请及时更换新的灯泡,以确保正常使用。
3. 存放:在不使用投影仪时,请将其存放在干燥、通风的地方,避免阳光直射和潮湿。
五、常见问题解答1. 投影图像模糊:请检查投影仪与设备的连接是否正确,并调整投影角度和焦距。
2. 投影仪无法开机:请检查电源线是否连接牢固,并确保电源插座有电。
3. 投影仪无声音:请检查音频连接是否正确,并调整音量设置。
六、产品规格1. 投影技术:3LCD2. 分辨率:800x6003. 亮度:3200流明4. 对比度:15000:15. 投影尺寸:30300英寸6. 投影距离:1.210.2米7. 噪音:37dB(经济模式)七、保修信息Epson爱普生EX31投影仪享有1年有限保修服务。
在保修期内,如遇产品质量问题,请及时联系Epson售后服务进行维修或更换。
- 1、下载文档前请自行甄别文档内容的完整性,平台不提供额外的编辑、内容补充、找答案等附加服务。
- 2、"仅部分预览"的文档,不可在线预览部分如存在完整性等问题,可反馈申请退款(可完整预览的文档不适用该条件!)。
- 3、如文档侵犯您的权益,请联系客服反馈,我们会尽快为您处理(人工客服工作时间:9:00-18:30)。
爱普生投影仪液晶组调重合教程
爱普生投影仪是一种常见的显示设备,广泛应用于教育、商务和娱乐等领域。
在使用投影仪时,有时会遇到液晶组调重合的问题,导致显示效果不佳。
本文将介绍如何进行爱普生投影仪液晶组调重合,以帮助用户解决这一问题。
一、了解液晶组调重合的原因
液晶组调重合问题通常是由于长时间使用或投影机移动不当而导致的。
液晶组调重合不仅会影响图像质量,还可能导致画面模糊不清、色彩失真等问题。
因此,及时调整液晶组的重合是非常必要的。
二、准备工作
在进行液晶组调重合之前,需要准备一张调整图。
调整图是一张特殊的图片,用于调整液晶组的位置和重合度。
您可以在爱普生官网上下载合适的调整图,然后将其保存到U盘或其他可读取的存储设备中。
三、进行液晶组调重合
1. 将投影仪放置在稳定的平台上,并打开电源。
2. 连接投影仪与电脑或其他设备,确保可以正常显示图像。
3. 进入投影仪的菜单界面,找到“图像调整”或类似的选项。
4. 进入图像调整界面后,找到“液晶组调整”或类似的选项,并选择进入。
5. 在液晶组调整界面,选择“调整图”选项,并插入之前准备好的调整图。
6. 投影仪会自动识别调整图,并在屏幕上显示出来。
7. 根据调整图上的指示,使用投影仪的遥控器或菜单键进行调整。
通常情况下,您需要调整液晶组的位置、大小和角度,直到调整图的线条与实际图像的线条重合为止。
8. 调整完毕后,保存设置并退出液晶组调整界面。
9. 断开与电脑或其他设备的连接,重新播放其他内容,检查液晶组调重合问题是否解决。
四、注意事项
1. 在进行液晶组调重合之前,确保投影仪已经预热完毕,并处于正常工作温度下。
2. 在调整液晶组时,避免使用过大的力量,以免损坏设备。
3. 在调整液晶组时,可根据实际情况进行微调,以获得更佳的显示效果。
4. 如果无法解决液晶组调重合问题,建议联系爱普生客服或专业维修人员进行处理。
通过以上步骤,您可以轻松进行爱普生投影仪液晶组调重合。
及时
调整液晶组的位置和重合度,可以保证投影仪的显示效果更加清晰、真实。
希望本文对您有所帮助,祝您使用愉快!。
