德生收音机DR920说明书
EK 2020-D-II 数字RF体聲收音器说明书

FEATURES• Digital RF signal transmission• Intuitive operating concept• 16 hours battery life• Free choice of headphones or induction loop • Backlit LC display• Sturdy housing DELIVERY INCLUDES • EK 2020-D-II• Instruction manualThe EK 2020-D-II is a sturdy digital RF bodypack receiver. It works in the frequency range of 863 – 865 MHz and offers 6 channels in paralell in tourguide mode, 8 channels in the conference mode in combination with a stationary transmitter. Intuitive operating controls make it easy to use. The included lithium polymer battery offers 16 hours of battery life. It can either be used with headphones or induction loops for use with hearing aids.PRODUCT VARIANTSEK 2020-D-II-US Art. no. 504795EK 2020-D-II Art. no. 504794ACCESSORIESEZL 2020-20 L Charging case Art. no. 500542 L 2021-4019" charger rack Art. no. 502037 EZT 3012Induction loop Art. no. 504061 SPECIFICATIONSModulation 2 FSKFrequency range863 – 865 MHz Frequency range (US)926 – 928 MHz ChannelsTourguide mode:Conference mode:6 in parallel8 in parallelAF frequency response100 – 7,000 Hz Headphone output power max. 40 mW/ 32 ΩMin. headphone impedance32 ΩTHD at 1 kHz< 1 %Operating time typ. 16 hPower supply Lithium-Polymer recharge-able battery, 1500 mAh Temperature range0 – 50 °CDimensions98 x 61 x 24 m mWeight approx. 78 gDIMENSIONSon-off3,5 mm Kopfhöreranschluss3.5 mm headphone jackARCHITECT‘S SPECIFICATIONA digital RF bodypack receiver works in the frequency range of 863 – 865 MHz. It provides two operating modes, a tour-guide and a conference mode. In mobile tourguide use 6 channels shall be usable in paralel, 8 in the conference mode in combination with a stationary transmitter.The volume wheel is easy to access and to control. On a backlit LC display all informations of battery life, signal strength, channel and volume settings are provided. A clip allows the receiver to be worn on clothing or a lanyard. The included rechargeable battery provides an operating time of 16 hours. The weight including the battery may not exceed 78 g. The bodypack receiver shall be Sennheiser EK 2020-D-II.Sennheiser electronic GmbH & Co. KG · Am Labor 1 · 30900 Wedemark · Germany · 。
德生PL757A 调频 中波 短波立体声钟控收音机 使用手册说明书
2004年4月第三版德生牌收音机东莞市德生通用电器制造有限公司中国 广东网址:e-mail:*****************.cn调频立体声/中波/短波(2.30-26.10MHz)采用进口优秀数字调谐(PLL)处理器应用先进的表面贴片(SMT)制造工艺,优质可靠四种方式选择搜索电台: 直接输入电台频率 手动搜索电台 自动搜索电台电脑预选记忆24个电台频率轻触式电子波段开关、短波米波段开关设按键锁定开关,防止误操作数字时钟,可控制定时开机及睡眠自动关机设9k/10k 中波步进频率选择开关,适合世界各国制式电池耗尽前自动关机,防止漏液损坏收音机设本地/远程灵敏度开关,方便在不同环境下接收强弱广播信号特设夜间照明指示灯,方便使用使用3节R6(5号)电池供电,可使用外接电源设外接天线插孔,附送室外短波天线,提高接收能力附送精美皮套、高级立体声耳机与外接电源供电器使用手册Operating Manual直接输入电台频率PL757A存储设置指示功能定时自动开机指示存储电台频率地址号码按键锁定开关功能指示调频立体声状态指示频率或时间指示波段指示:(),(),短波1或2(SW 1/2)调频FM 中波MW 液晶显示屏显示说明调频/短波频率单位(兆赫兹)中波频率单位(千赫兹)睡眠定时自动关机指示更换电池提示符号短波频率范围按电池正负极性正确方向装入3节R6(5号)新电池。
本机特设电源电压不足自动关机保护功能。
当电源电量即将耗尽时,会自动关闭收音机。
在您收听时,如果声音不稳定,可能是电池供电不足,请将收音机音量调小。
当收音机自动关机时,为防止已记忆的信息丢失,请及时更换新电池。
新旧电池不要混在一起使用。
当您长时间不用收音机时,请将电池取出,以免电池漏液,腐蚀机内元件。
务必关机后,才更换新电池!使用外接电源时,机内电池将被自动切断;请按照以上方式操作,以防机内记忆信息丢失!收音机左侧面220V 交流电插座外接电源连接和断开操作步骤:连接:断开:注意1.将DC05型交直流电源供电器插入220V 交流电 电源插座;2.打开DC05型供电器上的电源开关;3.将DC05型供电器与PL757A4.开收音机。
HD920X 2 手册说明书

HD920XManuale dell'utente2SOMMARIOImportante 3Introduzione 7Descrizione generale 7Prima di utilizzare l'apparecchio per la prima volta 9Preparazione per l'uso 9Utilizzo dell'apparecchio 9Tabella dei cibi 9Frittura ad aria 11Preparazione di patatine fritte fatte in casa 13Pulizia 14Tabella di pulizia 16Conservazione 16Riciclaggio 16Garanzia e assistenza 17Risoluzione dei problemi 173 ITALIANO4ITALIANOdi esperienza o conoscenze adatte a condizioneche tali persone abbiano ricevuto assistenzao formazione per utilizzare l'apparecchio inmaniera sicura e capiscano i potenziali pericoliassociati a tale uso. Evitare che i bambini giochinocon l'apparecchio. Le operazioni di pulizia emanutenzione non devono essere effettuate dabambini di età inferiore agli 8 anni.-Tenere l'apparecchio e il relativo cavo lontanodalla portata di bambini di età inferiore agli 8 anni.-Tenere il cavo di alimentazione lontano dasuperfici incandescenti.-Collegare l'apparecchio esclusivamente a unapresa a muro con messa a terra. Accertarsi sempreche la spina sia correttamente inserita nella presadi corrente.-Questo apparecchio non è stato progettato peressere utilizzato in abbinamento a un timeresterno o a un sistema separato con telecomandoa distanza.-Non collocare l'apparecchio contro una parete o unaltro apparecchio. Lasciare almeno 10 cm di spaziolibero sul retro e i lati e 10 cm di spazio sopral'apparecchio. Non posizionare alcun oggettosopra l'apparecchio.-Non usare l'apparecchio per scopi diversi da quellidescritti nel presente manuale.-Durante la frittura ad aria calda viene emessovapore attraverso le aperture di circolazionedell'aria. Tenere le mani e il viso a distanzadi sicurezza dal vapore e dalle aperture dicircolazione dell'aria. Fare attenzione al vapore eall'aria calda anche quando si rimuove il recipientedall'apparecchio.-Le superfici accessibili potrebbero diventare caldedurante l'uso.5ITALIANO-Il recipiente, il cestello e gli accessori all'internodi Airfryer si surriscaldano durante l'uso. Fare attenzione quando li si maneggia.-Non posizionare l'apparecchio al di sopra o in prossimità di fornelli a gas o ogni tipo di fornello o piastra di cottura elettrici, né all'interno di forni riscaldati.-Non inserire ingredienti dal peso ridotto o carta forno nell'apparecchio.-Non appoggiare l'apparecchio sopra o in prossimità di materiale combustibile, ad esempio tovaglie e tende.-Non lasciare mai incustodito l'apparecchio in funzione.-Scollegare subito l'apparecchio se da quest'ultimo fuoriesce del fumo scuro. Attendere chedall'apparecchio non fuoriesca più fumo prima di rimuovere il recipiente.-Conservazione delle patate: la temperatura deve essere adatta alla varietà di patata conservata e superiore ai 6 °C in modo da minimizzare i rischi di esposizione all'acrilammide negli alimenti preparati.-Non collegare l'apparecchio alla presa di corrente e non toccare il pannello di controllo con le mani bagnate.-Questo apparecchio deve essere utilizzato a una temperatura ambiente compresa tra 5 °C e 40 °C. Attenzione-Questo apparecchio è stato progettato per il normale uso domestico. Non è progettato perl'uso in ambienti quali zone dedicate alla cucina all'interno di negozi, uffici e altri ambienti di lavoro. Non è ideato per essere utilizzato dagli ospitidi alberghi, motel, bed and breakfast e in altri ambienti residenziali.6ITALIANO-Per eventuali controlli o riparazioni, rivolgersisempre a un centro autorizzato Philips. Nontentare di riparare l'apparecchio da soli per noninvalidare la garanzia.-Se l'apparecchio non viene utilizzatocorrettamente, è destinato a usi professionali osemi-professionali, oppure viene utilizzato senzaattenersi alle istruzioni del manuale dell'utente, lagaranzia non è più valida e Philips non rispondeper eventuali danni.-Posizionare e utilizzare sempre l'apparecchio suuna superficie piana, stabile e orizzontale.-Dopo l'utilizzo, scollegare sempre l'apparecchio.-Lasciare raffreddare l'apparecchio per circa 30minuti prima di maneggiarlo o pulirlo.-Assicurarsi che gli ingredienti preparati con questoapparecchio siano di colore giallo-dorato e nonscuri o marroni. Rimuovere i residui bruciati.Non friggere patate fresche a una temperaturasuperiore a 180 °C (per ridurre al minimo laproduzione di acrilammide).-Fare attenzione quando si pulisce la zonasuperiore della camera di cottura: la resistenza e ibordi delle parti metalliche sono caldi.-Assicurarsi sempre che il cibo sia completamentecotto nel sistema Airfryer.-Assicurarsi sempre di avere il controllo del sistemaAirfryer.-Durante la cottura di cibi grassi, il sistema Airfryerpotrebbe emettere fumo.Campi elettromagnetici (EMF)Questo apparecchio Philips è conforme a tutti gli standard e alle normerelativi ai campi elettromagnetici.7 ITALIANO8ITALIANO9 ITALIANO10ITALIANO11 ITALIANO12ITALIANO13 ITALIANO14ITALIANO15 ITALIANO16ITALIANO17 ITALIANO18ITALIANOLe specifiche sono soggette a modifica senza preavviso.© 2021 Koninklijke Philips N.V.Tutti i diritti riservati.。
德胜收音机产品展示
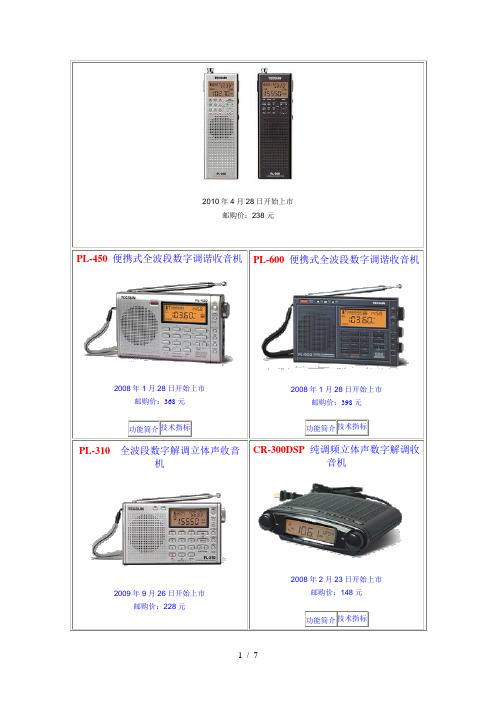
2010年4月28日开始上市邮购价:238元PL-450 便携式全波段数字调谐收音机2008年1月28日开始上市邮购价:368元功能简介技术指标PL-600 便携式全波段数字调谐收音机2008年1月28日开始上市邮购价:398元功能简介技术指标PL-310全波段数字解调立体声收音机2009年9月26日开始上市邮购价:228元CR-300DSP 纯调频立体声数字解调收音机2008年2月23日开始上市邮购价:148元功能简介技术指标功能简介技术指标PL-300wt世界钟全波段数字解调收音机2009年5月28日开始上市邮购价:198元(赠送AN-05外接天线一个)功能简介技术指标PL-380全波段数字解调立体声收音机2009年12月8日开始上市邮购价:238元功能简介技术指标1994 调频/调幅高保真收音机(纪念版)2007年8月18日开始上市邮购价:930元功能简介技术指标S-2000数字调谐全波段无线电接收机2008年8月8日开始上市邮购价:1500元(含邮资20元)功能简介技术指标致用户:了解方法:德生牌收音机产品及附件在全国各大中城市商场均有销售。
如您所在的地区没有德生产品销售,您可以与我公司用户服务部了解邮购。
邮购方法:通过邮局汇款邮购位置:广东省东莞市东城区莞长路189号德生大楼收款人:德生通用电器制造XXX邮政编码:523128说明:本产品橱窗内所标注的邮购价已经包含邮费,您只要按所标金额通过邮局汇款给我们即可,不需要另外再加邮寄费。
各位关心德生公司的朋友和德生电器公司的用户们,如果你们有什么意见和建议,请与我们了解,了解方法如下:Email:tecsun@21cnaaa来信:广东省东莞市东城区莞长路189号德生大楼德生电器公司收邮编:523128咨询热线电话:0769-2316 71180769-2245 5117[文档可能无法思考全面,请浏览后下载,另外祝您生活愉快,工作顺利,万事如意!]。
DC-9204E创新手动报警器说明书

Features✧Alarm by pressing, reset by a special key.✧Plug-in structure.✧Standard: EN 54-11.DescriptionDC-9204E Innovation Manual Call Point (MCP) is non-addressable. It alarms by the output current. It can be simply connected to compatible conventional fire alarm system from various manufacturers. The MCP is suitable for public places. When there is a fire, pressing the frangible element on the MCP can sendfire signal to fire alarm control panel. Connection and CablingTerminals on the MCP base are shown as Fig. 1 (unit: mm).I+ I- O+ O-Fig. 1I+, I-: Input signal, connecting with compatible control panel or the previous MCP.O+, O-: Output signal, connecting with the next MCP. Recommended Cabling0.5mm2 or above fire cable, subject to local codes.InstallationThe MCP can be mounted in two ways: conduit embedded and surface mounting.Surface Mounting: First install the back box into the wall using 4 screws, and then install the base onto the back box. Connect cables to corresponding terminals as described above. Hook the juts of the MCP body to the base, and then press the part below the frangible element to combine them completely, as shown in Fig.2.Conduit Embedded: First install the base onto the back box, then connect the MCP body and the base followed instructions above, as shown in Fig. 3.Back BoxBaseMCP BodyLock ScrewFig. 2DC-9204EInnovation Manual Call Point548g/072831-CPR-F0129GST-0011-0113BaseMCP BodyEmbedded BoxLock ScrewFig. 3Application✧ Application of the MCP is shown in Fig. 4.Fig. 4Note: The call point cannot be directly connected to 24VDC power, or its internal components may be damaged. It must be connected to a compatible power limited fire alarm control panel (28VDC/60mA max.).✧ Usage of the keyVertically insert the key into the key-hole, and turn it clockwise, then push it with force. Turn the key back and pull it out when the frangible element is rebounded.WEEE Information2012/19/EU (WEEE directive): Products marked with this symbol cannot be disposed of as unsorted municipal waste in the European Union. For properrecycling, return this product to yourlocal supplier upon the purchase of equivalent newequipment, or dispose of it at designated collectionpoints.SpecificationOperating Voltage24VDC (12VDC ~28VDC) Standby Current 0mAAlarm Current ≤30mA (equivalent resistance is 470 1/2W)IndicatorRed. Illuminates after alarming. Type of Initiating PartReusableInitiating Mode Pressing the frangible element manuallyResuming Mode Manually resumed by a special key Wiring two-wire ClassType A, indoors IngressProtection Rating IP43Environmental Temperature -10℃~+55℃Relative Humidity ≤95%, non -condensing Material of Enclosure ABS, redDimension (L×W×H) 87.1mm×87.1mm×58.5mm (with back box)87.1mm×87.1mm×23.5mm (without back box) Mounting Hole Distance 60mmWeightAbout 160g (with back box) About 107g (without back box)Limited WarrantyGST warrants that the product will be free from defectsin design, materials and workmanship during the warranty period. This warranty shall not apply to any product that is found to have been improperly installedor used in any way not in accordance with the instructions supplied with the product. Anybody, including the agents, distributors or employees, is not in the position to amend the contents of this warranty. Please contact your local distributor for products notcovered by this warranty.This Data Sheet is subject to change without notice. Please contact GST for more information or questions.Gulf Security Technology Co., Ltd.No. 80, Changjiang East Road, QETDZ, Qinhuangdao, Hebei, P . R. China 066004 Tel: +86 (0) 335 8502434 Fax: +86 (0) 335 8502532******************.com Output -Output +Compatible Fire Alarm Control PanelAlarm Zone MCPT o t h e n e x t d e v i c e。
阿尔伯特DR301 FM-DAB收音机_用户手册说明书

Öffnen Sie das Batteriefach. Ziehen Sie an dem Bändchen, um die alten Batterien zu entfernen und setzen Sie drei (3) AA Alkaline Batterien gemäßSetzen Sie die Batteriefachabdeckung ein und schieben sie nach links, bis zum hörbaren Einrasten.1221Drücken Sie die MENU Taste."MODE" erscheint auf dem Display. Platzieren Sie den Cursor anhand der Pfeiltasten auf "FM Radio" und bestätigen Sie mit der SELECT Taste.Drücken Sie die MENU Taste."MODE" erscheint auf dem Display. Platzieren Sie den Cursor anhand der Pfeiltasten auf "Music Player" und bestätigen Sie mit der SELECT Taste.Einzelauswahl:Der Nachrichtenservice hat jederzeit Vorrang gegenüber dem laufenden TIP- Themenauswahl TIP- Nachrichtenservice1.1.Andere Services: Wenn Sie andere Services vom aktuellen Ensemble wünschen, drücken Sie < (Rückwärtstaste) oder > (Vorwärtstaste), so dass Services wird der letzte Service des vorherigen Ensembles wiedergegeben. Daten Services: Die meisten Ensembles geben mehr als einen Datenservice wieder (das Symbol erscheint auf dem Display). Datenservices haben keine Audiowiedergabe.Andere Ensembles: Um einen anderen Service von einem anderen Ensemble zu wählen, halten Sie die Rückwärts- bzw. Vorwärtstaste länger als 1 Sek. DR301 gibt den ersten Service des Ensembles wieder.No Signal: Wenn eins der Ensembles keinen Service enthält, erscheint "No Signal" auf dem Display. "No Signal" bedeutet, dass entweder kein Empfang"Searching" bis das nächste DAB Ensemble gefunden wurde. Dann lädt das DR301 den ersten Service des Ensembles und das Autotune schaltet sich ab. Das Display zeigt :TIP-Bedienung während des FULL SCANUm den laufenden Full Scan zu stoppen, drücken Sie die SELECT(Play/Pause/Stop) Taste. Der Full Scan bricht ab und die bis dahin gefundenenDrücken Sie die REW (Rücklauf) Taste,und das DR301 gibt wieder, was vor einerDas Symbol erscheint oben im Display und das Service Logo blinkt. Um den Rücklauf zu stoppen und zurückzukehren zur aktuellen Sendung, drücken Sie die REW Taste erneut, oder wählen andereHalten Sie die Vorwärts- oderRückwärtstaste gedrückt bis das AUTOWenn ein Signal empfangen wird, erlischt dasAUTO Symbol und MAN erscheint. Der automatische Suchlauf ist beendet. Um den automatischen Suchlauf zu stoppen, drücken Sie die Vorwärts-oder Rückwärtstaste während des Suchlaufs.Während des Empfangs einer Frequenzdrücken Sie SELECT länger als 1 Sek.Daraufhin erscheint auf dem Display "Add toPreset?" (=zur Preset Liste hinzufügen?).Bestätigen Sie, indem Sie den Cursor auf OKplatzieren und drücken Sie SELECT. Damit ist diese Frequenz in der Preset Wechseln Sie den Suchlauf in den PresetTune Modus. (siehe Seite 25).Drücken Sie SELECT länger als 1 Sek.Die Preset Liste erscheint.Scrollen Sie anhand der Pfeiltasten rauf bzw.runter, bis zur gewünschten Frequenz, dieAuf dem Display erscheint "Delete preset?" (=Preset löschen?).Bestätigen Sie, indem Sie den Cursor auf OK platzieren und drücken Sie Damit ist diese Frequenz aus der Preset Liste gelöscht. Die Preset Liste erscheint erneut auf dem Display. (Die gelöschte Frequenz wird gesendet, obwohl sie aus der Liste gelöscht wurde.) Mit der MENU Taste kehren Sie in den Preset Tune Modus zurück.Drücken Sie SELECT länger als 1 Sek. Die Preset Liste erscheint auf dem Display. Scrollen Sie in der Liste rauf bzw.runter und drücken Sie SELECT, wenn Sie auf der gewünschten Frequenz sind.Drücken Sie die MODE Taste.Auf dem Display erscheint das MODE Symbol, platzieren Sie den Cursor anhand der Pfeiltasten auf "DAB Receiver" und bestätigen Sie mit ELECT.Drücken Sie die MODE Taste.Auf dem Display erscheint das MODE Symbol, platzieren Sie den Cursor anhand der Pfeiltasten auf "FM Mode" und bestätigen Sie mit SELECT.Drücken Sie die MENU Taste und bewegen Sie den Cursor anhand der Pfeiltasten auf "SET" (Setting).Anschließend platzieren Sie den Cursor auf "Contrast" und bestätigen mit SELECT. Einstellung des Kontrastes erfolgt von 0 (dunkel) bis 10 (hell).Stellen Sie den Kontrast anhand der Pfeiltasten ein und bestätigen Sie mit SELECT.b) Hintergrundbeleuchtung (Backlight)Drücken Sie die MENU Taste und bewegen Sie den Cursor anhand der Pfeiltasten auf "SET" (Setting).Anschließend platzieren Sie den Cursor auf "Backlight" und bestätigen mit SELECT. Einstellung der Hintergrundbeleuchtung erfolgt von 0 bis 5 Sek.Stellen Sie Beleuchtungsdauer anhand der Pfeiltasten ein und bestätigen Sie mit SELECT.Drücken Sie die MENU Taste und bewegen Sie den Cursor anhand der Pfeiltasten auf "SET" (Setting). Anschließend platzieren Sie den Cursor auf "Scroll Speed" und bestätigen mit SELECT.Einstellung der Geschwindigkeit erfolgt von 1 bis 11.Stellen Sie sie anhand der Pfeiltasten ein und bestätigen Sie mit SELECT.d) Klang BalanceDrücken Sie die MENU Taste und bewegen Sie den Cursor anhand der Pfeiltasten auf "SET" (Setting).Anschließend platzieren Sie den Cursor auf "Sound Balance" und bestätigen mit SELECT.Einstellung der Geschwindigkeit erfolgt von - 5 (links) bis +5 (rechts).Stellen Sie sie anhand der Pfeiltasten ein und bestätigen Sie mit SELECT.f) Software UpdateSiehe Software Update im Abschnitt DAB Modus.Drücken Sie die MENU Taste und bewegen Sie den Cursor anhand der Pfeiltasten auf "Equalizer".Scrollen Sie rauf bzw. runter und wählen einen der 6 Equalizer ( Normal,Classic, Jazz, Rock, Pop und User), bestätigen Sie mit er Equalizer: Hier können Sie Bässe und Höhen selbst einstellen.3) EqualizerNormal: Wiedergabe vom ersten Lied bis zum letzten, ohne Wiederholung.Repeat One: Wiederholt das laufende Lied immer wieder.Repeat All: Wiederholt alle Lieder in gleicher Reihenfolge.Shuffle: Wiederholt alle Lieder in zufälliger Reihenfolge.Intro: Wiedergabe von den ersten 10 Sek. eines jeden Liedes.4) Play ModeDrücken Sie die MENU Taste und bewegen Sie den Cursor anhand der Pfeiltasten auf "Delete".Bestätigen Sie mit SELECT, wenn "Delete One" ausgewählt wurde. Das betreffende Lied wird endgültig gelöscht.6) ExitDrücken sie die MENU Taste und bewesen Sie den Cursor anhand der Pfeiltasten auf das "SET"(Setting) Menü.Gehen Sie mit dem Cursor auf "Sleep" und drücken Sie die SELECT Taste um den Timer einzustellen.Die Einstellung erfolgt von 0 (aus) bis 60 Minuten in 1-Minuten-Schritten. Regeln Sie den Timer anhand der Pfeiltasten und bestätigen Sie mit SELECT.Um Batterie zu sparen, schaltet das DR301 sich nach 10 Sek. aus, nachdem gestoppt wurde.Liedersuche (Track Search)Während der Wiedergabe oder im Stop Modus drücken Sie die Vorwärts-oder Rückwärtstaste, um das nächste bzw. vorherige Lied zu wählen.Um eine bestimmte Stelle im Lied zu finden, halten Sie die Vorwärts- bzw.Rückwärtstaste gedrückt.Wenn Sie die Stelle erreicht haben und hören möchten, lassen Sie die Taste los.. ..Schalten Sie das DR301 ein und wechseln in den MP3-Player Modus.Verbinden Sie das DR301 mit dem PC anhand des mitgelieferten USB-Kabels. Windows 98 erkennt das Gerät als "Neue Hardware".Sie werden aufgefordert, die neue Hardware hinzuzufügen.Wenn gefragt wird, wo sich der Treiber befindet, legen Sie die CD in das CD-ROM Laufwerk ein.Geben Sie den Pfad des Laufwerks ein, z.B. [DR301_WIN98_usbdrv] und klicken Sie auf [OK]. Danach klicken Sie auf [Next].Die Treiber Installation startet automatisch.Nach Beendung klicken Sie auf [Fertigstellen] um die Installationabzuschließen.Wenn die Installation beendet ist, können Sie prüfen ob das DR301 richtig erkannt wird und ob der Treiber korrekt installiert wurde, indem Sie den Der Up- oder Download kann ganz einfach durch Kopieren und Einfügen der Dateien auf das "Externe Laufwerk" ausgeführt werden.Um dies zu vermeiden verfahren Sie folgendermaßen: Doppelklick auf das CD-Symbol in der Taskleiste.Dann klicken Sie auf [USB DISK] und dann auf [Stop]. Ein Bestätigungs-fenster öffnet sich.Klicken Sie auf die USB DISK in diesem Fenster und dann auf [OK]. Das System bestätigt mit "USB Disk can now be safely removed from the system".Achten Sie darauf, das USB Kabel am DR 301 abzuziehen, um Hard-oder Software-Probleme bei DR 301 und PC zu vermeiden.wird aufgrund eines fehlerhaften Downloads, kann es unter Umständen Hierfür klicken Sie mit der rechten Maustaste auf das externe Laufwerk.Wählen Sie "FORMAT" und bestätigen Sie durch anklicken.Frequency FrequencyFrequencyDas Gerät lässt sich nicht einschalten.Es wird kein DAB Signal empfangen.Der Ton setzt aus, oder Sie hören überhaupt nichts mehr.Es wird ein DAB Signal empfangen, aber Sie hören nichts.1086127.3 (mm) 4.25 2.44 1. 07(Inch) -5C ~ +35C-40C ~ +80CMP2 / MP3 / WMAKeine Tasteneingabe möglichBildschirm ist zu schwach zu erkennen.Das Display schaltet nicht ein.Überprüfen Sie die Display-Einstellungen. Wechseln Sie die Batterien (Das DR301 schaltet。
FMB920 小型智能追踪器快速手册说明书

FMB920Small and smart trackerQuick Manual v1.8CONTENTKnow your device (3)Pinout (4)Wiring scheme (5)Set up your device (6)PC Connection (Windows) (7)How to install USB drivers (Windows) (7)Configuration (8)Quick SMS configuration (10)Mounting recommendations (12)Basic characteristics (13)LED indications (13)Electrical characteristics (16)Safety information (17)Certification and Approvals (18)Warranty (19)Warranty disclaimer (19)KNOW YOUR DEVICETOP VIEWBOTTOM VIEW (WITHOUT COVER)PIN NUMBER PIN NAME DESCRIPTION1VCC (6-30) V DC (+)(Red) Power supply(+6-30 V DC)2GND (-)(Black) Ground3DIN1(Yellow) Digital input, channel 1. DEDICATED FOR IGNITION INPUT4AIN1(Grey) Analog input, channel 1. Input range: 0-30 V DC5DOUT1(White) Digital output. Open collector output. Max. 0,5 A DCPINOUT23451FMB920 pinoutWIRING SCHEMESET UP YOUR DEVICEHOW TO INSERT MICRO-SIM CARD41COVER REMOVAL3BATTERY CONNECTION2MICRO-SIM CARD INSERTATTACHING COVER BACKGently remove FMB920 cover using plastic pry tool from both sides.Insert Micro-SIM card as shown with PIN request disabled or read our Wiki 1how to enter it later in Teltonika Configurator 2. Make sure that Micro-SIM card cut-off corner is pointing forward to slot.1 /index.php?title=FMB920_Security_info 2 /view/Teltonika_ConfiguratorConnect the battery as shown on device. Position the battery in place where it does not obstruct other components.After configuration, see PC Connection (Windows)3, attach device cover back.3 Page 7, "PC Connection (Windows)"PC CONNECTION (WINDOWS)HOW TO INSTALL USB DRIVERS (WINDOWS)1. Please download COM port drivers from here 1.2. Extract and run TeltonikaCOMDriver.exe .3. Click Next in driver installation window.4. In the following window click Install button.5. Setup will continue installing the driver and eventually the confirmation window will appear. Click Finish to complete thesetup.1 /downloads/en/fmb920/TeltonikaCOMDriver.zip1. Power-up FMB920 with DC voltage (6 – 30 V) power supply using power wires. LED’s should start blinking, see “LED indications 1”.2. Connect device to computer using Micro-USB cable or Bluetooth connection:• Using Micro-USB cable• You will need to install USB drivers, see “How to install USB drivers (Windows)2”• Using Bluetooth• FMB920 Bluetooth is enabled by default. Turn on Bluetooth on your PC, then select Add Bluetooth or other device > Bluetooth . Choose your device named – “FMB920_last_7_imei_digits ”, without LE in the end.• Enter default password 5555, press Connect and then select Done .3. You are now ready to use the device on your computer.1 Page 13, "LED indications"2 Page 7, "How to install USB drivers (Windows)"CONFIGURATIONAt first FMM003 device will have default factory settings set. These settings should be changed according to the users needs. Main configuration can be performed via Teltonika Configurator1 software. Get the latest Configurator version from here2. Configurator operates on Microsoft Windows OS and uses prerequisite MS .NET Framework. Make sure you have the correct version installed.1 /view/Teltonika_Configurator2 /view/Teltonika_Configurator_versionsMS .NET REQUIREMENTSOperating system MS .NET Framework version Version LinksWindows VistaWindows 7MS .NET Framework 4.6.232 and 64 bit 1 Windows 8.1Windows 101 /en-us/download/dotnet-framework/net462Downloaded Configurator will be in compressed archive. Extract it and launch Configurator.exe. After launch software language can be changed by clicking in the right bottom corner.Configuration process begins by pressing on connected device.After connection to Configurator Status window will be displayed.Various Status window1 tabs display information about GNSS2, GSM3, I/O4, Maintenance5 and etc. FMB920 has one user editable profile, which can be loaded and saved to the device. After any modification of configuration the changes need to be saved to device using Save to device button. Main buttons offer following functionality:Load from device – loads configuration from device.Save to device – saves configuration to device.Load from file – loads configuration from file.Save to file – saves configuration to file.Update firmware – updates firmware on device.Read records – reads records from the device.Reboot device – restarts device.Reset configuration– sets device configuration todefault.Most important configurator section is GPRS – where all your server and GPRS settings6can be configured and Data Acquisition7 – where data acquiring parameters can be configured. More details about FMM003 configuration using Configurator can be found in our Wiki8.1 /view/FMB920_Status_info2 /view/FMB920_Status_info#GNSS_Info3 /view/FMB920_Status_info#GSM_Info4 /view/FMB920_Status_info#I.2FO_Info5 /view/FMB920_Status_info#Maintenance6 /index.php?title=FMB920_GPRS_settings7 /index.php?title=FMB9201_Data_acquisition_ settings8 /index.php?title=FMB920_ConfigurationQUICK SMS CONFIGURATIONDefault configuration has optimal parameters present to ensure best performance of track quality and data usage.Quickly set up your device by sending this SMS command to it:Note: Before SMS text, two space symbols should be inserted.GPRS SETTINGS:2001 – APN2002 – APN username (if there are no APN username,empty field should be left)2003 – APN password (if there are no APN password, empty field should be left)SERVER SETTINGS:2004 – Domain 2005 – Port2006 – Data sending protocol (0 – TCP, 1 – UDP)123456DEFAULT CONFIGURATION SETTINGSDEVICE MAKES A RECORD ON MOVING IF ONE OF THESE EVENTS HAPPEN:MOVEMENT AND IGNITION DETECTION:VEHICLE MOVEMENTwill be detected by accelerometer300seconds passesVEHICLE DRIVES 100 metersIGNITION WILL BE DETECTED by vehicle power voltage between 13,2 – 30 VVEHICLE TURNS 10 degreesSPEED DIFFERENCEbetween last coordinate and currentposition is greater than 10 km/hAfter successful SMS configuration, FMB920 device will synchronize time and update records to configured server. Time intervals and default I/O elements can be changed by using Teltonika Configurator 1 or SMS parameters 2.1 /view/Teltonika_Configurator2 /view/Template:FMB_Device_Family_Parameter_listDEVICE MAKES A RECORD ON STOP IF:RECORDS SENDING TO SERVER:1 HOUR PASSESwhile vehicle is stationary and ignition is offIF DEVICE HAS MADE A RECORDit is sent to the server every 120 secondsMOUNTING RECOMMENDATIONSCONNECTING WIRES• Wires should be fastened to the other wires or non-moving parts. Try to avoid heat emitting and moving objects near the wires.• The connections should not be seen very clearly. If factory isolation was removed while connecting wires, it should be applied again.• If the wires are placed in the exterior or in places where they can be damaged or exposed to heat, humidity, dirt, etc., additional isolation should be applied.• Wires cannot be connected to the board computers or control units.CONNECTING POWER SOURCE• Be sure that after the car computer falls asleep, power is still available on chosen wire. Depending on car, this may happen in5 to 30 minutes period.• When module is connected, measure voltage again to make sure it did not decrease.• It is recommended to connect to the main power cable in the fuse box.• Use 3A, 125V external fuse.CONNECTING IGNITION WIRE• Be sure to check if it is a real ignition wire i. e. power does not disappear after starting the engine.• Check if this is not an ACC wire (when key is in the first position, most of the vehicle electronics are available).• Check if power is still available when you turn off any of vehicles devices.• Ignition is connected to the ignition relay output. As alternative, any other relay, which has power output when ignition is on, may be chosen.CONNECTING GROUND WIRE• Ground wire is connected to the vehicle frame or metal parts that are fixed to the frame.• If the wire is fixed with the bolt, the loop must be connected to the end of the wire.• For better contact scrub paint from the spot where loop is going to be connected.BEHAVIOUR MEANINGPermanently switched on GNSS signal is not received Blinking every secondNormal mode, GNSS is working OffGNSS is turned off because:Device is not working or Device is in sleep modeBlinking fast constantlyDevice firmware is being flashedBEHAVIOUR MEANING Blinking every secondNormal mode Blinking every two secondsSleep mode Blinking fast for a short time Modem activityOffDevice is not working or Device is in boot modeLED INDICATIONSNAVIGATION LED INDICATIONSSTATUS LED INDICATIONSBASIC CHARACTERISTICSMODULE Name Teltonika TM2500Technology GSM, GPRS, GNSS, BLUETOOTHGNSS GNSS GPS, GLONASS, GALILEO, BEIDOU, SBAS, QZSS, DGPS, AGPS Receiver33 channel Tracking sensitivity -165 dBM Accuracy < 3 m Hot start < 1 s Warm start < 25 s Cold start < 35 sCELLUAR Technology GSM2G bandsQuad-band 850 / 900 / 1800 / 1900 MHzData transfer GPRS Multi-Slot Class 12 (up to 240 kbps), GPRS Mobile Station Class B Data supportSMS (text/data)POWERInput voltage range 6 - 30 V DC with overvoltageprotectionBack-up battery170 mAh Li-Ion battery (0.63Wh) Internal fuse 3 A, 125 VPower consumption At 12V < 2 mA (Ultra Deep Sleep1) At 12V < 4 mA (Deep Sleep2)At 12V < 5 mA (Online Deep Sleep3) At 12V < 6 mA (GPS Sleep4)At 12V < 35 mA (nominal with no load)At 12V < 1A Max. (with full Load / Peak)BLUETOOTHSpecification 4.0 + LE1 wiki.teltonika.lt/index.php?title=FMB920_Sleep_modes&Ultra_Deep_ Sleep_mode2 wiki.teltonika.lt/index.php?title=FMB920_Sleep_modes&Deep_Sleep_ mode3 wiki.teltonika.lt/index.php?title=FMB920_Sleep_modes&Online_Deep_ Sleep_mode4 wiki.teltonika.lt/index.php?title=FMB920_Sleep_modes&GPS_Sleep_ mode SupportedperipheralsTemperature and Humiditysensor5, Headset6, OBDII dongle7,Inateck Barcode Scanner INTERFACEDigital Inputs1Digital Outputs1Analog Inputs1GNSS antenna Internal High GainGSM antenna Internal High GainUSB 2.0 Micro-USBLED indication 2 status LED lightsSIM Micro-SIMMemory128MB internal flash memory PHYSICAL SPECIFICATIONDimensions79 x 43 x 12 mm (L x W x H) Weight54 g5 teltonika.lt/product/bluetooth-sensor6 wiki.teltonika.lt/view/How_to_connect_Blue-tooth_Hands_Free_ adapter_to_FMB_device7 wiki.teltonika.lt/view/How_to_connect_OBD_II_Blue-tooth_Dongle_to_ FMB_deviceOPERATING ENVIRONMENTOperatingtemperature(without battery)-40 °C to +85 °CStorage temperature(without battery)-40 °C to +85 °C Operating humidity5% to 95% non-condensing Ingress ProtectionRating IP54Battery chargetemperature0 °C to +45 °CBattery dischargetemperature-20 °C to +60 °CBattery storage temperature -20 °C to +45 °C for 1 month -20 °C to +35 °C for 6 monthsFEATURESSensors AccelerometerScenarios Green Driving, Over Speeding detection, Jamming detection, GNSS Fuel Counter, DOUT Control Via Call, Excessive Idling detection, Unplug detection, Towing detection, Crash detection, Auto Geofence, Manual Geofence, Trip88 /view/FMB920_Features_settingsSleep modes GPS Sleep, Online Deep Sleep,Deep Sleesp, Ultra Deep Sleep9Configuration andfirmware updateFOTA Web10, FOTA11, TeltonikaConfigurator12 (USB, Bluetooth),FMBT mobile application13(Configuration)SMS Configuration, Events, DOUTControl, DebugGPRS commands Configuration, DebugTimeSynchronization GPS, NITZ, NTPFuel monitoring LLS (Analog), OBDII dongle14 Ignition detectionDigital Input 1, Accelerometer,External Power Voltage, Engine RPM(OBDII dongle14)9 /view/FMB920_Sleep_modes10 /view/FOTA_WEB11 /view/FOTA12 /view/Teltonika_Configurator13 /view/FMBT_Mobile_application14 /view/How_to_connect_OBD_II_Bluetooth_ Dongle_to_FMB_deviceELECTRICAL CHARACTERISTICSCHARACTERISTICDESCRIPTION VALUE SUPPLY VOLTAGE MIN.TYP.MAX.UNITSupply Voltage(RecommendedOperating Conditions)+6+30V DIGITAL OUTPUT (OPEN DRAIN GRADE)Drain current (DigitalOutput OFF)120µA Drain current(Digital Output ON,RecommendedOperating Conditions)0.5AStatic Drain-Sourceresistance (DigitalOutput ON)300mΩDIGITAL INPUTInput resistance (DIN1)47kΩInput voltage(RecommendedOperating Conditions)030V Input Voltage threshold 2.5V CHARACTERISTICDESCRIPTION VALUESUPPLY VOLTAGE MIN.TYP.MAX.UNIT ANALOG INPUTInput Voltage(RecommendedOperating Conditions)030V Input resistance150kΩMeasurement erroron 12V3% Additional error on 12V360mV Measurement erroron 30V3% Additional error on 30V900mVThis message contains information on how to operate FMB920 safely. By following these requirements and recommendations, you will avoid dangerous situations. You must read these instructions carefully and follow them strictly before operating the device!•The device uses SELV limited power source. The nominal voltage is +12 V DC. The allowed voltage range is +6...+30 V DC.•To avoid mechanical damage, it is advised to transport the device in an impact-proof package. Before usage, the device should be placed so that its LED indicators are visible. They show the status of device operation.•When connecting the connection (1x5) cables to the vehicle, the appropriate jumpers of the power supply of the vehicle should be disconnected.• Before dismounting the device from the vehicle, the 1x5 connection must be disconnected.•The device is designed to be mounted in a zone of limited access, which is inaccessible to the operator. All related devices must meet the requirements of EN 62368-1 standard.•The device FMB920 is not designed as a navigational device for boats.SAFETY INFORMATIONDo not disassemble the device. If the device is damaged, the power supply cables are not isolated or the isolation is damaged, DO NOT touch the device before unplugging the powe supply.All wireless data transferring devices produce interference that may affect other devices which are placed nearby.The device must be firmly fastened in a predefined location.The programming must be performed using a PC with autonomic power supply.The device must be connected only by qualified personnel.Installation and/or handling during a lightning storm is prohibited.The device is susceptible to water and humidity.CERTIFICATION AND APPROVALSThis sign on the package means that it is necessary to read the User‘s Manual before your start using the device. Full User‘s Manual version can be found in our Wiki 1.1 /index.php?title=FMB920Hereby, Teltonika declare under our sole responsibility that the above described product is in conformity with the relevant Community harmonization: European Directive 2014/53/EU (RED).E-Mark and e-Mark are the European conformity marks issued by the transport sector, indicatingthat the products comply with relevant laws and regulations or directives. Vehicles and relatedproducts need to go through the E-Mark certification process to be legally sold in Europe.SIRIM QAS International Sdn. Bhd. is Malaysia’s leading testing,inspection and certification body.The RoHS1 is a directive regulating the manufacture, import and distribution of Electronics and Electrical Equipment (EEE) within the EU, which bans from use 10 different hazardous materials (to date).The Declaration EAC and the Certificate EAC in conformity with the technical regulation TR CU of the EurAsEC Customs Union are EAC certification documents issued by independent organizations. Such organizations perform their function through laboratories accredited to the public agencies in charge of the supervision of metrology and standardization in the three countries of the EAC Custom Union, joining at the moment the certification system : Russia, Belarus, Kazakhstan, Armenia and Kyrgyzstan.Para maiores informações, consulte o site da ANATEL .brEste equipamento não tem direito à proteção contra interferência prejudicial e não pode causar interferência em sistemas devidamente autorizados.For more information, see the ANATEL website .brThis equipment is not entitled to protection against harmful interference and must not cause interference in duly authorized systems.This sign on the package means that all used electronic and electric equipment should not be mixed with general household waste.CHECK ALL CERTIFICATES All newest certificates may be found in our Wiki 2.2 /view/FMB920_Certification_%26_ApprovalsREACHREACH addresses the production and use of chemical substances, and their potential impacts on both human health and the environment. Its 849 pages took seven years to pass, and it has been described as the most complex legislation in the Union's history and the most important in 20 years. It is the strictest law to date regulating chemical substances and will affect industries throughout the world.WARRANTYWe guarantee our products 24-month warranty1 period.All batteries carry a 6-month warranty period.Post-warranty repair service for products is not provided.If a product stops operating within this specific warranty time, the product can be:• Repaired• Replaced with a new product• Replaced with an equivalent repaired product fulfilling the same functionality• Replaced with a different product fulfilling the same functionality in case of EOL for the original product1 Additional agreement for an extended warranty period can be agreed upon separately. WARRANTY DISCLAIMER• Customers are only allowed to return products as a result of the product being defective, due to order assembly or manufacturing fault.• Products are intended to be used by personnel with training and experience.• Warranty does not cover defects or malfunctions caused by accidents, misuse, abuse, catastrophes, improper maintenance or inadequate installation – not following operating instructions (including failure to heed warnings) or use with equipment with which it is not intended to be used.• Warranty does not apply to any consequential damages.• Warranty is not applicable for supplementary product equipment (i. e. PSU, power cables, antennas) unless the accessory is defective on arrival.• More information on what is RMA11 /view/RMA_guidelines。
得力DL-920K针式打印机程序员手册 说明书

绪 言承蒙惠顾,购得DL-920K打印机。
操作手册详细阐述了本机的性能及操作方法,能指导您正确使用。
当您遇到疑问或机器发生故障时,此手册会带给您很大的帮助。
DL-920K在硬件方面别具特色。
其采用高速打印头设计,打印速度高达175汉字/秒,打印头寿命达4亿次/针,轻松实现各类票据打印。
软件方面,DL-920K兼容所有STAR、EPSON和OKI 打印机,拥有打印针调整和断针自动补偿功能等技术,方便的自动撕纸、参数设置是其特色功能。
DL-920K外观时尚、可靠性高,是税务、企业财务、保险、电信等行业部门票据打印理想选择。
本产品信息如有更改,恕不另行通知。
本资料仅供参考。
除中国现行法律法规规定,得力集团不承担任何由于使用本资料而造成的直接或间接损失的责任。
得力集团保留最终解释权。
目 录第1章安装打印机 ...................................... 1-11.1开箱和检查 ...................................... 1-11.2放置打印机 ...................................... 1-21.3打印机部件 ...................................... 1-31.4载纸板的安装及拆卸 .............................. 1-51.5安装和拆卸色带 .................................. 1-61.6打印机和主机连接 ................................ 1-81.7连接电源 ........................................ 1-91.8安装打印驱动程序 ............................... 1-10第2章纸的安装和使用 .................................. 2-12.1选纸 ............................................ 2-12.2调校打印头间隙 .................................. 2-12.3使用单页纸 ...................................... 2-22.4使用链式打印纸 .................................. 2-4第3章控制面板 ....................................... 3-13.1按钮及其指示灯 .................................. 3-13.2开机功能 ........................................ 3-33.3组合功能 ........................................ 3-63.4设置模式下的按键功能 ............................ 3-9第4章参数设置 ....................................... 4-14.1如何进行参数设置 ................................ 4-24.2系统设置 ........................................ 4-34.3纸张设置 ........................................ 4-74.4接口设置 ....................................... 4-144.5仿真设置 ....................................... 4-154.6其他设置 ....................................... 4-164.7纵向校正 ....................................... 4-174.8恢复出厂设置 ................................... 4-20第5章票据通设置和使用 ................................ 5-15.1票据通设置 ...................................... 5-15.2票据通的使用 .................................... 5-3第6章自定义页面 ...................................... 6-16.1摩擦纸页长调整 .................................. 6-26.2摩擦纸页首调整 .................................. 6-36.3摩擦纸左边界调整 ................................ 6-46.4摩擦纸底空调整 .................................. 6-56.5链式纸页长调整 .................................. 6-66.6链式纸页首调整 .................................. 6-76.7链式纸左边界调整 ................................ 6-86.8链式纸底空调整 .................................. 6-96.9撕纸位置调整 ................................... 6-10第7章故障和保养 ...................................... 7-17.1故障处理 ........................................ 7-17.2保养与维护 ...................................... 7-6第8章规格 ........................................... 8-18.1打印机规格 ...................................... 8-18.2字符集 .......................................... 8-48.3控制码摘要表 ................................... 8-108.3.1 ESC/P和LQ仿真控制码摘要表 ..................... 8-108.3.2OKI仿真控制码摘要表............................ 8-14附录1:电子电气产品有害物质限制使用的说明 ............. 9-1安全规范企业公开信息:1.售后服务请致电得力全国服务热线:400-185-05552.产品能耗:a. 本产品符合GB21521-2014《打印机、传真机能效限定值及能效等级》一级能效等级最高要求。