3KU-RepetierHost安装使用教程
【打印虎原创】3D打印控制软件Repetier-Host使用基础图解教程

【打印虎原创】3D打印控制软件Repetier-Host使用基础图解教程玩3D打印机,特别是Reprap类3D打印机的朋友,一般都听说过Repetier-Host这个软件。
这个软件功能丰富,界面友好,是玩3D打印机入门的好选择。
今天我就给大家介绍一下这款软件。
Repetier-Host软件目前版本是0.95F(打印虎本地下载,百度云下载)。
我们在【打印虎原创】Prusa_i3_3D打印机软件安装图解教程中,介绍了如何安装、设置这个软件,还有如何连接3D打印机。
所以这里我就不再重复介绍了。
假如你已经安装好软件,并且设置好了与3D打印机的连接,我们就可以开始了。
Repetier-Host软件主界面是这个样子的:可以看出,Repetier-Host是一个很复杂的软件。
下面我逐步介绍给大家。
第一节,模型的载入和查看既然是玩3D打印机,那一定要有3D模型啊。
Repetier-Host软件可以载入已有的3D模型。
虽然没有3D建模软件3ds Max之类的强大功能,但它也可以对3D模型做一定的调整。
想了解Repetier-Host有哪些功能,可以跟着我一步一步做:第一步,载入一个模型按下窗口左上角的“载入”按钮,就可以打开文件选择对话框,载入一个模型文件了。
Repetier-Host支持很多种格式的3D模型文件格式。
其中最常见的还是.stl格式。
.stl格式是一种非常简单的3D模型文件格式,而且是基于文本的格式,可以直接用文本编辑工具打开查看、编辑。
.stl格式具体的怎样的,以后打印虎会再独立介绍。
现在,我们只要知道Repetier-Host是支持.stl格式的模型就可以了。
这里的例子是我从打印虎3D模型库下载的“坐着的猫”3D模型。
下载这个文件之后,就可以用Repetier-Host打开了:最容易发现的是,左侧的3D窗口里面,猫模型已经被载入了。
另外,右侧的模型列表中,也出现了相应的一项(红圈圈里面)。
有一点需要特别注意到,那就是左侧的3D窗口,与一般的3D建模软件有些不同,在于它的辅助平面上面有一个框框。
Repetier-Host安装及使用教程
Repetier-Host 使用教程概述Repetier-Host是Repetier公司开发的一款免费的3D打印综合软件,可以进行切片、查看修改G-Code、手动控制3D打印机、更改某些固件参数以及其他的一些小功能。
Repetier 公司并不提供切片引擎,而是在该软件中外部调用其他的切片软件进行切片,比如CuraEngine、Slic3r及Skeinforge等切片软件。
在同类软件(如Printrun,Repelicator-G)中使用起来是比较方便的一款。
安装Repetier-Host当前为1.0.6版,下载地址为/download/,选择相应的操作系统下载即可。
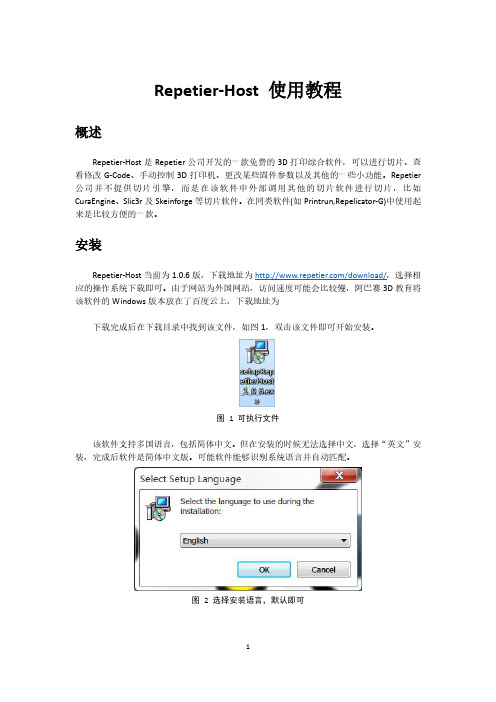
由于网站为外国网站,访问速度可能会比较慢,阿巴赛3D教育将该软件的Windows版本放在了百度云上,下载地址为下载完成后在下载目录中找到该文件,如图1,双击该文件即可开始安装。
图 1 可执行文件该软件支持多国语言,包括简体中文。
但在安装的时候无法选择中文,选择“英文”安装,完成后软件是简体中文版。
可能软件能够识别系统语言并自动匹配。
图 2 选择安装语言,默认即可接下来选择安装目录图 3 选择安装目录然后选择需要加载的切片引擎,默认加载CuraEngine和Slic3r,可选择加载Skeinforge,由于该切片引擎用起来很不爽,故笔者不建议选择。
若选择,须联网下载图 4 选择切片引擎下面选择“创建桌面图标”,图 5 创建桌面图标安装完成后,桌面出现快捷方式。
运行Repetier-Host软件,主界面如下图工具栏视图区功能区图 6 Repetier-Host主界面Repetier-Host软件主界面包括菜单栏,工具栏,视图区和功能区。
工具栏主要用于连接打印机,对打印机进行设置。
视图区主要用来查看模型、G-Code文件、观察温度变化曲线,另外包含一些查看视角快捷按钮。
功能区是该软件的核心区域,包含5个功能块:物体放置、切片软件、预览、手动控制和SD卡。
浪潮Cinder主机插件用户手册说明书
浪潮存储平台主机插件用户手册文档版本发布日期适用版本尊敬的用户:衷心感谢您选用浪潮存储!浪潮存储秉承“云存智用运筹新数据”的新存储之道,致力于为您提供符合新数据时代需求的存储产品和解决方案。
本手册用于帮助您更详细地了解和便捷地使用本存储,涉及的截图仅为示例,最终界面请以实际设备显示的界面为准。
由于产品版本升级或其他原因,本手册内容会不定期进行更新,如有变动恕不另行通知。
除非另有约定,本手册仅作为使用指导,本手册中的所有陈述、信息和建议不构成任何明示或暗示的担保。
浪潮拥有本手册的版权,保留随时修改本手册的权利。
未经浪潮许可,任何单位和个人不得以任何形式复制本手册的内容。
如果您对本手册有任何疑问或建议,请向浪潮电子信息产业股份有限公司垂询。
技术服务电话:4008600011地址:中国济南市浪潮路1036号浪潮电子信息产业股份有限公司邮编:250101在您正式使用本存储之前,请先阅读以下声明。
只有您阅读并且同意以下声明后,方可正式开始使用本存储。
如果您对以下声明有任何疑问,请和您的供货商联系或直接与我们联系。
如您在开始使用本系统前未就以下声明向我们提出疑问,则默认您已经同意了以下声明。
1.请不要自行拆卸本存储的机箱及机箱内任何硬件设备。
在本存储出现任何硬件故障或您希望对硬件进行任何升级时,请您将机器的详细硬件配置反映给我们的客户服务中心。
2.请不要将本存储的设备与任何其他型号的相应设备混用。
本存储的内存、CPU、CPU散热片、风扇、硬盘托架、硬盘等都是特殊规格的。
3.在使用本存储时遇到任何软件问题,请您首先和相应软件的提供商联系。
由提供商和我们联系,以方便我们共同沟通和解决您遇到的问题。
对于数据库、网络管理软件或其他网络产品的安装、运行问题,我们尤其希望您能够这样处理。
4.上架安装本存储前,请先仔细阅读相关产品手册中的快速安装指南。
我们致力于产品功能和性能的持续提升,部分功能及操作与手册描述可能会有所差异,但不会影响使用。
kuebler 一般操作手册
kuebler 一般操作手册Kubernetes(简称Kuebler)是一个开源的容器编排系统,用于自动化容器化应用程序的部署、扩展和管理。
以下是Kuebler的一般操作手册:1. 安装和配置:首先,您需要在您的环境中安装和配置Kubernetes。
您可以从Kubernetes的官方网站上下载适合您操作系统的安装包,并按照说明进行安装。
安装完成后,您需要配置网络和存储等基础设施。
2. 创建集群:在安装和配置好Kubernetes后,您需要创建一个集群。
集群是Kubernetes中的一个基本概念,它由一组节点组成,节点上运行着容器。
您可以使用kubeadm等工具来创建一个新的集群。
3. 部署应用程序:一旦集群创建完成,您就可以开始部署应用程序了。
在Kubernetes中,应用程序由一组容器组成,这些容器共同运行并协作。
您可以使用Kubernetes提供的各种API和工具来部署应用程序,例如kubectl命令行工具或Kubernetes的自定义资源定义(CRD)。
4. 管理和监控:一旦应用程序部署完成,您需要对其进行管理和监控。
Kubernetes提供了许多工具和API来监视和管理集群和应用程序的状态。
例如,您可以使用kubectl命令行工具来获取集群和应用程序的状态信息,使用Prometheus等工具来收集和存储监控数据。
5. 扩展和升级:随着应用程序的需求增加或变化,您可能需要扩展或升级应用程序。
Kubernetes提供了许多工具和策略来帮助您实现这一目标,例如自动缩放和滚动更新等。
6. 故障排查:如果集群或应用程序出现问题,您需要进行故障排查。
Kubernetes提供了许多工具和日志来帮助您找到问题所在并解决它们。
例如,您可以使用kubectl命令行工具来获取容器的日志或诊断信息。
以上是Kuebler的一般操作手册,希望对您有所帮助。
请注意,这只是一个概述,具体的操作步骤和细节可能因您的环境和需求而有所不同。
Sennheiser Updater - 端用户安装指南说明书

1.Sennheiser Updater InstallationCopy the installation package (Sennheiser_Updater_vX.Y.ZZZZ.exe) at any local path (E.g. C:\MySoftwares\)Using the installer setup fileExecute the “Sennheiser_Updater_vX.Y.ZZZZ.exe”, select the preferred language, accept the License Agreement and follow the further steps.Using the installer setup via command promptRun the Command Prompt (Start → All Programs → Accessories → Command Prompt).The below table describes the commands required during the installation:with ‘/L’ option to install Sennheiser Updater in a particular language. If not specified, user will be prompted to choose the preferred language.Below list mentions the corresponding language code for the preferred language:∙1030: For Danish language∙1031: For German language∙1033: For English language∙1034: For Spanish language∙1036: For French language∙1040: For Italian language∙1043: For Dutch language∙1053: For Swedish languageNote:For enabling ‘Forced Upgrade’feature of Sennheiser Updater, the xml config file (“sdfu_fu_options.xml”) along with the installer (Sennheiser_Updater_vX.Y.ZZZZ.exe) have to be present to be in the same folder.Using the configuration file along with installer setup fileOne or more entities described in the below table can be supplied in an xml file whose name can be passed as command line option/argument in the FU_CONFIG property (while executing Sennheiser Updater application installer setup file). If the name is not provided then installer will take its default value for FU_CONFIG as “sdfu_fu_options.xml”.Example of the xml file whose name needs to be passed as command line argument:<SeComAppForcedUpgradeOptions><AutoUpgradeCheckDuration>8</AutoUpgradeCheckDuration><DenyCount>0</DenyCount><ElapsedAutoUpgradeCheckDuration>0</ElapsedAutoUpgradeCheckDura-tion><ElapsedTime>0</ElapsedTime><ForcedUpgrade>False</ForcedUpgrade><ForcedUpgradeAll>true</ForcedUpgradeAll><ForcedUpgradeDelayTimeInterval1>15</ForcedUpgradeDelayTimeInter-val1><ForcedUpgradeDelayTimeInterval2>30</ForcedUpgradeDelayTimeInter-val2><ForcedUpgradeDelayTimeInterval3>45</ForcedUpgradeDelayTimeInter-val3><ForcedUpgradeHeadsetInfo><Model>Sennheiser Dect</Model><Model>Sennheiser Presence</Model></ForcedUpgradeHeadsetInfo><ForcedUpgradeMaxDenyCount>3</ForcedUpgradeMaxDenyCount><ForcedUpgradePopupWaitTime>5</ForcedUpgradePopupWaitTime><SDFUVersion>X.Y.ZZZZ</SDFUVersion><SelectedDenyInterval>0</SelectedDenyInterval><LaunchOption>True</LaunchOption><Language>en</Language><ShowFWUModeOptions>Both</ShowFWUModeOptions><RD_Mode>False</RD_Mode><AllowDowngrade>00</AllowDowngrade><Timeout_FWBinDownload_DWO>60</Timeout_FWBinDownload_DWO><Timeout_FWBinDownload_Capricorn>60</Timeout_FWBinDown-load_Capricorn><Timeout_FWBinDownload_Conexant>60</Timeout_FWBinDown-load_Conexant><Timeout_FWBinDownload_Rio3>60</Timeout_FWBinDownload_Rio3><TimeOut_FWUpgrade_DWO>900</TimeOut_FWUpgrade_DWO><TimeOut_FWUpgrade_Capricorn>300</TimeOut_FWUpgrade_Capricorn><TimeOut_FWUpgrade_Conexant>120</TimeOut_FWUpgrade_Conexant><TimeOut_FWUpgrade_Rio3>120</TimeOut_FWUpgrade_Rio3><Read_DWO_FW_Version_After_This_Time>10</Read_DWO_FW_Ver-sion_After_This_Time></SeComAppForcedUpgradeOptions>For installing Sennheiser Updater as per entities mentioned in an xml file named “mycon-fig.xml”, one has to run following command from the command line.Sennheiser_Updater_vX.Y.ZZZZ.exe /v"FU_CONFIG=myconfig.xml"Note:It is mandatory to keep “myconfig.xml” and insta ller file of Sennheiser Updater in same folder on the machine.2.Sennheiser Updater Uninstallation。
开源3D打印机软件Repetier使用教程
开源3D打印机软件Repetier使用教程3D打印技术在近年来迅速发展,并逐渐普及。
作为实现3D打印的重要工具之一,3D打印机软件在打印过程中起到了至关重要的作用。
Repetier是一款开源的3D打印机软件,具有强大的功能和灵活的使用方式。
本文将为您提供一份Repetier的使用教程,让您能够更好地利用这一工具进行3D打印。
首先,在使用Repetier前,我们需要安装相应的驱动程序。
根据你所使用的3D打印机型号,从Repetier官方网站上下载并安装对应的驱动程序。
安装完成后,将3D打印机通过USB线与电脑连接。
此时,我们就可以开始使用Repetier了。
打开Repetier软件后,我们会看到一个直观且易于理解的用户界面。
在软件的顶部,有一排常用功能按钮,如导入模型、调整打印参数等。
在界面的右侧,则显示了3D打印机当前的状态信息,如温度、运动轨迹等。
接下来,我们需要导入要打印的模型。
Repetier支持导入多种格式的3D模型文件,包括常见的STL格式。
点击界面顶部的“导入”按钮,选择你要打印的模型文件。
导入后,我们可以在界面的左侧看到这个模型,同时也可以对其进行缩放、平移和旋转等操作,以适应打印需求。
在导入模型后,我们需要设置打印参数。
点击界面顶部的“设置”按钮,可以进入打印参数调整的界面。
在这个界面中,我们可以设置打印温度、打印速度、打印材料等参数。
根据你所使用的3D打印机型号和打印材料的特性,合理地调整这些参数能够获得更好的打印效果。
调整好打印参数后,我们需要进行切片操作,将模型转换为3D打印机能够识别和打印的指令。
点击界面顶部的“切片”按钮,选择切片模式,并设置好切片参数。
Repetier支持多种切片引擎,可以选择自己熟悉和喜欢的切片软件。
在切片过程中,Repetier会根据设定的参数,将模型分割为多个薄片,并生成相应的打印路径。
切片完成后,我们可以将切片好的文件发送到3D打印机进行打印。
4打印机软件Repetier-Host中文说明书
4打印机软件Repetier-Host中文说明书4打印机软件Repetier-Host中文说明书1、简介Repetier-Host是一款用于控制3D打印机的软件。
本文档将详细介绍该软件的安装、设置和使用方法。
2、系统要求在开始使用Repetier-Host之前,请确保您的计算机系统符合以下要求:- 操作系统:Windows 7及以上版本、Mac OS X 10.8及以上版本、Linux- 处理器:双核处理器及以上- 内存.4GB及以上- 硬盘空间:至少100MB可用空间3、安装Repetier-Host1) Repetier-Host安装程序。
2) 运行安装程序,并按照提示完成安装过程。
3) 安装完成后,启动Repetier-Host。
4、连接3D打印机1) 将3D打印机通过USB线缆连接到计算机。
2) 打开Repetier-Host,在主界面“连接”按钮。
3) 在弹出的对话框中选择正确的串口和波特率,“连接”按钮。
5、配置打印机参数1) 在主界面的左侧菜单栏中“配置”。
2) 在“机械”选项卡中,设置打印机的相关参数,如打印范围、步进电机细分等。
3) 在“温度”选项卡中,设置打印头和热床的温度。
4) 在“连接”选项卡中,可以设置打印机连接方式和通信参数。
5) 在“外观”选项卡中,可以设置软件的界面显示方式。
6) 完成配置后,“保存”按钮。
6、打印模型1) 在主界面的左下方“打开G代码”按钮,选择要打印的模型文件。
2) 在打开的模型文件中,通过鼠标操作调整模型的位置和大小。
3) “切片和预览”按钮,选择适当的切片参数,并G代码。
4) 在预览界面中,可以查看模型的打印轨迹和预估打印时间。
5) “开始打印”按钮,开始打印模型。
7、监控打印过程1) 在打印过程中,可以通过主界面的右侧监控窗口实时查看打印进度和温度信息。
2) 如果发现打印异常,可以通过右侧菜单栏中的“暂停”按钮暂停打印,并进行必要的调整。
Bluehost 主机安装WordPress 教程
Bluehost 主机安装WordPress 教程by bluehost Saturday, 24 December, 2011简要文字记录下在Bluehost 主机安装WordPress 博客系统,以免忘记。
需要用WordPress 做个人博客的朋友也可以借鉴下,大致是想通的。
Bluehost 安装WordPress 过程如下:1、下载WordPress 最新版本源代码2、为Blog创建数据库。
进入cPanel面板,选择mysqldatabase选项,新建数据库(数据库名:WordPress),新建数据库用户(用户名:wd123、密码:123456),在下面将这个数据库用户添加到数据库中,并且指定权限为所有权限(ALL PRIVILEGES)(注意:数据库创建好后系统会自动在数据库名、数据库用户名前面加上你主机的用户名,比如主机帐户是yourdomain,那么数据库名就是yourdomain_WordPress、数据库用户名:yourdomain_wd123)3、用FTP上传工具登录空间,这里,我们使用CuteFTP登陆空间,将WordPress压缩包上传到public_html目录下(参考CuteFTP使用方法),上传完毕之后,进入cpanel面板,选择File Manager 选项,到根目录下选中Wordpress压缩包,点击上面的Extract(仅支持zip格式)进行解压4、在地址栏中输入域名,这时会提示要你创建wp-config.php配置文件,单击Create a Confiuration File 创建配置文件,这时,会显示需要提供的信息:Database Name(数据库名)Database Username(数据库用户名)Database Password(数据库密码)Database host(数据库主机地址)Table Prefix(数据表前缀)填写好后,单击Let’s go。
【打印虎】Repetier-Server基础图解教程
【打印虎】Repetier-Server基础图解教程玩3D打印机的朋友,安装了最近的Repetier-Host 1.5.6之后(打印虎本地下载,百度云下载),会发现Repetier-Host会缺省附带安装Repetier-Server 0.60.4,这个软件给Repetier-Host增加了(私有)云功能。
这一功能,允许用户把3D打印机部署在远程(也许是另一件屋子,也许是另一个城市),通过Repetier-Server提供的服务,连接、管理、操作3D打印机。
相比于直接使用Repetier-Host加USB连接3D打印机的方式,这样做有几个明显的好处:对于个人使用者来说,把3D打印机放在另一间屋子,可以减少3D打印过程中产生的塑料味道的吸入,有利于健康;对于拥有多台3D打印机的企业来说,可以更加有效的管理这些3D打印机,把他们组成一个3D打印机农场;对于出售3D 打印服务的商家来说,可以让服务的用户直接提交3D打印任务,观察任务执行的进度,让3D打印服务更加可视透明,提高用户的满意程度。
这么看,是不是感觉Repetier-Server是一个特别有用的工具?如果你对这个新工具感兴趣,可以读这篇教程,和我一起了解一下它。
可能你眼下还用不上其中的一些高级功能,但也说不准以后就会发现合适的使用场景。
既然是一个远程服务端工具,Repetier-Server自然会提供远程访问的方法。
目前最主要的使用方式有两种,一种是使用浏览器,直接访问Repetier-Server提供的Web服务,这种方式使用便捷,不论是电脑还是PAD还是手机都可以使用,但缺少一些前段处理STL 3D 模型方面的功能。
另一种方式是和Repetier-Host客户端配合使用,这样可以利用Repetier-Host弥补Repetier-Server 3D模型处理方面的不足,但要比Web方式麻烦一些。
这两种使用方式,我们在下文都会进行介绍,大家对这两种远程访问方法所能提供的功能有所了解之后,选择自己合适的方式即可。
Momentus 5400.3 蓝色服务器安装指南说明书
Momentus 5400.3 Blade Server Installation Guide ST9160821AB, ST9120822AB, ST9100828AB, ST980815AB, ST960815AB and ST9402116ABATA Interface Disc DrivesPublication Number: 100409997, Rev. A, April 2006The easiest way to install your driveMost blade servers are designed to make it possible to easily replace the hard drive. Refer to your system’s user manual for the location of the hard drive compartment and the specific instructions regarding replacement. Caution.Special training or tools may be needed to service some blade servers.Refer to your system manufacturer’s support website for the most up-to-date information. Read and follow all instructions regarding the proper steps to be taken when replacing the hard drive.What you need• A Phillips screwdriver•Existing drive mounting screws•Existing blade server drive mounting framework, cage, or tray•ATA interface adapter (built into blade servers)Handling precautions/electrostatic discharge protection •Disc drives are fragile. Do not drop or jar the drive. Handle the drive only by the edges or frame. Keep the drive in the electrostatic discharge (ESD) bag until you are ready to install it to minimize handling damage.•Drive electronics are extremely sensitive to static electricity. While installing the drive, wear a wrist strap and cable connected to ground.•Turn off the power to the blade server during installation. In most blade server host systems, you do not need to shut down the entire system chassis itself, just power to the blade server itself. Refer to the system’s documentation for information specific to your particular system.•Do not disassemble the drive. Doing so voids the warranty. See the war-ranty information on page 2.•Do not apply pressure or attach labels to the circuit board or to the top of the drive.Drive characteristicsST9160821AB ST9120822AB Formatted capacity** 160 Gbytes120 GbytesTotal number of sectors* 312,581,808234,441,648Cache size8 Mbytes8 MbytesST9100828AB ST980815AB Formatted capacity** 100 Gbytes80 GbytesTotal number of sectors* 195,371,568156,301,488Cache size8 Mbytes8 MbytesST960815AB ST9402116AB Formatted capacity** 60 Gbytes40 GbytesTotal number of sectors* 117,210,24078,140,160Cache size8 Mbytes8 Mbytes*One sector equals 512 bytes.**One Gbytes equals one billion bytes when referring to hard drive capac-ity. Accessible capacity may vary depending on operating environment and formatting.Replacing the existing hard driveEach system has its own unique hard drive compartment. Refer to your system manual to locate the hard drive compartment and for instructions on removing and replacing the hard drive.Warning.Ensure that power to the drive is removed or turned off. In a blade server, this typically means turning off power to the bladeserver itself, not the host chassis.Note.This drive is designed for a blade server that supplies interface sig-nals and +5V power through a single 44-pin connector. Most blade servers have a fixed connector that attaches directly to the drive. Some blade servers allow two drives to be installed and setup in a mirrored RAID configuration. If this is your situation, ensure that the storage capaci-ties and speeds of the two drives are identical to avoid potential perfor-mance and reliability problems.Setting the jumpersRefer to the jumper settings in Figure 1 or on your drive label to configure the drive for your system. Jumper settings can also be accessed online from our web site at .Master or single drive: Use the options jumper block shown in Figure 1 to configure the drive for operation. This jumper block is the 4-pin header adjacent to pins 1 and 2 of the I/O signal pins.Note.For blade server operation, use cable select (default) or master. Figure 1.four screws in the bottom-mounting holes. See Figure 2 for drive mounting dimensions. Follow these important mounting precautions when mounting the drive:•Allow a minimum clearance of 0.030 inches (0.76 mm) around the entire perimeter of the drive for cooling.•Use only M3 UNC mounting screws. (Reusing the existing screws may be acceptable provided the maximum screw penetration depth of 0.098 inches is not exceeded.)•Gently tighten the mounting screws (maximum torque: 4.0 in-lb).•Four (4) threads (0.080 inches) minimum screw engagement recom-mended.Figure 2.Mounting dimensions—end, top, side, and bottom viewsConfiguring the BIOSAfter completing the drive installation, restart your blade server according to your system documentation. Your blade server may automatically detect your new drive. If your server does not automatically detect your new drive, follow the steps below.1.Restart your blade server. While it restarts, run the system setup pro-gram (sometimes called BIOS or CMOS setup). This is usually done by pressing a special key, such as DELETE, ESC, or F1 during the startup process.2.Within the system setup program, instruct the blade server to autodetect your new drive.3.Save the settings and exit the setup program.When your blade server restarts, it should recognize your new drive. If your server still doesn’t recognize your new drive, see the troubleshooting section on this sheet.System manufacturer’s operating system restore CDRefer to your blade server’s system documentation for specific instructions on restoring the operating system on your newly installed hard drive. Many computers require the use of an operating system restore CD, originally shipped with the system, to reload the operating system on the hard drive. Microsoft operating system installation instructionsFor detailed information about installing a Microsoft operating system on your new Seagate drive, refer to the Microsoft Knowledgebase article ref-erences below. To locate an article, go to and enter the article number in any search box on the Microsoft web site. For example, to view the Knowledgebase article for installing Windows XP on your new Seagate drive:1.Open your browser.2.Go to .3.Enter 313348 in the Microsoft web site search box.4.Press Enter.The article is displayed on your screen.Operating systemMicrosoft Knowledgebase article numbers Windows XP313348Windows 2000/NT308209 (see also: 175761)Windows Me/98/95255867 (see also: 166172)Preparing the drive using DiscWizardWe recommend using DiscWizard Starter Edition to automatically partition and format your drive. DiscWizard software is available at and is free. To run DiscWizard:1.Insert your bootable DiscWizard Starter Edition diskette or CD and fol-low the instructions. DiscWizard will guide you through the installation process.2.Boot your blade server from the Windows operating system CD-ROMor from your system startup diskette with the Windows CD loaded. Fol-low the instructions provided on your screen.TroubleshootingIf your drive is not working properly, these troubleshooting tips may help solve the problem.1.Does the drive spin up? A spinning drive produces a faint whine andclicking noise. If your drive does not spin, check that the power con-nector and interface cable are securely attached.2.Does the computer recognize the drive? Verify that the drive isenabled in the system CMOS or setup program. If not, select the auto detect option and enable it. If your drive has a problem, it may not be recognized by the system. If the operating system does not recognize the drive, you need to load your host adapter drivers.3.Does FDISK detect the drive? Run the FDISK program located onyour Windows startup diskette. Type fdisk/status to verify that your hard drive is present and recognized by the system.4.I’m running Windows 98 and FDISK is not reporting the fullcapacity of my drive. Why? You need to upgrade your version of FDISK if you are using the diskettes or CD that came with your original Windows 95 or 98 operating system. Microsoft provides a free down-loadable FDISK upgrade. See Microsoft Knowledgebase article num-ber: 263044 located at .5.Does ScanDisk find the drive defect-free? ScanDisk is a utilitylocated on your Windows startup diskette that scans the drive for defects. If defects are detected, this may be an indication of a problem.6.Why does my computer hang on startup? Verify that your system isATA compatible. You need either an ATA-compatible motherboard con-nector or ATA host adapter to use this drive.Note.If these tips do not answer your question or solve the problem, con-tact your dealer or visit to download SeaTools™ disc diagnostics software and more troubleshooting advice.Seagate support servicesFor online information about Seagate products, visit or ************************************************.If you need help installing your drive, consult your dealer first. If you need additional help, call a Seagate technical support specialist. Before calling, note your system configuration and drive model number.Africa+31-20-316-7222Netherlands0 800-732-4283 Australia1800-14-7201New Zealand0800-443988Austria0 800-20 12 90Norway800-113 91Belgium0 800-74 876Poland00 800-311 12 38 China*800-810-9668Spain900-98 31 24Denmark80 88 12 66Sweden0 207 90 073France0 800-90 90 52Switzerland0 800-83 84 11 Germany************Singapore800-1101-150Hong Kong800-90-0474Taiwan*00-800-0830-1730 Hong Kong*001-800-0830-1730Thailand001-800-11-0032165 India1-600-33-1104Turkey00 800-31 92 91 40 Indonesia001-803-1-003-2165United Kingdom************Ireland 1 800-55 21 22USA/Canada/1-800 SEAGATE or Italy800-790695Latin America+1-405-324-4770 Malaysia1-800-80-2335Other EuropeanMiddle East+31-20-316-7222countries+31-20-316-7222*ChineseWarranty.To determine the warranty status of your Seagate disc drive, contact your place of purchase or visit our web site at for more information. Return Merchandise Authorization (RMA). Run SeaTools to diagnose your drive before requesting a return authorization. In addition, please verify that your drive is defective by following the troubleshooting checklist in this guide. Seagate offers com-prehensive customer support for all Seagate drives worldwide. Seagate customer service centers are the only facilities authorized to service Seagate drives. Drive return procedures vary depending on geographical location and are subject to current international trade regulations.Shipping the driveCaution.Back up the data before shipping. Seagate assumes no responsibility for data lost during shipping or service.Shipping drive in an unapproved container voids the warranty. Pack the drive with original box and packing materials. Use no other materials. This prevents electrical and physical damage in transit.Electromagnetic compliance for the European Union. This model complies with the European Union requirements of the Electromagnetic Compatibility Directive 89/ 336/EEC of 03 May 1989 as amended by Directive 92/31/EEC of 28 April 1992 and Directive 93/68/EEC of 22 July 1993. Compliance of this drive, as a system compo-nent, was confirmed with a test system. We cannot guarantee that your system will comply. The drive is not meant for external use (without properly designed enclosure, shielded I/O cable, etc.).Sicherheitsanleitung 1. Das Gerrät ist ein Einbaugerät, das für eine maximale Umgebungstempeatur von 60°C vorgesehen ist. 2. Zur Befestigung des Lufwerks werden 4 Schrauben 6-32 UNC-2A benötigt. Bei seitlicher Befestigung darf die maxi-male Länge der Schrauben im Chassis nicht merh als 3,3 mm und bei Befestigung an der Unterseite nicht mehr als 5,08 mm betragen. 3. Als Versorgungsspannugen wer-den benötigt: +5V +/- 5% 1,00A. 4. Die Versorgungsspannung muss SELV entspre-chen. 5. Alle Arbeiten auf dem Festplattte dürfen nur von Ausgebiletem Serciepersonal durchgeführt werden. Bitte entfernen Sie nicht die Aufschriftens-childer des Laufwerkes. 6. Der Einbau des Laufwerkes muss den Anforderungen gemäss DIN IEC 950 VDE 0805/05.90 entspreche.© 2006 Seagate Technology LLC. All rights reserved.Publication number: 100409997, Rev. A, April 2006, Printed in U.S.A.Seagate, Seagate Technology, and the Seagate logo are registered trademarks or trademarks of Seagate Technology LLC. DiscWizard, Momentus 5400.3 Blade Server, and SeaTools are trademarks of Seagate Technology LLC. Other product names are registered trademarks or trademarks of their owners. Seagate reserves the right to change, without notice, product offerings or specifications.。
- 1、下载文档前请自行甄别文档内容的完整性,平台不提供额外的编辑、内容补充、找答案等附加服务。
- 2、"仅部分预览"的文档,不可在线预览部分如存在完整性等问题,可反馈申请退款(可完整预览的文档不适用该条件!)。
- 3、如文档侵犯您的权益,请联系客服反馈,我们会尽快为您处理(人工客服工作时间:9:00-18:30)。
3D打印软件RepetierHost教程
V1.0
深圳三凯优科技
2015/5/16
教程内容包括:
1 软件下载,安装,3KU入门三角洲打印机参数设置
2 3KU入门三角洲打印机切片参数设置
3 SD卡脱机打印案例
软件介绍
Repetier-host 是一款安装在电脑上的3D打印机控制软件,功能有模型操作、打印机联机控制、可视化切片等功能。
该软件是干嘛用的,看一下3D打印机的使用过程就知道了:
图1 三凯优3D打印机使用图示
模型操作:
可以载入模型、可视化调整打印布局,对模型进行参数化的缩放、移动和旋转
打印机手动控制:
通过USB线连接3D打印机,直接可视化控制打印机,还可以进行联机打印。
可视化切片功能:
对载入的模型进行切片,产生可以直接控制打印机的Gcode代码,该命令可用于联机打印和脱机打印。
一、下载安装软件
下载地址:/download-now/
Windows 系统直接选择windows版本即可下载
双击安装
选择语言English ,进去之后发现会变成中文界面
一路Next
二、设置打印机
我们这里只讲解如何设置三角洲(并联臂)机型的3D打印机参数
首先,打开软件
如果是第一次打开会跳出设置框,不用理会,全部使用默认值点下一步即可。
第一次打开时,软件会自带一个模型在里面,截图如下
说明:该软件包含视图区、工具栏、功能区三部分
视图区:
于展示3D模型放置在打印平台上的效果,如图蓝色的是3D模型,下面的网格是打印平台,默认是方形的,后面我们需要将其调为圆形。
工具栏:
该软件的功能部分,包括设置打印机参数,连接打印机,操作打印等
功能区:
里面有几个页签,每个页签对应不同的功能
物体放置:打印平台中可以放入多个3D模型,同时打印,该功能区用于控制模型的摆放位置和旋转缩放操作
切片软件:将模型进行切片,计算出控制打印机打印的Gcode代码
预览:切片后的路径整体预览
手动控制:连接打印机之后可以通过里面的按钮控制打印机进行单项动作。
SD卡:联机后可以读取和操作打印机SD卡里的内容,速度很慢,不建议使用。
具体功能可以去官方网站学习,比较简单,也有很多技巧,可以后面慢慢摸索。
官网学习网址:/documentation/repetier-host/object-placement/
首先,删除自带的模型,在功能区,物体放置页签,点击如图中的按
钮即可
开始设置
第一步,设置打印机形状点击右上角的“打印机设置”按钮
弹出窗口
选择打印机页签,修改Z方向速度。
选择Extruder 页签
修改红框里面的值。
然后,选择“打印机形状”页签,设置里面的值如图显示:
然后点击“确定”保存我们的设置,这时软件的界面会变成这样
这样,我们的打印机尺寸就设置完成了,下一步设置切片参数。
第二步,设置切片参数
在功能区选择“切片软件”,然后下拉框选择 Slic3r ,然后点击 “配置”按钮
第一次点这个会弹出初始化对话框,不用理会,全部使用默认值,下一步即可
然后根据下面的图片来设置里面的具体数值:
(这里我只针对我们的这款入门级机器设置一个最常用的打印参数,若要再进一步提升自己打印水平,想要打印出比较复杂的物体,需要自己找资料学习,不断实践和尝试)
这样就设置完了,关掉这个窗口
软件界面就变成下面的样子了
第三步,导入模型,进行切片
点击左上角的“载入”按钮
弹出选择文件的窗口,用于选择3D模型文件,格式为stl或obj
选择一个模型,点击“打开”
在视图区,可以通过鼠标滚轮调整视野的远近,来看一下模型是否都在打印范围内
然后在功能区,选择“切片软件”,选择刚才设置的切片参数,点“开始切片Slic3r”
然后软件开始计算路径,需要等待一定时间,模型越大越复杂,等待时间越久,可以根据滚动条来看切片状态。
切片程序完成后,会自动跳转到“预览”界面,可以预览打印机运动的整个路径
电机Gcode编辑页签,就能看到生成好的Gcode代码了
然后在界面的右下角看到预测的打印时间。
点击Gcode编辑下面的保存图标,就可以把代码保存到SD卡中了保存时需要使用英文命名(如果写成中文,在LCD操作板上会显示乱码),点击保存。
取出SD卡,然后,插入到打印机中,就可以开始打印了。
第四步,使用3D打印机,开始打印首先,打印机接通电源,打开开关,等待LCD亮起来。
LCD控制器很简单,一个大按钮是控制所有操作的,旋转是移动光标,按一下是选择执行,LCD上面的数据显示打印机当前的温度状态和打印状态。
大旋钮下面的小按钮是紧急制动开关,不过我们有机器的电源开关了,所以不需要使用这个小按钮了。
然后看下面的图片操作:
将SD卡,引脚朝外插入到LCD控制板中
按一下右面的旋钮开关,进入一级菜单界面
选择黑色旋钮,使指针指向Print from SD 选项,然后按一下
进入SD卡目录,旋钮选择刚才保存的文件vase.gcode ,然后按一下,机器就开始打印了
教程到此为止,执行最后一步动作之后,打印机就开始工作了,三个小时之后就可以拿到打印出来的物体了。
如图所示:。