
《RF操作手册》word版
RF组托:
第一步:用登录物流大赛软件的账号登录RF;登录RF的界面如下:
第二步:在NOS-WMS-RF主界面页面,如下图,点击【入库作业】按钮,进入到NOS-WMS-RF 入库作业页面;
第三步:在NOS-WMS-RF入库作业页面,如下图,选择一个入库单状态是待组托的入库单ROD201004261001,点击【组托】按钮,进入到NOS-WMS-RF入库作业-组托页面;
第四步:在NOS-WMS-RF入库作业-组托页面,如下图,将光标移动到“托盘”的输入框内,用RF扫描托盘的标签53500;
第五步:扫描托盘标签53500之后,将光标移动到“货品”的输入框内,用RF扫描货品的标签80602,RF会自动的将扫描的货品80602的数量,显示在“数量”输入框中。
扫描货品80602之后,如果还有货品80602放到此托盘53500上,在“数量”输入
框中输入相应的数量。
第六步:如果放到此托盘53500上所有货品80602扫描完成,如下图,点击【确定】按钮。
第七步:重复第四步、第五步和第六步,组托本入库单ROD201004261001上其他的货品,本入库单ROD201004261001所有货品组托完毕,如下图,点击【提交组托】按钮。
第八步:提交组托成功的提示,如下图
RF上架:
第一步:用登录物流大赛软件的账号登录RF;登录RF的界面如下:
第二步:在NOS-WMS-RF主界面页面,如下图,点击【入库作业】按钮,进入到NOS-WMS-RF 入库作业页面;
第三步:在NOS-WMS-RF入库作业页面,如下图,选择一个入库单状态是已组托的入库单ROD201004261001,点击【上架】按钮,进入到NOS-WMS-RF入库作业-上架页面;
第四步:在NOS-WMS-RF入库作业-上架页面,将光标移动到“托盘”的输入框内,用RF扫描托盘的标签53500;
第五步:扫描托盘标签53500之后,将光标移动到“仓位”的输入框内,用RF扫描仓位的标签51004,扫描结果如下图:
第六步:重复第四步和第五步,上架本入库单ROD201004261001上其他的托盘,本入库单ROD201004261001所有托盘上架完毕,如下图,点击【提交上架】按钮。
第八步:提交上架成功的提示,如下图
RF拣货:
第一步:用登录物流大赛软件的账号登录RF;登录RF的界面如下:
第二步:在NOS-WMS-RF主界面页面,如下图,点击【出库作业】按钮,进入到NOS-WMS-RF 出库作业页面;
第三步:在NOS-WMS-RF出库作业页面,如下图,选择一个出库单状态是待拣货的出库单OSNO201004261501,点击【拣货】按钮,进入到NOS-WMS-RF出库作业-拣货页面;
第四步:在NOS-WMS-RF出库作业-拣货页面,如下图,将光标移动到“仓位”的输入框内,用RF扫描仓位的标签51006;
第五步:扫描仓位标签51006之后,将光标移动到“货品”的输入框内,用RF扫描货品的标签80602,RF会自动的将扫描的货品80602的数量,显示在“数量”输入框中。
扫描货品80602之后,由于货品80602的待拣数量是6,所以在“数量”输入框中
数量改为6,如下图所示:
第六步:改完数量之后,点击【确定】按钮,如下图。
第七步:重复第四步、第五步和第六步,拣本出库单OSNO201004261501上其他的货品,本出库单OSNO201004261501所有货品拣完,如下图,点击【提交拣货】按钮。
第八步:提交拣货成功的提示,如下图
. .。
RFID操作手册
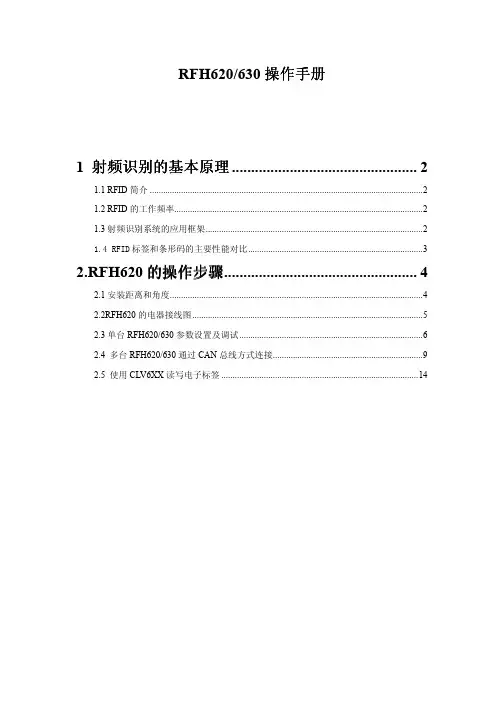
上图为电子标签分别与阅读器平行,成 45°成 90°的图片,由图可知,当电子标签与
阅读器平行试,穿过标签天线的磁感应线最多,其测量距离最远。而当标签与阅读器垂直时,
没有磁感应线穿过标签天线,所以此时的标签不被识别。
③读写速度:电子标签的读写速度与需要读写的区域与数据量大小由关如:
读写内容
读取 UID
1.4 RFID 标签和条形码的主要性能对比
技术 信息载体
信息量 读、写性 读取方式 保密性
条 形 纸、塑料薄 小
码
膜、金属表面
只读
CCD 或 激 差 光束
RFID EEPROM 等 大
读、写
无线通信 好
智能化 寿命 成本
无
较RFH620 的操作步骤
2.1 安装距离和角度
RFH620 的安装距离是指 RFH620 的天线到标签的垂直距离。不同型号的标签,其最大 检测区域也有所不同(如图 1 所示)。
读取一个 Block 的时间 写入一个 Block 的时间
读写时间/ms
19
13
16
④信息存储容量:电子标签的信息存储容量主要和电子标签内部所使用的存储芯片。现在市
面上绝大多数的电子标签的内部存储芯片由飞利浦、TI、西门子、富士通四家公司提供。其
应用于 RFID 的标签存储芯片的主要型号与施克电子标签所用存储芯片型号见下表:
1.3 射频识别系统的应用框架
(1)RFID 应用系统组成 RFID 应用系统由天线、阅读器、电子标签三部分组成(RFH620/630 具有集成在一起的
天线和阅读器)。 (2)电子标签
工作原理:电子标签主要包括天线和存储芯片两部分。电子标签的天线接受到 RFID 阅 读天线所发射的电磁波,激活电子标签的存储芯片,从而芯片将数据通过天线返回给 RFID 的阅读器。
rf60sc2 手册

rf60sc2 手册
摘要:
1.产品概述
2.产品特点
3.主要功能
4.操作方法
5.注意事项
6.售后服务
正文:
【产品概述】
rf60sc2 是一款高性能的射频识别(RFID) 读写器,广泛应用于物流、仓储、零售、制造等行业,为用户提供快速、准确的物品追踪和管理。
【产品特点】
rf60sc2 具有以下特点:
1.读写速度快,性能稳定;
2.支持多种RFID 标准,兼容性强;
3.抗干扰能力强,适应各种环境;
4.结构紧凑,易于安装和维护。
【主要功能】
1.读取和写入RFID 标签信息;
2.支持多标签识别;
3.实时数据传输,实时监控物品动态;
4.支持远程控制和管理。
【操作方法】
1.连接rf60sc2 读写器和电脑;
2.安装相应的驱动程序和软件;
3.设置rf60sc2 的参数,如通信速率、工作频率等;
4.开始读写RFID 标签信息。
【注意事项】
1.使用时请确保rf60sc2 读写器与RFID 标签处于有效范围内;
2.请勿将rf60sc2 暴露在高温、潮湿或腐蚀性环境中;
3.请定期检查rf60sc2 的连接线和接口,确保其正常工作。
RF优化指导书

RF优化指导书 (2)1当前主要问题 (2)2覆盖目标制定 (3)3问题的切入及解决思路 (4)3.1弱覆盖路段 (4)3.2越区覆盖路段 (5)3.3无主导小区路段 (6)3.4切换不合理路段 (7)3.5导频污染 (8)4调整方案的制定方法 (11)4.1FAD天线、单D天线调整原则 (11)4.2第一步:默认SINR分布图 (13)4.3第二步:去除扇区图层,拉近基站名,以便于查看和分析 (13)4.4第三步,改后的SINR测试分布图十分直观,很容易选出弱覆盖路段 (15)4.5第四步,结合PCI分布图分析出问题路段的主导扇区(以问题路段9为例) (16)4.6第五步,分析出辅助和多余的扇区信号,找到SINR差的原因,设计合理的覆盖方案(继续以问题路段9为例)。
(17)4.7第六步,整合整个网格的调整方案 (19)5实际的方案实施 (21)RF优化指导书随着LTE的商用网络的陆续铺设,为了满足网络验收标准而需要进行有针对性的优化,其中RF作为每个实际网络中最常用的优化手段是相当重要的一环。
RF优化是对无线射频信号的优化,目的是在优化信号覆盖的同时控制越区覆盖、减少乒乓切换、控制负载平衡和提升容量等。
根据用户的分布不同保障合理的网络拓扑,在合理的网络拓扑基础上再进行无线参数的优化能保障网络达到更优的网络性能。
1 当前主要问题当前阶段,北京移动TD-LTE网络需借助RF优化手段主要解决下面三大问题:1. 覆盖问题覆盖问题优化主要是针对信号强度和合理网络拓扑的优化,信号强度是保障一定的覆盖概率,导频信号覆盖的优化,保障网络尽量不出现弱覆盖或覆盖盲区,用户都能接入网络;合理的网络拓扑是指每个小区有明确的覆盖范围不出现过覆盖和小小区的现象,交叠不严重。
2. 切换问题一方面检查邻区漏配情况,验证和完善邻区列表,解决因此产生的切换、掉话和下行干扰等问题;另一方面进行必要的工程参数调整,解决因为不合理的RF参数导致的切换区域不合理问题。
摩托罗拉3190操作手册

RF 操作手册一、开机/关机点选开机按钮即可开机,如图(1-1),屏幕会显示欢迎界面。
同样,关机也是此按钮。
在开机状态下,点按关机按钮,虽然屏幕关闭了,但是运行的程序并没有关闭,而是挂起。
二、安装电池操作步骤:如图(1-2)1.打开后盖锁扣。
2.拉开后盖。
3.按照指示放入电池。
4.盖上后盖。
5.扣住锁扣。
三、电池充电MC3000 充电有两种方式:直充或座充。
直充:直接把电池放在RF 电池仓中,连好电源线即可,如图所示。
座充:把MC3000插在底座中充电。
电源指示灯跳动表示正在充电,一旦充电结束,指示灯则会长亮。
四、扫描器的使用MC3000的扫描器设计的非常出色,可以270 度旋转,对于一些特殊位置的条码,可以调节扫描头的位置,非常方便准确的扫描条码内容。
扫描条码时必须使扫描器发出的激光束完全覆盖条码,如果斜着或者是没有完全覆盖,将无法准确扫描条码内容的。
扫描条码时还要注意扫描角度,即避免 90 度正对扫描。
90 度正对扫描会产生镜面反射,影响扫描效果,最佳的角度是 65 度,如图(1-4)所示。
(1-3)五、键盘按键说明如图(1-5)先把MC3000的38个按键分成4个区:一区主要是方向键,从左往右依次是:向左,向上,向下,向右四个方向。
二区主要是功能键,实现系统级的操作,从左往右依次是:ALPHA 输入法选择键、CTRL 键、ESC 退出键、FUNC 组合键、BACK 后退键、SHIFT 功能键、ENT 回车键。
三区主要是数字键,实现0—9十个数字的输入,也包括小数点和逗号键。
四区主要是F功能键,F1—F10 的操作,实现不同的功能,如F1:帮助,ALT+F4:关闭。
左下角的按钮是背景灯的开关,在光线不好的地方需要使用背景灯时可以按此按钮点亮背景灯。
键盘说明表:按钮说明扫描键,按此按钮扫描头会发出一束激光。
机身侧面也有两个扫描键。
向左,向上,向下,向右移动选定位置。
CTRL按钮,按下此按钮屏幕状态栏里会显示^图标。
用户操作手册版
10 键:如果插有 SD 卡,停止 SD 卡,准备取出 SD 卡,注意,在取出 SD 卡前,最好按此键先停止录像,此时机头指示灯会快速闪烁,等指示灯停止闪烁后,再取出 SD 卡,以免 SD卡损坏:
11 键:待设;
12 键:待设。
7,设备变成蓝色自动加载图像或拖动设备至右边视频区域,即可看到图像。
1 2 3 4 5 6 7 8 9
1、添加设备选项:添加设备时输入 ID 号、用户名、密码即可添加新的设备。
2、录像设置选项:设置录像的存储路径、录像的时间段、录像的方式、录像的基本设置。可以设置到 TF 卡上、NAS/NVR 网络设备上、本地电脑上。
5,点选工具栏中铃铛图标,进入告警设置,设置防区关联预设位。选项
关闭:关闭视频连接
电脑录像:开始电脑连续录像,文件存储在本地电脑
网络摄像机
拍照:抓拍图像
高级拍照:抓拍图像可以设置水印和内容
开始监听:可以从客户端听摄像机附近实时声音
开始对讲:用客户端传输声音到摄像机端
图14 图15
第三章
一,连接电脑和视频网关
1、视频网关通电自检,处居中位置,表示摄像机启动完成,使用网线连接至路由器。(建议路由器开启 DHCP 功能)
2、在电脑上安装大白鹅PC端软件
4,双击电脑桌面的上的大白鹅图标,出现如下界面:
5,输入设备 ID 和设备出厂密码:1234,左边列表会多出一个摄像机图标。(也可点击“搜索设备”添加视频网关)
第二章
一,
1,用随机光盘通过电脑安装
2,从安卓市场下载到手机安装
二,
1,安装RF天线,接通网线到家中的路由器LAN口。建议路由器开启DHCP(可自动获取IP地址)。
LightwaveRF 专业系列暖气温度调节器(TRV) 模型号 JSJSLW922 操作手册说明书

lightwaveRFInstruction Manual/lightwaverfWhat do I need?How do I get started?The following installation guide will explain how tofit the LightwaveRF Thermostatic Radiator Valve(TRV) head to a radiator. The setup guide willexplain how to link it to other LightwaveRFheating devices. For anything other than a basicsetup, it is recommended to use the TRV with theLightwave Link & Web App. For further help andguidance, visit or scan theQR code below.Help Video & further guidanceYou can scan this QR code with your smartphone.It will take you to a video and further instructionsthat will help guide you through setup andinstallation.To install the TRV (head), you will first need to removethe existing one. This is usually straightforward, anddoes not require tools. The TRV then simply screwsonto the radiator valve body as a direct replacement.IMPORTANT: Please retain these instructions for guidance on how to link other LightwaveRF Heating devices to the TRV. For App setup and additional guidance please visit/lightwaverf‘O ’ LED. Whenilluminatedradiator is o .Boost Button.Temporarily increases temperature.‘On’ LED. When illuminated radiator is on.Overview Standby Button.Turns radiatoron/o Screw collar to valve.Press to enterlinking mode• T o attach the LightwaveRF TRV(head) you will need to ensure thatyou have a suitable thermostatic valvefitted to your radiator (such as the onepictured) and unscrew the existingvalve head. This can usually be doneby hand and does not require anyspecial tools.NOTE: Removing the valve headshould not risk any water leaks as themain body of the valve remains sealed.• The LightwaveRF TRV head willscrew fit the majority of existingthermostatic valves without alteration.There are, however, several adaptercollars provided to compensate for themost typical variations in the diameterof the valve and screw thread.Attaching the TRV head to the valveValve Head Collar OPTIONAL Valve Pin Insert Screw Thread ScrewThread2 x AA batteries are located in the top of the TRV.Remove the cover and insert the batteries.Once the batteries are inserted, the TRV willautomatically calibrate itself (this can take upto a minute). This requires it to be attached tothe radiator, therefore do not insert the batter-ies until the TRV is securely installed. If the‘error’ LED lights up during calibration, theTRV is not seated properly and may needadjustment (see troubleshooting section).Inserting the Batteries / CalibrationThere are 2 types of collar (type A, type B). IfType A fits the valve screw thread, this is themore desirable collar to use. It has 4 insert pinlengths options provided for the collar. Themost suitable pin is the one that replicateslength of the current pin (when in the collar).Type B provides a clamp fit around the valve body and can be tightened using the screw provided.Type A (with pin inserted)Type B Battery compartmentUnderstanding the Indicator LEDsBasic OperationThis section will show you how to setup the basic functions of the TRV to allow you to use it manually or with a Heating Remote / Magnetic Trigger. If you link the TRV to Room or Home Thermostat, or with the Lightwave Link & App, then the TRV will take its instructions from these devices. This means that the TRV will automatically abide by the temperatures and schedules that you set from them. The following section will show you how to link the TRV to a Thermostat and other LightwaveRF Heating devices to integrate it into your heating system. It is always recommended to use TRVs with the Lightwave Link if anything more than a basic setup is desired.Steady Green ‘On’: TRV is opening the radiator valveSteady Amber ‘O ’: TRV is closing the radiator valveAlternating On/O (longer on LED): Linking modeAlternating O /On (longer o LED): Unlinking modeSteady Red & Amber: Valve jammed or wrong pinSteady Red & Green: Not mounted correctly / wrong pinFlashing Red x10 times: low battery (App should alsoreport low battery status).The Standby button Standby button Pressing the Standby button toggles betweenstandard ‘Running’ mode and ‘Standby’. Holdingthe Standby button (3secs) activates ‘Away’ mode.When the TRV is operating alone (without a linkedThermostat or the LightwaveRF App controlling it)Running mode will set it to a default temperatureof 22 degrees. Standby will set the Switch to adefault setback temperature of 18 degrees andAway mode 15 degrees. If the TRV is linked to a Thermostat or to the App, Running mode will set it to the temperatures and schedules stipulated by these devices (see Thermostat and App instructions to learn how to do this). The Standby setback tempera-ture and Away mode temperature is also stipulated by what is set on the Thermostat.NOTE: If it is linked to a Home Thermostat or to the App, pressing Standby on the TRV will turn o Running mode only until the next ‘heating period’ in the schedule (see App or Thermostat instructions). Away mode, by contrast, will remain constantly active until it is cancelled by pressing the Standby button again on the TRV or Thermostat.Pressing the Boost button on the TRV raises the target temperature a few degrees above the current temperature for the duration of one hour. If the target temperature is already several degrees higher than the actualtemperature, then pressing boost will simply match this temperature. The Boost buttonA LightwaveRF Heating Handset can be linked toone or more TRVs to directly control them (seeHandset instructions). It can also be linked to aRoom Thermostat which will, in turn, control TRVs.Once linked, the Standby button on the Handsetwill toggle between Running and Standby Modesin the same way as the Standby button on theTRV. The Boost button operates the TRV Boostbutton.The plus and minus arrows on the handset willraise or lower the target temperature a fewdegrees above or below the current temperature.Using the Heating HandsetHow LightwaveRF heating devices work togetherT o use the TRV, with other LightwaveRF Heating Devices, you will need to ‘link’it. The devices that you link depends on the setup that you want to achieve. You can create a basic setup (e.g. TRV plus a Heating Remote) by linking the devices directly (see later section). The most comprehensive solution is to link all heating devices to the LightwaveRF Smartphone or Web App using the Lightwave Link. This allows you to create an expandable zoned system that can take care of your entire home. T emperatures can be set for each room or ‘heating zone’, and heating can be planned week by week and room by room. The illustration on the following page shows how di erent heating devices can be linked together in a whole house setup. Following this are some the most typical scenarios in which you would use the TRV. For further informa-tion and guidance please visit .Lightwave LinkWeb App Heating ‘Planner’Lightwave link (runs the show)Lightwave App (control any room from anywhere)Boiler Switch(turns boiler on/o )Bedroom 1Bedroom 2Home Thermostat (monitors house temp.)Heating Remote (sets house temp.)Window Trigger(open window turns o TRV)TRV (controls radiator)1. Recommended: Using TRVs with the Lightwave Link2. Controlling TRVs via a Thermostat and Lightwave LinkThe most comprehensive and recom-mended way to use TRVs is by linkingthem to the App using the LightwaveLink. This will allow you complete controlof the temperature of every radiator fromyour smartphone or tablet. The TRVs arearranged into ‘heating zones’ (e.g. rooms)and can be independently scheduledusing the Heating Planner.You can also use the App to control TRVsvia a Room or Home Thermostat. This isuseful as it provides a wall mounteddisplay and control as well as a moreaccurate temperature reference point forthe TRVs in the room to work to (becauseit is away from the hot radiator). AThermostat can also control more thanone TRVs together in the same room(heating zone).If there are several TRVs in a large room orarea of the house, they can be linked toand controlled by a single LightwaveRFRoom (or Home Thermostat).There are several advantages to this:1. The temperature of the room can bemeasured to a higher degree of accuracyas the sensor is distanced from the radiator.2. The temperature and status of the TRVs can be set together from one place.3. If the TRVs are not being controlled from the LightwaveRF App, the Home Thermostat can be used instead to set daily heating schedules and save favourite plans for that room or ‘heating zone’ of the house.4. If linked to the same thermostat, the valves can work together as one ‘heating zone’ which can appear on the LightwaveRF App or Web App.NOTE: If linked to the LightwaveRF App or Web App, TRVs in the same room or area of the house can also be linked to each other to form a heating zonewithout the need for a thermostat.3. Controlling TRVs with a Room/Home Thermostat2. Using a TRV with a Magnetic Trigger1. Using the TRV with a Heating RemoteThe LightwaveRF Heating Remotecan directly control a single TRV ortwo daisy-chained together (seelinking multiple devices). It can beused to turn the TRV on and o , toraise the temperature up and downand to boost the temperature.The LightwaveRF Magnetic Triggeris designed to send an alert to alinked LightwaveRF device or tothe LightwaveRF App when a dooror window has been opened. Ifsuch an alert is sent to a linked TRV,the valve will automatically beturned o . If the window is opened,it will turn on again.Linking the TRV to other LightwaveRF heating devicesIf you intend to use a LightwaveRF Heating Remote, Home / Room Thermostat or Magnetic Trigger to control the TRV directly then you will need to ‘link’ them. The TRV can be linked to other LightwaveRF heating devices using the following method.1. Press and release the ‘Linking’ button on the TRV (the on and o LEDs will flash alternately).2. Press the Linking button on the heating device you wish to link. The ‘on’ LED should flash to indicate a successful link.T o unlink a heating device from the TRV, press and release the Linking button and then press the Standby button. This activates ‘unlinking’ mode. Press the Linking button on the heating device you wish to unlink. The ‘o ’ LED should flash to indicate that the devices have been unlinked.T o completely clear the memory of the TRV, press and release the Linking button. Then hold the Linking button until the LEDs flash rapidly. Finally, press and release theLinking button once more. The o LED should flash.Linking to Multiple Radiators in one ‘heating zone’ (room) If you have a large room or area with more than one radiator, you may want to link the TRVs to become part of the same ‘heating zone’ on the App and work together.You can do this by, firstly, linking one TRV to Lightwave Link and App, and then linking it to the next TRV to form a ‘daisy-chain’. Alternatively, you can link a Room / Home Thermostat to the App, then to a TRV, and finally link the TRVs together. The Thermostat will take commands from the App and relay them to the linked TRVs in its ‘heating zone’.In some cases, you may also want to link a Heating Remote or Magnetic Trigger to more than one TRV in the same room or ‘heating zone’. This will cause all radiators to be controlled by the same device. This can be achieved in the same way: link one TRV to the Remote or Trigger, and then link that TRV to the next. A single Heating Remote or Magnetic Trigger can also be linked to multiple TRVs by linking it to a Thermostat that, in turn, controls the TRV in that room.IMPORTANT: LightwaveRF TRVs can link to a limited number of heating devices. If this limit is exceeded and an extra device linked, the link to the former device will be overwritten. More devices can be added by linking them to the Lightwave Link and App. It is always recommended to use the Lightwave Link if anything more than a basic setup is desired.Linking to the LightwaveRF AppsIf you intend to use the LightwaveRF Appor Web App to control the TRV , you willneed the ‘Lightwave Link’. This allowsLightwaveRF heating devices to be linkedto and controlled by a smartphone, tabletor PC. The TRV can be linked to the Appusing the following method.1. Follow the in-App setup instructions tosetup the Lightwave Link and App. Accessthe ‘Heating’ Page and follow the instruc-tions regarding how to add a device.2. Press and release the ‘Link’ button onthe TRV (the on and o LEDs will flashalternately).3. Send the linking command from theApp (the in-App instructions will explainhow to do this). The ‘on’ LED should flashto indicate a successful link.Using the Home Thermostat with the LightwaveRF App IMPORTANT: For full instructions on howto use the Home Thermostat with the LightwaveRF App or Web App follow the in-App help or visit . The main use of the Home Thermostat, if linked to the LightwaveRF App and Web App, is as an accurate temperature reference. You can still the schedule heating and select modes using the Thermostat, however, it may be more convenient to do this from the App or Web App on your smartphone/tablet. The Thermostat now acts as a convenient manual control to complement the App. Importantly, the Thermostat and App work together: when you change the mode or schedule on the Thermostat or the App, it will automatically appear onthe other device.1. (Easy): Cut heat loss from windowsRequired:TRV, Magnetic TriggersWhen people are too hot, especially children, instead of turning o the radiator, they often open a window. This can waste a great deal of energy as the radiator is still working, but never reaches temperature as the heat is lost to the atmosphere. Installing a LightwaveRF Window Trigger means that, if a window is opened, the LightwaveRF TRV on the radiator is automatically turned o , therefore saving energy. Once the window is closed again, the radiator is automatically turned back on.2. (Easy): Remote control of a single radiator Required: TRV, Heating RemoteIt is really comfortable and convenient to be able to have direct control over the room temperature without having to get up and alter the thermostat or boiler. This can be achieved quickly and easily using the LightwaveRF TRV and Heating Remote. Installed in seconds, they can turn o the radiator in the room and allow you to be comfortable without having to a ect the restof the house heating.3. (Advanced): ‘Wet’ Zoned HeatingRequired: TRVs, Lightwave Link, Boiler Switch, Home Thermostat With the LightwaveRF App and the Lightwave Link you can create an expandable zoned system that can take care of your entire home using TRVs that fit ‘wet’ radiators. T emperatures can be set for each room or ‘heating zone’, and heating can be planned week by week and room by room. If you have electric radiators, you can still achieve this by connecting them to Electric Switches. You can also link wet radiators AND electric radiators andschedule them together for a totally integrated heating system!Heating ScenariosProblem:The TRV will not consistently operate remotely.Solution:The Remote/Thermostat/Lightwave Link may be encountering interference or may be at the edge of its reliable range of operation. First, ensure that there are no large pieces of metal or bodies of water in the path of the transmission. If the problem persists, try moving the Controller/Link closer to the Socket.Problem:The TRV ‘error’ LED flashes after calibration/operation. Solution:The TRV is not calibrated correctly or may be jammed. This may be because it is not mounted properly; check that it is screwed down securely (finger tight) and not over tightened or cross threaded. If you are using an adapter collar, try changing the length of pin being used (there are four di erent lengths).Problem: The TRV no longer functions and the LEDs do not illuminate. Solution:Check the batteries. The average battery life should be at least one year, although this will vary depending on use. A red error LED will flash ten times to report a low battery status. If this measure fails, there may be a fault. Please contact technical support via .Q. Should I use a Room or Home Thermostat with the TRV?A.It is possible to use either of the these Thermostats to control more than one TRV in the same room or ‘heating zone’. The Room Thermostat, however, is the simplest and most attractive way to do this as it is purpose designed for the task. Q. How do I know that the TRV will fit my radiator?A.The TRV is designed to fit the vast majortiy of thermostatic radiator valves. It also comes with adjustable adapter collars to cater for any excep-tions, therefore it should fit any standard radiators.Q.Can I link more than one TRV to a Thermostat or Remote?A. Yes. Please refer to for current device limits.Q.I s it legal for me to install a LightwaveRF TRV myself?A. Yes, LightwaveRF products are fully legal for you to install in your own home. Q.How long do the batteries last?A.This depends on use but a minimum of one year is a realistic timeframe. Q.How do I know if the batteries need replacing?A.The red ‘error’ light will flash 10 times when recieving a command. The App should also report that battery levels are running low.Specification RF frequency: 868 MHz Batteries: 2 x 1.5V (AA)Warranty:2 year standard warranty/lightwaverf lightwave RF 2 Quadrant ParkMundellsWelwyn Garden CityHertsAL7 1FS01707 386035。
NLS-OY20-RF手持条码扫描器用户手册说明书
NLS-OY20-RF手持式条码扫描器用户手册免责声明请您在使用本手册描述的产品前仔细阅读手册的所有内容,以保障产品的安全有效地使用。
阅读后请将本手册妥善保存以备下次使用时查询。
请勿自行拆卸终端或撕毁终端上的封标,否则福建新大陆自动识别技术有限公司不承担保修或更换终端的责任。
本手册中的图片仅供参考,如有个别图片与实际产品不符,请以实际产品为准。
对于本产品的改良更新,新大陆自动识别技术有限公司保留随时修改文档而不另行通知的权利。
本手册包含的所有信息受版权的保护,福建新大陆自动识别技术有限公司保留所有权利,未经书面许可,任何单位及个人不得以任何方式或理由对本文档全部或部分内容进行任何形式的摘抄、复制或与其它产品捆绑使用、销售。
本手册中描述的产品中可能包括福建新大陆自动识别技术有限公司或第三方享有版权的软件,除非获得相关权利人的许可,否则任何单位或者个人不能以任何形式对前述软件进行复制、分发、修改、摘录、反编译、反汇编、解密、反相工程、出租、转让、分许可以及其它侵犯软件版权的行为。
福建新大陆自动识别技术有限公司对本声明拥有最终解释权。
版本记录目录第一章开始 (1)简介 (1)关于本指南 (2)开机、休眠、关机 (2)维护与保养 (2)OY20-RF扫描器外观尺寸(单位:mm) (3)左视图 (3)正视图 (3)右视图 (4)条码识读操作 (5)设置NLS-OY20-RF (6)使用设置条码 (6)第二章系统设置 (1)恢复出厂参数 (1)照明灯 (2)对焦灯 (3)提示音 (4)启动/关闭静音 (4)解码成功声音音量/音长设置 (4)蜂鸣器空闲态电平控制 (5)应用模式设置 (5)识读模式 (6)手动识读模式 (6)自动识读模式 (6)图像正反色解码设置 (7)产品序列号查询 (7)第三章通讯设置 (8)键盘口功能设置 (8)键盘输入模式控制 (8)键盘布局 (11)Code Page (15)第四章OY20-RF无线部分设置码 (18)无线配对相关操作 (18)显示电量及仓储条码数量 (18)通讯接口模式设置 (19)无线通讯模式设置 (19)第五章条码数据格式设置 (22)简介 (22)前缀顺序设置 (22)自定义前缀 (23)禁止或允许添加自定义前缀 (23)定义自定义前缀 (23)AIMID前缀 (24)CodeID前缀 (25)ECI标识符输出 (26)自定义后缀 (27)禁止或允许添加自定义后缀设置 (27)定义自定义后缀 (27)结束符后缀 (28)禁止或允许添加结束符后缀设置 (28)第六章条码参数设置 (29)简介 (29)Code128 (29)允许/禁止识读Code128 (29)设置读码长度限制 (30)UCC/EAN-128 (31)允许/禁止识读UCC/EAN-128 (31)设置读码长度限制 (31)AIM128 (32)允许/禁止识读AIM128 (32)设置读码长度限制 (32)EAN-8 (33)允许/禁止识读EAN-8 (33)设置是否传送校验位 (33)设置是否允许识读2位附加码 (34)设置是否允许读5位附加码 (34)设置是否把结果扩展成EAN-13 (35)EAN-13 (36)允许/禁止识读EAN-13 (36)设置是否传送校验位 (36)设置是否允许识读2位附加码 (37)设置是否允许识读5位附加码 (37)ISSN (38)允许/禁止识读ISSN (38)ISBN (39)允许/禁止识读ISBN (39)ISBN数据位设置 (39)UPC-E (40)允许/禁止识读UPC-E (40)设置是否传送校验位 (40)设置是否允许识读2位附加码 (41)设置是否允许识读5位附加码 (41)设置是否传送系统字符“0” (42)设置是否结果扩展成UPC-A (42)UPC-A (43)允许/禁止识读UPC-A (43)设置是否传送校验位 (43)设置是否允许识读2位附加码 (44)设置是否允许识读5位附加码 (44)设置是否传送系统字符“0” (45)Interleaved2of5 (46)允许/禁止识读Interleaved2of5 (46)设置是否传送校验位 (46)设置读码长度限制 (47)允许/禁止识读Febraban (47)允许/禁止Febraban扩展 (48)ITF-6 (50)允许/禁止识读ITF-6 (50)ITF-14 (51)允许/禁止识读ITF-14 (51)Matrix2of5(European Matrix2of5) (52)允许/禁止识读Matrix2of5 (52)检验设置 (52)设置读码长度限制 (53)Industrial25 (54)允许/禁止识读Industrial25 (54)设置是否传送校验位 (54)设置读码长度限制 (55)Standard25 (56)允许/禁止识读Standard25 (56)设置是否传送校验位 (56)设置读码长度限制 (57)Code39 (58)允许/禁止识读Code39 (58)设置是否传送起始符和终止符 (58)检验设置 (59)ASCII码识别范围设置 (59)设置读码长度限制 (60)Codabar (61)允许/禁止识读Codabar (61)检验设置 (61)起始符与终止符设置 (62)设置读码长度限制 (62)Code93 (64)允许/禁止识读Code93 (64)检验设置 (64)设置读码长度限制 (65)Code11 (66)允许/禁止识读Code11 (66)检验设置 (67)设置读码长度限制 (68)Plessey (69)允许/禁止识读Plessey (69)检验设置 (69)设置读码长度限制 (70)MSI-Plessey (71)允许/禁止识读MSI-Plessey (71)检验设置 (72)设置读码长度限制 (73)RSS-14 (74)允许/禁止识读RSS-14 (74)AI(01)字符发送设置 (74)RSS-Limited (75)允许/禁止识读RSS-Limited (75)AI(01)字符发送设置 (75)RSS-Expand (76)允许/禁止识读RSS-Expand (76)PDF417 (77)允许/禁止识读PDF417 (77)Data Matrix (78)允许/禁止识读Data Matrix (78)设置是否识别镜像Data Matrix (78)矩形码识别设置 (79)QR (80)允许/禁止识读QR (80)设置允许/禁止识读Micro QR (80)汉信码 (81)允许/禁止识读汉信码 (81)附录 (82)默认设置表 (82)数据码 (87)AIM ID列表 (90)CODE ID列表 (92)简介NLS-OY20-RF二维手持式条码扫描器,应用了国际领先的芯片化新大陆智能图像识别技术,开创影像式二维条码条码扫描器的新时代。
RF工具使用规范资料
金属切割工具的使用 ................................................................................................................................ 6
5.3
焊接工具的使用 ........................................................................................................................................ 9
5.1
装配工具的使用 ........................................................................................................................................ 4
5.2
3 工具 HSF 要求 .................................................................................................................................................... 3
4.1
普通工具使用的注意事项 ........................................................................................................................ 3
4.2
MirrorServer2大众操作手册_v3.1.1
2.选择要恢复的*.GHO文件(就是你备份的那个镜像),然后选择要恢复的硬盘(一定要选择正确,例如下图,红色的盘是我存放镜像的盘,第三个盘是我的U盘,所以第一个就是要恢复的盘了),点击OK。
3.选择第一个linux,点击OK
4.点击yes,恢复时间大概2-3个小时(也会出现卡进度条的情况),请耐心等待
进入windows界面之后点击计算机,点击U盘,找到ghost程序
后点击Ghost程序,点击local,点击Disk,点击To Image
3.选择MS2系统的硬盘作为源盘。(注:此处的KingsfonDT101G2PMAP是我的U盘,Samsung为我的移动硬盘,用于保存备份文件的,所以判断第一个是linux的源盘,此处一定要选好要备份的盘)
(2)弹出窗口,按下键选择Fsck Fsck all Devices,如图二
(3)Do you want filesystem check for all devices?
选择YES,如图三
回车,显示shutdown IA-RETAIL如图四
进度条完成后自动跳转到check filesystem,如图五:
一、
二、
经销商收到MS2服务器之后第一件事是要检查机器的硬件和系统是否是完好的,如果硬件检测报错,联系DELL800报修;如果系统检测出错,请按照第三章的备份恢复步骤进行操作。
(一)
接通电源,服务器开机当显示dell画面的时候,按F12
上下键,来选择Diagnostics选项之后,回车
回车之后系统会自行检查,耐心等待5-10分钟,如下图
自检完成后,弹出下面的画面说明硬件检查没有问题如下图。
如果检测完后出现error的一些错误代码,请与DELL800联系报修。
SOP标准操作程序 RF
SOP标准操作程序类风湿因子(RF)测定试剂盒1 实验原理:病人样品,标准液或质控中的类风湿因子(RF)与包被有人γ-球蛋白的胶乳颗粒发生免疫反应,形成免疫复合物产生混浊。
病人样品产生的浊度与标准液中类风湿因子(RF)标准产生的浊度来比较,进行计算。
2 标本的收集与处理:2.1 病人准备:无特殊要求。
最好用禁食的标本以减少乳糜血的干扰。
2.2. 抗凝剂:血清、肝素或EGTA血浆,标本最好不要溶血。
留取标本后请尽快分离血球血浆。
2.3 标本的稳定性:在室温条件下(15~25℃)可以稳定一周。
3 材料:3.1 材料:无需配制,开瓶即用,540nm试剂的空白吸光度超过1.5ABS试剂失效。
工作液:R1与R2按9:1混合,2-8℃可稳定20天。
标准品用1ml蒸馏水复溶,2-8℃稳定一个月。
3.2 试剂的贮存:3.2.1.当保存于2~8℃,不开盖情况下至标签的失效期。
3.2.2. 开盖后放于仪器中可以稳定30天。
3.2.3 开盖后避免污染。
3.3 变质指示:当试剂有浊度时,表明有细菌污染,不能继续使用。
4 类风湿因子(RF)测定试剂盒(日立7600生化分析仪)册或《7600A使用说明书》中查到。
5 计算:采用多点定标法,用RF标准液的吸光度值与相应的RF浓度作图,绘制标准曲线,从标准曲线上查得血清样品的RF浓度。
RF标准液浓度(IU/ml)见标签。
6 试剂性能概要采用科美公司规定的参数进行测定,线性范围(或可报告范围)0-160U/L。
7 超出线性范围(或可报告范围)的处理如样本中(RF)的浓度大于160U/L 时,需对样本进行稀释后再测定,结果乘以稀释倍数。
8 方法的局限性抗干扰能力:胆红素≤20mg/dl,血红蛋白≤10g/L,甘油三酯≤1000mg/dl对测定无干扰。
一些药物等可能会产生干扰。
9 其他必须说明的内容9.1 标准度稀释时,应严格按照说明书浓度进行。
9.2 胶乳试剂在使用前应轻轻摇匀。
9.3 所有的试剂已进行乙肝表面抗原,丙肝抗体和抗艾滋病毒抗体检测(FDA方法),结果阴性。