DOCSIS 3.0更上层楼
ThinkPHP3.0升级指导手册

ThinkPHP3.0 升级指导版权申明发布本资料须遵守开放出版许可协议 1.0 或者更新版本。
未经版权所有者明确授权,禁止发行本文档及其被实质上修改的版本。
未经版权所有者事先授权,禁止将此作品及其衍生作品以标准(纸质)书籍形式发行。
如果有兴趣再发行或再版本手册的全部或部分内容,不论修改过与否,或者有任何问题,请联系版权所有者 liu21st@。
对ThinkPHP有任何疑问或者建议,请进入官方论坛 [ ] 发布相关讨论。
并在此感谢ThinkPHP团队的所有成员和所有关注和支持ThinkPHP的朋友。
有关ThinkPHP项目及本文档的最新资料,请及时访问ThinkPHP项目主站。
本文档及其描述的内容受有关法律的版权保护,对本文档内容的任何形式的非法复制,泄露或散布,将导致相应的法律责任。
ThinkPHP3.0升级指导手册目录1升级须知32升级指导4 2.1准备工作 (4)2.2入口文件 (4)2.3目录结构 (5)2.4配置文件 (5)2.5路由定义 (6)2.6控制器 (7)2.7模型 (8)2.8模板 (8)2.9常量 (9)1升级须知3.0版本要求PHP的版本5.2.0以上如果低于该版本,将无法升级;本升级指导用于指导开发人员从2.1版本升级到3.0版本;如果你的项目对框架核心进行过较大的改动的话不建议升级;本指导手册不确保你的项目顺利升级和对因此带来的任何后果负责;升级项目之前请做好各项备份工作。
2升级指导2.1准备工作首先获取3.0最新完整版本(为了确保你的升级顺利,请先不要对完整版本做任何删减),如果是通过SVN下载的,请把Extend目录覆盖ThinkPHP框架目录下面的Extend空目录 备份你的项目文件(包括ThinkPHP系统目录)删除项目的Runtime目录现有的ThinkPHP系统目录更名为ThinkPHP2把3.0的ThinkPHP目录放入原来的项目对应位置2.2入口文件首先检查你的入口文件,注意如下变更:如果你在入口文件中定义了THINK_PATH和APP_PATH的话,请在路径最后加上“/”;如果你的项目目录位于网站的根目录(即项目的Lib目录位于网站根目录下面),定义APP_NAME为空字符串;升级过程中建议在入口文件中添加 define('APP_DEBUG',TRUE); 开启调试模式,升级完成后可以关闭调试模式;如果在入口文件中定义了APP_CACHE_NAME、NO_CACHE_RUNTIME、RUNTIME_ALLINONE、STRIP_RUNTIME_SPACE常量定义代码则删除,这些常量已经废弃;如果你使用了模式扩展,把THINK_MODE常量定义改为MODE_NAME;去掉入口文件中的App::run()代码,新版不再需要;2.3目录结构根据下面的情况检查你的目录结构是否需要调整:如果项目自定义了框架的目录名称或者路径,参考你的入口文件中的路径定义进行相关修改;如果项目启用了分组,模板目录下面的模板主题目录需要移动到分组目录下面,例如原来的目录结构是 Tpl/主题/分组/ 改成 Tpl/分组/主题/ ,其中主题名默认为default;2.4配置文件配置文件涉及到项目配置文件、分组配置文件和调试配置文件:添加DEFAULT_THEME参数,设置为你当前使用的模板主题名称,一般情况下应该是default 如果项目之前采用了模块配置文件的话,请并入分组配置文件或者项目配置文件;如果项目自定义了页面跳转模板,需要修改TMPL_ACTION_ERROR和TMPL_ACTION_SUCCESS配置参数为你之前的定义;如果项目自定义了异常页面模板,需要修改TMPL_EXCEPTION_FILE参数为你之前的定义,并拷贝你之前的页面模板文件到相应位置;如果项目自定义了页面Trace模板,需要修改TMPL_TRACE_FILE参数为你之前的定义,并拷贝你之前的页面模板文件到相应位置;由于原来的Think.Util类库包已经并入ORG.Util类库包,因此系统关闭了原来的自动加载路径,如果你使用了原来的Session或者Cookie类,升级的时候需要添加项目配置'APP_AUTOLOAD_PATH'=>'ORG.Util',如果有自定义了其他的自动加载路径,也需要加上,注意原来的设置参数去掉最后的“.”,例如 @.Util. 改为@.Util;如果自定义了LOG_RECORD_LEVEL参数,修改为LOG_LEVEL,并且值改为字符串方式,多个用逗号分隔;下面这些配置参数不再使用,如果有定义,可以删除或者注释:⏹APP_GROUP_DEPR⏹APP_CONFIG_LIST⏹APP_PLUGIN_ON⏹APP_AUTOLOAD_REG⏹APP_DOMAIN_DEPLOY⏹URL_PATHINFO_MODEL2.5路由定义新版的路由定义规则改变,如果项目启用了路由请参考下面的路由规则进行调整:取消路由配置文件routes.php改为配置参数URL_ROUTE_RULES定义;路由路由定义规范更改如下:1、正则路由'路由正则'=>'[分组/模块/操作]?参数1=值1&参数2=值2...''路由正则'=>array('[分组/模块/操作]','参数1=值1&参数2=值2...')'路由正则'=>'外部地址' '路由正则'=>array('外部地址','重定向代码')参数值和外部地址中可以用动态变量采用 :1 :2 的方式2、规则路由'路由规则'=>'[分组/模块/操作]?额外参数1=值1&额外参数2=值2...''路由规则'=>array('[分组/模块/操作]','额外参数1=值1&额外参数2=值2...')'路由规则'=>'外部地址' '路由规则'=>array('外部地址','重定向代码')路由规则中 :开头表示动态变量外部地址中可以用动态变量采用 :1 :2 的方式路由规则加上变量的数字约束定义,例如: 'news/:id|d'=>'News/read'规则路由可以支持全动态和动静结合定义,例如 ':user/blog/:id'=>array('Home/Blog/user')2.6控制器如果你使用了操作链功能,请合并相关方法;如果使用了跨分组和项目方式调用A方法,调用格式更改为:A(' [项目://][分组/]模块');如果使用了R方法,调用格式更改为:R(' [项目://][分组/]模块/操作');如果使用了跨分组和跨项目方式调用D方法的话,调用格式更改为:D(' [项目://][分组/]模型') 如果调用了Action的trace方法,改为调用trace函数;2.7模型模型的findall方法已经废除,请批量更改为select方法;原来的tableSuffix属性已经废除,可以用trueTableName属性设置表全名替代;如果使用了setField getField setInc setDec方法的话,去掉第二个条件参数,改为where连贯操作方法方式传人更新条件;高级模型中的切换数据库方法已经废除,如果有使用请改为使用基础模型的db方法切换;2.8模板模板输出方法display和fetch方法的规则调整为display(" [模板主题:][模块:][操作] ")和fetch("[模板主题:][模块:][操作] ") ,不再支持跨项目和跨分组调用,该规则同样适用于模板中的include标签;取消了模板变量的快捷输出,统一改成标准变量输出方式;取消了iterate标签,改为volist即可;取消了普通标签方式的include和load标签,以下用法不再支持 {include:public/header.html} {load:/public/css/common.css} 替代用法 <include file="public/header.html" /> <loadfile="/public/css/common.css" />如果使用了布局模板,请参考完全开发手册的8.23模板布局进行调整;如果你定制了页面Trace模板,需要在Tpl/page_trace.tpl的基础上重新修改;如果启用了表单令牌,并且设置了个别模板页面不开启令牌,需要删除模板中的{__NOTOKEN__}字符串2.9常量下面的常量不再支持:WEB_PUBLIC_PATH 可以改成 __ROOT__.'/Public'全部检查完成后,可以执行项目,并根据可能出现的异常信息和页面Trace显示进行调试,运行一起顺利后可以在入口文件关闭调试模式,预祝大家升级顺利!。
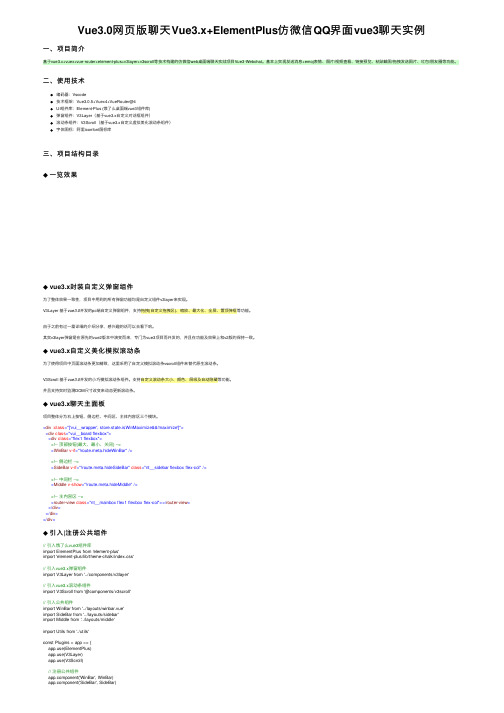
Vue3.0网页版聊天Vue3.x+ElementPlus仿微信QQ界面vue3聊天实例

Vue3.0⽹页版聊天Vue3.x+ElementPlus仿微信QQ界⾯vue3聊天实例⼀、项⽬简介基于vue3.x+vuex+vue-router+element-plus+v3layer+v3scroll等技术构建的仿微信web桌⾯端聊天实战项⽬Vue3-Webchat。
基本上实现发送消息+emoj表情、图⽚/视频查看、链接预览、粘贴截图/拖拽发送图⽚、红包/朋友圈等功能。
⼆、使⽤技术编码器:Vscode技术框架:Vue3.0.5+Vuex4+VueRouter@4UI组件库:Element-Plus (饿了么桌⾯端vue3组件库)弹窗组件:V3Layer(基于vue3.x⾃定义对话框组件)滚动条组件:V3Scroll(基于vue3.x⾃定义虚拟美化滚动条组件)字体图标:阿⾥iconfont图标库三、项⽬结构⽬录◆⼀览效果◆ vue3.x封装⾃定义弹窗组件为了整体效果⼀致性,项⽬中⽤到的所有弹窗功能均是⾃定义组件v3layer来实现。
V3Layer 基于vue3.0开发的pc端⾃定义弹窗组件,⽀持拖拽(⾃定义拖拽区)、缩放、最⼤化、全屏、置顶弹框等功能。
由于之前有过⼀篇详细的介绍分享,感兴趣的话可以去看下哈。
其实v3layer弹窗是在原先的vue2版本中演变⽽来,专门为vue3项⽬⽽开发的,并且在功能及效果上和v2版的保持⼀致。
◆ vue3.x⾃定义美化模拟滚动条为了使得项⽬中页⾯滚动条更加精致,这⾥采⽤了⾃定义模拟滚动条vscroll组件来替代原⽣滚动条。
V3Scroll 基于vue3.0开发的⼩巧模拟滚动条组件。
⽀持⾃定义滚动条⼤⼩、颜⾊、层级及⾃动隐藏等功能。
并且⽀持实时监测DOM尺⼨改变来动态更新滚动条。
◆ vue3.x聊天主⾯板项⽬整体分为右上按钮、侧边栏、中间区、主体内容区三个模块。
<div :class="['vui__wrapper', store.state.isWinMaximize&&'maximize']"><div class="vui__board flexbox"><div class="flex1 flexbox"><!-- 顶部按钮(最⼤、最⼩、关闭) --><WinBar v-if="!route.meta.hideWinBar"/><!-- 侧边栏 --><SideBar v-if="!route.meta.hideSideBar" class="nt__sidebar flexbox flex-col"/><!-- 中间栏 --><Middle v-show="!route.meta.hideMiddle"/><!-- 主内容区 --><router-view class="nt__mainbox flex1 flexbox flex-col"></router-view></div></div></div>◆引⼊|注册公共组件// 引⼊饿了么vue3组件库import ElementPlus from 'element-plus'import 'element-plus/lib/theme-chalk/index.css'// 引⼊vue3.x弹窗组件import V3Layer from '../components/v3layer'// 引⼊vue3.x滚动条组件import V3Scroll from '@components/v3scroll'// 引⼊公共组件import WinBar from '../layouts/winbar.vue'import SideBar from '../layouts/sidebar'import Middle from '../layouts/middle'import Utils from './utils'const Plugins = app => {e(ElementPlus)e(V3Layer)e(V3Scroll)// 注册公共组件ponent('WinBar', WinBar)ponent('SideBar', SideBar)ponent('Middle', Middle)app.provide('utils', Utils)}项⽬中背景整体采⽤虚化⽑玻璃效果。
codis 3.0.3安装搭建

安装codis(在第一台机下载,然后编译后的二进制文件copy 到其他两台,然后三台主机上执行)
1.下载 https:///CodisLabs/codis/archive/3.0.3.zip
unzip 解压:
cd /tmp
unzip codis-3.0.3.zip
root 操作
cd /tmp
tar -C /codisapp/svr/ -xzf /tmp/jdk-7u71-linux-x64.gz
chown -R codisapp:codisapp /codisapp/svr/jdk1.7.0_71
alternatives --install /usr/bin/java java /codisapp/svr/jdk1.7.0_71/bin/java 300;alternatives --set java /codisapp/svr/jdk1.7.0_71/bin/java
刷新配置文件:
source /etc/profile
查看go版本:
[root@mvxl2579 tmp]# go version
go version go1.5.2 linux/amd64
配置dns解析:
vi /etc/resolv.conf
nameserver 10.16.0.100
scp /codisapp/sh/codis/stop_zookeeper.sh 192.168.30.114:/codisapp/sh/codis/
scp /codisapp/sh/codis/stop_zookeeper.sh 192.168.30.115:/codisapp/sh/codis/
开源ORM框架SqlSugar3.0的巨大变化

//取11-20条 varpage1=db.Queryable().Where(c=>c.id>10).OrderBy(it=>it.id).Skip(10).Take(10).ToList();
//获取最小 intminId1=db.Queryable().Where(c=>c.id>0).Min(it=>it.id).ObjToInt();//拉姆达 intminId2=db.Queryable().Where(c=>c.id>0).Min("id");//字符串写法
//orderBy varorderList=db.Queryable().OrderBy("iddesc,nameasc").ToList();//字符串支持多个排序 //可以多个orderby表达示 varorder2List=db.Queryable().OrderBy(it=>).OrderBy(it=>it.id,OrderByType.desc).ToList();//orderbynameas,orderbyiddesc
//In varintArray=new[]{"5","2","3"}; varlistnew=db.Queryable().Where(it=>intArray.Contains()).ToList(); varintList=intArray.ToList(); varlist0=db.Queryable().In(it=>it.id,1,2,3).ToList(); varlist1=db.Queryable().In(it=>it.id,intArray).ToList();
博思廷智能分析标准化版本3.0安装使用手册

博思廷标准化版本安装和使用手册目录1.安装1.1 boostiv-server(ivas-分析、vsms-分发、vrms-存储、ams-告警)1.1.1选择boostiv-server.msi双击打开安装界面。
1.1.2进入安装界面,然后点击下一步。
1.1.3选择默认安装路径,或点击更改,选择其它安装路径;然后点击下一步。
1.1.4点击安装,开始安装ivas、vsms、vrms、ams服务。
1.1.5安装成功,点击完成。
1.1.6安装完成后,桌面显示BSTAIRSConfig(其它4个服务的配置界面)、ivas、vsms、vrms、ams图标。
1.2 ivms平台1.2.1选择ivms.msi双击打开安装界面。
1.2.2进入安装界面,然后点击下一步。
1.2.3选择默认安装路径,或点击更改,选择其它安装路径;然后点击下一步。
1.2.4点击安装,开始安装ivms平台。
1.2.5安装成功,点击完成。
1.2.6安装完成后,桌面显示BSTivms-平台、cmc-平台配置、BSTMplayer-播放器,图标。
1.3其它辅助软件vc++2005、vc++2008、mysql-5.1.67、加密狗驱动1.3.1点击插件exe文件,全部保持默认完成安装。
1.3.2 MySql安装,选择mysql-5.1.67-win32.msi双击打开安装界面。
保持默认选项,直到出现如下界面,勾选Include Bin Directory in Windows PATH,点击NEXT:密码必须为admin不可更改,勾选Enable root access from remote machines,点击NEXT,继续保持默认选项,完成安装:2.服务配置2.1 boostiv-server服务配置(BSTAIRSConfig、ivas、vsms、vrms、ams)2.1.1双击BSTAIRSConfig图标,打开配置界面。
2.1.2 ivas配置。
雨林木风开源操作系统 Ylmf OS 3.0 安装说明 最新安装教程

雨林木风开源操作系统Ylmf OS 3.0 安装说明最新安装教程欢迎使用Ylmf OS(由于原网页打开速度太慢,特整理为word文档分享给大家!)∙欢迎使用Ylmf OS ,雨林木风开源操作系统发布之后受到了全球的关注,这给了雨林木风开发团队极大的鼓舞,根据广大用户的反馈,我们在以前版本的基础上对此版本的系统软件进行了部分调整,进一步美化了操作界面,添加了更加人性化的脚本管理,主题依然采用精仿的Windows 主题。
希望Linux 老用户用着更顺手,新用户入门更容易。
∙我们坚信,经过大家的努力,Linux 也可以做得和Windows 一样出色,给广大用户多一个选择。
Ylmf OS 3.0 可以分为多种安装方式:传统的CD 安装方式、wubi-hd 安装方式、wubi 安装方式以及USB 设备如U 盘安装方式。
下面我们对这几种安装方式做以详细的介绍。
一.传统的CD 安装方式这种方式跟往常我们安装Windows 有点相似,首先我们将加载的Ylmf OS 刻录成光盘,点此查看刻录软件的操作指导将刻录好的CD 插入光驱,设置计算机启动顺序为光盘启动,启动计算机就会看到如下画面:(图1 OS 引导界面1)在OS的引导画面出现时,任意的键盘操作都会出现如下图所示的画面:(图2 OS 引导界面2)这时候我们用键盘的上下键选择上图中所示的语言界面,选定的语言呈深灰色,未选定的语言呈浅灰色。
这里我们以简体中文操作系统安装为例,所以选择“中文(简体)”,这时候计算机的画面如下图所示:(图3 OS 引导界面3)这里出现了两部分,在屏幕正中间有五个选项,在屏幕下方有六个选项,下面我们依次介绍一下这些选项1) 试用Ylmf_OS 而不安装(T) 这就是我们通常所说的Livecd 模式,Livecd 是个体验模式,进入系统此项后可以预览整个OS 的全貌,而且大多数的功能都能正常使用。
当然,在进入Livecd 以后也会有安装OS 的接口,这样用户不用退出Livecd 模式,就可以继续安装过程。
浅谈DOCSIS3.0部署及应用
2 D OC S l S 3 . 0的部 署 与 应 用
2 . 1 为何 部署 D OC SI S 3 . 0
D O C S I S 3 . 0的上 下 行频 率 物 理 范 围有 所 扩 展 , 下
行频 率从 7 5 0 M可 扩展 到 1 GH z ,上行 频率 范 围从 5 ~ 6 5 MH z 可扩 展 为 5 ~ 8 5 MHz , 拥 有 了更 宽 的信 道资 源 。
1 . 1 D OCS I S发 展概 述
白1 9 9 7年颁 布 了 D O C S I S 1 . 0 标 准后 , C a b l e L a b s 相继完 善颁 布 了 D O C S I S 1 . 1 、 2 . 0标 准 , 2 0 0 6年 8月
f 11
了这些 问题 。 这一新标准能够在降低建设成本 的前提
口规范 。D O C S I S 标准是 目 前唯一的有线电视数据传
输 国际 标 准 , 是 有 线 电视 宽 带 网的 主 流技 术 , 是 真 正 实 现三 网融 合 的手段 。
2 5 6 Q A M 6 MH z 5 3 6 Ms o s 4 2 . 8 8 Mb i d s 约 3 8 Mb i t / s
6 4 Q A M 6 MH z 5 . 0 5 7 Ms p s 3 0 . 3 4 Mb i d s 约 2 7 Mb i d s 下行 6 b / s y m 8 MH z 6 . 9 5 2 Ms p s 4 1 . 7 Mb i d s 约3 6 Mb i t / s
下, 提 供更 高 的带 宽 、 更优 的质 量和 更 多 的业务 种 类 , 商 业部 署模 式 也更 为成 熟 。
Control4 CORE 1 家庭自动化控制器说明书
Control4 CORE 1 Controller Installation GuideSupported model• C4-CORE1 Control4 CORE 1 Hub & ControllerIntroductionDesigned for an exceptional family room entertainment experience, the Control4® CORE 1 Controller does more than automate the gear around your TV; it is the ideal smart home starter system with entertainment built in.The CORE 1 delivers a beautiful, intuitive, and responsive on-screen user interface with the ability to create and enhance the entertainment experience for any TV in the house. The CORE 1 can orchestrate a wide range of entertainment devices including Blu-ray players, satellite or cable boxes, game consoles, TVs, and virtually any product with infrared (IR) or serial (RS-232) control. It also features IP control for Apple TV, Roku, televisions, AVRs, or other network-connected devices, as well as secure wireless Zigbee control for lights, thermostats, smart locks, and more.For entertainment, the CORE 1 also includes a built-in music server that allows you to listen to your own music library, stream from a variety of leading music services, or from your AirPlay-enabled devices using Control4 ShairBridge technology.Box contentsThe following items are included in the CORE 1 controller box:• CORE 1 controller• AC power cord• IR emitters (2)• Rubber feet (2, pre-installed)• External antenna (1 for Zigbee)Accessories available for purchase• CORE 1 Wall-Mount Bracket (C4-CORE1-WM)• Control4 1U Rack-Mount Kit, Single/Dual Controller (C4-CORE1-RMK)• Control4 3-Meter Wireless Antenna Kit (C4-AK-3M)• Control4 Dual-Band Wi-Fi USB Adapter (C4-USBWIFI OR C4-USBWIFI-1)• Control4 3.5 mm to DB9 Serial Cable (C4-CBL3.5-DB9B) Requirements and specificationsWe recommend using Ethernet instead of Wi-Fi for the best networkThe Ethernet or Wi-Fi network should be installed before starting theThe CORE 1 requires OS 3.3 or newer.Composer Pro UserGuide (ctrl4.co/cpro-ug) for details.WarningsCaution! To reduce the risk of electrical shock, do not expose this apparatus torain or moisture.AVERTISSEMENT ! Pour réduire le risque de choc électrique, n’exposez pas cetappareil à la pluie ou à l’humidité.Caution! I n an over-current condition on USB, the software disables theoutput. If the attached USB device does not appear to power on, remove theUSB device from the controller.AVERTISSEMENT ! Dans une condition de surintensité sur USB ou sortie decontact le logiciel désactive sortie. Si le périphérique USB ou le capteurde contact connecté ne semble pas s’allumer, retirez le périphérique ducontrôleur.SpecificationsInputs / OutputsVideo out 1 video out—1 HDMIVideo HDMI 2.0a; 3840x2160 @ 60Hz; HDCP 2.2 and HDCP 1.4Audio out 2 audio out—1 HDMI and 1 digital coaxAudio playback formats AAC, AIFF, ALAC, FLAC, M4A, MP2, MP3, MP4/M4A, OggVorbis, PCM, WAV, WMAHigh-resolution audio playback Up to 192 kHz / 24 bitNetworkEthernet 2 10/100/1000BaseT compatible ports—1 PoE+ in and1 switch network portWi-Fi Optional Dual-Band Wi-Fi USB Adapter(2.4 GHz, 5 Ghz, 802.11ac/b/g/n/a)Zigbee Pro802.15.4Zigbee antenna External reverse SMA connectorUSB port 1 USB 3.0 port—500mAControlIR out 4 IR out—5V 27mA max outputIR capture 1 IR receiver—front, 20-60 KHzSerial out 2 serial out (shared with IR out 1 and 2)PowerPower requirements100-240 VAC, 60/50Hz or PoE+Power consumption Max: 18W, 61 BTUs/hourIdle: 9W, 30 BTUs/hourOtherOperating temperature32˚F ~ 104˚F (0˚C ~ 40˚C)Storage temperature4˚F ~ 158˚F (-20˚C ~ 70˚C)Dimensions (H × W × D) 1.16 × 7.67 × 5.2" (29.5 × 195 × 132 mm)Weight 1.5 lb (0.68 kg)Shipping weight 2.3 lb (1.04 kg)Additional resourcesThe following resources are available for more support.• Control4 CORE series help and information: ctrl4.co/core• Snap One Tech Community and Knowledgebase: •Control4 Technical Support:ctrl4.co/techsupport• Control4 website: 71231 Connect one of the included IR emitters to an IR OUT port on the controller.2 Place the stick-on emitter end onto the IR receiver on the Blu-ray player, TV, or othertarget device to emit IR signals from the controller to the target device.Setting up external storage devices (optional)You can store and access media from an external storage device, for example, a networkhard drive or USB memory device, by connecting the USB drive to the USB port andconfiguring or scanning the media in Composer Pro.We support only externally powered USB drives or solid state USB sticks.Composer Pro driver informationUse Auto Discovery and SDDP to add the driver to the Composer project. See theComposer Pro User Guide (ctrl4.co/cpro-ug) for details.OvrC setup and configurationOvrC gives you remote device management, real-time notifications, and intuitivecustomer management, right from your computer or mobile device. Setup isplug-and-play, with no port forwarding or DDNS address required.To add this device to your OvrC account:1 Connect CORE 1 controller to the Internet.2 Navigate to OvrC () and log in to your account.3 Add the device (MAC address and Service Tag numbers needed for authentication).Front viewA Activity LED—The Activity LED shows when the controller is streaming audio.B IR window—IR receiver for learning IR codes.C Caution LED—This LED shows solid red, then blinks blue during the boot process.The Caution LED blinks orange during the factory restore process. SeeD —The LED indicates that the controller has been identified in a Control4project and is communicating with Director.E Power LED—The blue LED indicates that AC power is present. The controller turns onimmediately after power is applied to it.Back viewPower port—AC power connector for an IEC 60320-C5 power cord.B IR OUT/SERIAL—3.5 mm jacks for up to four IR emitters or for a combination of IRemitters and serial devices. Ports 1 and 2 can be configured independently for serialcontrol (for controlling receivers or disc changers) or for IR control. See “Connectingthe IR ports/serial ports” in this document for more information.C USB—One port for an external USB drive (such as a USB stick formatted FAT32). See“Setting up external storage devices” in this document.D DIGITAL AUDIO—Outputs audio (AUDIO OUT) shared from other Control4 devices orfrom digital audio sources (local media or digital streaming services).E HDMI OUT—An HDMI port to display navigation menus. Also an audio out over HDMI.F ID button and RESET—ID button is pressed to identify the device in Composer Pro. TheID button on the CORE 1 is also an LED that displays feedback useful during a factoryrestore. The RESET pinhole is used to reset or factory restore the controller.G ENET OUT—RJ-45 jack for Ethernet out connection. Acts as a 2-port network switchwith ENET/POE+ IN jack.H ENET/POE+ IN—RJ-45 jack for a 10/100/1000BaseT Ethernet connection. Also canpower the controller with PoE+.I ZIGBEE—Antenna connector for the Zigbee radio.Installation instructionsTo install the controller:1 Ensure that the home network is in place before starting system setup. An Ethernetconnection to the local network is required for setup. The controller requires anetwork connection to use all of the features as designed. After initial configuration,Ethernet (recommended) or Wi-Fi (with an optional adapter) can be used toconnect the controller to web-based media databases, communicate with other IPdevices in the home, and access Control4 system updates.2 Mount the controller near the local devices you need to control. The controller canbe hidden behind a TV, mounted on a wall, installed in a rack, or placed on a shelf.The CORE 1 Rack Mount Kit is sold separately and is designed for easy installation ofup to two CORE 1 controllers side by side in a rack. The CORE 1 Wall-Mount Bracketis sold separately and designed for easy installation of the CORE 1 controller behinda TV or on the wall.3 Attach antenna to the ZIGBEE antenna connector.4 Connect the controller to the network.• Ethernet—To connect using an Ethernet connection, connect the network cableinto the controller’s RJ-45 port (labeled ENET/POE+ IN) and into the network porton the wall or at the network switch.• Wi-Fi—To connect using Wi-Fi, first connect the unit to Ethernet, connect theWi-Fi adapter to the USB port, and then use Composer Pro System Manager toreconfigure the unit for Wi-Fi.5 Connect system devices. Attach IR and serial devices as described in “Connectingthe IR ports/serial ports” and “Setting up IR emitters.”6 Set up any external storage devices as described in “Setting up external storagedevices” in this document. | 888.400.4070Copyright 2022, Snap One, LLC. All rights reserved. Snap One and its respective logos are registered trademarks or trademarks of Snap One, LLC (formerly known as Wirepath Home Systems, LLC), in the United States and/or other countries. 4Store, 4Sight, Control4, Control4 My Home, SnapAV, Mockupancy, NEEO, OvrC, Wirepath, and Wirepath ONE are also registered trademarks or trademarks of Snap One, LLC. Other names and brands may be claimed as the property of their respective owners. Snap One makes no claim that the information contained herein covers all installation scenarios and contingencies, or product use risks. Informationwithin this specification subject to change without notice.More helpFor the latest version of this document and to view additional materials, open the URL below or scan the QR code on a device that can view PDFs.Legal, Warranty, and Regulatory/Safety informationVisit /legal for details.MOST RECENT VERSIONctrl4.co/core1-ig200-00724-A 2022-05-31 DHATroubleshootingReset to factory settingsCaution! The factory restore process will remove the Composer project.To restore the controller to the factory default image:1 Insert one end of a paper clip into the small hole on the back of the controller labeled RESET .2 Press and hold the RESET button. The controller resets and the ID button changes to solid red.3 Hold the button until the ID flashes double orange. This should take five to seven seconds. The ID button flashes orange while the factory restore is running. When complete, the ID button turns off and the device power cycles one more time to complete the factory restore process.Note: During the reset process, the ID button provides the same feedback as the Caution LED on the front of the controller.Power cycle the controller1 Press and hold the ID button for five seconds. The controller turns off and back on.Reset the network settingsTo reset the controller network settings to the default:1 Disconnect power to the controller.2 While pressing and holding the ID button on the back of the controller, power on the controller.3 Hold the ID button until ID button turns solid orange and the Link and Power LEDs are solid blue, and then immediately release the button.Note: During the reset process, theID button provides the same feedback asthe Caution LED on the front of the controller.LED status informationActivityCautionLinkPowerMORE INFO ON CORE CONTROLLERSctrl4.co/core。
DOCSIS3.0——第三代电缆数据传输系统15
广播 组播 广播
请求所需的微时隙 请求所需的微时隙 不允许 为 0 时的定义 厂家专用算法 整个间隔是一个传输机会
口大小在 0 1 02 3 之间� 这些回退值信息在 据 来定义, 每个
� � � 请求 / 数据 知名组播
中由请求
或请求�数
请求 / 数据 初始维护
组播 广播
可以表示多个传输机会�
间隔应理解为竞争时间间隔� 竞争传输以后, 就等待下一个 的决定, 即数据授权挂起或数据授权确认, � � 一旦接收到其中之 对多频道模式, 必须以分段方式来传输, 每一 一, 竞争立告结束 � 所谓数据授权挂起, 即等待授权确 分段有开始时间� 一个业务流需设置一个队列标头, � � 认,如果没有发现 信息中有数据授权确认或数 必须将这个队列标头放到分段中, 并首先传输 下去 � 据授权挂起信息, 则 必须将回退窗口加倍, 重新 发送 数据,直 到重试最 大值为 1 6 ,这时必 须丢弃 三� C � 带宽使用 � � � � � , 这种情况说明线路太忙, 将开始新一轮的竞 在处理 信息时应遵循下列规则: � � (1) 使用数据授权来发送数据, 首先寻找授权 争传输过程 � 以上的竞争过程即为单频道模式的竞争 方案� 信息, 如无授权信息则寻找请求信息, 如果有单播请
201 2 年第 4 期 (总第 26 8期 )
���
技术讲座
保障带宽的需求 � � � 的授权,这样就消除了 (2 ) 对于多频道模式, 的请求不得超出每个 栏的最大请求数, 栏 的参数包含在 信 当多频道模式不能采用时, 在每一时刻对一个具体
有线电视技术
对每数据包的请求, 从
� � � 求, 首先寻找非竞争请求, 然后才是竞争请求机会, 来 在周期性间隔上提供固定包尺寸的数据流 而减少了消耗和等待时间, 并满足实时性这一特性的 需求 � 负式请求方式 �
Docsis3.0——第三代电缆数据传输系统18
第八章悦酝和悦酝栽杂之间的互动第一节CMTS 的初始化悦酝栽杂的初始化机制包括:本地终端、文件的下载和杂晕酝孕等。
悦酝栽杂必须满足下列要求:荫悦酝栽杂必须能重新启动和工作,这样重新启动需借助于结构数据,这些结构数据储存在非易失性储存器中。
荫如果从非易失性储存器或通过别的机制来的参数不可行,不能重新启动,则悦酝栽杂不能发送任何下行信息,包括杂再晕和哉悦阅都不能发送,这也就阻止了悦酝发送任何信息。
荫悦酝栽杂必须向悦酝提供每一个上行频道的信息。
在构建和设定悦酝栽杂之前悦酝栽杂需具备下列条件:荫一个外部的阅匀悦孕服务器必须能正常运行。
荫一个外部的栽云栽孕服务器必须包含悦酝所需的结构文件,这些文件是由阅匀悦孕服务器所规定的。
在初始化时,为了能正常工作,还需包括下列项目:荫一个栽韵阅服务器,对悦酝提供日期。
荫一个晕栽孕服务器,服务于悦酝栽杂。
晕栽孕即网络定时协议。
荫一个杂赠泽造燥早服务器,即系统日志服务器。
第二节C M 的初始化概述每个悦酝必须初始化,如图愿原员所示。
悦酝的初始化可分为如下的步骤:高宗敏编著图8-1CM 初始化概述(员)扫描和同步于下行流。
(圆)业务组的发现和测距。
(猿)认证。
(源)建立陨孕连接。
(缘)注册。
图愿原员中部分缩略语说明如下:悦酝原杂郧:悦酝的业务组;杂耘悦———安全;耘粤耘———耘葬则造赠粤怎贼澡藻灶贼蚤糟葬贼蚤燥灶葬灶凿耘灶糟则赠责贼蚤燥灶,早确认和加密。
每个悦酝在出厂时应包含下列信息:荫唯一的源愿比特的陨耘耘耘愿园圆的酝粤悦地址,用以识别悦酝。
荫安全信息,安全服务器用它来确认悦酝和确认响应。
第三节扫描下行频道(员)悦酝必须获得一个具有基本功能的下行频道,称为基本下行频道。
具有下列属性的下行频道可作为基本下行频道:淤完成了物理层和传输会聚子层的同步,包括:荫匝粤酝码元定时同步;荫包括云耘悦在内的帧同步;荫酝孕耘郧数据包的同步。
于同步的下行酝粤悦信息得到了确认,例如可接收到哉悦阅信息等。
- 1、下载文档前请自行甄别文档内容的完整性,平台不提供额外的编辑、内容补充、找答案等附加服务。
- 2、"仅部分预览"的文档,不可在线预览部分如存在完整性等问题,可反馈申请退款(可完整预览的文档不适用该条件!)。
- 3、如文档侵犯您的权益,请联系客服反馈,我们会尽快为您处理(人工客服工作时间:9:00-18:30)。
成 为更 灵 活
更有效
、
可扩展性更
。
物理通道组 合或捆绑在
其支
高 的 电视 节 目分 配 方 法
所有这些
3 0
.
起
,
以实 现 带 宽 更 高 的 逻 辑 通 道
3 0
.
。
持 有 望 扩 大 运 营商 收入 渠道 的新 应
用
。
业 务都 可 通 过 D O C S I S 代功能来实现
。
的新
一
D O C S IS
4
采 用 速 率 为4 0 M
H
z
b p
.
s
的
理
同时
,
低成本 的升 级 途 径 不 仅
S O)
,
条或更多6M
一
D O C S IS
2 O物
S
意 味 着 多 业 务 运 营 商 (M
能够
通 道 (欧 洲
般速 率 为5
,
0 M b P的一源自更快地 部 署D O C S IS
3 0
.
而且 还
捆绑时 间
实现更高
D O C S IS
。
8M H
3 0
.
z
通道)
然后将 它 们捆 绑为
捆 绑在
一
擎
粤
能 根 据 市 场 需 求对 其 进 行 配 置 以确
线速 的
条逻 辑通 道
需连续
,
。
起 的通 道 无
保 不 断推 出新 业 务
D O C S IS 3 0
.
。
是 通道 捆 绑概 念
一
3 0
. .
版本主要建
也 不 需 要 具 有相 同 的性 能
重要
,
O C S I S
3 0
至关
捆 绑 的最 低 级 别 是 支 持4 条 通 道
提 升 足 以 满 足 处 理 大 量 高 清 (H
多媒体应用 的需 求
。
)
因为 这 样 可 以确保 与 旧 式设
,
但 是 任 何 数 量 的通 道 都 可 以在 逻 辑
上 捆 绑在
一
此 外
,
越 来
备 的后 向兼容 性
而 且 随着 技 术 不
,
起
,
以便 根 据 需 要 部署 例如
,
越 多 的有线 电视运 营商将 从让 他
断 向前 发展 还 可 实 现异 构 网 络
2 0
.
使
高 得 多 的带 宽
。
企 业 可 以预
O C S IS
们 与 电信 公 司 直 接 竞 争 的 线 缆 语
与3
.
0
线缆调 制解调器具备透 明 图 1 D O C S IS
订 某 项基 于 8 条 捆 绑 通 道 的D
3 0
.
业务
,
从而提供下行数据传输
b p
s
燃 n
。
速 率 达 ~ l [3 2 0 M
绑
16
的带 宽 通 道
。
捆
j
_
3 0 通 道 捆绑
.
条 通 道 可 以创 建 下 行 带 宽达
s
640M b p
的通 道
。
通 道 捆 绑概 念 固
有 的 内在 灵 活 性 与 可 扩 展 性 可 为 运
维普资讯
行业 观 察
D O CS I S 3 0 更 上 层楼
.
■ 德 州 仪 器 (T I ) 宽带技术 产 品 部 R a
n
Se
n
de
r o v
it
z
,
Et
a
i Z a lt
s m a n
有 线 行 业 数 据 通 信 协 议
D O C S IS 3 0 (线 缆 数 据
:
至少从
开始就能
s
、
立 在其 前 代D O C S IS 2 0 的通 道 结构
参数
,
如
线速
、
时延 等
。
将 用 户带宽提 高到 下行
上行
120 M b P
S
。
16 0 M b p
基 础之上
。
将D
,
O C S IS
2 0
.
通道结
.
D O C S I S
3 0
.
调 制解调器通道
,
这 种显 著 的带宽
D
构 作 为 出 发 点 X~ D
冲 分 组所 需 的 内存 就 越 大 。
DOCS S30 I .中最 新 的 通 道捆 绑技 术
3 0 组 流 通 过 由 多 条 物 理 通 道 组 .分
成 的一 条 逻 辑 通道 到达 线 缆调 制 解 调 器 。 由于 每 条 物理 通 道 可 能 具 有 不 同 的性 能 参数 ,因而 分 组 会 不 按 顺 序 到 达 。 例如 ,速 度 较 慢 的 物 理 通 道 中的 l 号分 组 可能 会 在 2 分 组 号 之 后 到 达 , 因 为 2 分 组 是 通 过 一 号
,
物理 通 道 传输原有D
包 时就 可 以实 现D
O C S IS 2 0
.
数据
O C S IS 3 0
通道捆
电 子 i殳 应 用 计
w w 砒 F 口w
—
c , l
维普资讯
I us r A nal i nd t y ys s
绑 ( 图 1 。 与 通 过 一 条 通 道 连 续 见 )
营商提供 极 高精 确度
,
使 其能够 在
网 络 中需 要 的具 体 位 置 高 效部 署 与
配 置 相 应 带 宽容量
。
投入运行
在下行模 式下 调 器 终 端 系 统 (M
,
当线缆调 制解
网络处理
C T S )等
一
节 点 通 过 逻 辑上 捆 绑在
起 的多条
.
_
30
2 008 10
.
、
j一
c o ln
条 速 度 更 快 的 物 理 通 道 传 输 的 。 调
通 过 为 特 定 应 用 细 心 分 配 通
道 捆 绑 包 中 的通 道 可 以避 免 网络 中
消 除 了 DOCSI . 固有 的 某 些 低 s 20
效 性 。 例 如 , D0CS S 30 用 了 I .采
可 能 产 生 的 时 延 。 采 用 DS D报 头 I
发送 一 个 M P EG传 输 流 的 DOCS S I
延 是 一 种 成 本 要 素 ,因为 在 重新 组
合 过 程 中 时 延 越 高 ,调 制 解 调 器 缓
对 于 从 线 缆 调 制 解调 器 到 网络
中 CM TS 处 理 节 点 的 上 行 通 信 , 等
2 0 行 数 据 传 输 不 同 ,DoCSI .下 S
字段 标题 字 段 可 以达 到上 述 目的 。
连 续 级 联 与拆 分 ( CCF 概 念 。无 论 )
在DOCSS 30 是 20 ,C I .还 .中 MT 都 S 可 以在 网络 中分 配 时 隙 ( 在DOCS S I 术 语 中称 为 微 时 隙 ) 以 满 足 线 缆 , 调 制解 调 器 对 补 充带 宽 的请 求 。 在 DOCSI . 中 ,仅 允 许 调 制解 调 S 20 器请 求 满足 传 输整 个 分 组 所 需 的 递
.
音 (V
外
,
o
C
a
b l
e
)业 务 中 大 量 获 利
,
。
另
而高效 的可 互 操 作性
D O C S IS 6 M H
z
。
业务接
口
规
I P T V
也 呼之 欲 出
、
并将 最 终
3 0
.
~f
~
D O C S IS
2 0
.
的
一
范)的最 新增 强 版 本 宣 告 了具 有 突 破 性 的更 高 线速 时代 的来 临
