新大洲派睿PR600DQT—10使用说明
D600操作使用指南与技巧(新手篇)
【Bruce】D600操作使用指南与技巧(新手篇)一、Outlook 联系人如何导出备份1.打开Outlook;2.点击“文件/导入和导出”;3.在弹出的“导入和导出向导”对话框中选择“导出到一个文件”,点击“下一步”;4.在“创建文件的类型”对话框中选择你将导出的文件类型(通常选择Microsoft Access或Microsoft Excel),点击“下一步”;5.在“选择导出文件夹的位置”对话框中,选择“联系人”,点击“下一步”;6.在“将导出文件另存为”界面,通过点击“浏览”选择你打算保存的位置,点击“下一步”;7.点击“完成”,整个导出备份工作结束。
如何将联系人导入1.打开Outlook;2.选择“文件/导入和导出/从另一程序或文件导入/下一步”;3.在“从下面位置选择要导入的文件类型”选择框中,选择按照你原来保存的文件类型(比如Microsoft Access),点击“下一步”;4.通过“浏览”选择你备份的联系人文件,-----注意,该界面下面有3个选项:用导入的项目替换重复的项目、允许创建重复项目、不导入重复项目,根据需要进行选择,点击“下一步”。
二、如何硬启动(所有硬启之前请把卡取出来)1.按住键盘上左右两个确认键(就是手机面版的绿色通话和红色关断话键上方两个键),然后再按手机开关键,此时屏幕会出现英文,这时放开所有按键,最好再按绿色通话,手机就可以硬起了。
2.在开始/设置/系统/里有个清除内存的程序也可以起到硬启的效果。
三、“今日”屏幕显示内容的选择1.点击“开始/设置/个人/今日/项目”,勾选相应的内容将出现在“今日”屏幕上。
2.如何实现一键回到桌面/今日的程序?开始/设置/个人/按键/程序按键,选择一个按键,在下面的“分配程序”中选定“今日”命令就行。
3.开始菜单的选择点击“开始/设置/个人/菜单”,勾选相应的内容将显示在“开始”菜单中,最多可选7个。
4.取消按键点击时声音点击“开始/设置/个人/声音和提醒”,取消“事件(警告,系统事件)”的勾选。
Giant Power Pro 电动自行车操作手册说明书
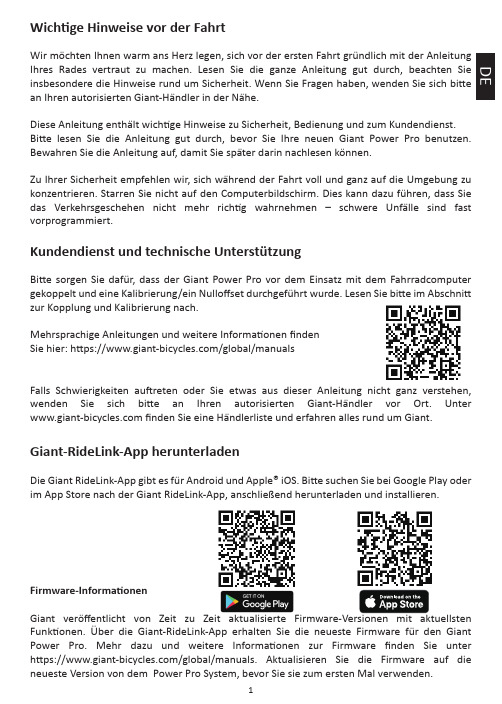
Wichtige Hinweise vor der FahrtWir möchten Ihnen warm ans Herz legen, sich vor der ersten Fahrt gründlich mit der Anleitung Ihres Rades vertraut zu machen. Lesen Sie die ganze Anleitung gut durch, beachten Sie insbesondere die Hinweise rund um Sicherheit. Wenn Sie Fragen haben, wenden Sie sich bitte an Ihren autorisierten Giant-Händler in der Nähe.Diese Anleitung enthält wichtige Hinweise zu Sicherheit, Bedienung und zum Kundendienst. Bitte lesen Sie die Anleitung gut durch, bevor Sie Ihre neuen Giant Power Pro benutzen. Bewahren Sie die Anleitung auf, damit Sie später darin nachlesen können.Zu Ihrer Sicherheit empfehlen wir, sich während der Fahrt voll und ganz auf die Umgebung zu konzentrieren. Starren Sie nicht auf den Computerbildschirm. Dies kann dazu führen, dass Sie das Verkehrsgeschehen nicht mehr richtig wahrnehmen – schwere Unfälle sind fast vorprogrammiert.Kundendienst und technische UnterstützungBitte sorgen Sie dafür, dass der Giant Power Pro vor dem Einsatz mit dem Fahrradcomputer gekoppelt und eine Kalibrierung/ein Nulloffset durchgeführt wurde. Lesen Sie bitte im Abschnitt zur Kopplung und Kalibrierung nach.Mehrsprachige Anleitungen und weitere Informationen findenSie hier: https:///global/manualsFalls Schwierigkeiten auftreten oder Sie etwas aus dieser Anleitung nicht ganz verstehen, wenden Sie sich bitte an Ihren autorisierten Giant-Händler vor Ort. Unter finden Sie eine Händlerliste und erfahren alles rund um Giant.Giant-RideLink-App herunterladenDie Giant RideLink-App gibt es für Android und Apple® iOS. Bitte suchen Sie bei Google Play oder im App Store nach der Giant RideLink-App, anschließend herunterladen und installieren.Firmware-InformationenGiant veröffentlicht von Zeit zu Zeit aktualisierte Firmware-Versionen mit aktuellsten Funktionen. Über die Giant-RideLink-App erhalten Sie die neueste Firmware für den Giant Power Pro. Mehr dazu und weitere Informationen zur Firmware finden Sie unter https:///global/manuals. Aktualisieren Sie die Firmware auf die neueste Version von dem Power Pro System, bevor Sie sie zum ersten Mal verwenden.Hinweise zum AufladenLaden Sie den Akku des Power Pro vollständig auf, bevor Sie ihn zum ersten Mal verwenden.Schritt 1: Nehmen Sie das Ladekabel zur Hand.Schritt 2: Bringen Sie das Ladekabel am Giant Power Pro an.Die LED leuchtet rot, solange der Akku geladen wird.Achtung:• Spannung: 5V ± 10% / Strom: 1~2A• Ladezeit: ca. 2 Stunden pro Seite.• Der Akku sollte alle zwei Monate vollständig aufgeladen werden,wenn das Power Pro System längere Zeit nicht benutzt wird.• Ein Verlust von maximal 30% der ursprünglichen Nennkapazitätpro Jahr bei maximal 400 Ladungen.Giant Power Pro – LED-SignaleAm Giant Power Pro gibt es eine spezielle Indikator-LED. Diese LED kann unterschiedliche Dinge signalisieren.LED-Signale:•Die LED blinkt zehnmal grün: Die Akkukapazität beträgt mehr als 50%, wenn der Giant Power Pro geweckt wird •Die LED blinkt zehnmal orange: Die Batteriekapazität liegt beim Aufwachen des Giant Power Pro zwischen 30und 50%.•Die LED blinkt zehnmal rot: Beim Aufwecken des Giant Power Pro liegt die Batteriekapazität unter 30%. • Die LED leuchtet konstant rot: Während des Ladevorgangs des Giant Power Pro. • Die LED leuchtet konstant grün: Wenn der Ladevorgang abgeschlossen ist.•LED blinkt und leuchtet weder rot noch grün: Der Akku ist nicht in Ordnung oder es liegen andere Probleme vor. Bitte lassen Sie sich von Ihrem autorisierten Giant-Händler unterstützen.Giant Power Pro koppelnVergewissern Sie sich vor dem Pairing, dass der Akku des Giant Power Pro vollständig geladen ist. Drehen Sie die Kurbelarme zwei- oder dreimal vollständig nach vorne oder hinten, um den Giant Power Pro aufzuwecken unddas Fahrrad in waagerechte Position zu bringen. Koppeln Sie den Fahrradcomputer mit dem Giant Power Pro, schauen Sie dazu in die technische Dokumentation des Fahrradcomputers. Die Schritte können von Computer zu Computer unterschiedlich ausfallen.Tipp: Mehr Informationen finden Sie in den Abschnitten zu LED-Signalen und zum Aufladen. Kalibrierung/NulloffsetSorgen Sie dafür, dass der Giant Power Pro vor der Kalibrierung mit dem Computer gekoppelt wurde.Halten Sie den linken Kurbelarm in der 6-Uhr-Position und die rechte Kurbel in der 12-Uhr-Position.Lesen Sie zum Kalibrieren des Giant Power Pro mit dem Fahrradcomputer inder technischen Dokumentation des Fahrradcomputers nach.Die Schritte können von Computer zu Computer unterschiedlich ausfallen.ACHTUNG: Bitte führen Sie nach sämtlichen Arbeiten an Halterung oderTretkurbel eine Kalibrierung aus.ACHTUNG: Wiederholen Sie die Kalibrierung vor jeder Fahrt.Mit der Smartphone-App koppeln1. Schalten Sie die Bluetooth-Smart-Funktion ein.2. Wählen Sie das Power Meter-Symbol und wählen Sie Power Pro.3. Drücken Sie das Bluetooth-Symbol, um den Scanvorgang zu starten.4. Die Geräte-ID erscheint.5. Wählen Sie das zu koppelnde Gerät aus, das Verbindungssymbol wird angezeigt und das Koppeln ist abgeschlossen.* Vergewissern Sie sich, dass Ihr Smartphone Bluetooth Smart (BLE 4.0) unterstützt.Mit der Smartphone-App kalibrieren1. Drücken Sie das Parametersymbol, um die Parameterseite aufzurufen2. Drücken Sie auf "Kalibrierung".3. Drücken Sie "Offset".4. Kalibrierung abgeschlossen.0 km Workouts DistanceHistory record Parameter Bluetooth Power Pro_65003BackPower Pro_65003Back 0 km Workouts Distance History record Parameter Bluetooth CalibrationClose Offset Information App Version 1.2.2-181214Device Name PowerPro_65003Back User Info LanguageCalibration CloseOffsetTechnische DatenAkku Aufladbarer LithiumakkuBatterielebensdauer: etwa 100 StundenKabellose Übertragung 2.4GHz, ANT+™/Bluetooth® Smart (BLE 4.0)Genauigkeit ± 2 % des gemessenen LeistungswertesGewicht Linke Seite: etwa 16 g/Rechte Seite: etwa 16 gLeistungsmessbereich 0-3000 WattsKadenzbereich 20-180 U/minWasserfestigkeit IPX7Umgebungstemperatur -10 bis 50 °Cim BetriebUmgebungstemperatur -20 bis 80 °Cbei LagerungZubehör LadekabelWasserfestigkeitDie Wasserfestigkeit Ihres Giant Power Pro entspricht der IPX7-Einstufung, die Wasserfestigkeit bis zu 1 m Eintauchtiefe vorgibt.Warnung: Tauchen Sie den Leistungsmesser NICHT längere Zeit unter Wasser.Warnung: Reinigen Sie den Leistungsmesser NICHT unter hohem Wasserdruck. Durch hohen Wasserdruck wird Feuchtigkeit ins Innere des Leistungsmessers gedrückt, beschädigt dort die elektronischen Komponenten.Reinigung und PflegeDamit Ihr Giant Power Pro stets einwandfrei funktioniert und Sie im Falle aller Fälle Garantieleistungen wahrnehmen können, beachten Sie unbedingt die folgenden WARN- und ACHTUNGS Hinweise. Falls Sie sich nicht an die Empfehlungen halten, kann Ihr Giant Power Pro beschädigt werden, die Garantie erlöschen.Warnung:• Reinigen Sie den Giant Power Pro nur von außen, also nur das Gehäuse. Nehmen Sie den Giant Power Pro NICHT auseinander – dadurch erlischt die Garantie.• Reinigen Sie das Gehäuse des Giant Power Pro mit einem sauberen Lappen und etwas Wasser. Verwenden Sie KEINE Reinigungsmittel – solche Mittel können das Gehäuse beschädigen.• Reinigen Sie den Leistungsmesser NICHT unter hohem Wasserdruck. Durch hohen Wasserdruck wird Feuchtigkeit ins Innere des Leistungsmessers gedrückt, beschädigt dort die elektronischen Komponenten.• Setzen Sie den Leistungsmesser NICHT längere Zeit hohen Temperaturen aus.• Bitte vermeiden Sie, dass der Power Pro von abnormalen externen Kräften getroffen wird, die den Power Pro beschädigen könnten.• Stoppen Sie den Ladevorgang sofort, um gefährliche Situationen zu vermeiden, wenn während des Ladevorgangs ein ungewöhnlicher Geruch, Rauch oder andere ungewöhnliche Zustände auftreten.• Laden Sie den Akku nicht in feuchter Umgebung oder bei Gewitter auf. Dies kann zu Schäden an der Batterie und möglicherweise gefährlichen Situationen wie einem elektrischen Schlag führen.• Achten Sie darauf, dass keine Metallgegenstände oder öligen Materialien den Ladeanschluss und die Ladeanschlüsse berühren.ACHTUNG:• Das Gerät kann bei Temperaturen von -20 °C bis 80 °C gelagert werden. Bei Über- und Unterschreitung dieses Temperaturbereiches kann die Elektronik beschädigt werden.• Sie können das Gerät bei Umgebungstemperaturen von -10 °C bis 50 °C verwenden. Außerhalb dieses Temperaturbereiches kann es zu Funktionsstörungen kommen.• Der Akku sollte alle zwei Monate vollständig aufgeladen werden, wenn der Power Pro längere Zeit nicht benutzt wird.• Die Umgebungstemperatur sollte beim Laden der Batterie zwischen -10 ° C und 50 ° C liegen. Die Batterie kann beschädigt werden, wenn die Umgebungstemperatur außerhalb des zulässigen Bereichs liegt.• Ladezeit beträgt ca. 3 Stunden. Wenn die Ladezeit mehr als 3 Stunden beträgt und der Akku immer noch nicht vollständig geladen ist, beenden Sie den Ladevorgang, um das Risiko einer Überhitzung des Akkus zu vermeiden. Bitte kontaktieren Sie Ihren autorisierten Giant-Händler vor Ort, um Unterstützung und Beratung zu erhalten.• Der Akku kann beschädigt werden, wenn er bei niedrigem Akkuladestand nicht aufgeladen wird. Bitte laden Sie ihn jederzeit.• Es ist ein normales Phänomen, dass sich der Akkuladestand allmählich verringert, wenn er längere Zeit nicht benutzt wurde.• Bitte beachten Sie die empfohlene Spannung und Stromstärke: 5V ± 10% / 1 ~ 2A• Verwenden Sie nur das Ladekabel, das mit dem Power Pro geliefert wird. Bündeln Sie das Ladekabel nicht während des Ladevorgangs. Ziehen oder beschädigen Sie das Ladekabel nicht. Die Verwendung eines beschädigten Ladekabels kann Gefahren verursachen.• Ein Verlust von maximal 30% der ursprünglichen Nennkapazität pro Jahr bei maximal 400 Ladungen. Eingeschränkte Giant-GarantieGiant gewährt dem Erstbesitzer des Giant Power Pro zwei Jahre Garantie ab Kaufdatum.Diese Garantie gilt nur, wenn das Gerät von einem autorisierten Giant Händler neu erworben und zum Zeitpunkt des Kaufes von diesem Händler montiert wird.EINSCHRÄNKUNGENSofern nicht anders vereinbart, beschränken sich sämtliche Ansprüche im Rahmen der oben erwähnten oder jegliche impliziten Garantien auf den Austausch defekter Komponenten gegen solche mindestens gleichwertigen Wertes nach alleinigem Ermessen Giants. Die Garantie beginnt mit dem Kaufdatum, gilt nur für den Erstbesitzer und ist nicht übertragbar. In keinem Fall haftet Giant für jegliche direkten, beiläufigen oder Folgeschäden, zu denen Verletzungen, Sachschäden, wirtschaftliche Verluste auf der Grundlage von Abmachungen, Verträgen, Gewährleistungen, Garantien, Fahrlässigkeit, Produkthaftung oder anderweitig zählen.AUSSCHLÜSSEDie obige oder jegliche sonstige implizite Garantie deckt Folgendes nicht ab:•Normaler Verschleiß, der nicht auf Material- oder Herstellungsfehler zurückzuführen ist.•Zu Verschleißteilen zählen Schrauben und Ladekabel.•Produkte, die nicht von autorisierten Giant-Händlern gewartet wurden.•Veränderungen, die dazu führen, dass das Produkt vom Originalzustand abweicht.•Einsatz des Produktes für anormale, Wettbewerbs- und/oder kommerzielle Aktivitäten oder für Zwecke, die dem bestimmungsgemäßen Verwendungszweck des Produktes entgegenstehen.•chäden, die durch Nichtbeachtung der Bedienungsanleitung entstehen.•Beschädigungen von Lackierung oder Dekorelementen, die durch Teilnahme an Wettbewerben, durch Sprünge, Abfahrten und/oder Trainieren solcher Aktivitäten entstehen oder durch widrige Wetter- oder Klimabedingungen verursacht werden.•Arbeitskosten für Austausch von Teilen oder Umrüstungen.Mit Ausnahme des im durch diese Garantie oder zusätzliche Garantien vorgegebenen Rahmen haften Giant, ihre Mitarbeiter und Agenten nicht für jegliche Verluste oder Schäden jeglicher Art (einschließlich durch Nachlässigkeit oder Fahrlässigkeit verursachte beiläufige und Folgeschäden), die durch Giant-Produkte oder in Verbindung mit solchen entstehen.Giant gewährt keine weiteren Garantien oder Gewährleistungen, weder ausdrücklich noch implizit. Sämtliche impliziten Gewährleistungen einschließlich Gewährleistung von Markttauglichkeit oder Eignung für einen bestimmten Zweck werden auf die Dauer der zuvor erwähnten Garantiezeit beschränkt.。
联圣 PRO10 程式安裝說明 说明书

聯聖科技股份有限公司使用手冊PRO10程式安裝說明MLTC2010/01/13 Update Ver.2.1PRO10程式安裝說明目錄1.請將光碟放入光碟機 (3)2.安裝PRO10應用程式 (4)2.1 開始安裝應用程式 (4)2.2 歡迎使用PRO10安裝精靈 (4)2.3 選取安裝位置 (5)2.4 正在安裝程式 (5)2.5 完成安裝 (6)2.6 安裝完成後 (6)3.安裝PRO10驅動程式 (7)3.1 開始安裝驅動程式 (7)3.2 歡迎使用SPMP3050 PC Device安裝精靈 (7)3.3 正在安裝 (9)3.4 安裝完成 (10)3.5 安裝完成後 (10)4.解安裝PRO10應用程式 (11)4.1 選擇解安裝的應用程式 (11)4.2 是否進行解安裝 (11)4.3 正在解安裝中 (11)4.4 應用程式解安裝完成 (12)5.解安裝PRO10驅動程式 (13)5.1 選擇解安裝的驅動程式 (13)5.2 準備解安裝 (13)5.3 是否進行解安裝 (14)5.4 正在解安裝中 (14)5.5 驅動程式解安裝完成 (15)本產品提供安裝光碟,若光碟片遺失或損壞,請至下載。
PRO10安裝方法共分成三大步驟,請依照以下列三大步驟操作,即可順利完成PRO10安裝流程:●步驟1:1.請將光碟放入光碟機●步驟2:2.安裝PRO10應用程式●步驟3:3.安裝PRO10驅動程式若使用者需移除應用程式及驅動程式,請依照下列二個步驟操作:●步驟1:4.解安裝PRO10應用程式●步驟2:5.解安裝PRO10驅動程式1.請將光碟放入光碟機請將本產品提供安裝光碟放入光碟機內,電腦會自動讀取並彈跳出安裝視窗如下:圖1-1 安裝視窗若電腦無彈跳出視窗,請至安裝光碟中點選Autorun.exe檔,同樣會彈跳出如圖1-1的安裝視窗,Autorun.exe檔圖示如下:圖1-2 執行檔圖示2.安裝PRO10應用程式請點選圖1-1的安裝PRO10應用程式按鈕進行安裝PRO10應用程式。
QT防爆电动执行器使用说明书

…………………………………………………………概述1…使用注意事项…………………………………………………1故障检查………………………………………………………1性能特点………………………………………………………3主要结构与性能参数………………………………………3-4外型和阀门连接尺寸…………………………………………5电气控制接线图………………………………………………6执行器安装……………………………………………………7电动前的事项…………………………………………………8调试说明………………………………………………… 8-10机械限位螺栓……………………………………………… 11开、关运行试验…………………………………………… 11转矩开关…………………………………………………… 11手-电动切换机构……………………………………………11目录结构………………………………………………………2……与阀门的连接………………………………………………7-8“QT”系列电动执行器适用于角行程运行的阀门启闭和调节控制,如蝶阀、球阀、旋塞阀等,可现场操作也可远程控制,广泛应用于石油、化工、水处理、船舶、造纸、电站、供热、楼宇自控、轻工等行业。
本产品已获防爆认证证书,产品质量具有保障。
结构壳体--铝合金外壳经氧化处理,环氧聚酯粉末涂层,可以适应各种严酷的工况。
电机--全封闭式鼠笼电机,绝缘等级为F级,内置过热保护开关,防止电机过热。
传动结构--具有精密的双蜗轮蜗杆结构,低噪音(最大50分贝),高输出力矩。
手动结构--扳动离合器手柄可以手动操作,通电时自动复位。
指示器--安装在中心轴上,凸透镜设计,可观察阀门位置。
外部机械限位--阻止限位开关失效时超行程。
接线端子--弹簧压紧的接线端子,接线牢固,控制线路符合单相或者三相电源标准,可在震动环境中使用。
限位开关--可精确定位阀门位置,辅助开关可提供干接点信号。
扭矩开关--提供过载保护(QT-010除外),也在阀门卡涩有异物时自动断开电机电源,保护阀门和执行器不受损坏。
胜利仪器 VICTOR 606D钳形表说明书

目录安全声明 (1)安全工作规范 (1)电气符号 (3)概述 (4)认识仪表 (4)测量操作 (5)交流电流测量 (5)直流电压测量 (5)交流电压测量 (6)频率/占空比测量 (6)电阻测量 (7)通断测量 (7)二极测量 (8)电容测量 (8)温度测量 (9)非接触交流电压检测(NCV) (9)其它功能 (10)通用技术指标 (11)精度指标 (12)直流电压 (12)交流电压 (12)交流电流 (13)电阻 (13)通断测试 (14)二极管测试 (14)电容 (14)频率/占空比 (15)温度 (16)维护 (17)一般维护 (17)电池安装或更换 (17)安全声明钳表的设计与制造符合IEC61010-1,IEC61010-2-032,IEC 61010-031国际电工安全标准,符合IEC61010CAT.III600V测量类别和污染等级2。
在使用本产品前,请先阅读“安全信息”。
安全工作规范“警告”表示会对用户造成危险的状况和操作。
“小心”表示会对仪表或设备造成损坏的状况和操作。
为了防止可能发生的触电、火灾或人身伤害●仔细阅读说明书,特别是警告和小心说明●严格遵守本说明书使用仪表,否则仪表所提供的保护功能可能会遭到破坏或削弱。
●测量电压超过30V交流有效值或60V直流有效值时,要特别小心,该类电压有电击的危险。
●端子间或每个端子与接地点之间施加的电压不能超过额定值。
●通过测量已知电压或电流来检测仪表工作是否正常,若不正常或已经损坏请勿再使用。
●使用仪表之前,请检查仪表外壳是否存在裂纹或塑胶件损坏,若有请勿再使用。
●使用仪表之前,请检查表笔是否有裂纹或损坏,若有请更换同样型号和相同电气规格的表笔。
●请勿超出产品、探针或附件中额定值最低的测量类别(CAT)额定值●测试表笔插在输入插孔时,请勿测量电流。
●不要单独工作●请遵守当地和国家的安全规范。
穿戴个人防护用品(如经认可的橡胶手套、面具和阻燃衣物等),以防危险带电导体外露时遭受电击和电弧而受伤。
ViewSonic VPAD10 Tablet PC 说明书

VPAD10Tablet PCViewSonic®Model No. : VS13790- User Guide- Guide de l’utilisateur - Bedienungsanleitung - Guía del usuario - Användarhandbok - Kullanιcι kιlavuzu- Pyководство пользователя- 使用手冊 (繁體)iViewSonicVPAD10電磁相容資訊歐洲國家聲明本裝置符合 (電磁相容指令 ) EMC Directive 2004/108/EC 及 (低電壓指令) Low Voltage Directive 2006/95/EC。
以下資訊僅適用於歐盟(EU)成員國:右側所示的符號符合《廢電子電機產品(WEEE) 指令2002/96/EC》之規定。
凡標有此符號的產品不得作 城市廢品加以處理,而必須按照當地有關法律利用貴國或貴地區的廢品回收及收集系統而加以處理。
如果本設備使用電池、充電電池或鈕扣電池,則會標示化學符號Hg、Cd 或Pb,代表電池的重金屬含量為0.0005%以上的汞、0.002%以上的鎘或0.004%以上的鉛。
R&TTE符合性聲明本無線模組裝置符合歐盟 R&TTE 指令之基本規定 (1999/5/EC)。
本設備符合下列符合性標準:ETSI EN 300 328EN 301 489EN 301 489認證國家:德國、英國、荷蘭、比利時、瑞典、丹麥、芬蘭、法國、義大利、西班牙、奧地利、愛爾蘭、葡萄牙、希臘、盧森堡、愛沙尼亞、拉脫維亞、立陶宛、捷克共和國、斯洛伐克、斯洛維尼亞、匈牙利、波蘭與馬爾他。
NCC經型式認證合格之低功率射頻電機,非經許可,公司,商號或使用者均不得擅自變更頻率、加大功率或變更原設計之特性及功能。
低功率射頻電機之使用不得影響飛航安全及干擾合法通信;經發現有干擾現象時,應立即停用,並改善至無干擾時方得繼續使用。
恒力电动迷你摩托车TT1600R产品说明书

OWNERS MANUAL TT1600R Mini BikeA s s e m b l y V i d e o F e a t u r e s a n d O p e r a t i o nC a r t o n C o n t e n t sLocated within top of the packing foam you will find the FrontFender, Rear Fender, Right and Left Footrest assemblies, Handlebar Clamps, all hardware and Tool Kit. The Front wheel and charger are located at the bottom of the packaging.OPEN THE TOP OF THE SHIPPING BOX and Remove the contents from the top of the foam inserts. Inspect and confirm that you have all parts and Hardware. Remove the foam separators that protect the components from damage during shipping. Remove the Front wheel and brake rotor. Inspect the contents of the box for scratches in the paint, dents or kinked Brake lines that may have occurred during shipping. Because these vehicles are 90 percent assembled and packed at the factory, there should not be any problems, even if the box has a few scars or dents.A l l o w u p t o 1 H o u r f o r a s s e m b l y .Check for all parts and hardware before beginning assembly. Follow these instructions carefully, Checking all bolts, Nuts and screws for tightness during the assembly process. D O N O T S q u e e z e t h e b r a k e l e v e r s u n t i l t h e b r a k e s h a v e b e e n f u l l y a s s e m b l e dSet the bike on a stable platform at least 18” off the ground. Position the front fork so that it hangs off one end of the platform to facilitate front wheel and brake assembly installation.Enjoy the process and take your time to ensure all components are secure. Checking all bolts, nuts and screws for tightness during the assembly process.Front WheelFolding FootPegsHandle Bars assemblyFront FenderRear Fender & Tool KitBattery ChargerHarware partsFeatures and ControlsPRE-RIDE CHECKLISTLOOSE PARTSCheck and secure all fasteners before every ride. Make sure handlebar clamp bolts are locked properly in place. There should not be any unusual rattles or sounds from loose parts or broken components. If you are not sure, ask an experienced mechanic to check.BRAKECheck the brake for proper function. When you squeeze the lever, the brake should provide positive braking action. When you apply the brake with the speed control on, the brake cut-off switch will stop the motor. When the brake is not in use, the Front and Rear wheel should spin freely without drag.FRAME, FORK AND HANDLEBARSCheck for cracks or broken connections. Although broken frames and chassis components are rare, it is possible for an aggressive rider to Jump, run into a curb or wall and wreck, bend or break a frame, fork or suspension components. Get in the habit of inspecting yours regularly.Safety GearAlways wear proper protective equipment such as an approved safety helmet, elbow pads and knee pads. Always wear athletic shoes (lace-up shoes with rubber soles), never ride barefooted or in sandals, and keep shoelaces tied and out of the way of the wheels, motor and drive system.R I D E R S S A F T E Y W A R N I N GT h i s M i n i B i k e i s d e s i g n e d f o r O f f R o a d U s e O n l y a n d h a s b e e nd e s i g n e d a n d i n t e n d e d f o r u s e i n c o n t r o l l e d e n v i r o n m e n t s f r e e o f p o t e n t i a l t r a f f i c h a z a r d s a n d n o t o n p u b l i c s t r e e t s.I f i s u p t o t h e e n d u s e r t o k n o w t h e l o c a l l a w s g o v e r n i n g s u c h v e h i c l e s a n d w h e r e t h e y a r e l e g a l t o b e r i d d e n.B u r r o m a x m a k e s n o c l a i m t h a t t h e s e b i k e s a r e s t r e e t l e g a l.Riding an electric mini bike can be a hazardous activity. Certain conditions may cause the equipment to fail without fault of the manufacturer. Like other electric products, these vehicles can and are intended to move, and it is therefore possible to lose control, fall off and/or get into dangerous situations that no amount of care, instruction or expertise can eliminate. If such things occur you can be seriously injured or die, even when using safety equipment and other precautions.R I D E A T Y O U R O W N R I S K A N D U S E C O M M O N S E N S E.It is your responsibility to review this information and make sure that all riders understand all warnings, cautions, instructions and safety topics and assure that young riders can safely and responsibly use this product. Burromax recommends that you periodically review and reinforce the information in this manual with younger riders, and that you inspect and maintain your product to insure rider safety. The recommended Minimum rider age is 16 years or older is only an estimate, and can be affected by the rider’s size, weight or skills. Any rider unable to fit comfortably on the Mini Bike should not attempt to ride it. A parent’s decision to allow a person younger than 16 years old to ride this product should be based on the child’s maturity, skill and ability to follow rules. DO not exceed the maximum recommended rider weight of 300 lbs. Rider weight does not necessarily mean a person’s size is appropriate to fit or maintain control of the vehicles.Keep this product away from small children and remember that this product is intended for use only by persons who are completely comfortable and confident when operating this Mini Bike.Do not touch the brakes or electric motor on your electric mini bike when in use as they can become very hot.Always check and obey any local laws or regulations which may affect the locations where the vehicles may be used.Ride defensively. Watch out for potential objects that could catch your wheel or force you to swerve suddenly or lose control.R I D E R S S A F T E Y W A R N I N GBe careful to avoid pedestrians, skaters, skateboards, scooters, bikes, children or animals who may enter your path, and respect the rights and property of others.Do not activate the Throttle on the hand grip unless you are on the electric mini bike and in a safe, outdoor environment suitable for riding. These bikes were manufactured for performance and durability but are not impervious to damage. Jumping or other aggressive riding can over-stress and damage any product, including the electric motorbike, and the rider assumes all risks associated with high-stress activity.Be careful and know your limitations. Risk of injury increases as the degree of riding difficulty increases. The rider assumes all risks associated with aggressive riding activities. Maintain a hold on the handlebars at all times. Never carry passengers or allow more than one person at a time to ride the electric mini bike without proper skills and accessories. Never use near steps or swimming pools. Keep your fingers and other body parts away from the drive chain, Wheels, Brake Rotors, steering system, and all other moving components. Never use headphones or a cell phone while riding this bike. Never hitch a ride with another vehicle.Do not ride the vehicles in wet or icy weather and never immerse the electric mini bike in water, as the electrical components and drive components could be damaged by water or create other hazards or possibly unsafe conditions. These vehicles are intended for use on flat, level ground without loose debris such as rocks or gravel. Wet, slick, bumpy, uneven or rough surfaces may impair traction and contribute to possible accidents. Do not ride the electric mini bike in mud, ice, puddles or water. Avoid excessive speeds that can be associated with downhill rides.P r o p e r C l o t h i n gAlways wear an approved safety helmet (with chin strap securely buckled). A helmet may be legally required by local law or regulation in your area. Elbow pads and knee pads, a long-sleeved shirt, long pants and gloves are recommended. Always wear athletic shoes (lace-up shoes or Boots with rubber soles), never ride barefooted or in sandals, and keep shoelaces tied and out of the way of the wheels, motor and drive system. BATTERY AND CHARGER WARNINGS1.The charger supplied with the electric mini bike should beregularly examined for damage to the cord, plug,enclosure and other parts, and in the event of suchdamage, the bike must not be charged until the chargerhas been repaired or replaced.e ONLY Burromax Li-ion Battery Charger Specific tothe TT1600R.3.Do not operate a charger near flammable materials.4.Unplug charger and disconnect from bike when not in use.5.Chargers are not waterproof and should never be used inwet conditions. Water and moisture will damage thecharger so always use the charger in a clean, dry area6.Do not store or charge the battery in extremetemperatures. Above 110° F or below 32° F7.Keep away from fire.8.Do not disassemble the battery. Do not use Lead Acid orautomotive battery chargers as it will damage the batteryand void your warranty.9.Turn the power switch OFF before charging the battery orconducting any maintenance procedures.10.FAILURE TO USE COMMON SENSE AND HEED THE ABOVEWARNINGS INCREASES RISK OF SERIOUS INJURY. USEWITH APPROPRIATE CAUTION AND SERIOUS ATTENTIONTO SAFE OPERATION.11.Recycle batteries at locations that acceptLithium Ion Batteries—DO NOT THROW IN THE TRASH P O W E R W A S H I N G W A R N I N G SU s e c a r e w h e n w a s h i n g t o a v o i d p o i n t i n g t h e w a t e r s t r e a m sd i re c t l y a t t h e e l e c t r i c a l c o m p o n e n t s.A v o i d p o i n t i n g t h e w a t e r a t t h e T h r o t t l e a n d S p e e d o m e t e r,B r a k e H a n d l e s,a n d t h e e n d s of t h e M o t o r. Do not use Hi Pressure to wash the plastic body or the hydrographics may come off! Do not put water directly into the battery housing vents! High Pressure washing tires, wheels, brakes and under the bike or frame components poses no danger to the bike when washing. Be Careful and thoughtful of all wiring and Electrical Components when washing.O p e r a t i o n a n d P e r f o r m a n c eThis bike was intended for enjoyment for the entire family as a Pit Bike, Camping Bike, Hunting mobility or to cruise around the property on. I t w a s d e s i g n e d s p e c i f i c a l l y a s a n o f f-r o a d m o t o r c y c l e. This Bike was not intended for use as a Competition or Motorcross bike and should not be used to jump, ride wheelies or stunt on. We recommend riders up to 350 lbs use this bike on relatively flat hard packed surfaces and lighter weight riders have more freedom on terrain and riding aggressiveness. Distance and performance testing was done with 200 lb riders and these bikes were tested to have a 44 Mile range on the low setting in saver mode ( 20 mph) and nearly 26 miles on the high setting in saver mode ( 32 mph) Testing was done on flat ground with wide open throttle with calm weather.W A R N I N G:D o N o t O p e r a t e t h i s v e h i c l e i n W A T E R o r S A N D. Water and sand can damage the motor which has AIR VENTING and COOLING HOLES in each end. Keep water and sand away from the Motor! These vehicles are intended for use on hard packed ground without loose debris such as rocks or gravel and sand. Wet, slick, bumpy, uneven or rough surfaces may impair traction and contribute to possible accidents. Do not ride the electric mini bike in mud, ice, puddles or water. Avoid excessive speeds that can be associated with downhill rides! This bike can achieve high speeds on downhill rides which can cause the rider to lose control and cause injury or even death.R u n n i n g t i m eRun time may vary depending on many factors such as riding conditions, rider weight, climate and/or proper maintenance. The most common cause of low performance is LOW TIRE PRESSURE. Please ensure tire pressure is maintained for optimum ride time and performance. R i d i n g u n t i l t h e b a t t e r y i s c o m p l e t e l y d e a dThis bike will run until the bike completely shuts off which is approximately 39.5V, which is displayed on the handlebar gauge. We do not recommend running the bike to cutoff, as it is a real pain to push your bike home. We recommend that you recharge the battery immediately after you have run the battery to cutoff. DO NOT LET A DEAD BATTERY SIT FOR A LONG PERIOD OF TIME. You should familiarize yourself with the voltmeter located on the handlebar gauge and displayed while the bike is under power and moving. You will notice the voltage changes with the power load required, this is normal. The battery, when run completely downS p e c i f i c a t i o n s:W e i g h t:Gross: 112.4 lb.Net (Bike only) 97 lb.P e r f o r m a n c e:H i g h S p e e d:32-34 Mph on Standard/Saver ModeL o w S p e e d:20-22 Mph on Standard or Saver ModeR a n g e: (Tested using 200 lb. Rider on FlatPavement)H i g h--Up to 26 MilesL o w--Up to 44 MilesC h a r g e T i m e:75%D i s c h a r g e a p p r o x.4.0H r s.100%D i s c h a r g e a p p r o x.6.5H r s.80%C h a r g e i n3H r s.W e i g h t C a p a c i t y:Up to 300 lbs. on Flat Pavement/DirtFor Off Road Riding we recommend 180 lb max E l e c t r i c a l:B a t t e r y:52 Volt 23.4AH Lithium IonC h a r g e r:58.8V 4 AmpC o n t r o l l e r:4 Modes, Hi/Lo Speed Handlebar controlled, Standard/Saver Mode is hidden switch, Locked Wheel CutW i r i n g:Waterproof *** TypeM o t o r:Brushless DC 1600W Rated 4500 rpmL i g h t i n g:LED 5000 Lumen Headlight, LED Taillight LED Safety Side LightsD i s p l a y:MPH, ODO, Voltage, Charge Bar Graph, Hi/LowU S B P o r t s:Dual 4.5 Amp Fast ChargingH o r n:Single Note 120 db.C h a s s i s;F o r k:36mm Inverted HydraulicR e a r S h o c k:150mm Coil Over Hydraulic-Adjustable W h e e l:3.5x10” 6 Spoke AlloyT i r e:100/90-10 Burromax Track TireB r a k e s:180mm Hydraulic Disc F/RCalifornia Prop 65 Warning Burromax Limited WarrantyThe manufacturer warranties this product to be free of manufacturing defects for a period of 90 days from date of purchase. This Limited Warranty does not cover normal wear and tear, tires, tubes, chain or any damage, failure or loss caused by improper assembly, maintenance, or storage or use of these products. Batteries are warranted 1 year from date of purchase.This Limited Warranty will be void if the product is ever:●used in a manner other than for recreationspecified in this manual●modified in any way; The manufacturer is not liable for incidental or consequential loss or damage due directly or indirectly to the use of this product.Burromax does not offer an extended warranty. If you have purchased an extended warranty, it must be honored by the store at which it was purchased. For your records, save your original sales receipt with this manual, Fill Out the product registration page and mail it to:B u r r o m a x1C h e s t e r f i e l d M a l lC h e s t e r f i e l d M O63017All Warranty requests will be evaluated by Burromax and final determination will be made at our sole discretion.ALL replacement parts are available at 1-800-742-1189。
新大洲电动车途行按键使用说明
新大洲电动车途行按键使用说明
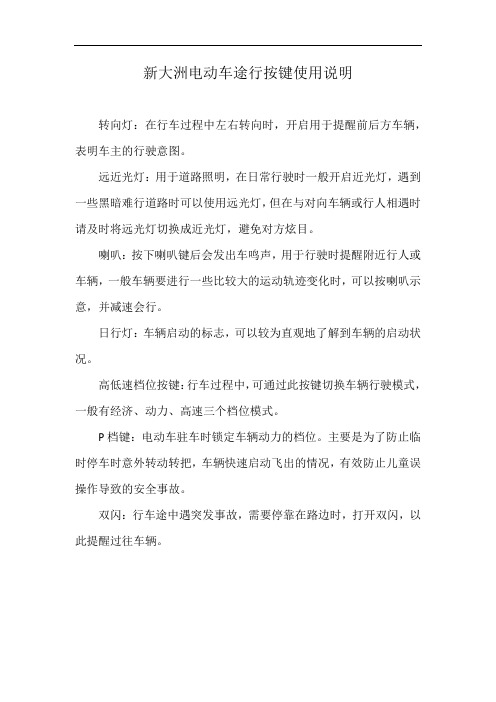
转向灯:在行车过程中左右转向时,开启用于提醒前后方车辆,表明车主的行驶意图。
远近光灯:用于道路照明,在日常行驶时一般开启近光灯,遇到一些黑暗难行道路时可以使用远光灯,但在与对向车辆或行人相遇时请及时将远光灯切换成近光灯,避免对方炫目。
喇叭:按下喇叭键后会发出车鸣声,用于行驶时提醒附近行人或车辆,一般车辆要进行一些比较大的运动轨迹变化时,可以按喇叭示意,并减速会行。
日行灯:车辆启动的标志,可以较为直观地了解到车辆的启动状况。
高低速档位按键:行车过程中,可通过此按键切换车辆行驶模式,一般有经济、动力、高速三个档位模式。
P档键:电动车驻车时锁定车辆动力的档位。
主要是为了防止临时停车时意外转动转把,车辆快速启动飞出的情况,有效防止儿童误操作导致的安全事故。
双闪:行车途中遇突发事故,需要停靠在路边时,打开双闪,以此提醒过往车辆。
- 1、下载文档前请自行甄别文档内容的完整性,平台不提供额外的编辑、内容补充、找答案等附加服务。
- 2、"仅部分预览"的文档,不可在线预览部分如存在完整性等问题,可反馈申请退款(可完整预览的文档不适用该条件!)。
- 3、如文档侵犯您的权益,请联系客服反馈,我们会尽快为您处理(人工客服工作时间:9:00-18:30)。
新大洲派睿PR600DQT—10使用说明
新大洲xx电动车PR600DQT行车使用说明与充电操作说明:起车时把钥匙插进钥匙孔,向右旋转至“on”人离开车子的时候,把档位置于前进档的位置上,把锁匙转到“OFF”的位置上把锁匙拔出,并且踩下刹车。
充电操作步骤:先把直流电源插头插进位于驾驶员座位下面的插座里,再插进交流电源插座。
充电器在使用过程中需防潮防湿。
车辆起动或行驶时请抓紧扶手。
充电操作步骤:先把直流电源插头插进位于驾驶员座位下面的插座里,再插进交流电源插座。
充电器在使用过程中需防潮、防湿,并放置在通风良好的地方,充电器工作时有一定的温度升、请注意散热。
充电时间一般在7到8小时,视电池使用状态而不同。
充电时,充电器的电源指示灯显示红色,充电指示灯也显示为红色,充满后,充电指示灯为绿色,在指示灯由红色转绿色后1到2小时停止充电,停止充电后,先拔出交流电源插头后再拔直流电源插头。
违反此操作程序,会导致充电器烧坏无法充电。