pyrosim说明书翻译(精品)
PeerSim中文教程

PeerSim中文教程(1):解析 Cycle-based 模式仿真本文介绍了PeerSim的基本概念,并解析了两个示例以更清晰地说明PeeSim的仿真流程。
Peersim支持两种仿真模式,即Cycle-based的模型和传统的event-based的模型,本文专注于前者,Cycle-based模型是一个简化的模型,拥有更好的伸缩性及性能,在拥有4GB内存的情况下,event-driven模式目前最多支持十万节点级别,而cycle-based模式则支持千万个节点级别。
但是Cycle-based模型缺少对传输层的仿真和并行处理,节点之间是直接通信的,仿真核心以一定的顺序周期性地给以节点控制。
在运行时,可以进行任意的操作,如调用其它对象的方法并执行一些计算。
Cycle-based模型损失了一些真实性,虽然一些简单的协议可以忽略这些差别,但是在选择使用这个模型时,需要注意这些区别。
我们可以相对简单地将Cycle-based的仿真移植到Event-driven引擎上,但在本文中不讨论这个话题。
一.基本介绍PeerSim鼓励基于接口的模块化编程,每一个组件都能被其它实现了相同接口的组件代替,一般的仿真过程如下:1.选择网络大小(即节点数量)。
2.选择要实验的一个或多个协议并进行初始化。
3.选择一个或多个Control对象来监视感兴趣的属性,并在仿真时修改一些参数(比如,网络大小,协议的内部状态,等等)。
4.根据配置文件,调用Simulator类运行仿真。
在仿真时创建的对象都是实现了一个或多个接口的类的实例,主要的接口如下所示:Node P2P网络是由节点组成的,节点是协议的容器。
Node接口提供了对节点所包含的协议的访问方法,并为节点提供了固定的ID。
CDProtocol 这是一个特定的协议,被设计用来在Cycle-based模型中运行,它只定义了在每一个周期中要运行的操作。
Linkable 一般都由协议来实现,这个接口为其它协议提供了访问邻居节点集合的服务,节点间相同的linkable协议类的实例定义了一个覆盖网络。
PIPESIM软件教程(软件介绍及模型建立)

PIPESIM软件教程(软件介绍、模型建立)目录前言 (1)1PIPESIM软件简介 (2)1.1PIPESIM软件 (2)1.2PIPESIM界面 (2)1.2.1启动/退出 (2)1.2.2开始页 (3)1.2.3物理模型组件 (5)1.2.4工作界面 (6)2建立物理模型 (7)2.1新建 (7)2.1.1操作步骤 (7)2.1.2新建文件 (7)2.2定义单位系统 (7)2.3选择流动相关式 (8)2.4流体模型建立 (9)2.5物理模型建立 (13)前言此次PIPESIM培训及练习,根据项目研究过程中应用到的PIPESIM软件地面管网相关基础功能及操作为基础,对PIPESIM应用软件进行简单的培训、练习以及探讨学习。
知识背景要求为顺利完成PIPESIM培训及练习,必须具备如下知识:☐熟悉Windows基础操作☐熟悉微软Office办公软件操作☐天然气相关知识课程学习目标通过如下PIPESIM相关培训及练习,将掌握如何运用PIPESIM软件进行建模、计算及分析。
☐PIPESIM软件相关知识☐管网模型建立案例☐管网模型模拟分析必备软硬件环境为顺利完成此次PIPESIM培训及练习,您需要准备如下软硬件环境:☐个人电脑☐Windows 64位操作系统☐安装PIPESIM 2017应用软件☐培训及练习相关资料11PIPESIM软件简介1.1PIPESIM软件PIPESIM软件是集油藏流入动态、单井分析与优化设计、地面管道/设备分析计算、井网/管网分析等为一体的综合分析模拟工具。
它可以模拟从油藏到地面处理站的整个生产系统。
PIPESIM最大的特点是系统的集成性和开放性,PIPESIM中的每一个模块都可以独立进行分析计算。
1.2PIPESIM界面1.2.1启动/退出☐鼠标停留至PIPESIM软件桌面快捷方式,双击/右键、打开,启动PIPESIM软件。
☐启动页面。
☐PIPESIM开始页。
☐单击上图/ 中×退出PIPESIM软件。
Servo Interface Module (SIM) 操作手册说明书

Operations Manual
PIN 88-004313-02 Compumotor CorpQr~tion
..,
COHTEH'l'S
Chapter 1. INTRODUCTION
Section
1.1 Overview. . . • . . . . . . . .
2-5 Input/Output Specifications •
•. ••
• • 2-4
2-6 DIP Switch Settings • • • • • •
• • • • · . . . 2-5
iii
Chapter 1
IRTRODUCTION
1 • 1 OVERVIEW
The Servo Interface Module (SIM), shown in Figure 1-1, is an Indexer-toservo converter that allows you to control operation of either AC or DC servo drive systems using a Compumotor Indexer and common stepper motor commands. It is a self-contained unit that is useful in applications where a stepper motor cannot provide sufficient torque or speed or where a stepper motor lacks the dynamic response required for proper and consistent operation. It is useful in a variety of other applications where you desire to maintain the simplicity of stepper motor control commands as your primary method of programming. The SIM is the perfect choice for these situations because it allows you to concentrate on motion profiles with confidence that your programmed commands will be followed precisely.
ultrasim的使用手册

ultrasim的使用手册UltraSim使用手册一、简介1.1 UltraSim是什么UltraSim是一款先进的电子仿真软件,用于模拟和分析电路设计中的信号传输和电磁特性。
它是用于电子产品开发的重要工具,可以帮助工程师快速评估和改进设计,提高产品质量和性能。
1.2 UltraSim的主要特点- 强大的电路模拟能力,支持高精度的电路和信号传输仿真。
- 快速的仿真速度,能够处理大规模复杂电路设计。
- 灵活的数据分析和结果展示功能,便于用户对仿真结果进行深入分析。
二、安装和配置2.1 系统要求- 操作系统:Windows 7/8/10,Mac OS X,Linux等。
- 内存:建议至少8GB的内存空间。
- 存储空间:至少100GB的硬盘空间。
- 显卡:支持OpenGL 2:0及以上版本的显卡。
2.2 安装步骤UltraSim安装程序,并按照安装向导执行以下步骤:1:运行安装程序,选择安装路径。
2:执行必要的授权步骤,输入许可证密钥。
3:等待安装完成,启动UltraSim。
2.3 配置UltraSim在首次启动UltraSim时,您需要进行以下配置: 1:设置仿真器:选择适合您的仿真需求的仿真器。
2:设置工作目录:选择一个用于存储仿真结果和中间文件的目录。
3:配置仿真参数:设置仿真的时间范围、时钟频率等参数。
三、基本操作3.1 创建电路设计1:在UltraSim中创建新项目文件。
2:添加电路元件:包括电源、电阻、电容、电感和逻辑门等。
3:连接电路元件:使用线缆或导线连接各个元件。
3.2 设置仿真参数1:设定仿真时间范围:确定仿真所需模拟的时间范围。
2:配置时钟频率:指定时钟信号的频率。
3:设置输入信号:定义输入信号的波形和参数。
3.3 运行仿真1:运行按钮开始仿真。
2:观察仿真结果:包括电压波形、电流波形和逻辑状态等。
四、高级功能4.1 参数扫描1:设定扫描参数范围和步进值。
2:运行参数扫描仿真。
3:分析扫描结果,并相关报告。
Pyris软件操作介绍
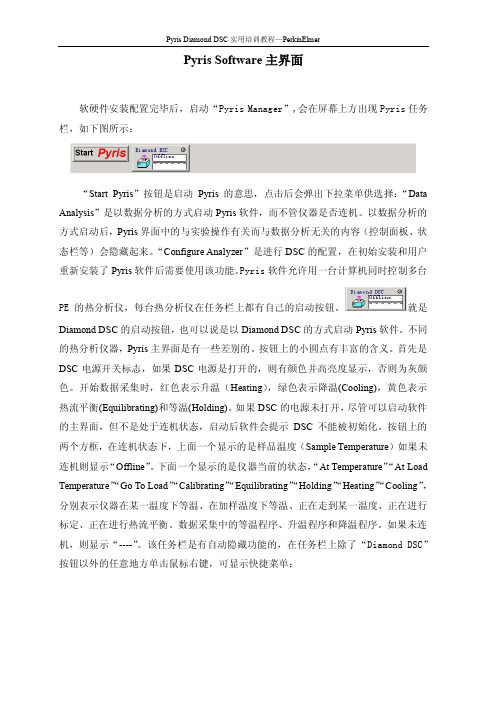
Pyris Software主界面软硬件安装配置完毕后,启动“Pyris Manager”,会在屏幕上方出现Pyris任务栏,如下图所示:“Start Pyris”按钮是启动Pyris的意思,点击后会弹出下拉菜单供选择:“Data Analysis”是以数据分析的方式启动Pyris软件,而不管仪器是否连机。
以数据分析的方式启动后,Pyris界面中的与实验操作有关而与数据分析无关的内容(控制面板、状态栏等)会隐藏起来。
“Configure Analyzer”是进行DSC的配置,在初始安装和用户重新安装了Pyris软件后需要使用该功能。
Pyris软件允许用一台计算机同时控制多台PE的热分析仪,每台热分析仪在任务栏上都有自己的启动按钮。
就是Diamond DSC的启动按钮,也可以说是以Diamond DSC的方式启动Pyris软件。
不同的热分析仪器,Pyris主界面是有一些差别的。
按钮上的小圆点有丰富的含义。
首先是DSC电源开关标志,如果DSC电源是打开的,则有颜色并高亮度显示,否则为灰颜色。
开始数据采集时,红色表示升温(Heating),绿色表示降温(Cooling),黄色表示热流平衡(Equilibrating)和等温(Holding)。
如果DSC的电源未打开,尽管可以启动软件的主界面,但不是处于连机状态,启动后软件会提示DSC不能被初始化。
按钮上的两个方框,在连机状态下,上面一个显示的是样品温度(Sample Temperature)如果未连机则显示“Offline”。
下面一个显示的是仪器当前的状态,“At Temperature”“At Load Temperature”“Go To Load”“Calibrating”“Equilibrating”“Holding”“Heating”“Cooling”,分别表示仪器在某一温度下等温、在加样温度下等温、正在走到某一温度、正在进行标定、正在进行热流平衡、数据采集中的等温程序、升温程序和降温程序。
optsim手册

optsim手册OPTSIM是一种用于仿真光通信系统的软件工具。
它提供了一套强大的功能和工具,用于对光纤通信系统进行建模、仿真和性能评估。
本手册将为用户提供关于OPTSIM的详细介绍和使用指南。
一、OPTSIM简介OPTSIM是一种基于光子技术的软件工具,可用于模拟和评估光通信系统的性能。
它可以帮助用户分析和优化光纤通信系统中的关键参数,并提供详细的仿真结果和性能评估。
二、安装和配置在开始使用OPTSIM之前,用户需要先进行安装和配置。
以下是安装和配置OPTSIM的步骤:1. 下载OPTSIM安装程序;2. 运行安装程序,按照提示完成安装过程;3. 启动OPTSIM,并进行必要的注册和激活。
三、OPTSIM界面OPTSIM提供了直观的用户界面,方便用户进行操作和设置。
以下是OPTSIM界面的主要组成部分:1. 菜单栏:包含各种功能和操作选项;2. 工具栏:提供快速访问常用工具和功能的按钮;3. 参数设置面板:用于设置系统参数和模型参数;4. 图表区域:显示仿真结果和性能评估图表;5. 日志窗口:记录系统状态和事件。
四、创建光通信系统模型在OPTSIM中,用户可以通过建立光通信系统的模型来进行仿真和评估。
以下是创建光通信系统模型的步骤:1. 确定系统拓扑结构和组件;2. 在OPTSIM中添加和配置光纤、光源、接收器等元件;3. 调整元件的参数,如传输功率、速率等;4. 连接各个元件,并设置光路。
五、运行仿真一旦光通信系统模型创建完成,用户可以对其进行仿真和性能评估。
以下是运行仿真的步骤:1. 设置仿真参数,如仿真时间、光源类型等;2. 执行仿真任务,并观察仿真过程和结果;3. 收集仿真结果,如位错率、误码率等;4. 根据仿真结果进行系统性能评估和优化。
六、结果分析与优化在OPTSIM中,用户可以对仿真结果进行详细的分析和优化。
以下是结果分析与优化的步骤:1. 查看仿真结果图表,如光信号功率、误码率曲线等;2. 对比不同参数设置下的性能差异;3. 根据结果分析,进行系统优化和参数调整;4. 重复仿真和优化过程,直到达到预期性能要求。
PetroSIM入门

(新课标)2018新高考历史第一轮总复习 2.7 第一次工业革命考点集训新人教版一、选择题1.(2016雅礼)“英国的社会结构不像欧洲大陆那样僵硬不变。
没有因袭的社会风尚去阻挠拥有土地的士绅经营工业或做买卖;没有法律上的障碍会阻止一个工匠的社会地位上升。
”此段材料表明工业革命最早从英国开始是因为(C)A.圈地运动改造了英国的传统农业B.海外扩张、奴隶贸易完成了资本积累C.完成社会革命,建立资产阶级政权D.工场手工业时期技术和经验的积累【解析】资产阶级革命推动了英国价值观念与法律关系的变革,因此工业革命没有因袭的社会风尚的阻挠和法律上的障碍,故C项正确。
2.英国学者尼尔·弗格森认为:“如果没有以对廉价服装弹性需求趋于无限大为特征的动态消费社会的同步发展,‘工业革命’就不会在英国发端,更不会蔓延至西方世界的其他地区。
”其主要观点是(A)A.市场扩大成为工业革命的推动力B.英国工业革命始于棉纺织业C.人们对廉价商品的追求过于盲目D.工业革命由英国扩展到世界【解析】材料中的“对廉价服装弹性需求趋于无限大为特征的动态消费社会的同步发展”,即海外对廉价服装的需求量逐渐增大,据此可知,题干材料主要强调海外市场的扩大是工业革命的推动力,故选A。
题干材料并没有涉及棉纺织业,B项错误;C项在材料中无法体现;D项不是题干强调的侧重点。
3.(2017雅礼)18世纪末英国有人记载:“在某个地方,一百所房屋和家庭已经减少到……八所或十所;往往还有这样的事情,四、五个富有的畜牧业主侵吞了不久前圈围的大片领土,这些土地以前是在二十至三十个租地农民或同样数目的较小的所有者以及其他居民的手里。
”持续不断的此类事件(D)A.消灭了英国的自耕农阶层B.阻碍了英国农业的发展C.标志着英国开始了工业革命D.加速了原始积累的过程【解析】 A项消灭了自耕农阶层的说法过于绝对,故A项错误;B项表述错误;英国开始工业革命的标志是1765年哈格里夫斯发明了珍妮纺纱机,故C项错误;材料中圈地运动的发展为英国开展工业革命准备了条件,加速了资本的原始积累,故D项正确。
PyTorch 安装指南:Jetson 平台说明书

Installing PyTorch For Jetson PlatformInstallation GuideTable of Contents Chapter 1. Overview (1)1.1. Benefits of PyTorch for Jetson Platform (1)Chapter 2. Prerequisites and Installation (3)2.1. Installing Multiple PyTorch Versions (3)2.2. Upgrading PyTorch (4)Chapter 3. Verifying The Installation (5)Chapter 4. Uninstalling (6)Chapter 5. Troubleshooting (7)Chapter 1.OverviewPyTorch on Jetson PlatformPyTorch (for JetPack) is an optimized tensor library for deep learning, using GPUs and CPUs. Automatic differentiation is done with a tape-based system at both a functional and neural network layer level. This functionality brings a high level of flexibility, speed as a deep learning framework, and provides accelerated NumPy-like functionality. These NVIDIA-provided redistributables are Python pip wheel installers for PyTorch, with GPU-acceleration and support for cuDNN. The packages are intended to be installed on top of the specified version of JetPack as in the provided documentation.Jetson AGX XavierThe NVIDIA Jetson AGX Xavier developer kit for Jetson platform is the world's first AI computer for autonomous machines. The Jetson AGX Xavier delivers the performance of a GPU workstation in an embedded module under 30W.Jetson AGX OrinThe NVIDIA Jetson AGX Orin Developer Kit includes a high-performance, power-efficient Jetson AGX Orin module, and can emulate the other Jetson modules. You now have up to 275 TOPS and 8X the performance of NVIDIA Jetson AGX Xavier in the same compact form-factor for developing advanced robots and other autonomous machine products. Jetson Xavier NXThe NVIDIA Jetson Xavier NX brings supercomputer performance to the edge in a small form factor system-on-module. Up to 21 TOPS of accelerated computing delivers the horsepower to run modern neural networks in parallel and process data from multiple high-resolution sensors — a requirement for full AI systems.1.1. Benefits of PyTorch for JetsonPlatformOverview Installing PyTorch for Jetson Platform provides you with the access to the latest version of the framework on a lightweight, mobile platform.Chapter 2.Prerequisites andInstallationBefore you install PyTorch for Jetson, ensure you:1.Install JetPack on your Jetson device.2.Install system packages required by PyTorch:sudo apt-get -y update;sudo apt-get -y install autoconf bc build-essential g++-8 gcc-8 clang-8 lld-8 gettext-base gfortran-8 iputils-ping libbz2-dev libc++-dev libcgal-dev libffi-dev libfreetype6-dev libhdf5-dev libjpeg-dev liblzma-dev libncurses5-dev libncursesw5-dev libpng-devlibreadline-dev libssl-dev libsqlite3-dev libxml2-dev libxslt-dev locales moreutils openssl python-openssl rsync scons python3-pip libopenblas-dev;Next, install PyTorch with the following steps:1.Export with the following command:export TORCH_INSTALL=https:///compute/redist/jp/v511/pytorch/ torch-2.0.0+nv23.05-cp38-cp38-linux_aarch64.whlOr, download the wheel file and set.export TORCH_INSTALL=path/to/torch-2.0.0+nv23.05-cp38-cp38-linux_aarch64.whl2.Install PyTorch.python3 -m pip install --upgrade pip; python3 -m pip install aiohttp numpy=='1.19.4' scipy=='1.5.3' export "LD_LIBRARY_PATH=/usr/lib/llvm-8/lib:$LD_LIBRARY_PATH"; python3 -m pip install --upgrade protobuf; python3 -m pip install --no-cache $TORCH_INSTALLIf you want to install a specific version of PyTorch, replace TORCH_INSTALL with:https:///compute/redist/jp/v$JP_VERSION/pytorch/ $PYT_VERSIONWhere:JP_VERSIONThe major and minor version of JetPack you are using, such as 461 for JetPack 4.6.1 or 50 for JetPack 5.0.PYT_VERSIONThe released version of the PyTorch wheels, as given in the Compatibility Matrix. 2.1. Installing Multiple PyTorch VersionsPrerequisites and Installation If you want to have multiple versions of PyTorch available at the same time, this can be accomplished using virtual environments. See below.Set up the Virtual EnvironmentFirst, install the virtualenv package and create a new Python 3 virtual environment: $ sudo apt-get install virtualenv$ python3 -m virtualenv -p python3 <chosen_venv_name>Activate the Virtual EnvironmentNext, activate the virtual environment:$ source <chosen_venv_name>/bin/activateInstall the desired version of PyTorch:pip3 install --no-cache https:///compute/redist/jp/v51/pytorch/ <torch_version_desired>Deactivate the Virtual EnvironmentFinally, deactivate the virtual environment:$ deactivateRun a Specific Version of PyTorchAfter the virtual environment has been set up, simply activate it to have access to the specific version of PyTorch. Make sure to deactivate the environment after use:$ source <chosen_venv_name>/bin/activate$ <Run the desired PyTorch scripts>$ deactivate2.2. Upgrading PyTorchTo upgrade to a more recent release of PyTorch, if one is available, uninstall the current PyTorch version and refer to Prerequisites and Installation to install the new desired release.Chapter 3.Verifying The InstallationAbout this taskTo verify that PyTorch has been successfully installed on the Jetson platform, you’ll need to launch a Python prompt and import PyTorch.Procedure1.From the terminal, run:$ export LD_LIBRARY_PATH=/usr/lib/llvm-8/lib:$LD_LIBRARY_PATH$ python32.Import PyTorch:>>> import torchIf PyTorch was installed correctly, this command should execute without error.Chapter 4.UninstallingPyTorch can easily be uninstalled using the pip3 uninstall command, as below: $ sudo pip3 uninstall -y torchChapter 5.TroubleshootingJoin the NVIDIA Jetson and Embedded Systems community to discuss Jetson platform-specific issues.NoticeThis document is provided for information purposes only and shall not be regarded as a warranty of a certain functionality, condition, or quality of a product. NVIDIA Corporation (“NVIDIA”) makes no representations or warranties, expressed or implied, as to the accuracy or completeness of the information contained in this document and assumes no responsibility for any errors contained herein. NVIDIA shall have no liability for the consequences or use of such information or for any infringement of patents or other rights of third parties that may result from its use. This document is not a commitment to develop, release, or deliver any Material (defined below), code, or functionality.NVIDIA reserves the right to make corrections, modifications, enhancements, improvements, and any other changes to this document, at any time without notice.Customer should obtain the latest relevant information before placing orders and should verify that such information is current and complete.NVIDIA products are sold subject to the NVIDIA standard terms and conditions of sale supplied at the time of order acknowledgement, unless otherwise agreed in an individual sales agreement signed by authorized representatives of NVIDIA and customer (“Terms of Sale”). NVIDIA hereby expressly objects to applying any customer general terms and conditions with regards to the purchase of the NVIDIA product referenced in this document. No contractual obligations are formed either directly or indirectly by this document.NVIDIA products are not designed, authorized, or warranted to be suitable for use in medical, military, aircraft, space, or life support equipment, nor in applications where failure or malfunction of the NVIDIA product can reasonably be expected to result in personal injury, death, or property or environmental damage. NVIDIA accepts no liability for inclusion and/or use of NVIDIA products in such equipment or applications and therefore such inclusion and/or use is at customer’s own risk.NVIDIA makes no representation or warranty that products based on this document will be suitable for any specified use. Testing of all parameters of each product is not necessarily performed by NVIDIA. It is customer’s sole responsibility to evaluate and determine the applicability of any information contained in this document, ensure the product is suitable and fit for the application planned by customer, and perform the necessary testing for the application in order to avoid a default of the application or the product. Weaknesses in customer’s product designs may affect the quality and reliability of the NVIDIA product and may result in additional or different conditions and/or requirements beyond those contained in this document. NVIDIA accepts no liability related to any default, damage, costs, or problem which may be based on or attributable to: (i) the use of the NVIDIA product in any manner that is contrary to this document or (ii) customer product designs.No license, either expressed or implied, is granted under any NVIDIA patent right, copyright, or other NVIDIA intellectual property right under this document. Information published by NVIDIA regarding third-party products or services does not constitute a license from NVIDIA to use such products or services or a warranty or endorsement thereof. Use of such information may require a license from a third party under the patents or other intellectual property rights of the third party, or a license from NVIDIA under the patents or other intellectual property rights of NVIDIA.Reproduction of information in this document is permissible only if approved in advance by NVIDIA in writing, reproduced without alteration and in full compliance with all applicable export laws and regulations, and accompanied by all associated conditions, limitations, and notices.THIS DOCUMENT AND ALL NVIDIA DESIGN SPECIFICATIONS, REFERENCE BOARDS, FILES, DRAWINGS, DIAGNOSTICS, LISTS, AND OTHER DOCUMENTS (TOGETHER AND SEPARATELY, “MATERIALS”) ARE BEING PROVIDED “AS IS.” NVIDIA MAKES NO WARRANTIES, EXPRESSED, IMPLIED, STATUTORY, OR OTHERWISE WITH RESPECT TO THE MATERIALS, AND EXPRESSLY DISCLAIMS ALL IMPLIED WARRANTIES OF NONINFRINGEMENT, MERCHANTABILITY, AND FITNESS FOR A PARTICULAR PURPOSE. TO THE EXTENT NOT PROHIBITED BY LAW, IN NO EVENT WILL NVIDIA BE LIABLE FOR ANY DAMAGES, INCLUDING WITHOUT LIMITATION ANY DIRECT, INDIRECT, SPECIAL, INCIDENTAL, PUNITIVE, OR CONSEQUENTIAL DAMAGES, HOWEVER CAUSED AND REGARDLESS OF THE THEORY OF LIABILITY, ARISING OUT OF ANY USE OF THIS DOCUMENT, EVEN IF NVIDIA HAS BEEN ADVISED OF THE POSSIBILITY OF SUCH DAMAGES. Notwithstanding any damages that customer might incur for any reason whatsoever, NVIDIA’s aggregate and cumulative liability towards customer for the products described herein shall be limited in accordance with the Terms of Sale for the product.HDMIHDMI, the HDMI logo, and High-Definition Multimedia Interface are trademarks or registered trademarks of HDMI Licensing LLC.OpenCLOpenCL is a trademark of Apple Inc. used under license to the Khronos Group Inc.NVIDIA Corporation | 2788 San Tomas Expressway, Santa Clara, CA 95051https://TrademarksNVIDIA, the NVIDIA logo, and cuBLAS, CUDA, DALI, DGX, DGX-1, DGX-2, DGX Station, DLProf, Jetson, Kepler, Maxwell, NCCL, Nsight Compute, Nsight Systems, NvCaffe, PerfWorks, Pascal, SDK Manager, Tegra, TensorRT, Triton Inference Server, Tesla, TF-TRT, and Volta are trademarks and/or registered trademarks of NVIDIA Corporation in the U.S. and other countries. Other company and product names may be trademarks of the respective companies with which they are associated.Copyright© 2022-2023 NVIDIA Corporation & Affiliates. All rights reserved.NVIDIA Corporation | 2788 San Tomas Expressway, Santa Clara, CA 95051https://。
- 1、下载文档前请自行甄别文档内容的完整性,平台不提供额外的编辑、内容补充、找答案等附加服务。
- 2、"仅部分预览"的文档,不可在线预览部分如存在完整性等问题,可反馈申请退款(可完整预览的文档不适用该条件!)。
- 3、如文档侵犯您的权益,请联系客服反馈,我们会尽快为您处理(人工客服工作时间:9:00-18:30)。
pyrosim说明书翻译(精品) 6.4.1 停止和再启动 一个重要的MISC 参数叫RESTART。建立一个CHID.STOP 的文件在目录下。重新开始, RESTART=.TRUE.需要添加到MISC行中。 第二章:PyroSim基础 PyroSim界面 pyrosim为您建立火灾模型提供了四个编辑器:3D模式,2D模式,导航模式和记录模式。这些都可以显示您现在的模型。当添加了、移除了、或在一个模式中选择了一个物体,其它的模式也同时反映出这些变化。下面简要介绍这几种模式。 导航视图:在这个视图下列出了模型中许多重要的记录。它可以使您将您的模型中几何体组成一个组,例如组成房间或者沙发。在这个模式下,定位和修改档案比较快捷。 3D视图:这个视图中以3D形式显示了您的火灾模型。您可以以不同的视角查看您的模型。您也可以控制模型的外观细节,如平滑阴影、纹理和物体轮廓线,也可以改变几何特征。 2D视图:在这个视图中您可以快速的画出几何体,例如墙和家具。您可以从三个视角查看您的模型,也可以执行许多有用的几何操作。 档案视图:这个模式给出了为本次模拟产生的FDS输入文件的预览。它提供了加入不经过pyrosim处理而直接输入FDS的自己的代码的方式。 导航视图 导航视图是在Pyrosim主窗口左部的树状视图。下图是使用这个视图的一个例子。当你右键点击这个视图中的一个项目时,将显示Pyrosim可以在这个项目上执行的功能。重新排列物体时,点选一个物体,然后拖转至新的位置。 在导航视图中使用菜单 3D视图 运用3D视图可以迅速得到模型的视觉外观。导航选项包括标准CAD控制模式,Smokeview型的控制,游戏型的控制查看模型。 3D轨道导航
点击激活3D轨道导航。这个模式的控制方式与许多CAD程序的控制模式相似。
后,左键点击模型并移动鼠标,模型将会随着您点选的点选转。 旋转3D模型:点击
点选(或按住ALT键)并竖向移动鼠标。选择后点击并拖动来定义缩放范围。 点选(或按住SHIFt键)并拖动,可以移动模型在窗口中的位置。 选择物体并点击定义在选择物体周围更小的视线范围可改变视图的焦点。点击恢复包括整个模型的视角。
在任何时刻都可点击(或同时按下CTRL+R)复位模型。 Smokeview型的控制方式 点选“View->Use Smokeview-like Navigation”使用Smokeview型的控制方式。在这种方式下: 鼠标横向与竖向移动分别控制场景绕X轴和Z轴旋转。 按下CTRL键,鼠标横向移动使场景沿X轴以90度旋转,竖向移动表移动使场景沿Y轴远离或接近屏幕 第一人称视角(漫游)控制方式
使用一个人穿过模型的视角来呈现模型时,在工具栏上点选。之后可以在模型中浏览,使用独立的控制按键移动位置。这个视角需要经过练习熟悉,但是脸之后,它可以提供独特的视角。在漫游模式中: 浏览3D模型时,左键点击模型并移动鼠标,就可以以鼠标的方向观察模型。 按下CTRL键不放,竖向移动鼠标向模型移动或远离模型,横向移动鼠标左右移动。 按下ALT键不放,竖向移动鼠标,相对模型上下移动。 滚动滚轮增加或减小视野(即缩放)。如果没有滚轮,请用缩放工具。 图片2.2从显示了一个模型的外部视角,图2.3显示进入了模型后,向上朝屋顶看的视角。 图2.2:模型的外视角 图2.3:模型的内视角:屋顶和看台。 2D视图 2D视图提供了模型的2D投影。2D视图的控制类似于3D视图。
2D视图中可以点击top、fornt或者side改变视向。 点选(或按住ALT键)并竖向移动鼠标。选择后点击并拖动来定义缩放范围。 点选(或按住SHIFt键)并拖动,可以移动模型在窗口中的位置。 选择物体并点击定义在选择物体周围更小的视线范围可改变视图的焦点。点击恢复包括整个模型的视角。
在任何时刻都可点击(或同时按下CTRL+R)复位模型。 截图 点击打开File菜单后点击Snapshot可以将目前显示的画面存储成为一个文件。使用者可以指定文件名、图像格式(png、jpg、tif、bmp)和清晰度。推荐选择中等清晰度的png格式。 首选项 一些关于Pyrosim运行的选项在首选项对话框中,如图2.4.这些选项在关闭Pyrosim后不会丢失。 Format FDS file for easy reading选项用来控制Pyrosim生成的FDSD输入文件。默认情况下,文件生成为容易阅读的格式。但是,这损失了一些精度。取消选择即为全精度模式。 FDS Execution选项允许指定Pyrosim使用的FDS与Smokeview程序。 Run Smokeview when FDS simulation completes选项决定FDS计算完成后是否自动显示计算结果(运行Smokeview)。 Parallel Simulations Use选项选择您在点击FDS菜单下Run Par-allel...之后运行的FDS程序。MPI选项在模拟中将分开每个MASH的进程,OpenMP选项将在模拟中尝试并行处理,可提升拥有多个网格的模拟时的性能。 Hardware Drawing Options给出在绘制模型中硬件加速的控制选项。如果有显示问题,使用者应关闭这两个硬件加速选项。
图2.4:首选项对话框 Autosave选项控制Pyrosim定期创建当前模型的备份文件。默认设置打开了这个选项,每10分钟保存一次。在一些情况下,尤其是制作大型模型时,保存备份文件可能会导致意外的延迟,一些使用者更喜欢关闭这个选项,手动存盘。 Record Preview选项可以在许多对话框中增加预览面板。预览面板显示将会在FDS输入文件中生成的文本。这对希望准确了解Pyrosim如何生成FDS输入文件的用户非常有用。 图2.5:显示FDS输入文本的MESH编辑器 单位 模型的单位使用英制或公制均可。设置单位时,在View菜单点击Units,然后点选希望使用的单位。Pyrosim会自动将您之前输入的数值转换成您选择的单位。无论您选择哪一种单位,Record View将会始终以适合FDS的单位显示数值。 配色方案 在View菜单中点击Color Scheme可以选择各种背静颜色。自定义配色方案在Pyrosim安装目录(一般是C:\Program Files\PyroSim)中的文件Pyrosim.props保存。 改变自定义配色: 1、关闭PyroSim 2、打开编辑PyroSim.props 3、将下面的默认颜色更改为您喜欢的颜色: Colors.Custom.axis=0xffff00 Colors.Custom.axis.box=0x404040 Colors.Custom.axis.text=0xffffff Colors.Custom.background=0x0 Colors.Custom.boundary.line=0xffffff Colors.Custom.grid=0x4d4d66 Colors.Custom.group.highlight=0xffff00 Colors.Custom.heatDetector=0xff0000 Colors.Custom.obst=0xff0000 Colors.Custom.obst.highlight=0xb2b200 Colors.Custom.origin2D=0x737373 Colors.Custom.smokeDetector=0xff00 Colors.Custom.snap.point=0xff00 Colors.Custom.snapto.grid=0x404040 Colors.Custom.snapto.points=0xc0c0c0 Colors.Custom.sprk=0xff Colors.Custom.text=0xffffff Colors.Custom.thcp=0xffff00 Colors.Custom.tool=0xff00 Colors.Custom.tool.guides=0x7c00 4、保存编辑过的PyroSim.props文件 yroSim 5、重新启动P 第三章:文件部分 运用PyroSim计算分宜一个火灾时需要用到一些文件。包括PyroSim模型文件,FDS输入文件,和FDS输出文件。本章讲述如何保存、读取PyroSim支持的文件。 建立一个新的PyroSim模型 打开Pyrosim时,将会自动打开一个空的模型。选择File菜单并点击New,您可以关闭当前模型并打开一个新的模型。PyroSim必须打开并且只能打开一个模型。 保存PyroSim模型 保存PyroSim模型的文件(.psm)以二进制形式保存。PyroSim模型包括了输出FDS输入文件时需要的一切数据,同时也包括其他信息,例如障碍物群组,层高,背景图片和材质纹理等。这个格式与其他PyroSim使用者分享您的模型时非常理想。 怎样保存一个新的模型: 1、在File彩电点击Save。 2、输入文件名并点击Save按钮。 打开一个以保存的PyroSim模型 PyroSim模型的后缀为.psm。打开已保存模型: 1、在File菜单下点击Ope...。 2、选择文件后点击Open键。 软件同时支持最近打开文件列表。在File菜单中点击Recent PyroSim Files,之后选择文件即可打开。 PyroSim可以自动保存,自动保存将会每10分钟保存一次打开的模型文件,当PyroSim正常退出后,自动保存文件将会删除,但当PyroSim后,您可以打开自动保存文件恢复您的工作。您可以在相同目录下最新的.psm文件,或PyroSim安装文件夹中找到自动保存文件。 防止更改模型