pagemaker教案
版面艺术设计PageMaker与方正飞腾技术教程电子教案第八章

• 例二:报社内部的计算机连成局域网 所有的图片均放 在服务器上的指定目录下,在其他的计算机上将该目录 映射为固定的网络驱动器,假设为X盘。在使用飞腾组 版时,所有图像均从X盘中排入。如果在飞腾的“包含 图片数据设定”对话框中设置为不包含所有图片,在发 排生成PS文件时不选择“忽略图片路径”,这样在RIP 解释该PS文件时,就会按照文件中给出的图像路径到X 盘中去寻找图文件。这时在RIP上需要设置图像搜索路 径。需要注意的是,如果RIP在X盘中找不到图文件,则 会报错,提示缺少图文件。这时就需要在RIP的图像搜 索路径中设置图文件所在的路径。
第三十一页,共35页。
• 配置飞腾字体 在“字体设置”对话框中可以设置字体 的下载属性,如果某种字体设置了下载属性,在发排生 成的PS文件中将包含该字体的显示字库的信息,这样在 后端RIP上输出时不使用RIP所带的后端发排字库。若不 设置下载属性,则在后端RIP上输出时将使用RIP所带的 发排字库。
第二十九页,共35页。
2. 不打开飞腾文件发排
• 不打开飞腾文件,在飞腾的主窗口中单击“文件”菜单 的“发排”命令或 按钮,弹出如图8-12所示的“发排” 对话框。
第三十页,共35页。
3. 其他与发排有关的设置
• · 方正 PSP31栅格解释器 如果后端使用的输出设备 是方正的PSP3.1输出软件,则一定要在“选项”对话框 的“环境设置”选项卡中选中“方正 PSP31 栅格解释 器”复选框(见图8-10);反之,则一定不要选择该项。 但该项设置最好在排入对象之前设置好。
• · 飞腾“发排”对话框中的“忽略图片路径”。 • · 方正后端输出软件中的“图像搜索路径”。
第二十一页,共35页。
下面分情况来说明这3个参数的设置关系。
PageMaker软件教案

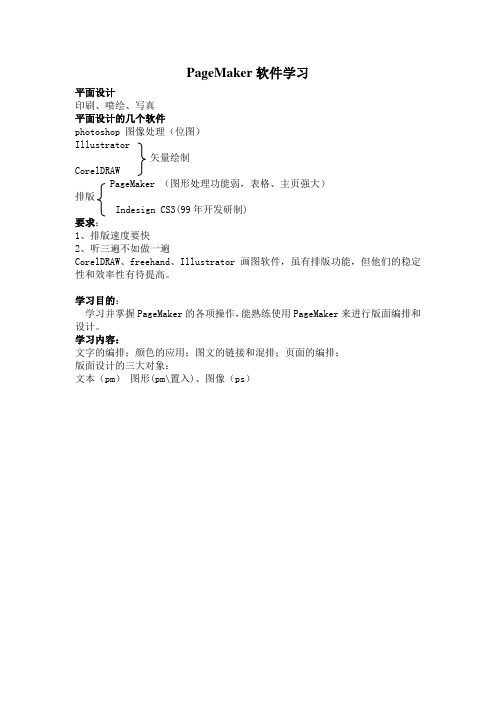
PageMaker软件学习平面设计印刷、喷绘、写真平面设计的几个软件photoshop 图像处理(位图)Illustrator矢量绘制CorelDRAWPageMaker (图形处理功能弱,表格、主页强大)排版Indesign CS3(99年开发研制)要求:1、排版速度要快2、听三遍不如做一遍CorelDRAW、freehand、Illustrator画图软件,虽有排版功能,但他们的稳定性和效率性有待提高。
学习目的:学习并掌握PageMaker的各项操作,能熟练使用PageMaker来进行版面编排和设计。
学习内容:文字的编排;颜色的应用;图文的链接和混排;页面的编排;版面设计的三大对象:文本(pm)图形(pm\置入)、图像(ps)基本操作认识PageMaker工作界面一、文件的管理1、文件—新建(Ctrl+N)页面/出版物页码最大知识999页1)尺寸大小确定了就不要改动,尺寸方向要明确好。
尺寸最大:1066mm2)打印方式:横、竖选项:双面,起始页码:2修改:文件—文档设定(Shift+Ctrl+P)页数:2 最高值999页3)边界内与版心的距离(图片除外)内边距可以设的大些页边距可以修改:文件—文档设定Tab键更换内→外→上→下2、打开(Ctrl+O)pm只能打开自己的存储文件类型高版本能打开底版本文件,地板本不能打开高版本文件打开时有个对话框,不是所有的文字类型都能印刷字体(替换)打开:检查图片链接3、保存(Ctrl+S)Ctrl+Z只能后退一步回复:回复到上一次保存的时候二、视图:显示实际大小:Ctrl+1显示全屏大小:Ctrl+0 (拼音输入法回复原状态)临时的内容可以放在粘贴板上,优点是可以在其他页面上显示。
(粘贴板是公用的,只显示不能打印)放大镜:放大:Ctrl+‘+’缩小:Ctrl+‘-’在任何工具上要移动:Alt+鼠标拖动三、文本块的编辑一、文本块的产生单击生成(框与栏同宽)复制粘贴1、键入时产生文本块拖动生成(任意大小)纯文本(txt)2、置入时产生文本块wotd文件(Doc)二、各种排文方式1、自动(版面—自动排文)2、手动3、半自动(shift)四、排版方式1、卷帘控制点:1、空白:文本块开头是一个独立的文本块2、红色箭头:有隐含的文字。
《PageMaker平面设计及排版教程》第3课:设置文本格式

使用【段落规格】对话框设置段落格式
01
段落缩排 段落间距 对齐方式 设置【选项】
02
设置段落的字距与行距
中文字距、英文字距、字母间距 自动微调特殊英文字母组合的字距 自动行距默认值 文字行中的文字基准线位置
小结
介绍控制面板的功能 介绍使用【段落规格】对话框设置段落格式的方法 介绍设置段落线的操作 介绍相邻栏间的文字行对齐方法 介绍设置段落的字距与行距的方法 介绍避头点的设置方法 介绍连字处理的处理方法
第3课 设置文本格式
单击添加副标题
(时间:1学时)
概述
单击添加标题
单击添加标题
/CONTENTS
概述
单击添加标题
单击添加标题
/CONTENTS
概述
单击添加标题
单击添加标题
学习重点 文字的基本操作 设置文字的基本格式 段落及相关格式设置 排式的定义和应用 学习难点 设置文字的基本格式 设置汉字的特殊字符格式 段落及相关格式设置 排式的定义和应用
文字的基本操作
选取文字
剪切、复制、粘贴和删除文字
多重粘贴
特殊粘贴
用鼠标拖动复制/移动文字对象
/CONTENTS
小结
介绍选取文字的常用方法 剪切、复制、粘贴和删除文字的操作步骤 介绍多重粘贴的方法 介绍特殊粘贴的方法 介绍用鼠标拖动复制/移动文字对象的操作
设置文字的基本格式
设置文字格式的时机
使用控制面板设置字符格式
输入排式与读取标记
01
输入排式
02
读取标记
小结
介绍输入排式的方法 介绍读取标记的方法
综合练习
文本排版练习 为书籍排版设计并应用排式
总结
在PageMaker中,一般应该先键入或置入文字,完成文字的修改与拼写检查,然后再将文字格式化,例如应用字体、改变大小、调整缩排、对齐方式等。本章主要介绍如何在PageMaker中根据需要对文字进行格式化。 通过本课学习,掌握PageMaker中文字操作的基本方法,包括文字的选取、移动、复制和粘贴等;通过不同的途径设置文字和段落的基本格式,并进一步学习给汉字注音、加着重点等特殊格式的设置方法;掌握排式的定义、修改、保存、导入等操作方法,利用排式功能提高排版效率。
pagemake教案

很奇怪的是,PM竟然还没有被淘汰----我是接手另一个人做了一半的东西接着做下去.而对方就是用的PM.这里面涉及到了很多东西,比如对方把整个设计烧录成DVD,从外地发过来,结果我在打开时,少了很多链接---其实链接文件就在里面,PM却不能识别路径,包括字体问题等.
单击Import Filter对话框中的Image Info按纽,在出现的对话框里的第一行指示着载体来源(Medium of Original);若出现Color Negative,则关闭此对话框,并在Kodak Photo CD Import Filter框中选择Color Negative V3.0为图像来源描述。若出现Color Reversal的字眼,则跳到下行Prod-uct Type of Original;若前3个码为052,则选择Universal Ektachrome为来源描述;若为其它数码,便选择Universal Kodachrome。现今很少用Kodachrome的格式来扫描图像,但偶然还是会遇到的。
无法将成品页面内容等比例缩小或放大 用coreldraw或是Illustrator做一份东西,图文混排,1个页面内图版和文字均较多,文字多为图片说明或是标注。用pagemaker同样可以完成,而且因文件小,操作上比以上两个软件还要快一些。万一需要将版面全部内容等比例缩至原来的90%大小,在coreldraw或是illustrator内将其群组,然后用选择比例,搞定!pageamker内同样选择群组,然后选择比例......等一下,图片类全部没问题,怎么文字不会缩小,只是文字框缩小了,而且文字位置乱七八糟.....没办法,将内容解散群组,一个一个选中文字块,一个一个慢慢调吧!什么?有xxx页? (我的经验是:苦苦哀求客户:不要缩小了,不要缩小了,一样的嘛.........)
pagemaker教案新部编本5

教师学科教案[ 20 – 20 学年度第__学期]
任教学科:_____________
任教年级:_____________
任教老师:_____________
xx市实验学校
课时计划(教案)首页授课教师:李跟升
授课班级:09计算机一、09平面一、二班
教学过程
1 排式的概念排式是定义某一系列文字或段落属性的集合。
当将
某一个预定的排式赋予某段文字后,此段文字将具有此排式所定义
的所有属性。
2 新建排式
1 单击排式面板上的新建按钮,弹出排式选项对话框。
文字规格对话框
段落规格对话框
备注
教学过程
连字处理对话框
2 先选中欲定义排式的文字,在相应的对话框中设置属性。
然后,
选取“文字” / “定义排式”命令,弹出定义排式对话框
3 编辑排式
1 在排式面板上选取欲修改的排式,打开面板菜单,单击“排式选
项”,弹出排式选项对话框。
可对其做修改。
也可按住Ctrl键单击欲编辑的排式也会弹出排式选项。
备注。
《版面艺术设计——PageMaker与方正飞腾技术教程》电子教案第四章

• (4)【操作】选择菜单【Element(元素)│Mask(蒙 版)】命令或者按快捷键Ctr1+6制作蒙版, 这时整张 图就会潜入六边形当中,它们的交集部分显露出来, 其它部分都被蒙版蒙起来了,这时我们发现图片还可 以移动,可以控制在这个窗口中要显露出图片的哪一 部分。
• (3)【操作】在矩形框中输入文 本“CONTENTS”,设置文字 属性如图4-37所示,并选择旋 转工具将文字旋转-90度方向, 属性设置如图4-38所示,将文
字移动放在举行框内最终效果
如图
• (4)【操作】继续绘制矩 形框,绘制蓝色的边框。 置入文本“ 目录1.txt”, 设置文本的字体为Arial, 字号为12,段落属性为 右对齐,属性设置如图 4-40、4-41所示。最终 文字显示效果
• (15)【操作】选择菜单【File│Place】命令,置入文 本“正文页4.txt”,并覆盖在三角形的上面位置。选 定三角图形,【效果】如图4-82所示(处于八个点选 的范围内)。
• (16)【操作】单击【Element(元素)│Text Wrap (文本绕图)】命令,在弹出的对话框里,选择一种 图文绕排样式,点击OK。如图4-83所示。
4.1.7 利用蒙版制作正文页
• (1)【操作】跳转至8、9页,双击工具箱的多边形图标, 在弹出的Polygen Setting(多边形设置)面板中,设 置Number of sider (边的数量)为6,单击OK,关闭 面板。
• (2)【操作】在第8页中按住功能键shift键绘制正6边 形,填充色按照默认的黑色,大小如图所示
pagemaker教案5
授课教师:李跟升
授课班级:09计算机一、09平面一、二班
课题
PageMaker排式
授课时间
教材
分析
重点
排式的涵义
难点
排式的操作
教学
目标
要求掌握排式的操作
教法
讲授、
演示
课型
新授课
课时
2
教具
多媒体课件
教学过程
板
书
设
计
教学目的:要求掌握排式的操作
教学重点:排式的涵义
教学难点:排式的操作
4删除排式
1在排式面板上选取欲删除的排式,打开面板菜单,单击“删除某种排式”,即可删除。
2在排式面板上拖选欲删除的排式至面板上的删除按钮,即可删除。
3选取“文字” / “定义排式”,打开排式选项对话框,选取欲删除的排式,按“删除”按钮。
5导入、增加HTML排式
1导入排式
在定义排式对话框上有“导入”按钮,单击即可导入预存的排式。
课时计划(教案)附页
教学过程
1排式的概念排式是定义某一系列文字或段落属性的集合。当将某一个预定的排式赋予某段文字后,此段文字将具有此排式所定义的所有属性。
2新建排式
1单击排式面板上的新建按钮,弹出排式选项对话框。
文字规格对话框
段落规格对话框
备注
课时计划(教案)附页
教学过程
连字处理对话框
2先选中欲定义排式的文字,在相应的对话框中设置属性。然后,选取“文字” / “定义排式”命令,弹出定义排式对话框
2增加HTML排式
在面板菜单中选取“增加HTML排式”命令,可把PageMaker内置的HTML排式添加到排式面板中来。
pagemaker教案3
课时计划(教案)首页授课教师:李跟升授课班级:09计算机一、09平面一、二班课时计划(教案)附页备注教学过程1矢量图形矢量图形也可置入。
1 矢量图形线条光滑、流畅。
经缩放后这一特性仍会保持。
2 矢量图的文件量很小,对保存和传输有利。
2 栅格图栅格图置入后,经缩放回影响图象质量。
它的文件也很大。
在PageMaker中订好栅格图所需尺寸大小,在图象处理中处理好所需尺寸,再置入,质量会好一些。
3 矢量图的绘制1 任意直线工具2 直线工具3 矩形工具4 椭圆工具5 多边形工具控制线型和填充,可选择“成分”菜单中“填充与线型”命令。
矩形的圆角化:双击工具条上的矩形工具,弹出圆角化对话框,可选择圆角的大小。
双击直线工具、任意直线工具,都会弹出自定义线型对话框。
可设置线型和颜色。
双击和圆形工具,会弹出填充与线型对话框。
可设置线型、边线颜色、填充颜色等。
矢量多边形具有可编辑性。
只要双击多边形,即可进入锚点可编辑状态。
1移动锚点拖动锚点可改变锚点的位置。
2删除锚点单击需删除的锚点,可删除该锚点。
课时计划(教案)附页教学过程备注3添加锚点在路径段上单击,可在单击处添加锚点。
4断开节点连结按Ctrl键单击锚点,可断开此锚点与前一个锚点的连结,并删除该两个锚点之间的连线。
4矢量图形的性质1 它与图文框可以相互转换。
2 它与栅格图或其它对象在一起选中的情况下,可起蒙版作用。
把图形与其它对象一起选中,选取“成分”菜单中的“遮色”名令即可。
遮色后,可将它们组成群组。
按住Ctrl键单击,可选中被遮住的对象,并可将它移动,以改变它在蒙版中的显示部分。
“遮色”命令可制作纹理填充效果。
“遮色”可以被解除。
选取“遮色”对象,选用“成分”菜单中的“摘掉遮色”即可。
5 图象与图形的置入可置入PageMaker中的图象格式:CGM、CDR、CMX、DCS、DXF、EPS、GEM、GIF、PLT、JPG、PCD、PIC、PCT、PNT、XLC、PCX、SCT、TBL、PLT、TIF、教学过程备注BMP、WMF、EMF、WPG。
PageMaker教学大纲
印刷技术专业《PageMaker》课程教学大纲一、课程名称:《PageMaker》三、课程的性质、目的与任务我们将要学习的PageMaker是出版业的首选工具之一,看字面就知道这是一种排版软件。
但目前我们知道的排版软件不知道有多少,而每个软件都有自己的特点, PageMaker到底有哪些独到之处能使众多的出版业者选择它呢?PageMaker提供了一套完整的工具,用来产生专业、高品质的出版刊物。
它的稳定性、高品质及多变化的功能特别受到使用者的赞赏。
另外,在6.5版中添加的一些新功能,让我们能够以多样化、高生产力的方式,通过印刷或是Internet 来出版作品。
还有,在6.5版中为与Adobe Photoshop 5.0配合使用提供了相当多的新功能,PageMaker在界面上及使用上就如同Adobe Photoshop,Adobe Illustrator及其他Adobe的产品一样,让我们可以更容易地运用Adobe的产品。
最重要的一点,在PageMaker的出版物中,置入图的方式可谓是最好的了。
通过链接的方式置入图,可以确保印刷时的清晰度,这一点在彩色印刷时尤其重要。
新版的Pagemaker可以在WWW中传送HTML格式及PDF格式的出版刊物,同时还能保留出版刊物中的版面、字体以及图像等。
在处理色彩方面也有很大的改进,提供了更有效率的出版流程。
而其他的新增功能也同时提高了和其他公司产品的相容性。
四、教学的基本要求在3D MAX的学习和基本应用中,其具体操作方法过程须经过多媒体教学的形式进行讲解,并结合实例。
在实例了解过程中,注意基本操作及基本应用的结合,并辅以技巧注意等内容。
学生可以在应用的基础上逐步加强其操作技巧能力。
五、本课程在教学中与其他课程的联系与分工:本课程的软件是adobe公司图形处理软件的其中的一款,它主要侧重页面排版方面内容。
好的印刷作品是版面、位图和矢量图的三者结合体,故在学习本软件的同时要结合adobe公司的其它软件,如处理位图的photoshop、联系版面的illustrator、矢量图绘制的CorelDRAW等软件。
《PageMaker排版精品教程》教学课件 第4章
图像的剪裁
利用剪裁工具选择图像,将光标放在图像周围的 任意控制点上,按住鼠标左键,当光标呈双向箭 头时,向图像内部拖动鼠标即可裁切图像。
图像的颜色调整
在PageMaker中,我们可对导入的图像进行比照
度及亮度的调整,并能对图像添加Photoshop的滤
镜效果。
原图
原图
应用滤镜效果后
改变亮度
改变比照度
对齐操作
以下图所示为利用“对齐对象〞对话框中的相应命
令执行的对i〞。
左对齐
水平居中
右对齐
原位置
顶部对齐
垂直居中
底部对齐
分布操作
以下图所示为利用“对齐对象〞对话框中的相应命
令执行的分布操作,其具体的操作方法,可参阅
视频“V4-3.avi〞。
按顶分布
4.6 对象的链接
4.6.1 链接设置
在PageMaker页面中,未置入任何图像或文字前,我们可利 用“链接选项〞对话框预先设置图文的链接存放形式。
4.6.2 查看链接
当置入到PageMaker中的源图文文件被修改、重 命名或删除后,可利用【链接】命令来查看页面 中图文文件的链接状态。
4.7 上机实践 ——制作名信片
4.2 使用外部图形与图像
4.2.1 置入外部图形与图像
在PageMaker中,要将外部的图 形和图像导入到软件中,可执行 如下两种方法中任一种: 利用【置入】命令导入; 利用【插入图像】命令导入。
4.2.2 编辑图像
图像被导入到文件中后,根据不同的需求,需要 对图像进行各种编辑操作: 图像的剪裁 图像的颜色调整 图像的遮色 图像的特殊粘贴方式
图像的遮色
在PageMaker中,对图像进行遮色操作后,产生 的效果与Photoshop等软件中的蒙版效果相似,即 上方的图像可控制下方图像的显示区域。
- 1、下载文档前请自行甄别文档内容的完整性,平台不提供额外的编辑、内容补充、找答案等附加服务。
- 2、"仅部分预览"的文档,不可在线预览部分如存在完整性等问题,可反馈申请退款(可完整预览的文档不适用该条件!)。
- 3、如文档侵犯您的权益,请联系客服反馈,我们会尽快为您处理(人工客服工作时间:9:00-18:30)。
pagemaker教案PageMaker lesson planFirst, talk about PageMaker overviewI. a brief introduction of.PageMakerPM is a professional desktop publishing software launched by Adobe in July 1984. It combines graphic processing and typesetting functions. It can mix text, tables, graphics and images in an intuitive environmentTwo. Application1) page design(2) text processing(3) graphic processing(4) form(5) electronic publicationsThree. Combine and distinguish with other software1. combinations: combine with Photoshop and coreldraw.2. difference: 1) PM in typesetting style at the same time pay attention to bookbinding, Word is only a single page typesetting printing2) PM allows the choice of binding in printing3) in PM, you can enter text at any location on the page, and input text in Word can only be the standard of behaviorFour. Start and interface layout1. start: 1) start - program ---Adobe---PageMaker6.5c2) double-click the desktop shortcut3) open a PM file2. interface layout: 1) title bar: located above the window for displaying programs and filenames2) menu bar: the foundation of using application software, including file, edit, layout, text, component and so on 9 kinds3) toolbox: mainly used for publications, text, graphics and other editing operations4) control panel: contains edit buttons for text and graphics. Set the properties of the toolFive. New, open, save1. new: ctrl+N2. open: ctrl+O3. save: ctrl+SSecond talking about the use and editing of basic toolsI. Basic Tools1. line tool: press and hold SHIFT while drawing a straight line with 45 degrees into multiplesArrow settings: tool synergy tool - creates arrows.2. limit line: do not press SHIFT, you can also generate a line with 45 degrees into multiples3. rectangle: press SHIFT to draw squares, and double-click tools to do rounding4.: press SHIFT can draw the ellipse circle.5. polygon tool: double click tool to do polygon edge and corner number, as well as internal settings6. placeholder tools: you can constrain text and pictures to display in graphical shapes.Two. Edit: ctrl+ opens the control panel1. moving graphics,2. rotating graphics,3. mirror and tilt4. graphics cutting5. insert objects: display the graphics settings in the specified software and display them directly in the pm. Double click graphics to restore to the original file.6. put in: ctrl+D directly displays the picture in pm.Revision of Figure 3Copy and paste1. copy (CTRL+C) paste2., multi paste: copy the graphics, paste more copies at a time.3. special paste: you can copy and paste graphics from other software into pm. Double click the graphics to return to the original file.4.ctrl+alt+ procrastinationTwo, arrangement (composition - arrangement)1. as for the front floor: shift+ctrl+]2. as for the rear layer: shift+ctrl+[3. forward one: ctrl+]4. back to one: ctrl+[Three. Group: (component - group) a group of more than one monomer.Ctrl+gCanceling groups: shift+ctrl+g (Group guidelines), the following rules apply to composition groups:* frames can be made up of other objects, but groups cannot be added to the frame.* a text object can change its size as part of a group, but the text will keep its text and paragraph specifications. For example, when you change the size of a block of text, the size of the text will not change.* groups cannot be cascaded - that is, a group can form a group (including another group) with other objects, but if the group is disbanded, the original group will be dissolved.* groups cannot be pasted as inter line graphics. Users can group text objects that include inter line graphics, but can not form an inter line graph and another object into groups.* if the user changes the size of a group and press the Shift key (or when the user uses the scaled resizing option in the control panel), the aspect ratio of all objects in the groupwill be maintained* a newly created group will move to the front of the stack order. Objects in groups keep their stack order relative to other objects until the user changes their stack order with commands in the "arrange" menu. If the object is composed of groups from different layers, the constituent group will be assigned to the topmost object layer of the selected range.* if the user creates a group in the PageMaker 5 publication (using its additional PS composition group), we recommend that we dissolve the group before using the publication (using the PS dissolution group). The user can then rebuild the group in PageMaker 6.5.Four. Lock object: (component - locked object) ctrl+lLocking an object into a page prevents it from moving, sometimes moving, causing unnecessary trouble.Unlock: ctrl+alt+lFive align1, composition / alignment and distributionCtrl+shift+e aligns and distributes graphics at specified locations2, arrangementArrangement (composition - arrangement)1) as to the front floor: shift+ctrl+]2) as for the rear layer: shift+ctrl+[3) forward one: ctrl+]4) backward one: ctrl+[3, printing color: is a color matching system, generally used is the CMYK color combination, you can use four colors printed out of ever-changing colors, and CMYK color printed out of the color than the actual color is darkerSpot color: refers to the fixed to the paper on the ink color samples. Use spot colors can reduce printing costs and costs, but also can achieve the color can not be synthesized with the original color (such as yellow and silver white)Light color: color saturationData:What is the color spot color: yellow red and blue black color to color.The role of spot colors:1) solve the overprinter is not allowed.2) improve the printing grade.3) avoid color deviation in printing.4) the corresponding cost reduction.Spot color printing is based on different color requirements and match the spot color ink, part of the spot color ink contains the color is four primary color ink can not be obtained, such as silver, gold, fluorescent and some bright colors. Spot colors are usually used in situations where printing is required with high color accuracy, such as company logos, packaging and greeting cards.In the desktop design software designated ink is divided into two major categories, spot color ink (Spot Color Ink) and four-color ink (Process Color Ink). The current four - color ink used in the world has three systems, including: Asian standards (Japan Standard), American standards (SWOP Standard) and European standards (Eurpoe Standard). This three ink is based on the people in different regions have different preferences for color perception. And spot color ink has several sets of standards, such as Pantone, DIC and ToyoInk and so on, and then subdivided into general spot color, fluorescent and metallic color. Colors are specified in four colors and spot colors, so designers should see which inks are printed in the end, and use that set of ink colors to specify.1) special color: the color defined is what is commonly called "spot color" in printing". In color separation printing, it is a separate palette.2) printing color: the defined color is usually called "four colors" in printing. The colors defined will be displayed in four blue, magenta, yellow and black colors.Light color: 3) will have predefined colors, by choosing different percentages, produce different color effect.4, the conversion between units: 1 inches =25.4mm 1 =0.3528mm 1 =8.19881mm 1 Cicero pica teeth =0.3527mm5, overprint and trappingOverprinting means that the lower part of the graphic overlap is no longer hollowed out, but rather the original color. If any graphic setting is selected, the overlap will be a superposition of two colors instead of the original color effect. Therefore, the overprinter settings must be carried out in very small spaces, not only to make the printing white, but also not to feel the original set of colors changed.The potential gap compensation between two adjacent color trapping. (TRAP) extended lighter colors to adjacent darker color in most cases.Page resizing: controls the displacement that affects the layout of a page during automatic page resizing, resizing text blocks, frames, and different self defining formats of images.6, book cover design overview1) the function of the cover: protect books from damage; publicize the content of books; beautify books and attract readers' sight.2) cover types: soft cover and hard cover (called type)3) cover structure: including a letter (the book cover (front),a back seal), three (back side) and four (back) 4. In the design to the overall design, to maintain the style of books unified, consistent style.Enclosed is a design element that usually has the title, author's name, publisher, and decor,Inside front and back cover two page is blank, sometimes arranging color pictures, monochrome illustration or arrangement of advertising and similar publications.The back cover below the general unified pricing and barcode typography ISBN, etc., can also according to the arrangement of illustrations.The spine (joint cover and back cover) general printing title, author name and press unit.7, the book page format designEditing and composing a long book is the basic function of PAGEMAKER, and it is also a regular work for design and typesetting staff.Basic knowledge:1) the inside pages of a book are commonly called book cores, and the book core is the part wrapped in the inside of the book cover,General (title), sealed by the preface, introduction, directory, text, illustrations, inserts, afterword, appendix, indexing, annotation and copyright page.2): cover sealed after the first or second page, with the title, author name and publishing units called pages (page) sealed.3) copyright page: copyright is the copyright and copyright of author and publisher, also called edition record. It is every book of birth records, including the title, author name, publication unit, distribution unit, format, print, insert, words, and previous print edition, ISBN, uniform pricing, publication date, version, and even distribution range. Abstract in general with copyright sealed, or printed on the end of the book alone.4) insert: refers to more than format and size, or insert and format is the same, but the use of paper and ink and printing requirements of different individual pages.8, image compression format (CMYK and RGB)Medium compressed ctrl+altMaximum compression ctrl+alt+shiftTIFF file format features: TIFF (Tag, Image, File, Format). It is characterized by 1) complex image format and storage information2) TIFF format is more complex and less compatibleFourth talking about graphic colorsI. linetype settings1. transparent: the line is double line, between the two lines is transparent.2. hidden line: line highlighted.Two. Graphics fill1. monochromatic1) color mode:Rgb: light color, display color, additive colorCmyk: printing color, color.2) color typePrinting color: it is a color matching system. The CMYK color combination is commonly used. You can print the ever-changing colors in four colors, and the CMYK colors are printed more darkthan the actual colorsSpot color: refers to the fixed to the paper on the ink color samples. Use spot colors can reduce printing costs and costs, but also can achieve the color can not be synthesized with the original color (such as yellow and silver white)Light color: color saturationData:What is spot color?Color: yellow red and blue outside the black color belong to the spot.The role of spot colors:1., the overprinter is not allowed.2., improve the printing grade.3. avoid color fading in printing.4. reduce costs accordingly.Spot color printing is based on different color requirements and match the spot color ink, part of the spot color ink contains the color is four primary color ink can not be obtained, such as silver, gold, fluorescent and some bright colors. Spot colors are usually used in situations where printing isrequired with high color accuracy, such as company logos, packaging and greeting cards.In the desktop design software designated ink is divided into two major categories, spot color ink (Spot Color Ink) and four-color ink (Process Color Ink). The current four - color ink used in the world has three systems, including: Asian standards (Japan Standard), American standards (SWOP Standard) and European standards (Eurpoe Standard). This three ink is based on the people in different regions have different preferences for color perception. Spot color ink has several standards, such as Pantone, DIC, ToyoInk and so on,Subdivided into general spot color, fluorescent color and metallic color. Colors are specified in four colors and spot colors, so designers should see which inks are printed in the end, and use that set of ink colors to specify.3) define the color window - display palette /CTRL+JClick the triangle in the upper right corner of the color palette, select new colors in the pop-up menu, then enter names, select categories, patterns, and enter the relevant color information --- determine2. paper color: white3. pattern fill (component fill)Three. Frame settings1., frame connectionCreate frames: draw directly / use graphics to convert text frames (elements - text frames - to text frames)(ctrl+shift+alt+f)2. insert content into the frame: select the text block or picture you want to put in, hold the SHIFT, and select the frame -- the component -- the frame -- join the content3. screen box option: adjust the location of text and pictures in the frameComponent - text frame - frame options4., the choice of frameLast picture frame: ALT+CTRL+[Next picture frame: ALT+CTRL+]Four. Image adjustment: editing only images in tiff format. (you can press the ctrl+alt+shift button to convert the image into TIFF format) - component - image - image control (you can use the filter effect in PS in PM)Five. Shading: (shift+6) displaying the content of a graph overlapping with the shape of the above figure (with no contour, no padding)Cancel mask: ctrl+shift+6Fifth, talk about the operation of textI. input of text1. direct inputFall into the cursor directly input, input is in English, if the continuous input, the text will not automatically line up, and the input text and the previous text coincide.2.ctrl+d insert text3. edit the page: ctrl+e/ edit the articleFeatures: 1) you can input middle length articles at one time2) only text, no graphics.3) you can find, replace, and spell check text.4. use paste command to add text.Two. Ways of inserting text:Manual text: in the appropriate location of the page click directly, that is, you can enter, suitable for entering the specified region of text.Semi-automatic text: press SHIFT while clicking the locationof the page, you can enter a page of content at a time.Automatic text: press CTRL while clicking the location of the page, you can enter the whole article at one time.Three. Editing of text blocks1. create: use the text tool to click and drag in the pageThe lower part of the 2. block of text if there is a red box indicating that there is no text input.3. consolidation of text blocks.Four. Text editing.1. font size 3.2. 4. 5. 6. text line spacing kerning word width Sixth, edit characters and paragraphsI. characters (ctrl+t)The 1. option: sets the superscript subscript position of the text2. set case: tool add utility - change case.Two. Paragraph (ctrl+m)Indent the 1. paragraph2. paragraph alignment3. paragraph spacing: Section front distance, section after distance.4. paragraph options:1) line close: the last paragraph in a page automatically jumps to the next page.2) go to the next page: no matter what the current paragraph is in the page, it will go to the next page or the next column.3) keep the line: the last line of a paragraph remains in an object with the following text, and the number of rows is less than the specified number of rows4) the first line of control: if a paragraph in the last line of a page in the front lines, set the first control after the passage can be completely jump to the page.5) our control:Seventh talk about layoutI. layout of the page1. add: CTRL+SHIFT+ALT+G add a page after the last page.2. delete3. option: CTRL+PAGEUP selects the previous page.CTRL+PAGEDOWN selects the next page.Press SHIFT while clicking on the jump page to play the picture like a slide show.Two. Preview1. magnifier2. gripHold down the ALT key to switch from other tools to the starting tool.Hold down the SHIFT key and right-click to switch between actual size and full display.Three. Main page1. function: you can set the same content displayed on the child page in the main page. And cannot edit on child pages.2. page number settings:1) ctrl+alt+p 2) ctrl+shift+3Motherboard pageFour. Setting up the auxiliary line (grid manager)Tool synergy tool - grid manager1. classification:Ruler auxiliary line / column auxiliary line / baseline auxiliary line2. editing1) how to set the auxiliary line on the specified page2) save and load the auxiliary line.Eighth layer and row styleLayer 11. NEW2. delete3. merge: merge the layers and merge all the contents to the first selected layer4. option:5. hide and displayThree. Special characters. (Editor)1. for the selected text: phonetic notation2. horizontal Rome characters: rotate the text directly into the direction of the input line.3. stresses the importance of selected text.4. composite characters: combine multiple text into a text size.Four. If treatment: if the last line of the English English words did not complete on this line, behind the emergence of a hyphen, behind the letters to the input in the next row.Five. RowFormat the text in a unified setting window --- display panel panel1. new row: click the "triangle" in the upper right corner of the panel, and select "new row" in the pop-up menu"Enter the name and make the relevant settings.2. edit row: select the row that you want to modify, double click to open and edit it.3. Application Layout: use the text tool to click an insertion point in the paragraph, select the paragraph -- in the row panel, click the row name you want to apply4. import and export row:Import: select import and output from the menu of the platoon panel select the row to importExport: select paragraphs or text to be exported in PM - file - export - text, select type to save in typeNinth, talking about the frame and directory settingsI. frame1. frame and graphics conversion: ctrl+alt+shift+f2., picture box connection3. merger4. optionTwo. Text winding: mixed arrangement of text and graphics1. winding schemeText without windingRegular windingIrregular winding graph2. lines of writingColumn interruptedSkip typeEnclosureThree. Directory settingsIndent tab (ctrl+i)1) open indent tab dialog box.2) set the tab position in it. And select the indicator line3) drop the cursor in the page and press tab to determine the tab positionTenth talk about synergy toolsI. change case:Two. Symbols and codingThree. Text background1. Edit - text background2. fill the text with the frame and enter the text3. tool synergy tool - peripheral boxEleventh talk about the arrangement of large publicationsI. sorting pages (layout - sorting pages)Rearrange the order of the current publication pageThe arrangement of 1. pages in order1) double page arrangement: select a page and drag it to the front of another page2) single page arrangement: when you hold down the CTRL key, click on a page to select, and then drag it to another page2. click options to open the options dialog box where you can set the page's display (on page / double page) and bind it (left / right)3. details: cancel the "options" dialog "display with thumbnail", page content page ranking will not be visible, select a page and then click on the "details", the content on this page can be fully displayed.Two. Bound (tool - bound)The multiple publications are assembled together, so that they link up to become a magazine.In the consolidated list of publications dialog box provides 4 encoding scheme.No / next page / next page is odd / next page is even numberThree. Compiled into a Book: synergistic tools - tools - compiled into a BookDraw up a binding process for publication, made version.1. blank page: Click to add a new blank page (no page number)2., reverse the page: after the choice can be in ascending and descending between the transformation3. pages: page printing and binding order, divided into double page to horse riding, double page to seamless binding, two page after page three page after page of Zhang, Zhang, four page after page. The best for more than 80 pages of publications using a double page seamless binding imposition. The standard is designed for printing.The book is because the edge: the edge of the paper folding is not in the flush, but because of the thickness of the paper and offset. When the smooth cutting edges, inner and outer margins relative to the edge of the page.Twelfth tableI. table setting1. NEW2. editing1) tables, rows, and columns2) add and delete tables3) the color of the table3. text editing4. decimal point alignment Two. Import and export of forms。
