罗技摄像头刷新操作手册文档 V1.0
罗技C920高清网络摄像头设置指南说明书

Setup GuideLogitech® HD Pro Webcam C920设置指南罗技® 高清网络摄像头 Pro C920Logitech® HD Pro Webcam C920ContentsEnglish 3简体中文 13t 23 t /supporwww.logi2 English 3Logitech® HD Pro Webcam C920Features1. Carl Zeiss® autofocus HD 1080p lens2. Microphone3. Activity light4. Flexible clip/base5. Tripod attachment6. Product documentationLogitech® HD Pro Webcam C920For Windows 7:Plug your webcam into a USB port to automaticallydownload your software. Follow the on-screenprompts to download and install your software.Tip: After downloading, if the installation does not beginautomatically, locate the LWS file in the Download folderon your computer. Double-click to begin the installation. English 5Logitech® HD Pro Webcam C920Setting up Logitech Vid HD1 Install Logitech Vid HDTip: If you prefer another video-calling application, you will need to download and install third-party software.Learn more:/webcam_howto 2 Create an accountFollow the on-screen instructions to createyour Logitech Vid HD account and to set upyour webcam for video calling.To make video calls with any application,both you and the person you call must have:• A webcam• A computer with speakers and a microphone (or a headset with a microphone; many Logitech webcams have a built-in microphone)• A broadband Internet connection(e.g., DSL, T1, or cable)• The same video-calling application(e.g., Logitech Vid HD)•Video calling accounts6 English Logitech® HD Pro Webcam C9203 Add a friend or make a practice callClick on the Practice Call tile to testyour settings.Tip: The Practice Call tile is always availableon your Contact List so you can testyour settings.To add a friend, click on the Add a Friendtile and enter your friend’s e-mail whenprompted.After your friend has accepted your invitation, click on your friend’s picture to make a call.Accessing account settings and starting applicationsLogitech automatically detects and adjusts the best settings for your webcam. If you would like to re-take your profile picture or update any of your settings, click the Settings icon.Double-click the icons on your desktop to launch your applications.1. Logitech Webcam Software2. Logitech Vid HDTip: The Logitech Vid HD icon is only presentif you chose to install Logitech Vid HD. To learn about third-party video calling, please visit:/webcam_howto12 English 7Logitech® HD Pro Webcam C920Navigating the Logitech Webcam Software45679831210111. Capture pictures and videos2. View captured images and share via e-mail,Facebook,® or YouTube®. Registration may be required.3. An area for easy access to your installedwebcam related applications4. Launch Logitech Vid HD (if installed)5. Capture videos triggered by detected motion6. Create your own custom video mask(for webcams that support this feature)7. Control your video effects and webcam whileon a video call8. Download additional webcam applications9. Change webcams (when you have morethan one)10. Open Logitech Webcam Software settings11. Open help dashboard (manuals andhow-to videos)8 English English 9Logitech® HD Pro Webcam C920Capturing video and snapping pictures Quick Capture allows you to take photos or record videos easily.You have easy access to webcam controlsand settings as well as video effects to personalize your images and recordings.1. Preview window2. Capture mode: photo/video3. Capture button4. Webcam controls5. Video effects and fun filters6. Photo thumbnails7. Video thumbnails8. Click a thumbnail to enter the galleryViewing and sharing using the GalleryClicking on an image thumbnail in the gallery (1) opens the video or photo in the review window (2).• Attach a video or picture file to an e-mail (3)• Edit a photo or splice together video (4)• Upload a picture or video to Facebook (5)• Upload a video to Twitter (6) • Upload a video to YouTube (7)You may also drag and drop a gallery image onto one of the function tiles (items 3–7) to launch an editing application or to attach or upload. Registration may required for applications. Additional software required for Twitter.126783451235467Logitech® HD Pro Webcam C920Using motion detection• Set up your webcam to record video when it detects movement.• Adjust captured video duration and detection sensitivity.• Captured video is automatically saved to your computer.• View content in the Gallery or upload it using the One-touch Upload window.Personalizing videos and picturesYour webcam offers Video Effects™, including avatars, face accessories (mustache, glasses, hats, etc.), fun filters, and video masks.Want to create your own video mask? Simply open the Video Mask Maker on the Main Menu and follow the on-screen instructions.Note that when you use video effects during video recording, your webcam uses an MJPEG compression format. MJPEG-compressed filesmay take longer to upload than H.264 files.10 English English 11Logitech® HD Pro Webcam C920Fine tuning your webcam during a video call1. Launch the webcam controller when on a video call.2. Hide your video image with a photo while your webcam stays connected.3. Use pan and tilt to find the best angle.4. Zoom in or out to include/exclude your surroundings.5. Use Follow my face so you’re always in the picture.6. Enjoy clear conversations without annoying background noise.7. Correct for poor lighting environments using RightLight.8. Choose between auto- or manual focus.9. Adjust the advanced settings for your webcam.Get more applications for your webcamDownload and install additional applications for your webcam, like video calling, photo and video editing, and other value-added programs.15697823412 EnglishLogitech® HD Pro Webcam C920Getting helpClick on the help icon to access a complete user manual, or watch how-to videos that show you how to get the most out of your Logitech webcam and software.Tip: If you are not sure about a feature, click the help icon, and our manual will open tothe right place.简体中文 13罗技® HD Pro Webcam C920功能1. 卡尔·蔡司® 自动对焦 1080p 高清镜头2. 麦克风3. 活动指示灯4. 可调式通用夹/底座5. 三角架附件6. 产品文档14 罗技® HD Pro Webcam C920对于 Windows 7:将网络摄像头连接到 USB 端口以自动下载软件。
罗技X50用户手册说明书

Logitech® X50 Product Manual | 产品手册Logitech X50ContentsEnglish 3简体中文8 2Logitech X50English 3Features1. Power / Bluetooth Pairing Button2. Volume Buttons3. 3.5mm Aux-In Jack4. Micro USB Connector5. Status LEDLogitech X504 EnglishPowerconnection.English 5Advanced Audio Distribution Profile (A2DP), such as smartphones, tablets and personal computers.Pairing additional devicesTo pair X50 with additional source devices, press and hold the Power / Bluetooth pairing button for 3 seconds. X50 will enter pairing mode, make a sound, and flash its Bluetooth LED while searching for another device. Once the next device is paired with, X50 will sound to confirm pairing and the Bluetooth LED will remain solid blue.X50 will remember the last 8 devices it was connected to. The next time the speaker is turned on, it will attempt to reconnect automatically to the last device it was connected to before it was turned off.X50’s Bluetooth range is approximately 10 meters, or 30 feet. If you take your source device out of range, the connection will be suspended. X50 will automatically reconnect if the source device is brought back in range within 5 minutes. After 5 minutes, the active connection will be dropped.Logitech X50Connection – via Auxiliary inputYou can also connect X50 with any source devices using a 3.5mm auxiliary cable. 6 EnglishLogitech X50English 7LED IndicationNot Charging - Normal BatteryNot Charging - Low BatteryCharging Fully ChargedPower Off OFF OFF Breathing in PURPLE colour OFF Power On - Pairing Fast blinking in BLUE colour Fast blinking in RED colour Fast blinking in PURPLE colour Fast blinking in BLUE colour Power On - Connectable Slow blinking in BLUE colour Slow blinking in RED colour Slow blinking in PURPLE colour Slow blinking in BLUE colour Power On - ConnectedSteady BLUESteady REDSteady PURPLESteady BLUE罗技 X508 简体中文功能1. 电源/蓝牙配对按钮2. 音量按钮3. 3.5 毫米辅助输入插孔4. 微型 USB 接口5. 状态 LED 指示灯罗技 X50简体中文 9电源1.10 简体中文多台设备配对要将 X50 与其他音源设备配对,请按住电源/蓝牙配对按钮 3 秒钟。
W100网络摄像头用户手册说明书
W100Webcam 網路攝影機网络摄像头User Manual 使用說明手冊使用说明手册w100 WebcamAbout this GuideThe content in this document is for information purpose and is subject to change without prior notice. We have made every effort to ensure that this User Guide is accurate and complete. However, no liability is assumed for any errors or omissions that may have occurred.The manufacturer reserves the right to change the technical specifications without prior notice. Regulatory noticesThis document provides country- and region-specific non-wireless and wireless regulatory notices and compliance information for your product. Some of these notices may not apply to your product.CE Regulatory NoticeThe product herewith complies with the requirements of the EMC Directive 2014/30/EU, and the RoHS Directive 2011/65/EU.WEEE NoticeDisposal of Waste Electrical and ElectronicEquipment and/or Battery by users in privatehouseholds in the European UnionThis symbol on the product or on thepackaging indicates that this cannot bedisposed of as a household waste. You mustdispose of your waste equipment and/orbattery by handling it over to the applicabletake-back scheme for the recycling ofelectrical and electronic equipment and/orbattery. For more information aboutrecycling of this equipment and/or battery,please contact your city office, the shopwhere you purchased the equipment oryour household waste disposal service. Therecycling of materials will help to conservenatural resources and ensure that it isrecycled in a manner that protects humanhealth and environment.FCC StatementThis equipment has been tested and found to comply with the limits for a Class B digital device, pursuant to Part 15 of the FCC Rules. These limits are designed to provide reasonable protection against harmful interference in a residential installation. This equipment generates, uses and can radiate radio frequency energy and, if not installed and used in accordance with the instructions,may cause harmful interference to radio communications. However, there is no guarantee that interference will not occur in a particular installation. If this equipment does cause harmful interference to radio or television reception, which can be determined by turning the equipment off and on, the user is encouraged to try to correct the interference by one or more of the following measures:• Reorient or relocate the receiving antenna.• Increase the separation between the equipment and receiver.• Connect the equipment into an outlet on a circuit different from that to which the receiver is connected. • Consult the dealer or an experienced radio/TV technician for help.This device complies with Part 15 of the FCC Rules. Operation is subject to the following two conditions: (1) This device may not cause harmful interference, and (2) this device must accept any interference received, including interference that may cause undesired operation.FCC Caution: Any changes or modifications not expressly approved by the party responsible for compliance could void the user's authority to operate this equipment.1.IntroductionThank you for purchasing this webcam. Thisproduct is designed for various video chatstreaming application via USB interface. 2.Package Contentswebcam User manual3.Product Overview1 Lens 5 USB connector2 Adjustable focus 6 Microphone connector3 Tripod hole 7 Microphone4 Clip base4.Setting up your webcam4.1Place your webcamDesigned for the way you like to make a video call, place the webcam where you want it—on the monitor or the desktop.4.1.1 Grasp the webcam as shownand open clip base with your otherhand. Mount the webcam, makingsure the foot on the clip base isflush with the back of yourmonitor.4.1.3Plug USB connector into USB port, and microphoneconnector into MIC hole (red / )of yourcomputer. Wait for about 1 minute, webcam willinstall automatically..4.2Getting start with video callingTo take advantage of video calling, both you and the person you call must install video-calling application such as SkypeTM, Yahoo! @Messenger, Windows Live@ Messenger or Gmail. As well as a USB camera and video calling application, bothcallers need:• A computer with speaker (or a headset).• A broadband internet connection (e.g., DSL, T1, or cable) Please check your preferred video callingapplication requirements. (Requirements may vary between different applications but usually a minimum of 2Mbps upload speed is required).5.SpecificationsItem DescriptionSensor 0.3MP CMOS sensorCapture Image Size 160x120,176x144, 320x240,352x288, 640x480Frame Rate Max. 30 fps Output Format MJPG, YUY2View Angle D: 50.6°Focus Manually Adjustable Focusing Range 20mm to infinityMicrophone External (connected with computer)Compatibility Windows 10 or higher MAC OS X 10.6 or higherInterface USB2.0, A/VStill Image format BMP/ JPG WorkingTemperature0~40°CPower Consumption <0.5W Dimension 67.5 x 32.5 x 51mm Weight 88gw100網路攝影機有關本手冊本手冊之內容只供參考,並得以隨時變更不需要事先通知。
摄像机操作指导书
摄像机操作指导书1. 简介本指导书旨在帮助用户正确地操作摄像机设备。
请按照以下步骤进行操作,以确保获得最佳的拍摄效果。
2. 准备工作在开始操作摄像机之前,请确保已经完成以下准备工作:- 摄像机已经正确连接到电源并开启。
- 镜头已经清洁,并且摄像机的视角没有被阻挡。
- 存储介质(如SD卡)已经插入摄像机。
- 如果需要,摄像机已经与其他设备(如电脑或显示屏)正确连接。
3. 操作步骤请按照以下步骤操作摄像机:1. 打开摄像机电源,确保摄像机已经完全启动。
2. 使用摄像机上的菜单按钮或触摸屏,进入主菜单界面。
3. 通过主菜单界面,您可以选择不同的拍摄模式和设置选项。
请根据您的需求进行选择。
4. 如果需要进行相机参数的调整,如曝光、对焦等,请在设置选项中找到相应的调整菜单,并按照提示进行操作。
建议先阅读摄像机说明书以了解不同参数的具体作用。
5. 选择您要拍摄的场景或对象,通过摄像机的取景器或触摸屏,确认画面构图。
6. 按下摄像机上的录像按钮或触摸屏上的录像图标,开始录制视频。
7. 当您完成录制时,按下停止按钮或停止图标,结束录像。
8. 如果需要,您可以进行视频回放和编辑,以及其他相关操作。
请参阅摄像机说明书,了解更多操作细节。
9. 在操作完成后,关闭摄像机电源。
同时,记得及时备份您的视频文件,以防止意外数据丢失。
4. 注意事项在操作摄像机时,请注意以下事项:- 避免在摄像机工作时强行拔出存储介质,以免损坏文件。
- 避免在摄像机镜头上触摸或刮擦物体,以免损坏镜片。
- 在拍摄过程中,尽量保持摄像机的稳定,以获得清晰、稳定的画面。
- 如有需要,可以使用三脚架或稳定器等辅助设备,提高拍摄质量。
- 根据需要,及时清理和充电摄像机的电池,确保其正常工作。
- 遵守法律法规,尊重他人隐私,并遵循当地的拍摄规定。
5. 总结通过本操作指导书,您应该能够正确地操作摄像机设备,并获得满意的拍摄效果。
如果您在操作过程中遇到问题,请及时参阅摄像机说明书,或与摄像机厂商进行联系与咨询。
罗技 PTZ PRO 2 摄像头设置指南说明书

PTZ PRO 2 Setup Guide | 设置指南3 EN GLISH8简体中文2Camera1. 10X lossless zoom2. Camera LED3. Kensington®Security Slot Remote4. Mirror5. Zoom in6. Pan and tilt7. Zoom out8. Camera presets1, 2, and 39. Video mute10. Far end control11. Home12. Remotebattery doorAccessories13. Camera mount14. Cable lock15. Cables1314231English 31. Set up camera by placing on table or by using camera mount on table or wall.2. Attach cable lock before plugging the cable into the camera port.3. Connect to external power.4. Connect the USB cableto your computer.5. The camera LED will flash when the camera is connecting. Once complete, the camera head will rotate.6. If the camera cannot connect,try again. If issues persist, consult /support/ptz2 or call technical support.7. Start your video call fromyour application. The camera LEDwill illuminate when streaming.4 EnglishVISIT PRODUCT CENTRALDiscover your product’s full potential. Get valuable information and usage tips by browsing easy-to-use FAQs. Find answers to product questions and get help setting up your product. See if there’s software availablefor download that can enhance your product experience. To enjoy all the benefitsof your Logitech product,visit /support/ptz2 and take advantage of Logitech’s wide range of useful support services.– Troubleshooting– Diagnostics– Firmware upgrades– Support community– Software downloads– In-box documentation– Warranty information– Spare parts (if available)English 5USE YOUR PRODUCTVideo– Starting the video: Video will start once a video call/capture session is opened and the camera is selected. The camera LED will illuminate when the video is streaming.– Pan and tilt the camera usingthe remote control. Press once for incremental movement or pressand hold for continuous pan or tilt. Caution: Do not manually rotate webcam head. Doing so may damage unit.– Zoom the camera up to 10X by pressing the zoom button.– Home: Press the Home buttonto return to the default, out-of-box home position.– Camera presets: You can set upto 3 preset positions. First, positionthe camera using the pan and tilt controls, and then press and hold one of the preset buttons for 3 secondsto save that position. You may return to your defined position at any timeby pressing the preset button once.Use Preset 1 as your own defined “home” position. When the camerais reconnected to the PC, it will return to the position set in Preset 1. If no position is set for Preset 1, the camera will return to the default home position.All three presets are by default set to the out-of-box home.– Far end control: This function allows you to control the pan, tilt, and zoom of any remote Logitech ConferenceCam or select Logitech Webcams.Some applications support this feature natively, while others can be enabled by using an application downloaded from /support/ptz2. Please visit the download page listed for more information.– Camera settings application:You can use this program to control the pan, tilt, zoom, focus,and image quality (like brightnessand contrast) of the camera from your computer. This applicationcan be downloaded from/support/ptz2.6 EnglishMounting your camera Changing the remote control battery/for troubleshooting tips,English 7摄像头1. 10X 无损变焦2. 摄像头指示灯3. Kensington®防盗锁插孔遥控4. 镜像5. 放大6. 水平与垂直遥摄7. 缩小8. 摄像头预置 1、2和 39. 视频静音10. 远端控制11. Home12. 遥控器电池盖配件13. 摄像机底座14. 线缆锁15. 线缆13142318 简体中文1. 将摄像头置于桌子上,或通过摄像头底座将摄像头支在桌子或墙上。
罗技摄像头说明书

Setup GuideLogitech® HD Pro Webcam C920 English 3Logitech ® HD Pro Webcam C920Features1. Carl Zeiss® autofocus HD 1080p lens2. Microphone3. Activity light4. Flexible clip/base5. Tripod attachment6. Product documentation4 EnglishGetting started withThank you for buying your c920!your Logitech webcam.please visit /support.Setting up your webcam1 Place your webcam3 Install the softwareIf you’re using your webcam with Windows® 8,the software required is downloaded automatically when you connect your webcam for the first time, and installed silently in the background. Important: Make sure you’re connected to the Internet, so the software can be downloaded.If you’re using your webcam with Windows® 7or Windows Vista®, you must install the Logitech® Webcam Software, available from:/downloadsand a microphone; your Logitech HD ProWebcam c920 has two built-in microphones.• A broadband Internet connection(e.g., DSL, T1, or cable) English 56 EnglishGetting started withUsing your webcam with Windows 8Use the Camera app, available from the Windows 8 Start screen, to operate and control your webcam .Understanding the Camera app1. Preview window. Click or tap to capture photos or videos (depending on whether Video Mode is selected).2. Change webcams (when you have more than one). The face of your Logitech webcam illuminates when selected.3. Adjust your camera settings.4. Activate or deactivate the Timer feature.When activated, there is a three second countdown to capturing a photo or video.5. Turn Video Mode on (to record videos) or off (to take photos).6. Click or tap on the arrows to scroll through the photos and videos you have captured. Videos are denoted by a timer and play button inthe bottom right-hand corner:Tip: The Camera app lets you use your webcam’s most popular features quickly and easily. If you want to take advantage of the enhanced features your webcam offers, such as motion detection, use the Logitech Webcam Software available from /downloads. English 7Logitech ® HD Pro Webcam C920Adjusting your Camera settingsThe Logitech software optimizes the settings for your environment automatically. To adjust any of your settings choose Camera options . This is available from the Camera app (see the previous page) and from within Metro apps that support webcams.Choose your required resolution for photo capture, or video capture when in Video Mode.1. Choose the microphone you want to use to record sound in your videos, if you have more than one available.2. Access More Options , to benefit from enhanced features such as digital Zoom and Move .3. If the More Options pane doesn’t show the Logitech logo and offer enhancedoptions, it is likely that the Logitech software didn’t install correctly when you first connected your camera. To reinstall it, go to the Windows Store and look for Logitech Camera Controller.4. Zoom in or out to include/exclude your surroundings.5. Having zoomed in, drag the white box to pan (adjust the focus area of your webcam).6. Use Follow my face so you’re always in the picture.7. Enjoy clear conversations without annoying background noise.Depending on the features available with your camera, you can access further advancedsettings by scrolling.Sharing your photos and videosYou can share your photos and videos via e-mail, Twitter, Facebook®, YouTube®, or Microsoft SkyDrive®. Follow these steps:1. In the Camera app, scroll to the photo or video you want to share.2. Select Share in the Charms bar (or press- H):3.Choose the media through which you want to share the photo or video.Getting started with1. Capture pictures and videos.2. View captured images and share via e-mail,Facebook, or YouTube.3. Capture videos triggered by detected motion.4. Control your webcam while on a video call.5. Change webcams (when you have more than one).6. Open Logitech Webcam Software settings.7. Open help dashboard.Using your webcam with Windows 7 and Windows VistaThe Logitech Webcam Software provides everything you need to use and control your webcam. Launch the software from the Windows Start® menu, or by right-clicking on the camera icon in the Windows taskbar.Understanding the Logitech Webcam Software8 English English 9Logitech ® HD Pro Webcam C920Capturing videoand snapping pictures Quick Capture allows you to take photos and record videos easily.You have easy access to webcam controls and settings:1. Preview window2. Capture mode: photo/video3. Capture button4. Webcam controls5. Photo thumbnails6. Video thumbnails7. Click a thumbnail to enter the galleryViewing and sharing usingthe GalleryClicking on an image thumbnail in the gallery(1) opens the video or photo in the review window (2). You can then:• Attach the video or picture file to an e-mail (3)• Edit the photo or splice together video (4)• Upload the picture or video to Facebook (5)• Upload a video to Twitter or YouTube (6)You may also drag and drop a gallery image onto one of the function tiles (items 3–6) to launch an editing application or to attach or upload.10 EnglishGetting started withUsing motion detection• Set up your webcam to record video when it detects movement. • Adjust captured video duration and detection sensitivity. • Captured video is automatically saved to your computer.• View content in the Gallery or upload it using the One-touch Upload window.Fine tuning your webcam duringa video call1. Launch the webcam controller when on a video call.2. Use pan and tilt to find the best angle.3. Zoom in or out to include/exclude your surroundings.4. Use Follow my face so you’re always in the picture.5. Enjoy clear conversations without annoying background noise.6. Correct for poor lighting environments using RightLight.7. Choose between auto- or manual focus.8. Adjust advanced webcam settings.。
Logitech QuickCam Sphere AF 说明书

Logitech™QuickCam™Sphere AF User’s Guide1 Camera FeaturesEnglishContentsThank you for purchasing your new Logitech QuickCam Sphere AF with Carl Zeiss optics and autofocus. This guide will help you install and get the best performance from your webcam.English . . . . . . . . . . . . . . . . . . . . . . . . . . . . . . . . . . . . . . . . . . . . . . . . . . . . . . . . . . . . . . . . . . . . . 繁體中文 . . . . . . . . . . . . . . . . . . . . . . . . . . . . . . . . . . . . . . . . . . . . . . . . . . . . . . . . . . . . . . . . . . .1 简体中文 . . . . . . . . . . . . . . . . . . . . . . . . . . . . . . . . . . . . . . . . . . . . . . . . . . . . . . . . . . . . . . . . . . . 1 한국어 . . . . . . . . . . . . . . . . . . . . . . . . . . . . . . . . . . . . . . . . . . . . . . . . . . . . . . . . . . . . . . . . . . . . . 0CameraActivity lightMicrophoneCarl Zeiss optics with autofocus9’’ ( .9cm) eye-level standUSB cableCamera bottom Stand topBase top Stand bottomLine up connectors Line up connectorsIncorrectCorrect: Hold base and stand to move camera.Using the camera standRemove the camera from the base .Connect the stand to the base . Carefully use the alignment features to connect the stand easily to the base.Connect the camera to the stand . Carefully line up the connectors on the stand with the connectors on the camera.Do not carry the camera by the stand . The base could detach from the stand, and the base could get damaged if it were to hit the floor. Move the unit by holding on to the base and stand at the same time.1 . . . . Install the Software FirstInsert the installation CD into your CD-ROM/DVD-ROM drive. Your CDshould start automatically. If it does not, follow the steps below:Double-click the My computer icon. Alternatively, click Start My computer.Right-click the CD-ROM/DVD-ROM drive icon, and then click Autoplay.••Install the software before plugging in the camera. Many of your camera’s extended features, including autofocus, will not operate properly without the complete software installation.Connect Your Camera to Your ComputerWait until you are prompted by the software beforeconnecting your camera to an available USB port on your computer.Position Your Camera, Microphone,and SpeakersYour camera comes with Logitech RightSound Technology. RightSound Technology cancels echo and significantly reduces background noise. The following steps will ensure the best possible audio performance:Tabletop Placement . The camera can be placed on a tabletop next to your computer monitor. Use the camera on its base, or use the stand to raise the camera to your eye level.Monitor Placement . If there is a flat, stable surface on top of your monitor, place the camera on the base in the middle of your monitor for optimal eye contact. You don’t need to use the stand on your monitor.Camera Rotation . Do not manually rotate the camera on the base or on the stand. You could damage the camera. Use your mouse or keyboard to pan and tilt the camera. Or activate face-tracking for automatic camera movements. Position your camera’s microphone no more than 3 feet (915 mm) away from you and point it toward you.Position your speakers (if used) at least 12 inches (305 mm) away from your microphone to reduce feedback, and then angle your speakers away from your microphone.•••••Tip Do not place objectsbetween you and the microphone.The Audio Tuning WizardThe first time that you start QuickCam, you are guided through the Microphone/Speaker Setup Utility and Audio Tuning Wizard that lets you do the following:Select the audio input device (microphone) and audio output device (speakers).Enable Acoustic Echo Cancellation (AEC)—recommended.Enable background suppression—recommended.Specify microphone input volume and speaker output volume.Test audio settings.In situations with loud and irregular background noise, your voice can become distorted when using noisesuppression. If this occurs, disable noise suppression in the QuickCam software.Tip To change your audio settings in the QuickCamsoftware, click the Settingsbutton, and then click the Audio tab.•••••Your camera is now set up and ready to go!There are many ways to enjoy using your new webcam, includingMaking free video calls to friends and family. (Installation and use of an instant messaging application is required. Click in the QuickCam software to learn more.)Taking still photos or recording videos to share or e-mail.Adding videos to your E-bay auctions (see www .logitech .com/videosnap ).Using the QuickCam SoftwareTo start the Logitech QuickCam software, do either of the following:On your desktop, double-click the QuickCam icon.- or-In the lower-right corner of your desktop in the taskbar, click the QuickCam icon.•••••Tip To personalise your video calls with customized Avatar images, Face Accessories, or Fun Filters,click the Video Effects button.10 Using AutofocusThe autofocus system will ensure that images as close as 10 cm to the camera will be put in focus, automatically. If you wish to control the lens focus manually, switch to manual mode in ‘‘autofocus’’ controls on the Settings tab of the QuickCam software.Record videos or capture images.Enable Logitech Video Effects.Enable Audio & Video Mute (when on a video call). Specify camera settings.Install and use video programs and services.Congratulations9 QuickCam Software FeaturesLogitech RightLight2 ensures that you automatically get the best image quality in harsh, dim, or back litconditions that usually cast a shadow on your face. When your camera determines that you are experiencing these situations, a dialog box appears asking if you want to turn on Logitech RightLight2. Click Yes to let your camera automatically adjust frame rates, color, and exposure to produce the best image quality.To manually adjust these settings, click theSettings button.1 For More InformationAudio Information. Go to http://www .logitech .com/rightsound .Software Updates. Go to http://www .logitech .com/support .Additional Help. Launch the software and click the Help button.To learn more about Logitech products, go to http://www .logitech .com .UL Testing . Your product is UL tested and should only be used with other UL listed devices. Compliance . For compliance information, go to http://www .logitech .com/compliance .11 Ensure Quality ImagesLogitech Hardware Product Limited WarrantyLogitech warrants that your Logitech hardware product shall be free from defects in material and workmanship for two (2) years, beginning from the date of purchase. Except where prohibited by applicable law, this warranty is nontransferable and is limited to the original purchaser. This warranty gives you specific legal rights, and you may also have other rights that vary under local laws. RemediesLogitech’s entire liability and your exclusive remedy for any breach of warranty shall be, at Logitech’s option, to repair or replace the hardware, provided that the hardware is returned to the point of purchase, or such other place as Logitech may direct, with a copy of the sales receipt and/or local warranty card. Shipping and handling charges may apply except where prohibited by applicable law. Logitech may, at its option, use new or refurbished or used parts in good working condition to repair or replace any hardware product. Any replacement hardware product will be warranted for at least the remainder of the original warranty period, or for any additional period of time that may be applicable in your jurisdiction. Limits of WarrantyThis warranty does not cover problems or damage resulting from (1) accident, abuse, misapplication, or any unauthorised repair, modification or disassembly; (2) improper operation or maintenance, usage not in accordance with product instructions or connection to improper voltage supply; or (3) use of consumables, such as replacement batteries, not supplied by Logitech except where such restriction is prohibited by applicable law.How to Obtain Warranty SupportBefore submitting a warranty claim, we recommend you visit the support section at for technical assistance. Valid warranty claims are generally processed through the point of purchase during the first 2 years after purchase; however, this period of time may vary depending on where you purchased your product. Please check with Logitech or the retailer where you purchased your product for details. Warranty claims that cannot be processed through the point of purchase and any other product related questions should be addressed directly to Logitech. The addresses and customer service contact information for Logitech can be found in the documentation accompanying your product and on the web at /contactus.Limitation of LiabilityLOGITECH SHALL NOT BE LIABLE FOR ANY SPECIAL, INDIRECT, INCIDENTAL, OR CONSEQUENTIAL DAMAGES WHATSOEVER, INCLUDING BUT NOT LIMITED TO LOSS OF PROFITS, REVENUE OR DATA (WHETHER DIRECT OR INDIRECT) OR COMMERCIAL LOSS FOR BREACH OF ANY EXPRESS OR IMPLIED WARRANTY ON YOUR PRODUCT EVEN IF LOGITECH HAS BEEN ADVISED OF THE POSSIBILITY OF SUCH DAMAGES. Some jurisdictions do not allow the exclusion or limitation of special, indirect, incidental, or consequential damages, so the above limitation or exclusion may not apply to you. Duration of Implied WarrantiesEXCEPT TO THE EXTENT PROHIBITED BY APPLICABLE LAW, ANY IMPLIED WARRANTY OR CONDITION OF MERCHANTABILITY OR FITNESS FOR A PARTICULAR PURPOSE ON THIS HARDWARE PRODUCT IS LIMITED IN DURATION TO THE DURATION OF THE APPLICABLE LIMITED WARRANTY PERIOD FOR YOUR PRODUCT. Some jurisdictions do not allow limitations on how long an implied warranty lasts, so the above limitation may not apply to you. National Statutory RightsConsumers have legal rights under applicable national legislation governing the sale of consumer goods. Such rights are not affected by the warranties in this Limited Warranty.No Other WarrantiesNo Logitech dealer, agent, or employee is authorized to make any modification, extension, or addition to this warranty.1 攝影機外觀說明繁體中文感謝您購買羅技具自動對焦功能與卡爾蔡司光學鏡頭的 QuickCam Sphere AF 。
Logitech CC5000E PLUS 设置指南说明书
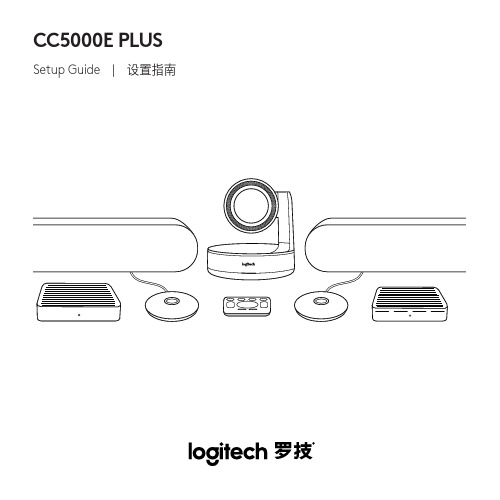
CC5000E PLUS Setup Guide | 设置指南English 3简体中文 1021. Power2. Mic Pod3. Future Expansion4. Connection To Display Hub5. HDMI 1 In6. HDMI 2 In7. Meeting Room Computer USB8. Future Expansion9. Security Slot10. Power LEDWHAT’S WHATTABLE HUBEnglish 31. Speaker2. Power3. Connection To Table Hub4. HDMI 1 Out5. HDMI 2 Out6. Meeting Room Computer USB7. Camera8. Security Slot9. Remote Control Pairing10. Power LEDDISPLAY HUB4 EnglishCAMERA1. Remote control pairing button2. USB3. Status LED4. Security slot5. MIPI6. Tripod Thread7. Expansion SlotEnglish 5REMOTE1. Bluetooth pairing2. Call answer3. Call end4. Microphone mute5. Zoom in/out6. Volume up/down7. Home8. Camera pan/tilt9. Camera presetsAfter completing the installation, the system can be checked by running the diagnostic application available at Logitech com/support/Rally6 EnglishMAKE RALLY PLUSTHE DEFAULT DEVICEEnsure that RALLY PLUS is chosen as the camera, speaker and microphonein your video conferencing applications Please consult the application documentation for further instructions on how to do thisSTARTING A VIDEO CALLAfter installing RALLY PLUS and ensuring it is the default device in your video conferencing application, simply start the application in the normal manner and enjoy the benefits of improved audio and video PAIRING RALLY PLUSTO A BLUETOOTH DEVICEYou can use RALLY PLUS for audio calls when paired to a Bluetooth device To pair your Bluetooth device to RALLY PLUS, follow these simple step:1. Press and hold the Bluetooth button on the remote control until you seea flashing blue light on the camera and microphones2. Place your mobile devicein Bluetooth pairing mode and select “Logitech Rally”3. You are now ready to use RALLY PLUS for audio callsEnglish 7PAIRING A REMOTE CONTROL TO RALLY PLUSRALLY PLUS and the remote control are paired at the factory You can pair up to 5 remote controls to RALLY PLUS to make it easier to control the system in larger rooms Or, if you need to pair a remote to the camera, such as when replacing a lost remote, do the following:1. Press and hold the button onthe camera until the LED flashes2. Press and hold the button onthe Display Hub until the LED flashes 3. Press and hold the Bluetooth button on the remote control until the LEDs on both the camera and Display Hub stop flashing4. If the pairing fails, repeat from step 1 CAMERA SETTINGS APPLICATIONUse this program to control the camera pan, tilt, zoom, focus, and image quality (like brightness and contrast) from your computer The software can be downloaded from www logitech com/ support/Rally8 EnglishENHANCING RALLYThere are several optional accessories that ease installation and allow RALLY PLUSto be used in larger rooms:1. Rally Mounting Kit: Mounting brackets for the Table Hub, Display Hub, Camera and Speakers2. Extra Mic Pods: RALLY PLUScan support up to 7 Mic Pods allowing great flexibility in room size and configuration3. Mic Pod Hub: Used to branch microphone routing and run most of the Mic Pod cabling is below the table The Mic Pod Hub has 3 jacks that can be connected to a combination of Mic Pods or other Mic Pod Hubs4. TV mount: Works with one of either the Camera or Speaker mounting brackets The TV Mount can be used in pairs to mount the Camera and Speaker above and below the TV FOR MORE INFORMATION You can find additional information on RALLY PLUS including:- F AQs- S oftware to enable functionsin various application- H ow to order replacement parts and more atwww logitech com/support/RallyEnglish 91. 电源2. 麦克风3. 未来扩展4. 连接至显示器集线器5. HDMI 1 输入6. HDMI 2 输入7. 会议室电脑 USB8. 未来扩展9. 防盗锁插孔10. LED 电量指示灯硬件说明桌面集线器10 简体中文简体中文 111. 音箱2. 电源3. 连接至桌面集线器4. HDMI 1 输出5. HDMI 2 输出6. 会议室电脑 USB7. 摄像头8. 防盗锁插孔9. 远程控制配对10. LED 电量指示灯显示器集线器912 简体中文1. 遥控器配对按钮2. USB 端口3. LED 状态指示灯4. 安全槽5. MIPI 端口6. 三脚架安装螺纹7. 扩展插孔1. 蓝牙配对2. 接听通话3. 结束通话4. 麦克风静音5. 放大/缩小6. 音量增大/减小7. 主页键8. 摄像头平移/倾斜9. 摄像头预置安装完成后,可运行诊断应用程序检查系统,下载请访问 Logitech com/support/Rally。
- 1、下载文档前请自行甄别文档内容的完整性,平台不提供额外的编辑、内容补充、找答案等附加服务。
- 2、"仅部分预览"的文档,不可在线预览部分如存在完整性等问题,可反馈申请退款(可完整预览的文档不适用该条件!)。
- 3、如文档侵犯您的权益,请联系客服反馈,我们会尽快为您处理(人工客服工作时间:9:00-18:30)。
4/7
[罗技 c930e 摄像头刷新操作手册]
1.2. 下载更新驱动程序(win 7/win8/Win10 系统)
点击链接下载驱动程序; https:///c930edriver/c930e_0843.exe
1.3. 摄像头刷新操作(win 7/win8/Win10 系统)
中国电信 罗技 c930e 摄像头刷新操作手册
版本:1.0
[罗技 c930e 摄像头刷新操作手册]
文档信息
文档名称: 保密级别 文档管理编号 制作人: 复审人: 扩散范围:
罗技 c930e 摄像头刷新操作手册
低
文档版本编号:
管理人:
宋明康
制作日期:
复审日期:
1.0 2016/3/15
版本记录
版本编号 1.0
联系人 2:刘峰 邮件 : liuf@ 手机 : 13535307615
[罗技 c930e 摄像头刷新操作手册]
Microsoft Partner | DELL Primper Partner | Oracle Gold Partner
7/7
版本日期 2016/3/15
修改者 宋明康
说明 初稿
文档说明
此文档是由中通信息服务有限公司物资分公司根据罗技摄像头官方的刷新操作步骤, 为使用者提供的实施记录。
版权说明
本文件中出现的任何文字叙述、文档格式、插图、照片、方法、过程等内容,除另有特别注 明,版权均属中通信息服务有限公司物资分公司所有,受到有关产权及版权法保护。任何个 人、机构未经中通信息服务有限公司物资分公司的书面授权许可,不得以任何方式复制或引 用本文件的任何片断。
iv. 更新完成;
v. 点击关闭;
Microsoft Partner | DELL Primper Partner | Oracle Gold Partner
6/7
2. 摄像头刷新不支持 XP
3. 联系方式
联系人 1:宋明康 邮件 :songmk@ 手机 : 13660578925 QQ : 2429506490
Microsoft Partner | DELL Primper Partner | Oracle Gold Partner
3/7
1. 接入摄像头
[罗技 c930e 摄像头刷新操作手册]
1.1. 确认摄像头型号,并打开摄像头包装,将 usb 插头接 入电脑
Microsoft Partner | DELL Primper Partner | Oracle Gold Partner
i. 右键以管理员身份运行 c930e_0843.exe 软件;
Microsoft Partner | DELL Primper Partner | Oracle Gold Partner
5/7
[罗技 c930e 摄像头刷新操作手册]
ii. 从 8.0885 更新到 8.0.895,点击“ok”按钮; iii. 开始更新(切勿拔掉摄像头 usb 插口);
2. 摄像头刷新不支持 XP..............................................................................................................7 3. 联系方式...................................................................................................................................7
Microsoft Partner | DELL Primper Partner | Oracle Gold Partner
2பைடு நூலகம்7
[罗技 c930e 摄像头刷新操作手册]
目录
1. 接入摄像头...............................................................................................................................4 1.1. 确认摄像头型号,并打开摄像头包装,将 usb 插头接入电脑 ...............................4 1.2. 下载更新驱动程序(win 7/win8/Win10 系统) ......................................................5 1.3. 摄像头刷新操作(win 7/win8/Win10 系统) .........................................................5