英文测距仪说明书
FLUKE 421D Distance Meter 说明书

September 2009 (Simplified Chinese)© 2009 Fluke Corporation. All rights reserved. Specifications are subject to change without notice. All product names are trademarks of their respective companies. 421D Distance Meter用户手册有限保证和责任限制在正常使用和维护条件下,Fluke 公司保证每一个产品都没有材料缺陷和制造工艺问题。
保证期为从产品发货之日起二(2)年。
部件、产品修理和服务的保证期限为 90 天。
本项保证仅向授权零售商的原始买方或最终用户提供,并且不适用于保险丝和一次性电池或者任何被 Fluke 公司认定由于误用、改变、疏忽、意外非正常操作和使用所造成的产品损坏。
Fluke 公司保证软件能够在完全符合性能指标的条件下至少操作90 天,而且软件是正确地记录在无缺陷的媒体上。
Fluke 公司并不保证软件没有错误或无操作中断。
Fluke 公司仅授权零售商为最终客户提供新产品或未使用过产品的保证。
但并未授权他们代表 Fluke 公司提供范围更广或内容不同的保证。
只有通过 Fluke 授权的销售商购买的产品,或者买方已经按适当的国际价格付款的产品,才能享受 Fluke 的保证支持。
在一个国家购买的产品被送往另一个国家维修时,Fluke 公司保留向买方收取修理/更换零部件的进口费用的权利。
Fluke 公司的保证责任是有限的,Fluke 公司可以选择是否将依购买价退款、免费维修或更换在保证期内退回到 Fluke 公司委托服务中心的有缺陷产品。
要求保修服务时,请与就近的 Fluke 授权服务中心联系,获得退还授权信息;然后将产品连同问题描述寄至该服务中心,并预付邮资和保险费用(目的地离岸价格)。
激光测距仪说明书

MEDIDOR LÁSERPrecauciónEn primer lugar, gracias por elegir el medidor de distancia láser de mano.Lea atentamente las instrucciones de seguridad y el manual del usuario antes de utilizar este producto; de lo contrario, puede provocar una radiación láser peligrosa e incluso una descarga eléctrica. La persona responsable del equipo debe asegurarse de que todos los usuarios comprendan estas instrucciones y las cumplan.•Este producto es un producto láser de clase. No mire fijamente a la luz del láser en ningún momento cuando utilice este producto.•No mire directamente a la luz incluso si tiene ayudas ópticas (por ejemplo, binoculares, telescopios, etc.•No quite ninguna etiqueta de seguridad de este producto.•El rango de medición es de entre 0.05m ~ 60m•Función de cálculo:a. Áreab. Volumenc. Altura (teorema de Pitágoras)d. Suma y restae. Suma de área•Almacenamiento y recuperación de resultados de medición•Sistema de unidades métricas y británicas•LCD con luz de fondo•Apagado automáticoMedición única √Max. / Min. Medición √Medición continua √Área / Suma de área / Volumen √Configuración de la unidad √Configuración de referencia √Iluminación de la pantalla √Indicador de icono de operación √Pantalla multilínea √Indicador de zumbador √Registros de datos históricos 30 gruposLimpieza de datos √Código de mensaje de error √Indicador de batería √Apagado automático del láser Después de 30s Apagado automático del medidor láser Después de 180sRango de medición 0.05m ~ 60m Precisión de medición(desviación estándar) ±2.0mmUnidad de medida m, pies, pulgadas Unidad área m 2, ft 2 Tipo de láser 620 ~ 690 nm Clase de láser Ⅱ,<1mW Punto láser @ distancia 8mm@10m,40mm@50m Tiempo de medición única 0.25~4s Temperatura de funcionamiento 0~+40℃ Temperatura de almacenamiento -20~+65℃Pilas AAA(Alcalina), 2x1.5VMedidas por juego de baterías >8000*El error de desviación máxima o rango más corto se produce en condicionesdesfavorables como la luz solar intensa o cuando se miden superficies muy poco reflectantes o muy rugosas, la temperatura ambiente es demasiado alta o demasiado baja.• Al medir dentro de los 10 m: la precisión de la medición es de ± 2,0 mm• Más de 10 m, la precisión de la medición se calcula de la siguiente manera: ±2,0 mm ± 0,1 * (D-10) (D: Distancia de medición, Unidad: m)AtenciónNo se puede:1. Abrir el equipo con herramientas (destornilladores, etc.), en la medida en que noesté específicamente permitido para determinados casos. 2. Apuntar directamente al sol3. Usar fuera de los límites establecidos4. Sumergir el equipo en agua5. Limpiar la lente con alcohol o cualquier otro solvente orgánico.6. Limpiar la lente directamente con los dedos u otras superficies rugosas7. Encender el equipo más allá del voltaje de CC nominalDescripción de la pantalla LCD y el teclado1. Láser encendido 10. Encendido / Medición2. Referencia 11. Área / volumen / Pitágoras3. Medición continua4. Lectura actual12. Referencia / Menos5. Área / resumen área / volumen /Pitágoras13. Pulsar [+] / Pulsar [-] / Luz anterior / Botón de registros de datos históricos6. Estado de la batería7. Lecturas históricas 8. Añadir y restar9. Unidad14. Borrar / ApagarPuesta en marchaInstalación de la batería• Según las figuras, retire la tapa del compartimento de la batería• Inserte las pilas con la polaridad correcta de acuerdo con las indicaciones de latapa de las pilas.• Cierre la tapa del compartimento de la batería.Precaución• No mezcle pilas nuevas y viejas, utilice pilas alcalinas o pilas recargablesúnicamente.• Reemplace las pilas cuando el símbolo parpadee permanentemente en lapantalla.• Retire las pilas antes de un período prolongado de inactividad.• Las pilas descargadas no deben desecharse con la basura doméstica. Cuide elmedio ambiente y llévelos a los puntos de recogida previstos de acuerdo con las normativas nacionales o locales.1 2 5 6 73 84 91011 131412Mantenga pulsado el botón para encender el equipo con laconfiguración de referencia predeterminada del modo de mediciónúnica, la referencia trasera y el sistema de unidades métricas. Al mismotiempo, también indica la intensidad del estado de la batería como semuestra en la figura de la izquierda.Mantenga pulsado el botón de apagado para apagar el equipo. El láser se apagará automáticamente después de 30 segundos y el equipo se apagará después de 3 minutos de inactividadCambiar referencia de mediciónLa configuración predeterminada de la medición es el borde trasero cuando se enciende. Al presionar este botón cambiará la referencia de medición;Botón BorrarAl presionar el botón para borrar el último comando o los datos mostrados por líneas. Pantalla de luz de fondoLa configuración predeterminada del fondo de la pantalla LCD se apaga. Al presionar el botón se encenderá o apagará la luz de fondo de la pantalla LCD;Conversión de unidadesLa configuración predeterminada de la unidad de medida es la unidad métrica. Si presiona durante mucho tiempo el botón , se convertirá la unidad a pulgadas (sistema británico) y así sucesivamente como se muestra en la figura.Cuando el equipo está encendido, presionar el botón activará el láser y apuntará el láser al objetivo y presionar el botón nuevamente activará la medición modo único, el resultado se mostrará inmediatamente como se muestra en la figura.Medición en modo continuoCuando el equipo está encendido, presiona el botón de formaprolongada activará la medición en modo continuo. MIN: VALOR MÍNIMO MAX: VALOR MÁXIMOEl valor de medición actual se muestra en la línea inferior de la pantalla LCD como se muestra en la figura.Área, volumen, medición indirecta (teorema de Pitágoras)• Presione el botón para cambiar las funciones de medición, respectivamente • Seleccione la función correspondiente y comience la mediciónMedición modo únicoMedición de áreaFunción de suma deáreasMedida de volumen Medida de altura 1Medida de altura 2Funciones de suma y restaAlmacenamiento y recuperación de resultados de mediciónEl equipo almacenará automáticamente los resultados de la última medición de Grupos en secuencia inversa.• En el estado de espera, al presionar los botones o se recuperarán los resultados históricos de la medición con la primera lectura como el registro Nº1 y así sucesivamente, como se muestra en la figura.• Cuando el espacio de registro está lleno, el equipo eliminará directamente la primera lectura y almacenará la lectura actual.Código mensajePosible causa Solución err101 Batería demasiado bajaCambiar pilaserr104Error de cálculoRepita el procedimiento err154 Fuera de rangoMide el objetivo con la distancia del rango demedición err155 La señal recibida es demasiadodébilUtilice la planta de destinoerr194Desbordamiento de datos+ El resultado de la medición actual se suma al anterior - El resultado de la medición actual se resta del anterior•No deseche los aparatos eléctricos ni pilas como residuos municipales sin clasificar, use instalaciones de recolección separadas.•Comuníquese con su autoridad local para obtener información sobre los sistemas de recolección disponibles.•Si los aparatos eléctricos se desechan en vertederos, las sustancias peligrosas pueden filtrarse al agua subterránea y entrar en la cadena alimentaria, dañando su salud y bienestar.MEDIDOR LÁSER。
全功能激光测距设备说明书
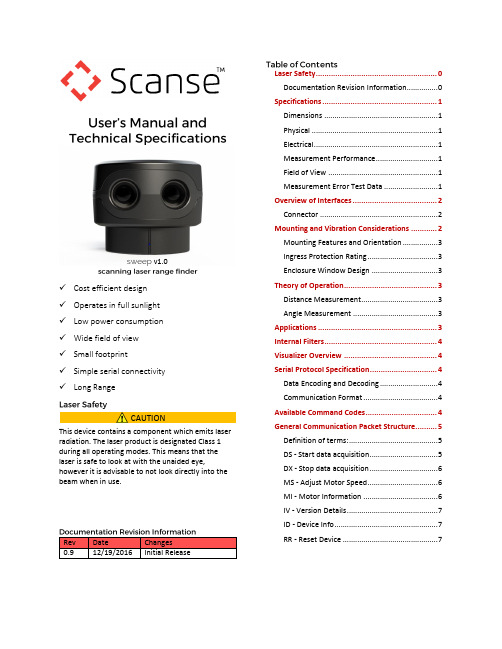
✓Cost efficient design✓Operates in full sunlight✓Low power consumption✓Wide field of view✓Small footprint✓Simple serial connectivity✓Long RangeThis device contains a component which emits laser radiation. The laser product is designated Class 1 during all operating modes. This means that the laser is safe to look at with the unaided eye, however it is advisable to not look directly into the beam when in use.Rev Date Changes0.9 12/19/2016 Initial Release Laser Safety 0Documentation Revision Information 0Specifications (1)Dimensions (1)Physical (1)Electrical (1)Measurement Performance (1)Field of View (1)Measurement Error Test Data (1)Overview of Interfaces (2)Connector (2)Mounting and Vibration Considerations (2)Mounting Features and Orientation (3)Ingress Protection Rating (3)Enclosure Window Design (3)Theory of Operation (3)Distance Measurement (3)Angle Measurement (3)Applications (3)Internal Filters (4)Visualizer Overview (4)Serial Protocol Specification (4)Data Encoding and Decoding (4)Communication Format (4)Available Command Codes (4)General Communication Packet Structure (5)Definition of terms: (5)DS - Start data acquisition (5)DX - Stop data acquisition (6)MS - Adjust Motor Speed (6)MI - Motor Information (6)IV - Version Details (7)ID - Device Info (7)RR - Reset Device (7)CAUTION sweep v1.0ALL DIMENSIONS ARE IN MM, DRAWINGS ARE NOT TO SCALE Figure 1, Sweep Dimension Drawing Specification ValueWeight 120 g (4.23 oz.) Operating Temperature -20 to 60° C (-4 to 140°F) Storage Temperature -40 to 80° C (-40 to 176°F) Specification ValuePower 5VDC ±0.5VdcCurrent Consumption Up to 650mA450mA nominal Specification ValueRange(75% reflective target)40 m (131ft) Resolution 1 cm (0.4 in)Update Rate(75% reflective target) Up to 1075Hz (see“Theory of Operation”)Sweep is a single plane scanner. This means that asits head rotates counterclockwise, it records data ina single plane. The beam starts out at approximately12.7mm in diameter and expands by approximately0.5 degrees as show in Figure 2.Figure 2, Sweep Field of View1020300%5%10%15%20%25%30%01000200030004000±cmMeasurementVariability%ErrorRange in CentimetersLong Range Error With 75% Reflective Target1020300%5%10%15%20%25%30%0100200300400500±cmMeasurementVariability%ErrorRange in CentimetersClose Range Error With 75% Reflective TargetSpecification ValueHorizontal Field of View 360 degreesVertical Field of View 0.5 degreesSweep can be connected to low level micro controllers directly using its serial port, or to a PC using the provided USB to serial converter.Figure 4, Sweep Cable DiagramSweep has two serial port connectors with identicalsignals. This allows for more mounting options.Figure 5, Sweep Pigtail Cable Connector DetailPin Color Function1 Red 5 Vdc (+) (minimum 0.5A capable)2 Orange Power enable (internal pull-up)3 Yellow Sync/Device Ready4 Green UART RX 3.3V (5V compatible)5 Blue UART TX 3.3V (5V compatible)6 Black Ground (-)You can create your own cable if needed for yourapplication. These components are readily available.Part Description Mfg. Part No.ConnectorHousing6-Position,rectangularhousing, latch-lock connectorreceptacle with1.25 mm(0.049 in.) pitch.JST GHR-06V-SConnectorterminal26-30 AWG crimpsocket connectorJST SSHL-002T-P0.2Wire UL 1061 26 AWGstranded copperN/A N/ASweep can be mounted in any orientation. Sweep’srotating head is dynamically balanced, which meansit is immune to linear vibration, but it can beaffected by rotational vibration. Sudden rotationalshocks can cause the head to either slow down orspeed up, which can affect data accuracy. If Sweep isrotationally jerked hard enough, it can cause themotor to lose sync, which will trigger a momentarymotor pause, and then restart.DRAWINGS ARE NOT TO SCALEFigure 6, Sweep Connector DiagramSweep has four brass threaded inserts designed to fitM2.5X0.45 screws in its base. These are the bestfeatures for mounting Sweep to an application. Thescrew holes are aligned with the scanner’smeasurement angles. The scanner’s zero degreestarting angle is aligned with the status LED, asshown in Figure 7.Sweep is rated as IP51, which is to say, it is not dustor water tight. It is recommended that Sweep beplaced inside a protective transparent enclosure if itwill be used in dusty or wet environments.Figure 7, Sweep Mounting Features (all dimensions in mm) Sweep uses 905nm laser light, which passes through several kinds of clear glass and plastic very well. Based on our testing, clear Polycarbonate plastic is one of the best choices, as it can be molded to fit the profile of the application’s enclosure, is very inexpensive, and in most cases, is more than 95% translucent to Sweep’s light beam. Factors that can affect the performance of a window are:∙Thickness of the window. Thicker windows will block more light, as well as bend the light more if the beam is not hitting the window normal to the surface.∙Scratches and dust. The presence of scratches and dust on the window will scatter the laser light, and may reflect some of the light back into the sensor’s detector, causing measurement errors.∙Surface coatings. There are a variety of coatings that can help with the performance of windows. One is an anti-reflective (AR) coating, which can help reduce the amount of laser light that is reflected as it passes through the window’s surface.Sweep employs a time of flight ranging method. This technique involves transmitting a packet of micro pulses of light in a unique pattern. When this light bounces off an object and returns to the receiving detector, a correlation algorithm is used to identify the unique light pattern from ambient noise. Each light packet is different from the last, which allows multiple Sweep sensors to operate adjacent to each other without interference.The light packets that Sweep uses can vary, which can affect accuracy of range measurements, as well as the maximum range and update rate. Under normal operation, Sweep limits the maximum time per measurement to around 1ms. Sometimes if not enough light is returned from the environment, the measurement fails, and a 1 is returned as the range value. On the other hand, if allot of light is returned from the environment, the correlation algorithm can reach its maximum accuracy early, and can return a range value in less than 1ms. This is what makes the update rate of Sweep variable.Sweep uses an optical encoder to measure the angle of the rotating sensor head. The angle that is recorded for a range data point is the angle the sensor is at when the measurement is completed.Sweep can be used for a variety of applications, including robot guidance/obstacle avoidance, 3D scanning, surveying, people tracking and many more.Sweep has the ability to perform some simple data filtering within the sensor itself. These filters are still in development, and are being made for specific customer segments. Examples include having Sweep split up its field of view into eight sections, then transmit only the closest objects within each of those sectors. Another example is to have Sweep only output data from a range of angles. If you have an application that requires a specific filter, please contact us.You can download the Sweep visualizer at www.scanse.io/downloadsThe purpose of the Scanse visualizer is to provide a way to quickly evaluate Sweep’s performance in your application/environment. For some applications, like surveying, our visualizer can be used to take quick measurements between range data points within a scan. It contains a programming tool for updating Sweep’s firmware.A full tutorial for using the visualizer can be found in software support section at support.scanse.io. Specification ValueBit Rate 115.2 KbpsParity NoneData Bit 8Stop Bit 1Flow Control NoneAll characters used for commands and responses are ASCII code in addition to CR and LF, except for the measurement packet.Responses with float values are sent as 16bit integer values.Example conversion:angle_f = 1.0f * ((float)(angle_i >> 4) + ((angle_i & 15) / 16.0f));All communication packets between the host computer and the sensor begin with ASCII letter command codes. ASCII Code (2 bytes) FunctionDS Start data acquisitionDX Stop data acquisitionMS Adjust Motor SpeedMI Motor InformationIV Version InfoID Device InfoRR Reset Device(HOST -> SENSOR) Command with no parameterCommand Symbol (2 bytes) Line Feed (LF)Example: DS, DX, MS, MI, IV…Line Feed (LF) or Carriage Return (CR) orCommand with parameterCommand Symbol (2 bytes) Parameter(2 bytes)Line Feed(LF)(SENSOR -> HOST)Response with no parameter echoedCommand Symbol (2 bytes) Status(2 bytes)Sum of Status Line Feed(LF)orCommand with parameter echoedCommand Symbol (2 bytes) Parameter(2 bytes)Line Feed(LF)Status(2 bytes)Sum of Status Line Feed(LF)Command Symbol: 2 byte code at the beginning of every command.Parameter: Information that is needed to change sensor settings.Line Feed (LF) or Carriage Return (CR): Terminating code. Command can have LF or CR or both as termination code but reply will always have LF as its termination code.Status: 2 bytes of data in reply that informs normal processing if command is authenticated or errors if undefined, invalid or incomplete command is received by sensor. Status other than 00 and 99 are error codes.Sum of Status: 1 byte of data used in authentication. Calculated by adding status bytes, taking lower 6 byte of this sum and adding 30H to this sum.Sum = 111111 = 3fH+30H = 6fH = oExample: [LF] 0 0 [LF] = PResponses to Invalid Commands: 11 -- Invalid parameter∙Initiates scanning∙Responds with header containing status.∙Next responds with measurement packets indefinitely until commanded to stop.(HOST -> SENSOR)D S LF(SENSOR -> HOST)Header responseD S Status(2 bytes) SUM(2 bytes)LFData Block (7 bytes) Data BlockSync/Error (1 byte) Azimuth - degrees(float)(2 bytes)Distance - cm(int)(2 bytes)Signal Strength (1byte)Checksum(1 byte)sync / error: 0 bit indicates the sync value, a value of 1 indicates the packet is the beginning of a new scan, a value of 0 indicates all other measurement packets. Bits 1-6 are reserved for error codes.azimuth: Angle that ranging was recorded at. Azimuth is a float value - needs to be converted from 16bit int to float, use instructions at the topdistance: Distance of range measurement.signal strength: Signal strength of current ranging measurement. Larger is better. Range: 0-255checksum: Calculated by adding the 6 bytes of data then dividing by 255 and keeping the remainder. (Sum of bytes 0-6) % 255Status00 -- Command received without any Error22 -- Stopped to verify error55 -- Hardware trouble99 -- Resuming operationStops outputting measurement data.(HOST -> SENSOR)D X LF(SENSOR -> HOST)D X Status SUM LFDefault Speed: Sensor stores last speed command in non-volatile memory, and will return to that speed after a power cycle, except if the last state was speed 00 (stopped).(HOST -> SENSOR)M S Speed Parameter (2 bytes)LFSpeed Parameter: 00 - 10 : 10 different speed levels according to revolutions per second (Hz), increments of 1. Example: 01,02,..00 = Motor stopped(SENSOR -> HOST)M S Speed(Hz)(2 bytes)LF Status Sum LFReturns current rotation frequency in Hz in ASCII 00 - 10 (increments of 1) (HOST -> SENSOR)M I LF(SENSOR -> HOST)M I Speed(Hz)(2 bytes)LF Status Sum LF∙Model∙Protocol Version ∙Firmware Version ∙Hardware Version ∙Serial Number (HOST -> SENSOR)I V LF (SENSOR -> HOST)I V Model(5 bytes)Protocol(2 bytes)Firmware Version(2 bytes)Hardware Version(1 byte)Serial Number(8 bytes)LFExample: IVSWEEP01011100000001I V SWEEP 01 01 1 00000001 LF ∙Bit Rate∙Laser State∙Mode∙Diagnostic∙Motor Speed∙Sample Rate(HOST -> SENSOR)I D LF(SENSOR -> HOST)I D Bit Rate(6 bytes)Laser state Mode DiagnosticMotor Speed(2 bytes)Sample Rate(4 bytes)LFExample: IV115200110050500I D 115200 1 1 0 05 0500 LF ∙Reset Scanner(HOST -> SENSOR)R R LF(SENSOR -> HOST)R R Status Sum LF。
Leica DISTO D810 touch 测距仪使用手册

ZH
水平 - - - - - - - - - - - - - - - - - - - - - - - - - - - - - - - - - - - - - - - - 21 面积 - - - - - - - - - - - - - - - - - - - - - - - - - - - - - - - - - - - - - - - - 21 体积 - - - - - - - - - - - - - - - - - - - - - - - - - - - - - - - - - - - - - - - - 22 照片 - - - - - - - - - - - - - - - - - - - - - - - - - - - - - - - - - - - - - - - - 23 罗盘 - - - - - - - - - - - - - - - - - - - - - - - - - - - - - - - - - - - - - - - - 24 图库 - - - - - - - - - - - - - - - - - - - - - - - - - - - - - - - - - - - - - - - - 25 三角形面积 - - - - - - - - - - - - - - - - - - - - - - - - - - - - - - - - - - - - 26 远程模式 - - - - - - - - - - - - - - - - - - - - - - - - - - - - - - - - - - - - - 26 高度剖线测量 - - - - - - - - - - - - - - - - - - - - - - - - - - - - - - - - - - 27 倾角测量 - - - - - - - - - - - - - - - - - - - - - - - - - - - - - - - - - - - - - 28 高度跟踪 - - - - - - - - - - - - - - - - - - - - - - - - - - - - - - - - - - - - - 29 梯形 - - - - - - - - - - - - - - - - - - - - - - - - - - - - - - - - - - - - - - - - 30 放样功能 - - - - - - - - - - - - - - - - - - - - - - - - - - - - - - - - - - - - - 31 勾股定理测量 (2 点)- - - - - - - - - - - - - - - - - - - - - - - - - - - - 32 勾股定理测量 (3 点)- - - - - - - - - - - - - - - - - - - - - - - - - - - - 33 宽度 - - - - - - - - - - - - - - - - - - - - - - - - - - - - - - - - - - - - - - - - 34 直径 - - - - - - - - - - - - - - - - - - - - - - - - - - - - - - - - - - - - - - - - 35 照片中的区域 - - - - - - - - - - - - - - - - - - - - - - - - - - - - - - - - - - 36 技术参数 - - - - - - - - - - - - - - - - - - - - - - - - - - - - - - - - - - - - - - - 37 消息代码 - - - - - - - - - - - - - - - - - - - - - - - - - - - - - - - - - - - - - - - 38 保养 - - - - - - - - - - - - - - - - - - - - - - - - - - - - - - - - - - - - - - - - - - 38 保修期 - - - - - - - - - - - - - - - - - - - - - - - - - - - - - - - - - - - - - - - - - 38 安全说明 - - - - - - - - - - - - - - - - - - - - - - - - - - - - - - - - - - - - - - - 39 责任范围 - - - - - - - - - - - - - - - - - - - - - - - - - - - - - - - - - - - - - 39 禁止使用 - - - - - - - - - - - - - - - - - - - - - - - - - - - - - - - - - - - - - 39 使用限制 - - - - - - - - - - - - - - - - - - - - - - - - - - - - - - - - - - - - - 39 废物处置 - - - - - - - - - - - - - - - - - - - - - - - - - - - - - - - - - - - - - 39 电磁兼容性 (EMC) - - - - - - - - - - - - - - - - - - - - - - - - - - - - - - - 40 通过 Bluetooth® 使用产品 - - - - - - - - - - - - - - - - - - - - - - - - 40 激光分类 - - - - - - - - - - - - - - - - - - - - - - - - - - - - - - - - - - - - - 40 标识 - - - - - - - - - - - - - - - - - - - - - - - - - - - - - - - - - - - - - - - - 40
Triplett LD70 激光距离计说明书

Laser Distance MeterLD70 User ManualTriplett Test Equipment & Tools850 Perimeter Rd. Manchester, NH 03103Contents11234711121213IntroductionThis meter measures distance up to 70m (229.6’) and calculates Area, Volume, and Indirect readings using the Pythagorean Theorem (a2+b2=c2). It also includes a laser pointer, tripod mount and 20 point historical data group function. Please visit for the latest version of this User Guide, Product Updates, and Customer Support.Safety InstructionsThis meter has been designed for safe use,but must be operated with caution.Laser classification (Class 2)The meter produces a visible Class 2 laser beamfrom the top of the instrument.WARNING: Do not directly view or point the laser at an eye. Do not look directly into the beam using an optical aid such as binoculars. This can create a hazard. Low power visible lasers do not normally present a hazard, but may present some potential for hazard if viewed directly for extended periods of time.Please read all safety instructions carefully before using this instrumentDo not use this device in flammable or explosive environmentsDo not use this device near aircraft or medical equipmentDo not use this device near strong electro-magnetic interference Do not aim the meter directly into sunlightDo not dis-assemble or modify the instrumentDo not store in areas of high temperature/humidityRemove the batteries when storing the instrument for long periodsProduct introductionSafety instructions Description of display interface Keypad descriptionInitial operation and setting Measurement Measurement condition Product maintenanceFailure promptTechnical parametersDisplay DescriptionKeypad descriptionLaser indicationThe reference edge of measurement (Pythagorean Theorem) Indirect measurement Setting-out measurement Area/volume measurement Length measurement Battery level indication Stored data indication Angle indicationSignal strength Indication Auxiliary display area Main display area1. Power on/measurement key2. Area/volume key3. Indirect measurement key4. “+” Key5. Historical record key6. “-” Key7. Reference edge key 8. Clear/power off key 9. Unit keyLIMITED WARRANTYThe manufacturer warrants to the original consumer that this product is in good working order for a period of one year from the date of manufacture or the date of purchase. During This period, the product will be repaired or replaced without charge for either parts or labor. Repair or replacement as provided under this warranty is the exclusive remedy of the Purchaser.Initial operation and setting1. Install/replace the battery◆Open the battery cover.◆Install two battery AAA batteries provided by the manufacturer; it issuggested to use alkaline battery in the future); pay attention to thepolarity and don’t install reversely.◆Put the battery cover in placeHold down 【】 key for about 2 seconds to power on and enter thelength (distance) measurement mode automatically.3. Power offManual power off: hold down 【 】key to power off at any mode.Automatic power-off: the instrument will power off automatically if there is nokey operation within 46 seconds.4. Clearing functionsPress 【】key to cancel the last instruction or clear the display.5. Setting of the reference edgeThe default reference edge of the instrument is back side. And themeasurement starting point is the tail end. If the reference edge is set as frontPress 【】key to select reference edge: back side/front edge/after powering on the instrument again.6. Setting of function menuAt the power-off state, hold down 【】for about 5 seconds to entersetting state and set laser, data calibration, buzzer.The positioning hole of the tripod on theUnitMeasurement1. Single measurementIn the length measurement mode, press 】 key to open the laser. After the laser aims at the object, press key to carry out measure-ment. The measurement result is displayed at main display area. The auxiliary display area displays the distanced measured last time.2. Continuous measurementThe continuous measurement function may enable users to start from one measurement point and find a distance point or measure the minimum or maximum distance. For example, measure the diagonal distance (maximum In the length measurement mode, hold down 】 key to enter the continuous measurement mode and the buzzer sounds. The auxiliary display area on the screen displays the measured maximum value (MAX) and minimum value (MIN). The main display area displays the currently measured distance. Press [ ] key to exit from the continuous measurement mode.3. Area measurementPress 【 】key once and the screen displays . The edge to be measured flashes to prompt. Press 【】 key to complete measure-ment of length and width respectively and the instrument calculates the area automatically.4. Volume measurementPress 【 】key twice and the screen displays . The edge to be measured flashes to prompt. Press 】 key to complete measurement of length and width and height respectively and the instrument calculates the volume automatically.7. Check historical recordThe instrument saves 20 groups of latest data automatically. The new data overwrites the old data in proper order. In the length measurement mode, press 【 】 key to enter historical record mode. Press 【 】 and 【 】key to check the data. Press 【 】 to exit.8. Unit settingPress[ ] key to switch the unit.In the interface, press key to set the laser (the disappears).The laser symbol appears: indicate that the laser will open automatically after powering on.The laser symbol disappears: indicate that the laser will not Hold down 】key to adjust the parameters from -7mm to+7mm.Hold down 【】key for 2 seconds to exit from the setting state.Hold down 【】key for about setting interface. press 【】key to select on or off.aabcd5. Accumulation/ subtraction functionFor measurement of distance, area and volume, accumulation/subtractionoperation may be conducted through operation of addition and subtraction.Press [ ] key to carry out additive operation and press [ ] key tocarry out subtraction.press [ ] key and the left side of the screen displays “+” (forsubtraction, press [ ] key and the left side of the screen displays “-”).displayed on the main display area.Accumulation/ subtraction of area/volume: At the area/volume measurementmode, carry out the measurement to obtain an area/volume. For additiveoperation, press [ ] key and the left side of the screen displays “+” (forsubtraction, press [ ] key and the left side of the screen displays “-”).the result of accumulation (or subtraction) is displayed on the main displayarea.6. Indirect measurement with Pythagorean Theorem(1). As illustrated in following figure, measure the bottom edge andhypotenuse to calculate the height of the triangle.At the length measurement mode, press [ ] once and the screendisplays . The edge to be measured flashes to prompt. Pressautomatically (edge a).Note: when the bottom edge b of a triangle is measured, keep instrumenthorizontal as possible.(2). As illustrated in following figure, measure hypotenuse a, hypotenuse cand common right-angle edge b of a triangle to calculate the length of edge dof the triangle.At the length measurement mode, press [ ] key twice and the screendisplays . The edge to be measured flashes to prompt. Presscommon right-angle side b of a triangle. The instrument calculates the lengthof edge d of the triangle automatically.Note: when the common right-angle side b of a triangle is measured, keep theinstrument horizontal as possible.(3). As illustrated in following figure, measure hypotenuse a, hypotenuse b and common right-angle edge c of a triangle to calculate the length of edge d of the triangle.In the length measurement mode, press [ ] key three times and the screen displays . The edge to be measured flashes to prompt. Press 】key to complete measurement of hypotenuse a, hypotenuse b and common right-angle side c of a triangle. The instrument calculates the length of edge d of the triangle automatically.Note: when the common right-angle side c of a triangle is measured, keep the instrument horizontal as possible.7. Angle measurement functionThe angle and length of the hypotenuse are known, calculate the length ofMeasurement conditionThe measurement result will have large error under the condition of extremely strong sunshine, large fluctuation of temperature, weak reflection of reflector, etc. The effect will be better if objective reflect sheet is used under such condition.When the measured objects are colorless liquid (such as water), clean glass, etc or objects with transparent surfaces, mistaken measurement may take place. When the measured objects can reflect light strongly, the laser may be reflected. Accordingly, mistaken measurement may take place. When surface without reflection or very dark surface is measured, the measurement time is increased or error may be reported. Under such condition, the objective reflector sheet is used together.Product maintenanceDon’t place the instrument at a high temperature and high humidity environment for storage. Please take out the battery if it is out of use for a long time to avoid corrosion to the instrument by battery leakage.Please keep the instrument clean. Use soft and wet cloth to wipe the instrument shell. Please use cleanser for optical lens to wipe sensor lens and screen. Don’t use corrosive cleansers.a bcdMeasurement accuracy ±(3.0mm+5*10-5*D)Measurement unit Feet, inch and meter Laser grade Grade Ⅱ Laser parameters620-670nm ,<1mW Continuous measurement Addition/subtraction measurement: Area/volume measurementMeasurement with Pythagorean Theorem Maximum/minimum value measurement Angle measurement Historical measurement recordSetting-out function Calibration function Multiline display Buzzing promptOperation temperature 0~40℃ Storage temperature -20~60℃Power supply 2 AAA. 1.5V alkaline batteriesLaser automatic off 1 minuteAutomatic power off 3 minutesSize112.3mm×51.6mm×28.8mmFailure promptCode hint Er.b.L Er.b.H Er.t.L Er.t.H Er.d.H Er.d.E Er.L.H Er.S.L Er.S.HProduct type Measurement range WeightCausesThe battery voltageis too low.The battery voltageis too high.The temperature is too low. The temperature is too high. Data overflow Data error Ambient light is too strong Too weak signalToo strong signalCode hint Er.H.F Er.A.L Er.A.H Er.A.d Er.F.E Er.R o Er.U.L Er.U.HCauses Hardware error Internal error Internal error Internal error Storage error Excessive fluctuation Hardware error(the internal voltage is low) Hardware error(the internal voltage is high)Technical parametersHT-1910.05~70M100g (battery not included)√√√√√√√√√√√。
激光测距仪器说明书

Crane positioningStorage technology Elevator positioning Surveying applications ± 1 mmAccuracy:0 ... 500 m Measuring range:FLS-C –for fast measurements and unique accuracyDISTANCE MEASURING –contactless and reliablePowerError DO 1DO 20-20 mA101102..Serial interfaces9 (30V)IP65+50°C -40°C0.2 mm1 mm500 mFLS-C –for fast measurements and unique accuracyThe FLS-C distance measuring device measures absolute distances up to 500meters without contact.Due to most innovative laser technology the FLS-C has a unique accuracy of 1mm.A further advantage of the FLS-C is the quick registration of positions of moving objects.The FLS-C is an optical distance measuring device.It measures,main-tenance-free,distances on natural and reflecting surfaces.It determines positions of objects,that are difficult to access or may have very high surface temperatures.Just as well,it measures distances in hostile en-vironment accurately and with ease.Fast and accuratemDISTANCE MEASURING –contactless and reliableAccessoriesVarious accessories are available for the FLS-C distance measuring device.Further information can be found on our web site ().Configuration softwareFor simple configuration of the FLS-C measuring device self-explanatory software is provided.This software may be used to change settings on the measuring device in a fast and easy way.Various features can also be activated.The software is available free of charge as a download from our web site ().It also includes different languages for international use.Direct connection of an external displayDo you need an external display to directly read the measuring results?For displaying the measuring results with millimeter precision the device can be connected to an external display directly,via the serial interface RS-232or RS-422.Gain,offset and the output format can be configured easily.Flexible measurement outputThe measurement output of the FLS-C can be formatted to best suit an application.Standard outputs include a serial interface RS-232,RS-422,SSI and an analog output.Optionally,a connection to a Profibus-Master is also possible.The FLS-C device can be connected via a D-sub-connector or via screw terminals inside the device.Unique accuracy of 1mmThe FLS-C measures with an absolute accuracy of 1mm.The specified accuracy is reached over the complete range of measurement and temperature.Even a change of the target object does not affect the accuracy.The repeatability of the FLS-C measuring device is typically 0.3mm.As a result,the FLS-C is the preferred distance measuring device for surveying the geometry of objects as well as for supervising objects for movements.Its possible to gather the exact profile of a tunnel.Furthermore,for the definition of production data the FLS-C is used to measure the geometry of rooms or any kind of object.Creating templates by the FLS-C distance measuring device for production are applications which are found in several industries such as wood,stone,glass or shipbuilding.Fast determination of the position of moving objectsThe FLS-C distance measuring device is especially convenient for the fast determination of positions of moving objects,as you find them in small part-or high rack storage areas or in crane compositions.Absolute measuring error: ±1 mmHighlightsLASER RADIATION DO NOT STARE INTO BEAM CLASS 2 LASER PRODUCTDimetix AG Degersheimerstr. 14CH-9100 Herisau SwitzerlandTel.: +41 71 353 00 00Fax: +41 71 353 00 01****************Your local agent:Further information can be found in our manual.Product typeItem No.FLS-C 10600502FLS-C 30600501FLS-CH 10600504FLS-CH 30600503Design conditions Operating temperature STANDARD -10 °C ... +50 °C STANDARD -10 °C ... +50 °C WITH HEATER(extended temperature range)-40 °C ... +50 °C WITH HEATER-40 °C ... +50 °C (extended temperature range)Accuracy(includes all possible errors)± 1 mm ± 3 mm ± 1 mm ± 3 mm Repeatability (typ.)± 0.3 mm ± 0.5 mm± 0.3 mm± 0.5 mmResolution 0.1 mmMeasuring range –on reflective foil –on natural surfaces approx. 0.5 ... 500 m 0.05 ... approx. 65 m Measuring rate up to 200 Hz Supply voltage 9 ... 30 V DC 9 ... 30 V DC 24 ... 30 V DC 24 ... 30 V DCHousing Metal case IP 65Laser visible, red Dimensions 150 x 80 x 55 mm Weight 690 g690 g 720 g 720 gInterfaces –Standard–Option–1 serial interface RS-232 / RS-422 or SSI–1 analog output 0/4 ... 20 mA, programmable –3 digital outputs - 2 programmable, 1 error display –1 digital input for external trigger –ProfibusFLS-C –for fast measurements and unique accuracyDISTANCE MEASURING –contactless and reliable。
Leica DISTO D110 测距仪 中文说明书
重量 (连同电池)
92 g / 3.25 oz
温度范围: - 储存
- 使用
-25 到 70 °C -13 到 158 °F
-10 到 50 °C 14 到 122 °F
* 适用于 100 % 目标反射率 (白墙),环境光线较 暗,25 ?C
** 适用于 10 至 500 % 目标反射率,环境光线较亮, - 10 °C 至 + 50 °C
i 在实际操作中,必须严格遵循说明书的重要章节,这样 才能正确有效地使用产品。
概述
显示屏
开启 / 测量 面积 / 单位
清除 / 关闭
Leica DISTOTM D110 812794a
ZH
Bluetooth®
2
仪器设置 显示屏
信息
电池 Bluetooth®
主显示栏
插入电池
ZH
为了确保可靠地使
i 用,请勿使用碳锌 电池。 当电池符 号闪烁时更换电 池。
有关更多详细信息,请参阅我们的主页。
Leica DISTOTM D110 812794a
6
技术参数
常规
典型测量误差 *
± 1.5 mm / ± 0.06 in ***
最大测量误差 **
± 3.0 mm / 0.12 in ***
Leica 反射板 GZM26 上测 70 m / 230 ft 程
通常测程 *
保养 - - - - - - - - - - - - - - - - - - - - - - - - - - - - - - - - - - - - - - - - - - 8
废物处置 - - - - - - - - - - - - - - - - - - - - - - - - - - - - - - - - - - - - - 8
红外测距仪操作流程
红外测距仪操作流程英文回答:Operation Procedures for Infrared Rangefinder.1. Power on the rangefinder. To power on the rangefinder, press and hold the power button for 2 seconds. The rangefinder will emit two beeps and the display will illuminate.2. Select the measuring mode. The rangefinder offers two measuring modes: single-shot mode and continuous mode. To select the single-shot mode, press the mode button once. To select the continuous mode, press the mode button twice.3. Point the rangefinder at the target. When using the rangefinder, make sure to point the laser beam at the center of the target. Grip the rangefinder with both hands for stability and keep the rangefinder level.4. Press the measure button. To measure the distance to the target, press and hold the measure button. The rangefinder will emit a short beep and the display will show the measured distance.5. Read the display. The display will show the measured distance in meters, feet, or inches. The rangefinder can measure distances up to a maximum range of 150 meters (500 feet).6. Power off the rangefinder. To power off the rangefinder, press and hold the power button for 2 seconds. The rangefinder will emit two beeps and the display will turn off.中文回答:红外测距仪操作流程。
NIKON测距仪FORESTRY550中文说明书
日本NIKON FORESTRY550激光测距/高仪 使用说明书——为了得到最佳性能和最长的使用寿命,使用前请仔细阅读此说明【生产商】◆日本尼康【主要特点】◆ 利用红外激光进行简单、快速的距离量测,并以数字形式显示◆从仪器至目标的可量测距离:10--500m(Forestry550),好的反射目标可测得更远【量测模式】有5种目标模式加一种扫描模式可适用于各种情况。
只要按Mode 键即可在仪器的视场中选择模式。
模式 Act 直线距离测量 十字光丝直接瞄准被测物体,按发射键即可,在液晶显示屏上读取数据模式 Hor 水平距离测量 十字光丝瞄准被测物体,仪器内置的倾斜补偿器会进行自动角度补偿,计算离被测物体的水平距离模式 Hgt 高度测量单点定高, 目镜内部十字光丝直接瞄准被测物体的最高点,适合测量悬空物体的相对高度;如:高架线缆模式 Ang 角度测量 十字光丝直接瞄准被测物体模式 Hgt (Hgt+Hgt2)目镜内部十字光丝直接瞄准被测物体高点,再测低点,两步测量完成后,仪器显示高度差。
模式键 单位切换 米/码 电源键/发射键物镜及激光发射器 激光接收器电池安装处CR2锂电池 照准器调节±5dpt显示屏【技术指标】规格Forestry550放大率6 X有效孔径21 mm视场6.0°瞳孔 2.5 mm眼调节10.1 mm距离显示在LCD视场中显示数字量测精度± 0.5m量测范围10-500 m照准器调节±5dpt电源CR2锂电池(DC3V)电源自动关闭功能(8秒后)尺寸(L×W×H)130×69×45mm重量195g(包括电池)仪器准备:拧下仪器底部螺钮——》打开电池后盖——》装入CR2电池(注意)极性——》旋上电池后盖。
常见故障的排除:仪器没有显示——压下发射按纽;——如果有必要,请更换电池;转换测量目标时没有清除上一次的测量值——上一次测量值不需清除,只需把十字叉对准新的目标,按下发射按纽并保持,直到出现测量值。
CONTOUR_XLRiC中文说明书
Contour XLR ic Operator’s Manual操作手册LaserCraft Inc.1450 Oakbrook Drive,Suite 900Norcross,GA 30093TEL:770-409-9660 * Fax:770-409-9649一、简介恭喜您拥有了一台高科技、功能强大的激光测量系统!在使用本仪器之前,我们建议您务必仔细阅读操作说明书。
这将有助于您正确操作该仪器,同时避免仪器的损伤和操作的失误。
和Contour 系列手持激光测量系统中的Contour XLRi比较起来,Contour XLR ic在内部又集成了一个高精度磁通量数字罗盘。
配合高精度磁通量数字罗盘,XLR ic在功能就比XLR和XLRi 多了不少。
有了Contour XLRic,您就可以把它和您的GPS系统连接起来,去测量那些无法到达或不容易到达的地方的坐标信息,省时又省钱。
或者您也可以使用它内置的软件计算:树高,倾斜度,面积,周长,空间线段的长度,水平距离,高差等等数据。
由于Contour XLRic配置了数字罗盘和倾斜角度测量仪,所以它完全可以被看作是一个手持式全站仪,可以协助您进行测绘和测量工作。
一级人眼安全的激光测距仪精确地向您报告以下测量数据:距离,方位,倾斜角。
以下是一些必须注意的事项:-禁止在使用或运输过程中挤压或撞击仪器!-运输仪器时,一定要保证包装完好!-任何情况下,都不要私自拆解仪器!-长久不用时,请一定要把电池从仪器中拿出来!基本配置:Contour XLRic激光测量系统(主机)、英文操作说明光盘NiMH 充电电池、电池充电器、原厂保修卡、豪华仪器箱二、工作模式(详细功能)技术特点-测量距离到:1850米;-测量精度达到:10厘米;-倾斜角度测量;-方位角测量;-周长测量;-面积测量;-电力线高度和垂度测量;-3D空间尺寸测量;-连接GPS工作;-高度测量功能;-“点到点”斜距测量;-水平距离测量和垂直距离测量;-独特的坏天气模式:一般的测距仪在天气不好的情况下,测量的距离往往会大大缩短,甚至无法工作。
- 1、下载文档前请自行甄别文档内容的完整性,平台不提供额外的编辑、内容补充、找答案等附加服务。
- 2、"仅部分预览"的文档,不可在线预览部分如存在完整性等问题,可反馈申请退款(可完整预览的文档不适用该条件!)。
- 3、如文档侵犯您的权益,请联系客服反馈,我们会尽快为您处理(人工客服工作时间:9:00-18:30)。
Instruction For Digital Measuring Wheel
Main Features and Range
1.Up to 999,999.9/Feet/Yards/Meters
2.Measuring Accuracy: 99.9%
3.Control panel on handle (reading without bending)
4.Shown in a backlight function (for reading in darkness )
5."Smart Wheel" (automatically includes wheel diometer for accurate wall-to-wall measurements)
6.Area or Volume can be automatic computed by calculator in sets
7.Units conversion: Meter/Foot/Yard; square meter/square yard/square acres; cubic meter/cubic foot/cubic yard
8.Auto power off after 3 minutes of idleness
9.Wheel size: circumference: 1m (39-3/8” ); diameter: 0.318m (12-9/16” )
10.Maximum measuring speed: 13km/h
11.Power: Four AAA 1.5V Duracell batteries
12.Operating Temperature: -10~60 ºC (14~140 º.F)
13.Display Type: LCD display; 7 digits(0~ 999,999.9),
Instructions for Buttons
1. ON/OFF: power switch, press ON/OFF for turning on or turning off power,
2. START/STOP: press START/STOP to set zero and it shows “ 0 m” for beginning measurement. After
measuring ,Press this button and the data will be kept for reading.
3. UNITS: measurement unit conversion
4. L, W, H : L, W, H for keeping data and reading. When measuring, press L, W or H to keep data. L, W , H will
be shown on the LCD display. Before restarting, other data can not be kept. Press START /STOP to stop
measuring for reading the stored data and L, W or H on LCD display will twinkle. Press again START/STOP to
restart the measuring and new data can be kept.
5. L*W: When data for L and W is stored, press START/STOP to stop measuring and read the measured area.
6. L*W*H: When data for L, W, H is stored, press START/STOP to stop measuring and read the measured
volume.
7. HOLD: While measuring , press HOLD to keep the data. Press HOLD again it will quit.
8. +D: The wheel diameter will be added to the measured value
9. RESET: Delete the data for L, W and H. When it’s restarted , “0 m” will be displayed and ready for measuring.
10. LIGHT: Press this button to turn on the backlight for reading in darkness. It will be off in 3 seconds.
Attentions
1. Don’t cleanse this precision device with organic solvent. Keep away from water and corrosive.
2. While using, it will shut down if its button is not pressed in 3 minutes in order to save power. When the screen is
not bright or doesn’t work, it shows the batter is flat. Replace with 4 AAA 1.5V batteries. Take out the batteries
if it’s not used for a long time in order to avoid the leakage of battery liquid.
3. Keep this device indoors in -30 ºC~+65 ºC and relative humidity < 90%.