BDM100系列技术说明书V2.7
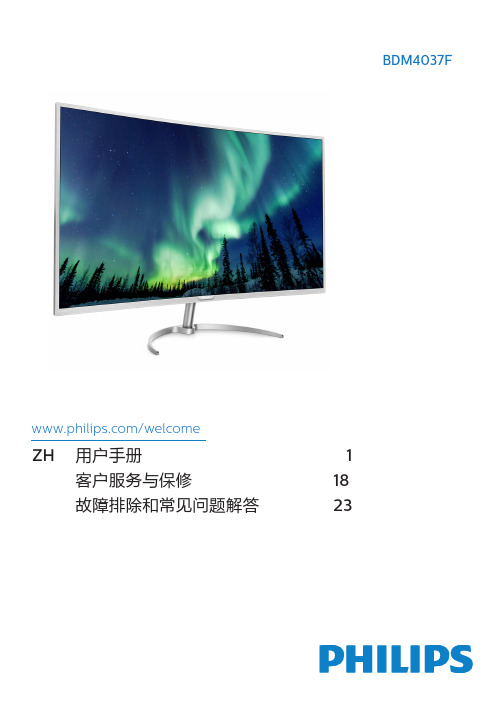
飞利浦 BDM4037F 用户手册说明书

BDM4037F/welcomeZH 用户手册1客户服务与保修 18故障排除和常见问题解答23目录1. 重要 (1)1.1 安全措施与维修 (1)1.2 标志说明 (2)1.3 产品和包装材料的废弃 (3)2. 设置显示 (4)2.1 安装 (4)2.2 操作显示器 (6)2.3 卸下底座装置(VESA安装) (9)3. 图像优化 (10)3.1 SmartImage (10)3.2 SmartContrast (11)4. 技术规格 (12)4.1 分辨率和预设模式 (14)5. 电源管理 (15)6. 客户服务与保修 (16)6.1 Philips平板显示器像素缺陷规定 (16)6.2 客户服务与保修 (18)7. 故障排除和常见问题解答 (23)7.1 故障检修 (23)7.2 一般常见问题解答 (24)1. 重要此电子版用户指南适合使用Philips显示器的所有用户。
请在使用您的显示器之前花点时间阅读本用户手册。
它包含与使用显示器相关的重要信息和注意事项。
产品享受Philips保修须符合下列条件:产品适当用于其设计目的、符合操作说明、返修时提供原始帐单或付款收据,帐单或收据应载明购货日期、销售商名称、产品型号及生产号。
1.1 安全措施与维修警告使用本文档中未介绍的控制、调整或过程可能导致碰撞、电气危险和/或机械危险。
连接和使用电脑显示器时,请阅读并遵循以下说明。
操作• 请使显示器远离阳光直接照射、明亮强光线、以及任何其他热源。
长期暴露于此类环境可能导致显示器褪色和损坏。
• 移开任何可能掉入通风孔的物品或者会妨碍显示器电子器件正常冷却的物品。
• 请勿堵塞机壳上的通风孔。
• 放置显示器时,确保电源插头和插座便于插拔。
• 如果通过拔掉电源线或直流电源线关闭显示器电源,则在重新连接电源线或直流电源线以进行正常操作之前,必须等待6秒钟。
• 请务必使用由Philips提供的经过认可的电源线。
如果电源线缺失,请与您当地的服务中心联系。
SM100-M系列HART数据采集器产品说明书(2018_07_05)

2、SM100-M 系列 HART 数据采集器硬件说明
2.1 实物图
2.2 接线图
2.3 端口介绍
端口名称 功能/接入设备
NET 网关
RS485D- RS485D+ RS232TX RS232RX GND
RS485 通讯
RS232 通讯
GND
POW
直流电源
端口名称
LOOP1+ LOOP1- LOOP2+ LOOP2- LOOP3+ LOOP3- LOOP4+ LOOP4-
HART 仪表 16
● NET:以太网接口。 ● RS485D-、R485D+:RS485 通讯,485 线正负端分别接到 RS485+、RS485-端口。 ● RS232TX、RS232RX、GND:RS232 通讯,参照连接图连接仪器设备,实现采集器与设备之间的数据
传输。 ● GND、POW:电源接口接线端子,POW 接电源正极,GND 接电源负极。 ● LOOP1+、LOOP1-~LOOP16+、LOOP16-:共16组HART仪表通讯接口接线端子。
1、SM100-M 系列 HART 数据采集器介绍
1.1 产品简介
SM100-M系列HART数据采集器是采用ARM微处理器、HART协议调制解调专用芯片并结合大量的实 践经验所研发的产品。其按照工业产品要求进行设计,具有很高的可靠性及稳定性。数据采集器配 有标准的RS485接口、RS232接口和网关,能与有HART协议的智能仪表进行数据透明传输或者转换为 MODBUS_RTU或MODBUS_TCP协议读取数据,保证数据进行实时传输。
2、SM100-M 系列 HART 数据采集器硬件说明........................................................................................... - 2 2.1 实物图............................................................................................................................................ - 2 2.2 接线图............................................................................................................................................ - 2 2.3 端口介绍........................................................................................................................................ - 3 2.4 指示灯及拨码开关说明................................................................................................................ - 3 -
MP100中文说明书110928

一.简介1.1 优玛集团优玛集团创建于1983年,由留美华人组成,主要从事精密电源设备的研究与制造,提供不间断电源自300VA到3600KVA,已有单机500KVA UPS的安装经验。
为适应中国广大用户的需要,自1995年起在东莞市成立中国的售后服务中心,并陆续成立32个全资单位、办事处及代理。
优玛集团是少数具有全系列不间断电源、直流电源、逆变电源、稳压电源、EPS消防应急电源、数控(IDC)机房工程、节能工程及防雷工程的专业公司之一,已通过ISO9001(2000版)国际质量体系认证和国内相关行业的入网认证。
1.2 产品标准本产品的生产管理符合ISO9001(2000版)品质认证,该产品技术要求符合GB/T1475-93《信息技术设备用不间断电源通用技术条件》、GB4943-1995《信息技术设备(包括电气事务设备)的安全》、GB9254-1998《信息技术设备的无线电骚扰限值和测量方法》等,并依照国家电源标准、企业标准、广电入网、电信入网、信息产业等相关行业的文件规定生产。
目录内容页数内容页数一、简介八、产品安装8.1 外观尺寸12二、目录 1 8.2 拆卸与检视128.3 产品定位13三、安全与概述8.4 产品接线143.1 应用环境 23.2 工作环境 2 九、操作步骤3.3 安全守则 2 9.1 开机前准备工作169.2 冷开机顺序16四、工作原理9.3 电池放电测试184.1 系统方块图 3 9.4 日常开关机18 4.2 正常供电 3 9.5 长时间不用开关机18 4.3 市电断电 34.4 旁路供电 3 十、维护4.5 电池及充电 4 10.1 预防性维护1810.2 电池维护18五、产品特点10.3 异常处理195 10.4 报警说明19六、规格及型号6.1技术规格 6 十一、保修条款20 6.2其他指标7十二、附录七、产品部件12.1 装箱清单7.1 前面板7 12.2 合格证7.2 后面板9 12.3 保修卡7.3 智能通讯接口117.4干接点信号接口117.5并机接口DB25(选件) 12三.安全与概述本手册包括UPS和电池在安装和维护过程中应遵守的重要指令,本手册内容对UPS的正确安装及长期可靠运行至关重要,在安装UPS前,请详细阅读本手册。
LTMR100MBD说明书

LTMR100MBD说明书 1746-A101746-A131746-A71746-BAS-T1746-HSCE1746-IA161746-IB161746-IB321746-IN161746-N21746-NI41746-NI81746-NO4I1746-NO4V1746-NO8V1746-NR41746-NR81746-NT41746-NT81746-OA161746-OB161746-OB321746-OB32/D1746-OW161746-OX81746-P21746-P4安全模块伺服单元SGDV330A21A002000010高性能型伺服驱动器SGDV-330A21A002EX001高性能型伺服驱动器SGDV-330A21A002EX002用途型伺服单元SGDV-330A21A002FT001用途型伺服单元SGDV-330A21A002FT003用途型伺服单元SGDV-330A21A002FT005用途型伺服单元SGDV-330A21A002FT006伺服驱动器MECHATROLINK-Ⅲ通信指令型SGDV-330A21B伺服驱动器MECHATROLINK-Ⅲ通信指令型SGDV-330A21B002000 直线伺服电机用伺服驱动器SGDV-330A25A安全模块伺服单元SGDV330A25A000000010高性能型伺服驱动器SGDV-330A25A000EX001高性能型伺服驱动器SGDV-330A25A000EX002用途型伺服单元SGDV-330A25A000FT003用途型伺服单元SGDV-330A25A000FT006直线伺服电机用伺服驱动器SGDV-330A25A002000VZO 20 FL 180/25VZO 20 FL 180/25-RV 1 VZO 20 FL 180/25-IN 0.01 VZO 20 FL 180/40VZ0 25 FL 130/25VZF 15 FL 180/25VZO 25 RC 130/16VZO 20 RC 130/16VZO 15 RC 130/16VZO 15 RC 130/16VZO 25 RC 130/16VZF 20 FL 180/25VZO 20 RC 130/16VZF 15 RC 130/16VZ0 25 FL 130/25VZ0 50 FL 130/25VZO 4-RE0.00125VZO 20 RC 130/16-IN0.01 VZO 15 RC 130/16 - RV0,1 VZO 20 RC 130/16-RV 1 VZO 20 RC 130/16-IN 0.01 VZO 20 FL 130/25VZO 20 FL 130/25-RV 1VZO 20 FL 130/25-IN 0.01施耐德LTMR100MBD中海德说明书工人整体素质机电设备安装工作人员作为整个安装工作的主体,其本身的综合素质和专业技术水平对于安装质量和水平有着直接的影响。
PDH120 240 480+100M系列光端机说明书

PDH120/240/480+100M光传输设备用户手册安全使用须知PDH120/240/480+100M系列综合业务传输设备在设计使用范围内具有良好可靠的性能,但仍应避免人为对PDH120/240/480+100M系列综合业务传输设备造成的损害或破坏。
◆仔细阅读本手册,并保存好本手册,以备将来参考用;◆不要将设备放置在接近水源或潮湿的地方;◆不要在电源电缆上放任何东西,不要将电缆打结或包住,并应将其放在不易碰到的地方;◆电源接头以及其它设备连接件应互相连接牢固,请经常检查;◆连接电源线时,务必认真按接线柱标注接线;所用电源必须满足如下条件:1.直流-48V机种:-36V ~-72V2.交流220V机种:220V±20%,50Hz◆请注意设备清洁,必要时可用软棉布擦拭;◆不要堵塞通风口;◆在下列情况下,请立即断开电源,并与公司联系:1.设备进水;2.设备摔坏或机壳破裂;3.设备工作异常或展示的性能已完全改变;4.设备产生气味、烟雾或噪音。
◆请不要自己修理设备,除手册中有明确指示外。
一、概述PDH120/240/480+100M系列综合业务传输设备是本公司使用自主开发的专用集成电路研制生产的综合业务传输设备。
它将标准的2M传统TDM业务接口、V.35业务接口与10/100BaseTx以太数据业务接口融为一体,并转变为高速光信号,在光纤上进行传输,同时支持双光路1+1无损保护,从而使高速数据业务和传统TDM业务在同一对光纤上传输成为可能,以最小的成本满足用户对高速数据业务和传统TDM业务综合接入的需求。
PDH120/240/480+100M系列综合业务传输设备维护简单,开电即用,还可提供集中式局端设备,并提供完整的网络管理功能。
二、主要特点◆E1数字口阻抗75Ω/120Ω可选;◆以太接口均为10/100Base-Tx自适应,带宽可以0.5M为单位调整,最大带宽100M;◆E1通道支持内置BERT(Bit Error Rate Test);◆提供1个公务话机接口;◆提供1个RS232异步数据接口;◆提供1个管理接口,可实现集中监控,并支持系统升级;◆提供一组控制开关,用于设置设备维护测试;◆双光路光端机可实现业务的1+1无损保护;◆采用大规模芯片,电路简单,功耗低,可靠性高;◆适应多种电源环境,-48VDC或220V AC;◆标准1U机框,体积小,重量轻,工作稳定可靠,安装方便。
DM100安装手册[1]
![DM100安装手册[1]](https://img.taocdn.com/s3/m/3571f48c680203d8ce2f249e.png)
PMI Nebu-100系列说明书
Pioneer Medical Instrument Technology (PMI) Co.,Ltd.Nebu ‐100 SeriesInstruction Manual“PMI”MICROMESH NEBULIZERModel: Nebu‐100⏹Product InstructionThis nebulizer atomizes liquid (normal saline), and sprays it into the user’s airway in order to keep the respiratory tract unobstructed, moisten respiratory tract, and dilute sputum.⏹Intend for useFor adult and pediatric patients suffering from asthma or Chronic Obstructive Pulmonary Disease (COPD) such as; emphysema and chronic bronchitis, or other respiratory diseases that are characterized by obstruction to air flow.⏹Thank you for purchasing this product. Please readthe instruction manual carefully before use.⏹Please keep this instruction manual at a convenientplace for future references.⏹This is a single patient device. Do not allow multiplepatients to use the same nebulizer.Contents⏹Safety Instruction (1)⏹Product Specifications List (3)⏹Components (4)⏹Components’ Names & Functions (5)⏹How to assemble the nebulizer (6)⏹How to operate the nebulizer (11)⏹How to clean the nebulizer (13)⏹How to store the nebulizer (15)⏹Option Accessories (17)⏹Troubleshooting (19)⏹Note (21)⏹Explanation of Symbols (29)Safety Instruction⏹Recommended using Distilled water or (physiologicalsalt solution) normal saline, please follow a doctor’s instructions when choosing the medication, dosage, and regimen of schedule.⏹Do not place any liquid in the medication cup that isnot prescribed by a licensed physician.⏹This is a single patient device. Do not allow multiplepatients to use the same device.⏹If you are using the nebulizer for the first time afterpurchasing it or if you have not used it for a long time, please clean the nebulizer parts. (Please see pages 13 to 14 )⏹After each use, please clean the necessary nebulizerparts, (such as medicine cup, nozzle, mask, adapter and ring and other parts) with distilled water. Dry the cleaned parts immediately and store in a clean environment. (Please see page 13 to 16)⏹Do not immerse (wash) the main unit of thenebulizer in water, please use dry cotton cloths to clean directly.⏹The trachea or bronchial will be irritated by sprayedparticles and may lead cough or choking.⏹Please clean the nebulizer parts carefully after eachuse. Otherwise it may not fulfill its function.⏹Avert severe impact with the nebulizer. Otherwise itmay not fulfill its function.⏹Do not use the nebulizer to the Unconsciouspatients.⏹Do not use the nebulizer with increased pulses orcardiac irritability.⏹Do not store nebulizer with liquid medication orwater still remaining in the medicine cup.⏹Do not fill the medicine cup over 8 mL, otherwise itmay risk overflow.⏹Do not submerge the main nebulizer unit in water. ⏹Do not drop the nebulizer.⏹Please remove the battery if you do not intend onusing the nebulizer for a while.⏹Keep the device out of the reach of infants andchildren. Children should only use the device while under adult supervision.Product Specifications List“PMI” micromesh nebulizerNebu‐100Ultrasonic (Atomize by Micromesh)Approx. 26 mm ( L ) x 35 mm ( W ) x 98 mm ( H )Approx. 46g (Excluding battery)3V DC (Two “AAA”1.5V alkaline batteries)Approx. 1WApprox. 110kHzUp to 0.4mL/minMMAD ≤ 5μmApprox. 8 mL MaximumApprox. 1 mL Minimum4 days if used daily for 15 minutes.Nebulizer main unit: 1 YearMedication Cup: 3 months (In normal use)10 ℃ ~ 40℃(50 ℉ ~ 104 ℉), 30 ~ 85% R.H.‐20 ℃ ~ 70℃(‐4 ℉ ~ 158 ℉), ≦ 85% R.H.⏹main unit (Include battery cover) x1⏹medication cup ( Include the cap) x1⏹nozzle cap x 1⏹mask adapter x 1⏹mask (L) x 1; mask (S) x 1⏹10mL (Medicine cup) x 1⏹‘AAA’ alkaline 1.5V battery x 2⏹packet of cotton swabs x 1⏹zippered pouch x 1⏹Instruction Manual x 1ComponentsThe package contains the following components. If any components are missing, please immediately contact the retailer from which the product was purchased from.Components Names & FunctionsHow to assemble the nebulizerPlease clean and dry the nebulizer’s parts before use1.Attach / Remove the medication cup to the mainunit:Mount the medication cup. The medication cup should be secured with a “click” upon attachment. Press down on the safety lock on the side of the main unit and pull the medication cup out toward the front of the main unit.Caution⏹Please ensure that the medication cup is attachedcorrectly; otherwise, it may result in a bad connection and the nebulizer may not perform properly.⏹Users can check the safety lock on the side, or pull atthe medicine cup to test if it is secured.2.Attach the inhalation mask:Attach the adapter to the breathing mask. Then ensure that the adapter is fitted all the way to the bottom of the nozzle.CautionThere are two sizes of masks available for adults and children, please select the correct size before installation.Mask(L) Mask(S)3.Battery Installationa.Please push the battery cover down and theninsert two AAA alkaline batteries as indicated bythe positive and negative battery contacts.b.Close the battery cover to complete theinstallation.Caution⏹For using 15 minutes in each treatment, 2 batteriescan be used for 4 times.⏹The low‐power indicator is indicated by the LEDblinking red (interlaced flicker), suggesting battery replacement.4.Fill the medicationa.Please remove the medication cup and open thecup lid, then fill the medication cup with theprescribed medication (normal saline) as shown inthe diagram.b.Please close the lid of the medication cup thenremount the cup back to main unit.⏹Recommended fill volume: Approx. 8 ml maximum / 1ml minimum. (Otherwise it may not fulfill its function)⏹Recommended using Distilled water or (physiologicalsalt solution) normal saline only, please follow a doctor’s instructions when choosing the medication, dosage, and regimen of schedule.⏹Do not place any liquid in the medication cup that isnot prescribed by a licensed physician.How to operate the nebulizerAfter filling the medication, Press the power button to activate it, if you wish to halt the treatment, press the button again to turn the power off. The LED indicator instructions are as follows:1.Both LED lights off: main unit powered off.2.Blue LED light on and red LED off: the unit has startedto spray.3.Red LED light on and blue LED light off: an error hasoccurred, the main unit will power off automatically after 10 seconds.4.Blue LED light on and red LED blinking duringoperation: the battery is nearly exhausted.5.Blue LED blinking and red light off: in cleaning mode. During operation, please grasp the main unit in your hand and put on the mask covering the nose and latch nozzle, and start inhaling as normal.⏹If the cup lid screwed too tightly, the spray may bedecreased by the vacuum effect. Do not screw the cup lid too hard.⏹If the spray rate is still poor, please turn off the power,and put 5mL warm water (50 ~ 60o C) into the medication cup. Then, hold down the power button 5 seconds (do not release) for switching the nebulizer into the cleaning mode. While entering the clean mode, the blue LED indicator will start blinking, keep press the button for cleaning the mesh, release the button will interrupt this function.⏹If the nebulizer is unable to spray out, please go topage 19 ~ 20 for troubleshooting.⏹The Medication cup is expendable, and the suggestedlifetime of the mesh is approximately three months, depending on the medication.⏹If the Medication cup still cannot be used aftercleaning, please replace it with a new one.How to clean the nebulizerStraight after each use, make sure to clean the nebulizer with the distilled water and a wet piece of gauze and lightly wipe off the stains on the main unit, before storing or carrying.The cleaning instructions are as follows:1.Clean the remaining medication, open the cup lid ofthe medication cup and discard the remaining medication.2.Pour a small amount of distilled water (2 ~ 3mL) intothe medication cup and close the lid.3.Press and hold on the “button” to nebulize thedistilled water for 1 to 2 minutes to remove the residual medication in the medication cup until the distilled water is depleted.4.Remove the medication cup, and clean the maskadapter, connection tube, and the inhalation mask or mouthpiece from the nebulizer with distilled water. 5.If there is dirt or residual liquid in the main unit,please wipe it off before storage.Caution⏹If the mesh is clogged or dirty, please use a cleancotton swab with distilled water to wipe at the nozzle.⏹If the main unit is dirty, please wipe it with a wetcotton cloth.⏹Do not wash the main unit in water directly.⏹Please do not clean the nebulizer and other parts withan organic solvent or volatile liquid such as benzene or thinner.⏹After cleaning, attach the nozzle cap back on, andstore all parts in a clean environment.How to store the nebulizer1.Remove the mask, nozzle and adapter from themedication cup2.Re‐attach the cap to the nozzle of the medicationcup.3.Remove the battery, if you do not intend on using thenebulizer for a while.4.When you need to take the nebulizer out, keep allaccessories and the nebulizer in the pouch.⏹Please do not store a nebulizer that still containsmedication or water. The liquid may leak out and damage or stain the unit.⏹Do not store the nebulizer when the power is turnedon.⏹Do not store the nebulizer in an area with hightemperature or humidity, or in direct sunlight.Optional AccessoriesAccessories / Optional parts are shown below. If you wish to purchase any of them, please contact the retailer which you purchased the nebulizer from.Nebu ‐100‐MC01Nebu ‐100‐MA01 Mouthpiece Nozzle CapNebu ‐100‐MM01Nebu ‐100‐NC01Nebu‐100‐ML01Nebu‐100‐MS01Zippered PouchNebu‐100‐CB01TroubleshootingPlease refer to the table below to troubleshoot any problems you may encounter when using the nebulizer.Power indicator blue light on, but extremely low or no mist. Medication cup’smesh is clogged up.Please turn off the unitand use a clean cottonswab with distilled waterto wipe the nozzle.Then restart the power.Medication cup isdirtyTurn off the unit, clean themedication cup. Thenrestart it.Electrodes on themedication cupis dirtyRemove the medicationcup, please use a cleancotton swab with alcoholto wipe the Electrodes atthe bottom of the cup, andrestart the power.Medication cup isnot completelyattached.Re‐attach the medicationcup correctly and restartthe power. (Jiggle the cupto ensure the safety lock iscompletely latched)The consistency ofliquid is too high inthe medication cup.Please follow theinstruction to elect theliquid (As normal saline) The medication cup’smesh has expired.Replace with a newmedication cup.Power indicator does not light up and nebulizer does not operate. Low battery power.Please replace with newbatteries and restart thepower.Batteries installed inreverse directions, orthe battery is not incontact.Re‐install the batteries inthe correct orientation andrestart the power.Power indicator red light on The medication cupdoesn’t attachedcorrectlyPlease ensure that themedication cup is attachedcorrectly then restart thepower.The Mesh is clogged,and the frequencyscanning functionisn’t complete.Clean the mesh and restartthe power.Stops functioningduring usage (Blue light on). The mesh is clogged.Please use a clean cottonswab to clean the mesh.Stops functioningduring usage (No LED light). Low battery.Please replace with newbatteries.The liquid is overflowing from the medication cup. The cap did notcover the cup.Re‐screw the cap lock The O‐ring under thecup lid of themedication cup isout of life.Replace with a newmedication cup.The O‐ring under themedication cupnozzle is out of life.Replace with a newmedication cup.The medication cupis broken.Replace with a newmedication cup.Note1.Follow the instructions for useIf the unit is used outside of the specifications,proper function is no longer guaranteed! Wereserve the right to make technical changes to improve and further develop the product.2.Expected Service Life and RepairsBy the reliability test and the function decay of electronic component, the expected service life on nebulizer main unit is one year. Since the medication cup is an expendable item, the expected service life is three months.Never open or attempt to repair the unit byyourself, as otherwise proper function is nolonger guaranteed. Failure to observe this regulation shall void the warranty.If you need to have the unit repaired, contact customer service or an authorized dealer.3.Safety standardThis Nebulizer complies with the EC Directiveand bears the CE mark This Nebulizer alsocomplies with mainly following standards (included but not limited):This device and its accessories comply with European standards EN60601‐1 and EN60601‐1‐2, as well as EN13544‐1. The product is subject to special safety measures in terms of electromagnetic tolerance. The unit conforms to the requirements of the European Directive for Medical Products 93/42/EC.4.Performance standards⏹EN 13544‐1: Respiratory therapy equipment ‐ part1:nebulizing systems and their components.⏹All measurements were obtained with a sodiumfluoride (NaF) 2.5% (M/V) in distilled water using a personal cascade impactor method.5.Cumulative particle size distributionDuring the test of personal cascade impactor method, the aerosol output (ml) is 0.72±0.06 and the aerosol output (ml/min) 0.18±0.006.This diagram may not be applicable for suspensions or highly viscous medicines. More information can be obtained from the relevant medicine manufacturer.6.Sound Power Level Measurement:By the test method:EN 13544‐1:2007+A1:2009, A‐weighted sound power level (L wA) is 38.6dB.7.IP22Protected against foreign objects equal to or greater than 12.5 mm in diameter and against drops of water falling at up to 15° from vertical.8.Electromagnetic CompatibilityThe device complies with current specifications with regard to electromagnetic compatibility and is suitable for use in all premises, including those designated for private residential purposes. The radio frequencies emissions of the device are extremely low and in all probability do not cause any interference with other devices in the proximity.It is recommended that you do not place the device on top of or close to other devices. Should you notice anyinterference with other electrical devices, move the unit or connect it to a different socket. Radio equipment may affect the operation of this device.9.Guidance and manufacturer's declaration –electromagnetic emissions for PMI Nebu‐100series.10.Verification of EMC Compliance:11.The Plastic Components in Applied PartsMouthpiece Silicon Nebu‐100‐MM01 Nozzle Cap Silicon Nebu‐100‐NC01Adult mask PVC Nebu‐100‐ML01Child mask PVC Nebu‐100‐MS01 Medicine Cup PC Nebu‐100‐MC01 Mask Adapter PE Nebu‐100‐MA01 Zippered Pouch Nylon, PP, PVC, PET Nebu‐100‐CB0112.Containing particular phthalatesThe PVC masks and the O‐Rings in themedication cup contain particularphthalates.13.ManufacturerPioneer Medical Instrument Technology Co. Ltd: 7F., No. 11, Wuquan 2nd Rd., Wugu Dist., New Taipei City 248, Taiwan (R.O.C)14.Authorized representative in the EuropeanCommunityMedNet GmBh: Borkstrasse 10, 48163 Muenster, Germany.15.The Batch and Serial CodeThe code indicates the production batch ofNebu‐100 main unit and its applied parts.The batch code is marked on the battery slot of main body or pasted in the packaging bags of each applied parts. Takes AGA as an example, the first letter “A” indicates the AC chronology started from 2014. The second letter “G” means the 7th month of the year and the third letter “A” shows the first batch of the month.The code indicates the production serial ofNebu‐100 medication cup. The serial code ismarked on the bottom of medication cup, such as AGB0003. According to the batch coding rules, the AGB0003 shows the medication cup produced is the third output of the second batch on July, 201416.DisposalThe appliance should be disposed ofaccording to Regulation 2002/96/EC –WEEE (Waste Electrical and ElectronicEquipment). In case of queries, please contact the municipal authorities responsible for waste disposal in your area.Used batteries do not belong in thehousehold waste. You are legally obliged todispose of the batteries. Dis‐pose of themvia your specialist electrical supplier orlocal collecting point for recyclable waste. Batteries containing pollutant substances are marked as follows: Pb = Battery contains lead,Cd = Battery contains cadmium,Hg = Battery contains mercury.The batteries for this device do not contain any toxic substances.Explanation of SymbolsFollow the instructions for useThis Product complies with the ECDirectives and bears the CE Mark “CE0120”Symbol for “CAUTION”Symbol for “BATCH CODE”The symbol indicates the serial number of medication cup.The symbol indicates the catalogue number of nebulizer main unit.WEEE SymbolWEEE SymbolSymbol for "MANUFACTURER"Authorized representative in the EuropeanCommunitySymbol for “Containing particularphthalates”Symbol of type of applied partPMI Nebu‐100 Instruction ManualRevision Number: ENR1.3。
BWBDM防爆排油注氮灭火说明书解析
BW-BDM型变压器防爆排油注氮灭火装置说明书保定博为泓翔电气有限公司1.系统简介油浸电力变压器总是存在着发生火灾的危险。
无论是电力变压器铁芯产生的持续高温,还是由于短路、过电压等的内部电弧产生的高能放电引起的突发性短暂高温,只要能使变压器油的温度大于400℃,就会分解出各种可燃气体,变压器内部压力增大,一旦由于变压器内部超压造成其自身薄弱部位(如变压器瓷套管、器身焊缝、防爆口等处)破成裂口,使变压器油及产生的可燃气体一起从裂口中喷出,喷出的变压器油及可燃气体的混合物在与空气接触摩擦后,就产生火焰起火甚至爆炸,造成重大损失。
国家有关标准规定大型变压器必须配置灭火装置;另外数量众多的油浸变压器在工业、民用建筑群中应用,或许多容量较小,却处于经济发展的中心位置和政治、军事、交通有关的地域需要重点保护,也应配置灭火装置;在无人值守的变电站,对消防系统的要求也越来越高。
BW-BDM针对变压器故障的特点,我公司研制了BW-20-I变压器灭火装置。
型排油注氮灭火装置(以下简称装置)是专门用于油浸变压器防护和灭火的一种新装置,弥补了当前水喷雾灭火系统及其他灭火系统不能预防火灾的不足。
装置具有防爆、防火、灭火的功能。
即为防止火灾危险的产生而开发的成套灭火装置。
此系列灭火装置不适用于变压器油箱外部和分接开关箱内部火源的灭火。
2.装置的特点与优点:2.1以防为主,消防结合。
限制内部故障引起火灾的损坏范围,可以有效的防止变压器破裂所产生的火灾;一旦着火,动作后可以立即灭火,灭火时间短,减少变压器火灾造成的损失。
2.2不用水或泡沫等灭火介质,免除了消防排水设计和相关设施,结构紧凑,易于安装,不受水源等地理环境限制,不会冻冰,阻塞。
2.3 属环保产品,该设备不对环境和变压器本身造成任何污染。
2.4 造价低,运行管理简单、维护方便,连续自动监视。
2.5 装置设计特殊机械结构,具有强的防震防误动能力。
3.产品概述3.1系统结构BW-BDM防爆排油注氮变压器灭火装置(图1),包括控制部分(图6)和灭火部分。
PM100使用手册
PAM100系列功能比较
PAM122 PAM132
PAM123 PAM133
单相
单相
PAM124 PAM134
单相
PAM125 PAM135
单相
可选配1路 可选配2路 可选配1路或2路
1路
PAM12X数码显示/PAM13X液晶显示
PAM115
一路 PAM126 PAM136
单相
南京国高电子有限公司
前面板开孔尺寸
................................................5
接线方法
................................................5
施工注意事项
................................................6
信号开出 • 脉冲输出,遥控脉冲宽度为 1 秒 • C 型继电器:5A/250VAC,5A/30VDC
外形尺寸和重量 • 48×96×112mm • 0.45KG
电源 • AC/DC 60~265V • 功耗小于 6W •
南京国高电子有限公司
3
过电流保护
PAM100 使用操作指南
CAUTION
安装CT: 建议 使用接线排,不要直接接CT,以便与拆装。
通信接线 配电分析仪表提供串行异步半双工 RS-485 通信接口,采用 MODBUS-RTU 协议,各种数据信息均 可在通信线路上传送。在一条线路上可以同时连接多达 128 个配电分析仪表,每个配电分析仪 表均可设定其通信地址。
2 为数码显示 3 为液晶显示
2
南京国高电子有限公司
技术参数规格
DMR说明书
1.概述.... ................... ............................. (3)2.主要技术指标............................................ .. (3)3. 仪表显示及操作........ ........................................ (4)3.1 单通道曲线显示及操.................................. . (4)3.2 多通道曲线显示及操作.................. (4)3.3棒图画面显示及操作.. .... .. (5)3.4大字/数显画面..... (6)3.5流量累积显示数据存盘.................. . (7)3.6仪表设置显示画面及操作. (8)4.仪表参数设置... ................... .. (11)4.1 参数设置方法 .. (11)4.2 仪表公共参数说明..... . (11)4.3通道参数说明...... . .. (12)5. 仪表标定. ............... . .............................. (16)5.1 标定准备工作....... . (16)5.2 标定方法..... ..... ........ (16)5.3 热电阻通道零点及增益调校方法 (17)5.4 电流输出通道增益标定.................... .. (18)6.仪表安装与接线.. (19)6.1 仪表安装. .. (19)6.2 各种输入信号接线及设置 (20)6.3 电流输出通道接线及设置 (20)6. 4 输入通道开关设置. (21)7.流量累积算法. (22)7.1 累积算法.. (22)7.2 差压. 温度及压力输入通道设定 (24)7.3 全补偿流量积算参数设置 (25)7.4 全补偿流量积算参数设置举例 (26)8.仪表通讯.. . ...... (27)8.1 通讯方式 (27)8.2 通讯接线 (27)8.3 通讯数据 (28)9.仪表通道工位文字设置 (29)9.1工位文字软件安装方法 (29)9.2 工位文字编辑... .... . (29)9.3工位文字文本文件格式转换 (30)9.4 工位文字转存记录仪 (30)10.附加功能.................... .. (31)10.1 仪表两线制供电. (31)10.2 数据在线打印 (31)11. 仪表使用环境及维护 .. ... .. (32)11.1 仪表使用环境及注意事项............ . (32)11.2 常见问题及处理方法 (32)附录一.DMR输入信号一览表. ........ . (34)附录二.DMR信号单位一览表........ (34)附录三.通道模式开关定义........ . (34)附录四 DMR100 仪表端子图........ . (35)附录五 DMR180仪表端子图........ . (35)1. 概述DMR系列无纸记录仪,采用了宽视角、宽温、高亮度大屏幕液晶显示记录曲线,大容量FLASH RAM实时存储记录数据和全智能嵌入式高可靠磁盘数据备份三项最新技术。
- 1、下载文档前请自行甄别文档内容的完整性,平台不提供额外的编辑、内容补充、找答案等附加服务。
- 2、"仅部分预览"的文档,不可在线预览部分如存在完整性等问题,可反馈申请退款(可完整预览的文档不适用该条件!)。
- 3、如文档侵犯您的权益,请联系客服反馈,我们会尽快为您处理(人工客服工作时间:9:00-18:30)。
3.1 BDM100-B 系列 .........................................................................................................................5 3.1.1 操作面板 .............................................................................................................................5 3.1.2 端子示意 .............................................................................................................................5 3.1.3 端子定义 .............................................................................................................................5
3.5 BDM100-T 系列........................................................................................................................ 10 3.5.1 操作面板 ........................................................................................................................... 10 3.5.2 端子示意 ........................................................................................................................... 10 3.5.3 端子定义 ........................................................................................................................... 10
2 产品选型............................................................................................................................................2
2.1 功能详表.....................................................................................................................................2 2.2 产品选型表 .................................................................................................................................3 2.3 订货须知.....................................................................................................................................3
3.2 BDM100-C 系列 .........................................................................................................................6 3.2.1 操作面板 .............................................................................................................................6 3.2.2 端子示意 .............................................................................................................................6 3.2.3 端子定义 .............................................................................................................................6
BDM100 系列低压电机保护
技术说明书
北京北斗银河科技有限公司
版本号:V2.7 技术不断创新,请随时联系,证实本版资料
目
录
1 概述...................................................................................................................................................1
3.6 外形尺寸................................................................................................................................... 11
3.6.1 BDM100-C/B 系列外形尺寸 .................................................................................................. 11 3.6.2 BDM100-M/M+内置外形尺寸 ................................................................................................. 11 3.6.3 BDM100-T/E/M 系列外形尺寸 ............................................................................................... 11
操作面板 .............................................................................................................................7 端子示意 .............................................................................................................................7 端子定义 .............................................................................................................................8
4 应用说明.......................................................................................................................................... 12
4.1 专用外置互感器 ........................................................................................................................ 12 4.1.1 BDCTAD-00 外置式电流互感器............................................................................................. 12 4.1.2 BDCTAD-01 外置式电流电压互感器...................................................................................... 13 4.1.3 BDCTL 外置式漏电流互感器 ................................................................................................. 14
3.4 BDM100-E 系列..........................................................................................................................9 3.4.1 操作面板 .............................................................................................................................9 3.4.2 端子示意 .............................................................................................................................9 3.4.3 端子定义 .............................................................................................................................9
