纬地系统V4.0主要功能
常见问题解答【纬地系列软件教程】

第二十六章常见问题解答26.1 软件维护1. 运行环境问题:纬地道路CAD运行在什么环境下?答复:使用纬地道路CAD需要有Windows运行环境,支持Win98,Win2k,WinXP 操作系统;并且在计算机上还要安装AutoCAD R14、2000/2002或2004、2005/2006中的一种;然后在其上安装纬地道路CAD。
我们推荐用户使用WinXP,AutoCAD2002。
在输出成果表格时,还需要Office组件中的Word和Excel 支持。
推荐用户安装Office2000/XP。
2. 软件安装问题:安装纬地软件有那些注意事项?答复:首先要确定计算机中有满足纬地运行的软件环境,如Windows操作系统,Office办公环境,AutoCAD 绘图软件。
纬地系统使用USB软件锁,须注意:在第一次安装软件之前不要插软件锁,在安装纬地道路软件时会将软件锁驱动程序一并安装到计算机中。
否则Windows会自动安装一个错误的软件锁驱动程序。
如果是这样,则必须在控制面板中将错误的驱动程序删除掉,重新安装纬地道路系统。
问题:为什么升级或者重新安装纬地道路时,不能正常安装,提示没有安装等信息?答复:解决方法:1、先从系统控制面板中卸载原装版本软件;2、若有自定义的标准挡墙库,直接复制备份C:\HINT40\DQDB.HDQ库文件;3、若有自定义的标准图框表格等模板文件,请复制备份这些文件;4、手工删除C:\HINT40目录下的所有文件;5、手工删除C:\WINDOWS\SYSTEM32目录下的以下动态库文件:Datfil40.dll HDMView.ocx HWndLib.dll DatFil40.70.dll和HWndLib.70.dll (如果存在的话);6、重新运行纬地系统安装程序完成安装即可;7、正常后将备份的标准挡墙库和标准图框表格等模板文件覆盖回C:\HINT40目录下。
(主要原因是个别计算机上旧版的动态库文件被系统锁定,没有被新版安装程序所更新,因为该动态库是纬地系列软件所公用的,以前可能还安装了纬地系列软件中的其他软件如土方调配等,自动卸载程序因为该库要被其它软件所用便没有将其更新。
纬地计算详细步骤(教学生用)[1]
![纬地计算详细步骤(教学生用)[1]](https://img.taocdn.com/s3/m/9f31d100770bf78a64295415.png)
一、平面设计(假设,平面线形在地形图上已经选好)1。
1 补充(重要):项目管理菜单:项目——项目管理命令:HPM首次安装纬地系统后,第一次加载时系统会提示用户指定当前项目或新建项目。
选择新建项目后,系统提示用户输入项目名称、路径以及平面曲线数据文件名。
用户也可新建目录路径,以保证一个项目的所有数据全部存放于同一个目录下。
输入完成后,用户便可以利用“主线平面设计”或“立交平面设计”功能开始进行该项目的平面设计等工作.一般情况下,对于一条公路的施工图设计任务,项目管理中可能需要添加以下数据文件:平面曲线数据文件(*.pm)平面交点数据文件(*.jd)纵断面地面线数据文件(*。
dmx)横断面地面线数据文件(*。
hdm)纵断面设计数据文件(*.zdm)超高渐变数据文件(*.sup)路幅宽度数据文件(*.wid)桩号序列数据文件(*.sta)路基设计中间数据文件(*。
lj)设计参数控制文件(*.ctr)挡墙设计文件(*。
dq)——设有挡土墙的情况下至少需要设置以下项目属性:项目名称及路径公路等级类别超高旋转方式加宽渐变方式断链位置(设有断链时)纬地系统的“项目管理器”对话框如图1—1所示.在纬地“项目管理器”对话框的“项目文件"菜单中,用户可以“打开项目”,也可以在此处“新建项目”。
当点取对话框中“文件”选项后,将出现一个项目的所有数据文件列表如图1-1数据文件的添加和重新指定,如果欲删除该文件,则直接将该文件名删除即可,执行编辑菜单下的“编辑文件”命令(或直接双击该文件类型名称)可打开该文件的文本格式进行查看和编辑.图1-1-1当用户选取对话框中“属性”选项,对话框切换到如图1-2所示本项目的属性设置页,用户可以查看本项目的名称、项目类型和设计的起终点桩号等,同时也可以修改所输出图表的“项目标识”和“桩号小数精度"。
断链的设置也在此选项中进行,使用“编辑”菜单中的“添加断链”、“删除断链"、“前移断链”和“后移断链”命令,可完成任意多级断链的添加和修改。
纬地其他辅助功能

第十二章其他辅助功能12.1生成桩号文件菜单:工具——桩号文件命令:crsta用户可通过指定桩号间距直接输出所选定平面线形的桩号序列文件,并包含所有曲线要素桩在内。
12.2平面数据转换之Jd→Pm菜单:数据——平面数据转换——交点→曲线(Jd→Pm)命令:Jdtopm用于将交点设计法得到的平面线形数据文件(*.jd)转化为曲线设计法得到的线形数据文件(*.pm),HintCAD系统以曲线法线形为基本线形。
一般用交点法完成的平面线形均可转换为曲线法的数据。
12.3平面数据转换之Pm→Jd菜单:数据——平面数据转换——曲线→交点(Pm→Jd)命令:Pmtojd用于将曲线设计法得到的平面线形数据文件(*.pm)转化为交点设计法得到的线形数据文件(*.jd)。
纬地道路v5.8版加强了平面数据的转换功能,可以将回头曲线和大头曲线等特殊平面线形自动转换为交点法中的虚交点线形,也可以将曲线设计法设计的复曲线、凸曲线、卵形曲线等复杂线形自动转换为交点法设计的平面线形。
注意:对于某些情况用曲线法生成的平面线形是不能转化为交点形式的,例如平面线形只有一段缓和曲线等情况。
12.4搜索连接部及匝道接坡计算菜单:工具——搜索端部命令:Caldb本功能用于自动搜索互通立交交叉处楔形端的位置及其对应两条线形的桩号和切线方位角等数据,另外还可用于匝道的自动接坡计算,对话框如图12-1所示。
图12-112.4.1 搜索确定连接部位置根据对话框中内容的提示,用户需要分别输入D1当前项目支距、D2相邻项目支距、R鼻端半径和相邻项目的平面线形数据文件名称等信息,点按“搜索”按钮后,系统提示用户在所要搜索的楔形端附近输入一段分别与两条线形的平面线形相交叉的直线段(如图12-2所示),软件在分别读入两条线形的平面数据文件的同时,根据用户输入的直线段来确定搜索计算的对应范围开始自动搜索计算。
如果搜索成功,系统将以表格的形式在AutoCAD的文本屏幕显示楔形端数据对应表;如果点按“搜索标注”按钮,系统在完成“搜索”的全部工作后,并在当前图形屏幕标注楔形端位置。
08 第8章 公路计算机辅助设计—纬地软件介绍
第8章公路计算机辅助设计—纬地软件内容提要:⏹软件的主要功能及常规应用步骤⏹路线平面线形设计⏹纵、横断面数据准备与纵断面设计绘图⏹路基设计计算⏹横断面设计绘图8.1 软件的主要功能及常规应用步骤8.1.1 软件的主要功能✓路线辅助设计✓互通式立交辅助设计✓数字化地面模型应用(DTM)✓公路三维真实模型的建立(3DRoad)✓平交口自动设计✓其他功能✓数据输入与准备✓输出成果8.1.1 软件的主要功能(1) 路线辅助设计⏹平面动态可视化设计与绘图⏹断面交互式动态拉坡与绘图⏹超高、加宽过渡处理及路基设计计算⏹参数化横断面设计与绘图⏹土石方计算与土石方计算表等成果的输出⏹公路用地图(表)与总体布置图绘制输出⏹路线概略透视图绘制(以及全景透视图)⏹路基沟底标高数据输出沟底纵坡设计⏹平面移线8.1.1 软件的主要功能(1) 路线辅助设计⏹平面动态可视化设计与绘图系统沿用传统的导线法(交点法)经典理论,可进行任意组合形式的公路平面线形设计计算和多种模式的反算。
用户可在计算机屏幕上交互进行定线及修改设计,在动态拖动修改交点位置、曲线半径、切线长度、缓和曲线参数的同时,可以实时监控其交点间距、转角、半径、外距以及曲线间直线段长度等技术参数。
8.1.1 软件的主要功能(1) 路线辅助设计⏹断面交互式动态拉坡与绘图系统在自动绘制拉坡图的基础上,支持动态交互式完成拉坡与竖曲线设计。
用户可实时修改变坡点的位置、标高、竖曲线半径、切线长、外距等参数;对设计者指定的控制点高程或临界坡度,受控处系统可自动提示控制情况。
8.1.1 软件的主要功能(1) 路线辅助设计⏹超高、加宽过渡处理及路基设计计算系统支持处理各种加宽、超高方式及其过渡变化,进而完成路基设计与计算、方便、准确地输出路基设计表,可以自动完成该表中平、竖曲线要素栏目的标注。
8.1.1 软件的主要功能(1) 路线辅助设计⏹参数化横断面设计与绘图✓系统支持常规模式和高等级公路沟底纵坡设计模式下的横断面戴帽设计,同时准确计算并输出断面填挖方面积以及坡口、坡脚距离等数据,并可以根据用户选择准确扣除断面中的路槽面积,用户可任意定制多级填挖方边坡和不同形式的边沟排水沟。
Building Integration System V4.0 建筑结合系统V4.0说明书

uComplete enterprise management for efficient,integrated building and security management in a single solutionuConsistent use of world-wide open IT standards for configuring, interfacing and displaying makes the system extremely user and installer friendly uProvides even better integration of Bosch and 3rd party systems through OPC complianceuEasily links alarm information to user-defined action-plans and location maps, for a faster and safer reaction from the operatoruModular structure makes it easy to create a security solution which best meets your requirementsThe building management systemThe Building Integration System (BIS) is a flexiblebuilding management system which can be configured to suit the user's specific needs.It contains a huge range of applications and features which enable both the integration and coupling as well as the monitoring and control of all technical building systems.The new generation builds on Bosch's many years of experience in management systems and was considerably influenced by the following market trends:•Increasing complexity of technical building equipment The increasing complexity of technical equipment inside buildings requires a powerful management system which combines the most varied functions (e.g. fire and intrusion alarm systems, access control,video systems and building automation... etc.) in the best possible way. The OPC standard enables BIS to process and share information efficiently with a huge variety of hardware devices and other sources.•Using new technologies and standardsWhile the strict regulations in the field of security technology ensure a high degree of reliability insecurity matters, they hinder the integrated use of new technologies from the IT world. BIS hassucceeded in harnessing the benefits of non-security-based technologies (e.g. OPC, CAD, web) and harmonizing them with the world of security technologies.•Customers want complete solutionsFacility managers and integrators are demanding a single building-management solution that is nevertheless able to integrate all their security subsystems.System overviewThe Building Integration System is a versatile product made up of a basic package plus various optional components (also known as Engines) based on a common software platform. The engines can becombined to tailor building management systems to detailed requirements.These main components are:•Automation Engine •Access Engine •Video Engine •Security Engine* not available in all countriesThese engines are described in greater detail in separate datasheets.FunctionsSystem architectureThe BIS Engines provide fire and intrusion detection,access control, video surveillance plus the monitoring of HVAC and other vital systems.BIS is based on a performance-optimized three-tier architecture especially designed for use in Intranet and Internet environments.Subsystems are connected via the well-established,world-wide OPC standard. This open standard makes it easy to insert BIS into existing OPC-compliant subsystems.4.15.16.n4.n5.n4.1.- 4.n Connection serversOrganizational structure and configurationA number of automatic functions and easy-to-use tools make configuration installer-friendly, saving time and expense.Hierarchical location trees can be created by theimport of existing CAD data containing layers, named views and detector locations. Zooming and panning allow rapid navigation through the building.The user interface is web-server-based using dynamic HTML pages. Default pages for different screenresolutions and formats are included in the installation software, and the default pages can easily be customized using a standard HTML editor.BIS automatically detects the monitor resolution and provides the appropriate user interface.OperationThe system’s main task is to operate as the alarm-monitoring and control center for the various security systems within a site. Its graphical interface isdesigned to help the operator grasp the extent and urgency of an occurrence quickly, and to take prompt and effective action.The heart of the system, the State Machine, monitors all incoming events and operator requests and, if desired, can take actions prescribed by user-defined rules or Associations, thus unburdening the operators.System securityAES encryption between BIS central server andworkstations provides additional security in addition to configurable user-access rights. If PCs within a corporate network are to be used as clientworkstations then enhanced security can be achieved by restricting operators to specific workstations or IP-addresses.Basic packageThe Building Integration System basic packageprovides many features used in common by the various Engines.•Customizable device condition counters to provide an overview of the condition of subsystems across the entire BIS system•Message processing and alarm display•Alarm queue with up to 5000 simultaneous alarmevents and detailed alarm information•Fixed assignment of operators to workstations for higher security•State machine for automated event and alarm handling.•Web-server-based platform allows client workstations to connect to BIS via just the Internet Explorer •Direct support for location maps in standardAutoCAD DWF vector format reduces configurationeffort.•Changes to architecture within a graphic (new walls,moving a door, etc.) can be implemented without changing the BIS configuration, simply import a new plot file.•Automated workflows between operators, with message broadcasting and customizable escalation paths•Huge library of standardized detector icons in standard vector format including color, event and control definitions•Direct control and monitoring of detectors via the context menus of their icons in the location maps •Direct control and monitoring of detectors via the logical tree-structure (e.g. building – floor – room) of a site, with hyperlinks to photos, manuals,instructions•Location tree generated automatically from the "named views" within the AutoCAD graphic•Action management for automatic and manual control into connected subsystems and their peripherals•Device overview for all connected subsystems, and their peripherals (detectors) and internal virtual devices (operator, server, ...) in the form of a tree structure with detailed information about address,status, type, location and notes. Control theperipherals via the context menus of their tree nodes.•Ability to compartmentalize the managed site into autonomous Divisions, and to restrict operators to the control of specific Divisions.•Ability to provide specific information to the operator in the form of free-form “miscellaneous” hypertext documents, including text, bitmaps, video images,etc.•Highly configurable operator access rights for monitoring and control of subsystems and their peripherals•Event log to ensure all events are completely documented (including messages received and actions taken)•Reporting services to quickly create reports from the event log•Linking and embedding of OPC servers from any computer in the network •Online HelpAlarm document packageThis package extends the standard alarm handling of your BIS system with the capability of displayingaction plans and location maps as well as the graphical navigation and the alarm-dependent visualization of layers inside those maps. This ensures optimalguidance to operators especially in stress situations,such as fire or intrusion alarms.Alarm-dependent action plans or workflows provide detailed event-dependent information such asstandard operating procedures, live images, control buttons, etc. to the operator. Simply create and assign one action plan to each possible alarm type in your system, e.g. fire alarm, access denied, technical alarms, etc.With the deletion of an alarm message an unmodifiable snapshot of the displayed action plan is attached to the event log. This ensures accountability by providing a trace of all steps performed by the operator duringthe alarm response.•Location maps are a visualization of premises e.g.floors, areas or rooms, based on the popular AutoCAD vector-graphics format. Detectors and other devices are represented by colored, animated icons thatprovide direct control via their context menus. In the case of an alarm the system zooms automatically to the location in the map where it was triggered.• A location tree provides entry points to the location map and its graphical navigation functions (pan,zoom).•Alarm-dependent layer control allows the display of additional graphical information for specificsituations, e.g. escape routes in case of fire alarms.BIS optional accessoriesThe optional features listed below can be added to the BIS system to meet specific customer requirements.They are usable with all the BIS Engines (Automation,Access, Video and Security Engine).Alarm management packageThis package extends the standard alarm-handling of your BIS system by some additional features:Message distribution allows the definition ofescalation scenarios which are activated automatically when an operator or operator group fails toacknowledge an alarm message within a defined period. BIS will then forward the messageautomatically to the next authorized operator group.The timer feature allows the setup of time schedules which can be used to perform automatic control commands, such as closing a barrier at 8:00 pm, as well as for time-dependent redirection of alarmmessages, e.g. within time period 1 show message tooperator group 1 else to operator group 2.The operator alarm feature allows an operator to trigger an alarm manually from the location tree, for example, if informed by telephone of a dangerous situation. Such manual alarms are processed in the same way as those triggered by a detector: that is, the associated documents are displayed and all steps taken are recorded in the event log.The application launcher allows the invocation of non-BIS applications by the system based upon predefined conditions, e.g. alarms or timers. A typical application of this would be for an automatic, scheduled system backup.Building Integration System in figuresParts includedWhen ordered as Installation Media in Box the box contains:ponents1BIS Installation medium with software and installationmanuals as PDF1Quick installation guide (printed)When downloaded (Version 4.0 and later) the online documentation is contained in the download. Software Maintenance Agreement (SMA)The SMA is a cost-effective way to stay abreast of technical enhancements to the software.Each SMA you purchase entitles you to free upgrades of the corresponding software feature, plus hot fixes and technical support, for a period of one year from the date of purchase.For first-time buyers one year of SMA is included automatically for each item purchased.Technical specificationsMinimum technical requirements for a login or connection serverProcessor 3GHz CPU Dual Core or higher4 GB RAM80 GB of free HD space100 Mbit network card (PCI)USB port (if using the USB installation medium)Graphical adapter with 1280 x 1024, 32 k colors and 256 MB RAM Windows Server 2008 R2,or Windows 7 (32 or 64 Bit, but not Starter/Home Edition),- Microsoft Internet Explorer 9 or 10- Keyboard, mouseSubject to technical changes.Minimum technical requirements for a client computerProcessor 3GHz CPU Dual Core4 GB RAM20 GB of free HD space100 Mbit Ethernet network cardGraphical adapter with 1280 x 1024, 32 k colors and 256 MB RAM non-sharedWindows 7 (32/64 Bit)Microsoft Internet Explorer 9 or 10Keyboard, mouseSubject to technical changes.Ordering informationBIS is available in the following languages:•DE = German•EN = English•ES = Spanish•FR = French•HU = Hungarian•NL = Dutch•PT = Portuguese•RU = Russian•ZH-TW = Traditional Chinese•ZH-CN = Simplified ChineseA BIS basic license is required for when setting up a new systemNote: for versions 3.0 and earlier, a BIS basic package in one of these languages is always required when setting up a new system.Ordering informationBIS 4.0 Installation Media in BoxValid only for BIS V 4.0 and above.Box contains the installation medium for all languages and the Quick Installation Guide.Order number BIS-GEN-B40BOXBIS 4.0 Basic LicenseValid only for BIS V 4.0 and above.Basic license for the Building Integration System (BIS) itself.Order number BIS-BGEN-B40BIS Upgrade from 3.0 to 4.xLicense for an upgrade between the versions specified.Order number BIS-BUPG-30TO40BIS Upgrade from 2.x to 4.xLicense for an upgrade between the versions specified.Order number BIS-BUPG-2XTO40BIS Alarm Management PackageValid only for BIS V 4.0 and above.License bundle containing Message distribution, Timer, Operator alarm, and Application launcher. Order number BIS-FGEN-AMPK40BIS additional 1 Operator ClientValid only for BIS V 4.0 and above.License for one additional concurrent operator. Order number BIS-XGEN-1CLI40BIS additional 1 DivisionValid only for BIS V 4.0 and above.Licenses the addition of an autonomous, named party (aka Division) to your BIS installation.Order number BIS-XGEN-1DIV40BIS Multi-Server Connect per ServerValid only for BIS V 4.0 and above.License for one additional BIS login server within the BIS installationOrder number BIS-FGEN-MSRV40BIS-BVMS ConnectivityValid only for BIS V 4.0 and above.License for the connection between one BIS and one BVMS installationOrder number BIS-FGEN-BVMS40SMA - BIS 4.0 Basic LicenseValid only for BIS V 4.0 and above.The Software Maintenance Agreement for the BIS product specifiedOrder number BIS-SMA-BASSMA - BIS Alarm Management PackageValid only for BIS V 4.0 and above.The Software Maintenance Agreement for the BIS product specifiedOrder number BIS-SMA-AMPKSMA - BIS additional 1 Operator ClientValid only for BIS V 4.0 and above.The Software Maintenance Agreement for the BIS product specifiedOrder number BIS-SMA-1CLISMA - BIS additional 1 DivisionValid only for BIS V 4.0 and above.The Software Maintenance Agreement for the BIS product specifiedOrder number BIS-SMA-1DIVSMA - BIS Multi-Server ConnectValid only for BIS V 4.0 and above.The Software Maintenance Agreement for the BIS product specifiedOrder number BIS-SMA-MSRVSMA - BIS-BVMS ConnectivityValid only for BIS V 4.0 and above.The Software Maintenance Agreement for the BIS product specifiedOrder number BIS-SMA-BVMSRepresented by:Americas:Europe, Middle East, Africa:Asia-Pacific:China:America Latina:Bosch Security Systems, Inc. 130 Perinton Parkway Fairport, New York, 14450, USA Phone: +1 800 289 0096 Fax: +1 585 223 9180***********************.com Bosch Security Systems B.V.P.O. Box 800025617 BA Eindhoven, The NetherlandsPhone: + 31 40 2577 284Fax: +31 40 2577 330******************************Robert Bosch (SEA) Pte Ltd, SecuritySystems11 Bishan Street 21Singapore 573943Phone: +65 6571 2808Fax: +65 6571 2699*****************************Bosch (Shanghai) Security Systems Ltd.201 Building, No. 333 Fuquan RoadNorth IBPChangning District, Shanghai200335 ChinaPhone +86 21 22181111Fax: +86 21 22182398Robert Bosch Ltda Security Systems DivisionVia Anhanguera, Km 98CEP 13065-900Campinas, Sao Paulo, BrazilPhone: +55 19 2103 2860Fax: +55 19 2103 2862*****************************© Bosch Security Systems 2014 | Data subject to change without notice 153****2939|en,V3,18.Jul2014。
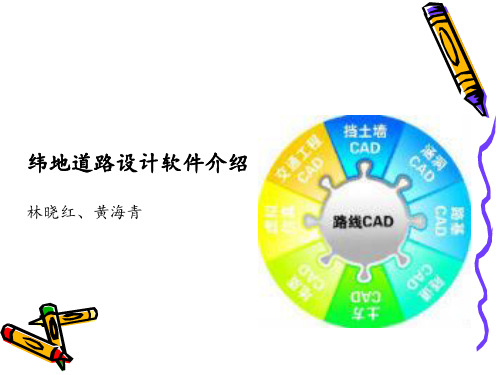
纬地道路设计软件介绍
纬地道路详细步骤(1)
纬地道路详细步骤(2)
纬地道路详细步骤(2)
纬地道路详细步骤(3)
点击设计项中的主线平面设计,选择插入交点, 并输入交点的坐标。选择所要设计的交点,点击 拖动,点击CAD中的交点,选择所配的半径等, 点击计算绘图,系统将计算出路线的曲线要素, 这时,生成的圆曲线不是平滑曲线,在CAD命 令栏中输入regen,圆曲线将变成圆滑曲线。
软件优点
• 在省去外业测量的人马劳顿和缩短设计周期的同时,更使 得大范围的路线方案深度比选更加方便快捷。
• 它具有“高速、海量和高精度”的显著特点,是纬地数模 引擎相对于国内外各种公路CAD软件数模功能的绝对优势。
纬地软件路面设计步骤
平面设计:
1、项目——新建项目(或打开项目页) 2、主线平面设计
纬地道路详细步骤(3)
纬地道路详细步骤(3)
纬地道路详图步骤(4)
点击存盘,如下图。
如果设计桩号的起点桩号不是K0+000, 则点击控制,进行更改,如下图:
纬地道路详细步骤(5)
点击项目菜单中的项目管理器,如下图,说明已有平面交点 文件
点击绘图菜单栏中的平面自动分图,如下图,设置每页的长度,等项。
纬地道路详细步骤(6)
附属软件
纬地系列软件:
• 纬地道路交通辅助设计系统(HintCAD)
附属软件
纬地数字交通与工程仿真平台系统(HintVR)
附属软件
• 纬地挡土墙综合设计系统(HintDQ)
附属软件
纬地工程土石方调配系统(HintTF)
附属软件
纬地涵洞设计系统(HintHD)
附属软件
纬地操作步骤(配图)
路线设计基本教程之巴公井开创作1.用纬地软件翻开需要设计的地形图.2.项目---新建项目, 选好要保管设计文件的路径(最好新建一个文件夹, 因为设计过程中会生成很多的数据文件)3.设计---主线平面设计.在这进行路线的平面设计, 先点拾取, 拾取的点为你的路线起点, 然后再点拔出, 拔出为设计路线的平面交点.选完点之后记得要点击保管, 否则系统数据不会自动更新.4.项目---设计向导.一直点击下一步设计你相应品级公路的参数.(一般来说都不需要改, 系统已经把相应品级的的规范数据已输入进去)最后要点击自动计算超高加宽, 显示呈现红色暗示该标段有不符合规范.5.快捷建立三维数模地形图.1)先将你地形图复制一份出来, 把边框和其他的都删失落, 仅留下地形线即可, 保管关失落该图.2)翻开纬地软件--数模---新数模.根据设计地形图的推想出的最小高程和最年夜高程填进去, 这样系统计算出来的三维地形图误差年夜年夜减小.3)数模---三维数据读入---选dwg文件结尾的----翻开刚才复制的地形图呈现下面的对话框----选择所有空中线的图层, 数据类型都为地形点.然后开始读入---4)数模---数据预检把最小、年夜高程改为刚才修改的一样.确定.5)数模—三角构网保管.数模文件已建成, 把复制的地形图关失落即可.6.设计纵断面图.数模---数模应用---纵断面插值----设计----纵断面设计.(由于纵断面地形图它在固定的位置, 说个快捷键快速找到该图:re回车z回车a回车)拾点—拔出(注意:终点桩号要根据平面终点桩号输入进去)7.设计----纵断面绘图.把绘图栏目那里全部取消, 然后再重新逐一按顺序点击.再点击搜索全线看三个终点桩号是否一样.再点击批量绘图8.横断面绘图.数模---数模应用----横断面插值----设计----路基计算(选择好路基设计文件保管的路径, 最后点击搜索全线)9.设计----横断面设计绘图(划红线位置需要点击)10.所需要的表格在表格的工具栏里, 直接按输出即可.若需要改动表格文字信息在系统那里把它的系统文件路径你设定好的模板位置即可.。
纬地系统连接部图和路面标高图绘制
道路三维动态可视化几何设计第五章连接部图和路面标高图绘制5.1 连接部图(端部设计详图)的绘制菜单:绘图——绘制连接部图命令:DBT连接部图绘制功能主要用于分侧别、分段落绘制立交连接部图和路线加宽段变化图。
对于正常宽度匝道和路线标准断面,推荐用户使用AutoCAD的平移线命令“Offset”直接平移得到路基的各条边缘线,同样方便、快速。
系统主要针对性地处理路线线性或高次抛物线加宽等情况时的路基边线绘制。
连接部图绘制主对话框,如图5-1所示。
图5-1对话框中“位置:”控制绘图时的侧别,“左侧”或“右侧”。
“标注控制:”中的内容用于控制标注桩号的字体高度及旋转方向等。
“边线绘制:”按钮控制在用户点取“计算标注”按钮后,程序是否绘制各相应位置的边线,否则只完成桩号标注工作。
而“步长”中的步长控制绘图过程中曲线的模拟步长。
“起始桩号:”、“终止桩号:”分别用于输入绘图的桩号区间。
而其后的两行编辑框分别输入区间内的路基一侧的路幅宽度变化关于“附加车道”、“附加车道线形平面文件”和各项路幅参数的具体意义请参见下文13.4节中路幅宽度数据文件介绍中的详细内容。
如果用户已经填写了路幅宽度数据文件,就可以单击“上一组”和“下一组”按钮,程序会读取路幅数据,并将匝道左右侧不同的区间路54第一部分纬地道路辅助设计系统教程幅宽度变化自动显示于下面的编辑框中,用户可以在其基础上进行修改。
连接部图绘制程序只根据对话框中的路幅宽度数据来绘图,并不是直接根据项目中的路幅宽度文件进行绘图的。
“绘图标注”按钮主要完成下列任务,从匝道平面线位数据文件中读取匝道平面数据,计算桩号区间路幅宽度的各项值的变化,绘制出有关的曲线线条,如中分带边缘线、行车道边线、土路肩外侧边线,及路基边线等。
如果需要标注桩号时,用户必须输入“桩号序列文件”,程序将处于分段区间范围内的桩号读出,标注于连接部图上。
“确定”按钮用于关闭对话框并同时完成当前对话框输入数据的记忆功能(本系统各部分对话框中的“确定”按钮基本都具有此项功能)。
纬地操作简要步骤
纬地操作简要步骤纬度是地理坐标系统中用于表示地球表面上一个点与赤道之间的角度。
纬度的度量通常是从赤道开始测量,向北和向南分别为正和负。
纬度是地理位置坐标的重要组成部分,在导航、地图制作、气象和航空等领域都有关键作用。
以下是关于纬地操作的简要步骤:1.理解纬地系统:首先,要了解纬地系统的基本概念。
纬地系统由一个赤道和一系列平行线组成,这些平行线被称为纬线,每一纬线上的点都有相同的纬度。
赤道的纬度为0度,北纬和南纬用正负数表示。
2.确定位置的纬度:要确定一个位置的纬度,可以使用全球定位系统(GPS)设备或者地图工具。
GPS设备可以通过卫星信号来确定位置的纬度坐标。
而地图工具可以通过纬度刻度线来确定位置的纬度。
在地图上,纬度刻度线是水平的线条,通常与经度刻度线交叉成网格。
3.理解纬度的范围:纬度的范围从-90度到90度,其中0度为赤道。
从0度到90度的纬度称为北纬,从0度到-90度的纬度称为南纬。
纬度表示一个点距离赤道的角度,当纬度越大,距离赤道越远。
4.确定位置的纬度数值:在地图上,纬度的数值通常以度-分-秒的形式表示。
角度的单位是度,分和秒是角度的分割单位。
例如,一个位置的纬度可能是25度30分40秒。
要确定位置的纬度数值,需要将地图上的纬度刻度线与纬度刻度盘对齐。
5.使用纬地系统导航:纬地系统在导航中起着重要的作用。
当导航到达一个新的目的地时,可以使用纬度来确定正确的方向。
通过调整纬度,可以沿着经度线向北或向南移动,以便最快到达目的地。
6.理解纬度的影响:纬度对地球上的日照、气候和季节变化有重要影响。
由于地球倾斜的角度,不同纬度的地区的太阳照射角度不同,从而导致不同的季节和气候。
7.进一步了解纬地系统:纬地操作还涉及到其他相关概念,如经度、坐标转换和地理信息系统等。
经度是另一个地理位置坐标系统中的重要组成部分,用于表示一个点与本初子午线之间的角度。
坐标转换可以将纬度和经度在不同坐标系统之间进行转换。
纬地(平面设计)
数据输入平面设计步骤及图表打印、平面移线、卵形曲线和大头曲线设计一、输入平面设计数据一种是“平面数据导入/导出”对话框中输入;另一种方法则是在纬地系统的数据编辑器里面按照一定的格式输入平面设计数据,这里的数据编辑器也可以是windows操作系统自带的记事本等工具,只要是保存为纯文本格式即可,下面分别做以介绍。
法(1)在“平面数据导入/导出”对话框中输入点击“数据”菜单下的“平面数据导入/导出”命令,系统弹出“平面数据导入/导出”对话框图1—4各栏目的数据输入说明如下:1)起始桩号:输入本项目的路线起点桩号,纬地中的桩号录入均为纯数据格式,不能加入其它字符。
如起点桩号为K0+000,则输入0,如起点桩号为K2+500,则输入2500。
2)起点X、Y坐标:输入起点的测量坐标,如果外业测量中没有坐标,可以输入一个任意的假设X、Y坐标。
注意坐标值宜输入较大的数值,避免坐标可能会产生负值,因为路线可能往坐标值减少的方向前进,而坐标取值一般都是正数。
3)起始方位角:输入起始边与北方向的方位夹角,输入格式为:按度分秒的格式输入,用小数点分割度和分秒,如115° 03' 25.5 〃则输入115.03255,又如30°则输入30即可。
如果外业中没有测量方位角,也可以输入一个大概估计的方位角,当然输入任意角度也可以。
4) 数据格式:系统支持输入“交点间距”或“交点桩号”两种格式交点编号:输入路线起点、各交点号和终点的名称和编号。
注意输入时可不带“ JD ”两个字符,在平面标注交点时,系统会自动加上“JD”,如“ JD1 ”则输入1。
5)交点间距或交点桩号: 按照选择的数据格式, 输入交点间距或交点桩号。
注意: 如果路线测量中存在虚交或者断链,则必须选择交点间距的数据模式,因为虚 交点不存在交点桩号,而断链以后的桩号是路线测量的表面桩号,并非按路线 实际距离推算的连续桩号,所以不能采用交点桩号的数据格式。
- 1、下载文档前请自行甄别文档内容的完整性,平台不提供额外的编辑、内容补充、找答案等附加服务。
- 2、"仅部分预览"的文档,不可在线预览部分如存在完整性等问题,可反馈申请退款(可完整预览的文档不适用该条件!)。
- 3、如文档侵犯您的权益,请联系客服反馈,我们会尽快为您处理(人工客服工作时间:9:00-18:30)。
纬地系统V4.0版主要功能描述
一、 公路路线辅助设计
1、 平面动态可视化设计与绘图
系统沿用传统的导线法(交点法)经典理论,可进行任意组合形式的公路平面线形的设计计算和
多种模式的反算。用户可在计算机屏幕上交互进行定线及修改设计,在动态拖动修改交点位置、曲线
半径、切线长度缓和曲线参数的同时,可以实时监控其交点间距、转角、半径、外距以及曲线间直线
段长等技术参数。在平面设计完成的同时,系统自动完成全线桩号连续计算和平面绘图。
系统支持基于数字化地形图(图像)上的上述功能,同时也可方便地将低等级公路外业期间已经
完成的平面线形导入本系统。
2、 纵断面交互式动态拉坡与绘图
系统在自动绘制拉坡图的基础上,可动态交互式完成拉坡与竖曲线设计。用户可实时修改变坡点
的位置、标高、竖曲线半径、切线长、外距等参数;对主要纵坡,受控处系统可自动提示控制情况。
对于公路改建项目,系统可根据用户需要自行回归纵坡(点)数据。
系统支持以“桩号区间”和“批量自动绘图”两种方式绘制任意纵横比例和精度的纵断面设计图
及纵面缩图,自动标注沿线桥、涵等构造物,绘图栏目也可根据用户需要自由取舍定制。
以上功能不仅适用于公路主线,同样适用于互通式立交匝道的纵断面设计与绘图。
3、超高、加宽过渡处理及路基设计计算
系统支持处理各种加宽、超高方式及其过渡变化,进而完成路基设计与计算,方便准确地输出路
基设计表,可以自动完成该表中平、竖曲线要素栏目的标注。系统在随盘安装的“纬地路线与立交标
准设计数据库”的基础上,“设计向导”功能自动为项目取用超高和加宽参数,并建立控制数据文件。
另外,系统最新版中路基的断面型式(包括城市道路的多板块断面)可由用户随意指定。
4、 参数化横断面设计与绘图
系统支持常规模式和高等级公路沟底纵坡设计模式下的横断面戴帽设计,同时准确计算并输出断
面填挖方面积以及坡口、坡脚距离等数据。用户可任意定制多级填挖方边坡和不同形式的边沟排水沟。
系统直接根据用户设定自动分幅输出多种比例的横断面设计图,并可自动在图中标注断面信息和
断面各控制点设计高程。
V4.0版新增的横断面设计中支挡防护构造物处理模块,可自动在横断面设计图中绘出挡土墙、护
坡等构造物,并在断面中自动扣除其土方数量。
5、 土石方计算与土石方计算表等成果的输出
系统利用在横断面设计输出的土石方数据,直接计算并输出土石方计算表到Excel中,方便用户
打印输出和进行调配、累加计算等工作。系统可在计算中扣除大、中桥、隧以及路槽的土石方数量,
并考虑到松方系数等影响因素。
特别是系统直接为本公司最新开发完成的“公路工程土石方交互式调配系统”提供原始数据,用
户在方便、直观地鼠标拖曳操作中完成土石方纵向调配,系统自动后台记录用户的每一次操作(可无
限制返回),并据此直接绘制完成全线的土石方纵向调配图表。
6、 公路用地图(表)与总体布置图绘制输出
基于横断面设计成果,系统批量自动分幅绘制公路用地边线,标注桩号与距离或直接标注用地边
线上控制点的平面坐标,同时可输出公路逐桩用地表(仅供参考)和公路用地坐标表。
同样,系统还可基于路线平面图,直接绘制路基边缘线、坡口坡脚线、示坡线以及边沟排水沟边
线等,自动分幅绘制路线总体布置图。新版软件中系统可自动标注所有大、中型桥梁、隧道、涵洞等
构造物。
7、 路线概略透视图绘制(以及全景透视图)
系统可直接利用路线的平、纵、横原始数据,绘制出任意指定桩号位置和视点高度、方向的公路
概略透视图(线条图)。
另外,在系统的数模版中,系统可直接生成全线的地面模型和公路全三维模型,可方便地渲染制
作成三维全景透视图和动态全景透视图(三维动画),并模拟行车状态。
8、 路基沟底标高数据输出沟底纵坡设计
系统的横断面设计模块中可直接输出路基两侧排水沟及边沟的标高数据,新版软件中,用户可交
互式完成路基两侧沟底标高的拉坡设计。
9、 平面移线
平面移线功能主要针对低等级公路项目测设过程中发生移线情况而开发,系统可自动计算搜索得
到移线后各对应桩号的纵、横地面线数据。
二、 互通式立交辅助设计
1、 立交匝道平面线位的动态可视化设计与绘图
系统采用曲线单元设计法和匝道起终点智能化自动接线相结合的立交匝道平面设计思路,方便快
捷地完成任意立交线形的设计和接线。特别是系统在任意曲线单元和接线约束实时拖动条件下的匝道
终点动态接线更为直观、灵活。立交匝道平面线位的动态可视化设计是纬地系统的核心和精髓。
与主线平面绘图相同,系统在立交平面设计完成的同时,完成立交平面线图的绘制,用户可根据
出图需要控制其标注方向、内容和字体大小;同时可直接在线位图中绘制输出立交曲线表和立交主点
坐标表。
2、任意的断面型式、超高加宽过渡处理
系统采用独特而精巧的路幅变化描述和超高变化描述方式,可支持处理任意路基断面变化型式(如
单、双车道变化、分离式路基等)和各种超高变化。
同样基于已随盘安装的“纬地路线与立交标准设计数据库”,“设计向导”功能也可为匝道项目自
动建立超高和加宽变化控制数据。
3、立交连接部设计与绘图
纬地系统除支持处理各种形式的加宽和超高过渡外,更可自动搜索计算立交匝道连接部(加、减
速车道至楔形端)的横向宽度变化,根据用户指定批量标注桩号及各变化段的路幅宽度,自动搜索确
定楔形端位置及相关线形的对应桩号。
4、连接部路面标高数据图绘制
在连接部设计详图(大样图)的基础上,系统可批量计算、标注各变化位置及桩号断面的路基横
向宽度、各控制点的设计标高、横坡及方向等数据。由于系统内部采用同一计算核心模块,所以自动
保证立交连接部处路基设计表、横断面图和路面标高图等输出成果的一致性。
纬地系统的开发设计首先是基于互通式立交设计的,系统v1.0~v2.0版只有互通式立交设计部分
的内容。纬地系统是国内第一套同时兼顾路线和互通式立交辅助设计两套功能的专业软件。前面所述
及的关于路线设计部分的所有功能如纵断面设计与绘图、路基设计、横断面设计与绘图、土石方计算
等均同时适用于互通式立交设计,这里不再重复。
三、 数字化地面模型应用(DTM)
1、 支持多种三维地形数据接口(来源)
系统支持AutoCAD的dwg / dxf格式、Microstation的dgn格式、Card/1软件的asc/pol格式,
以及pnt/dgx/dlx格式等多种三维地形数据来源(接口)。
2、 自动过滤剔除粗差点和处理断裂线相交等情况
系统自动过滤并剔除三维数据中的高程粗差点,自行处理平面位置相同点和断裂线相交等情况,
免去繁多的手工修改处理。
3、 快速建立最优化三角网三维数字地面模型(DTM)
以独特的内存优化模块和最快的点排序方法为后盾,纬地系统建立最优化三角数字地面模型的速
度是国外其他同类软件两倍以上。并且突破了其他软件在处理公路带状长大数模时存在的限制,没有
可处理点数上限。
4、 系统提供多种数据编辑、修改和优化功能
系统不仅提供多种编辑三角网的功能,如插入、删除三维点,交换对角线或插入约束段,另外系
统专门开发了自动优化去除平三角形的数模优化等模块。
5、 系统快速准确进行路线纵横断面插值
系统可根据用户需求快速插值计算并输出路线纵横断面的地面线数据。用户可直接进行纵断拉坡
设计,进而迅速得到土石方工程量数据,使大范围的路线方案的深度、比选成为可能。
四、 公路三维真实模型建立(3DRoad)
(基于数字化地面模型建立的公路三维模型才是真正意义上的公路三维模型)
1、 基于地模快速建立公路全线地面三维模型
2、 基于横断面设计建立真实的公路全三维模型(包括护栏、标线、波型梁等)
3、 自动根据公路全三维模型完成对原地面模型的切割(挖除)
4、 方便地制作公路全景透视图和公路三维动态全景透视图(三维动画)
五、 其他功能
1、 估算路基土石方数量与平均填土高度计算
2、 外业放线计算
3、 任意地理坐标系统的换带计算
4、 桥位、桩基坐标计算
5、 立交连接部鼻端(楔形端)位置自动搜索
6、 桩号自动查询等
六、 数据输入与准备
纬地系统中所有的平、纵、横基础数据录入均开发有实用方便的录入工具(软件)如:平面
数据(交点)导入、纵断面数据输入、横断面数据输入等,方便了用户,减少数据错误。
七、 输出成果
绘图部分
路线平面设计图 路线纵断设计图横断面设计图公路用地图(表)路线总体布置图路线概略与全景
透视图互通式立交平面线位数据图立交连接部设计详图立交连接部路面标高图
纬地系统V4.0版全部采用AutoCAD R2000支持的图纸空间和模型空间方式高效输出路线平、
纵、横等所有图纸,用户可单张、多张或一次性输出所有图纸到打印机中。用户也可打开由纬地系
统自动设定的图纸空间和模型空间的相互关系,自由修改图纸输出比例、位置等。
出表部分
1、 直曲线转角表主点坐标表逐桩坐标表立交曲线表与路线平面曲线元素表纵坡与竖曲线表
2、 路基设计表公路用地表
3、 土石方计算表
以上输出的表格均可由用户自由选择输出方式(AutoCAD图形、WORD、EXCEL三种方式),并自
动分页,方便打印。