CodeWarrior软件与编程地讲解(完整版)
Freescale CodeWarrior 10.6 集成开发环境(IDE)使用手册
单击此处“…”则会 弹出下页ppt所示的 周期设置窗口
CodeWarrior 10.6 IDE使用手册
14
设置定时器中断周期为10ms
在此输入期望的中断周期10ms 这里列出了当前选择的定时器能 够实现的定时周期及精度 设此处限定定时误差,若设置的中断周 期超出此误差,则处理器专家会报错
CodeWarrior 10.6 IDE使用手册
CodeWarrior 10.6 IDE使用手册
3
利用工程向导快速创建KEA工程
e.选择编程语言和浮点数支持以及控制 台(console)硬件支持: f.选择是否使用处理器专家系统以及工 程外设driver的使用模式:
CodeWarrior 10.6 IDE使用手册
4
利用工程向导快速创建KEA工程
其中包含了默认看门狗、SWD调试口以及Flash Memory 的设置
在CPU组件的属性设置中还包括CPU 内核中断/复位设置(CPU interrupt/reset)
其中包含了CPU内核系统级中断(ARM Cortex M0+实现的 异常):不可屏蔽中断NMI、硬件错误异常Hard fault(当 CPU执行非法指令、非对其地址访问时触发该异常,可以 用于捕获程序跑飞时的场景)、超级调用Supervisor Call和 可请求服务异常(用于RTOS系统任务切换),以及内部时 钟失锁(ICS Loss of lock)。所有这些中断的优先级都高于 外设中断。
CodeWarrior 10.6 IDE使用手册
18
添加和配置定时器中断组件
最后在中断回调函数中添加中断处理,这里为全局中断计数器加1; 注意:用户的中断处理代码必须加在处理器专家指定的位置
CodeWarrior 10.6 IDE使用手册
Code Warrior 10.6 DSC培训教程

Code Warrior 10.6 DSC培训教程Larry Yang 6/4, 2015 一.创建一个工程1. File -> New -> Bareboard Project,输入工程名“MC56F82748”,然后点“Next”。
然后选择芯片型号:MC56F82748,如下图所示,然后点“Next”。
接下来选择仿真器类型,常用的有MultiLink Universal, Open Source JTAG和Freescale USB TAP,可多选,然后点“Next”。
在Language and Build Tools Options页面选C,然后点“Next”,选择Processor Expert,该工具可以快速完成芯片的配置,省去了看参考手册的时间。
最后点“Finish”完成工程的创建。
2工程创建完成后,接下来就可以下载调试程序了。
(1)右击工程名,选择Debug As -> Debug Configurations,如下图所示。
然后选择MC56F82748_FLASH_SDM_FSL_USB TAP-> Debug,开始编译下载程序。
程序下载完成后,在工具栏中点“绿色的三角形”开始运行。
调试程序,也可以点下面的图标。
二.打开一个现有的工程菜单File -> Import,在对话框中选择“Existing Projects into Workspace”,如下图所示。
然后选择工程所在的路径,如果需要将工程从其它路径拷贝到当前的worksapce,则选中” Copy projects into workspace”,点”Finish”即打开工程。
三.点亮LED灯1.通过Processor Expert添加IO初始化组件Components Library -> Categories -> CPU Internal Peripherals -> Port I/O,双击 BitIO,添加IO元件。
codewarrior介绍及安装流程
CodeWarrior 5.1软件安装流程本文档主要用来说明CodeWarrior软件安装流程。
2 软件介绍CodeWarrior Development Studio是一个全面的集成开发环境(IDE),提供了高度可视化和自动化的框架,可加快最复杂的嵌入式应用的开发速度。
CodeWarrior包括构建平台和应用所必需的所有主要工具 - IDE、编译器、调试器、编辑器、链接器、汇编程序等。
而且得益于各种处理器和平台(从Motorola 到TI到Intel)间的通用功能性,CodeWarrior IDE支持开发人员插入他们所喜爱的工具,使他们可以自由地以希望的方式工作。
另外,它是一个单一的开发环境,在所有所支持的工作站和个人电脑之间保持一致。
在每个所支持的平台上,性能及使用均是相同的,则无需担心主机至主机的不兼容。
其主要功能如下:1、项目管理器:为软件开发人员处理最高级别的文件管理;按照主要组别组织项目条目;追踪状态信息(例如文件修改日期);确定每个构建中特定文件的构建顺序及内容;协调插件程序以提供箱版本控制和RTOS支持这样的业务。
2、文本编辑器:支持源代码和其他文本文件的创建和处理。
与其他的IDE 功能完全集成。
3、搜索引擎:查找特定的文字串;以替代文字替换找到的文字;支持常规表达的使用;提供文件比较及差别功能。
4、源浏览器:保存用于程序的符号数据库;包括变量及功能的名称和值的符号的举例;使用符号数据库协助代码浏览;将每个符号与此符号相关代码的其他位置链接;处理目标导向和程序语言。
5、构建系统:使用编译器从源代码生成可重新定位的目标代码,并使用链接器从目标码生成最后的可执行图像。
CodeWarrior C/C++*编译器工具包括业内领先的C/C++*语言CodeWarrior编译器,包括标准模板库(STL)及各种其他工具。
6、源级别调试器:提供高性能窗口的源级别调试器,配备最新的高效率增强型图形性能,缩短板的bring-up和应用开发时间;使用符号数据库,提供源级别调试;支持符号格式,例如CodeView、Debug With Arbitrary Records Format (DWARF)和STABS。
Codewarrior Processor Expert使用简介
使用简介 Freescale 傅志强
Freescale™ and the Freescale logo are trademarks of Freescale Semiconductor, Inc. All other product or service names are the property of their respective owners. © Freescale Semiconductor, Inc. 2005.
Slide 3
TM
Freescale™ and the Freescale logo are trademarks of Freescale Semiconductor, Inc. All other product or service names are the property of their respective owners. © Freescale Semiconductor, Inc. 2005.
Processor Expert™
1
点击 “创建工程”
Slide 12
TM
Freescale™ and the Freescale logo are trademarks of Freescale Semiconductor, Inc. All other product or service names are the property of their respective owners. © Freescale Semiconductor, Inc. 2005.
Processor Expert™
使用Processor Expert™(芯片专家系统) 使用 (芯片专家系统) 创建一个简单的项目
codewarrior注释
codewarrior注释CodeWarrior是一种集成开发环境(IDE),可用于编写和调试嵌入式系统的软件。
它最初是由Metrowerks开发的,后来被Freescale收购,现在是NXP半导体的一部分。
CodeWarrior 具有众多功能和工具,可以帮助开发者编写和调试高效、可靠的嵌入式代码。
在CodeWarrior中,注释是一种常见的编程实践,用于解释代码的功能、目的和工作原理。
注释对于代码维护和合作开发非常重要,可以提高代码的可读性和可维护性。
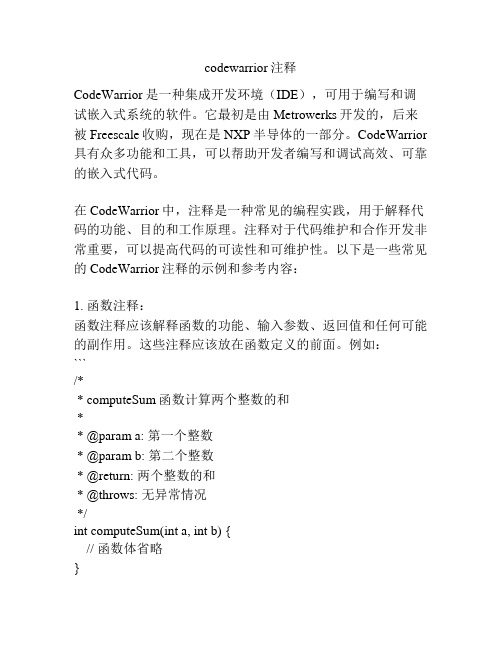
以下是一些常见的CodeWarrior注释的示例和参考内容:1. 函数注释:函数注释应该解释函数的功能、输入参数、返回值和任何可能的副作用。
这些注释应该放在函数定义的前面。
例如:```/** computeSum函数计算两个整数的和** @param a: 第一个整数* @param b: 第二个整数* @return: 两个整数的和* @throws: 无异常情况*/int computeSum(int a, int b) {// 函数体省略}```2. 类和结构注释:对于类和结构,应该在其定义之前加入注释,解释其目的和用法。
```/** Point类表示一个二维平面上的点*/class Point {// 类定义省略};```3. 代码段注释:有时候,较复杂的代码段可能需要解释其执行逻辑。
在这种情况下,可以将注释放在代码段之前或之后。
```// 初始化变量sum为0int sum = 0;// 计算数组中的所有元素的和for (int i = 0; i < size; i++) {sum += array[i]; // 累加每个元素到sum}```4. TODO注释:TODO注释用于指示代码中需要完成或改进的部分。
这对于团队合作和代码维护非常有用。
```// TODO: 实现排序算法逻辑void sortArray(int array[], int size) {// 未完待续...}```5. Bug注释:Bug注释用于记录代码中已知的问题或bug。
codewarrior介绍及安装流程【精选】
CodeWarrior 5.1软件安装流程信入党组形式组织一次“坚持根讨论不,开展党邀请党话,做合格党员”党规、学在全市号),结育,基础实党的”专题教优,进一持问题导为协调面小1目的本文档主要用来说明CodeWarrior软件安装流程。
2 软件介绍CodeWarrior Development Studio是一个全面的集成开发环境(IDE),提供了高度可视化和自动化的框架,可加快最复杂的嵌入式应用的开发速度。
CodeWarrior包括构建平台和应用所必需的所有主要工具- IDE、编译器、调试器、编辑器、链接器、汇编程序等。
而且得益于各种处理器和平台(从Motorola到TI到Intel)间的通用功能性,CodeWarrior IDE支持开发人员插入他们所喜爱的工具,使他们可以自由地以希望的方式工作。
另外,它是一个单一的开发环境,在所有所支持的工作站和个人电脑之间保持一致。
在每个所支持的平台上,性能及使用均是相同的,则无需担心主机至主机的不兼容。
其主要功能如下:1、项目管理器:为软件开发人员处理最高级别的文件管理;按照主要组别组织项目条目;追踪状态信息(例如文件修改日期);确定每个构建中特定文件的构建顺序及内容;协调插件程序以提供箱版本控制和RTOS支持这样的业务。
2、文本编辑器:支持源代码和其他文本文件的创建和处理。
与其他的IDE 功能完全集成。
3、搜索引擎:查找特定的文字串;以替代文字替换找到的文字;支持常规表达的使用;提供文件比较及差别功能。
4、源浏览器:保存用于程序的符号数据库;包括变量及功能的名称和值的符号的举例;使用符号数据库协助代码浏览;将每个符号与此符号相关代码的其他位置链接;处理目标导向和程序语言。
5、构建系统:使用编译器从源代码生成可重新定位的目标代码,并使用链接器从目标码生成最后的可执行图像。
CodeWarrior C/C++*编译器工具包括业内领先的C/C++*语言CodeWarrior编译器,包括标准模板库(STL)及各种其他工具。
单元一(3)08C语言运算符使用及Codewarrior调试.
单元一(3)08C语言运算符使用及Codewarrior调试一、08C语言运算符介绍C语言的运算符与大多数计算机语言基本相同,分为算术、逻辑、关系和位运算及一些特殊的操作符。
下表列出了C语言的运算符及使用方法举例。
注:增量运算符和减量运算符存在运算和取数先后次序,例如,A++是先取变量A的值再对A加1,而++A是先对变量A加1再取A的值。
二、变量定义1.全局变量和局部变量全局变量为整个程序而定义,在整个程序运行期间,它们占用固定的RAM资源。
在C 语言中,在所有函数外部声明的变量都认为具有全局作用域,这些声明通常置于源文件的顶部。
“全局”实际上仅仅意味着标识符从声明点到文件末尾的范围内是可访问的,当程序包含多个源文件时,则在一个文件中定义的全局变量在其他文件引用时,需要使用extern关键字声明。
在引用文件内部,标识符的作用域是由extern声明的位置确定的。
如果该声明是全局的,那么该标识符对于文件是全局的;如果该声明是放在块内的,则它对于那个块就是局部的。
局部变量为某个函数或子程序而定义,只在函数运行时,从堆栈空间中分配存储空间;函数运行结束,所占用堆栈空间释放。
2.变量修饰符变量定义有三个修饰符值得注意,虽然它们与标准C是相同的,但是在嵌入式C语言中又有不同的含义。
(1)volatile大多数编译器对源程序编译时做优化操作,其中一种优化方法是基于这种假设:除非明确地把某值写到内存,否则内存中的值不会改变。
所以如果源程序中频繁使用某个内存,编译器会把这个内存放到CPU寄存器或高速缓存中,提高代码运行速度。
在嵌入式系统中,这种优化会影响程序的正确执行,典型的情况是:①硬件外设寄存器的值随时都在变化,并且这种变化是不需要在写寄存器程序来改变。
②内存变量在主程序中没有显示改变,但在中断服务程序被改变,如果编译器在主程序中将内存以寄存器来取代,中断服务程序对变量的改变就不能传递到主程序中。
对于这两种情况做变量声明时,需要加前缀volatile,告诉编译器不要对这些变量做优化操作。
CodeWarrior V10.1 使用方法快速入门
CodeWarrior V10.1 使用方法快速入门CodeWarrior V10.1 Quick Start Guide1.启动CodeWarrior。
如果是首次启动该软件,需要设定一个工作空间。
选定工作空间后,如果是第一次运行CodeWarrior,则首先进入“欢迎”界面,点击该界面左上角“×”按钮,关闭该界面后即进入“C/C++项目”编程界面。
2.新建工程:在工具栏中选择 “文件->新建->BareBoard Project”,如图1所示。
图11)设定文件名在缺省状态下,该新建工程将保存在当前工作空间的文件夹下。
完成后点击“下一步”,如图2所示。
图22)选择芯片类型。
此处以MK10N512VMD100为例。
选择好芯片类型后,点击“下一步”,如图3所示。
图33)选择调试器类型(可多选)如果成功安装了新的USBBDM并且patch成功,此处会出现USBDM选项,如图4所示。
如果要在该工程中添加一些已有文件、或者希望生成一个默认的main.c文件,则完成后点击“下一步”。
如无上述需求,则直接点击“完成”。
此时将生成一个包含Startup Code、但不含main.c 的新工程。
图44)选择导入的默认文件以及是否生成main.c,完成后点击“下一步”。
CodeWarrior的默认编程语言是C,也支持C++和汇编,如果使用C语言编程,此处也可直接单击“完成”,具体操作如图5所示。
图55)选择编程语言,完成后点击“下一步”,如图6所示。
图66)选择是否需要调用一些快速开发工具(如Processor Expert、Device Initialization),完成后点击“完成”,如图7所示。
图7至此,CodeWarrior将为您生成一个包含Startup.c和main.c的新工程。
在编程界面(C/C++项目)下的工程窗口下,您可以浏览该工程含有的全部文件。
如果您无法找到上述窗口,可在CodeWarrior界面左下角的视图管理器中寻找。
CodeWarrior开发环境快速入门-工程创建for9S12DG128B
CodeWarrior 开发环境迅速入门 -工程创立先看一下你的实验板上单片机是发环境迅速入门 -工程创立forMC9S12DG128吧假如是,往下看。
假如不是,去看“”。
CodeWarrior 开注意一下文末的“注”。
1、运转CodeWarrior IDEa、选择开始 > 程序 > CodeWarrior > CW for HC12 --- 弹出菜单。
b、选择 CodeWarrior IDE -- IDE启动 , 同时弹出CodeWarrior 窗口。
2、在 IDE 主菜单栏中 , 选择 File > New –弹出新建窗口。
a、选择 HC(S)12 New Project Wizardb、在 Project name 文本框中 , 输入工程名—-工程创立后IDE 会自动增添 .mcp 扩展名。
c、在 Locationd、点击 OK --文本框中输入工程保留的地点或许点击弹出 New Project Wizard –Page 1。
Set... 阅读文件夹。
点击 Next --弹出 New Project Wizard –Page 2。
f、选择MC9S12DG128B。
g、点击 Next -- 弹出 New Project Wizard - Page 3 。
h、保证复选框 C 被选中。
i、点击 Next –弹出 New Project Wizard - Page 4 ;用户能够选择能否用“ Processor Expert”,由软件自动达成中止向量,外头模块初始化等工作。
j、选择Nok、点击Next –弹出 New Project Wizard - Page 5 ;用户能够选择能否将工程配置使用PC-lint。
l、选择Nom、点击Next –弹出 New Project Wizard - Page 6 ;用户能够选择启动代码的种类。
n、选择 ANSI startup codeo、点击 Next button -- New Project Wizard - Page 7 ;用户能够选择工程配置的浮点种类。
codewarrior快速入门
codewarrior快速入门CodeWarrior 开发环境快速入门-适用HC(S)08/RS08 单片机CodeWarrior 对计算机系统要求:硬件: 400MHZ Pentium II 以上处理器, 128MB 内存, CD-ROM, USB 接口操作系统:Microsoft Windows 98SE/2000/XP 占用磁盘空间:完全安装需要635M 第一步:安装 CodeWarrior 软件 1.安装 CodeWarrior 软件 1)运行 CD 中的 CW08_V5_1.EXE 文件 2)按照提示完成安装 2.安装升级包软件 1)运行 HC08V5_1_OSBDM_SP.EXE 文件,使 CodeWarrior 软件支持 HCS08 Open Source BDM 调试工具 2)运行 rs08ka_sp.exe 文件,使 CodeWarrior 软件支持 RS08 Open Source BDM 调试工具注:1)以上两个软件会自动安装到 CW08_V5_1.EXE 软件的安装目录下。
2)该免费软件在使用上有一定限制。
当使用汇编语言开发应用程序时,对源代码数量是没有限制的;当使用 C 语言开发应用程序时,对源代码有 16K 的限制,同时对同一工程下的文件数目限制在 32 个之内。
3.如果计算机使用 Windows 98 SE,在完成安装后重启计算机。
第二步:创建一个工程 1.运行 CodeWarrior IDE 1) 开始>程序>Freescale CodeWarrior>HC08 V5.1 2) 选择 CodeWarrior IDE,IDE 开始运行,出现 Startup 窗口 Create New Project:创建一个新工程Load Example Project:加载一个示例工程Load Previous Project:加载以前打开过的工程 Run Getting started Tutorial:运行CodeWarrior 软件帮助文档Start Using CodeWarrior:返回CodeWarrior 主窗口Startup 窗口2.创建一个新工程1)选择Create New Project-出现HC(S)08 New Project 窗口 Select the derivative you would like to use 对话框中选择所使用的单片机型号Choose your default connection 对话框选择工程所使用的开发工具,选择每一种开发工具,在下面的显示栏中显示其相关信息。
- 1、下载文档前请自行甄别文档内容的完整性,平台不提供额外的编辑、内容补充、找答案等附加服务。
- 2、"仅部分预览"的文档,不可在线预览部分如存在完整性等问题,可反馈申请退款(可完整预览的文档不适用该条件!)。
- 3、如文档侵犯您的权益,请联系客服反馈,我们会尽快为您处理(人工客服工作时间:9:00-18:30)。
CodeWarrior 使用教程第一课认识CodeWarriorTranslated from CodeWarrior 能做些什么?当你知道自己能写更好的程序时,你一定不会再使用别人开发的应用程序。
但是常常会发生这种情况,就是当你写了无数行代码后,却找不到使得整个程序出错的那一行代码,导致根本没法编译和链接整个程序。
这可能更令人灰心丧气。
本文将告诉你如何使用 CodeWarrior 这一工具解决上述问题。
从现在开始,我们将集中精力学习如何在 CodeWarrior 中使用 C/C++ 进行编程。
为了学习本课程,你必须已经能够比较熟练地使用上述两种语言之一。
CodeWarrior 也可以支持 Java 开发,但那是另一门课程的内容。
本课程仅限于在 Windows 平台上使用 CodeWarrior 进行的开发。
一旦你精通了 CodeWarrior 编程后,你可以试试在其它平台上使用 CodeWarrior。
本文中讨论过的大部分内容都可以应用到开发 Mac 应用程序中。
CodeWarrior 能够自动地检查代码中的明显错误,它通过一个集成的调试器和编辑器来扫描你的代码,以找到并减少明显的错误,然后编译并链接程序以便计算机能够理解并执行你的程序。
你所使用过的每个应用程序都经过了使用象 CodeWorrior 这样的开发工具进行编码、编译、编辑、链接和调试的过程。
现在你在我们的指导下,自己也可以去做这些工作了。
你可以使用 CodeWarrior 来编写你能够想象得到的任何一种类型的程序。
如果你是一个初学者,你可以选择编写一个应用程序(比如一个可执行程序),比如象微软公司的文本编辑器 WordPad 这样的应用程序。
应用程序可能是最容易编写的程序了,而那些庞大的商业软件,比如象 Adobe Photoshop,Microsoft Word 以及 CodeWarrior 软件都是极其复杂的。
其它类型的程序指的是控制面板(control panels),动态链接库(dynamic linked libraries,DLLs) 和插件(plug-ins)。
我们先来简单的讨论一下这些类型的程序。
在 Windows 中,控制面板程序是一些(通常比较小的)存放在控制面板目录下的程序,可以在开始菜单的控制面板项中看到它们。
控制面板实际上是设置系统功能的一个简单界面,比如可以在控制面板中完成诸如设置音量和鼠标移动速度这样一些参数。
动态链接库 (DLLs) 提供了一些很有用的被系统和应用程序共享的函数。
通常它们都是没有用户界面的。
插件 (Plug-ins) 有点类似于 DLLs,插件也是可供其它软件使用的小程序,但插件只能被特定的软件使用。
比如说,Photoshop 的插件允许程序员方便地扩展 Photoshop 的功能,而不需要去修改它的源代码。
同样的,许多 Web 浏览器也使用插件来增加功能,或者为了让你能够看到页面上的新的内容类型。
实际上,有许多程序,包括 CodeWarrior,都使用这种插件结构。
一旦你掌握了 CodeWarior 和你所使用的操作系统的编程接口时,你可以编写许多其它类型的程序。
实际上,本课程也是你深入学习其它编程方法的基础课程。
你已经找到了一个最优秀的地方开始你的编程之旅。
好,现在请坐好,放松,去吸取这门课程的精华吧,你将踏上一条成为一个编程武士的道路!CodeWarrior 入门CodeWarrior 是一个复杂的应用程序,你必须花点时间来了解它的各种各样的组件和功能。
第一课将讲述CodeWarrior IDE 的安装。
我们将学习菜单、窗口和其它的一些方面。
建议你最好一边学习本课程,一边学习使用 CodeWarrior 的集成开发环境。
我们从运行 CodeWarrior 开始,如果你按照默认方式安装的CodeWarrior 软件,那么在 Windows 的桌面上将会有一个该软件的快捷方式图标。
双击该图标启动CodeWarrior 的集成开发环境。
如果在 Windows 桌面上没有这个快捷图标(这种情况经常发生),你可以在C:\Program Files\Metrowerks\CodeWarrior\Bin 中找到 IDE.exe 文件,然后运行它。
工具条启动 CodeWarrior 后,你将会看到,在屏幕上方的菜单下面有一个工具条。
这个工具条(见图1-1)包含了一些常用菜单项的快捷方式。
在后面的章节中,你将学到如何设置这个工具条,甚至是整个 IDE 环境。
现在,你应记住,这个工具条用于快捷使用 IDE 中的功能。
图 1-1: CodeWarrior IDE 的工具条文件菜单CodeWarrior IDE 的菜单是按照标准方式设置的。
其中的文件菜单用于处理和文件相关的一些操作,比如创建、打开、保存和打印等等。
编辑菜单CodeWarrior 的编辑菜单和其它的 Windows 应用程序也很相像。
其中包括了剪切、复制和粘贴等操作,以及其它一些使得程序员能够更方便地管理源码版面布局的选项。
在编辑菜单中还有一个 Preferences 项,我们在这一课的后面将提到它。
查看菜单查看菜单(图1-2)用于安排工具条和其它窗口在 CodeWarrior 环境中如何显示的选项。
所谓的“其它窗口”包括许多特殊的窗口,比如观察点(Watchpoints)窗口,表达式(Expressions)窗口,过程(Processes)窗口和全局变量(Global Variables)窗口等。
图 1-2: 查看菜单中的工具条子菜单查找菜单查找菜单用于在单个文件或硬盘的目录中查找指定的代码。
你可以使用它来方便地替换文本块或在你的代码中搜索指定的项目。
即使是在小工程中使用这个工具也非常方便。
工程菜单工程菜单中的工具用于管理 CodeWarrior 工程。
一个工程包括组成你正在编写的程序的所有的文件,包括头文件、源代码和库文件。
工程窗口显示了所有这些文件的名称。
我们将在第二课中深入讨论这部分内容。
调试菜单这是在编制程序中最常用到的工具。
我们将在第五课中详细介绍它的使用方法。
窗口菜单用于在 CodeWarrior 环境管理窗口显示方式的菜单。
帮助菜单通过帮助菜单可以到网上寻求关于 CodeWarrior 任何问题的在线解答。
够酷的吧?了解 CodeWarrior 集成开发环境的设置CodeWarrior IDE 提供了许多设置以便让你定制你的工作环境。
当你选择了编辑菜单中的 Preferences 项时,你将会看到一个设置对话框(如图1-3)。
在该对话框中,有控制 CodeWarrior 编辑器、调试器和其它许多功能的界面和行为的选项。
在这一节中,我们将学习这些设置的使用。
图 1-3: 设置对话框你可以在自己的 CodeWarrior 中试试上述这些设置项。
你可以先点击问号标志,然后点击你感兴趣的项目,就可以得到一个有关该项目的用途的简短介绍,也可以从帮助菜单中得到更详细的信息。
通用设置•编译设置(Build Settings):选择是否在执行编译之前保存已打开的源文件,以及有多少内存被用于编译工作;•IDE 之外(IDE Extras):几个独立的设置。
比如指定 CodeWarrior 是否使用一个第三方的文本编辑器——因为集成的编辑器并不是很完美,这可以通过指定一个你惯用的编辑器来替代它;•插件设置(Plug-In Settings): 供插件开发商调试他们的插件;•隐藏文件夹(Shielded Folders):在这里指定的文件夹在工程设计期间,或执行查找和比较操作期间,将要被忽略掉。
如果在你的工程级有一个巨大的“数据”文件目录,而你又不想让这些文件降低CodeWarrior 的操作速度时,这个设置就很管用了;•资料树(Source Trees):用于指定 CodeWarrior 在编译程序时用不着的目录。
编辑器设置•编辑器设置(Editor Settings):几个用于定制编辑器显示、管理文本和窗口的设置项;•字体和制表符(Fonts and Tabs):设置编辑器中的文本大小、字体、制表符和其它显示设置;•文本颜色(Text Colors):用于指定特定语言元素(比如程序的注释)在编辑窗口中的显示的颜色。
调试器设置•显示设置(Display Settings):几个用于定制调试器显示的设置项;•视窗化(Windowing):设定调试器如何管理它的窗口(比如隐藏所有打开的编辑器窗口);•全局设置(Global Settings):几个用于定制调试器在全局层次如何工作的设置。
比如当一个包含了程序调试信息的文件被打开时,是否启动这个程序;•远程连接(Remote Connections):允许通过 TCP/IP 进行远程调试。
这样,你就可以在地球的另一边调试你的软件了;•Java 设置/Java 调试(Java Settings/Java Debugging):允许你设置特定的 Java 编程语言选项。
本课程不涉及这部分内容。
RAD 工具•Layout 编辑器:几个用于在 CodeWarrior 中定制快速应用程序开发工具的使用的设置。
正如你所见到的,CodeWarrior 有许多设置项和选项。
设置完后点击“Save”按钮保存你所作的修改,点击“Close”按钮将忽略你所作的所有修改。
在进入下一节课之前,多练习几次。
最后请确认“默认的文本文件格式(Default Text File Format)”(在编辑器设置面板中)保持为 DOS 设置。
(待续) 附原文:Lesson 1: Getting to Know CodeWarriorWhat Will CodeWarrior Do for Me?It can be frustrating to use other people's applications when you know you can make something better. But it can also be frustrating when you have a zillion lines of code and can't find the one typo that's making the whole application go kablooey -- not to mention getting it all compiled and linked and so on.This is why you are here. And this is why CodeWarrior was created.For now, we'll focus on writing programs in CodeWarrior using the C or C++ programming languages. This course assumes that you're pretty comfortable using at least one of these languages. CodeWarrior also supports Java development, but that will be covered in a separate class. This course concerns itself with Windows platform development. Once you get really good at programming with CodeWarrior, you can explore the other platforms for which tools have been designed. Much of what will bediscussed here can also be applied to developing Mac applications.CodeWarrior automatically checks your code for obvious errors, helps you scan it for less obvious ones (via an integrated debugger and editor), and then compiles and links the code so that your computer can understand and execute your program. Every application that you have used has been through the coding, compiling, editing, linking, and debugging process, using tools like CodeWarrior. Now you can do it too! But we still have to teach you how.Using CodeWarrior, you can write just about any type of program you can imagine. If you are a beginner, you may choose to write an application (also known as an executable) as your first program. You might choose to create something as basic as WordPad, Microsoft's text editor, for example. Applications are probably the simplest type of program to write, though large commercial ones like Adobe Photoshop, Microsoft Word and even CodeWarrior itself are quite complex. Other program types include control panels, dynamic linked libraries (DLLs), and plug-ins. Let's talk about these types for a minute.Under Windows, control panels are those (usually small) programs that are stored in your Control Panels directory and visible in the Control Panel section on the Start menu. The control panel itself is simply an interface to a system-wide feature, like setting the sound volume or the mouse's motion speed, for example.DLLs supply useful functions that are shared by the operating system and applications. They typically don't have a user interfacePlug-ins are similar to DLLs in that they provide small pieces of code that are used by other software. However, a single program typically uses this code. For example, Photoshop plug-ins allow programmers to easily extend the capabilities of the Photoshop application without having access to its source code. Likewise, many Web browsers use plug-ins that add extra features to the application or allow you to manipulate new content types on the Web. Many programs, including CodeWarrior, make use of this plug-in architecture.There are plenty of other types of programs you can write once you master CodeWarrior and the programming interfaces for your operating system. In fact, once you complete this course, you can take other courses in which you will learn more in-depth methods of programming your computer. You've chosen an excellent place to begin your journey, however. So sit back, relax, and absorb the lessons in this course, and you'll be well on your way to becoming a CodeWarrior!An Introduction to the CodeWarrior ApplicationCodeWarrior is a complex application. If you really want to benefit from all of its features, you should take this time to get to know its various components and the capabilities that will be available to you. This first lesson will give you a basic overview of how the CodeWarrior IDE is set up. (That acronym gets thrown around a lot, and it's short for Integrated Development Environment. ) We'll take a look at menus, windows, and other aspects of the program. Follow along with the CodeWarrior IDE while you read through these lessons. Start by launching the IDE application. If you followed the defaults for the CodeWarrior software installation, there will be an icon that represents a shortcut to the program.Double-click on it to start the IDE. If the shortcut icon is absent (these things happen), you can typically find the program at C:\Program Files\Metrowerks\CodeWarrior\Bin\IDE.exe.ToolbarWhen you launch the CodeWarrior IDE, you'll notice a toolbar attached to the menu at the top of your screen. This toolbar (Figure 1-1) contains buttons that are shortcuts to frequently used menu items. You'll learn how to customize this toolbar -- and even the entire IDE -- in a later lesson. For now, notice that this toolbar can be used to quickly access features within the IDE.Figure 1-1: The CodeWarrior IDE toolbar.File MenuThe menus in the CodeWarrior IDE are set up in a relatively standard manner. The File menu contains choices that manage the care and feeding of files. It has standard items that let you create, open, save, and print files.Edit MenuThe Edit menu will also seem familiar if you use other Windows applications. You'll find commands that cut, copy, and paste text, as well as a few other options to help programmers more easily manage source code layout. There is also a Preferences item in the Edit menu that we'll discuss later in thislesson.View MenuThe View menu (Figure 1-2) gives you options to manage which toolbars and other windows are displayed in the CodeWarrior environment. Some of these windows include various specialty windows, such as the Watchpoints window, Expressions window, Processes window, and Global Variables window.Figure 1-2: The Toolbar submenu of the View Menu.Search MenuThe Search menu's commands allow you to locate source code within a single file, or within the directories of your hard disk. You can also easily replace large blocks of text or search your source codefor references to other source code. These tools can be very handy, even for small projects. Project MenuTools in the Project menu allow you to manage CodeWarrior projects. A project includes all of the files that make up a program you are writing, including its headers, source code, and libraries. The Project window serves as a container for these files. We'll discuss this in more depth in Lesson 2.Debug MenuWhen your source code doesn't do exactly what you want it to (or your computer crashes when you run your program), you'll develop a close relationship with the items on the Debug menu. We'll discuss debugging in Lesson 5.Window MenuThe Window menu gives you the basic options to manage cascading and tiling windows in the CodeWarrior environment.Help MenuLastly, use the Help menu to get online help with just about any item in CodeWarrior. Pretty cool setup, huh?Getting to Know IDE PreferencesThe CodeWarrior IDE has numerous preferences that you can use to customize your work environment. You may only want to change the text color, or you might want to get more personal, changing lots of settings. When you select Preferences from the Edit menu, you are presented with the IDE Preferences dialog box (Figure 1-3). There, you'll find options that control the appearance and behavior of the CodeWarrior editor, debugger, and lots more. In this section, we'll take a look at these preferences.Figure 1-3: The Preferences dialog box.As each item is described below, follow along in your own copy of CodeWarrior, and check out the various options available. You can get additional help by clicking on the question mark, then the item you're interested in. You'll see a terse description of the selected item's purpose. More detailed information is also available from the Help menu.•Build Settings: Choose whether to save open-source code files before performing a build and how much memory to use while building.•IDE Extras: Various settings that don't belong anywhere else. Here's where you can have CodeWarrior interoperate with a third-party text editor. The integration of editors with the IDE is often less than perfect, but this limitation may be offset by the ability to use an editor that you know and like.•Plug-In Settings: Used by plug-in developers to assist in the debugging of plug-ins.•Shielded Folders: Directories listed here are skipped (ignored) during project and/or find and compare operations. This can be useful if you have a large directory of "data" files inside your project hierarchy yet you do not want those files to slow down certain operations ofCodeWarrior.•Source Trees: This lets you specify directories other than the standard ones CodeWarrior searches when it builds a program.Editor Preferences•Editor Settings: Various settings to customize the way the Editor displays and manages text and windows.•Fonts and Tabs: Text size, font, tab, and other display settings for the Editor windows.•Text Colors: Like the browser display, you choose the color in which certain language elements (such as comments) appear in the Editor window.•Display Settings: Various settings to customize the display of the debugger.•Windowing: How the debugger manages its windows (e.g., hiding any open editor windows).•Global Settings: Various settings that customize how the debugger works on a global level, such as whether to launch a program when you open a file that contains the program'sdebugging information.•Remote Connections: Allows debugging over TCP/IP. You can debug software on a computer on the other side of the Earth!•Java Settings/Java Debugging: Allows you to set specific java programming language options, not covered in this course.RAD Tools•Layout Editor: Various settings to customize the use of rapid application development tools within CodeWarrior.As you can see, there are numerous settings and options that can be set. Clicking the Save button will save any changes you've made. Clicking the Close box for the Preferences window will cause CodeWarrior to ignore any changes you've made. Go ahead and play with it a little before you proceed to the next lesson. Make sure the Default Text File Format (in the Editor Settings panel) remains set for DOS.第二课显示和定制工程和目标文件(1)Translated from 本课将讲述 CodeWarrior 操作文件的方式以及介绍它的工程(Project)窗口。