温度计说明书
Fluke OS562 无接触温度计说明书

OS562Starts at£84SpecificationsMeasurement Range:-60 to 760°C (-76 to 1400°F); Type K thermocouple input, -64 to 1400°C (-83 to 1999°F)Accuracy:±2% of reading or 2°C (4°F),whichever is greater; Type K thermocouple,1% of reading or 1°C (2°F)Resolution:1°C/1°F (0.1°C/0.1°F between -9.9 and 199.9)Response Time:1 sEmissivity:0.10 to 1.00 adjustable,preset to 0.95Field of View:12:1Operating Temperature:0 to 50°C (32 to 122°F)Power:2 “AAA” alkaline batteries (included)Battery Life:18-hr typical continuous use with laser and backlight; 180-hr without laser and backlightDimensions:175.2 x 39.0 x 71.9 mm(6.9 x 1.53 x 2.8")Weight:179 g (6.3 oz) including batteries The OS562 is the ultimate tool for temperature measurements, with non-contact measurement capability and compatibility with Type K thermocouples. Its user-friendly,5-key operation offers max, min,DIF, hold, and AVG modes. The backlit LCD screen and the laser can be switched on and off, while auto power-off is fixed at 60 seconds.These features give the OS562 the versatility to meet most temperature measurement requirements. It uses 2 “AAA” batteries (included) and has an ultra-long battery life.ߜAdjustable Emissivity ߜ12:1 Field of View ߜLong Battery Life ߜLarge, Backlit LCD Screen ߜAuto Power-Off ߜType K T/C InputOS562, £84,shown smaller than actual size.These models include a free 1 m (40") Type K insulated beaded wire thermocouple withsubminiature connector and wire spool caddy (1 per channel). Order a Spare! Model No. SC-GG-K-30-36, £10.Thermocouple Included!Covered by U.S. andInternational patents and pending applications.PATENTEDJ-23Low-Cost InfraredThermometer with Built-In Ordering Example: OS562,infrared thermometer, 2 “AAA” alkaline batteries, 1 Type Kbeaded wire thermocouple and operator’s manual, £84.OS562 built-in Type K connector port fortemperature probes.SPHT-K-6, 6"Type K surface probe, £30.。
kt300温度计使用说明书

kt300温度计使用说明书1、测量额温保持探头盖盖上,将红外探头对准额头部位,并将距离保持在3cm以内,轻按一下测量键即可开始测量,伴随蜂鸣声响约1秒后,测量成功,屏幕显示读数。
建议多测量几次,待测量值稳定,即最接近正确的体温。
注意:◎如果额头区域沾有头发,汗水或灰尘,请在使用前清洁该区域以提高读取精度◎经常检查探头是否清洁2、测量耳温取下探头盖,将红外探头轻轻插入耳道,轻按一下测量键“”,即可开始测量,伴随蜂鸣声响约1秒后,测量成功,屏幕显示读数。
注意:1岁以下儿童,测量时将耳朵轻柔向后拉,使耳道变直。
1岁以上儿童及成人,将耳朵轻柔向上并向后拉,使耳道变直。
注意:◎确保耳道清洁,没有耳垢或阻塞物◎右耳的测量结果可能与左耳有差别,若需反复测量,请测量同一侧耳朵温度◎不要强迫进入耳道,否则,耳道可能会有损伤3.测量物温当体温计处于关机状态时,长按记忆/静音键,3秒以上,当屏幕显示物温符号时,进入物温测量状态。
保持与物体1-3cm距离进行测量,按下测量按键,伴随蜂鸣声响,约1秒显示测量数值。
4.静音模式当体温计处于开机状态时,长按记忆/静音键3秒,当屏幕显示静音符号时松开,成功切换成静音模式;再次长按记忆/静音键3秒,当静音符号消失时松开,即切换成提示音打开模式。
注意:◎请勿长时间握住温度计,因为它对环境温度较敏感。
◎每次测量后,请用软布清洁探头,并将体温计放置在干燥通风处。
◎每次测量请间隔10秒,以确保测量稳定5、组记忆数据查询当体温计处于开机或关机状态时,短按记忆/静音键查询记忆数据,再次按键,查看下一组记忆数据。
如果没有记忆数值,屏幕显示“----M”。
注意:◎卸载或重新安装电池时,所有记忆数据都会重置。
◎卸载电池时,所有设置都将恢复为默认设置。
如果需要调整设置,请打开电源并进行新设置。
6.摄氏度/华氏度切换打开电池仓,拨动电池仓内顶部黑色拨动开关切换华氏度/摄氏度。
摄氏度图标为: C; 华氏度为:F。
TR-10数字温度计使用说明书

TR-10数字(shùzì)温度计使用说明书TR-10数字(shùzì)温度计使用说明书TR-10便携式记录(jìlù)型测温仪使用说明一,概述(ɡài shù):TR-10是一款具备数据记录(jìlù)功能的温度测量仪表,仪表可记录100个温度点和时间,摄氏华氏转换,超温报警等功能。
广泛应用于暖通制冷维修、食品、宠物等行业。
二,技术参数:1、温度传感器:NTC K=103,B=34352、测温范围(fànwéi):-40℃~+110℃,3、测温精度(jīnɡ dù):±1℃(-20℃~+80℃),±2℃(-40℃~-20℃,+80℃~+110℃)4、记录点数:100个,5、采样周期:记录状态下为间隔时间,非记录状态下为10S6、显示未定要求—电磁兼容测试:(1)EFT干扰测试>2级(2)ESD测试>2级7、时间:2009年1月1日—2099年12月31日产品出厂参数值:日期为09 01 01,时间为12:00 00间隔时间为001,(1分钟)上限温度值都为:000.0度下限温度值都为:000.0度三,产品示意图:正面图片:要求有液晶屏全部显示,以及能看清(kàn qīnɡ)按键上的字。
背面图片:要求说明有背面各个部分的功能,及按键的图片,必要时增加局部(júbù)放大的图片液晶屏显示(xiǎnshì)的说明:说明(shuōmíng)液晶屏各部分显示代表的参数四,按键操作(cāozuò)说明:按键使用(shǐyòng)模式说明:按一下按键立即抬起为“时间(shíjiān)按”,按住按键(àn jiàn)查过五秒后抬起为“长时间按”前置按键的使用说明:Record:功能一:开启和关闭记录功能功能二:在记录过程中或记录完成后,按此键可以查看温度记录点的参数。
数显双点温度计技术使用说明书
数显双点温度计技术使用说明书数显双点温度计技术使用说明书数显双点温度计是一种高精度的温度测量仪器,它能够测量两个不同点位的温度,用于各种工业、实验室和研究领域。
以下是数显双点温度计的使用说明。
一、温度计结构数显双点温度计主要由显示屏、探头、控制器以及电源等组成,显示屏用来显示温度数据,探头用来接触被测物体并测量温度,控制器用来控制温度计的操作,电源用来提供电力。
二、探头使用1. 探头结构探头一般由感温元件、温度敏感材料、导线和外壳组成。
感温元件通常是热电偶、热电阻或半导体温度传感器等。
2. 探头使用方法首先,将温度计插入被测物体中,接着按下温度计上的按键,数显双点温度计上显示被测物体两个点位的温度数据。
温度计应当插入被测物体的两个不同位置来测量温度。
三、温度计操作1. 开关机将电源插入温度计电源插孔,按下温度计开关即可开启温度计,按下开关再次即可关闭温度计。
2. 常规设置可以通过按键选择摄氏或者华氏温度来显示温度数据。
3. 峰值保持峰值保持是一种很有用的功能,可以帮助我们记录测量过程中出现的最高/最低温度值。
在需要记录峰值时,按下峰值保持按键,温度计会将当前的温度值储存在内存中,再次按下峰值保持键即可取消峰值保持功能。
四、注意事项1. 温度计应当使用在相应的温度范围内。
2. 在使用过程中不要将温度计探头弯曲或者锤击探头测量。
3. 不要将温度计置于高温或者高湿的环境中,以免损坏温度计。
4. 温度计保存时应当避免长时间暴露于太阳底下或其他高温环境中。
总之,数显双点温度计是一种实用的温度测量仪器,可以用来测量各种物体的温度值。
使用时要按照说明书说明进行使用,避免错误操作。
ecobee 智能温度计说明书

Syncing is usually instant, but in some cases it can take up to three minutes for the syncing between the ecobee, Powered by Bryant thermostat and to complete. Once finished, the thermostat will start sending data to the platform.Instructions to integrate the ecobee thermostat with the platform.Open the mobile app on your mobile device or log into the customer website.In the mobile app, click on the menubutton and select + Add Device. In the customer website, the userwill need to select Settings in the sidemenu and then select + Add Device.Select Thermostat.Synchronizationecobee SmartThermostat Pro with voice control, Powered by Bryantecobee3 lite Pro, Powered by BryantSelect ecobee if it is notautomatically selected.Select Next (Fig. 5) for the credentials page (Fig. 6).Figure 1Figure 4Figure 2Figure 5Figure 6Figure 3Models EB-STATE5BR-01, EB-STATE3LTBR-01ECOBEE, POWERED BY BRYANT THERMOSTATAND INTEGRATIONWhen finished select Continue (Fig. 8) then Done (Fig. 9).Input the homeowner’s ecobee, Powered by Bryant username and password and select Sign In . Disconnecting the thermostat from the app can be done via two methods. The dealer can disconnect the accounts from the Partner Portal, or the homeowner can disconnect from the homeowner app / homeowner website.Dealer Disconnection Instructions1. Log into the Partner Portal and bring up the customer account via the thermostat.2. Navigate to the Equipment Page and click on the Cloud Devices tab.3. Find the thermostat account in the list and press the Logout button.HOMEOWNER DISCONNECTION INSTRUCTIONSThe homeowner can disconnect the thermostat by navigating to the Manage Devices page on the customer website or app and removing the device from the list:1. O pen the Homeowner app and click on the Menu button in the top left. (Fig. 1)2. S elect Manage Devices from the list. (Fig. 10)3. S elect the “…” to the far right of the ecobee, Powered by Bryant device.4. Select Remove . 1. O pen the Homeowner website and click on the Menu button in the top left.2. Click on Settings from the left side menu 3. Select Mange Devices .4. S elect the “…” to the far right of the ecobee, Powered by Bryant device.5. Select Remove .DISCONNECTING METHODSFigure 7Figure 8Figure 10Figure 9©2021 Carrier. All Rights Reserved.Manufacturer reserves the right to discontinue, or change at any time, specifications or designs without notice or without incurring obligations.01-8110-1662-01 6/2021A Carrier Company。
温度计使用说明书
●使用前请仔细阅读电子体温计为您提供快速准确的体温测量,请仔细阅读说明书,这样可以使您熟知该体温计的性能特点,以使它可以给您带来更多的便利,并使它保持可靠的性能。
●适用范围用于腋下,口腔测量人体体温。
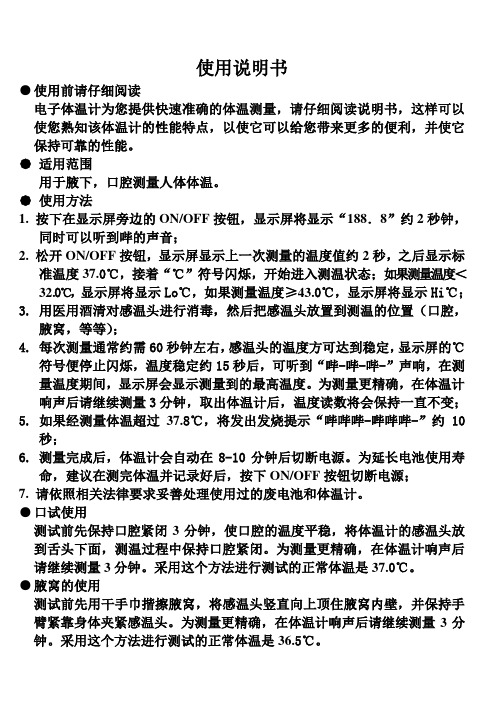
●使用方法1. 按下在显示屏旁边的ON/OFF按钮,显示屏将显示“188.8”约2秒钟,同时可以听到哔的声音;2. 松开ON/OFF按钮,显示屏显示上一次测量的温度值约2秒,之后显示标准温度37.0℃,接着“℃”符号闪烁,开始进入测温状态;如果测量温度<32.0℃,显示屏将显示Lo℃,如果测量温度≥43.0℃,显示屏将显示Hi℃;3. 用医用酒清对感温头进行消毒,然后把感温头放置到测温的位置(口腔,腋窝,等等);4. 每次测量通常约需60秒钟左右,感温头的温度方可达到稳定,显示屏的℃符号便停止闪烁,温度稳定约15秒后,可听到“哔-哔-哔-”声响,在测量温度期间,显示屏会显示测量到的最高温度。
为测量更精确,在体温计响声后请继续测量3分钟,取出体温计后,温度读数将会保持一直不变;5. 如果经测量体温超过37.8℃,将发出发烧提示“哔哔哔-哔哔哔-”约10秒;6. 测量完成后,体温计会自动在8-10分钟后切断电源。
为延长电池使用寿命,建议在测完体温并记录好后,按下ON/OFF按钮切断电源;7. 请依照相关法律要求妥善处理使用过的废电池和体温计。
●口试使用测试前先保持口腔紧闭3分钟,使口腔的温度平稳,将体温计的感温头放到舌头下面,测温过程中保持口腔紧闭。
为测量更精确,在体温计响声后请继续测量3分钟。
采用这个方法进行测试的正常体温是37.0℃。
●腋窝的使用测试前先用干手巾揩擦腋窝,将感温头竖直向上顶住腋窝内壁,并保持手臂紧靠身体夹紧感温头。
为测量更精确,在体温计响声后请继续测量3分●使用前请仔细阅读电子体温计为您提供快速准确的体温测量,请仔细阅读说明书,这样可以使您熟知该体温计的性能特点,以使它可以给您带来更多的便利,并使它保持可靠的性能。
AcuRite 无线温度计说明书
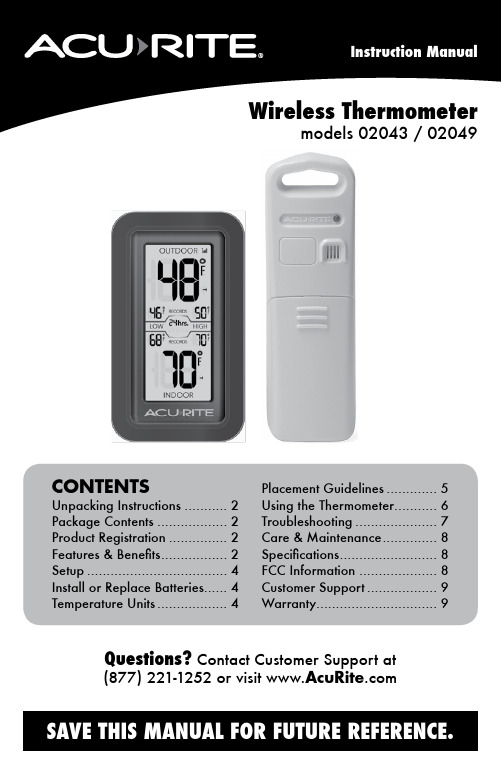
CONTENTS Unpacking Instructions (2)Package Contents (2)Product Registration (2)Features & Benefits (2)Setup (4)Install or Replace Batteries (4)Temperature Units (4)Placement Guidelines (5)Using the Thermometer (6)Troubleshooting (7)Care & Maintenance (8)Specifications (8)FCC Information (8)Customer Support (9)Warranty (9)Wireless Thermometermodels 02043 / 02049Questions? Contact Customer Support at (877) 221-1252 or visit Congratulations on your new AcuRite product. To ensure the best possible product performance, please read this manual in its entirety and retain it for future reference.Unpacking InstructionsRemove the protective film that is applied to the LCD screen prior to using this product. Locate the tab and peel off to remove.Package Contents1. Display unit2. Outdoor sensor3. Instruction ManualFeatures & BenefitsOUTDOOR SENSOR1. Integrated Hanger For easy placement.2. Wireless Signal Indicator Flashes when data is beingsent to the display unit.3. Battery Compartment Cover132DISPLAY UNIT1. S ensor Low Battery Indicator2. C urrent Outdoor Temperature Arrow icon indicates the direction thetemperature is trending.3.R ecord TimespanIndicates viewing records for past 12 hours, 24 hours, 36 hours, 48 hours, or all-time.4. LOW Temperature RecordsLowest temperatures recorded for #3.5. C urrent Indoor TemperatureArrow icon indicates the direction thetemperature is trending.6. D isplay Low Battery Indicator7. H IGH Temperature RecordsHighest temperatures recorded for #3.8. O utdoor Sensor Signal StrengthBACK OF DISPLAY UNIT9. RECORDS ButtonPress to cycle through records (#3).10. Battery Compartment 11. °C/°F ButtonPress to select °C or °Ftemperature units.12. Integrated HangerFor easy placement.Features & Benefits12356478101112Front of Display UnitBack of Display Unit°C/°FInstall or Replace BatteriesAcuRite recommends high quality alkaline batteries for the best product performance. Heavy duty or rechargeable batteries are not recommended.The outdoor sensor requires lithium batteries in low temperature conditions. Cold temperatures can cause alkaline batteries to function improperly. Use lithium batteries in the outdoor sensor for temperatures below -4ºF / -20ºC.Outdoor Sensor1. S lide off the battery compartment cover.2. I nsert 2 x AA batteries into the battery compartment, as shown. Follow the polarity (+/-) diagram in the battery compartment.3. R eplace the battery cover.Display Unit1. S lide off the battery compartment cover.2. I nsert 2 x AA batteries into the battery compartment, as shown. Follow the polarity (+/-) diagram in the battery compartment.3. R eplace the battery cover.Select Temperature UnitsTo select between degrees Fahrenheit (ºF) or Celsius (ºC) temperature units,press the “ºC/ºF” button located inside the battery compartment of the display.batteries properly. Only batteries of the same or equivalent type as recommended are to be used. DO NOT incinerate used batteries. DO NOT dispose of batteries in fire, as batteries may explode or leak. DO NOT mix old and new batteries or types of batteries (alkaline/standard). DO NOT use rechargeable batteries. DO NOT rechargenon-rechargeable batteries. DO NOT short-circuit the supply terminals.°C/°FR E C O R D S - h o l d t o c l e a rPlacement for Maximum AccuracyAcuRite sensors are sensitive to surrounding environmental conditions. Proper placement of both the display unit and outdoor sensor are critical to the accuracy and performance of this product.Display Unit PlacementPlace the display unit in a dry area free of dirt and dust. Display unit stands upright for tabletop use or is wall-mountable.Outdoor Sensor PlacementSensor must be placed outside to observe outdoor conditions. Sensor is water resistant and is designed for general outdoor use, however, to extend its life place the sensor in an area protected from direct weather elements.Hang the sensor using the integrated hang holes or hanger, or by using string (not included) to hang it from a suitable location, like a well covered tree branch. The best location is 4 to 8 feet above the ground with permanent shade and plenty of fresh air to circulate around the sensor.Important Placement Guidelines• To ensure accurate temperature measurement, place units out of directsunlight and away from heat sources or vents.• Display unit and outdoor sensor must be within 165 ft (50 m) of each other. • To maximize wireless range, place units away from large metallic items, thick walls, metal surfaces, or other objects that may limit wireless communication.• To prevent wireless interference, place both units at least 3 ft (.9 m) away from electronic devices (TV, computer, microwave, radio, etc.)Setup is CompleteThe sensor will now synchronize with the display unit. It may take a few minutes for synchronization to complete. Please refer to the troubleshootingsection of this manual if anything appears to be functioning improperly.(50 meters)(165 feet maximum)AT LEAST APARTUsing the ThermometerHigh & Low RecordsThe display will automatically cycle through the high and low recorded values for the past 12 hours, 24 hours, 36 hours, 48 hours, and all-time. To manually cycle through the records, press and release the RECORDS button located in the battery compartment. After 12 seconds of inactivity, the records will return to auto mode.All-time high & low records reflect the minimum and maximum temperature recorded since the unit was powered on, since the batteries were changed, or since it was manually reset (whichever was most recent).To manually reset the high/low records currently being viewed, press and HOLD the RECORDS button, located in the battery compartment for 3-5 seconds.Care & MaintenanceDisplay Unit CareClean with a soft, damp cloth. Do not use caustic cleaners or abrasives. Keep away from dust, dirt and moisture. Clean ventilation ports regularly with a gentle puff of air.Outdoor Sensor CareClean with a soft damp cloth. Do not use caustic cleaners or abrasives.SpecificationsTEMPERATURE RANGE Outdoor: -40ºF to 158ºF; -40ºC to 70ºCIndoor: 32ºF to 122ºF; 0ºC to 50ºCWIRELESS RANGE165 ft / 50 m depending on home construction materials WIRELESS FREQUENCY433 MHzPOWER Display: 2 x AA alkaline batteriesSensor: 2 x AA alkaline or lithium batteriesDATA REPORTING30 second updatesFCC InformationThis device complies with part 15 of FCC rules. Operation is subject to the following two conditions:1- This device may NOT cause harmful interference, and2- This device must accept any interference received, including interference that may cause undesired operation. WARNING: Changes or modifications to this unit not expressly approved by the party responsible for compliance could void the user’s authority to operate the equipment.NOTE: This equipment has been tested and found to comply with the limits for a Class B digital device, pursuant to Part 15 of the FCC rules. These limits are designed to provide reasonable protection against harmful interference in a residential installation. This equip-ment generates, uses and can radiate radio frequency energy and, if not installed and used in accordance with the instructions, may cause harmful interference to radio communications. However, there is no guarantee that interference will not occur in a particular installation. If this equipment does cause harmful interference to radio or television reception, which can be determined by turning the equipment off and on, the user is encouraged to try to correct the interference by one or more of the following measures:• Reorient or relocate the receiving antenna.• Increase the separation between the equipment and the receiver.• Connect the equipment into an outlet on a circuit different from that to which the receiver is connected.• Consult the dealer or an experienced radio/TV technician for help.NOTE: The manufacturer is not responsible for any radio or TV interference caused by unauthorized modifications to this equipment. Such modifications could void the user authority to operate the equipment.This device complies with Industry Canada licence-exempt RSS standard(s).Operation is subject to the following two conditions:(1) This device may not cause interference, and(2) This device must accept any interference received, including interference that may cause undesired operation of the device.At AcuRite, we proudly uphold our commitment to quality technology. Chaney Instrument Co. warrants that all products it manufactures to be of good material and workmanship, and to be free of defects when properly installed and operated for a period of one year from the date of purchase.We recommend that you visit us at for the fastest way to register your product. However, product registration does not eliminate the need to retain youroriginal proof of purchase in order to obtainwarranty benefits.Chaney Instrument Co. warrants that all products it manufactures to be of good material and workmanship, and to be free ofdefects when properly installed and operated for a period ofone year from the date of purchase. Remedy for breach of thiswarranty is limited to repair or replacement of the defectiveitem(s). Any product which, under normal use and service, isproven to breach the warranty contained herein within ONEYEAR from date of sale will, upon examination by Chaney,and at its sole option, be repaired or replaced by Chaney.Transportation costs and charges for returned goods shallbe paid for by the purchaser. Chaney hereby disclaims allresponsibility for such transportation costs and charges. Thiswarranty will not be breached, and Chaney will give no credit for products it manufactures which have received normal wear and tear, been damaged (including by acts of nature), tampered, abused, improperly installed, damaged in shipping, or repaired or altered by others than authorized representatives of Chaney.The above-described warranty is expressly in lieu of all other warranties, express or implied, and all other warranties are hereby expressly disclaimed, including without limitation the implied warranty of merchantability and the implied warranty of fitness for a particular purpose. Chaney expressly disclaims all liability for special, consequential or incidental damages,whether arising in tort or by contract from any breach of thiswarranty. Some states do not allow the exclusion or limitationof incidental or consequential damages, so the above limitation or exclusion may not apply to you. Chaney further disclaims all liability from personal injury relating to its products to the extentpermitted by law. By acceptance of any of Chaney’s products, the purchaser assumes all liability for the consequences arisingfrom their use or misuse. No person, firm or corporation is authorized to assume for Chaney any other liability in connection with the sale of its products. Furthermore, no person, firm or corporation is authorized to modify or waive the terms of this paragraph, and the preceding paragraph, unless done in writing and signed by a duly authorized agent of Chaney. This warranty gives you specific legal rights, and you may also have other rights which vary from state to state.For in-warranty claims: Chaney Instrument Co. 965 Wells St., Lake Geneva, WI 53147Limited One Year WarrantyCustomer SupportAcuRite customer support is committed to providing you with best-in-class service. For assistance , please have the model number of this product available and contact us in any of the following ways:(877) 221-1252 ********************24/7 support at www.AcuRite .com► Installation Videos ► Register your Product ► Instruction Manuals ► Support User Forum ► Replacement Parts► Submit Feedback & Ideas11©Chaney Instrument Co. All rights reserved. AcuRite is a registered trademark of the Chaney Instrument Co., Lake Geneva, WI 53147. All other trademarks and copyrights are the property of their respective owners. AcuRite uses patented technology.Visit /patents for details.Printed in China 02043 INST 121714It’s more than accurate, it’sAcuRite offers an extensive assortment of precision instruments, designed to provide you with information you can depend on toPlan your day with confidence ™.www.AcuRite .comWeather Stations Temperature & Humidity Weather Alert Radio Kitchen Thermometers & Timers Clocks。
干湿温度计说明书

干湿温度计说明书篇一:干湿计使用方法干湿计的原理和使用方法20.7摄氏度15.0摄氏度将内圈中红色的湿球温度示数与外圈干球温度示数对齐XX年09月25日08:48生物第一实验室内空气湿度为63%干湿计工作原理:在研究生物对环境的影响这节课上大家用到了干湿计。
这是我们接触生物实验用到的第一个实验用具,对于它的使用方法和工作原理大家学习和理解起来可能都有一点难度,因为这涉及到物理学的知识。
大家通过本次实验(转自:小草范文网:干湿温度计说明书)应该感觉到,科学的发展并不是孤立的,要运用到很多方面的知识。
要想学好生物学必须具备全面的知识。
现在我们就通过大家能够容易理解的知识简要介绍干湿计的工作原理。
我们先来看一看干湿计的结构:两支球部大小形状完全相同的温度表,其中一支用来测定空气温度,称为干球;另一支球部缠上润湿的纱布,称为湿球。
湿当空气中的水汽含量未达到饱和时,篇二:干湿球温度计的使用教案首页篇三:多功能温度计说明书说明书一、性能参数1.测量范围温度测量范围:-55℃~125℃2.测量精度温度测量精度:±0.5℃3.分辨率温度分辨率:0.0625℃4.外形尺寸190×135×35(mm)5.供电电源⑴.9V直流稳压电源,此时有一个电源开关可以控制电源的通断;⑵.通过USB 数据线(A 口转MiniAB)连接到PC 机为基板供电。
二、产品特点1.128×64OLED显示屏,可手动切换显示温度、日期、星期和时间2.手动校时、调整日期3.最高∕最低温度记忆功能4.℃∕℉切换显示5.24小时制时钟6.每日闹钟功能7.立式或卧式8.可通过RS232串口传输当前温度和时间至PC机三、操作方法1.开机上电后显示“中国海洋大学”图标、“中国海洋大学 09级自动化”、“多功能温度计”等文字,显示过后自动进入温度显示模式;2.进入温度显示模式后,拨动SW1可显示自开机上电或复位后所记录的摄氏最高∕最低温度值;拨动SW2可显示相对应的华氏最高∕最低温度值;拨动SW3可启动串行传输功能,此时可通过RS232串口传输当前温度和时间至PC机;将拨码开关拨回原位即可返回温度显示界面;3.按下KEY1可在温度显示模式和日期、星期和时间显示模式之间来回切换;4.进入日期、星期和时间显示模式后,按下KEY2进入校时模式,此时可通过KEY1选择校准小时、分钟、秒;每次校准时,按下KEY3则对应项+1,按下KEY4则对应项-1;小时或分钟或秒校准后都需要按下KEY2,此时显示对应项校准完成;所有项目均校准完成后,按下KEY4推出校时模式,返回日期、星期和时间显示模式;5.进入日期、星期和时间显示模式后,按下KEY3进入调整日期模式,此时可通过KEY1选择调整年、月、日;每次调整时,按下KEY3则对应项+1,按下KEY4则对应项-1;年或月或日调整后都需要按下KEY2,此时显示对应项校准完成;所有项目均校准完成后,按下KEY4推出日期调整模式,返回日期、星期和时间显示模式;6.进入日期、星期和时间显示模式后,拨动SW1进入闹钟设定模式,此时可通过KEY1选择设定小时、分钟以及取消闹钟;每次设定时,按下KEY3则对应项+1,按下KEY4则对应项-1;小时或分钟设定或取消闹钟后都需要按下KEY2,此时显示对应项设定完成;所有项目均设定完成后,将SW1拨回原退位即可出闹钟设定模式,返回日期、星期和时间显示模式;7.闹钟响起时,拨动SW2即可停止响铃。
- 1、下载文档前请自行甄别文档内容的完整性,平台不提供额外的编辑、内容补充、找答案等附加服务。
- 2、"仅部分预览"的文档,不可在线预览部分如存在完整性等问题,可反馈申请退款(可完整预览的文档不适用该条件!)。
- 3、如文档侵犯您的权益,请联系客服反馈,我们会尽快为您处理(人工客服工作时间:9:00-18:30)。
基于AT89C51的数字温度计的说明书第十二组张思琪:PC板的制作,电路板的焊制,PPT演讲肖容:原理图的绘制,说明书的制作刘盼:说明书的制作,PPT的制作目录第1章引言...................................................................................................... - 2 -第2章系统设计方案 ..................................................................................... - 3 -第3章硬件系统设计 ..................................................................................... - 4 -3.1 单片机最小系统设计 ............................................................................... - 4 -3.1.1 电源电路................................................................................................ - 4 -3.1.2 振荡电路与复位电路 ........................................................................... - 4 -3.1.3 DS18B20与单片机的接口电路 ............................................................ - 5 -3.2 主控制器AT89C51 .................................................................................. - 5 -3.2.1 AT89C51的特点及特性: .................................................................... - 5 -3.2.2 管脚功能说明: ................................................................................. - 6 -3.2.3 PROTEUS仿真电路图 ............................................................................ - 8 -第4章软件设计.............................................................................................. - 8 -4.1 程序流程.................................................................................................... - 9 -4.1.1 主程序流程图 ....................................................................................... - 9 -4.1.2 各子程序流程图 ................................................................................... - 9 -第5章汇编语言程序源代码 ....................................................................... - 13 -第6章DS18B20简单介绍........................................................................... - 18 -6.1 DS18B20 的性能特点如下: ................................................................. - 19 -6.2 DS18B20使用中的注意事项 .................................................................. - 20 -6.3 DS18B20内部结构 .................................................................................. - 21 -6.4 DS18B20测温原理 .................................................................................. - 24 -第7章仿真调试............................................................................................ - 25 -第八章总结.................................................................................................... - 26 -第九章参考文献............................................................................................ - 27 -第1章引言随着时代的进步和发展,单片机技术已经普及到我们生活,工作,科研,各个领域,已经成为一种比较成熟的技术,本文将介绍一种基于单片机控制的数字温度计,本温度计属于多功能温度计。
现代信息技术的飞速发展和传统工业改造的逐步实现。
能够独立工作的温度检测和显示系统应用于诸多领域。
传统的温度检测以热敏电阻为温度敏感元件。
热敏电阻的成本低,但需后续信号处理电路,而且可靠性相对较差,测温准确度低,检测系统也有一定的误差,所以传统的温度计有反应速度慢、读数麻烦、测量精度不高、误差大等缺点。
本文是以单片机AT89C51为核心,通过DALLAS公司的单总线数字温度传感器DS18B20来实现环境温度的采集和A/D转换,用来测量环境温度,温度分辨率为0.0625℃,并能数码显示。
因此本文设计的数字温度计具有读数方便,测温范围广,测温精确,数字显示,适用范围宽其电路简单,软硬件结构模块化,易于实现等特点。
数字式温度计的设计将给人们的生活带来很大的方便,为人们生活水平的提高做出了贡献。
数字温度计在以后将应用于我们生产和生活的各个方面,数字式温度计的众多优点告诉我们:数字温度计将在我们的未来生活中应用于各个领域,它将会是传统温度计的理想的替代产品。
第2章系统设计方案方案一:来采用热敏电阻器件,利用其感温效应,再将随被测温度变化的电压或电流采集过来,进行A/D转换后,利用单片机进行数据的处理,然后在显示电路上,将被测温度显示出。
方案二:利用温度传感器,在单片机电路设计中,大多都是使用传感器,所以这是非常容易想到的,所以可以采用一只温度传感器DS18B20,此传感器,可以很容易直接读取被测温度值,进行转换就可以满足设计要求。
分析上述两种方案可以看出方案一是使用热敏电阻之类的器件利用其感温效应,进行A/D转换后,利用单片机进行数据的处理,在显示电路上被测温度显示出来,这种设计需要用到A/D转换电路,感温电路比较麻烦。
方案二是利用温度传感器直接读取被测温度,读数方便,测温范围广,测温精确,适用范围宽而且电路简单易于实现。
综合方案一和方案二的优缺点,我们选择方案二。
除了以上的选择方案,还可以选择别的方案,如传感器的选择改变。
用KTY84-130、HT69-KTY84-130 、KG3044等,只要稍微改一下电路和程序的话就可以实现功能。
第3章硬件系统设计3.1 单片机最小系统设计3.1.1 电源电路VCC图3.1.1电源电路图3.1.2 振荡电路与复位电路图3.1.2振荡电路图图3.1.2 复位电路图3.1.3 DS18B20与单片机的接口电路3.2 主控制器AT89C513.2.1 AT89C51的特点及特性:40个引脚,4K Bytes FLASH片内程序存储器,128 Bytes的随机存取数据存储器(RAM),32个外部双向输入/输出(I/O)口,5个中断优先级2层中断嵌套中断,2个16位可编程定时计数器,2个全双工串行通信口,看门狗(WDT)电路,片内时钟振荡器。
此外,AT89C51在空闲模式下,CPU暂停工作,而RAM定时计数器,串行口,外中断系统可继续工作,掉电模式冻结振荡器而保存RAM的数据,停止芯片其它功能直至外中断激活或硬件复位。
同时该芯片还具有PDIP、TQFP和PLCC等三种封装形式,以适应不同产品的需求。
主要功能特性:兼容MCS-51指令系统4k可反复擦写(>1000次)ISP FLASH ROM32个双向I/O口4.5-5.5V工作电压2个16位可编程定时/计数器时钟频率0-33MHZ全双工UART串行中断口线128X8 BIT内部RAM2个外部中断源低功耗空闲和省电模式中断唤醒省电模式3级加密位看门狗(WDT)电路软件设置空闲和省电功能灵活的ISP字节和分页编程双数据寄存器指针3.2.2 管脚功能说明:图3.2.2 AT89C51管脚图(1)VCC:供电电压。
(2)GND:接地。
(3)P0口:P0口为一个8位漏级开路双向I/O口,每脚可吸收8TTL门电流。
当P1口的管脚第一次写1时,被定义为高阻输入。
P0能够用于外部程序数据存储器,它可以被定义为数据/地址的第八位。
在FIASH编程时,P0 口作为原码输入口,当FIASH进行校验时,P0输出原码,此时P0外部必须被拉高。
(4)P1口:P1口是一个内部提供上拉电阻的8位双向I/O口,P1口缓冲器能接收输出4TTL门电流。
P1口管脚写入1后,被内部上拉为高,可用作输入,P1口被外部下拉为低电平时,将输出电流,这是由于内部上拉的缘故。