J2EE笔记
HQL笔记

1.hql更新String hql = "update PhUser set realName=?";int row=this.getSession().createQuery(hql).setString(0, "小李想").executeUpdate();PhUser 类名2.hql删除String hql = "delete PhUser a where erId=2";int row=this.getSession().createQuery(hql).executeUpdate();还有个这种的格式:final String hql = "delete PhRoleFunction as a where a.roleId = "+ roleId;this.getHibernateTemplate().execute(new HibernateCallback() {public Object doInHibernate(Session session)throws HibernateException, SQLException {return session.createQuery(hql).executeUpdate();}});更新也可以写成这样的格式3.hql单表查询String hql = "from PhUser a where erId=" + userId;List list = this.getHibernateTemplate().find(hql);4.hql多表查询(1)String hql = "select new map(a.CUId as CUId,a.unitName as unitName,b.CUFId as CUFId,b.UFName as UFName) from PhCorrelativeUnit a,PhCorrelativeUnitFunction b where a.CUId=b.CUId";List list = this.getHibernateTemplate().find(hql);多个表的字段放到map中,map的键值就是as后面的别名,如果没有as就是字段名(2) String hql = "select new com.phantom.appeal.action.bean.DealPaper(a.id as id,a.billId as billId,a.state as state,a.creator as creator,a.createtime as createtime ,b.eventContent as eventContent ,c.realName as realName,b.billCode as billCode,b.citName as citName ) from PhDealBill a,PhAcceptBill b,PhUser c where a.departmentId="+ billid+ " and a.state=0 and a.billId=b.billId and a.creator =erId order by a.billId";return this.getHibernateTemplate().find(hql);另外就是写一个类,对应你要查询的字段,这里的类名是new com.phantom.appeal.action.bean.DealPaper,里面对应查询的字段名5.得到记录数String hql = "select count(*) from PhUser";List list = this.getHibernateTemplate().find(hql);return ((Long) list.get(0)).intValue();<?xml version="1.0" encoding="UTF-8"?><!DOCTYPE beans PUBLIC "-//SPRING//DTD BEAN//EN""/dtd/spring-beans.dtd"><beans><bean id="propertyConfig"class="org.springframework.beans.factory.config.Pr opertyPlaceholderConfigurer"><property name="locations"><list><value>classpath:system.properties</va lue></list></property></bean><!--JNDI DataSource for J2EE environments --><bean id="dataSource"class="boPooledDataSource"destroy-method="close"><property name="driverClass"value="${db.driverClassName}"/><property name="jdbcUrl" value="${db.url}"/><property name="user" value="${ername}"/><property name="password" value="${db.password}"/><!--C3P0 configuration --><property name="autoCommitOnClose" value="true"/><property name="checkoutTimeout"value="${cpool.checkoutTimeout}"/><property name="initialPoolSize"value="${cpool.minPoolSize}"/><property name="minPoolSize"value="${cpool.minPoolSize}"/><property name="maxPoolSize"value="${cpool.maxPoolSize}"/><property name="maxIdleTime"value="${cpool.maxIdleTime}"/><property name="acquireIncrement"value="${cpool.acquireIncrement}"/><property name="maxIdleTimeExcessConnections"value="${cpool.maxIdleTimeExcessConnections}"/></bean><bean id="baseService" lazy-init="true"class="org.springframework.transaction.interceptor.TransactionPr oxyFactoryBean"abstract="true"><property name="transactionManager"><ref bean="transactionManager" /></property><property name="transactionAttributes"><props><prop key="exec*">PROPAGATION_REQUIRED</prop><prop key="create*">PROPAGATION_REQUIRED</prop><prop key="update*">PROPAGATION_REQUIRED</prop><prop key="save*">PROPAGATION_REQUIRED</prop><prop key="add*">PROPAGATION_REQUIRED</prop><prop key="del*">PROPAGATION_REQUIRED</prop><prop key="remove*">PROPAGATION_REQUIRED</prop><prop key="insert*">PROPAGATION_REQUIRED</prop><prop key="*">PROPAGATION_REQUIRED</prop></props></property></bean><bean id="messageSource"class="org.springframework.context.support.ReloadableResourceBundleMe ssageSource"><property name="basenames"><list><value>classpath:GlobalMessage</value></list></property></bean><bean id="lobHandler"class="org.springframework.jdbc.support.lob.DefaultLobHandler"lazy-init="true"></bean><!-- SessionFactory --><bean id="sessionFactory"class="org.springframework.orm.hibernate3.LocalSessionFactoryBea n"abstract="false" singleton="true" lazy-init="default"autowire="default" dependency-check="default"><property name="dataSource" ><ref bean="dataSource"/></property><property name="lobHandler"><ref local="lobHandler" /></property><property name="mappingDirectoryLocations"><list><value>classpath:com/hmmarket/entity</value></list></property><property name="hibernateProperties"><props><prop key="hibernate.dialect">org.hibernate.dialect.MySQLDialect</prop><prop key="hibernate.show_sql">true</prop><propkey="hibernate.format_sql">true</prop></props></property></bean><!-- TransactionManager --><bean id="transactionManager"class="org.springframework.orm.hibernate3.HibernateTransactionMa nager"><property name="sessionFactory"><ref local="sessionFactory" /></property></bean><bean id="sqlMapClient"class="org.springframework.orm.ibatis.SqlMapClientFactoryBean"><property name="dataSource" ref="dataSource"/><property name="configLocation"value="classpath:sqlmap/sql-map-config.xml"/></bean><bean id="baseDao"class="com.hmmarket.framework.base.dao.impl.BaseDaoImpl"><property name="sessionFactory" ref="sessionFactory"/><property name="sqlMapClient" ref="sqlMapClient"/> </bean><bean id="tagDao"class="mon.tag.hibernate.TagDa oHibernate"autowire="byName"/><bean id="tagManager" parent="baseService" singleton="false"> <property name="target"><beanclass="mon.tag.impl.TagManagerImpl"autowire="byName" /></property></bean><!--start config batch job--><bean name="hmBatchJob"class="com.hmmarket.service.batchjob.HMBatchJob" singleton="false"autowire="byName"/><bean name="hmBatchFeeInfo"class="org.springframework.scheduling.quartz.MethodInvokingJobDetailF actoryBean"><property name="targetObject" ref="hmBatchJob"/><property name="targetMethod" value="execAllBatchJob"/><property name="concurrent" value="false"/> </bean><bean id="cronTrigger"class="org.springframework.scheduling.quartz.CronTriggerBean"><property name="jobDetail" ref="hmBatchFeeInfo"/><property name="cronExpression" value="0 0 0 ? *MON-FRI"/></bean><bean id="seheduler"class="org.springframework.scheduling.quartz.SchedulerFactoryBean"> <property name="triggers"><list><ref bean="cronTrigger"/></list></property></bean><!--end config batch job--></beans>。
maven2+struts2 使用maven一步步搭建ssi ssh框架

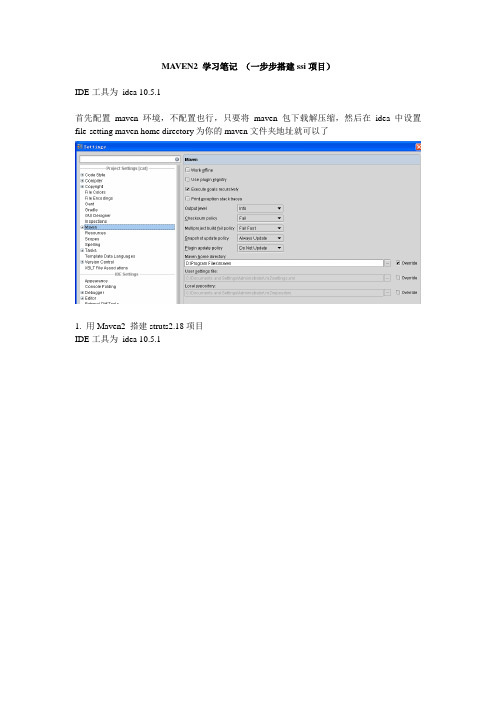
MA VEN2 学习笔记(一步步搭建ssi项目)IDE工具为idea 10.5.1首先配置maven环境,不配置也行,只要将maven包下载解压缩,然后在idea中设置file-setting maven home directory为你的maven文件夹地址就可以了1. 用Maven2 搭建struts2.18项目IDE工具为idea 10.5.1先创建项目骨架部分mvn archetype:create -DgroupId=com.mycompany.app -DartifactId=my-webapp -DarchetypeArtifactId=maven-archetype-webapp命令说明:archetypegroupId 项目的java包结构:comartifactId 项目的名称:certusSimplearchetypeArtifactId(项目骨架的类型):* maven-archetype-archetype* maven-archetype-j2ee-simple* maven-archetype-mojo* maven-archetype-portlet* maven-archetype-profiles (currently under development)* maven-archetype-quickstart* maven-archetype-simple (currently under development)* maven-archetype-site* maven-archetype-site-simple, and* maven-archetype-webappPom.xml文件<?xml version="1.0" encoding="UTF-8"?><project xmlns="/POM/4.0.0" xmlns:xsi="/2001/XMLSchema-instance"xsi:schemaLocation="/POM/4.0.0/maven-v4_0_0.xsd"><modelV ersion>4.0.0</modelV ersion><!-- 项目或者组织的唯一标志,并且配置时生成的路径也是由此生成--><groupId>my.web</groupId><!--项目的通用名称--><artifactId>cat</artifactId><!--打包的机制,如pom, jar, maven-plugin, ejb, war, ear, rar, par--><packaging>war</packaging><!-- 项目的版本--><version>1.0</version><!-- 项目除了artifactId外,可以定义别名--><name>web</name><!-- 开发者--><developers><developer><id>mars</id><name>Ryan</name><roles><role>开发</role><role>测试</role></roles><email>993985246@</email><timezone>+8</timezone></developer><developer><id>mars</id><name>whjzuiai</name><roles><role>开发</role></roles><email>76513716@</email><timezone>+8</timezone></developer></developers><dependencies><!-- 依赖--><dependency><groupId>junit</groupId><artifactId>junit</artifactId><version>3.8.1</version><scope>test</scope></dependency><!--这里下面的两个dependency, servlet-api与jsp-api所需--><dependency><groupId>javax.servlet</groupId><artifactId>servlet-api</artifactId><version>2.4</version><scope>provided</scope></dependency><dependency><groupId>javax.servlet</groupId><artifactId>jsp-api</artifactId><version>2.0</version><scope>provided</scope></dependency><dependency><groupId>org.apache.struts</groupId><artifactId>struts2-core</artifactId><version>2.1.8.1</version></dependency><dependency><groupId>org.apache.struts</groupId><artifactId>struts2-tiles-plugin</artifactId><version>2.1.8.1</version></dependency><dependency><groupId>org.apache.tiles</groupId><artifactId>tiles-jsp</artifactId><version>2.0.4</version></dependency><dependency><groupId>javax.servlet</groupId><artifactId>jstl</artifactId><version>1.1.0</version></dependency></dependencies><!--主要用于编译设置,包括两个主要的元素,build和reporting --> <build><plugins><plugin><groupId>org.apache.maven.plugins</groupId><artifactId>maven-eclipse-plugin</artifactId><configuration><wtpmanifest>true</wtpmanifest><wtpapplicationxml>true</wtpapplicationxml><wtpversion>2.0</wtpversion></configuration></plugin><plugin><groupId>org.codehaus.mojo</groupId><artifactId>tomcat-maven-plugin</artifactId></plugin><plugin><artifactId>maven-javadoc-plugin</artifactId><configuration><links><link>/Java_Docs/jdk6/html/zh_CN/api</link></links><aggregate>true</aggregate></configuration></plugin><plugin><artifactId>maven-site-plugin</artifactId><configuration><locales>zh_CN</locales><outputEncoding>UTF-8</outputEncoding></configuration></plugin><plugin><groupId>org.mortbay.jetty</groupId><artifactId>maven-jetty-plugin</artifactId><version>6.1.6</version></plugin><plugin><artifactId>maven-compiler-plugin</artifactId><configuration><source>1.6</source><target>1.6</target><encoding>UTF-8</encoding></configuration></plugin></plugins></build><reporting><plugins><plugin><groupId>org.codehaus.mojo</groupId><artifactId>surefire-report-maven-plugin</artifactId> </plugin><plugin><artifactId>maven-javadoc-plugin</artifactId><configuration><links><link>/Java_Docs/jdk6/html/zh_CN/api</link></links><aggregate>true</aggregate><charset>UTF-8</charset><docencoding>UTF-8</docencoding><encoding>UTF-8</encoding></configuration></plugin></plugins></reporting></project>Web.xml文件<?xml version="1.0" encoding="UTF-8"?><web-app xmlns:xsi="/2001/XMLSchema-instance"xmlns="/xml/ns/javaee"xmlns:web="/xml/ns/javaee/web-app_2_5.xsd"xsi:schemaLocation="/xml/ns/javaee/xml/ns/javaee/web-app_2_5.xsd"id="WebApp_ID" version="2.5"><display-name>SSH_proto</display-name><filter><filter-name>struts2</filter-name><filter-class>org.apache.struts2.dispatcher.FilterDispatcher</filter-class> </filter><filter-mapping><filter-name>struts2</filter-name><url-pattern>/*</url-pattern></filter-mapping></web-app>Login.jsp文件<html><body><h2>Hello World!1112</h2></body></html>struts.xml文件<?xml version="1.0" encoding="UTF-8" ?><!DOCTYPE struts PUBLIC"-//Apache Software Foundation//DTD Struts Configuration 2.0//EN""/dtds/struts-2.0.dtd"><struts><include file="struts-default.xml" /><package name="My" namespace="/" extends="struts-default"> <action name="sss" class="IndexAction" method="index"><result name="success">WEB-INF/login.jsp</result></action></package></struts>运行使用jetty插件run启动成功访问地址成功。
(总结完整版) Ant 从SVNCVS下载 编译打包部署到本地远程服务器 (FTP上传)

通过一番琢磨,参考网上些许资料以及Ant文档,将Ant在J2EE构建中常用的脚本整合了起来,实现了Ant从版本控制器(SVN/CVS /VSS)checkout项目源码,编译编译打包,部署软件包到远程/本地服务器的整合,从此任何复杂的J2EE构建变得方便优雅...现记录大致笔记如下:分为两部分:1.我的环境2.文字大致叙述整合流程以及注意事项3.贴脚本实例一. 我的环境JDK1.7/TOMCAT6.0/ANT1.8.2/SVN/CVS/SERVER-U二:整合流程1.下载并安装Ant,配置ANT_HOME,PATH;在命令行执行ANT -VERSION,查看版本号检查是否安装配置成功2. 将ant从SVN checkout,上传FTP,启动Tomcat的依赖Jar分别加入进ant目录下地lib目录,具体为A.SVN依赖jar: svnant.jar/svnClientAdapter.jar/svnjavahl.jar;可从这里下载(/source/3544090)B.FTP依赖Jar: commons-net-1.4.1.jar;可从这里下载()C.Tomcat 依赖Jar:将Tomcat目录中lib目录下地catalina-ant.jar 拷贝之ant目录下地lib目录3.编写脚本(分段编写,并一一测试)A.从SVN/CVS checkout项目B.打包编译C.部署软件包到远程服务器(1)通过FTP上传到远程服务器webapps目录:注意事项:本人在远程服务器架设的ftp服务器是Server-U,设置Server-U账户权限时注意赋予账户写文件的权限以及访问需要的路径(可以为任意路径)(2) FTP上传完毕后,启动Web application:注意设置添加账户 <user username="admin"password="admin" roles="admin,manager"/>三:脚本实例<!-- svn下载,编译,打包,上传到ftp服务器,启动Web程序-->1.Tomcat/svn/ftp等配置属性文件 ant.properties=antDemocatalina.home=D:\Tomcat6.1catalina.apps=D:\Tomcat6.1\webapps#svn properties#svn.url=svn://192.168.1.202/antDemoername=*****svn.password=*****#cvs properties##cvs.root=:pserver:***@192.168.8.27:2401/home/Functions#cvs.password=*****#cvs.checkout.dir=.#tomcat properties#tomcat.manager.url=http://localhost:9080/managerername=*****tomcat.manager.password=*****#ftp properties#ftp.server=192.168.1.202ftp.password=*****erid=*****2.build.xml<?xml version="1.0" encoding="UTF-8"?><project name="${}" default="start" basedir="."><!-- svn下载,编译,打包,上传到ftp服务器,启动Web程序--><property file="ant.properties" /> <!-- 引入Tomcat/svn/ftp等配置属性文件--><property name="complile.dir" location="${basedir}/bin/classes"/> <property name="src.dir" value="${basedir}/src"/><property name="lib.dir" value="${basedir}/WebRoot/WEB-INF/lib"/><!-- =================================clean files================================= --><target name="cleanAll"><delete dir="${basedir}" /></target><!-- Ant svn Task Definition --><taskdef name="svn"classname="org.tigris.subversion.svnant.SvnTask" /><!-- =================================SVN Checkout================================= --><target name="svn.checkout" depends="cleanAll"><mkdir dir="${basedir}/SVN"/><svn javahl="true" username="${ername}"password="${svn.password}"><checkout url="${svn.url}"destPath="${basedir}/SVN"></checkout></svn></target><!-- =================================CVS Checkout================================= --><!--<target name="initpass" depends="cleanAll"><cvspass cvsroot="${cvs.root}" password="${cvs.password}" /> </target><target name="checkout" depends="initpass"><cvs cvsroot="${cvs.root}" command="checkout" quiet="true" cvsrsh="ssh" package="${}" dest="${cvs.checkout.dir}" /> <cvs cvsroot="${cvs.root}" command="checkout" quiet="true" cvsrsh="ssh" package="${}" dest="${cvs.checkout.dir}" /> </target>--><!-- =================================target: compile the src================================= --><target name="init"><delete dir="${complile.dir}"/><mkdir dir="${complile.dir}"/></target><path id="complile.classpath"><fileset dir="${catalina.home}/lib"><include name="catalina*.jar"/></fileset><fileset dir="${lib.dir}"><include name="**/*.jar"/></fileset></path><target name="complile" depends="init"><javac srcdir="${src.dir}" destdir="${complile.dir}"> <classpath path="${complile.dir}" /><classpath refid="complile.classpath"/></javac></target><!-- =================================target: deploy war================================= --><target name="war" depends="complile"><delete><fileset dir="." includes="**/*.war" /></delete><war destfile="${}.war"webxml="WebRoot/WEB-INF/web.xml"><classes dir="${complile.dir}"/><fileset dir="WebRoot" id="dir"><include name="**/*.*"/><exclude name="WEB-INF"/></fileset></war></target><!-- =================================target: upload with ftp================================= --><target name="upload" depends="war"><ftp password="${ftp.password}"server="${ftp.server}"userid="${erid}"remotedir="${catalina.apps}"binary="true"><fileset file="${basedir}/${}.war"/></ftp></target><!-- Ant Tomcat Task Definition --><taskdef name="deploy"classname="org.apache.catalina.ant.DeployTask" /><taskdef name="undeploy"classname="org.apache.catalina.ant.UndeployTask" /><taskdef name="remove"classname="org.apache.catalina.ant.RemoveTask" /><taskdef name="reload"classname="org.apache.catalina.ant.ReloadTask" /><taskdef name="start"classname="org.apache.catalina.ant.StartTask" /><taskdef name="stop" classname="org.apache.catalina.ant.StopTask" /><taskdef name="list" classname="org.apache.catalina.ant.ListTask" /><!-- =================================target: deploy_to_tomcat================================= --><target name="deploy" depends="war"><deploy url="${tomcat.manager.url}"password="${tomcat.manager.password}"path="/${}"war="file:${basedir}/${}.war" /> </target><target name="undeploy"><undeploy url="${tomcat.manager.url}"username="${ername}"password="${tomcat.manager.password}"path="/${}"/></target><target name="remove"><remove url="${tomcat.manager.url}"username="${ername}"password="${tomcat.manager.password}"path="/${}"/></target><target name="reload"><reload url="${tomcat.manager.url}"username="${ername}"password="${tomcat.manager.password}"path="/${}"/></target><target name="start" depends="upload"><start url="${tomcat.manager.url}"username="${ername}"password="${tomcat.manager.password}"path="/${}"/></target><target name="stop"><stop url="${tomcat.manager.url}"username="${ername}"password="${tomcat.manager.password}"path="/${}"/></target><target name="list"><list url="${tomcat.manager.url}"password="${tomcat.manager.password}"/></target><!-- =================================target: tomcat shell================================= --><target name="tomcat.start"><java jar="${catalina.home}/bin/bootstrap.jar" fork="true"> <jvmarg value="-Dcatalina.home=${catalina.home}"/></java></target><target name="tomcat.stop"><java jar="${catalina.home}/bin/bootstrap.jar"fork="true"><jvmarg value="-Dcatalina.home=${catalina.home}"/> <arg line="stop"/></java></target><target name="tomcat.debug"><java jar="${catalina.home}/bin/bootstrap.jar"fork="true"><jvmarg value="-Dcatalina.home=${catalina.home}"/> <jvmarg value="-Xdebug"/><jvmargvalue="-Xrunjdwp:transport=dt_socket,address=8000,server=y,suspend=n" /></java></target></project>。
spring_security3.2 详细配置 培训笔记

Spring Security 3.x 出来一段时间了,跟Acegi是大不同了,与2.x的版本也有一些小小的区别,网上有一些文档,也有人翻译Spring Security 3.x的guide,但通过阅读guide,无法马上就能很容易的实现一个完整的实例。
我花了点儿时间,根据以前的实战经验,整理了一份完整的入门教程,供需要的朋友们参考。
1,建一个web project,并导入所有需要的lib,这步就不多讲了。
2,配置web.xml,使用Spring的机制装载:<?xml version="1.0" e ncoding="UTF-8"?><web-app version="2.4" xmlns="/xml/ns/j2ee"xml ns:xsi="/2001/XMLS chema-i nstance"xsi:s chemaLocation="http://java.s /xml/ns/j2eehttp://java.s /xml/ns/j2ee/web-app_2_4.xsd"><conte xt-param><param-name>contextConfi gLocation</param-name><param-val ue>classpath:applicationConte xt*.xml</param-value></conte xt-param><listener><listener-class>org.springframework.we b.conte xt.Context LoaderListener</listener-class></listener><filter><filter-name>springSecurityFilterChain</filter-name><filter-class>org.springframework.we b.filter.DelegatingFilterProxy</filter-class></filter><filter-mappi ng><filter-name>springSecurityFilterChain</filter-name><url-pattern>/*</url-pattern></filter-mapping><w elcome-file-list><wel come-file>l ogin.jsp</wel come-file></welcome-file-list></we b-app>这个文件中的内容我相信大家都很熟悉了,不再多说了。
bos笔记

1.某控件判断是否为空,空则返回trueif (UIRuleUtil.isNull(txtNumber.getText())){MsgBox.showInfo(this,"销售合同号不能为空");SysUtil.abort();}2.F7带出属性public void kdtEntrys_Changed(int rowIndex,int colIndex) throws Exception{if ("number".equalsIgnoreCase(kdtEntrys.getColumn(colIndex).getKey())) {kdtEntrys.getCell(rowIndex,"name").setV alue(UIRuleUtil.getString(UIRuleUtil.getProperty((IObj ectV alue)kdtEntrys.getCell(rowIndex,"number").getV alue(),"name")));}3.某控件为空则锁定某控件,不为空则不锁定if ("amount".equalsIgnoreCase(kdtEntrys.getColumn(colIndex).getKey())) {if(com.kingdee.bos.ui.face.UIRuleUtil.isNull(kdtEntrys.getCell(rowIndex,"number").getV alue())) {contsettlement.setEnabled(false);}else{contsettlement.setEnabled(true);}}4.数学公式金额=数量*单价if ("price".equalsIgnoreCase(kdtEntrys.getColumn(colIndex).getKey())) {if (UIRuleUtil.isNull(kdtEntrys.getCell(rowIndex,"price").getV alue())){kdtEntrys.getCell(rowIndex,"totalPrice").setV alue(UIRuleUtil.getBigDecimal(UIRuleUtil.getBig DecimalV alue(kdtEntrys.getCell(rowIndex,"price").getV alue())*UIRuleUtil.getBigDecimalV alue(kdtEntrys.getCell(rowIndex,"amount").getV alue())));}}单据头金额=分录金额之和if ("totalPrice".equalsIgnoreCase(kdtEntrys.getColumn(colIndex).getKey())) {if (UIRuleUtil.isNull(kdtEntrys.getCell(rowIndex,"totalPrice").getV alue())){txttotalPrice.setV alue(UIRuleUtil.getBigDecimal(UIRuleUtil.sum(kdtEntrys,"totalPrice"))); }5.检出功能:把很多条记录中判断2个属性相同的记录进行合并List info=new ArrayList();List sameInfo=new ArrayList();List error=new ArrayList();//是否出现对话框boolean errorWarning=false;//把分录所有行对象放入infofor(int index=0;index<kdtEntrys.getRowCount();index++){info.add(kdtEntrys.getRow(index));}if (((PurContractModeEnum)contractMode.getSelectedItem()).getAlias().equals("采购")){for(int index=0;index<info.size();index=0){String saleCId=null;String cargoNumber=null;//容器第一个销售合同号saleCId=((IRow)info.get(index)).getCell("saleCId").getV alue().toString();//容器第一个款号cargoNumber=((IRow)info.get(index)).getCell("cargoNumber").getV alue().toString();for(int sameindex=index+1;sameindex<info.size();sameindex++){//判断容器第一个销售合同号,款号是否等于后面的销售合同号,款号if(saleCId==((IRow)info.get(sameindex)).getCell("saleCId").getV alue().toString()&&cargoNumber==((IRow)info.get(sameindex)).getCell("cargoNumber").getV alue().toString()) {//相同的时候则放入sameInfo容器sameInfo.add(info.get(sameindex));sameInfo.add(info.get(index));}}//判断sameInfo容器是否有元素if(sameInfo.size()!=0){BigDecimal materialBalance=new BigDec imal(0);//把相同合同号,款号的金额相加for(intsameInfoindex=0;sameInfoindex<sameInfo.size();sameInfoindex++){materialBalance=materialBalance.add((BigDecimal)((IRow)sameInfo.get(sameInfoindex)).g etCell("totalPrice").getV alue());}//判断是否大于预算if(pareTo((BigDec imal)((IRow)sameInfo.get(0)).getCell("materialBalan ce").getV alue())==1){//大于的时候则把一条记录放入容器error,为了读销售合同号和款号信息error.add(info.get(index));errorWarning=true;}//info删除判断过的元素for(int delete=0;delete<sameInfo.size();delete++){info.remove(sameInfo.get(delete));}//清空sameInfosameInfo.clear();}else{//如果不存在第一个记录与后续记录销售合同号和款号相同记录则判断此记录是否超出预算if(((BigDecimal)((IRow)info.get(index)).getCell("totalPrice").getV alue()).compareTo((BigDecimal)((IRow)info.get(index)).getCell("materialBalance").getV alue())==1){errorWarning=true;error.add(info.get(index));}//info删除第一个判断完所有的info.remove(index);}}if(errorWarning){showWarning(error);}}6.提示框显示多数据public void showWarning(List errorString){String error="";for(int index=0;index<errorString.size();index++){error=error+”销售合同("+((IRow)errorString.get(index)).getCell("saleCId").getV alue().toString()+")的款号为("+ ((IRow)errorString.get(index)).getCell("cargoNumber").getV alue().toString()+")超出预算"+"\n";}MsgBox.showWarning(error);}7.必输项SCMClientUtils.setNecessColorInTable(kdtEntrys, "terms");if (UIRuleUtil.isNull(kdtEntrys.getRow(index).getCell("terms").getV alue())) {throw new EASBizException(EASBizException.CHECKBLANK,new Object[] {"价格条款"});}8.时间值推迟public Date dateChange(Date Newdate,int day) throws ParseException{// INT数组用于保存年月日int []a={0,0,0,0};//通过java.util.Calendar.getInstance()返回一个Calendar句柄java.util.Calendar c = java.util.Calendar.getInstance();c.setTime(Newdate);//把对象DA TE的年月日放入数组中a[2]=c.get(java.util.Calendar.DAY_OF_MONTH);a[1]=c.get(java.util.Calendar.MONTH ) + 1;a[0]=c.get(java.util.Calendar.YEAR);//把数组合成一个如期STRINGStringdate3=DateCalculate.formatY ear(a[0])+DateCalculate.formatMonthDay(a[1])+DateCalculate.for matMonthDay(a[2]);//day1是要减的天数int day1=day;//生成一个DateCalculate对象,该对象的参数是,第一个参数STRING是日期的,第二个是要加的天数DateCalculate date4=new DateCalculate(date3,day1);//countday返回计算好的新日期String x=date4.minusDay();//把日期拆分放入数组中间a=date4.splitYMD(x);//设置显示模式SimpleDateFormat sdf = new SimpleDateFormat("yyyy-MM-dd");//把日期放入一个Date 值对象中间Date todate = sdf.parse(a[0]+"-"+a[1]+"-"+a[2]);return todate;}9.bos基本问题1.发布生成java代码,添加为实现的方法。
ofbiz菜鸟笔记

OFBIZ学习一、ofbiz之Hello World⏹下载OFBIZ并配置到当地⏹下载地址:解压(安装)OFBIZ:配置到当地:运行命令行: (cmd)进入到安装目录(即解压旳目录):在安装目录下运行命令: ant load-demo注: 版本较低旳命令也许是 ant run-install⏹安装成功后运行命令: java -jar ofbiz.jar导入到IDE(Eclipse)中:直接import安装目录, 将整个ofbiz导入到eclipse中1.新建练习项目:2.在hot-deploy目录下新建practice目录(apache-ofbiz-12.04.02\hot-deploy\practice)在practice目录下新建webapp、widget目录, 然后新建ofbiz-component.xml文献(apache-ofbiz-12.04.02\hot-deploy\practice\webapp)(apache-ofbiz-12.04.02\hot-deploy\practice\wid)(apache-ofbiz-12.04.02\hot-deploy\practice\ofbiz-component.xml)注: ofbiz-component.xml可直接从(apache-ofbiz-12.04.02\specialpurpose\example)下拷贝后来所有需要新建旳文献都直接从示例中拷贝, 然后进行修改。
代码如下:3.在webapp下新建practice目录(hot-deploy/practice/webapp/practice)4.在第二个practice下新建WEB-INF目录(hot-deploy/practice/webapp/practice/WEB-INF)注: 第一种practice是我们旳组件名, 第二个practice是我们旳应用名5.在下面我们不再使用第一种第二个这种说法, 会直接说组件(component)或应用(webapp)6.在WEB-INF下新建web.xml与controller.xml文献(去拷贝过来)先修改web.xml文献, 在ofbiz 中web.xml配置文献遵守j2ee旳规范, 与j2ee旳配置文献类似。
java的开源项目
java的开源项目java_项目_java开源项目简介摘要:Spring Framework 【Java开源J2EE框架】Spring 是一个解决了许多在J2EE开发中常见的问题的强大框架。
Spring提供了管理业务对象的一致方法并且鼓励了注入对接口编程而不是对类编程的良好习惯。
Spring的架构基础是基于使用JavaBean属性的Inversion of Control容器。
然而,这仅仅是完整图景中的一部分Spring Framework 【java开源J2EE 框架[kuang jia]】Spring 是一个解决了许多在J2EE开发中常见的问题[wen ti]的强大框架[kuang jia]。
Spring提供了管理业务[ye wu]对象[dui xiang]的一致方法[fang fa]并且鼓励了注入对接口[jie kou]编程[bian cheng]而不是对类编程[bian cheng]的良好习惯。
Spring的架构[jia gou]基础是基于使用JavaBean属性[shu xing]的Inversion of Control容器。
然而,这仅仅是完整图景中的一部分:Spring在使用IoC容器作为构建完关注所有架构[jia gou]层的完整解决方案[jie jue fang an]方面是独一无二的。
Spring提供了唯一的数据[shu ju]访问抽象[chou xiang],包括简单和有效[you xiao]率的JDBC框架[kuang jia],极大的改进了效率并且减少了可能的错误[cuo wu]。
Spring的数据[shu ju]访问架构[jia gou]还集成[ji cheng]了Hibernate和其他O/R mapping解决方案[jie jue fang an]。
Spring还提供了唯一的事务管理抽象[chou xiang],它能够在各种底层事务管理技术,例如JTA或者JDBC事务提供一个一致的编程[bian cheng]模型[mo xing]。
用Axis构建Web服务
WebService学习笔记1.txt在Eclipse+MyEclipse+WebLoigc环境下,用Axis构建Web服务2007年04月30日星期一 09:051.环境说明MyEclipse Help Documentation Version: 3.8.3Eclipse 平台版本:3.0.2WebLogic Server 8.1 SP1Apache Axis 1.42.下载Axis1.4地址:/dist/ws/axis/1_4/axis-src-1_4.zip解压axis-src-1_4.zip到axis-src-1_4 文件夹3.建立Web工程在Eclipse中:文件->新建->工程->J2EE->Web Project。
工程名:WSServer4.把\axis-src-1_4\axis-1_4\webapps\axis\WEB-INF\lib考到WSServer\WebRoot\WEB-INF\lib中。
共axis-ant.jar、axis.jar、commons-discovery-0.2.jar、commons-logging-1.0.4.jar 、 jaxrpc.jar、log4j-1.2.8.jar、saaj.jar、wsdl4j-1.5.1.jar这8个.jar文件把这些.jar添加到工程的构建路径中5.在WSServer\WebRoot\WEB-INF 下建立文件server-config.wsdd内容如下<?xml version="1.0" encoding="UTF-8"?><deployment xmlns="/axis/wsdd/"xmlns:java="/axis/wsdd/providers/java"><globalConfiguration><parameter name="sendMultiRefs" value="true"/><parameter name="disablePrettyXML" value="true"/><parameter name="adminPassword" value="admin"/><parameter name="attachments.Directory" value="D:\Program Files\Tomc 5.0\webapps\axis\WEB-INF\attachments"/><parameter name="dotNetSoapEncFix" value="true"/><parameter name="enableNamespacePrefixOptimization" value="false"/><parameter name="sendXMLDeclaration" value="true"/><parameter name="sendXsiTypes" value="true"/><parameter name="attachments.implementation"value="org.apache.axis.attachments.AttachmentsImpl"/><requestFlow><handler type="java:org.apache.axis.handlers.JWSHandler"><parameter name="scope" value="session"/></handler><handler type="java:org.apache.axis.handlers.JWSHandler"><parameter name="scope" value="request"/><parameter name="extension" value=".jwr"/></handler></requestFlow></globalConfiguration><handler name="LocalResponder"type="java:org.apache.axis.transport.local.LocalResponder"/><handler name="URLMapper"type="java:org.apache.axis.handlers.http.URLMapper"/><handler name="Authenticate"type="java:org.apache.axis.handlers.SimpleAuthenticationHandler"/><service name="HelloSCW" provider="java:RPC"><parameter name="allowedMethods" value="*"/><parameter name="className" value="samples.HelloSCW"/></service><service name="AdminService" provider="java:MSG"><parameter name="allowedMethods" value="AdminService"/><parameter name="enableRemoteAdmin" value="false"/><parameter name="className" value="org.apache.axis.utils.Admin"/> <namespace>/axis/wsdd/<。
深入浅出Servelet&JSP读书笔记
深入浅出Servelet & JSP1.Servlet受控于容器: 通信支持,生命周期管理,多线程支持,声明方式实现安全,JSPa)流程:用户点击指向servlet的链接----容器创建httpservletrequest和httpservletresponse两个对象-----容器创建线程,把对象和请求传给java程序------容器调用service()生成响应对象------容器把相应对象转化成http响应------结束b)除printwriter以外还有别的c)一个servlet有三个名字i.路径名ii.部署名iii.URL名(在HTML中)建立映射,有利于servlet的灵活性和安全性d)Servlet部署到web时,会创建XML文档-》DD部署描述文件:提供一种声明定制webapp,不用修改源代码。
DD描述安全角色,错误页面,标记库等<servlet>映射内部名到类名。
<web-app>前面不能有任何标签<servlet-mapping>映射内部名到URLe)Servlet查询数据库,把输出任务委托给jsp-》MVCf)业务逻辑应该单独放在一个类里,而不是放在servlet里g)J2EE: web容器和EJB容器(业务逻辑部分)2.第一个Web应用a)开发环境b)部署环境c)Model类d)调用modele)Controller转发请求去jsp3.Servlet的生命周期:web容器加载类---构造函数-----init()||||------service()----destroy()a)Servlet对每个请求都会新开一个线程b)ServletConfig对象和ServletContext对象c)相关接口:Httpservletrequest等d)如果不加method=POST,会自动发送get请求e)在servlet里获取parameterF)getHeader和getIntHeader的区别f)响应端的函数大多数情况下只发回数据,用setContentType即可g)用servlet返回文件h)两种返回字节或者字符的方式(PrintWriter是装饰者模式的应用)i)setHeader() 增加一个新对,或者替换现有值;addHeader()增加一个新对,或者给一个现有的首部增加一个值j)重定向:必须在相应之前做(绝对URL)sendRedirect()方法只接受string,不接受URL相对URL:k)请求分派:服务器端。
工作计划之java开发学习计划
java开发学习计划【篇一:java学习计划】软件开发学习概要:1、java(基础学习,高级编程)2、sql3、android手机开发4、html+css+javascript5、php说明:每学完一块都要做一个综合实例,否则等于没有学。
ui设计学习概要:1、photoshop2、html+css+javascript模块1:java基础学习介绍:掌握java基础,培养面向对象的编程思想时间:3周1、入门准备 0.5天java编译环境eclipse的安装和使用java程序的运行和调试2、语法入门2天基础操作符基本数据类型流程控制3、*面向对象 1周*认识类、方法,属性*类的继承、多态与接口*熟悉面向对象的编程思想package(包)和import(导入)4、异常处理 0.5天了解java的异常捕获与处理5、复杂数据类型5天数组与字符串(2天)collection容器:list、set、queue、map(3天)6、界面控件 6天swing界面控件事件处理推荐书籍:java大学简明教程java语言程序设计(基础篇)名师讲坛——java开发实战经典(配光盘)视频:/thread-2633-1-1.html马士兵java视频教程全集推荐例子:坦克大战(推荐时间3天)贪吃蛇,俄罗斯方块,拼图,扫雷,打字游戏等(推荐时间10天) /*****************************************模块2:java文件操作介绍:掌握java核心应用时间:2周-1、javaio(推荐学习时间10天)2、多线程(5天)推荐例子:资源管理器(10天)模块3:绘图介绍:用java画图的相关知识时间:2周推荐例子:画板的实现模块4:数据库介绍:掌握sql语言时间:2周1、学习sql语法2、掌握mysql或mssql数据库3、java jdbc编程推荐例子:图书馆管理系统,仓库管理系统,学生管理系统,超市管理系统(推荐时间10天,3人一组,合作开发)android开发————暂无从事android手机开发的话java学到这个地步就可以了,android 开发这部分内容比较庞大,稍后我再整理一份详细的学习计划,这里只介绍一本比较好的入门书籍。
- 1、下载文档前请自行甄别文档内容的完整性,平台不提供额外的编辑、内容补充、找答案等附加服务。
- 2、"仅部分预览"的文档,不可在线预览部分如存在完整性等问题,可反馈申请退款(可完整预览的文档不适用该条件!)。
- 3、如文档侵犯您的权益,请联系客服反馈,我们会尽快为您处理(人工客服工作时间:9:00-18:30)。
J2EE 读书笔记第一章:J2EE概述1、Java Bean,Java Servlet和JSP是J2EE的核心部分。
2、J2EE还包含7个标准服务分别是:●符合CORBA技术标准(Common Object Request BrokerArchitecture,公共对象请求代理体系结构,通用对象请求代理体系结构)。
JavaIDL和RMI-IIOP技术遵循上述标准。
JavaIDL使Java程序与基于CORBA技术标准系统互联。
RMI-IIOP是JAVA远程调用(JAVA Remote MethodInvocation)API和Internet Inte-ORB协议(IIOP)的混合体,IIOP用CORBA连接JAVA程序与遗留系统。
●JavaMail API●Java消息服务(JMS)●Java命名和目录借口API (JNDI)●Java事务API(JTA)●JDBC API●XML部署描述符常见功能:1、管理容器和EJB之间的事务,2、注册消息驱动Bean到一个队列3、定义JNDI查找名称4、管理状态和无状态回话Bean第二章:J2EE多层架构1、层层是一个抽象的概念,它定义一组为其用户一种或多种服务(组件)的技术。
2、客户端●当某个资源发送一个服务请求到服务提供者时,这个资源被认为是客户端。
●客户端指请求组件服务的程序。
●客户端是指发送请求的任何组件。
3、服务服务是指接受和完成客户端请求的任意资源。
4、资源资源是组件提供服务所需的任何东西。
5、容器容器式管理组件的软件,并为组件提供系统服务。
6、多层架构包括客户端、资源、组件和容器。
J2EE里术语“组件”用来替代“服务”,两者在意义上是一样的。
7、API定义组件必须遵循的规则和从容器得到的服务。
8、容器负责持久性、资源管理、安全性、线程和其他系统级的与容器相关的组件服务。
9、组件负责实现业务逻辑。
10、J2EE多层架构包括客户层(有时候被称作表现层或应用层)、Web层、EJB层(有时称作业务层)和EIS层(企业信息系统层、Enterprise Information System Tier)。
每层致力于给应用程序提供一类特定的功能。
11、客户层包含与用户交互的程序。
12、Web层为J2EE应用程序提供Internet功能。
13、EJB层包含J2EE应用程序的业务逻辑。
●EJB层是每个J2EE应用程序的重点,因为在这一层上运行的EJB支持应用程序的多个实例同时访问业务逻辑和数据而不会影响性能。
14、EJB包含在EJB服务器之中,EJB服务器是在EJB层上运行的分布式对象服务器,它管理事务和安全、并确保访问EJB正确的实现多线程和持久性。
(尽管EJB可以访问任何层的组件,但通常EJB访问的是EIS层上的组件和资源)15、层间的访问是在访问控制列表(Access Control List,ACL)的控制下进行的。
(ACL阻止对DBMS和类似的资源直接访问)16、EIS连接J2EE应用程序到企业骨干网上的资源和遗留系统。
17、J2EE规范中指出:应用层有两个组件,它们是Apple客户端和应用程序客户端。
(胖客户端是第三种客户端,不过胖客户端不是一种客户层的组件,因为它是用Java以外的其他语言编写的,所以J2EE没有定义胖客户端容器)18、客户端还按照访问各层组件和相关资源时所使用的技术来分类。
用这种方法可以将客户端分为5类:●Web客户端包含访问Web层资源的软件,通常是浏览器。
●EJB客户端EJB客户端在客户层工作并充当J2EE应用程序和用户之间的接口,EJB只访问位于EJB层的一个或多个EJB而不是访问Web层的资源。
这种访问可能使用RMI API实现的,RMI处理EJB客户端和EJB层之间的通信,使用的协议是Java远程方法协议(JAVA Remote Method Protocol,JRMP)或是Internet ORB互联协议(Internet Inte-ORB Protocol,IIOP)●EIS客户端用户和EIS层资源之间的接口●Web对等客户端Web服务对等客户端与Web层上的其它组件是一种对等的关系。
●多层客户端多层客户端访问的是除它自身驻留的那一曾之外的隔层上的组件。
19、EJB层包含EJB服务器,它是一个管理和存储EJB的对象服务器。
20、EJB服务器和EJB容器一起负责底层的系统服务,这些底层的系统服务是实现EJB的业务逻辑所需要的,它们包括:●资源地●分布式对象协议●线程管理●状态管理●过程管理●对象的持久性●安全性●部署时间的配置21、EJB层和其他层之间的通信协议取决于与之通信的那一层。
22、所使用的EJB必须是消息驱动bean(MDB)。
23、EIS层(企业信息系统层、Enterprise Information System Tier)。
是J2EE体系架构与外部资源的连接。
第三章:J2EE最佳实践1、J2EE认为企业应用程序应该是这样的应用程序:●超过一组用户同时使用●使用分布式资源,如同其他应用程序共享的DBMS●将功能委派给分布式对象●使用Web服务矿机和J2EE技术把分布在公司骨干网络各处的组件(例如对象)连接到一起2、建立资源管理器的三种常见方法为:JSP、Servlet、EJB。
3、有两种策略实现用户试图:All-or-Northing策略以及选择行策略。
4、域是表单上用户输入数据的位置。
J2EE 模式Value Object(值对象) 用于把数据从某个对象/层传递到其他对象/层的任意Java 对象。
通常不包含任何业务方法。
也许设计有公共属性,或者提供可以获取属性值的get 方法。
JSP1.JSP的基础知识_______ | directive (指令)| |-- scripting (脚本)JSP -------| |__ action (动作)||_____Template data :除JSP 语法外,JSP 引擎不能解读的东西1)在JSP 中使用的directive(指令)主要有三个:a) page 指令b) include 指令c) taglib 指令在JSP 的任何地方,以任何顺序,一个页面可以包含任意数量的page 指令2)Scripting(脚本)包括三种类型a) <%!declaraction %>b) <% scriptlet %>c) <%= expression %>3)action(动作)标准的动作类型有:a) <jsp:useBean>b) <jsp:setProperty>d) <jsp:getProperty>e) <jsp:param>f) <jsp:include>g) <jsp:forward>h) <jsp:plugin>1. 注释: <% -----jsp comment-------%><! -----html comment-------%>2. <%@ page session = “true” import =”java.util.*” %> session 可以不赋值,默认为true,如果session=”false”,则在JSP 页面中,隐含的变量session 就不能使用。
3. 请求控制器结构(Request Controller)也被称之为JSP Model 2 Architecture这种途径涉及到使用一个Servlet 或一个JSP 作为一个应用程序或一组页面的入口点。
为创建可维护的JSP 系统,Request Controller 是最有用的方式之一。
不是JSP,而是Java 类才是放置控制逻辑的正确的地方。
请求控制器的命名模式为: xxxController.jsp请求控制器类的命名模式为: xxxRequestController2.JSP中的JavaBeanJSP 三种bean 的类型1) 页面bean2) 会话bean3) 应用bean大多数的系统会使用一个会话bean 来保持状态,而对每一个页面使用一个页面bean 来对复杂的数据进行表示。
页面bean 是一个模型,而JSP 是一个视图。
3.Custom tagbean 是信息的携带者,而tag 更适用于处理信息。
标记库包含一个标记库描述符(TLD)和用于实现Custom tag 的Java类在翻译阶段,JSP 容器将使用TLD 来验证页面中的所有的tag 是否都被正确的使用。
标记处理程序只是一个简单的适配器,而真正的逻辑是在另一个类中实现的,标记处理程序只是提供了一个供其他的可复用的类的JSP 接口Servlet1.ServletConfig一个ServletConfig 对象是servlet container 在servlet initialization 的时候传递给servlet 的。
ServletConfig 包涵ServletContext 和一些Name/Value pair (来自于deploymentdescriptor)ServletContext 接口封装了Web 应用程序的上下文概念。
2.会话跟踪1) Session当一个Client 请求多个Servlets 时,一个session 可以被多个servlet 共享。
通常情况下,如果server detect 到browser 支持cookie,那么URL 就不会重写。
2) cookie在Java Servlet 中,如果你光Cookie cookie = newCookie(name,value)那么当用户退出Browser 时,cookie 会被删除掉,而不会被存储在客户端的硬盘上。
如果要存储cookie,需加一句cookie.setMaxAge(200)cookie 是跟某一个server 相关的,运行在同一个server 上的servlet 共享一个cookie.3) URL Rewriting在使用URL Rewriting来维护Session ID 的时候,每一次HTTP 请求都需要EncodeURL()典型的用在两个地方1) out.print(“form action=\””);out.print(response.encodeURL(“sessionExample”));out.print(“form action=\””);out.print(“method = GET>”);2) out.print(“<p><a href=\””);out.print(response.encodeURL(“SessionExample?database=foo& datavalue=bar”));out.println(“\” >URL encoded </a>”);3.SingleThreadModel默认的,每一个servlet definition in a container 只有一个servlet class 的实例。
