LaunchPad使用说明
launchpad说明
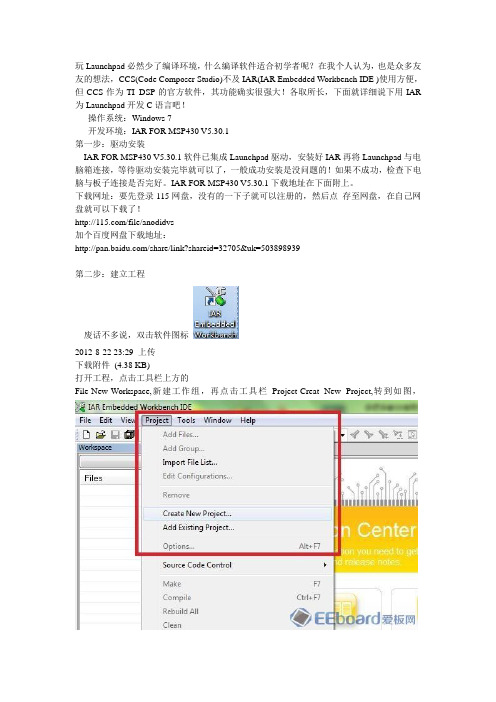
玩Launchpad必然少了编译环境,什么编译软件适合初学者呢?在我个人认为,也是众多友友的想法,CCS(Code Composer Studio)不及IAR(IAR Embedded Workbench IDE )使用方便,但CCS作为TI DSP的官方软件,其功能确实很强大!各取所长,下面就详细说下用IAR 为Launchpad开发C语言吧!操作系统:Windows 7开发环境:IAR FOR MSP430 V5.30.1第一步:驱动安装IAR FOR MSP430 V5.30.1软件已集成Launchpad驱动,安装好IAR再将Launchpad与电脑箱连接,等待驱动安装完毕就可以了,一般成功安装是没问题的!如果不成功,检查下电脑与板子连接是否完好。
IAR FOR MSP430 V5.30.1下载地址在下面附上。
下载网址:要先登录115网盘,没有的一下子就可以注册的,然后点存至网盘,在自己网盘就可以下载了!/file/anodidvs加个百度网盘下载地址:/share/link?shareid=32705&uk=503898939第二步:建立工程废话不多说,双击软件图标2012-8-22 23:29 上传下载附件(4.38 KB)打开工程,点击工具栏上方的File-New-Workspace,新建工作组,再点击工具栏Project-Creat New Project,转到如图,下载附件(44.98 KB)接着点击如图所示,2012-8-22 22:51 上传下载附件(28.69 KB)接着会提示你保存工程文件,存在事先建好的文件夹内.下载附件(59.97 KB)选择 C - main,这里也可以选择Empty project,但选择 C -main的话,它会自己帮你新建一个main.c文件,并且把它加入到工程中。
给指定一个文件,并且把它加入到工程中。
给指定的工程名称msp430中。
【LaunchPad】开发板介绍

LaunchPad开发板介绍前言大家都拿到了超级便宜的LaunchPad的开发板,这些开发板有的朋友是拿来学习的,有的只是看着便宜先入手一个。
无论大家是出于什么目的都无所谓,现在板子到手了,咱们就要把他利用起来。
咱们EE论坛这次展开LaunchPad的千人大学习,我算是抛砖引玉发出此贴,希望大家一起来编写LaunchPad的中文教材,打造中国最全面的LaunchPad中文教材。
闲话不说了,介绍我挑重点的说,尽量少说废话。
开始了!开发板介绍首先,LaunchPad是一个完整的开发板。
板上包括仿真器和目标芯片,通过仿真器我们可以在线控制CPU的运行以及查看硬件寄存器;目标芯片就是我们编写的代码要下载到的芯片。
在图1所示的开发板照片中,照片中用黄色方框框出来的是仿真器,蓝色方框框出来的是目标板,也就是我们编写的代码最终要运行的地方。
套件内容LaunchPad的开发板包括以下内容:1、LaunchPad开发板2、MinUSB电缆3、两块MSP430G系列芯片– MSP430G2231: 低功耗16位单片机,片上拥有10位8通道的ADC、2K容量的Flash和128bytes 的RAM– MSP430G2211: 低功耗16位单片机,包括一个片上比较器以及2K容量的Flash和128bytes的SRAM4、2排10针的排针和2排10针的插座5、一只32.768-kHz的晶体仿真器介绍大家拿到开发板的时候可以看到在仿真器中最大的那块芯片也是一款1xx系列的MSP430单片机,但我们的代码并不是在这块单片机上运行的,这块单片机其实是充当了仿真器的功能,代码真正还是在目标板上的目标芯片上运行。
在初学阶段的话不需要再仿真器上花时间,仅仅把它当做工具使用即可。
通过图片可以看到,仿真器和目标板之间是通过跳线连接的。
其实这暗示着LaunchPad 上的仿真器不止可以调试下载Gxxx系列的芯片,它还可以调试下载eZ430-RF2500T开发板、eZ430-F2012T/F2013T开发板以及eZ430-Chronos手表。
Cali LPD教程说明

Cali Launchpad教程说明1.- 什么是Launchpad?Launchpad是Novation与Ableton合作的专门控制Live的MIDI控制器,它有8x8+8+4=76个多彩颜色的按钮,用于演奏clip,还有横竖各8个功能按钮用于演奏场景或自己分配功能。
仅有717克重,24毫米薄。
你可以同时接6个Launchpad,让他们做不同的事情,使你同时获得48x8=364个按钮。
你可以让其中几个控制场景,其中几个控制音量,另外几个控制自定义的参数,但都控制同一台电脑上的同一个Live,这是APC40做不到的。
而且Launchpad的LED具有4种不同的颜色即红、黄、绿和橙,可以相应的控制对应的MIDI输出来选择不同的颜色然后最近出的Launchpad S其实就是Launchpad的改进版,支持了多款宿主,除了Live还有水果,Cubase什么的,不过个人感觉Launchpad就是做给Live的,所以还是用Live比较好,毕竟Session是只有Live有的。
2.– Launchpad怎么用?Launchpad有四种模式:Session模式:控制Session视图的clip,控制loopMixer模式:控制调音台两个用户模式(User1&2):控制设备和进行管理Launchpad的按钮都非常大,而且是多彩的LED灯。
在Mixer模式下,按钮变成了控制音量推子位置的功能,也可以控制声像、发送、静音、独奏、clip停止、录音等功能。
两个用户模式可以将大按钮变成DJ控制台或者是鼓机打击垫,且支持Max for Live,便用用户自己进行深入定制。
Launchpad赠送Ableton Live 8 Launchpad Edition,跟完整版Live比稍微有点限制。
不过我可以提供Ableton Live的9.0.1, 9.0.5的32&64位版本破解版,附赠实时更新。
独家教程一对一收费标准及内容如下:包教包会普通版,300元(适合只为掌握LPD技术的人)基本设置的应用Live基本操作Session模式的应用Arrangement模式的应用Audio,MIDI Clip的应用编辑I/O面板应用MIDI、Key面板应用User1,2模式的应用Mixr模式的应用演奏设置及编辑工程编辑LED灯光编辑导入导出包教包会豪华版,600元(适合自己用Live制作音乐的人)基本设置的应用Live基本操作Sounds的应用Instruments的应用(Drum Rack,Analog,Collision,Electric,External Instrument,Impulse,Operator,Sampler,Simpler,Tension)。
LaunchPad使用说明
• 提供的API库函数省去逐位操作寄存器,大大简化了开发难度 • 程序的可读性也提高了
用熟悉的环境来设计
• 作为CCS5.1的一个插件安装 • 在TI Resource Explorer中可以简单的向CCS导入例程,也可以阅读相关设计文 档,还包含了图形化的编程工具(Grace)、射频及USB软件资源,以及新的 超低功耗设计向导(ULP Advisor)
LaunchPad支持的MSP430器件
详细的参考Launchpad用户指南.pdf
Adobe LiveCycle Launch Pad 11 用户指南说明书
Legal NoticesFor more information, see /en_US/legalnotices/index.html.ContentsAbout This DocumentIntroductionDeploying Launch PadEnabling or Disabling ComponentsAdding new componentsCreate the SWF file. . . . . . . . . . . . . . . . . . . . . . . . . . . . . . . . . . . . . . . . . . . . . . . . . . . . . . . . . . . . . . . . . . . . . . . . . . . . . . . . . . . . . . . . . . . . . . . . . . . . . . . . . . . . . . . . . . . . . . . . . . . .7 Build the Launch Pad code . . . . . . . . . . . . . . . . . . . . . . . . . . . . . . . . . . . . . . . . . . . . . . . . . . . . . . . . . . . . . . . . . . . . . . . . . . . . . . . . . . . . . . . . . . . . . . . . . . . . . . . . . . . . . . . . . . . .8 Deploy the component . . . . . . . . . . . . . . . . . . . . . . . . . . . . . . . . . . . . . . . . . . . . . . . . . . . . . . . . . . . . . . . . . . . . . . . . . . . . . . . . . . . . . . . . . . . . . . . . . . . . . . . . . . . . . . . . . . . . . . .8 Test the component in Launch Pad . . . . . . . . . . . . . . . . . . . . . . . . . . . . . . . . . . . . . . . . . . . . . . . . . . . . . . . . . . . . . . . . . . . . . . . . . . . . . . . . . . . . . . . . . . . . . . . . . . . . . . . . . . . .9About This DocumentAdobe ® LiveCycle ® Enterprise Suite 4 (ES4) Launch Pad is an Adobe ® AIR client application that provides access from your desktop to the services on your organization’s LiveCycle server. Y ou access the services using the components available within Launch Pad.This document is intended for administrators and developers responsible for managing access to LiveCycle using LiveCycle Launch Pad components.Conventions used in this documentAdditional informationThe resources in this table can help you learn more about LiveCycle.Name Default valueDescription[LiveCycle root ]Windows:C:\Adobe\Adobe LiveCycle ES4Linux and UNIX:/opt/adobe/adobe_livecycle_es4/The installation directory that is used for all LiveCycle modules. The installation directory contains subdirectories for LiveCycle Configura-tion Manager. This directory also includes directories relating to third-party products.[Launch Pad root ][LiveCycle root ]/sdk/misc/LaunchPadThe directory where all Launch Pad source files are saved.For information about SeeLaunch PadLaunch Pad Help An overview of LiveCycleLiveCycle Services Additional LiveCycle documents and resources LiveCycle Documentation Adobe Flash ®Builder ™Flash Documentation Other services and products that integrate with LiveCycle Patch updates, technical notes, and additional information on this product versionAdobe Enterprise SupportIntroductionAdobe LiveCycle Launchpad 11 provides access from your desktop to the services on your organization’s LiveCycle server. The following components are included with the SDK and appear in Launch Pad providing the corresponding services are enabled:•Convert to PDF•Export PDF•Create a PDF Package•Rights Protect DocumentAdministrators can also set up and enable additional components for end users based on other LiveCycle functionality.Note: The service that you want to access by using a component must be installed on the LiveCycle server. Otherwise, the component does not appear within Launch Pad.By combining Flex remoting and the services-oriented architecture of LiveCycle server, Launch Pad configures itself each time it restarts. Whenever you start Launch Pad, it queries the LiveCycle server for changes to existing components or for new components to display. Using Launch Pad benefits all types of users:•End users can access on-demand services, such as the Generate PDF service from the LiveCycle server without affecting desktop perfor-mance. Files are created according to enterprise standards instead of using settings that are selected.•Administrators can supply services to the desktop without desktop management and without end-user intervention. The administrators deploy their Launch Pad assets, which, in turn, appear on the desktop.•Developers have a platform for creating end-user values through an SOA programming interface.Deploying Launch PadAfter you complete the LiveCycle installation, you can install and deploy Launch Pad. The following files are used to deploy Launch Pad: adobe-launchpad-dsc.jar Contains the LiveCycle component called LaunchPadServiceadobe-launchpad-assets.lca and adobe-livecycle-launchpad.lca LiveCycle archive (LCA) files that contain process definitions for the desktop componentsInstall LaunchPadService:1In Adobe® LiveCycle® Workbench, navigate to the Components view.2Search the component list to see whether LaunchPadService is running. If LaunchPadService is running, stop it, and then uninstall it.3Right-click the Components view and install the adobe-launchpad-dsc.jar file from the deploy folder.4Right-click LaunchPadService and select Start Component.LaunchpadService is now running. LaunchpadService is the container application that interacts with the client Adobe AIR application. LaunchpadService is responsible for identifying and providing the available user interface components to the Adobe AIR application.To import the LiveCycle archive files:1In Adobe® LiveCycle® Administration Console, click Services > Application and Services > Application Management.Import two archives: adobe.-launchpad-assets.lca and adobe-livecycle-launchpad.lca. The Launch Pad assets archive file contains the SWF application modules and icons that are downloaded to Launch Pad. The Launch Pad services archive file contains the LiveCycle processes that run when Launch Pad makes a call to the LiveCycle server.2Click Import.3Select adobe-livecycle-launchpad.lca, and then click Preview.The adobe-livecycle-launchpad.lca file deploys the processes that are responsible for all the Launch Pad activities.4To deploy the assets to the run time, select Deploy Assets To Runtime When Import Is Complete.5To view a list of the assets that are contained in the file, click View Assets.6Click Import. The archive file is deployed.7Repeat steps 4-6 but choose the adobe-launchpad-assetts.lca file.The adobe-launchpad-assets.lca file is responsible for deploying the following Adobe AIR client assets: •The icons for the components•The SWF file code that runs within the Adobe AIR application and defines the user experience •The version of the Adobe AIR application used on the desktop•The configuration file that binds everything togetherLaunch Pad is now ready to be run, and the components are located on the client desktop.Enabling or Disabling ComponentsY ou control which LiveCycle components are available in Launch Pad by editing a copy of the Launch Pad configuration file (launchpad-config.xml). This configuration file is deployed with Launch Pad. Y ou can place the copy of the configuration file in the Launch Pad Appli-cations view within Workbench.To enable extending the number of Launch Pad components deployed to the desktop, add a new folder structure to the application assets. The folder structure is .../ext/config/. Create this folder structure and copy the launchpad-config.xml file into it. Then, edit the copy of the configuration file. (See “Deploying Launch Pad” on page3)Note: The /ext/config/launchpad-config.xml file takes precedence over the /launchpad-config.xml file. If a component is disabled in the/ext/config/launchpad-config.xml file but enabled in the /launchpad-config.xml file, that component does not appear in Launch Pad. It is recom-mended that you change only the ext/launchpad-config.xml file.To disable a component:❖Edit the /ext/config/launchpad-config.xml file to change the enabled tag from true to false.To enable a component:❖Edit the /ext/config/launchpad-config.xml file to change the enabled tag from false to true.Adding new componentsIn addition to the default components, you can create and enable components for other LiveCycle services.Before you can begin creating a component for Launch Pad, you must have access to the following items:•Launch Pad Includes the adobe-launchpad-module.swc library for developing components.•Adobe Flash®Builder™ 4.0 or later Includes the tools to create a SWF file for the component.•Workbench Used to create processes and deploy the component.•Adobe® LiveCycle® Foundation Provides the underlying foundation and services. Launch Pad must be connected to a LiveCycle server. Each component depends on having the associated LiveCycle service available.The following steps are for adding a new component:•Create the SWF file that runs within the desktop client.•Deploy the component.•Test the component’s accessibility in Launch Pad.Create the SWF fileThe first step for adding a new component is to create the SWF file.1Copy the Launch Pad library file (adobe-launchpad-module.swc) from [LiveCycle root]/sdk/client-libs/common directory to the /library folder of the project.The library contains the unchpad.ClientHubcomponent class. The components that you develop must be a subclass of the unchpad.ClientHubcomponent class, which has the following properties:•serverProtocol•serverName•serverPort•userName•passwordComponents use these properties to interact or load the services on the LiveCycle server.2Copy the following files from [Launch Pad root]/pdfg/src/com/adobe/launchpad/ui/common/effect/ to the project under a package:•AppearEffect.mxml•DisappearEffect.mxml•ClarifyEffect.mxmlBe sure to edit the package declaration line of these files accordingly.3In the project’s main MXML file, change the root element of the project from WindowedApplication/Application to Launchpadcomponent. The initial code of the MXML looks similar to the following code:<ch:LaunchpadModule xmlns:mx="/2006/mxml" layout="absolute"xmlns:ch="unchpad.*" creationComplete="initData(this)"xmlns:effect="mon.effect.*"xmlns:common="mon.*" hideEffect=" {disappear}" showEffect="{appear}"/> <effect:AppearEffect id="appear"/><effect:DisappearEffect id="disappear"/><effect:ClarifyEffect id="clarify"/>This code enables the sliding effect for showing and hiding a component in Launch Pad to the new component.4Update ChannelSet in the new component to communicate with the LiveCycle server:remote_object>.channelSet = this.lcChannelSet as ChannelSet;5Compile the component by using the Adobe Flash® compiler.6Use the @Embed tag to embed images that are used in the component, in the SWF file.The new component is ready to be deployed on the LiveCycle server.Build the Launch Pad codePerform the following steps to build the Launch Pad code:1Set the FLEX_HOME environment variable to the Flex SDK root directory.2Set the LiveCycle_ES_SDK environment variable to [dep root]/sdk.3Set the ANT_HOME environment variable to point to Ant (1.7 or later) root directory. Also, add %ANT_HOME%/bin to the system PATH variable.4Download the ant-contrib.jar fie from /projects/ant-contrib/files/ and copy it to the [ANT_HOME]/lib directory. 5Set the JAVA_HOME environment variable to the Java home directory. Also, add %JAVA_HOME%/bin to the system PATH variable. 6Copy the jdom.jar file (jdom-b7.zip) from /dist/binary/archive/) to the [dep root]/sdk/client-libs/thirdparty directory. 7Extract the [Launch Pad root] /lc-launchpad-src.zip file and follow the instructions to comment or uncomment the code lines in all build.xml files in the extracted directories.Tip: Use the keyword "comment" to search for instructions.8Update the value of flex.sdk.dir in the build.properties file to point to the Flex-sdk-3.4 location.9Execute the ant command from the [Launch Pad root] directory to build the code.Deploy the componentApplications are managed through the Application view in Workbench. Launch Pad has two applications: the system application and the Launch Pad Assets application, the application that contains assets and configuration information for Launch Pad.1To open the Launch Pad assets application from Workbench, click File > GetApplications.2Open Launch Pad Assets (system), and then select Launch Pad Assets (system)/1.0. The folder structure appears in the Applications view.3In Workbench, deploy the SWF file to the SWF file folder in the assets application in the Applications view.4Add the icon (32 X 32 pixels) that appears in the client to the Launchpadcomponent/icons folder in Workbench.5Create a folder called /ext/config in the Launchpadcomponent folder.6Copy the launchpad-config.xml file to this folder.7Edit the launchpad-config.xml file and create a component tag. The component tag supports the following tags:•id Identifies the component. If more than one component with the same ID is present in the configuration file, only the last occur-rence is enabled in Launch Pad.•name Name of the component. This text is used as the tooltip and application title when the component is enabled.•component-url URL of the component’s SWF file in the repository.•description Short description of the component.•icon-url URL of the component’s icon (png) in the repository.•enabled Specifies whether this component is enabled. The default is true.•order Specifies the order in which the component is shown in Launch Pad. The components are sorted alphabetically in Launch Pad.•services Acomma-separated list of services that the component uses. If a service is specified in this list, the component is sent to Launch Pad. The service must be installed on the LiveCycle server.•role A comma-separated list of roles that are required to download and run the component. If a role is specified, the component appears only if the current user has those roles.An example of a component tag<updates><enabled>true</enabled><current-app-version>9.0.20090707.004745</current-app-version><force-update>false</force-update><app-url>/Applications/LaunchpadAssets/1.0/Launchpad.air</app-url></updates><modules><module><id>IdOfTheNewcomponent</id><name>New component</name><module-url>/Applications/LaunchpadAssets/1.0/swf/Newcomponent.swf</component-url><description>New component</description><icon-url>/Applications/LaunchpadAssets/1.0/icons/Newcomponent.png</icon-url><enabled>true</enabled><order>1</order><services>AssemblerService</services><supported-operating-system>ALL</supported-operating-system></module></modules>Test the component in Launch PadY ou test the component’s accessibility in Launch Pad.1Start Launch Pad. The new component appears in the list of components.2Click the component and confirm that the service starts as expected.。
lunch pad指法

lunch pad指法一、进入 Launchpad要打开 Launchpad 并快速访问 app,请执行以下操作:1、点按 Dock 中的 Launchpad 图标。
2、按键盘上的 Launchpad 键(如果有)。
3、在触控板上使用拇指和另外三个手指合拢手势。
二、导航 Launchpad在进入 Launchpad 后,OS X 会显示您的所有 app。
要打开某个 app,只要点按其图标。
默认情况下,Launchpad 中的项目按字母顺序排列。
您可以在 Launchpad 上通过拖动操作来按您所需的顺序重新排列图标。
如果一个屏幕上没有足够的空间来显示所有 app,Launchpad 会创建多个页面。
Launchpad 屏幕底部的点表示存在的 app 页面数以及当前显示哪个页面。
要在页面之间移动,请执行以下操作:1、通过鼠标滚轮前后滚动。
2、点按 Launchpad 屏幕底部的点。
3、在触控板上用两个手指向左或向右轻扫。
在 OS X Mountain Lion 及更高版本中,您还可以通过在 Launchpad 窗口顶部的搜索栏中输入 app 名称来搜索 app。
三、Launchpad 文件夹在 Launchpad 中,您可以分类整理 app。
只要将一个图标拖放到另一个位置即可。
要在 Launchpad 中查看某个文件夹的内容,只要点按该文件夹即可。
其他图标将消失,以便您查看该文件夹中的 app。
您也可以通过在此视图中点按其名称来重命名此文件夹。
您也可以将项目从某个文件夹中移回 Launchpad 主屏幕。
只要将图标拖出 Launchpad 文件夹然后松手即可。
如果您删除了某个 Launchpad 文件夹中的所有图标,则此文件夹将自动消失。
四、退出 Launchpad要退出 Launchpad,请打开一个 app。
如果您要在没有打开任何内容的情况下退出,请执行以下操作:1、在键盘上按 Escape (esc) 键或 Launchpad 键。
MSP430 G2 LaunchPad使用入门

MSP430 G2 LaunchPad使用入门v1.0 2013.8.8xie_sx@目录目录 (1)1 G2 LaunchPad功能简介 (1)1.1 快速入门 (1)1.2 硬件电路 (3)1.3 片上资源 (4)1.4 自学资料 (5)1G2 LaunchPad功能简介1.1快速入门收到MSP430 LaunchPad G2板卡,完整包装盒如下所示:打开盒子,MSP-EXP430G2 套件盒包括下列物品:•MSP-EXP430G2板卡•USB线•两个10 脚单排孔(暂时用不上)•1个32.768kHz 时钟晶振(该晶振不焊接,单片机使用的是内部晶振,建议焊接上)•一张快速启动指南+两个LaunchPad 贴签•两个MSP430 单片机–MSP430G2553:具有8 通道10 位模数转换器(ADC)、片上比较器、触控式使能I/O、通用串行通信接口、16kB 闪存、和512 字节RAM 的低功耗16 位MSP430 微控制器(预加载有示例程序)–MSP430G2452:具有8 通道10 位ADC、片上比较器、触控式I/O、通用串行接口、8kB 闪存、和256 字节SRAM 的低功耗16 位MSP430 微控制器拆开包装,拿出G2板卡,电路板如下图所示:作为入门使用的电路板,在设计入门实验时,我们更多的是借助两个LED灯和一个按键,进行单片机功能模块的学习。
在电脑上安装CCS软件,接着用USB线连接电脑和G2板卡,简单两个步骤就可以开始单片机的实验了。
基本的实验环境搭建好之后,如下图所示。
在宿舍/教室/图书馆等地方,仅需外带一台电脑就可以做实验了。
1.2硬件电路在嵌入式的学习过程中,硬件知识是必不可少的。
对于初学者来说,仿真器部分的具体电路可以跳过,把精力放在单片机核心板卡上。
G2板卡硬件电路较为简单,将所有的IO口引出,并且配有两个LED知识灯+1个用户按键输入。
电源供电部分的电路如下所示,通过电脑的USB口获取5V的电源输入,经稳压芯片稳压后输出3.6V电压给单片机供电。
LaunchPad 实验板

LaunchPad实验板触摸感应子卡使用指南ZHCU011 – August 201011. 触摸感应子卡概述1.1 概述LaunchPad Touch的触摸感应子卡是一个基于Texas Instruments MSP430G2xx系列的完整的触摸感应应用开发方案.。
触摸感应子卡可以被插入现有的MSP-EXP430G2 LaunchPad实验板来实现一个触摸感应的应用。
进行简单的硬件配置和使用不同的软件,可以实现按键/滑条/拨号盘的不同应用。
在MSP-EXP430G2 LaunchPad实验板套件中采用了MSP430G2211微控制器;利用MSP430G2211的内置比较器来完成触摸感应, 同时利用计时器来控制LED闪烁频率以及LED的亮度作为反馈.强烈推荐您在使用触摸感应子卡前阅读MSP-EXP430G2 LaunchPad 实验版用户手册(SLAU318)相关代码和更多信息可在/xxx上下载.MSP-EXP430G2可以运用IAR Embedded workbench集成开发环境(IDE) 或Code Composer Studio (CCS) 来进行代码编写, 程序下载和调试。
调试程序非常简单易用,不需要任何额外的硬件资源,允许用户全速运行程序,设定硬件断点以及单步执行等。
触摸感应子卡特性:z实现触摸按键/滑块/拨号盘的功能z通过2个通用数字I/O口来驱动2颗LED用于视觉反馈z支持所有PDIP14封装的具有片内比较器模块的MSP430G2x11和MSP430F20x1型号z能轻松连接到MSP-EXP430G2 LaunchPad实验板用于调试图1. 触摸感应子卡外观图1.2 套件内容触摸感应子卡套件包含了以下一些配件:z触摸感应子卡另外, 套件附送的MSP430G2211芯片可以帮助您马上体验EXP430G2的各项功能。
MSP430G2211是超低功耗16位微控制器MSP430中的一员,拥有片内比较器,2k字节程序空间和128字节的SRAM。
- 1、下载文档前请自行甄别文档内容的完整性,平台不提供额外的编辑、内容补充、找答案等附加服务。
- 2、"仅部分预览"的文档,不可在线预览部分如存在完整性等问题,可反馈申请退款(可完整预览的文档不适用该条件!)。
- 3、如文档侵犯您的权益,请联系客服反馈,我们会尽快为您处理(人工客服工作时间:9:00-18:30)。
CCS5.1的详细安装步骤参考CCS5.1User`s guide for MSP430.pdf,现在有破解版的CCS5.1。
Code Composer Studio (CCS5.1)
Workspace
Project 1
Project 2 Project 3 Settings and preferences
USI with I2C and SPI support USCI with I2C, SPI and UART support Inverting and non-inverting inputs Selectable RC output filter Output to Timer_A2 capture input Interrupt capability
GPIO Code Example
P1DIR |= BIT0; //设置 P1.0为输出 P1OUT |= BIT0; //P1.0 输出高电平
For GPIO 中断相关寄存器
详细的参考MSP430x2xxFamily user guide.pdf
主要内容
LaunchPad实验板介绍
开发环境介绍
LaunchPad的应用
演示LaunchPad的电容触摸板
详细参考:430BOOST-SENSE1.pdf
LaunchPad应用1
• 基于心电图的心率监测仪(EKG-Based Heart-Rate Monitor Implementation on the LaunchPad Using the MSP430G2452MCU)
Link
Project Project Project Source files
Link
Source files
Code and Data
Source files Source Header filesfiles Link Header Files Header Files Library files Library files Library files Build and tool settings Build and tool settings Link Build and tool settings
主要内容
LaunchPad实验板介绍
开发环境介绍
LaunchPad的应用
演示LaunchPad的内部温度测量
演示应用使用了MSP430G2231器件的片上外设,例如 10位ADC用于对内部温度传感器进行采样,而16位定时器 用于驱动PWM以改变LED的亮度并启用软件UART以与PC进 行通信。
• 通过USB连接LaunchPad后,演示启动,同时LED交替闪烁。 • 按下按钮P1.3可将应用切换到温度测量模式。此外,还可 通过再次按P1.3来重新对参考温度进行校准。 • 所收集的温度数据UART通过USB仿真电路传回PC。在PC上 使用一个简单的串口调试助手就可以显示温度值。PC上的 串行通信端口必须配置为2400bps、一个停止位且无流控 制,才能正确显示值。
操作通用IO口
GPIO Register
Input Register PxIN Output Register PxOUT Direction Register PxDIR Function Select PxREN Function Select PxSEL Function Select PxSEL2 Interrupt Edge PxIES Interrupt Enable PxIE Interrupt Flags PxIFG
CCS5.1的插件——Grace图形化编程工具
• 使用按钮,下拉菜单以及文字输入来生成带注释 的C代码,可以配置应用中所需要的外设 • 多层视图:基本视图、开发者视图和寄存器视图 • 是CCS的一个免费插件,支持MSP430F2XX和G2XX 系列的MCU
• 详细请参考Grace software for MSP430 peripherals.pdf.
• USB调试与编程接口无需驱动即可安装使用,且具备高 达9600波特率的UART串行通信速度; • 支持所有采用PDIP14或PDIP20封装的MSP430G2xx和 MSP430F2xx器件; • 分别连接至绿光和红光LED的两个通用数字I/O 引脚可提 供视觉反馈; • 两个按钮可实现用户反馈和器件复位; • 器件引脚方便地用于调试目的,也可用作添加定制的扩 展板的插座; • 高质量的20引脚DIP插座,可轻松简便地插入目标器件或 将其移除.
Getting Started with MSP430 Launchpad
——Launchpad开发板使用说明
主要内容
LaunchPad实验板介绍
开发环境介绍
LaunchPad的应用
LaunchPad 开发板介绍
USB Emulator Connection Embedded Emulation
Header files
Declarations/Defines
Library files
Code and Data
工作区,可包括多 个工程和设置信息
工程包括源文件、头文 件、库、编译和一些工 具的设置信息,删除工 作区的文件只是删除了 链接信息,而不是文件 本身
开发自己的程序
• • • • 运行CCS; 创建workspace; 创建工程(File→New→CCSProject); 选择开发对应的器件,如MSP430G2231,可以 选择不同的空工程或者简单例程,还可以选择 Grace的简单例程; • 单击完成,并添加自己的代码; • 完成后对工程进行编译(Project→BuildProject); • 下载和调试程序(Run →Debug(F11));
CCS5.1的插件——MSP430Ware
通过’view——TI Resource Explorer’打开
MSP430Ware的特点
MSP430Ware中可以直接找到各种设计资源
• 通过GUI界面可以找到各种例程、文档、API和其他设计资源 • 可以按照器件、开发工具以及软件库来寻找资源
提供MSP430外设驱动库
LaunchPad支持的MSP430器件
详细的参考Launchpad用户指南.pdf
MSP43l Purpose I/O(通用I/O口)
Independently programmable Any combination of input, output, and interrupt (edge selectable) is possible Read/write access to port-control registers is supported by all instructions Each I/O has an individually programmable pull-up/pull-down resistor Some parts/pins are touch-sense enabled (PinOsc) 3 capture/compare registers Extensive interrupt capabilities Also available as an interval timer Provides correct reset signal during power up and down Power consumption included in baseline current draw
开发环境
• IAR Embedded Workbench KickStart; • Code Composer Studio™ (CCS) IDE (CCS5.1).
将附带USB线缆的EXP430G2LaunchPad目标板连 接至PC。将自动开始安装驱动。如果出现提示,要 求提供软件,则允许Windows自动安装该软件。
16-bit Timer_A3 (16位定时器)
WDT+ Watchdog Timer(看门狗)
Brownout Reset (复位)
详细的参考MSP430x2xxFamily user guide.pdf
MSP430外设接口
Serial Communication (串行通信)
单击一下使能 所需外设
交互式配置外 设
产生带注释的 易读的C代码
Comparator_A+ (比较器)
8 Channel/10-bit 200 ksps SAR ADC (逐次逼近型 ADC)
8 external channels (device dependent) Voltage and Internal temperature sensors Programmable reference Direct transfer controller send results to conversion memory without CPU intervention Interrupt capable Some parts have a slope converter
仿真器
6-pin eZ430 Connector Crystal Pads Part and Socket
MSP430
Chip Pinouts
P1.3 Button LEDs and Jumpers
Power Connector
Reset Button
P1.0 & P1.6
LaunchPad 特性
详细请参考EKG-Based Heart-Rate Monitor.pdf
LaunchPad应用2
• 用于音频电容式触控 BoosterPack 的 LaunchPad