Tiva LaunchPad快速入门V1.0
launchpad说明
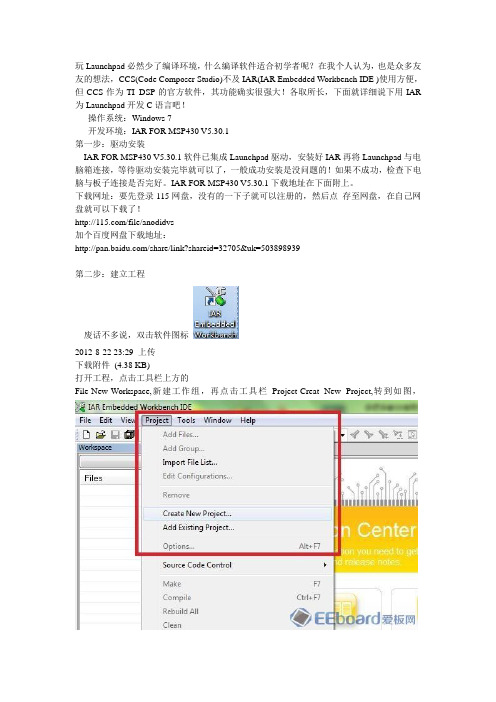
玩Launchpad必然少了编译环境,什么编译软件适合初学者呢?在我个人认为,也是众多友友的想法,CCS(Code Composer Studio)不及IAR(IAR Embedded Workbench IDE )使用方便,但CCS作为TI DSP的官方软件,其功能确实很强大!各取所长,下面就详细说下用IAR 为Launchpad开发C语言吧!操作系统:Windows 7开发环境:IAR FOR MSP430 V5.30.1第一步:驱动安装IAR FOR MSP430 V5.30.1软件已集成Launchpad驱动,安装好IAR再将Launchpad与电脑箱连接,等待驱动安装完毕就可以了,一般成功安装是没问题的!如果不成功,检查下电脑与板子连接是否完好。
IAR FOR MSP430 V5.30.1下载地址在下面附上。
下载网址:要先登录115网盘,没有的一下子就可以注册的,然后点存至网盘,在自己网盘就可以下载了!/file/anodidvs加个百度网盘下载地址:/share/link?shareid=32705&uk=503898939第二步:建立工程废话不多说,双击软件图标2012-8-22 23:29 上传下载附件(4.38 KB)打开工程,点击工具栏上方的File-New-Workspace,新建工作组,再点击工具栏Project-Creat New Project,转到如图,下载附件(44.98 KB)接着点击如图所示,2012-8-22 22:51 上传下载附件(28.69 KB)接着会提示你保存工程文件,存在事先建好的文件夹内.下载附件(59.97 KB)选择 C - main,这里也可以选择Empty project,但选择 C -main的话,它会自己帮你新建一个main.c文件,并且把它加入到工程中。
给指定一个文件,并且把它加入到工程中。
给指定的工程名称msp430中。
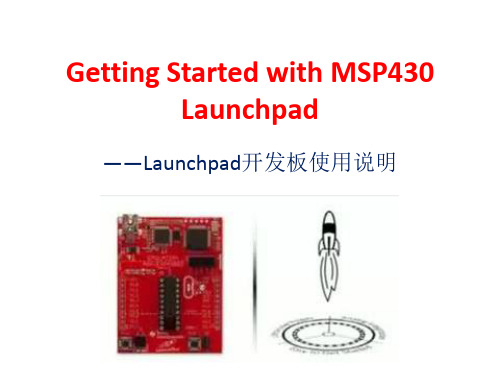
手把手教你使用TI MSP430 LaunchPad
手把手教你使用TI MSP430 LaunchPad1、用USB线连接电脑PC和目标板LaunchPad。
Windows会自动搜索驱动,当然,一般来说,都是安装失败的。
2、LaunchPad套件并没有提供光盘,驱动在哪里?IAR for MSP430已经集成了TI USB FET 的驱动,所以,我们先把IAR for MSP430给安装上,驱动也就有了。
这里驱动路径如下:D:\Programs\IAR Systems\Embedded Workbench 6.0 Evaluation\430\drivers\TIUSBFET 至于软件安装时的注册/和谐问题,大家都是很有办法的,你懂的。
3、安装了IAR for MSP430之后,重新拔插USB,Windows 7会自动重新搜索驱动,一般是可以安装成功的。
如果安装失败了,指定刚刚的路径安装驱动即可。
在设备管理器可以看到如下端口MSP430 Application UART(COM28),端口号视实际情况而定。
有些地方,端口号并不支持到那么大,可以通过高级设置更改,更改方法如下面链接所示:/viewthread.php?tid=237823&page=1&fromuid=194149#pid827 620很好,驱动安装完毕。
下面开始用IAR for MSP430建立工程。
工程建立1、运行IAR Embedded Workbench,点击菜单栏Project –> Create New Project…选择C –> main,这里也可以选择Empty project,但选择C -> main的话,它会自己帮你新建一个main.c文件,并且把它加入到工程中。
给工程指定一个工程名称Blinky,如下图:2、编写如下代码:#include "io430.h"int main( void ){// Stop watchdog timer to prevent time out resetWDTCTL = WDTPW + WDTHOLD;P1DIR |= 0x01; // Set P1.0 to output direction while(1){volatile unsigned inti;P1OUT ^= 0x01; // Toggle P1.0 using exclusive-ORi = 50000; // Delaywhile (i--);}}编写完成后,点击工具栏的Make按钮:提示Save Workspace As,这里给它指定一个工作空间名称也是Blinky,编译之后,信息栏显示编译通过:3、编译通过之后,右击工程,选择Options…:这里主要配置三个地方,一是在General Options的Target选项卡里选择对应的器件Device,这里是MSP430G2231:二是Debugger里选择FET Debugger:三是检查FET Debugger里的设置是否正确,这里是Texas Instrument USB-IF采用Automatic方式:4、经过以上设置,重新编译一下,点击Make按钮,编译无误之后,点击工具栏绿色小三角的Download and Debug按钮,就可以进入仿真了。
Launchpad_Pro中文说明书
在Ableton Live中,进入“Preferences”选项,在左侧的 菜单列表中找到“MIDI / Sync”标签并点击,您将会看到 如下界面:
64个触垫网格区
功能按钮区
混音按钮区
场景启动按钮区
正如下文我们将要解释和说明的,通过以上区域协MIDIO调UT M工IDIIN POWER
作,Launchpad Pro将带给您有趣而富有创意的音乐体 验。
进行乐曲工程界面导航最简单的方式是利用“导航箭头 (Navigation Arrows)”按钮,位于Launchpad Pro的左 上方。
可以想见,“上下(Up、Down)”箭头可以整体移动8x8 触垫所涵盖的区域,一次移动一轨。当您移动出某个区域 时相应的按钮就会被关闭。
在现场演出过程中,您或许想知道如何快速地在成百上千个 片段间自由切换。为了在“工程模式(Session Mode)” 中实现这一点,您可以首先切换到“工程模式”,然后按 住“Session”按钮,您将会看到8x8网格触垫所对应的片 段(如果8x8网格触垫区域内一个对应的片段都没有,触 垫将不显示颜色)。轻松地按一下这些红色的触垫,或者 用“上/下(Up/Down)”导航键就可以跳到相应的网格区 域。如果您跳到的8x8区域没有片段在播放,那绿色的触 垫将表示有片段在播放的区域。
MIDI输出接口
POWER
MIDI OUT MIDI IN
电源输入 电源开关
MIDI输入接口
故障排除:如果您的Launchpad Pro不能正常工作,这或 许是USB接口的问题,包括电脑端的USB接口,也有可能 是USB线缆本身的问题。我们建议您使用设备自带的USB 线,如果仍然不能解决问题,请用12V DC电源对设备进行 供电。
TI TM4C123G LaunchPad 电路及接口功能分析文档
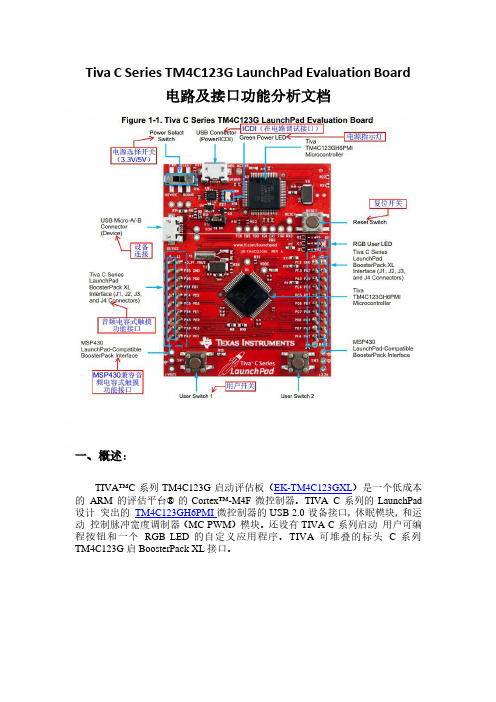
Jx 引脚 (J1,J2,J3,J4)
GPIO(通用 输入输出接
口)
模拟功能
GPIO AMSEL
板上功能
Tiva C Series MCU 引脚
GPIOPCTL 寄存器设置
四、电源管理
1.TIVA C 系列启动电源可以从以下选取一个:
•板上:ICDI USB 电缆(调试,默认) •USB 设备电缆 电源选择开关(SW3)用于选择两个电源之一。
个 PWM 输出模块。每个 PWM 模块提供了很大的灵活性并且可以生成简单的 PWM 信号。
两个正交编码器接口(QEI)也可提供运动控制反馈。
3.用户开关和 RGB LED
TIVA C 系列 LaunchPad 带有 RGB LED。该指示灯用于在预加载的 RGB 快速启动应用
程序,并且可以配置在自定义应用程序中使用。评估板上有两个用户按钮。用户按钮可用于
PC2
TDI
PC3
TDO/SWO
6.虚拟 COM 端口
当连接到 PC 时,设备枚举作为调试器和一个虚拟的 COM 端口。下图显示了 COM 端
口和微控制器的连接关系。
Table 2-8. 虚拟 COM 端口信号
GPIO 引脚
引脚功能
PA0
U0RX
PA1
பைடு நூலகம்
U0TX
Table B 设备信号
GPIO 引脚
引脚功能
USB 设备
PD4
USBODM
D-
PD5
USBODP
D+
TM4C123GH6PM 目标设备也具有 USB 嵌入式主机和 on-the-go(OTG)功能。具体操作细节略去。
运动控制
Tivaware使用入门指导
8.1 参考资料.....................................................................................................................20
1 TM4C12x MCU 概述
TM4C12x MCU 是德州仪器 (TI) 推出的基于 ARM® Cortex®-M4 内核的嵌入式处理器, 目前有两个大的子系列:TM4C123x 系列和 TM4C129x 系列。 TM4C123x 系列:USB + CAN MCU
4 TivaWare 图形库 ....................................................................................................................15 4.1 图形库简介.................................................................................................................15 4.2 图形库目录结构.........................................................................................................16
launchpad入门指南翻译材料
无锡职业技术学院翻译要求:英文-小四号字,单倍行距,首行缩进2个字符,不能定义文档网格,约3000英文单词中文-小四号字,单倍行距,首行缩进2个字符,不能定义文档网格MSP430 Value LineLaunchPad Development KitIntroductionAs applications continue to advance, 8-bit microcontrollers are struggling to meet the growing demand for higher performance and ultra-low power to support evolving product designs. Texas Instruments introduced the affordable 16-bitMSP430™ MCU V alue Line to meet the changing market dynamics and requirements faced by typical low-cost 8-bit MCU developers. Taking the next step in providing a low-cost solution to the shortcomings of 8-bit MCUs, TI created the MSP430 MCUV alue Line LaunchPad development kit to jump start application designs and provide a low-cost tool for developers of all experience levels. This overview will provide an introduction to the features and functionality of LaunchPad as well as everything included in the $4.30 kit.As the number of competitors grow and the time for taking products to market shrinks, the microcontroller (MCU) industry is being stretched by two opposing, but equally strong vectors. The growing demand for higher performance and ultra-low power functionality is matched only by an aggressive need for lower and lower price points. This is especially clear in low-cost applications that utilize 8-bit MCUs. To increase performance without breaking the bank, developers of low-cost 8-bit MCUs must migrate to higher performance 16-bit MCUs that are available at affordable price points.In high volume and quick turnover markets such as consumer and personal electronics, the need for a highly differentiated MCU, while maintaining aggressive price points, is a constant struggle. For instance, the market for 3D glasses has exploded in the recent months, both on the big and small screen. As this market trend moves up and to the right, developers are hard at work in creating technological solutions that provide a unique and immersive experience while remaining affordable. By providing more affordable solutions, developers hope to minimize the risks and barriers associated with new and fast moving markets.For many, this barrier to success is prohibited by a limited MCU core. Many developers of 8-bit MCUs have completely exhausted the full capabilities of their MCU due to limited data throughput and inefficient interfacing with higher resolution analog and digital peripherals. To enable increased functionality and improve feature sets of existing projects, developers must migrate to higher performance 16-bit MCUs.The MSP430 MCU V alue Line series provides a migration path for many of these constrained 8-bit MCU developers. At no additional cost, the affordableMSP430 MCU V alue Line devices offer a 16-bit architecture, higher precision timers and improved peripheral integration and interfacing, enabling improved performance and lower power consumption. The implementation of 16-bit MCUs enable up to 10 times improved performance and 10 times lower power when compared to manylow-cost 8-bit applications. Currently, the MSP430 MCU V alue Line series offers 27 ultra-low power 16-bit devices that offer varying levels of analog integration, communication modules and package types. At 100K unit volumes, MSP430 MCUV alue Line devices start at just $0.25 USD, ensuring that developers do not have to sacrifice price for improved performance. Additionally, the MSP430 MCU V alue Line series will continue to grow to more than 100 devices through the second half of 2011.This roadmap will introduce higher memory sizes, more package options and additional integrated analog and digital peripherals.To make the transition from 8- to 16-bit MCUs more seamless, Texas Instruments (TI) listened to the requirements of developers and created the newMSP430 MCU V alue Line LaunchPad development kit. Furthering the commitment to add performance and value to MCU designs with the MSP430 MCU V alue Line, TI introduced LaunchPad to lower the barrier of entry for developers new to 16-bit architectures, or those new to MCU design, in general. The LaunchPad kit is TI’s simple, yet thorough, introduction to 16-bit MCU development, offering all of the hardware and software a developer needs to get started for just $4.30 USD. Within minutes of opening the LaunchPad kit, users can begin interfacing with pushbuttons, LEDs and the on-chip peripherals of the MSP430 MCU V alue Line devices. See Figure 1 below:△Figure 1For just $4.30, the LaunchPad kit includes a development board with an integrated USB-powered flash emulation tool for programming and debugging any of the existing MSP430 MCU V alue Line devices. Any MSP430G2xx MCU in a DIP package can be dropped into the DIP target socket of LaunchPad, which allows easy evaluation of any MSP430 MCU V alue Line device. The flexible target socket allowsdevelopers to remove their freshly programmed and debugged MSP430G2xx MCU to be plugged into a custom breadboard or PCB so that customers are not constrained to the form factor of the LaunchPad board. Alternatively, developers can use LaunchPad as a standalone system, by leaving the MSP430G2xx device plugged into the board to leverage on-board and programmable push buttons and LEDs. Additionally, every pin of the MSP430G2xx device is fully accessible, allowing easy interfacing of external components or custom daughter cards.Also provided in the kit are free, downloadable software compilers and debuggers including TI’s own eclipse-based Code Composer Studio™ version 4 and IAR Embedded Workbench Kickstart. These independent development environments (IDEs) are full featured and are completely compatible with LaunchPad and theMSP430 MCU V alue Line devices available today. This complements the hardware features of the LaunchPad board by providing a complete software component as well. Using either IDE, users can then leverage MSP430 MCU code examples, open source projects and other free online resources, which can be accessed on LaunchPad’s Wiki page, /launchpadwiki.The unlimited access to the LaunchPad Wiki promotes collaboration and simple sharing of solutions and ideas, making LaunchPad a complete development environment. This active and growing online community supplements the hardware and software components of the LaunchPad package and provides instant support, projects and helpful hints that will be shared through the Wiki pages and E2E™ forums.To fully benefit from 16-bit architecture and ultra-low power performance, the MSP430 MCU V alue Line series and LaunchPad development kit offers a complete and simple introduction to quicken developers’ time to market. By providing 16-bit performance at 8-bit price points, and complete development tools for just $4.30, TI would like to welcome both new and experienced users to the world of high performance and affordable MCU development.△Figure 2. $4.30 LaunchPad kit offers the hardware and software needed to start developing applications, and is backed by an active online community to quicken time to market.MSP430价值链LaunchPad开发工具包引言随着应用程序的持续发展,8位微控制器难以满足日益增产的需求更高的性能和低功耗的支持不断变化的产品设计。
TivaWare应用入门

(2)Tiva的BootLoader
在PC里,BIOS通常存放在主板上的一块ROM里,PC一上电默认找到这块ROM内的程序执行;在Tiva系列MCU系统里,起到类似PC里ROM的功能的是闪存(Flash存储器,简称Flash),BootLoader是存放在Flash起始地址处的一小段代码,占据默认大小为2K字节的空间。Tiva的BootLoader有两种可配置的加载功能,其一是加载用户应用程序(Application);其次是与其它设备建立标准通信通路,并从该设备上加载新的系统软件来更新(Update)原有的系统。更新的过程通过对固件(Firmware)的烧写来实现。烧写固件也是那些经常更新手机系统的用户比较熟悉的术语。系统上电后BootLoader内的启动代码(Start-up Code)将先被执行,进行一系列的初始化操作后,根据预先设定的条件,选择执行用户应用程序或更新控制程序(Updater)。
第2章
CCS是TI的一个集成开发环境,它提供开发所需的编辑、编译、生成、下载并调试的功能,并支持TI的所有处理器的开发。上一章我们用CCS写了一个简单的程序,并编译、生成、下载并调试运行。我们可以把CCS想象成一个有灶台、炉子、锅、铲、刀和案板等基本工具的厨房。在具备这些工具的厨房里,如果你是娴熟的厨师,不需要借助其它工具,只须再有些原料就可以做出各式菜品。同样,有了CCS,你只要具备足够强的开发能力,不需要借助其它软件工具,只需拥有开发板之类的硬件,就可以设计出各种功能的系统。但你会发现用刀切肉末一定不如绞肉机做得更快更好,于是,你在厨房里不断添置各种工具,比如微波炉,面包机等等,它们加快我们做菜的效率;类似的,TI也不断在CCS中添加各种工具,让用户能更快更有效地开发产品。TivaWare就是其中的一种工具,它是一个函数代码库的集合,它作为一套完整的基于Tiva系列MCU的库软件,简化并加速开发人员在Tiva系列MCU上的应用开发。如果想把厨房里的新工具用得得心应手,我们就得花一点时间了解它。用好TivaWare也需要一定的时间。为了使初学者能够更快地入门、理解并掌握TivaWare,我们以相对简单的GPIO操作为例。首先根据硬件的数据手册对GPIO的描述,通过对寄存器直接读写编写一小段代码实现对GPIO的基本控制。然后在此代码的基础上逐步修改扩展,直Байду номын сангаас实现一个自建的函数库,并最终将自己实现的函数库与TivaWare已有的函数进行比对。希望借此能让读者理解TivaWare。
LaunchPad使用说明
• 提供的API库函数省去逐位操作寄存器,大大简化了开发难度 • 程序的可读性也提高了
用熟悉的环境来设计
• 作为CCS5.1的一个插件安装 • 在TI Resource Explorer中可以简单的向CCS导入例程,也可以阅读相关设计文 档,还包含了图形化的编程工具(Grace)、射频及USB软件资源,以及新的 超低功耗设计向导(ULP Advisor)
LaunchPad支持的MSP430器件
详细的参考Launchpad用户指南.pdf
- 1、下载文档前请自行甄别文档内容的完整性,平台不提供额外的编辑、内容补充、找答案等附加服务。
- 2、"仅部分预览"的文档,不可在线预览部分如存在完整性等问题,可反馈申请退款(可完整预览的文档不适用该条件!)。
- 3、如文档侵犯您的权益,请联系客服反馈,我们会尽快为您处理(人工客服工作时间:9:00-18:30)。
对外输出两路电压: 3.3VDC 最大 300mA; 5.0VDC 输出能力 23mA~323mA,与 3.3VDC 的使用有关。3.3V 用的多了,供这 边使用的就少了。
1.2 复位电路
低电平有效复位。当按键按下时,为低电平。
1.3 时钟电路
板卡上有两个晶振。16MHz 晶振(Y2)提供给处理器,通过内部 PLL,倍频后再分 频给内核和外设使用; 晶振 32.768KHz(Y1)用于休眠系统的时钟源;休眠系统也是一大特色,后续有时 间再补充哈。
3
Tiva 板卡入门实验 .......................................................................................................... 17 3.1 下载 Bin 文件 ....................................................................................................... 17 3.1.1 3.1.2 找到编译好的 BIN 文件 ........................................................................... 17 程序下载演示........................................................................................... 18
TI 大学计划资料
Tiva LaunchPad 快速入门 V1.0
目录
1 Tiva LaunchPad 简介 ......................................................................................................... 3 1.1 1.2 1.3 1.4 1.5 1.6 1.7 1.8 2 电源 ........................................................................................................................ 4 复位电路 ................................................................................................................ 5 时钟电路 ................................................................................................................ 5 用户按键 ................................................................................................................ 6 三色 LED 灯显示 .................................................................................................... 6 虚拟串口 ................................................................................................................ 7 调试接口 ................................................................................................................ 8 USB 接口电路 ........................................................................................................ 8
Tiva 的开发环境搭建 ........................................................................................................ 9 2.1 2.2 2.3 2.4 CCS 的下载与安装 ............................................................................................... 10 Stellaris ICDI 驱动安装 ........................................................................................ 10 LM Flash Programmer 安装与使用 ..................................................................... 13 TivaWare 安装与使用.......................................................................................... 14 2.4.1 2.4.2 2.4.3 PC 机上安装 TivaWare ............................................................................ 14 CCS5.4 上使用 TivaWare .......................................................................... 15 CCS6.0 上使用 TivaWare(待补充) ...................................................... 16
TM4C123GH6PM 是 TI 公司推出的一款 32 位基于 ARM Cortex-M4 的处理器,主频 80MHz,256kB Flash,32kB SRAM,具有 USB Host,Device 和 OTG 的能力。
另: TM4C129 系列带有 LCD、 以太网控制器等, 主频可到 120M, 更多信息参考 TI 官网。
6
附录 ................................................................................................................................. 32
1 Tiva LaunchPad 简介
3.4 4 5
导入他人的工程 .................................................................................................. 28
Tiva 参考资料 .................................................................................................................. 29 常见问题解决 ................................................................................................................. 30 5.1 5.2 5.3 5.4 5.5 找不到 Tivaware .................................................................................................. 30 TivaWare 的函数定义.......................................................................................... 30 编译时提示找不到头文件 .................................................................................. 30 找不到变量 .......................................................................................................... 31 错误:unresolved symbol ................................................................................... 31
拿到 TivaC LAUNCHPAD 板子时,不用急于上电操作,“磨刀不误砍柴工”,先花点 时间大致了解下板卡的硬件电路连接。使用前,只要了解大概即可。
1.1 电源
板子通过 USB 口供电。有两个 USB 口(Device 和 Debug;USB 座子边上有丝印字符 表示),这两个 USB 口都可以给板子供电,用开关来选择。 板子上有一个绿色的 LED 灯,用来指示 3.3V 供电。