黑蚂蚁节油器说明书
Bugatti产品说明书.pdf_1701909617.47057

4x 6097637
2x 242001
2x 4550745
1x 300101
1x 617901
4x
4666579
1x
4107623
1x
389921
2x
6117974
2x
614123
2x
362323
1x
302123
1x
6112629
1x
6175988
2x
306226
6x
6168646
Tout l’amusement LEGO ® dans une appli Toda la diversión LEGO ® en una app
M in ifi g u r e y o u r s e lf T r a n s f o r m e -t o
i e n fi g u r in e C o n v iér t e t e e n
: 00800 5346 5555
: 1-800-422-5346
2x
4211397
2x
4211349
1x
4211881
2x
4211425
1x
4210631
1x
4234534
2x
6150297
1x
6141856
1x
6132266
1x
4535553
4x
6102594
1x
6172403
2x
4504371
o r t
a b o u t T
h i s
L E G O s e
t f o r a
c h a n c e
黑金刚V80操作说明

********************************************************VS8.0 巡更巡检管理系统简明操作手册一、系统特点秉承“零”售后服务的设计理念,VS8.0是一款简单、实用的巡更巡检管理系统。
软件设置简单,操作方便,在使用过程中数据分析、存贮由软件自动完成,自动生成各类统计报表。
A.界面:清晰、简洁、一目了然,所有的功能都在软件界面上,无需翻阅复杂的菜单;B.自动分析数据:读取记录后自动生成各类统计报表;C.强大的报表功能:简洁、方便的报表查询,报表种类丰富,风格清新,并可将报表导出为Excel、PDF、RTF(Word格式)及文本等文件,或JPG和BMP图象文件。
D.国际化多语言:目前有简体中文、繁体中文,西班牙语、俄文、德文和英文,其他语言将陆续增加。
E.功能自由变换:为适应不同用户的应用需求,本软件从功能上可分为普通版、专业版、高级版,用户可根据自己的需要选择不同的版本,各版本区别如下:a)普通版:只需添加人员、地点、事件即可使用。
b)专业版:添加人员、地点、事件等资料后,还可以每天设置巡检计划,并可按计划进行考核。
c)高级版:丰富的计划类型,除可按每天设置计划外,还可按周、按月设置计划,并可以设置临时计划。
不同的线路中可含有相同的地点,即可以有交差点。
d)计次方式:计次收费的应用。
F.适应巡检器:本软件目前可使用VF2000/VF2000+、V2/V2+、V3/V3+、V5等型号巡检器。
★特别提示★起始点:每条线路必须设置一个起始点,每次巡检(巡逻)必须从起始点开始,否则不能生成巡检报表。
巡检流程:(人员卡)→起始点→(人员卡)→地点1→…(事件卡)→地点N读人员卡可在起始点前或起始点后均可,巡检过程中可随时读事件卡。
每读一次起始点就意味一次巡检的开始。
二、快速上手指南初次使用本软件,密码为空,直接点击『确认』登录后按以下步骤设置:特别提示:当第一次运行软件时,软件显示的语言由操作系统决定。
恒基汽车Dirt Rocket MX500和MX650电动摩托车用户手册说明书
WARNING: Riding an electric motorbike can be a hazardous activity. Certain conditions may cause the equipment to fail without fault of the manufacturer. Like other electric products, the Dirt Rocket can and is intended to move, and it is therefore possible to lose control, fall off and/or get into dangerous situations that no amount of care, instruction or expertise can eliminate. If such things occur you can be seriously injured or die, even when using safety equipment and other precautions. RIDE AT YOUR OWN RISK AND USE COMMON SENSE.This manual contains many warnings and cautions concerning the consequences of failing to maintain, inspect or properly use your electric motorbike. Because any incident can result in serious injury or even death, we do not repeat the warning of possible serious injury or death each time such a possibility is mentioned.APPROPRIATE RIDER USE AND PARENTAL SUPERVISIONThis manual contains important safety information. It is your responsibility to review this information and make sure that all riders understand all warnings, cautions, instructions and safety topics and assure that young riders are able to safely and responsibly use this product. Razor USA recommends that you periodically review and reinforce the information in this manual with younger riders, and that you inspect and maintain your child’s product to insure their safety.The recommended rider age (14 for the MX500 and 16 for the MX650) is only an estimate, and can be affected by the rider’s size, weight or skills. Any rider unable to fit comfortably on the Dirt Rocket should not attempt to ride it.A parent’s decision to allow his or her child to ride this product should be based on the child’s maturity, skill and ability to follow rules.Keep this product away from small children and remember that this product is intended for use only by persons who are, at a minimum, completely comfortable and competent while operating the product.DO NOT EXCEED THE WEIGHT LIMIT OF 175 pounds for the MX500 and 220 pounds for the MX650. Rider weight does not necessarily mean a person’s size is appropriate to fit or maintain control of the Dirt Rocket.Do not touch the brakes or electric motor on your electric motorbike when in use as they can become very hot.Refer to the section on safety for additional warnings.ACCEPTABLE RIDING PRACTICES AND CONDITIONSAlways check and obey any local laws or regulations which may affect the locations where the Dirt Rocket may be used.Ride defensively. Watch out for potential obstacles that could catch your wheel or force you to swerve suddenly or lose control. Be careful to avoid pedestrians, skaters, skateboards, scooters, bikes, children or animals who may enter your path, and respect the rights and property of others.The Dirt Rocket is meant to be used only in controlled environments free of potential traffic hazards and not on public streets or sidewalks. Do not ride your electric motorbike in any areas where pedestrian or product traffic is present.Do not activate the speed control on the hand grip unless you are on the electric motorbike and in a safe, outdoor environment suitable for riding. These bikes were manufactured for performance and durability but are not impervious to damage. Jumping or other aggressive riding can over-stress and damage any product, including the electric motorbike, and the rider assumes all risks associated with high-stress activity.Be careful and know your limitations. Risk of injury increases as the degree of riding difficulty increases. The rider assumes all risk associated with aggressive riding activities.Maintain a hold on the handlebars at all times.Never carry passengers or allow more than one person at a time to ride the electric motor bike.Never use near steps or swimming pools.Keep your fingers and other body parts away from the drive chain, steering system, wheels and all other moving components.Never use headphones or a mobile phone when riding.Never hitch a ride with another product.Do not ride the Dirt Rocket in wet or icy weather and never immerse the electric motorbike in water, as the electrical and drive components could be damaged by water or create other possibly unsafe conditions.The Dirt Rocket is intended for use on flat, level ground without loose debris such as rocks or gravel. Wet, slick, bumpy, uneven or rough surfaces may impair traction and contribute to possible accidents. Do not ride the electric motorbike in mud, ice, puddles or water. Avoid excessive speeds that can be associated with downhill rides. Never risk damaging surfaces such as carpet or flooring by use of an electric motorbike indoors.Do not ride at night or when visibility is limited.PROPER RIDING ATTIREAlways wear proper protective equipment such as an approved safety helmet (with chin strap securely buckled), elbow pads and kneepads. A helmet may be legally required by local law or regulation in your area. A long-sleeved shirt, long pants and gloves are recommended. Always wear athletic shoes (lace-up shoes with rubber soles), never ride barefooted or in sandals, and keep shoelaces tied and out of the way of the wheels, motor and drive system.USING THE CHARGERThe charger supplied with the electric motorbike should be regularly examined for damage to the cord, plug, enclosure and other parts, and in the event of such damage, the bike must not be charged until the charger has been repaired or replaced.Use only with the recommended charger.Use caution when charging.The charger is not a toy. Charger should be operated by an adult.Do not operate near flammable materials.Unplug charger and disconnect from bike when not in use.Always disconnect from the charger prior to wiping down and cleaning your electric motorbike with liquid.FAILURE TO USE COMMON SENSE AND HEED THE ABOVE WARNINGS INCREASES RISK OF SERIOUS INJURY. USE WITH APPROPRIATE CAUTION AND SERIOUS ATTENTION TO SAFE OPERATION.warnIng: DO NOT USE NON-RAZOR PRODUCTS WITH YOUR RAZOR DIRT ROCKET. The Dirt Rocket has been built to certain Razor design specifications. The original equipment supplied at the time of sale was selected on the basis of its compatibility with the frame, fork and all other parts. Certain aftermarket products may or may not be compatible and will void your warranty.required Tools5mm and 6mm Allen wrenches (Included)2.5mm Allen wrench (Not Included)Spoke tightener(Included)Charger Phillips screwdriver (Included)Bicycle tire pump for Schrader valve tires, with pressure gauge (Not Included)Remove contents from box. Remove the foam separators that protect the components from damage during shipping. Inspect the contents of the box for scratches in the paint, dents or kinked cables that may have occurred during shipping. Because the Dirt Rocket is 95 percent assembled and packed at the factory, there should not be any problems, even if the box has a few scars or dents.MAKE SURE POWER SWITCH IS TURNED “OFF” BEFORE CONDUCTING ANY MAINTENANCE PROCEDURES.estimated assembly and set-up TimeRazor recommends assembly by an adult. Allow up to 30 minutes for assembly.Allow up to 12 hours for initial charge (see page 5 for charging information).10mm, 14mm and 17mmopen wrenches (Included)19mm open wrench (Not Included)1Place the handlebars in the handlebar clamps. Note: Handlebar clamps are located in the plastic bag.2Align parallel to the fork andtighten the bolts using a 6mmAllen wrench. When properlytightened, the handlebars shouldnot move forward or back.Adjust the brake leveradjuster to the proper placeand tighten it with the 5mmAllen wrench.attaching the Handlebars1 Align fender with the holein the fork and insert thebolt. Tighten securely using a10mm open wrench and 5mmq attaching the front fenderInflating the TiresTires are inflated when shipped, but they invariably lose some pressure between the point of manufacturing and your purchase.Note: The pressurized airsupplies found at gasoline stations are designed to inflate high-volume automobile tires. If you decide to use such an air supply to inflate your tires, first make sure the pressure gauge is working, then use very short bursts to inflate to the correct PSI. If you inadvertently over-inflate the tire, release the excess pressure immediately.Using a bicycle tire pump equipped for Schrader valves, inflate the tires to the PSI indicated on the sidewall of the tire.warnIng:Failing to properly adjust and tighten the nuts and bolts that affix the fork can cause you to lose control and fall.through the other side of the wheel hub, add the other spacer and slide though the fork. Secure with washer and nut.Note: Front axle is installed with the spacer between the fork and wheel for all Dirt Rockets.Note: If your model has one short spacer, it goes on the side of the hub with the disc brake.Note:where front axle is located in box.1 Position wheel in front fork and slide disk brake into caliper.3 With a 14mm and 17mmopen wrench tighten the front wheel screws.The brake is capable ofcausing the electric motorbike repaIr anD MaInTenancewarnIng:Always disconnect your electric motorbike from the charger beforewarnIng:To prevent shock, please follow the instructions accordingly and do not skip any steps.Note: the arrangement of the hardware sequence:Right Side (Throttle)16-1 Nut 16-2 Washer 16-3 Spacer Left Side (Brake)16-1 Nut 16-2 Washer 16-3 Spacer16-116-316-216-216-316-1qwarnIng:To avoid a pinch or injury, keep fingers away from moving q warnIng: Regularly check the spoke tension and retighten the 1q Battery care and DisposalDisposal: Your Razor product uses sealed lead-acid batteries which must be recycled or disposed of in an environmentally sound manner. Do not dispose of a lead-acid battery in a fire. The battery may explode or leak. Do not dispose of a lead-acid battery in your regular household trash. The incineration, land filling or mixing of sealed lead-acid batteries with household trash is prohibited by law in most areas. Return exhausted batteries to a federal or state approved lead-acid battery recycler or a local seller of automotive batteries. If you live in Florida or Minnesota, it is prohibited by law to throw away lead-acid batteries in the municipal waste stream.q chargerThe charger supplied with the bike should be regularly examined for damage to the cord, plug,enclosure and other parts and in the event of such damage, the Dirt Rocket must not be charged until it has been repaired or replaced.Use ONLY with the recommended charger.warnIng:If a battery leak develops, avoid contact with the leaking acid and place the damaged battery in a plastic bag. Refer to the disposal instructions at left. If acid comes into contact with skin or eyes, flush with cool water for at least 15 minutes and contact a physician.warnIng: Batteryposts, terminals and related accessories contain lead and lead compounds. Wash your hands after handling.Motor bike does not runMotor bike was running but suddenly stoppedShort run time (less than 15 minutes per charge)Motor bike runs sluggishlySometimes the motor doesn’t run, but other times it doesMotor bike does not stop when applying the brake Motor bike makes loud noises or grinding soundsproblem possible cause solutionUndercharged batteryLoose wires or connectorsBurned-out fuseMotor or electrical switch damageUndercharged batteryBattery is old and will not accept full chargeBrakes are not adjusted properlyRiding conditions are too stressful Tires are not properly inflatedMotor bike is overloadedLoose wires or connectors Motor or electrical switch damageBrakes are not adjusted properly Chain is too dryCharge the battery. A new battery should have been charged for at least 12 hours before using the motor bike for the first time and up to 12 hours after each subsequent use.Check all connectors. Make sure the charger connector is tightly plugged into the charging port, and that the charger is plugged into the wall.Make sure power flow to the wall outlet is on.Check all wires and connectors to make sure they are tight.The fuse will burn out and automatically shut off the power if the motor is overloaded.An excessive overload, such as too heavy a rider or too steep a hill, could cause the motor to overheat. Replace the fuse(s) with a new one of equal amperage. Correct the conditions that caused the fuse to burn out and avoid repeatedly burning out fuse.Contact your local Razor authorized service center for diagnosis and repair.Charge the battery. A new battery should have been charged for at least 12 hours before using the motor bike for the first time and up to 12 hours after each subsequent use.Check all wires and connectors. Make sure the battery connector is tightly plugged into the charger connector, and that the charger is plugged into the wall.Even with proper care, a rechargeable battery does not last forever. Average battery life is 1 to 2 years depending on use of product and conditions. Replace only with a Razor replacement battery.Refer to brake adjustment instructions on page 5 of this e only on solid, flat clean and dry surfaces such as pavement or level ground.The tires are inflated when shipped, but they invariably will lose some pressure between the point of manufacturing and your purchase. Refer to instructions on page 4 of this manual to properly inflate tires.Make sure you do not overload the motor bike by allowing more than one rider at one time, exceeding the maximum weight limit, going up too steep a hill or towing objects behind the vehicle.Check all wires around the motors and all connectors to make sure they are tight.Contact your local Razor authorized service center for diagnosis and repair.Refer to instructions on page 5 of this manual to properly adjust brakes.Apply a lubricant such as 3 in 1TMor Tri-Flow TMto the chain.01 Handlebar grip (right/left)02Twist grip throttle02-1 Sleeve 03 Front brake lever assembly (right)04 Handlebar05 Rear brake lever assembly (left)06 Front fork 07Front fender08 Handlebar clamp (upper/lower)09 Front wheel complete 10 Caliper brake 11 Shock 12 Control module13 Battery (3- 12V/ 12Ah) with Fuse 14 MX500 motor (36V/500W)MX650 motor (36V/650W)15 Kickstand16 Rear wheel complete 17 Chain 18 Chain guard19 Battery cover (left/right)20 On/ Off switch 21 Charger port 22Seat fairingSB 1918 (CALIFORNIA) DECLARATIONYOUR INSURANCE POLICIES MAY NOT PROVIDE COVERAGE FOR ACCIDENTS INVOLVING THE USE OF THIS SCOOTER/ELECTRIC RIDE-ON PRODUCT. TO DETERMINE IF COVERAGE IS PROVIDED, YOU SHOULD CONTACT YOUR INSURANCE COMPANY OR AGENT.Tire InflationPeriodically inspect the tires for excess wear and replace as required, and regularly check the tire pressure and re-inflate as necessary. If you get a flat tire, the inner tube can be patched or a new tube can be purchased from Razor or an authorized repair center.safety gearAlways wear proper protective equipment, such as an approved safety helmet, elbow pads and kneepads. Always wear shoes, never ride barefooted or in sandals, and keep shoelaces tied and out of the way of the wheels, motor anddrive system.razor limited warrantyThe manufacturer warranties this product to be free of manufacturing defects for a period of 90 days from date of purchase. This Limited Warranty does not cover normal wear and tear, tires, tubes orcables, or any damage, failure or loss caused by improper assembly, maintenance, or storage or use of the Razor Dirt Rocket.This Limited Warranty will be void if the product is ever: •used in a manner other than for recreation;•modified in any way;•rented.The manufacturer is not liable for incidental or consequential loss or damage due directly or indirectly to the use of this product.Razor does not offer an extended warranty. If you have purchased an extended warranty, it must be honored by the store at which it was purchased.For your records, save your original sales receipt with this manual and write the serial number below.__________________________________________Item Numbers:MX500 15128190MX650 15165070loose partsThere should not be any unusual rattles or sounds from loose parts or broken components. If you are not sure, ask an experienced mechanic to check.BrakesCheck the brakes for proper function. When you squeeze the lever, the brake should provide positive braking action.frame, fork and HandlebarsCheck for cracks or broken connections. Although broken frames are rare, it is possible for an aggressive rider to run into a curb or wall and wreck and bend or break a frame. Get in the habit of inspecting yours regularly.q pre-rIDe cHecKlIsTq qq qDo not use this product for the first time until you have inflated the tires to the correct psI and charged the battery for at least 12 hours.failure to follow these instructions may damageyour product and void your warranty.Discover skating and wheel toys in our online store.。
黑豹 2s 操作说明书

原版操作说明书黑豹 2s第1版软件版本: RP21-***德国印刷:09/2021 E901441CN版本说明保留一切权利©版权拥有者ROPA Fahrzeug- und Maschinenbau GmbH(罗霸车辆与机械制造有限公司)Sittelsdorf 24D-84097 Herrngiersdorf/德国电话 + 49 – 87 85 – 96 01 0传真 + 49 – 87 85 – 56 6网址 www.ropa-maschinenbau.de电子邮件:************************************只有在明确征得罗霸有限公司的同意后才能翻印、拷贝或复制本操作说明书的全部或部分内容。
非经罗霸有限公司授权,以任何形式复制、传播本操作说明书或将之储存到数据载体上都构成对现行国家和国际版权法的侵犯,因此会被追究法律责任。
对本操作说明书的内容负责的发行者:ROPA Fahrzeug- und Maschinenbau GmbH(罗霸车辆与机械制造有限公司)2 / 534目录目录3 / 534目录4 / 534目录1前言 (13)1.1机器铭牌和重要数据 (16)1.2型号概览 (17)1.3序列号与机器铭牌 (18)1.4符合性声明 (20)2安全 (21)2.1一般性说明 (23)2.2机主义务 (23)2.3一般性标志与说明 (24)2.3.1安全标识 (25)2.4常规使用 (26)2.4.1可预见的错误应用 (26)2.5危险区域 (27)2.6机器上的安全标签 (29)2.7作业安全与健康防护 (31)2.8要求(对机器操作和保养人员) (31)2.9爬梯使用规范 (32)2.10事故应对 (32)2.11废旧零件,燃料和辅料的处理 (32)2.12其它危险 (32)2.13由机械因素导致的危险 (32)2.14由电气装置导致的危险 (33)2.15由运行物质导致的危险 (33)2.16由噪音 导致的危险 (34)2.17由液压装置导致的危险 (34)2.18由于气动装置导致的危险 (34)2.19由高温介质/表面导致的危险 (34)2.20个人防护装备 (35)2.21泄漏 (35)2.22酸性电池使用安全提示 (36)2.23禁止擅自 对机器进行改装 (36)2.24安全和保护装置 (36)2.25紧急出口 (37)3概览图及技术参数 (39)3.1概览图 (41)3.2技术参数 (44)3.3轮胎压力 (46)3.4无附加行驶机构的机器的低货箱运输示意图 (47)3.5带附加行驶机构的机器的低货箱运输示意图 (48)3.6低货箱运输/海运固定孔 (49)4一般性描述 (51)4.1功能 (53)4.2供货范围 (54)5操作元件 (55)5.1爬梯 (57)5.1.1驾驶室爬梯 (57)5.1.2储料仓爬梯 (58)5.2驾驶室概览图 (59)5 / 534目录5.3转向控制柱 (61)5.3.1转向柱开关 (63)5.4驾驶员座椅 (64)5.5驾驶室地面上的操作元件 (69)5.6R-Concept 操作台 (70)5.6.1R-Touch 触屏彩显终端 (71)5.6.2R-Select (72)5.6.3R-Direct (75)5.6.4键盘 I (76)5.6.5键盘 II (77)5.6.6键盘 III (78)5.6.7控制台开关 (79)5.6.8转向控制总开关 (80)5.6.9包含多功能手柄的操纵杆 (81)5.6.10点火开关 (83)5.7左侧的彩显终端 (84)5.8清空储料仓操作元件 (85)5.9车顶控制台开关 (87)5.10空调 (89)5.11前轮上方的地面操作按钮 (90)5.12犁头单元地面操作装置 (92)5.13发动机舱 (93)5.14电池紧急关闭 (95)6运行 (97)6.1首次调试 (100)6.2机器运行安全规范 (100)6.2.1在裸露电线附近工作的注意事项 (101)6.2.2在与裸露的电线接触时或接触后应采取的行动 (101)6.3R-Concept (102)6.3.1R-Touch 彩显终端(右侧面板) (102)6.3.1.1R-Touch 上显示区 (103)6.3.2R-Direct 功能区域 (107)6.3.2.1主页按钮 (107)6.3.2.2主菜单 (108)6.3.2.2.1菜单基础设定值 (109)6.3.2.2.2自动驾驶菜单 (112)6.3.2.2.3菜单特殊功能 (112)6.3.2.2.4系统菜单 (113)6.3.2.2.5菜单运行数据 (116)6.3.2.2.6菜单服务 (118)6.3.2.3任务管理器 (119)6.3.2.3.1任务数据快速概览 (120)6.3.2.3.2调节行数 (121)6.3.2.3.3结束任务 (122)6.3.2.3.3.1在标准装备和 R-Transfer 基础版中结束任务 (123)6.3.2.3.3.2在 R-Transfer 专业版中结束任务 (123)6.3.2.3.4导出数据 (124)6.3.2.3.5R-Transfer 专业版数据导入 (125)6.3.2.3.6任务评估 (126)6.3.2.4空调 (127)6.3.2.5灯光控制 (129)6.3.2.5.1配置灯光程序 (130)6.3.2.5.2爬梯照明装置 (130)6.3.2.5.3根据客户要求特别安装的大灯 (131)6.3.3警告极限值的调节 (132)6.3.4R-Touch 中的警告与状态显示 (133)6 / 534目录6.4左侧的彩显终端 (139)6.5操纵杆 (143)6.6柴油发动机 (150)6.6.1启动/关闭柴油发动机 (153)6.6.2发动机转速的调节 (155)6.6.3SCR 系统功率减小(只针对 RP2Sd) (157)6.6.3.1车用尿素液位功率减小 (158)6.6.3.2车用尿素质量和系统故障功率减小 (159)6.6.4对沃尔沃发动机操作说明书的更改和补充 (160)6.7“田地”和“公路”运行方式 (161)6.7.1变速箱换档 (162)6.7.2全轮驱动开关 (162)6.7.3差速器锁 (163)6.8行驶 (164)6.8.1速度限制 柴油发动机过冷 (166)6.8.2选择行驶方向(前进+/后退) (166)6.8.3行驶驱动装置模式 (167)6.8.4定速巡航 (168)6.8.4.1在“公路”运行方式下打开定速巡航控制系统 (168)6.8.4.2在“公路”运行方式下关闭定速巡航控制系统 (169)6.8.4.3快速课程:“公路”运行方式下定速巡航控制系统的操作 (169)6.8.4.4在“田地”运行方式下打开定速巡航控制系统 (170)6.8.4.5定速巡航控制系统额定速度的设置(“田地”运行方式) (171)6.8.4.6在“田地”运行方式下关闭定速巡航控制系统 (171)6.8.4.7快速课程:“田地”运行方式下定速巡航控制系统的操作 (172)6.9公路行驶 (173)6.9.1概述 (173)6.9.2附加行驶机构(选件) (176)6.9.2.1连接附加行驶机构 (176)6.9.2.1.1在连接模式下操作链 (177)6.9.2.2带有附加行驶机构的公路行驶 (182)6.9.2.3断开附加行驶机构 (183)6.10制动装置 (186)6.10.1运行制动装置 (186)6.10.2发动机制动装置 (186)6.10.3驻车制动 (186)6.10.4自动驻车制动装置 (187)6.11转向 (188)6.11.1在“公路”运行方式下的转向 (190)6.11.1.1同步转向 (190)6.11.1.2将后轴调至中央位置 (190)6.11.1.3同步转向 (191)6.11.1.4在“公路”运行方式下的掉头行驶 (192)6.11.1.5在“公路”运行方式下的转向 (193)6.11.2在“田地”运行方式下的转向 (194)6.11.2.1预选和激活直线挖掘 (194)6.11.2.2选择左向/右向保护档 (195)6.11.2.3预选保护档等级 (196)6.11.2.4激活保护档 (197)6.11.2.5掉头行驶 (197)6.11.2.6刚性行驶 (198)6.11.2.7蟹形转向 (198)6.11.2.8用操纵杆控制后轮的转向 (199)6.11.2.9快速课程:“田地”运行方式下的转向方式 (200)6.11.3自动转向(自动驾驶) (201)6.11.3.1激活前轴自动转向 (202)6.11.3.2快速课程:只激活前轴自动驾驶 (203)6.11.3.3激活后轮自动驾驶仪 (204)7 / 534目录6.11.3.4快速课程:自动激活后轮自动驾驶 (205)6.11.3.5在菊苣装备上使用的自动驾驶仪 (206)6.11.4转向动作设置 (207)6.12底盘 "R-Balance" (208)6.12.1R-Touch 上底盘显示区 (209)6.12.2激活底盘 (210)6.12.3手动倾斜 (210)6.12.4自动倾斜(可选) (211)6.12.5倾斜时的离心力补偿 (212)6.13挖掘 (213)6.13.1挖掘前的准备工作 (213)6.13.2挖掘运行 (213)6.14打叶器 (214)6.14.1菜叶探测器 (216)6.14.2打叶器轴 (218)6.14.2.1设置打叶器轴转速 (219)6.14.2.2打叶器轴监控 (219)6.14.2.3设置清洁轴转速(只适用于 RES) (220)6.14.2.4设置清洁轴高度(只针对 RES) (220)6.14.3设置打叶器高度 (221)6.14.3.1通过探测轮设置打叶器高度(非 R*SU 型) (221)6.14.3.1.1打叶器卸压(非 R*SU 型) (223)6.14.3.2无探测轮设置打叶器高度(仅 R*SU 型) (225)6.14.3.3打叶器自动高度 "R-Trim"(选项) (226)6.14.4打叶器附加升高装置 (228)6.14.5菜叶蜗杆(只针对 RBS/RAS) (229)6.14.6液压打叶器盖板(只针对 RAS) (229)6.14.7菜叶抛撒盘 (231)6.14.7.1菜叶抛撒盘折叠 (231)6.14.7.2菜叶抛撒盘转速设置 (232)6.14.7.3菜叶抛撒盘等级 储料仓清空 (233)6.14.8切削器 (234)6.14.8.1微型切削器 2(缩写 MT2) (234)6.14.8.2切削厚度调节 – MT2 (235)6.14.8.3切削梳原始设定值 (236)6.14.8.4设置带入口滑板的滑块(可选) (237)6.14.8.5切削器弹簧负载/切削角度(微型切削器 2) (239)6.15收获 (240)6.15.1限深轮轴转速调节 (242)6.15.2深度制导 (243)6.15.3挖掘深度调节 (245)6.15.4辊筒组高度调节 (246)6.15.5设置犁刀深度 (249)6.15.6犁刀 (256)6.15.7设置振动犁刀转速 (258)6.15.8避石器 (260)6.15.9避石器压力调节 (261)6.15.10犁刀体导向(线性导向) (262)6.15.11犁刀体转向 (263)6.15.12犁辊筒转速调节 (264)6.15.13犁辊筒倒转 (266)6.15.14最后一根犁辊筒和短犁辊筒之间距离的调节 (268)6.15.15最后一个(光滑)犁辊筒(螺旋辊筒)的旋转方向 (269)6.15.16短犁辊筒/2-叶桨片 (269)6.15.17侧面位移犁头单元 (270)6.15.18手动侧面位移犁头单元 (271)6.15.19自动侧面位移犁头单元 (272)6.15.20RR-V 型犁头的行距调节 (273)8 / 534目录6.15.21辊筒组移动 (277)6.15.21.1辊筒组移动与行距的匹配(只针对 RR-V) (278)6.16筛带 (279)6.16.1设置筛带转速 (280)6.16.2输送带倒转 (281)6.16.3输送带地面操作 (282)6.16.4输送带调节 – 调节间距 (283)6.16.4.1设置筛带纵向间距 (283)6.16.4.2输送带前方高度调节 (284)6.16.4.3输送带后方高度调节 (285)6.17星状筛 (286)6.17.1星状过滤网转速调节 (287)6.17.1.1单独调节星状过滤网 (288)6.17.1.2关闭星状过滤网 (288)6.17.2星状过滤网的监控 (289)6.17.3星状过滤网地面操作 (290)6.17.4星状过滤网导栅条 (291)6.17.5弯曲的星状过滤网弹齿 (295)6.17.6弹齿(可选) (296)6.17.7刮刀 (296)6.18环形升降带 (297)6.18.1环形升降带的展开-收拢 (297)6.18.2升降带转速调节 (299)6.18.3升降带的监控 (300)6.19储料仓 (301)6.19.1展开和收起卸料带折叠件 (302)6.19.2前面的料仓栅格打开 - 折叠 (303)6.19.3升起/降下储料仓蜗杆 (304)6.19.4切换储料仓蜗杆的旋转方向 (305)6.19.5手动切换储料仓蜗杆的旋转方向 (307)6.19.5.1快速关闭 (308)6.19.6通过自动折叠功能展开和收起机器 (309)6.19.7手动展开和收起机器 (310)6.20清空储料仓 (314)6.20.1清空储料仓操作元件 (315)6.20.2调节卸料带转速 (322)6.20.3堆放块根堆的提示(使用罗霸巧鼠) (324)6.21泵分配器传动机构 (324)6.22液压装置 (325)6.23压缩空气装置 (328)6.23.1压缩机 (328)6.23.2压缩空气罐 (329)6.24集中润滑装置 (331)6.24.1黄油枪的填充 (332)6.24.2临时润滑 (333)6.25视频系统 (335)6.25.1倒车摄像头 (336)6.25.2星状过滤网摄像头 (336)6.25.3输送带摄像头(选项) (337)6.25.4卸料带摄像头(选件) (337)6.25.5R-View(可选) (338)6.26电气装置 (339)6.26.1电压监控 (339)6.26.2电池切断继电器 (339)6.26.3电池紧急关闭 (340)6.27打印机 (341)6.27.1按钮功能描述 (341)6.27.2适用热敏纸 (341)9 / 534目录6.28停放 (343)7保养和护理 (345)7.1柴油发动机 (347)7.1.1干燥空气滤清器 (347)7.1.2为柴油发动机换油 (352)7.1.3燃油供应 (353)7.1.3.1更换电动泵上的燃油预滤器滤芯/排水 (355)7.1.3.2更换燃油预滤器滤芯和燃油主过滤器滤芯 (355)7.1.3.3对燃油系统进行排气 (357)7.1.3.4加注柴油燃料 (358)7.1.3.5燃油系统中的微生物 (359)7.1.4柴油发动机冷却系统 (360)7.1.4.1冷却装置的清洁 (361)7.1.4.2检查冷却液(在 RP2Sa) (364)7.1.4.3更换冷却液 (在 RP2Sa) (365)7.1.4.4检查冷却液 (在 RP2Sd) (366)7.1.4.5更换冷却液 (在 RP2Sd) (368)7.1.4.6罗霸公司对于冷却液的一些提示(常规) (369)7.1.5调节阀门间隙 (369)7.1.6SCR 尾气处理与车用尿素 AdBlue® (370)7.1.6.1更换 AdBlue® 滤芯 (370)7.1.7发动机的其它保养工作 (372)7.2泵分配器传动机构 (PVG) (372)7.3液压装置 (373)7.3.1液压油箱 (375)7.3.1.1液压油更换 (376)7.3.1.2更换吸入式回流滤芯 (378)7.3.2压力滤芯的更换 (379)7.3.3集成回油管内的保护滤网 (381)7.4三根转向轴的机械驱动 (382)7.4.1从分配器传动机构到转向控制轴的万向轴 (382)7.4.2车轴内万向节的保养 (383)7.5行走变速箱 (行驶驱动) (384)7.6轴 (386)7.6.1行星传动机构(两根轴均适用) (386)7.6.2前轴差速器(摆动轴) (388)7.6.3后车轴差速器(摆动轴) (389)7.6.4前轴龙门驱动 (390)7.6.5后轴龙门驱动 (391)7.7气动装置 (391)7.8打叶器 (392)7.8.1打叶器保养位置 (393)7.8.2菜叶探测器传感器的调节 (396)7.8.3探测轮(非 R*SU 型) (398)7.8.4打叶器轴 (399)7.8.5切削器 (400)7.9收获 (402)7.9.1犁刀 (403)7.9.2犁辊筒犁头变速箱 (405)7.9.3桨片变速箱 (407)7.9.4限深轮轴驱动 (408)7.9.5震动犁刀传动机构 (409)7.9.6只适用于选配“可变行距”的振动犁刀驱动装置 (410)7.9.7偏心轴轴承 (411)7.9.8振动犁刀驱动偏心轮轴承的重新调节 (412)7.9.9犁刀体的导轨/悬挂装置 (413)10 / 534目录7.9.10犁辊筒 (414)7.10筛带 (416)7.10.1张紧 (416)7.10.2调节同步运行 (417)7.11筛带传动机构 (418)7.12星状筛 (419)7.13环形升降带 (420)7.14储料仓 (425)7.14.1储料仓蜗杆 (425)7.14.2超声波传感器 (425)7.14.3刮板 (425)7.14.3.1刮板链的张紧 (427)7.14.3.2纵向刮板再张紧 (428)7.14.3.3横向刮板再张紧 (429)7.14.3.4驱动链 (430)7.14.3.5刮板驱动轴和清洁辊筒的轴承 (431)7.15卸料带 (433)7.15.1张紧皮带 (434)7.16空调与通风装置 (436)7.16.1空调设备冷凝器 (436)7.16.2循环空气过滤器 (437)7.16.3新鲜空气抽吸过滤器 (438)7.16.4冷凝水排放 (438)7.16.5制冷剂循环 (439)7.17电瓶保养 (440)7.18打印机(可选) (441)7.19长时间停机 (442)7.20拆卸和废气处理 (443)8故障与应对措施 (445)8.1安全开关 (447)8.2保险丝 (448)8.2.1熔断保险丝 (448)8.2.2电子保险丝 (449)8.2.3柴油发动机上的保险丝 (450)8.2.4电池箱里的保险 (452)8.2.5驾驶室座椅控制台中的保险丝 (453)8.2.6在驾驶室内的总电气装置中的保险丝 (454)8.2.7驾驶室外的总电气装置中的保险丝 (456)8.2.8发动机电气箱内保险 (458)8.2.9中部电箱内的保险丝 (460)8.2.10割台电气箱内保险丝 RR (462)8.3继电器清单 (464)8.4对电气布线的颜色编号 (465)8.5通过 R-Touch 进行故障搜索 (465)8.5.1诊断菜单概览 (468)8.6通过外力启动和给电瓶充电 (469)8.7机器上的焊接作业 (471)8.8拖车 (472)8.9营救工具的固定 (473)8.10将车身支起以更换轮胎 (474)8.11手动松开驻车制动装置 (476)8.11.1关闭在前轴的弹簧蓄压器 (476)8.11.2关闭在后轴的弹簧蓄压器 (477)8.12液压阀 (479)8.13中央润滑装置 – 排气与排除堵塞 (480)8.14风扇驱动的应急运行 (481)目录8.15油箱降下 (482)8.16优化收获质量检查清单 (483)9清单/ 表格/ 图/ 图表/ 保养证明 (487)9.1润滑剂与运行物质 (489)9.2保养表格 (491)9.3RR 犁头 6 行润滑图 (495)9.4润滑剂规格表 (497)9.4.1产品数据表 ROPA hydroFluid(液压油)HVLP 46 (498)9.4.2产品数据表 ROPA engineOil(机油)E7 10W-40 (499)9.4.3产品数据表 ROPA engineOil(机油)E9 5W-30 (500)9.4.4产品数据表 ROPA gearOil(齿轮油)GL5 90 (501)9.4.5产品数据表 ROPA 齿轮油 GL5 90 LS (502)9.4.6产品数据表 ROPA gearOil(齿轮油)GL5 75W-90 synth (503)9.4.7产品数据表 ROPA 齿轮油 GL5 75W-140 LS synth (504)9.4.8产品参数表 ROPA gearFluid(齿轮油)ATF (505)9.4.9产品数据表 ROPA multi temperature grease 2 润滑脂 (506)9.5冷却液 柴油发动机 (507)9.6滤芯、三角皮带 (508)9.7润滑图 (510)9.7.1带 48 个润滑点的基本机型的润滑图 (510)9.7.2RR 犁头(6 行 45 cm/50 cm/可变行距)润滑图 (512)9.7.3RIS 型打叶器润滑图 (513)9.7.4RISU 型打叶器润滑图 (513)9.7.5RASW 型打叶器润滑图 (513)9.7.6RASO 型打叶器润滑图 (513)9.7.7RES-45/-50/-V 润滑图 (514)9.8保养证明 (515)9.8.1换油和更换过滤器的保养证明 (515)9.8.2保养确认书 (517)9.9螺丝与螺母扭矩表格 (Nm) (518)9.10AdBlue®说明 (519)9.11驾驶员培训的确认文件 (521)9.12安全培训 (523)9.13罗霸移交确认书 (525)9.14罗霸 首次下地的记录 (527)10索引 (529)前言1前言前言前言恭喜您有了全新的罗霸收获机。
EPIC 多用途封闭接触器 150A以上电源切换说明书

Multi Purpose EPIC ® Sealed Contactor -150+ Amp Power SwitchingRoHS Compliant , all date codesPatent PendingChassis level UL508 sized power terminals – No need for speciallyrouted power cables, special bus bars, or special lugsRugged EPIC ® Seal rated to 175°C - Same technology used foradvanced aerospace programs that reduces risk of fire or meltdown in over current conditionsHermetically Sealed - Designed to meet: UL1604 for Class I & II, Div 2 and Class III for use in hazardous locations, IP67 for temporary water immersion for 30 min, SAE J1171 - external ignition protection, and ISO8846 for protection against ignition around flammable gassesElectronics-free high efficiency coil – No EMI emissions or cross-talk on your system control powerBuilt-in coil suppression for DC coils - Saves engineering time and parts cost to add external coil suppressionStainless steel hardware and mounting inserts, for years of corrosion free serviceUL508 ambient compliant to 75°C but can operate continuously at 85°C with a higher terminal temperature rise of 60°C. Can also operate up to 125°C in special cases -contact GIGAVAC for details.Not position sensitive – can be mounted in any position for ease of installationElectrical life rating is based on resistive load with TBD maximum inductance in circuit. Because your application may be different, we suggest you test the contactor in your circuit to verify life is as required.End of life is defined as when the dielectric, insulation resistance or contact resistance exceeds the specifications listed.If your application requires a higher current rating, you may want to consider the GIGAVAC GX12 EPIC ® sealed contactor .Make & Break Resistive Currentwith 1/0 cable and 50° terminal temp riseContact Voltages & Life Cycle RatingsDC or 50/60 Hz AC24 V 48 V 72 V 120 V 350 V 750 V150A - (75° C Ambient) 1/150,000100,00040,00020,0007,500 1,200 125A - (75° C Ambient) 1/180,000120,00048,00024,0009,0001,440 100A - (75° C Ambient) 1/225,000150,00060,00030,00011,2501,800 75A - (75° C Ambient) 1/300,000200,00080,00040,00015,0002,400 50A - (75° C Ambient) 1/435,000290,000116,00058,00021,7503,480 30A - (75° C Ambient) 1/750,000500,000200,000100,00037,5006,000 20A - (75° C Ambient) 1/900,000600,000240,000120,00045,0007,200 225A - (50° C Ambient) 2/127,50085,00034,00017,0006,3751,020 Max Break A, 2 cycles (75° C Ambient) 1/2,500A 2,000A 1,500A 1,000A 900A 600A Max Make, 10 cycles (75° C Ambient) 1/1,400A1,100A800A600A500A350A1/ Assumes UL508 ratings with 1/0 cables, UL508 max ambient temperature of 75°C as shown, and max. UL508 terminaltemperature rise of 50°C.At 85°C ambient, contactor can also meet all of its 75°C specifications but the terminal temperature can rise can be up to 60°C, which is higher than the 50°C rise allowed by UL508 and can be higher than some cable insulation ratings.2/ Assumes UL508 ratings with 1/0 cables, at a lower 50°C UL508 ambient temperature, and max. UL508 terminal temperature rise of 50°C.If your application requires a higher current rating, you may want to consider the GIGAVAC GX12 EPIC ® sealed contactor.1/ Assumes UL508 ratings with 1/0 cables, ambient maximum UL 508 temperature of 75°C, and maximum UL508terminal temperature rise of 50°C. Contactor can also carry the higher current as shown for 50°C ambient, and meet all of the UL508 temperature rise requirements.At 85°C ambient, contactor can also meet all of its 75°C specifications but the terminal temperature can rise can be up to 60°C, which is higher than the 50°C rise allowed by UL508 and can be higher than some cable insulation ratings.The maximum terminal temperature rating of the contactor is 175°C, which means much higher currents than shown can be carried and switched. However, this temperature is much higher than most cable insulation ratings, which mean busbars must be used. Contact GIGAVAC for assistance for higher current applications using this contactor.2/ Rating consists of combined inrush + cranking current at the times specified, with 2 seconds off between cycles. This is higher current than is required for UL1107 for marine battery switches.75°C / 50°CCable size 1/1 / 0Continuous, UL508 Max 1/ 10 seconds (1 time) 100 Seconds (1 time) 300 Seconds (1 time)Amp Amp Amp Amp 150 / 225 375 / 560 240 / 360 200 / 300 Starter Carry – Inrush 250 ms (10 repeats 1/ 2/)Amp NA / 2,000 Starter Carry - Cranking 10 sec (10 repeats 1/ 2/)Amp NA / 500 Maximum terminal Temp, Continuous Deg C 175 Maximum terminal Temp, Intermittent Deg C 225Ratings are at worse case temperature extremes, except coil resistance and current are at 25ºC.1/ DC coils have built-in coil suppression. The use of additional external coil suppression can slow the release time andinvalidate the life cycle ratings, or can cause the contactor not to be able to interrupt the maximum current specified. If lower coil back EMF is required, please contact GIGAVAC for assistance.Nominal Volts12Vdc 24Vdc 48Vdc 72Vdc 120Vdc 120Vac, 50/60Hz 240Vac, 50/60HzCoil P/N Designation B C F H J K L Max Volts14285684140140280 Pick-up, Volts, Max 7.51528467272144 Hold, Volts, Min491828464692 Drop-Out, Volts, Min0.50.5 1.8 2.7 4.5 4.59 Coil Resistance @ 25ºC (Ohms ±10%)17853358502125N/A N/A Coil Current, mA, Max at nominal Voltage7002801509056TBD TBD Coil Back EMF (volts) - Built in suppression 1/5555100150288N/AN/A1/ Auxillary contact rating - 2A, 24Vdc Resistive load, 100,000 cycles.2/50 Mohms after life.3/ Contactor can operate up to 125°C in special cases -contact GIGAVAC for details.SpecificationsUnits Specifications Contact Arrangement (main)Form X SPST-NO Contact Arrangement (Auxilary) 1/Form C SPDT Mechanical Lifecycles 1 millionContact ResistanceMax @ rated carry current Typical @ rated carry current mohms mohms .4 .15 to .3Operate time, 25˚CClose (includes bounce) Max Close (includes bounce) Typical Bounce on close, MaxRelease time (includes arc time at max. break current) ms ms ms ms 20 13 7 12 Insulation ResistanceMohms 100 2/ Dielectric at sea level (leakage < 1mA)VRMS 2,500 ShockG’s peak 20 Vibration, Sinusoidal (500-2000 Hz peak)G’s 15Operating ambient Temp Range ˚C -55 to +85 3/ Storage ambient Temp Range ˚C -70 to +175 Weight, TypicalKg (Lb)0.50/(1.1)GX11C ACoil VoltageB = 12 Vdc, internal coil suppressionC = 24 Vdc, internal coil suppression F = 48 Vdc, internal coil suppression H = 72 Vdc, internal coil suppression J = 120 Vdc, internal coil suppression K = 115 VAC, 50/60 Hz L = 240 VAC, 50/60HzCoil TerminationA = Flying leads, 38 cm (15 in)B = Flying leads, 61 cm (24 in)C = Flying leads, 122 cm (48 in)Auxiliary Contact (same length as coil wire selection) Blank = None A = SPDTThe polarity of the power terminals was previously shown reverse from what is correct and what is now indicated. The polarity is important only for switching the "Maximum Break, 2 cycles" when the voltage is over100 Vdc.Application Information:1. WARNING - When using more than one lug on a power terminal, make sure the primary power is closest to thecontactor busbar, with the lower current lug on top, then the washer, then the lock washer, then the nut. Improper order can cause severe over-heating resulting in the possible melting of the connecting cable insulation.2. EPIC ® sealing technology3. Relay Schematics and FormsPower contactsAuxiliary contacts (optional)05/12/08GIGAVAC® - P.O. Box 4428 - Santa Barbara, CA 93140-4428 - ph +(805) 684-8401 - +(805) 755-2000fx +(805) 684-8402 - **************** - - ©Copyright 2003-2008 GIGAVAC, LLC.。
Yanmar K21 2.1L 基础 Powershift 1速度 座椅型 1.5 吨 货运车说明书
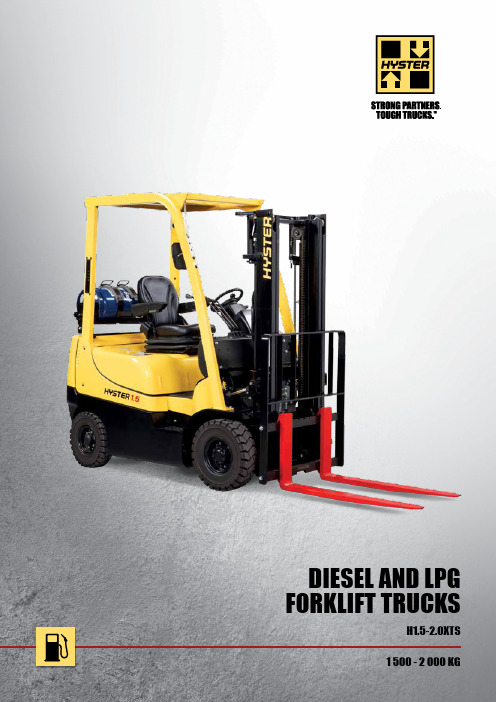
1 500 -2 000 KGH1.5-2.0XTS DIESEL AND LPG FORKLIFT TRUCKSHYSTERHYSTERH1.5XT H1.5XT Yanmar 2.6L K21 2.1L Basic Powershift Basic Powershift1 speed 1 speed Drum Brakes Drum Brakes DieselLPG/Dual fuel Seated Seated 1.5 1.5 500 500 410 410 1410 1410 2765 2790 2675 2700 3710 545 3680 495 1255 1510 1215 1460 Automatic AutomaticSE SE 6.0-9 6.0-9 21x8-9 21x8-9 5.0-8 5.0-82x 2 2x 2 915 1000 915 1000 905 9056 10 6 10 1995 1995 145 145 3035 3035 4105 4105 2160 2160 970 970 295 295 3200 3200 2280 22801070 1190 1070 1190 35 100 920 35 100 920II II 920 920 110 110 120 120 3565 3565 3365 3365 1960 1960 1845 1845 390 390 24024017.018.0 18.0 19.0 17.018.0 18.0 19.0 0.68 0.71 0.63 0.68 0.500.52 0.50 0.52 17.519.2 36 24 37 24 Hydraulic Hydraulic Yanmar/4TNE92 GCT/K 2129 31 2050 2250143 1400 144 1600 4 2659 4 2065 2.31.52.3 12 9212 55181181 62 59 23.5 23.5 52.0- 81 82 Hook Hook1.1 Manufacturer 1.2 Manufacturer’s type designation Engine / transmissionBrake Type1.3 Drive: electric (battery or mains), diesel, petrol, LPG1.4 Operator type: hand, pedestrian, standing, seated, order-picker 1.5 Rated capacity / rated load Q (t)1.6 Load centre distancec (mm)1.8 Load distance, centre of drive axle to fork x (mm)1.9 Wheelbasey (mm)2.1 Service weight (standard/dual tread) kg 2.2 Axle loading, laden front / rear kg 2.3 Axle loading, unladen front / rearkg8.1 Type of drive unit 3.1 Tyres: L = pneumatic, V = solid, SE = Pneumatic Shape Solid 3.2 Tyre size, front (standard tread)3.2.1 Tyre size, front (dual tread) 3.3 Tyre size, rear3.5 Number of wheels, front/rear (x = driven) 3.6 Tread, front (standard/dual tread) b 10 (mm)3.7 Tread, rearb 11 (mm)4.1 Tilt of mast / fork carriage forward / backward a /b (°)4.2 Height, mast lowered h 1 (mm)4.3 Free lift ¶ h 2 (mm)4.4 Lift ¶ h 3 (mm)4.5 Height, mast extended è h 4 (mm)4.7 Height of overhead guard (cabin) h 6 (mm)4.8 Seat height relating to SIP/stand height ¢ h 7 (mm)4.12 Coupling height h 10 (mm)4.19 Overall length l 1 (mm)4.20 Length to face of forks l 2 (mm)4.21 Overall width b 1/b 2 (mm)4.22 Fork dimensions DIN ISO 2331 s/e/l (mm)4.23 Fork carriage ISO 2328, class/type A, B4.24 Fork carriage width l b 3 (mm)4.31 Ground clearance, laden, below mast m 1 (mm)4.32 Ground clearance, centre of wheelbase m 2 (mm)4.34.1 Aisle width for pallets 1000 × 1200 crossways u A st (mm)4.34.2 Aisle width for pallets 800 × 1200 lengthways u A st (mm)4.35 Turning radius W a (mm)4.41 90° intersecting aisle (with pallet L = 1000mm x W = 1200mm) (mm) 4.42 Step height (from ground to running board) (mm) 4.43 Step height (between intermediate steps and floor) (mm)5.1 Travel speed, laden/unladen km/h 5.1.1 Travel speed, laden/unladen, backwards km/h 5.2 Lift speed, laden/unladen m/s5.3 Lowering speed, laden/unladen m/s 5.5 Drawbar pull, laden kN 5.7 Gradeability, laden/unladen †† %5.10 Service brake D I S T I N G U I S H I N G M A R K SW E I G H T ST Y R E S & C H A S S I S D I M E N S I O N SP E R F O R M A N C E D A T AP E R F O R M A N C E D A T A A D D I T I O N A L D A T AEQUIPMENT AND WEIGHT:Weights (line 2.1) are based on the following specifications: Complete truck with 3035mm TOF 2-stage limited free lift mast, with standard hook type carriage, 920mm forks with manual hydraulics, overhead guard and standard pneumatic shaped solid drive and steer tyres.D R I VE /L IF T M E C H A N I S M7.1 Engine manufacturer/type 7.2 Engine power according to ISO 1585 kW 7.3 Rated speed min–1 7.3.1 Torque at 1/min Nm/min–1 7.4 Number of cylinders/displacement (-)/cm 3 7.5 Fuel consumption according to MIL 268C cycle l/h or kg/h 7.10Battery voltage/nominal capacity S (V)/(Ah) 10.1 Operating pressure for attachments bar 10.2 Oil volume for attachments ³ l/min 10.3 Hydraulic oil tank, capacity l 10.4 Fuel tank, capacity l 10.7 Sound pressure level at the driver’s seat < J dB (A)10.8 Towing coupling, type DINHYSTER HYSTERH1.8XT H1.8XT Yanmar 2.6L K21 2.1L Basic Powershift Basic Powershift1 speed 1 speed Drum Brakes Drum Brakes DieselLPG/Dual fuel Seated Seated 1.75 1.75 500 500 410 410 1410 1410 3000 3000 2920 2920 4090 660 4060 610 1215 1785 1185 1735 Automatic Automatic SE SE 21x8-9 21x8-9 21x8-9 21x8-9 18x7-8 18x7-82x 2 2x 2 915 1000 915 1000 9309306 10 6 10 1995 1995 145 145 3035 3035 4105 4105 2160 2160 970 970 295 295 3240 3240 2320 2320 1135 1190 1135 1190 35 100 920 35 100 920 II II 920 920 110 110 120 120 3605 3605 3405 3405 1995 1995 1895 1895 390 390 240 240 17.0 18.5 18.0 19.517.0 18.5 18.0 19.50.67 0.71 0.62 0.680.50 0.52 0.50 0.5217.4 19.132 22 33 22Hydraulic Hydraulic Yanmar/4TNE92GCT/K 21 29 31 2050 2250143 1400 144 1600 4 2659 4 2065 2.4 1.6 2.4 12 9212 55181 181 62 59 23.5 23.5 52.0- 81 82 Hook Hook 2.12.22.31.11.21.31.41.51.61.81.93.13.23.2.13.33.53.63.75.15.1.15.25.35.55.75.107.17.27.37.3.17.47.57.108.110.110.210.310.410.710.8DISTINGUISHING MARKS WEIGHTS TYRES & CHASSISDIMENSIONS PERFORMANCE DATAPERFORMANCE DATA ADDITIONAL DATANOTE:Specifications are affected by the condition of the vehicle and how it is equipped, as well as the nature and condition of the operating area. Inform your dealer of the nature and condition of the intended operating area when purchasing your Hyster T ruck. ¶ Top of forksè Add 32mm with load backrest ¢ Full suspension seat in depressedpositionl Without load backrest, add 32mm with load backrestuStacking aisle width (lines 4.34 & 4.34.1 & 4.34.2) are based on the VDI standard calculation as shown on illustration. The British Industrial Truck Association recommends the addition of 100 mm to the total clearance (dimension a) for extra operating margin at the rear of the truck††at 4.8km/h. Gradeability figures are provided for comparison of tractive performance, but are not intended to endorse the operation of the vehicle on the stated inclines. Follow instructions in the operating manual regarding operation on inclines.SBattery ampere hour (Ah) nominal capacity ratings are estimated.³ VariableJ L PAZ , Measured according to the testcycles and based on the weighting values contained in EN12053MAST TABLES:v without load backrest s with load backrestDRIVE/LIFT MECHANISMNOTICECare must be exercised when handling elevatedloads. When the carriage and/or load is elevated, truck stability is reduced. It is important that the mast tilt in either direction is kept to a minimum when loads are elevated.Operators must be trained and must read, understand and follow the instructions contained in the Operating Manual.All values are nominal values and they are subject to tolerances. For further information, please contact the manufacturer.Hyster products are subject to change without notice.Lift trucks illustrated may feature optional equipment. Values may vary with alternative configurations.S afety:This truck conforms to the current EU requirements.4.14.24.34.44.54.74.84.124.194.204.214.224.234.244.314.324.34.14.34.24.354.414.424.43EQUIPMENT AND WEIGHT:Weights (line 2.1) are based on the following specifications: Complete truck with 3040mm TOF 2-stage limited free lift mast, with standard hook type carriage, 920mm forks with manual hydraulics, overhead guard and standard pneumatic shaped solid drive and steer tyres.HYSTERHYSTERH2.0XTS H2.0XTS Yanmar 2.6L K21 2.1L Basic Powershift Basic Powershift1 speed 1 speed Drum Brakes Drum Brakes DieselLPG/Dual fuel Seated Seated 2.0 2.0 500 500 415 415 1410 1410 3220 3220 3140 3140 4505 715 4475 665 1210 2010 1180 1960 Automatic AutomaticSE SE 21x8-9 21x8-9 21x8-9 21x8-9 18x7-8 18x7-8 2x 22x 2 915 1000 915 1000 9309306 10 6 101995 1995 150 150 **** **** 4105 4105 2160 2160 970 970 295 295 3275 3275 2355 2355 1035 1190 1035 1190 40 122 920 40 122 920 II II 920 920 110 110 120 120 3640 3640 3440 3440 2030 2030 1920 1920 390 390 240 24017.018.5 18.0 19.5 17.018.5 18.0 19.5 0.660.71 0.62 0.68 0.500.52 0.50 0.52 17.519.2 29 20 30 20 Hydraulic Hydraulic Yanmar/4TNE92 GCT/K 2129 31 2050 2250143 1400 144 1600 4 2659 4 2065 2.51.72.6 12 9212 5518181 62 59 23.5 23.5 52.0- 81 82 Hook Hook1.1 Manufacturer 1.2 Manufacturer’s type designation Engine / transmissionBrake Type1.3 Drive: electric (battery or mains), diesel, petrol, LPG1.4 Operator type: hand, pedestrian, standing, seated, order-picker 1.5 Rated capacity / rated load Q (t)1.6 Load centre distancec (mm)1.8 Load distance, centre of drive axle to fork x (mm)1.9 Wheelbasey (mm)2.1 Service weight (standard/dual tread) kg 2.2 Axle loading, laden front / rear kg 2.3 Axle loading, unladen front / rearkg8.1 Type of drive unit 3.1 Tyres: L = pneumatic, V = solid, SE = Pneumatic Shape Solid 3.2 Tyre size, front (standard tread)3.2.1 Tyre size, front (dual tread) 3.3 Tyre size, rear3.5 Number of wheels, front/rear (x = driven) 3.6 Tread, front (standard/dual tread) b 10 (mm)3.7 Tread, rearb 11 (mm)4.1 Tilt of mast / fork carriage forward / backward a /b (°)4.2 Height, mast lowered h 1 (mm)4.3 Free lift ¶ h 2 (mm)4.4 Lift ¶ h 3 (mm)4.5 Height, mast extended è h 4 (mm)4.7 Height of overhead guard (cabin) h 6 (mm)4.8 Seat height relating to SIP/stand height ¢ h 7 (mm)4.12 Coupling height h 10 (mm)4.19 Overall length l 1 (mm)4.20 Length to face of forks l 2 (mm)4.21 Overall width b 1/b 2 (mm)4.22 Fork dimensions DIN ISO 2331 s/e/l (mm)4.23 Fork carriage ISO 2328, class/type A, B4.24 Fork carriage width l b 3 (mm)4.31 Ground clearance, laden, below mast m 1 (mm)4.32 Ground clearance, centre of wheelbase m 2 (mm)4.34.1 Aisle width for pallets 1000 × 1200 crossways u A st (mm)4.34.2 Aisle width for pallets 800 × 1200 lengthways u A st (mm)4.35 Turning radius W a (mm)4.41 90° intersecting aisle (with pallet L = 1000mm x W = 1200mm) (mm) 4.42 Step height (from ground to running board) (mm) 4.43 Step height (between intermediate steps and floor) (mm)5.1 Travel speed, laden/unladen km/h 5.1.1 Travel speed, laden/unladen, backwards km/h 5.2 Lift speed, laden/unladen m/s 5.3 Lowering speed, laden/unladen m/s 5.5 Drawbar pull, laden kN 5.7 Gradeability, laden/unladen †† %5.10 Service brake D I S T I N G U I S H I N G M A R K SW E I G H T ST Y R E S & C H A S S I S D I M E N S I O N SP E R F O R M A N C E D A T AP E R F O R M A N C E D A T A A D D I T I O N A L D A T AD R I VE /L IF T M E C H A N I S M7.1 Engine manufacturer/type 7.2 Engine power according to ISO 1585 kW 7.3 Rated speed min–1 7.3.1 Torque at 1/min Nm/min–1 7.4 Number of cylinders/displacement (-)/cm 3 7.5 Fuel consumption according to MIL 268C cycle l/h or kg/h 7.10Battery voltage/nominal capacity S (V)/(Ah) 10.1 Operating pressure for attachments bar 10.2 Oil volume for attachments ³ l/min 10.3 Hydraulic oil tank, capacity l 10.4 Fuel tank, capacity l 10.7 Sound pressure level at the driver’s seat < J dB (A)10.8 Towing coupling, type DIN5l l b b b xWa100mm a 2100mma 2Asth h h h sQcαll y l h h h m m βb x40003500300025002000150010005000250500750100012501500H1.5XTH1.8XT H2.0XTS 4000350030002500200015001000500250500750100012501500H1.5XTH1.8XT H2.0XTS RATED CAPACITIESTRUCK DIMENSIONS= Centre of gravity of unladen truck Ast = W a + x + l 6 + a (see lines 4.34.1 & 4.34.2) a = Minimum operating clearance(VDI standard = 200 mm BITA recommendation = 300 mm)l 6= Load lengthLoad centreDistance from front of forks to centre of gravity of load.Rated loadBased on vertical masts up to 3035 mmLoad centre (mm)Standard CarriageIntegral Sideshift CarriageLoad centre (mm)R a t e d l o a d (k g )R a t e d l o a d (k g )2-StageFull Free Lift2-StageFull Free Lift 2-StageLimited Free Lift2-StageLimited Free Lift3-Stage Full Free Lift3-Stage Full Free LiftMaximum fork height (mm)Maximum fork height (mm)MASTMASTWith ISS & FPWith ISS & FPH2.0XT H2.5XT H2.0XT H2.5XT H3.0XT H3.0XTH2.0XT H2.5XT H2.0XT H2.5XT H3.0XT H3.0XTMaximum Fork Height (mm)Maximum Fork Height (mm)Without SideshiftWithout SideshiftWith ISS & FP With ISS & FP Without SideshiftWithout Sideshift3035 1500 1750 1500 1750 3040 2000 2000 3335 1500 1750 1500 1750 3340 2000 2000 3735 1500 1750 1500 1750 3740 2000 2000 4035 1500 1750 1500 1750 4040 2000 2000 4835 1410 1660 1410 1660 4840 1880 1880 3035 1460 1690 1400 1630 3040 1930 1850 3335 1450 1690 1400 1620 3340 1920 1850 4035 1440 1670 1380 1610 4040 1910 1840 4835 1340 1560 1290 1500 4840 1790 1720 5035 1290 1520 1250 1470 5040 1750 1680 4375 1500 1680 1500 1680 4380 1930 1930 4527 1470 1660 1470 1660 4532 1900 1900 4825 1410 1590 1410 1590 4832 1840 1840 5125 1360 1520 1360 1520 5130 1720 1720 6025 1090 1270 1110 1270 6030 1200 12004375 1440 1610 1380 1540 4380 1840 1770 4527 1410 1590 1360 1520 4532 1810 1750 4825 1340 1520 1290 1450 4832 1750 1680 5125 1290 1450 1220 1410 5130 1680 1610 6025 1070 1220 1020 1180 6030 1220 12203025 1500 1750 1500 1750 3030 2000 2000 3325 1500 1750 1500 1750 3330 2000 2000 3025 1450 1680 1390 1620 3030 1920 1850 3325 1450 1680 1390 1610 3330 1910 1840STANDARD FEATURES & OPTIONSSTANDARD EQUIPMENTComplete truck equipped with:n2-Stage limited free lift (LFL) mast with lift height of 3035mm n Hook-type carriage with 1070mm high load backrest (LBR)n920mm long forksn Y anmar 2.6L Diesel or GCT K21 LPG / Dual fueln Powershift Single Speed Transmissionn Directional control levern Single inch / brake pedaln Shift Lever: Left hand on columnn C omfort full suspension seatn Pneumatic shaped solid tyresn 2 cowl mounted hydraulic leversn Standard integrated dash display+ Monochrome LCD panel– Real time clock– Hour meter– Fasten seatbelt– F uel level with low fuel warning buzzer (Diesel fuel only) + Service Indicators– Service required– Coolant temperature with high temp warning buzzer– Alternator with warning buzzer– Transmission oil temperature with warning buzzer– Engine oil pressure with low pressure warning buzzer– Glow lamp (Diesel fuel engine only)– Error messagen Key starting with anti-restart functionn Steering Wheel with Spinner Knobn Synchronous Steeringn Electric Hornn Infinitely adjustable steering columnn Rubber floor matn High air intaken Counterweight exhaustn Black seat beltn Serpentine radiatorn Hyster Stability Mechanism™ (HSM)n Swing down LPG tank bracket (H1.8-2.0XTS)Cabinn O ver Head Guard (OHG) with rain gutter and cup holdern 82 dB(A) standard noise level for LPG/Dual fuelengine optionn 81 dB(A) standard noise level for Diesel engine optionn 12 months / 2000 hours manufacturer’s warrantyn Operator’s manual OPTIONAL EQUIPMENTMastsn 2-Stage limited free lift (LFL) masts with up to 5040mm lift heightn 2-Stage full free lift (FFL) masts with up to 4130mm lift height n 3-Stage full free lift (FFL) masts with up to 6030mm lift heightCarriagesn Integral side shift (ISS) carriageHydraulic Valve and Leversn 3-function cowl mounted hydraulic levers with or without interlock for clampingn 4-function cowl mounted hydraulic levers with or without interlock for clampingForksn Fork lengths are available from 1070mm to 2120mmControlsn M onotrol™ PedalDash Displayn Speedometer with speed alarm and warning buzzern Traction speed limiter (H1.5XT Diesel)n Audible reverse alarmLightsn L ight Kit consisting of: 2 Front Halogen Work Light, Brake / Tail / Back-Up Lights with Turn Signals and reverse alarmn L ED Front Work Lightn L ED Rear Combination Lightn R ear Work Light - Reverse Operatedn R ear Work Light - Switch OperatedEnvironmentaln Vertical exhaustn 2-way catalytic mufflern Spark arrestor mufflern High capacity radiatorn Anti Clog Radiator with Lint Screenn Tilt Cylinder Bootsn High mount pre-cleanerOthern H ydraulic cut-out seat interlock (prevents travel when operator seatbelt is not used)n Lexan Overhead Guard Covern Rear Drive Handle with Horn Buttonn 2 rear vision mirrorswww.hyster.eu*********************/HysterEurope@HysterEurope/HysterEuropeSTRONG PARTNERS. TOUGH TRUCKS.TMFOR DEMANDING OPERATIONS, EVERYWHERE.Hyster supplies a complete range of warehouse equipment, IC and electric counterbalanced trucks, container handlers and reach stackers. Hyster is committed to being much more than a lift truck supplier.Our aim is to offer a complete partnership capable ofresponding to the full spectrum of material handling issues: Whether you need professional consultancy on your fleet management, fully qualified service support, or reliable parts supply, you can depend on Hyster.Our network of highly trained dealers provides expert,responsive local support. They can offer cost-effective finance packages and introduce effectively managed maintenance programmes to ensure that you get the best possible value. Our business is dealing with your material handling needs so you can focus on the success of your business today and in the future.HYSTER-YALE UK LIMITED trading as Hyster Europe. Registered Address: Centennial House, Building 4.5, Frimley Business Park, Frimley, Surrey GU16 7SG, United Kingdom.Registered in England and Wales. Company Registration Number: 02636775. HYSTER,and FORTENS are registered trademarks in the European Union and certain other jurisdictions.MONOTROL ® is a registered trademark, and DURAMATCH and are trademarks in the United States and in certain other jurisdictions.Printed in The Netherlands. Part number: 3990866 Rev. 01-10/17-TLCHYSTER EUROPECentennial House, Frimley Business Park, Frimley, Surrey, GU16 7SG, England.Tel: +44 (0) 1276 538500。
马迪尔密(Marvelmind)小车辆操作指南说明书

Marvelmind Boxie Operating manualv2021_02_01Table of contents1.Executive summary (4)1.1Legend (6)2.System elements (7)2.1Marvelmind Small Robots (7)2.1.1Powertrain (7)2.2Marvelmind Indoor “GPS” system (8)2.3Control system (9)3.Robot’s controls and basic operations description (10)3.1Controls (10)3.2Back control panel (10)3.3Charging (11)4.Setting up the autonomous robots (12)4.1Test launch (12)4.2Launching robots in the custom map (15)5.Robot’s functionality (16)5.1Obstacle avoidance and detection (16)6.Robot’s optional features (17)6.1Touch screen control (17)7.Contacts (18)Version changesV2021_02_01- Initial release1. Executive summary-Marvelmind Boxie is an autonomous mobile robot designed for smart warehousing, industrial applications, research and education. -Fully autonomous move between any points covered by Marvelmind Indoor "GPS" -Payload capacity up to 10kg -Driving time more than 6h on a single charge (no payload) -Automatic obstacle avoidance and detection -The route can be reconfigured by 1 button click in 1 second -Charging time is less than 2h with optional charger. Default – 6 hours (with supplied charger by default) -Smart screen for status display and interactions -Up to 250 robots per system -Reconfigurable multi-shelves top -It is also can be equipped with QR-scanner to eliminate errors in the delivery of goodsOmni microphones Base Bright LEDs Omni microphones Intel RealSense ™Hi-Res displayUltrasound sensor LIDAR Powerful speakerKey specs:1.1 LegendLegend chapter contains small icons and signs to highlight some key points of the text.- Important- For experienced users- Demo or Help video- Useful link2. System elements2.1 Marvelmind BoxieIt relies on Marvelmind Indoor “GPS” navigation system. The robot is equipped withadditional sensors for detecting and avoiding obstacles. It has a long battery life,high payload capacity compares to its size.- Fully autonomous driving unit from Marvelmind Robotics- Can be flexible tuned for different cases and projects- Shockproof housing- Bright lights- Noticeable sound- Programmable hardware buttons2.1.1 PowertrainOur team brought together capacious batteries, powerful motors and smart controllersin one device, making it budget and very productive.It gives the perfect balance between battery life and performance.- Up to 6 hours driving (no payload)- Emergency stops with breaks- Recuperation (future optional)2.2 Marvelmind Indoor “GPS” systemMarvelmind Indoor Navigation System is an off-the-shelf indoor navigation system, designed to provide precise (±2cm) location data to autonomous robots, vehicles (AGV), and copters. It can also be used to track moving objects via mobile beacons attached to them. Other applications include, for example, forklifts, virtual reality (VR) systems, helmets for construction workers or miners, etc.The navigation system consists of a network of stationary ultrasonic beacons interconnected via radio interface in a license-free band.2.3 Control systemThe control system allows you to configure the system, receive various data, collectstatistics. The center of the control system is Dashboard. It communicates with the modem, receives data from it, and can send data in various formats.3. Robot’s controls and basic operations description This chapter describes interactions with basic robot controls.3.1 Controls3.2 Back control panelBindable button Bindable button Hi-power charging port Charging portUSB ports HDMI portReset Power3.3 ChargingTurn of the robot and connect a charger. Charging time: less than 2 hours with optional charger (Hi-power Marvelmind charger) and 6 hours (with supplied charger by default). Operating time at full battery is 6 hours (No payload). Use only Marvelmind supplied chargersHi-power charging portCharging port4. Setting up the autonomous robotsThe steps below describe setting up the system with Marvelmind Boxie. Notice that Marvelmind Small Robot relays upon Inverse Architecture.4.1 Test launchWhen you receive the robot, you can start a testing launch process. Test launch is a process of testing for Marvelmind Small Robot. Test launch consists of 5 autonomous rides from point A to point B and back. If you are experienced enough, you can skip this part and go forward to “Launching robots in custom maps” chapter.When you received the Marvelmind Small Robot, you also got 2 stationary Super-Beacons and Modem.It is included to make it possible to do a test launch of the robot and ensure that the robot works correctly. How to:1) Place stationary beacons as described on the picture below2) Install and launch Marvelmind Testing Software 3) Connect Modem to your PC via USB4) Place robot into starting area (If placed correctly – area colors green)Top view5m5mRobot ’s path (Orange)This is the initial testing path which is created to test the robot when it ’s a very first time to launch itStarting area (Ø≈2m)Place robot into this area beforestartPoint BPoint ARobot 5mSide view3m3mStationary beacon (Right)Shall be placed on walls on the height of 3m and 5m distance between themStationary beacon (Left)-Shall be placed on walls on the height of 3m and 5m distance betweenthemMake sure that you have enough space for the test launch.5) When robot is ready to go and everything automatically checked by the system,“Start robot” button will color green6) Press “Start robot” button to launch the robotRobot will go through the testing path (from point A to B) and back five times- To pause the movement – press “Press to pause” button while moving- To continue the movement – press “Press to continue” button while stopped - To stop the movement – press “Stop robot” button7) Test launch complete. Now, you can build your custom maps and launch the robotin it4.2 Launching Boxie in the custom mapWhen you made a test launch of the robot and succeed, you can build more complex maps and launch the robot in it.How to:1) Set up the Marvelmind Indoor “GPS” system. It’s detailed described in theOperating Manual – Sending Path to Robot chapter2) Configurate paths and start/end points (Use Shift+Left mouse button click tocreate point, click on point – to remove)3) Upload path to robot (Upload path to send it to robot)4) Reset the modem and connect it to the network.5) Wait for 30 seconds after connecting (keep the modem and antenna vertically).6) Position the robot on the driving zone/path.7) Press the blue button (go to point 2 - end point).8) After arrival at end point press the black button (go to point 1 - start point)5. Robot’s functionalityThis chapter describes some key features of Marvelmind Small Robot.5.1 Obstacle avoidance and detectionMarvelmind team installed multiple low-cost lidars into the robot to make it possible to besafety and guarantee solid coverage in different cases.- Adjustable detection distance (0.3-4m)- Emergency stop - https://youtu.be/efOc-ItVvgg?t=67- Rebuilding paths and alarming if stuck6. Robot’s optional featuresThis chapter describes some additional parts and components which can be installed to the robot depending on your case. If you need something more, you can request some features you want to see in robot (contact ******************* for details)6.1 Touch screen controlTouch screen gives advanced experience and control level of Marvelmind AutonomousRobots. It replaces and complements hardware buttons on the robot’s housing.What new abilities it gives:- Displays information about current task- Highlights goods code and delivery stage- Displays statistics in real time- Edit tasks and order- Edit paths- Displays whole map with robots and paths- Other functions you may need (contact ******************* for details)7. ContactsFor additional support, please send your questions to *******************。
iRobot Braava 380t 中文说明书

当您将Mint Plus提起或按其上面任意按钮,它将暂停在此模式下的工作
此时,清洁模式按钮将亮起蓝色指示灯,指示当前情节任务周期被暂停了。 暂停时,Mint Plush会降已清洁的区域地图保存。 若想继续清洁,将Mint Plush置于离导航盒6英尺的范围内,并要特别地将其 放到原来开始的位置且使其面对同样地方向。 然后按下正在闪烁的清洁模式按钮即可。 这时,Mint Plus会开始打扫并判断其在地图上的位置。一旦确定其位置,它将 开至一个尚未覆盖的区域继续清扫。 Mint Plus在判断其在地图上的位置后可能会重复清洁已覆盖的区域 或是重新开辟新的清洁区域。 如果您在您暂停Mint Plus的地方使其恢复清洁,它判断它在地图上的位置可能会 使用更长的时间,而这也要看它离导航盒的距离。 若想退出暂停结束当下清洁任务周期,只需要按住电源按钮2秒将Mint Plus关闭即可
Mint Plus能探测到楼梯,并将智能地避开防止 摔落,返回清洁区域. 请注意做好以下安全防护措施,即在当开放平台 或阳台落差达2英尺或以上时,请用物理屏障阻断 Mint Plus通往它们的道路。 Mint Plus还可以探测到地板间过渡, 使其不会误入地毯或围毯上 注意:若您的地毯与硬质地面齐平就需要设置一个临时 障碍物以便Mint Plush能够探测到这个临时分界物。
Mint Plus 5200型 用户手册
爸爸乐轻松网友情提供www.bblqs.com 请勿商用
目录
安全须知
/ 第4页
Mint Plus 概览
/ 第6页
按钮和指示灯
/ 第8页
电池及充电
/ 第10页
干扫和湿擦模式
/ 第12页
工作原理
/ 第14页
- 1、下载文档前请自行甄别文档内容的完整性,平台不提供额外的编辑、内容补充、找答案等附加服务。
- 2、"仅部分预览"的文档,不可在线预览部分如存在完整性等问题,可反馈申请退款(可完整预览的文档不适用该条件!)。
- 3、如文档侵犯您的权益,请联系客服反馈,我们会尽快为您处理(人工客服工作时间:9:00-18:30)。
2
产品说明
本公司应用了电子、物理方面的综合技 术设计了黑蚂蚁高电能节油器,在汽缸 中通过高压放电产生之电能,缩短点火 滞后期,而达成良好的燃烧和降低废气 排放的目的。黑蚂蚁高电能节油器由震 荡电路、脉冲产生电能,放大驱动电路 和升压变压电路组成,通过电路控制将 电流转变为高频高压电流电,此电路的 设计由本公司自行设计制作。
晟明来节能光电科技有限公司
8
请勿私自拆封本产品,否则发生任何人员、 车辆伤损本公司概不负责 本产品由台湾新光物产保险股份有限公司 承保保单号码:130097AKPR000020 本说明书解释权为东莞晟明来节能光电科 技有限公司所有
晟明来节能光电科技有限公司
9
晟明来节能光电科技有限公司
3
工作原理
主要由放电电极、诱导电极、陶瓷 原件、及高压电组等组成,在高频 高压电源的驱动下,进行电晕放电 的工作,放出大量的电能, 通过调 节电位器可以改变震荡频率,产生 内部驱动输出两路时序不同的正脉 冲,然后放大驱动、升压等工作产 生车动能所需之电压。
晟明来节能光电科技有限公司
产品说明书
东莞市晟明来 节能光电科技有限公司
1
前
言
尊敬的客户,您好! 承蒙惠顾我公司产品,谨致谢意! 我公司是集产品研发、制造、应用、销售于一体 的高新技术企业。我公司坚持以人为本,技术领 先,将最佳性价比的产品奉献给消费者的理念, 致力于全面节能解决方案和节能技术产品开发, 是节能市场上最专业的节能产品提供商,掌握着 全面的节能技术和丰富的应用经验。您现在拥有 的是在汽车节油领域中占据领先地位的高电能节 油器,它不单只为您省油,还能保护电瓶,提升 马力,是有车族不可或缺的贴心小精灵。
晟明来节能光电科技有限公司
5
装箱明细
高电能节油器 专用双面胶 扎带 说明书 保修卡 合格证 1台 2张 2条 1份 1份 1份
晟明来节能光电科技有限公司
6
功ቤተ መጻሕፍቲ ባይዱ特点
最新二代芯片电路板高电容设计,节油效 果明显,城区驾驶节油率8%-15%,高速公 路节油率10%-25% 有效提升爱车低中高转速扭力和马力,装 设后可立即感受提升的快感 能使整部车电流更顺畅,并能延长发电机 寿命,改善冷气重托,提升音响质量 安装简便,安全设置,自己可以简单轻松 DIY, 防水、耐高温、耐冲击
晟明来节能光电科技有限公司
7
原 产 地:台湾 制 造 商:台湾旭昶光电科技有限公司 中国总代理:东莞市晟明来节能光电科技 有限公司 地 址:中国 东莞市长安镇莞长路85-13号
电 传
话:+0086-769-82383981 真:+0086-769-81604255 E-MAIL: dgsml0769@
4
安装说明
安装简便,不改变任何车身结构,可以自己 轻松DIY。 步骤1. 打开汽车引擎盖,将节油器的金属导线与爱 车的电池之正负极对应连接(红色为正极, 黑色为负极); 步骤2. 将节油器置放在汽车引擎室内适当的位置, 用配备的专用双面胶及扎带固定即可。 安全设置,即使接错正负极端口,也不会对 车辆造成损坏。安装时节油器与电瓶接触会 有少许电花产生,属正常现象,建议由终端 销售之经销商协助安装。