尼康捕影工匠使用说明
尼康单反p档使用技巧
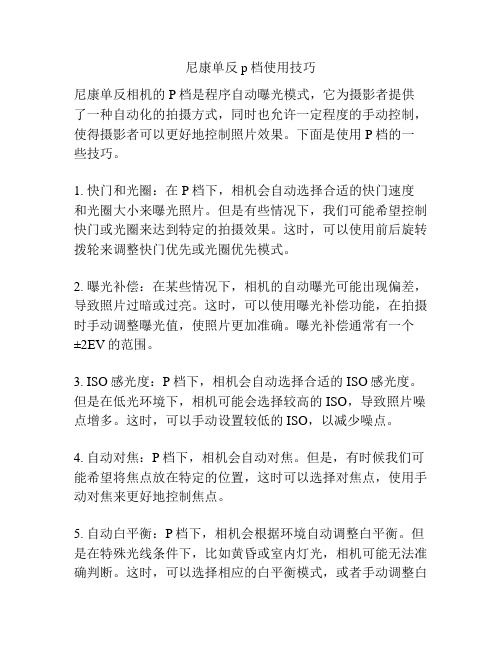
尼康单反p档使用技巧尼康单反相机的P档是程序自动曝光模式,它为摄影者提供了一种自动化的拍摄方式,同时也允许一定程度的手动控制,使得摄影者可以更好地控制照片效果。
下面是使用P档的一些技巧。
1. 快门和光圈:在P档下,相机会自动选择合适的快门速度和光圈大小来曝光照片。
但是有些情况下,我们可能希望控制快门或光圈来达到特定的拍摄效果。
这时,可以使用前后旋转拨轮来调整快门优先或光圈优先模式。
2. 曝光补偿:在某些情况下,相机的自动曝光可能出现偏差,导致照片过暗或过亮。
这时,可以使用曝光补偿功能,在拍摄时手动调整曝光值,使照片更加准确。
曝光补偿通常有一个±2EV的范围。
3. ISO感光度:P档下,相机会自动选择合适的ISO感光度。
但是在低光环境下,相机可能会选择较高的ISO,导致照片噪点增多。
这时,可以手动设置较低的ISO,以减少噪点。
4. 自动对焦:P档下,相机会自动对焦。
但是,有时候我们可能希望将焦点放在特定的位置,这时可以选择对焦点,使用手动对焦来更好地控制焦点。
5. 自动白平衡:P档下,相机会根据环境自动调整白平衡。
但是在特殊光线条件下,比如黄昏或室内灯光,相机可能无法准确判断。
这时,可以选择相应的白平衡模式,或者手动调整白平衡,以获得更准确的颜色效果。
6. 慢门作用:在P档下,相机会自动选择合适的快门速度来避免手持拍摄的抖动。
但是有时候,我们可能希望使用慢门来捕捉运动的轨迹或者创造一些特殊的效果。
这时,可以选择慢门模式,手动调整快门速度。
总之,使用尼康单反相机的P档可以让我们在自动化的同时,也可以根据需要手动调整一些参数,以获得更好的拍摄效果。
熟练掌握P档的使用技巧,可以让我们更好地应对不同的拍摄场景和拍摄需求。
尼康屏幕操作方法有哪些

尼康屏幕操作方法有哪些
尼康相机上的屏幕操作方法可以根据不同的相机型号和功能而有所不同,但是以下是一些常见的尼康相机屏幕操作方法:
1. 开/关屏幕:通常是通过按下电源按钮来开启或关闭屏幕。
2. 菜单操作:通过屏幕上显示的菜单选项来调整相机的各种设置,包括ISO、曝光补偿、白平衡等。
3. 图像预览:可以在屏幕上实时查看通过取景器拍摄的画面。
4. 对焦操作:在屏幕上选择对焦点或者触摸屏幕来实现对焦操作。
5. Live View (实时取景):通过屏幕上显示的实时画面来进行取景和拍摄。
6. 图片回放:可以通过屏幕上的回放按钮或手势来查看拍摄好的照片或录制的视频。
7. 触摸操作:对于一些具有触摸屏功能的尼康相机,可以通过触摸屏来进行各种操作,例如选择对焦点、菜单操作等。
请注意,以上仅是一些常见的屏幕操作方法,具体的操作方法可能会因不同的尼
康相机型号而有所不同。
建议您查阅相应型号的用户手册以获取更详细的操作方法。
尼康d800使用说明书详解
尼康d800使⽤说明书详解( )虽然⽬前售价较⾼,但是相信时间⼀长价格就会逐渐降下来,此外不管售价⾼不⾼,D800都注定会是未来四年最⽕爆的相机。
⽽且笔者觉得很多不差钱的摄友往往会选择D800作为⾃⼰最完美的⼊门相机。
但是尼康单反菜单⼀向复杂,今天IT168就来和你说说D800菜单操作的问题。
D800菜单主要可以分为:播放菜单、拍摄菜单、⾃定义菜单、设定菜单、润饰菜单、我的菜单,这⼏项。
对于拍摄来说⾃然是拍摄菜单最为重要。
下⾯我们来看看拍摄菜单⾥⾯能调节什么。
拍摄菜单中插槽功能图像区域暗⾓控制我的定时器功能多数参数调节在菜单中还是⼀⽬了然的,但是诸如使⽤DX画幅拍摄等等功能菜单⾥交代并不明确。
下⾯让我们来看看拍摄菜单中隐藏了哪些不引⼈注⽬的常⽤功能吧。
DX画幅怎么调使⽤DX画幅镜头或者使⽤全画幅镜头时,想⽤DX格式拍摄。
对于尼康以前的相机来说意义可能并不⼤,但是3630万像素的D800可以依次赚得长焦。
所以相信很多⽤户会⽤到这个功能。
更有意义的是,使⽤DX格式拍摄之后,尼康D800不配⼿柄可以提⾼到每秒5张的连拍速度,配上尼康⼿柄之后可以提⾼到每秒6张的连拍速度。
这能⼤⼤弥补D800在连拍⽅⾯的不⾜。
调节到DX画幅其实很简单,这个功能其实就在拍摄菜单中:图像区域调节选择图像区域DX格式如此⼀来,我们就能享受到长焦变长、连拍变快的优势了。
不过调节DX格式拍摄还有另⼀个调节⽅法:fn键设置⼀般来说尼康单反默认的Fn键+机⾝背波轮的组合就是调节拍摄图像区域。
这样调节更加简单。
如何调节⾊深⽤RAW拍摄的摄影师们肯定会优选14bit的,不过也会有摄影师考虑到后期处理速度或者卡容量等等因素使⽤12bit拍摄。
不管如何这个调节在菜单中还是埋藏挺深的。
具体调节办法:RAW格式记录RAW格式记录⽩平衡AUTO1是怎么回事⽩平衡AUTO1是怎么回事?相信很多尼康⽼⽤户会觉得摸不着头脑,其实尼康D800和D4的⾃动⽩平衡都多了⼀项保留暖⾊⾊调。
尼康 数码相机 说明书

I AM THE NEW NIKON1全新可換鏡數碼相機NIKON 1I AM THE INTELNikon 1一款隨時隨地供您拍攝的全新相機誕生了我們本可以使用簡單的方法和現有的技術,但我們仍決定從頭開始,重溫相機的設計歷程。
2 ||3LIGENT CAMERA結果我們造就了Nikon 1,它擁有的智能相機系統可讓您享受全新級別的速度、操作時的簡易性以及 攝影過程中的樂趣。
由於其速度驚人、非常輕巧以及極其精準的特點, 第一代Nikon 1的兩款相機讓您在掌心即可輕鬆拍攝出令人難忘的靜態影像和短片。
它們提供全面的自動化操作,使用起來非常簡便。
它們配備全世界速度最快的自動對焦系統1和高速影像處理器,在任何情況之下均可達致最佳的 拍攝效果。
它們可在您完全按下快門釋放鍵之前開始記錄 影像,並在發出喀嚓聲後再繼續記錄,拍攝出讓您 超乎想像的影像。
我們並不只專注於新技術。
事實上,說起製造相機的1接環系統,我們已有50年以上的專業技術。
透過1接環,您可使用Nikon 1系列的1尼克爾可換鏡頭。
1接環為使每個鏡頭和相機完美結合而設計,它可確保毫無障礙地拍攝靜態影像和攝錄 短片。
1 全世界最短的拍攝時滯(由尼康效能試驗測定)。
測定時使用的是單點AF 模式及標準變焦鏡頭(1尼克爾VR 10-30mm )的最短焦距。
截至2011年8月5日。
4|目錄N i k o n 1可換鏡頭相機系統:I A M T H E I N T E L L I G E N T C A M E R A認識N i k o n 1背後的工程師簡單易用:定位最佳演繹創新的自動拍攝模式2689| 5N i k o n 1相機N i k o n 1 V 1:攜帶方便,速度非凡N i k o n 1 J 1:隨時為您效勞影像品質:全新C X 格式C M O S 影像感應器及全世界速度最快的自動對焦影像處理器——E X P E E D 3:速度由快變為更快動態快照:喀嚓一聲,靜態影像動起來智能相片選擇器:一次拍攝——5張完美影像可供選擇連續拍攝模式:以每秒60幅的速度進行先進短片模式:隨心所欲地拍攝短片1尼克爾鏡頭1尼克爾V R 10-30m m f /3.5-5.6:重現過去的瞬間1尼克爾V R 30-110m m f /3.8-5.6:拉近距離1尼克爾10m m f /2.8:步入廣闊的視野,保留清晰的畫面1尼克爾V R 10-100m m f /4.5-5.6 P D -Z O O M :短片拍攝者N i k o n 1系統配件F 接環配接器:無限的可能性S B -N 5閃光燈:合適的光線G P -N 100 G P S 裝置:標記影像N i k o n 1套裝:隨身攜帶相機套裝配件總覽鏡頭技術規格軟件要求N i k o n 1 V 1技術規格N i k o n 1 J 1技術規格10 13 14 15 16 17 18 1920 21 22 2324 25 25 26 28 29 29 30 31|認識Nikon 1背後的工程師我們曾與研發新相機系統的工程師們交談,詢問過Nikon 1對他們來說意味著什麼。
尼康d800使用教程
尼康d800使用教程尼康D800是一款功能强大的全画幅数码单反相机,以下是一些使用教程,希望对您有所帮助:1. 放置电池和存储卡:在使用相机之前,首先要确保电池和存储卡已正确放置到相机内。
打开相机底部的电池仓,将电池放入,并确保电池极性正确对齐。
然后,打开存储卡仓门,将存储卡插入并推到底部。
2. 选择拍摄模式:D800提供了多种拍摄模式,可以根据不同场景选择合适的模式。
通过按下"模式"按钮并转动主拨轮,您可以在"自动"、"程序自动"、"光圈优先"、"快门优先"等模式之间进行切换。
3. 调整焦距和对焦:D800配备了一组对焦系统,可以通过转动镜头焦距环来调整焦距,并使用快门按钮半按下的方式进行自动对焦。
4. 设置曝光参数:D800可以手动设置曝光参数,包括光圈值、快门速度和ISO感光度。
通过按下"曝光补偿"按钮并转动曝光补偿轮,您可以增加或减少曝光量。
5. 调整白平衡:白平衡是校正相机对不同光源的颜色表现的设置。
在D800上,您可以通过按下"白平衡"按钮和选择不同的预设或手动设置来调整。
6. 拍摄照片:在设置好相机参数后,您可以通过按下快门按钮来拍摄照片。
D800的高像素和快速连拍功能可以捕捉清晰且高质量的图像。
7. 查看和编辑照片:D800配备了一个液晶显示屏,您可以通过按下"播放"按钮来查看拍摄的照片。
您还可以在相机上进行一些基本的图像编辑和处理,例如裁剪、旋转和应用滤镜效果。
8. 连接电脑和打印:通过连接数据线,您可以将D800连接到电脑上,以便将照片导入到电脑中进行后续处理。
另外,您还可以通过连接打印机,将照片直接打印出来。
以上是一些基本的使用教程,希望能够帮助您更好地使用尼康D800相机。
记住,最好的学习方法是亲自尝试,并根据实际情况进行调整和探索。
尼康单反D90使用手册
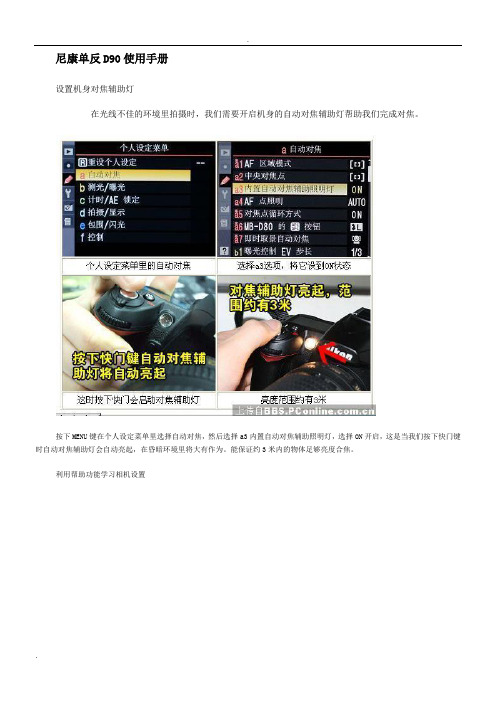
尼康单反D90使用手册设置机身对焦辅助灯在光线不佳的环境里拍摄时,我们需要开启机身的自动对焦辅助灯帮助我们完成对焦。
按下MENU键在个人设定菜单里选择自动对焦,然后选择a3内置自动对焦辅助照明灯,选择ON开启,这是当我们按下快门键时自动对焦辅助灯会自动亮起,在昏暗环境里将大有作为。
能保证约3米内的物体足够亮度合焦。
利用帮助功能学习相机设置功能越来越丰富的尼康D90,使用的时候难免遇到不懂用的功能,不愿查看说明书的朋友可以使用机内的显示注释功能了解一下该功能的用处。
显示注释十分简单,只需在高亮所选项目时按下“?”键即可,该键与WB键为同一键,将显示相关的注释。
设置自定义Fn键提高拍摄效率位于手柄内侧的Fn键可以自己设定所需的功能设定项,方便在需要高效率拍摄时,更快地操作。
Fn键的位置设定为刚好可以在握住手柄时用食指按下,方便快速设定,设置时按下MENU键进入菜单,选择控制页面,进入第三项“指定FUNC按钮”即可设定多项快速设定功能,可以使用显示注释功能作查看再设置。
手动设置白平衡的方法按住WB键拨动拨盘调整白平衡拨动后拨盘切换到PRE档再次长按WB键长按WB键直到PRE字样闪烁对白色物体对焦完成取样出现GOOD字样表示成功设置设置自定义白平衡首先按下WB键,按住的同时拨动后拨盘选择PRE档,然后再一次长按WB键,直到PRE档闪烁,表示可以取样,镜头选择手动对焦,对准白色或者灰色物体,是单一颜色充满画面,使用A档按下快门即可。
出现GOOD字样时表示成功设置,否则出现NO GOOD,须重新设置。
如何设置包围曝光包围曝光在拍摄高光比的场景时会使用到,当我们不确定曝光值是否正确的时候,使用包围曝光拍摄多张不同曝光值的照片,可以减少拍出不满意的照片而后悔的情况出现。
开启包围曝光功能按住BKT拨动拨轮即可,拨动前拨轮完成曝光量偏移,以三分一曝光量为步进值,拨动后拨轮调整拍摄张数,有2张及3张供选择,选择2张时,可选择过曝偏移还是欠曝偏移。
PIXEL KING PRO 使用手册 尼康说明书
2361Thank you for purchasing high-performance Pixel product.King PRO SET), please check if the below items are included King PRO SET01020304050706080910Hot Shoe ProtectorUniversal Flash Holder SF-18Optional AccessoriesKing PRO TransceiverKing X Receiver312589476312589101112134761234567812111095SpecificationFunctionMode: FSK2.4GHz Distance: 300m or AboveChannel: Transceiver – 1 Auto Channel and 15 Fixed Channels Receiver – 1 Auto Channel and 3 Fixed Channels.Antenna: Internal Antenna Power Supply: 2.2-3.3V (AA x 2)Sync Speed: 1/8000s (According to Different Models of Camera and Flash)Shutter: Support Camera Control Camera Single Shooting Group: 3 Groups (A/B/C)Interface: USB2.0, SYNC Interface Flash Test: SupportFunction: Support EOS's E-TTL II Flash Mode, Manual Output M ModeInstalling the Receiver:1234Installing the Transceiver:1222111113122334441234A. Please ensure camera and device are turned off, fix the hot shoe on transceiver on the screw nut loosen the nut clockwise. As shown in ( ),fully install the transceiver into the camera hot shoe. Rotate the hot shoe fixed screw nut anti-clockwise to lock tightly as shown in( ). Test Flash784Through continuously pressing [A:B] button on LCD panel twice, immediately enter A:B C lightratio setting screen (as shown in), press SET immediately can base on the “+, -” button on the screen to set up the output of the light ratio and exposure compensation (as shown in ),press “OK” button to confirm. After finish setting, press [A:B] button, you can immediately exit to main panel.Light Ratio SettingAfter turned on, press [A:B] button to enter into light ratio setting screen.1、1、1、1、2、2、2、Separately buy Pixel's USB shutter connecting cable, you can use wired or wireless shutterremote control (as shown below).1、Remote Camera ShootingPSM108 V30.02Wireless Flash E-TTL TriggerFor CanonInstruction ManualFirst, thank you for purchasing high-performance Pixel product - King PRO, it achieves high syncshooting with Canon cameras and flashes, and its various flash mode functions, including ETTL II, FP, etc., the maximum shutter sync speed up to 1/8000s.Also, it has grouping function. It has three groups in total. Each group can control outputdifferent mode through the device. When you use EOS EXII or 600EX-RT compatible flash, you can directly control the flash mode or output ratio of the flash through the transmitter. No need to adjust flash and you can get different flash mode .Before using, you must read through and totally understand this instruction manual , your camera and flash , to ensure you are familiar with the operation and can use correctly . By this manual , you can use this product easily with precautions.Before installing make sure your camera and flash are powered off .This product is an electronic device, it may be affected by external environmental factors and cause the camera cannot operate or malfunction. Nevertheless, this possibility is very small.Do not let the components suffered from strong vibration , otherwise it may cause the product failure.When not in use for long durations, please turn off the power of the transceiver and the receiver and remove the batteries.The batteries should be installed correctly. Reverse polarity may cause batteries to leak corrosive liquids, heat or explosion.When connecting the cable to the device, do not pull the wires directly.Do not store in a high temperature , such as a closed car under direct sunlight, the dashboard and other high-temperature areas.Keep dry, do not touch the product with wet hands. Do not immerse in water or exposed to rain as this may lead to device failure.Do not use near flammable gases. Failure to follow this warning may cause explosion or fire.This product involves batteries, please strictly follow the instruction for proper operation. Failure to follow this may cause explosions, fire or personal injury.King PRO Transceiver 1 pcKing X Receiver 1 pcUSB 2.0 cable 1 pcHot Shoe Protector2 pcsUniversal Flash Holder SF-18 1 pc Instruction Manual1 pcInstallation Drawings for Optional AccessoriesHot Shoe: Connect with flash for communication. This connect flash function is not controlled by thetransceiver, flash output function set on the flash directly.Light Indicator: Blue light blinks indicates normal communication with camera. Red light blinksindicates sending of flash signal .Test Flash / Shutter Button: This button is used to test whether the device is connected successfully.Press the button connected to the device flash indicates a successful connection. If you use together with the shutter connecting cable, this button is used as the shutter button.Test Flash / Shutter Button: This button is used to test whether the device is connected successfully.Press the button connected to the device flash indicates a successful connection. If you use together with the shutter connecting cable, this button is used as the shutter button.Group Settings: Group settings on/off. When the group is opened, the light indicator of thecorresponding group will on. When the group is off, the light indicator of the corresponding group will off. When the transceiver is under standby condition, press the corresponding group key, you can directly set the group 's function mode.USB Interface: Update the interface of the device, power input, shutter signal output (using shutterfunction need to purchase USB shutter connecting cable from Pixel ).SYNC: Trigger signal output interface , used to trigger studio lights.Custom Key :According to the icon illustrated on the screen as the corresponding function key.Hot Shoe Foot: Connect with camera for communication.Device Working Mode Button: Set the device as Master or Slave.Channel Setting Key: Can set 1-15 fixed channels and 1 automatic channel.Sync Switch Key: Hi-speed sync, 1st curtain sync , 2nd curtain sync switch button.On/Off Key: Power switch, ON and OFF .Mounting Bracket Nut: When transceiver is used as the slave mode and install the flash is fixed ,you can buy and use in conjunction with our company 's special bracket.Hot Shoe: Connect with flash for communication.Light Indicator: Blue light blinks indicates normal communication with camera. Red light blinks indicates sending of flash signal . When the battery power is low , the red light will blink twice every second.Group Settings: Group settings on/off. When the group is opened, the light indicator of thecorresponding group will on. When the group is off, the light indicator of the corresponding group will off.USB Interface: Update the interface of the device, power input, shutter signal output (using shutterfunction need to purchase shutter connecting cable from Pixel).SYNC: Trigger signal output interface , used to trigger studio lights.Mounting BracketON/OFF Key: Power switch, ON and OFF .Channel Setting Key: Can set 1-3 fixed channels and 1 automatic channel.Remark: All functions of Receiver King X are used with the Transmitter King PRO.Transceiver King PRO Icon IntroductionLight Ratio IconGroup Setting Function Icon Camera Connection Icon Device Operation Mode IconChannel IconSync Mode Icon Focal Length AreaExposure Compensation/Manual Output Display AreaGroup Function Mode Display Area Group IconFocus Icon Power Icon Easy and Convenient, Smart and Powerful01. LCD Display Output at a glance .02. Multi-keys Settings. Each feature has individual buttons, simple and easy to use.03. Support more operation system to upgrade device firmware online , such as Windows , Mac OSX .04. More stable and reliable hardware and software for the new upgrade.05. Farther remote distance, control distance of above 300m.06. More output mode combinations, you can always set each group to different flash output ratio.07. More energy-saving design, and the use of more reliable gold-plated metal battery clip as well as anti-lost battery compartment cover design.08. King Pro uses a full metal structure design, more solid, hard as stone chime ; external metal mounting bracket nuts, same as the design of flash bracket.09. King Pro uses 15 fixed channels and 1 automatic channel mode, allow thousand sets of products to be used in the same area without interference .10. King Pro uses two-colour LED backlight, more easy to distinguish Master or Slave Mode.11. More scalability SYNC output socket, camera can control camera shooting. Also, can control outdoor lights and studio lights.12. More humane test flash for brightness output.13. Support group to control the focal length of the flash.A. in mount the quick board on the mounting bracket .As shown in( ),put the quick board screws into the receiver 's quick board fixing screws. As shown ( ).B. Ensure the flashgun is turned off, install the hot shoe foot of the flash on the receiver 's hot shoe as shown in ( ).According to the locking method of the flash to lock the flash as shown in( ).B. as shown in According to the locking method of the flash to lock the flash as shown in Ensure the flash is turned off, install the hot shoe foot of the flash into the transmitter 's hot shoe ( ),( ).1. Check that the power is turned on.2. Press the test flash button , check the transceiver and receiver are set to the same channel and group or if the connection is successful . You can only successfully test the flash when the channel and group are consistent .a. Test Flash for Transceiver , when the flash is set to E-TTL mode, the test flash output is pre-flash . When the flash is set to manual M mode , test flash output is the current output ratio .b . When transceiver is the master , press the test flash button , it corresponds the valid flash to flash , including the flash of this device .c . When transceiver is the slave , press the test flash button , the flash of this device flashes .d . When you press the test flash test button of the receiver , the flash of this device will test flash .A:B Light Ratio SettingThrough pressing [A:B] button on LCD panel once, immediately enter A:B light ratio setting screen (as shown in ), press SET immediately can base on the “+, -” button on the screen toset up the output of the light ratio (as shown in), press “OK” to finish setting. Press again [A:B] key twice continuously, exit to main panel.A:B C Light Ratio SettingFlash Focal Length SettingGroup Function Mode SettingAfter turned on, through pressing function mode to set (as shown in ), the set option flashes , base on “+, -“ button on the screen to choose Master or Slave. After choosing Master mode,press “OK ” key to confirm and exit the setting panel . After choosing Slave mode , press “OK ” key to enter group slave mode , directly press A , B or C key on the screen or press Group A , B or Cbutton to choose slave group (as shown in ). When you are in slave mode , the light shown on the panel is white .Master and Slave SettingAfter turned on, through pressing [ZOOM] button on LCD panel to enter group focal lengthsetting screen (as shown in ),press again Group A , B or C button to choose the group youneed to set the focal length . According to the “+, -” button on the screen to set the focal length from “24mm –105mm ”, auto is autofocus ,press“OK ” key to finish setting .Channel SettingAfter turned on, through pressing the channel setting button (as shown in), the setoption flashes, base on“+, -“ buttonon the screen to choose channel . You can choose channel “CH1-CH15” for 15 channels andoneautomaticchannel , press “OK” button onthe screen to confirm andexit.CH au of Transmitter and Auto of Receiver are automatic channels , its operation is as follows :When the device is under off condition:Check Channel when King PRO is a Master : Hold down the Group C key and switch onthe powerkey until the screen turns as shown in Figure 2. Release the Group C key , the power indicator shows blue light blinks , the device immediately enters into the checking condition. If it is in improper operation , it will enter into the normal user screen. After all receivers successfully check the channels , turn off and you can use after re-open it.Check Channel when King PRO is a Slave : Hold down the Group C key and switch on the power key until the screen has the word Coding as shown in Figure 3, then release Group C key , the power indicator shows blue light blinks . If checking channel is successful with the receiver , the indicator shows red light blinks . Turn it off and you can use after re -open it . If it is in improper operation , it will enter into the normal user screen Check Channel for King X : Hold down Group C key and switch on the power on/off key at thesame time . The indicator shows blue light blinks will immediately enter into checking condition . If checking channel is successful with the receiver , the indicator will have red light blinks . Turn it off and you can use it after re -open it . a 、b 、c 、After finish checking the channel, the device will not be interfered by any other channels, the same product can be used with an unlimited quantity without interruption.* Channel checking will first adjust King PRO Master to the channel checking condition, and then adjust Slave or Receiver and the setting is complete.3 When you use with King Pro, you can only use the same channel setting.When you use with King, L1=CH01, L2=CH02, L3=CH03, L2+L 3=CH 04, L 1+L 2=CH 05, L1+L 3=CH 06, L 1+L 2+L 3=CH 07.When you use with King X, CH1=CH01, CH2=CH02, CH3=CH03, Auto-CH au.Flash Mode SettingAfter turned on, through pressing the switch button of the LCD frequency sync mode to enterbetween high-speed sync, 1st curtain sync and 2nd curtain sync to choose . (repeatedly press this button).Hi-speed Sync 2nd Curtain 1st Curtain SyncYou must set the focus function of the camera lens to “MF ” to test shooting , otherwise , youmight not shoot as you cannot find the focus point .Through Master Camera to Control Other Cameras to Shoot SimultaneouslyWhen you use with the shutter connecting cable, you can use camera to control camera to shoot(as below).Receiver TransceiverSlave Camera Master Camera* Since the response time of different cameras differs , shooting time may have small differences.* When some cameras cannot find the focus point , though receive the shooting signal , it may not shoot . Please set the focus mode of your camera lens to manual “MF ”.* If you are using non -dedicated transceiver , then slave camera cannot focus .Thank you for purchasing Pixel product and read this instruction manual. If you have any question, please contact your local dealer or visit This information of this instruction manual is updated as of 15th July , 2013. For information on the use of the combination of product marketed after this date , please contract Pixel 's dealer for advice.Checking Channel for Master121232181When using the shutter release; as the shutter button is 1 step, the focus mode might not very clearAfter turned on, through pressing [SET] button on LCD panel to enter group function mode settingscreen (as shown in ), press again the left side Group A, B or C button to choose the group you need to set up. Continuously press the select key (group key) to switch between “TTL, M, OFF ” mode (as shown in ). After choosing mode, you can base on “+, -” button on the screen to select output , press “OK ” keyto confirm and exit the setting panel .After turned on , you can directly press left side Group A , B or C button to choose the function mode of A , B**。
尼康相机的各个功能按键使用
尼康7100相机:不是全画幅,是dx画幅,俗称半画幅SCENE键=全自动场景模式(夜间人像、夜景、宴会/室内、海滩/雪景、日落、黄昏、宠物像、烛光、花、秋色、食物、人像、风景、儿童照、运动、近摄)使用方法:先把木工拨盘调到SCENE再按info转动大显屏右上角的拨轮,选择需要的场景。
EFFECTS键=全自动场景模式(夜视、夜景、彩色素描、模型效果、可选颜色、剪影、高色调、低色调)使用方法与上同。
A=光圈优先=AV:可以控制光圈,快门速度随着曝光量大小来变化,光圈大小可以控制所拍照片的景深。
光圈大景深短,光圈小景深长。
S=快门优先=TV:可以控制快门速度,光圈随着曝光量大小来变化。
(多用于运动的物体拍摄)需要防止手抖,快门设定不低于1/60秒瞬间选取清晰的定格画面(如水滴、火焰等)M=全手动模式:需测光,所有参数:光圈、快门、感光度都要手动调整与设置。
(有经验的可用)P=程度模式:也叫自动可调模式,自动档,快门、光圈由相机来设定,也可以自己调节。
U1U2=用户自定义模式:可事先对其进行设置参数,后面直接转到此键可操作,如U1为人像,U2为风景Auto=自动模式:更高级的全自动,但尼康的也可以调节感光度。
需自己对焦。
AE-L=曝光锁定:摁下能固定曝光值,通过不同的设置可以实现不同的操作(使用较多,也可以在菜单里设置)AF-L=对焦锁定:摁下锁定焦点不移动,同样设置里有好几种使用方式。
Fn这是自定义按钮,大部分相机都会有1—3个(有些甚至多到6个),用户可以在菜单中自行设置按钮功能,例如:照片尺寸/格式切换、测光模式、照片风格、白平衡、ISO、闪光灯、连拍等。
闪光灯按键:很多人认为闪光灯按钮只是将内置闪光灯弹起。
其实再按一次闪光灯按钮,就会出现跟曝光补偿相似的调整栏位,能通过转盘调整闪光灯的补偿值。
info键=信息显示:按下此键时,屏幕上将显示:光圈、快门速度、AF区域、测光、色彩空间等拍摄信息,可以迅速了解当前相机设定。
尼康DS-L3一体化显微摄影说明书
DS-L3使用说明检查DS-L3与外部设备是否连接正确1. 按下DS-L3的电源开关2. 电源指示灯(绿色)开始闪烁,开始屏幕出现在显示器上。
3. 当DS-L3已正常启动,电源指示灯(绿色)停止闪烁,并由DS摄像机头捕获的图像(实时图像)替换显示器上的开始屏幕。
一、设置(一) .设置语言1.1点击任务栏中[SETUP]按钮显示[SETUP MENU :MAIN]窗口。
1.2选择[LANG]按钮,会出现下级菜单,初始默认是英文。
1.3 选择下级菜单中所需的语言,英文或日文。
1.4.点击[SAVE]保存设置。
1.5.点击[X]按键关闭[SETUP MENU:MAIN]窗口。
(二) .设置日期和时间1.1.点击任务栏中[SETUP]按键显示[SETUP MENU]窗口,1.2.按[MENU SELECT]按钮并选择[ADD]1.3.在[DATE/TIME SET]中设置当前的日期和时间1.4.点击[SAVE]按钮保存设置1.5.点击右上[X]按钮关闭[SETUP MAENU:ADDITIONAL]窗口。
(三) .标尺单位设置3.1 打开TOOL菜单,点击[TOOL SET]按钮,点击其中的[MAIN]按钮3.2. 点击[UNIT]按钮,并选择相应的标尺单位。
(初始设置)mm3.3点击[◀◀TOOL]按钮,回到[TOOL MENU]菜单,点击[X]按钮关闭[TOOL SETUP]窗口。
(四).定标设置4.2在[MODE]中选择[MANUAL]人工模式或者[OPTICAL]光学模式。
4.4在[UNIT]中选择单位4.5在[INFO]中输入相应信息。
此信息在[TOOL MENU]和[TOOL BAR]窗口选择[M1]至[M7]时会显示。
4.6 在[CALIBRATION]区域在[M1]至[M7] 中选择一个来保存此次定标信息4.7点击[SAVE]按钮来保存此次定标设置4.8 点击[◀◀TOOL]按钮返回[TOOL MENU],点击[X]关闭[TOOL SET:CALIB]窗口。
尼康D800使用技巧说明
尼康D800使用技巧说明尼康D800使用技巧说明尼康d800是一款全新FX格式数码单镜反光相机。
3,630万有效像素,并搭载了新型EXPEED 3数码图像处理器和约91,000像素RGB 感应器,令其具有突破性的高清晰度和图像品质。
今天就来了解一下尼康d800使用技巧。
在使用Nikon D800的P(程序自动曝光)、S(快门优先自动曝光)、A(光圈优先自动曝光)时,都可以设置曝光补偿功能。
曝光补偿的单位是EV。
Nikon D800可以在±5级间以1/3EV、1/2EV或者1EV为单位调节。
每增加或减少1EV,相当于射入的光线量增加一倍或减少一半。
由此可见了解尼康d800使用技巧是必须的。
尼康d800使用技巧一:把拍摄模式切换到P(程序自动)、S (快门优先)或者A(光圈优先)模式,半按快门按钮完成对焦和测光后,取景器下方可以查看当前的曝光参数。
第二步的尼康d800使用技巧是按住机身右上方的按钮,再转动机身背面的主指令拨盘,就可以设置曝光补偿。
第三步:向左转动拨盘增加曝光量,向右转动拨盘则减少曝光量。
此时,光圈和快门组合也会同时发生变化。
曝光设置完成后,按下快门按钮,如果设置了增加曝光补偿(正补偿),画面会变得更亮。
如果设置了减小曝光补偿(负补偿),画面会变得更暗。
现在来讲讲尼康d800使用技巧之曝光补偿的原则。
曝光补偿的第一原则是“白加黑减”。
所谓“白加”是指拍摄白色或浅色景物时要增加补偿。
所谓“黑减”是指拍摄黑色或深色物体时要减少补偿。
拍摄白色的绒毛玩具时,适当增加曝光补偿才能避免玩具的毛色变得灰暗尼康d800使用技巧之曝光补偿的原则。
曝光补偿的第二原则是“亮增暗减”。
所谓“亮增”是指背景非常明亮并且占较大面积时,需要增加曝光补偿。
所谓“暗减”是指背景很暗并且占较大面积时,需要减小曝光补偿。
- 1、下载文档前请自行甄别文档内容的完整性,平台不提供额外的编辑、内容补充、找答案等附加服务。
- 2、"仅部分预览"的文档,不可在线预览部分如存在完整性等问题,可反馈申请退款(可完整预览的文档不适用该条件!)。
- 3、如文档侵犯您的权益,请联系客服反馈,我们会尽快为您处理(人工客服工作时间:9:00-18:30)。
捕影工匠参考手册A除非另有说明,否则插图均来自Windows 8.1。
本手册假定使用了默认的照相机和软件设定。
A每页顶部的链接可用于章节导航。
单击可返回本页。
Sc以其他格式保存照片润饰或处理后的RAW)图像可以JPEG或TIFF格式保存以用于其他.NEF.JPG.TIF图像数据优化校准设定曝光补偿原始图像润饰预览润饰预览原始图像当文件转换为JPEG或TIFF时,在保存图像的同时会应用更改创建一个新的修改后的图像数据文件。
设定原始图像JPEG或TIFF文件A图像调整图像调整保存在与原始图像位于同一文件夹的像调整文件被删除,所有更改都将丢失;同样,由于图像和图像调整文件是通过文件名称所链接,若图像调整文件被重新命名,更改也将丢失或应用至其他图像。
中以q菜单栏:访问菜单(第9页)。
w 工具栏:选择一种显示以及选取图像调整工具(第8页)。
e 文件夹板块:选择一个文件夹以在图像区域中显示其内容(第6页)。
r 图像区域:查看当前文件夹中的图像。
t 所选图像:所选图像将加亮显示为灰色,且已修改的图像在缩略图左上角将用一个图标标识。
双击即可进行预览(第10页)。
y 直方图板块:查看所选图像的色调分布(第6页)。
u 编辑/元数据板块:使用编辑板块中的工具润饰图像或切换至元数据板块以查看图像信息(第7页)。
i 状态栏:查看所选图像的信息(第9页)。
文件夹板块菜单若要访问板块菜单,请单击板块右上角的小三角()。
选择q w ertyuio!0!!!!!!!!!@@@@打印打印图像区域中当前所选或正被预览的图像。
第39页选择当前文件夹之前或之后的文件夹。
—显示一个对话框,您可通过该对话框找到并打开一个文件夹。
第6页缩略图以缩略图形式查看当前文件夹中的图像。
第10页组合在图像区域上方显示预览并将缩略图列于下方。
第11页预览仅显示预览。
第10页全屏查看图像。
第12页并排查看图像。
您可选择比较两个图像或调整前/调整后。
第13页并排查看所选图像。
第13页并排查看调整前及调整后的图像。
第14页!1当前!3预览模式!7打开方式@0中止批处理@2q w e r t y文件名称文件名称。
缩放率当前所示预览的缩放率。
色空间预览显示中图像的色空间。
图像尺寸预览显示中图像的尺寸(以像素表示)。
色彩值预览和组合显示中光标所指处像素的色彩。
文件夹中的位当前图像的位置以及文件夹中图像的总数量。
单击或可查看其他图像。
e r t y u i 将文件转换为其他格式,运行批处理以及打印和重新命名文件。
选择、复制、粘贴以及删除图像。
选择查看模式,调整缩放以及排序和选择图像。
矫正、评级和使用标签标记图像,或者显示网格、对焦点、暗部或亮部。
复制、粘贴、保存以及载入图像调整设定。
选取图像调整工具。
查看和隐藏板块。
查看在线帮助或当前软件的版本编号。
缩略图列表所选图像双击一个缩略图或选择一个缩略图并单击工具栏中的按钮将显示一个预A缩略图尺寸使用图像区域上方的滑块可选择缩略图尺寸。
滑块A返回缩略图显示若要返回缩略图显示,请单击工具栏中的按钮。
A相同名称,不同扩展名在默认设定下,若文件夹包含两张文件名称相同但扩展名不同的图像(例如,以“RAW+JPEG”图像品质设定记录的RAW和JPEG图像),将仅显示RAW图像。
若要查看所有图像,请选择工具(在Mac中则选择捕影工匠)>偏好设置>不要将NEF/NRW和JPEG图像视为NEF/NRW+JPEG图像。
工具栏中的按钮。
预览板块菜单预览板块缩略图板块单击缩略图可预览其他图像。
缩略图板块菜单若要隐藏菜单、工具栏和板块并全屏查看当前图像,请单击工具栏中的全屏显示在多重预览显示(第13 页)中也可用。
比较两个图像调整前/调整后若要退出全屏显示并返回上一显示,请单击按钮或按下Esc键。
请单击工具栏中的按钮并选择)或位操作系统的计算机上,单击按钮将显示一个菜单,除标准的比较两个图像选项之外该菜单还提供一个比较四并排比较图像。
缩放或滚动其中一张图像时,另一张图像也会相应地进行当前图像当您单击按钮时,当前图像将显示在左边。
若要选择图像进行显示,请单击所需预览框,然后单击一个缩略图。
仅同一文件夹中的图像才可选来进单击单击一个缩略图所选预览将加亮显示为白色。
图像调整与直方图和导航板块显示一样仅适用于所选预览。
未调整曝光补偿设为+1.0EVA在预览显示中比较图像单击按钮即可在预览显示中并排打开两张图像。
图像以反映当前图像调整,请单击工具栏中的按钮。
比较当前图像调整前和调整后的显示。
调整前调整后n恢复“调整前”图像若要将“调整前”图像恢复至未调整状态,请单击工具栏中的按钮。
“调整前”图像将恢复至图像首次在捕影工匠中打开时的状态(请注意,自最后一次在捕影工匠中打开以后在其他应用程序中对JPEG和TIFF图像所作的任何更改将不会被重设)。
(无评级)至图标并从(无评级)至星中选择一个评级。
若要为照片指定3星评级,请单击从左边起的第三颗星。
前3颗星将加亮显示为黄色。
;对于无标签图像,标签“0”仅在光标位于照片上中选择一个标签(w)。
q单击一个标签图标。
w单击一个标签。
若要使用评级、标签和照片信息等标准筛选照片,请单击工具栏中的按屏幕中将出现一个对话框,您可在该对话框中选择筛选器。
仅至少符合一个所选标准的照片才会出现在缩略图列表中。
A筛选器型号、焦距、快门速度、光圈和ISO感光度筛选器的选项限制为在当前文件夹内的图像中所能找到的值。
使用工具栏中的按钮可根据评级和标签快速筛选照片。
单击按钮显示筛选栏。
边的方框中会出现一个勾选标记(),取消方框()中的勾选可隐藏更改。
)。
(中的任意位置以单个像素为样本,或者在图像上拖动光标以使用所选区域在蓝色区域取样白平衡被调整使蓝色显示为灰色,且整个图像带有“暖”氛围qwero!0!1qwetqwe qwew按与参考线平行的方向拖动光标图像被旋转以使参考线水平A图像尺寸矫正不会改变图像的尺寸。
图像中任何不符合其原始尺寸的部分都将被裁切掉,而新添加的区域则以黑色填充。
yu wert i单击调整管理器图标并从调整板块的选复制编辑内容或复制所有图像设。
这里我们已选择复制所有图像设置。
选择图像。
本例中,所选图像已使用曝光补偿()工具进行过调整。
图标并从调整板块的选选项可将调整添加至调整管理器下如果我们在步骤2中选择复制编辑内容,所选图像的曝光补偿和优化校准将设为步中所选的值,而白平衡将仍保留为步骤3中所选的值。
)图像,请单击工具栏中的按qe t uwyr图像的位深度(每通道8位或16位)。
:使用滑块或下拉菜单在0至100之间选择一个值。
值越高,压缩比越低,且图像品质越高;值越低,则压缩比越高,且文”LZW压缩压缩TIFF文件。
压缩有时可能会增加文件大小。
:选择该选项可将当前色彩配置文件嵌入图像。
按钮。
1在裁切板块中选择一个宽高比并单击应用所选宽高比的裁切框。
A宽高比可在调整完裁切框的尺寸及位置之后进行更改。
若要调整裁切框的位置,请拖动框中央的图标。
单击图标可将裁切框旋转90°。
A裁切框仅可以90°为增量进行旋转。
按钮裁切图像。
裁切无法应用至原始图像数据。
任何时候单击工具栏中的按钮都可调整裁切。
当图像转换为JPEG或TIFF格式(第34页)时将应用裁切。
q wr y i oetu浏览选择一个源文件夹。
若要将所选文件夹下子文件夹中的所有图像也包含在内,请选择包含子文件夹。
应用当前的调整使用当前图像的调整处理图像。
若要从调整管理器中取得先前保存的调整进行应用,请选择从文件导入选择一个调整文件。
若要将所选文件夹中的图像以另一种格式输出而不更改当前为每张图像所选的设定,请选择保留每个文件的原始压缩:选择处理后的文件将保存的格式。
请从JPEG、TIFF (q w eq w er等候已处理过单击工具栏中的按钮打开。
当使用工具栏中的按钮以其他格式(输出文件时,若选择了多个文件,则文件将作为请按照以下页面中的说明调整设定并单击打印打印预览显示中的照片。
有关打印的注意事项照片在全屏显示时无法打印。
文件,请单击打印到文件。
对话框中选择了旋转以适合页面尺寸时不会旋转。
超出打印区域使用预定义的格式请从列表框中选择每页的照片数量。
照片尺寸将根据所选项自动调整。
2×4式布局照片以50mm×50mm的尺寸打印3×3式布局:在其他应用程序中打开之前,图像将先转换为16位的。
使用该选项可选择是否保存转换后的文件。
:色阶和曲线自动对比度选项(第30页)可通过设定黑白点来排除图像中一定比例的最亮像素和最暗像素,从而增加对比度。
通过点选择所排除像素的百分比。
y u i o !0!1!2!3qw r e t)或评级(第15页)。
:创建一个文件,其中仅包含自当前文件夹最后一次打开以:将所有调整保存为一个文件。
导出所有图像设置所创建的文件载入调。