2020广西高校毕业生平均初次就业率达91%
2020-2021学年 外研版英语九年级下册 Module 1Unit2课件

2. Did Li Lin find his own seat first?
Yes, he did.
3. In fact which car should the elderly man be in?
In fact he should be in Car 9.
It’s a long story.
(Li Lin and Li Wei are on the station platform, saying goodbye to each other.)
Li Lin: Tell Mum and Dad I’ll miss them... I’ll miss you all.
telling me what sort of car that is? 5. That __e_ld_e_r_ly_ lady had died of old age.
Module 1
Unit 2 It’s a long story.
Read and answer the questions:
短上衣;夹克
____j_a_c_k_e_t_____
确切地;完全
____e_x_a_c_t_ly_____
毕业生
_______s_c_h_o_o_l-_l_eaver
笨的;糊涂的
____s_t_u_p_id______
从方框内选择适当的词并用其正确形式完成句子。
elder stupid sir officer jacket
ticket. Oh, I see the problem. This is Seat 12A, but you should be in Car 9. This is Car 8. Elderly man: Oh, how stupid of me! I’d better go and find Car 9.
中文91全站动态各站接入规则

中文91全站动态各站接入规则1目的本文档用于给程序员作参考。
2案子介绍各站程序员根据动态格式进行数据接口的书写。
3前台实现3.1各站规范接口实现原理:根据各站的动态规则,若用户在对应站点进行交互,则产生动态,记录在同城动态的数据库中。
同时产生动态的站点,可从同城顺利调到数据。
数据管理:用户在对应站点进行删除操作时,会删除之前该动态的记录,在下一次动态产生时,更新显示。
接口限制:1.用户动态记录的是行为人,行为时间,行为主体,行为的对象和行为模式。
2.只记录有积极影响的行为。
例如图站,只需记录上传、评论、推荐图片等的操作,不需要记录修改,删除等操作。
3.1.1.各站动态记录规则以下表格将列出需要记录的行为。
具体的用户操作动态对应的记录表现形式见下文。
此处只列出需要记录的大概。
包子铺包子兑换商品、活动发奖、抽中商品、拍卖某商品、参与某团购活动参与活动(通过任务系统)、活动获奖信息(参与XX活动,获得了1包子奖励XX 时间)任务接受任务、完成任务下载站下载了XX软件用户中心:行为动态规则举例修改资料修改单个字段:用户名将字段修改为……Miss将昵称修改为Miss UMiss将昵称修改为Miss U修改多个字段:用户名修改了字段A、字段B、字段C 查看>>点击查看到该用户的交友主页。
Miss 修改了生日、所在地、爱好查看>>推荐内容推荐单个内容:用户名推荐了用户名1的内容内容描述“推荐语”用户名推荐了用户名1的内容内容描述Miss 推荐了Done的照片我真的是够了啊“真是太牛啦”推荐多个内容:用户名推荐了用户名1的内容内容描述“推荐语”>>用户名的其它n个推荐点击用户名的其它n个推荐则查看其推荐更多页。
Miss 推荐了Done的照片我真的是够了啊“真是太牛啦”>> Miss的其它3个推荐图片中心:行为动态规则举例上传图片上传单张图片:用户名上传了1张图片到相册名(缩略图)Miss上传了1张照片到这就是我上传多张图片:用户名上传了n张图片到相册名(最新3张缩略图)查看>>点击查看进入到用户的该相册。
2021年最新时事政治—均衡价格理论的难题汇编含答案解析(1)

一、选择题1.2020年3月,世界主要产油国增产和新冠肺炎疫情全球蔓延给国际油价带来重大冲击。
其他条件不变,下列图示能合理反映上述现象的是(图中S表示供给,D表示需求,E 表示均衡价格)()A.B.C.D.2.如果石油和液化气的价格上涨,居民可能的选择是()。
①减少对私人汽车的消费②增加对电的消费③增加对液化气的消费④减少对食品的消费A.①② B.①③ C.②④ D.③④3.下侧是n商品的需求量随着m商品的价格变动而发生变化的示意图(其中Pm表示m商品的价格,Qn表示n商品的需求量),假定m商品是柴油,并且不考虑其它因素,那么n商品最有可能是A.汽油车 B.汽油 C.柴油车 D.电动车4.2017年7月以来,国际油价开启了断崖式跳水行情,一度下跌至43.83美元/桶,这让我国新能源汽车的发展蒙上了阴霾。
这是因为,油价下跌会①降低传统能源汽车的使用成本②相对拉低新能源汽车市场销量③增加污染排放,破坏生态环境④增加汽车销量,优化产业结构A.①②B.①③C.②④D.③④5.假定猪肉价格上升10%时,鸡蛋的需求量变动20单位;西红柿的价格下降10%时,鸡蛋的需求量变动10单位。
如果其他条件不变,当猪肉价格上升10%、西红柿的价格下降10%同时出现时,那鸡蛋的需求数量A.减少30单位B.增加30单位C.增加10单位D.减少10单位6.需求弹性是指当价格发生变化时,不同商品的需求量对价格变动的反应程度。
以下四种商品中需求弹性最大的是A.照明用电B.自来水C.大米D.翡翠手镯7.随着科技进步,社会劳动生产率的提高,某商品的需求曲线出现了从如图到如图的变化。
对这一变化解读正确的是①该商品的替代品需求量可能增加②该商品由高档耐用品变为生活必需品③该商品的互补品需求量可能增加④该商品由生活必需品变为高档耐用品A.①③B.①④C.②③D.②④8.我国汽车销售情况(部分数据)如下图所示:下列对材料信息的解读正确的是①新能源汽车销量暴涨是其他类型汽车销量下降的根本原因②新能源汽车与其他类型汽车存在替代关系③汽车产业的生产要素投入可能向新能源车企转移④销量变动是行业劳动生产率提高的必然结果A.①②B.①④C.②③D.③④9.甲商品价格(P甲)与乙商品需求量(Q乙)之间存在如图所示关系。
微软Windows 10操作系统虚拟化许可说明书
This brief applies to all Microsoft Licensing programs.ContentsSummary .................................................................................................................................................................................................. 1 Details ....................................................................................................................................................................................................... 2 How to license Windows in a virtual environment ........................................................................................................... 2 Licensing users for Windows Enterprise E3/E5 subscription or Windows VDA E3/E5 subscription on a per user basis .................................................................................................................................................................................. 3 Comparing Windows Virtualization rights ........................................................................................................................... 4 Scenarios .. (6)SummaryThis licensing brief is an overview of the Microsoft Commercial Licensing use rights for the Windows 10 operating system when running virtual machines.The topics covered in this brief apply to the licenses listed below. We will refer to them as SoftwareAssurance for the Windows desktop operating system, Windows Enterprise E3/E5 subscription licenses, and Windows Virtual Desktop Access (VDA) subscription licenses.• Windows 10 Enterprise E3/E5 • Windows 10 Enterprise per device • Windows 10 Education E3/E5 • Windows VDA E3/E5 •Windows VDA per device(Microsoft 365 F3/E3 licenses include Windows 10 Enterprise E3 entitlements. Microsoft 365 E5 licenses include Windows 10 Enterprise E5 entitlements)For use rights provided with Windows preinstalled by the original equipment manufacturer (OEM) or purchased through other channels, review the license terms that accompany those products.Licensing briefApril 2020DetailsSoftware Assurance for the Windows desktop operating system, Windows 10 Enterprise E3/E5 subscription licenses, and Windows Virtual Desktop Access (VDA) subscription licenses provides the greatest flexibility for how you use Windows. They include access to unique products and license rights not available through other licensing programs. These offerings enable flexible work styles by providing access to Windows instances in a variety of ways across devices.You can separate license users or devices that do not have or are not eligible for Windows licenses (such as thin clients) with a Windows VDA subscription to gain access to these benefits.This brief provides an overview of the Windows virtualization rights available to Microsoft Commercial Licensing customers. The information here applies only to licensing the Windows desktop operating system for virtualization scenarios. It does not address other licenses that may be required for specific scenarios, such as Microsoft Office licenses and Client Access Licenses (CALs).For Windows desktop operating system software licenses acquired through the OEM channel, the Windows use rights are outlined in the Software License Terms that accompany the software. These license terms provide use rights to run Windows locally on the licensed device in a virtual operating system environment (OSE). However, they do not provide use rights for accessing Windows running remotely in a virtual OSE from the licensed device and are limited in other ways when compared to virtualization use rights provided with Software Assurance for the Windows desktop operating system, Windows 10 Enterprise E3/E5 subscription licenses, and Windows VDA subscription licenses acquired through Microsoft Commercial Licensing. For example, OEM licenses do not permit remote access to a Windows virtual machine running in a data center.How to license Windows in a virtual environmentThere are three ways to license and access a remote virtual machine running Windows desktop software: •Windows Virtualization rightsWindows Virtualization Rights allow for a licensed device or user to access virtual Windows desktops either remotely and/or locally, depending on how the device or user is licensed. You can licensedevices or users for Windows Virtualization rights in the following ways:o License devices with Software Assurance for the Windows desktop operating system or Windows VDA subscription on a per device basis via one of the following programs: Open License,Select/Select Plus, Microsoft Products and Services Agreement, Open Value, EnterpriseAgreement, or Enrollment for Education Solutions.o License users with Windows Enterprise E3/E5 subscription licenses or Windows VDA E3/E5 subscription on a per user basis via one of the following programs: Open License, Select/SelectPlus, Microsoft Products and Services Agreement, Open Value, Enterprise Agreement, orEnrollment for Education Solutions.Customers may choose to use a third party to host their Windows client virtual machines for remote access by their end users. This is often referred to as "Outsourcing Software Management" or using a third party to host Desktop as a Service (DaaS) and requires the third party to be an AuthorizedOutsourcer. The hosted environment must be on servers dedicated to the customer. An Authorized Outsourcer is restricted from being a Listed Provider and may not use a Listed Provider as a datacenter provider. A list of Listed Providers can be found at https://aka.ms/ListedProviders.Note: The license terms for Outsourcing Software Management were updated October 1, 2019,which the explanations in this brief reflect. The use of a Listed Provider was not restricted prior to the terms being updated. Refer to the Product Terms for more details.Note: Microsoft 365 licenses that include Windows 10 Enterprise E3/E5 are only eligible if the user is the primary user of a device with a Qualifying Operating System.•Windows 10 Multitenant Hosting rightsCustomers also have the option to host their Windows client virtual machines for remote access on Microsoft Azure or a third-party shared server under Windows 10 Multitenant Hosting rights. When using a third-party shared server, the third party hoster must be a Qualified Multitenant HostingPartner (QMTH). A list of Authorized QMTH Partners can be found at Qualified Multitenant Hosting Partner. The customer may only deploy Windows 10 desktops (Creators Update or later versionsoftware) using Azure AD-based activation. Windows 10 Multitenant Hosting rights are not provided with any device-based licenses and are only available with Windows Enterprise E3/E5 subscriptionlicenses and Windows VDA E3/E5 subscription licenses on a per user basis. (Licenses acquired through all programs are eligible)Note: Microsoft 365 licenses that include Windows 10 Enterprise E3/E5 are only eligible if the user is the primary user of a device with a Qualifying Operating System.•Windows Virtual Desktop (WVD) in AzureWVD is a desktop and app virtualization service running in Azure and provides licensed users access to Windows 7 and Windows 10 virtual machines. In addition to the eligible per user license, you only pay the base compute and storage costs in Azure. You can license users for WVD rights with WindowsEnterprise E3/E5 subscription licenses, Windows VDA E3/E5 subscription licenses, or Microsoft 365suite license on a per user basis. (Licenses acquired through all programs are eligible.)Note: Microsoft 365 licenses are eligible in all cases.Licensing users for Windows Enterprise E3/E5 subscription or Windows VDA E3/E5 subscription on a per user basisYou have the choice to license your users—instead of devices—for Windows 10 Enterprise E3/E5 subscription or Windows VDA E3/E5 subscription on a per user basis. If the primary user’s primary work device is already covered for Software Assurance for the Windows desktop operating system or Windows VDA subscription on a per device basis, you can acquire a Windows Enterprise E3/E5 per User Add-on or Windows VDA E3/E5 per User Add-on, which gives you all of the benefits of Windows per User or Windows VDA per User license at a price that recognizes your existing investment.Here’s an overview of the requirements for each per user option:For more information about Windows Software Assurance and Windows VDA subscription options, refer to the Commercial Licensing Reference Guide for Windows.Comparing Windows Virtualization rightsSome differences exist between the Windows Virtualization Rights granted depending on whether you are licensed for Windows Software Assurance or Windows VDA subscription and whether you are licensed on a per device or per user basis.The following table provides an overview of the Windows Virtualization Rights by license type.The following table below provides details of the Windows Virtualization Rights by license type.ScenariosThe following business scenarios can help you understand how you can license the Windows desktop operating system in your environments on servers dedicated to you. If the Dedicated Servers are under the management or control of a third party, they are subject to the Outsourcing Software Management terms. Notwithstanding anything to the contrary in the Outsourcing Software Management terms, Customer’s Windows VDA E3 and E5 Licensed Users may remotely access Windows software under these Remote Virtualization rights on any Listed Provider’s Servers dedicated to Customer’s use.Note: These examples are focused on scenarios for customers with Windows Software Assurance and/or Windows VDA subscription. They do not necessarily specify all licenses needed for the scenario. For example, Users or Devices also need to license for remotely accessing a VDI/Session desktop or application on Windows Server, if used, with the corresponding access licenses, i.e. Windows Server CALs and RDS CALs. Some scenarios may also require Microsoft Office Professional Plus licenses. For simplicity, those separate licensing requirements are not always included.Virtual Desktop Infrastructure Desktops The Windows desktop operating systemruns within virtual machines in the datacenter, on servers dedicated to thecustomer, on a hypervisor platform (suchas Hyper-V technology). These virtualdesktops are accessed from either PCs, thinclients, or other devices.Because they are accessing the Windowsdesktop operating system running withinvirtual machines, the devices or users wouldneed active Windows Software Assurance,Windows VDA subscription, or WindowsE3/E5 licenses acquired through an eligibleprogram (see above).Remote Desktop SessionHost/Terminal Services Session Virtualization “Desktops”A Windows Server operating system (suchas Windows Server 2019) is shared acrossmultiple users via Remote Desktop SessionHost running applications like MicrosoftOffice Professional Plus 2019. Either PCs,thin clients, or other devices access thesesessions.Because the devices access a WindowsServer operating system only, they do notneed any additional licensing for theWindows desktop operating system.However, the devices/users need to belicensed for the session technology (such asWindows Server CALs and Remote DesktopServices [RDS] CALs). The devices accessingthe sessions also need licenses for OfficeProfessional Plus.Mixed VDI and Session Desktops Some users access VDI desktops and someaccess session-based desktops orapplications. In some cases, a particulardevice may need to access bothsimultaneously (for example, a user logsinto a VDI desktop and then accesses aremote application or desktop through asession).Users or devices accessing Windows Clientand Windows Server sessions will need bothan eligible Windows 10 license and WindowsServer access licenses (Windows Server CALand RDS CAL).Roaming VDI Users A user’s primary device is a thin client atwork that has been licensed for VDI. Theuser also needs the flexibility to accesstheir VDI desktops from home or whiletraveling using their personal tablet device. The user needs a Windows VDA per User license— to allow access to up to four concurrent Windows virtual machines running in a data center from any device.Bring Your Own Companion Device (BYOCD) The company provides employees with aprimary work device covered by SoftwareAssurance for Windows, or Windows VDAsubscription and wants to allow employeesto bring their own companion devices(such as tablets) to work and access acorporate VDI form those devices.Because the primary work device is licensedfor Software Assurance for Windows orWindows VDA subscription, the companycan acquire a Windows Software Assuranceper User Add-on for the user, which allowsthat user to access a corporate VDI at workfrom any device.Bring Your Own Device (BYOD) The company decides to let users bringtheir own devices to work and sets up VDIdesktops for all users. Devices do not havea qualifying operating system (for example,they may be licensed for Windows 7 HomePremium). These users do not have accessto any other devices.The Windows VDA per User license wouldallow the user to access the VDI desktopsfrom any device.Contractor PCs Organization A contracts some work toorganization B and allows organization B’semplo yees to access organization A’s VDIdesktops through orga nization B’s PCs.Devices have a qualifying operating system(such as Windows 10 Pro). Organization A will need to license devices that organization B’s employees use to access organization A’s VDI d esktops with either Windows Enterprise per device with Software Assurance or Windows VDA per device subscription license; or license the users with Windows Enterprise E3/E5 subscription or Windows VDA E3/E5 subscription on a per user basis.Local Windows Virtual Machines An organization has a group of developerswho need to test an application acrossmultiple Windows images running in localvirtual machines on PCs running Windows10 Pro.The PC or the primary user of the PC needsactive Windows 10 Enterprise with SoftwareAssurance or Windows 10 Enterprise E3/E5subscription, which permits running up tofour virtual machines concurrently.© 2020 Microsoft Corporation. All rights reserved.This document is for informational purposes only. MICROSOFT MAKES NO WARRANTIES, EXPRESS OR IMPLIED, IN THIS DOCUMENT. This information is provided to help guide your authorized use of products you license; it is not your agreement. Your use of products licensed under your volume license agreement is governed by the terms and conditions of that agreement. In the case of any conflict between this information and your agreement, the terms and conditions of your agreement control. Prices for licenses acquired through Microsoft resellers are determined by the reseller.。
I-9 用户手册说明书

I-9 User Guide Online I-9 & E-VerifyProcessUpdated June 2023Table of ContentsOnline I-9 & E-Verify Process 2 I-9 Compliance 3 Section 1 – Employee Information 4 Accessing the System 11 New Hire Center 13 Section 2 – Employer Review 16 Photo Matching 22 Terminations 33 Special Circumstances 33Online I-9 and E-Verify ProcessAbout Electronic I-9s and E-Verify•Implemented to automate the process of documenting that each new employee is authorized to work in the United States•Complies with mandate from the Governor of Virginia to process all new hires and rehires through E-Verify•E-Verify allows employers to automatically determine eligibility of their employees to work in the United States•Online I-9 Management system is hosted by external vendor•Electronic I-9s are stored in a central database•Eliminates the need to complete a paper I-9 and submit to HRWhat is an I-9?• A form used to document verification of identity and employment eligibility of all employees (both citizen and non-citizen) hired to work in the United States after November 6, 1986•Required to comply with the Federal Immigration Reform and Control Act•Regulated by the U.S. Citizenship and Immigration Services (USCIS) division of Department of Homeland Securities (DHS)Some Penalties for Non-Compliance•Employers who violate the law may be subject to:o Civil fineso Criminal penalties (when there is a pattern or practice of violations)o Debarment from government contractso A court order requiring the payment of back pay to the individualdiscriminated againsto A court order requiring the employer to hire the individual discriminated against•More information is available at: /i-9-central/penaltiesI-9 ComplianceIs an I-9 Required?•Open Banner form PZII9HS for the employee•Does the employee have an E-Verify case number?o If NO, continue with I-9 processo If YES, open Banner form PWIEMPV•Review job start/end dates/last paid date•If there is a break in service or break in pay for more than one year, a new I-9 must be completed•For non-residents, the employment authorization documents could have changed - review carefully•Contact HR with questions if an I-9 is neededPWIEMPVTIPS: You can find the Last Paid Date on page PWIEMPVSection 1: Employee Information•Section 1 should be completed and signed by employee on or before the first day of work•Employee will receive two emails from **********************. One will have the link to the New Hire Center and the other will have the password to login. The password is only valid for the original login.*Please note, wage employees must have a job in Banner before they will be sent to the New Hire Center and receive these email*•Once logged in, employee will need to complete all forms in the New Hire Center before completing section 1 of the I9.Section 1:TIPS:•All fields are required EXCEPT:o Other Nameso Apt. Numbero Email Addresso Telephone Number•If the employee does not have a Middle Name, enter N/A•Foreign nationals without a Social Security number- check the “SSN Applied For”button below the Social Security number fieldTIPS:•Employee attests to citizenship•If number 4, An alien authorized to work until, is selected the new hire should indicate the “authorized to work until date” on the i9. The date should be listed on their form I-20, DS2019, or another form of work authorization.•If someone other than employee prepares section 1 on behalf of employee, thePreparer and/or Translator Certification must be completed•Click Continue to save•Review the data foraccuracy•Scroll to bottom of page•Employee signs the form by checking the attestation box•Employee’s initials must correspond to the name asit was keyed (not casesensitive)•If the employee hasmultiple first namesand/or last names, onlyenter the first, first nameinitial and the first, lastname initial•Click ContinueTIPS:•Print the receipt code page if section 2 will be completed by a remote completer. The remote completer will need the receipt number to pull up the I9.•New Hire will receive an email confirmation once Section 1 has been completed •Scroll to bottom of page to review acceptable documents to present for completingSection 2•Click continue to finish section 1TIPS:•List A document to prove identity and work authorization OR List B document to prove identity AND List C document to prove work authorization• A full list of acceptable documents can be found at https:///i-9-central/form-i-9-acceptable-documents•All documents must be original. Only exception is certified copy of birth certificate •All documents must be unexpired by the first day of work. For Foreign Nationals, Transfer Pending documents may not be used•Must present a document with a photo•Reminder – employee must present original documentation within three business days of starting workGetting access the I9 SystemFor employees needing access to the I9 system for processing purposes, departments need to complete the following steps:•Employer access only – for I9 access, complete the following steps:•Online Banner HR access request form on (https:///vt/prod/vtirm.irm_forms_main.entry) •Login and select Add/Change Administrative System Access•Enter employee’s ID and select Request additional access•Select Human Resources and check the Online I-9 option•Submit electronic form•Print copy for signature approval•Must be signed by employee AND dean, director, or department head•Send a signed copy to the HR Apps Team through the HR Dropbox (The dropbox link is located on )Completing Section 2 of the I9This section focuses on how to search for employees and complete section 2 of the I-9•Click on Login to New Hire CenterConsent to Information Release•Each time an I9 processor logs in, the Consent to Information Release screen will appear. Verify the VT Username and ID number, then click the SharebuttonNew Hire Center Welcome Screen•Click on Search Employee to verify all forms have been completed and Section 2 is ready to be completed•Enter First and Last Name, then press View•Verify Status says Document Complete - Waiting on Section 2 of I9•Click on the NameClick Complete I9•Verify the start date is the first day the employee began working. If the date listed is not the first day of physical work, please update this date.•Enter the VT ID. Do not include dashes•Visa type is not applicable to US Citizen•Select the document(s) presented by employee•Select documents from valid list of options provided in drop down list. The list provided will be based on the citizenship status indicated in Section 1•If employee is terminated before completing I-9, choose that option and continue•Click Continue to save•Examine documents and record verification information•Complete all fields provided•Click Continue to saveTIPS:•Fields may vary depending on documents presented•Click on Sample Document link to view valid examples of selected document type •Do not include dashes in Document number•If there is no Document number, include several zeros• Carefully review all information entered • Check the box stating you have read and agree with certification statement • Click Continue to saveE-Verify Status•Unique case number is assigned to I-9•I-9 verified against SSA and DHS databases•Receive initial status response within seconds•How to proceed depends on E-Verify status. One of the following messages will appear:o Employment authorized▪Employment authorized - with additional verification optional▪Employment authorized - with additional verification requested automaticallyo Photo matching requiredo Current I-9 is not eligible for verificationo SSA or DHS tentative non-confirmation; this status will be handled by the Central HR I9 Coordinators•Temporary initial responses, requiring more time or more steps include: o Initial verification not processed▪Review/Edit employee data (may indicate minor error/typo) o DHS verification in processo SSA or DHS continuanceo DHS referral to SSAo SSA/DHS case incomplete•I-9 wassuccessfullyadded•Next actiondepends onE-Verifyresponse•Always click“View CaseDetails” totakeappropriateaction•E-Verify has assigned a Case Number•Status at bottom of page shows Employment Authorized (If anything other than Employment Authorized or Manual Review is showing, please contact *********) •Case Resolved should be displayed at bottom of page•Logout or click Back to Compliance Center and proceed with another I-9Photo Matching•Required when employee presents any of the following eligibility documents: o U.S. Passport or Cardo I-551 Permanent Resident Card (green card)o I-766 Employment Authorization Document (EAD)•E-Verify requires I-9 administrators to match the photo provided with the one on file with the United States Citizenship and Immigration Services (USCIS)• A securely scanned copy of the photo document must be attached to the electronic I-9 as supporting documentation.•DO NOT ATTACH OTHER DOCUMENTS.Attaching Photos•Securely scan the image•Save the file with a name you will recognize•Attach the scanned image to the electronic I-9•Open the attached document to confirm legibility•Delete the file or encrypt it if retainedo Do not send any scanned documents to HRSECTION 2 – Uploading DocumentsTIPS:• Use List A to select US Passport or US Passport card, Permanent Resident Card, or Employment Authorization Document (EAD).• Attach both the front and back of the card. This can be attached as two separate documents• Click Continue to saveTIPS:• Examine the employee’s document(s) and record verification data • Enter Expiration Date (check box if there is not one)• Click Continue to saveTIPS:• Get started by uploading the image file• Select the Attach File link – Do not click on Upload I9. This will overwrite the currentI9 document in the fileTIPS:• Select document from list of valid options• Scroll to the bottom of the pageTIPS:• Select document from list of valid options• Be sure to use image files in one of the supported formats • Use the Choose File button to select from your computer • Click UploadTIPS:• An image of the attachment appears• Select Correct if this document does not have any errors • Select Incorrect if there are errors presentTIPS:• Notice theUploadStatus nowshows acheck mark• Press theFinishedbuttonTIPS:• E-Verify hascaught upand displaysthe PhotoMatchingstatus• Click viewcase detailsor scroll tothe bottom ofthe pageTIPS:• Verifylegibilityand closethe windowTIPS:• Click thePhotoMatchingbutton toproceed• Compare the photo shown to the photo on the ID cardSelect Yes:• If the photo on the document matches the photo on file• If there is no photograph in the database• Click Continue to proceedSelect No:• If the photo on the ID does not match the database• E-Verify response will be a Tentative Non-Confirmation• Notify *********• Click Continue to proceedSelect No Photo Displayed:• If not photo shows, click the No Photo Displayed button and click ContinueTIPS:• E-Verify has assigned a Case Number • Scroll to the bottom of the page• Make sure the case is closed• I-9 circumstances that may warrant terminationo Employee does not present documentation to complete Section 2 within three business days of the first day of worko Employee refuses to furnish a Social Security Number for E-Verify purposeso Employee elects not to contest a negative E-Verify finding• Complete Section 2 using the option at bottom of the Review and Verification page indicating that employee has terminatedSpecial Circumstances• SSN Applied For:o E-Verify requires employee’s social security number (SSN) on Section 1 in order to for the I9 to be Authorizedo Select the SSN Applied For option in the Employee Information and Verification section for someone who does not yet have a SSN. The I9 will bein a holding status until the SSN is providedo Employee MUST apply for an SSN and provide it to Payroll. Payroll will update the number in the I9 system and will submit to E-verify at that time• Receipts:o Employer may be required to accept a receipt in lieu of the List A, B, or C documento When receipt is presented, check the “Receipt” box next to the type of identification document on Section 2; a copy of the receipt should beattached to the I9Acceptable receipts an employee can present for identification• For Non-residents with a SSN - Always use the Non-everify location at beginning of semester!o Foreign nationals must be updated in the Federal SEVIS database before being processed in E-Verifyo If this is not done, submission to E-Verify needs to be delayed▪If individual’s “Applied for SSN” submission is automatically delayed▪If individual has an SSN, department must manually delay submission using the “non-E-Verify” locationo Complete Section 2 by entering the special non-E-Verify location, “000001”in the Location fieldo HR will follow up with the E-Verify process and updating the location data Directanyquestionsto:**********************。
Silver Telecom 2020 评估板用户手册说明书
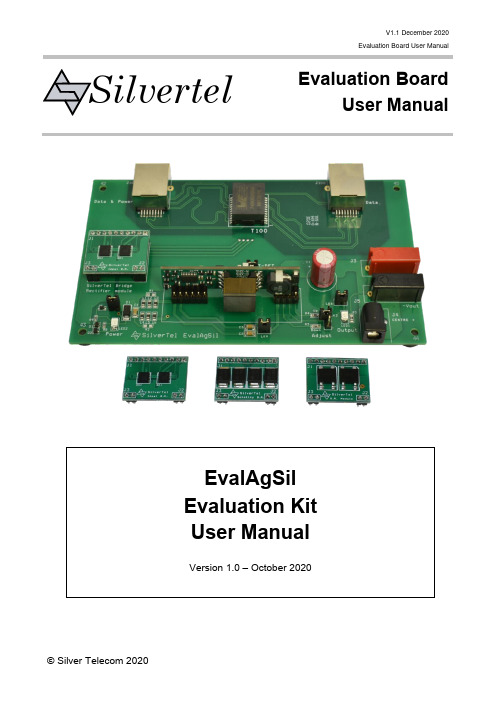
V1.1 December 2020Evaluation Board User ManualEvaluation BoardUser ManualSilvertelTable of Contents1Kit Contents (3)2Introduction (3)3Board Layout (3)Link Settings (3)3.13.2Compatible models (4)4Input (4)Diode Bridge Selection (4)4.14.2Input Signature (5)4.3PSE Detect (5)Output (5)4.44.4.1Output Adjust (6)Data Output (6)4.55Operation (7)5.1LED output (7)5.2EMI (7)6Test Setup (8)Data Throughput (8)6.17Additional information (8)8Schematic (9)9Bill of Materials (10)Table of FiguresFigure 1: EvalAgSil Board Layout (3)Figure 2 Basic Test Setup (8)1 Kit ContentsEvalAgSil Evaluation BoardBridge Rectifier ModuleSchottky Bridge Rectifier ModuleIdeal Bridge Rectifier Module2 IntroductionThis manual is intended to be a guide to using the “EvalAg Sil Evaluation Board” with one of Silvertel’s SIL (Single-In-Line) footprint PD (Powered Device) modules. The board is designed to handle 10/100/1000/10GBASE-T Ethernet data rates.This board has been designed to assist with evaluating the use of Silvertel's SIL format modules in an application; as such it has been design to pass through Ethernet data signals (10/100/1000/10GBASE-T) from the Midspan PSE (Power Sourcing Equipment) or PoE enabled switch connected to J100, onto the system connected to J101.3 Board LayoutFigure 1: EvalAgSil Board LayoutLink SettingsLK2 – Output Adjust SelectLK3 – AT-DET LED EnableLK4 –‘V’ cap EnableLK5 – Input Power LED EnableLK6 – Output Power LED EnableCompatible models4 InputOne of Silvertel’s PD modules fitted to t he EvalAgSil evaluation board will present a valid signature and classification request to an IEEE compliant PSE through its RJ45 connector J101.Diode Bridge SelectionThe EvalAgSil has the option to fit different bridge rectifier technologies. Supplied with the EvalAgSil are three bridge rectifier modules for evaluating the losses involved when using different rectifier technologies:∙Bridge Rectifier Module – featuring 2x DF01S bridge rectifiers∙Schottky Bridge Rectifier Module – featuring 8x SS36 Schottky rectifier diodes ∙Ideal Bridge Rectifier Module - featuring 2x FDMQ8205A MOSFET bridge rectifiersA simple method of utilising the most power output on a PoE system is to reduce the losses involved in the rectification. Rectification is required to enable the PD to be insensitive to the polarity of the power on the pairsets in a PoE system.Schottky rectifiers are an improvement over conventional bridge rectifiers due to their lower forward voltage drop, a greater improvement can be made by switching to an active bridge rectifier topology.The chosen bridge rectifier module should inserted into to EvalAgSil board using the two 2 pin and one 10 pin headers on the left hand side of the board before power is supplied to the board.Input SignatureThe EvalAgSil board will automatically direct the power from J101 through the bridge rectifier module to the input of the Silvertel module fitted into U1.This module will provide a 25K signature required to be powered from an IEEE compliant PSE.The EvalAgSil has been designed to be powered by any compliant IEEE802.3 PSE such as Silvert el’s Ag6120 PSE module.PSE DetectWhen U1 on the EvalAgSil board has been populated with a module that contains an ‘AT-DET’ feature, and it has detected it is being powered by an IEEE802.3 type 2 or greater PSE, the ‘at Flag’ pin will be pulled low, and this will cause LED3 to become illuminated on the EvalAgSil board.OutputThe output voltage will be present on both the DC10 connector, J4 and the banana plug terminals J3 and J5. J3 and the centre pin of J4 are the positive outputs, with the outer ring of J4 and J5 being the negative output.4.4.1Output AdjustBy default the nominal output voltage of the fitted module will be present on the output connectors. This can be adjusted up or down using the adjust connector, LK2.The EvalAgSil is fitted with two adjust resistors. The down adjust resistor R3, is fitted with a 68kΩ resistor. And the up adjust resistor R4, which is fitted with a 0Ω resistor. Depending on the module fitted the down adjust resistor, R3 may have to be replaced with a different value in order to provide the full down adjust stated in the corresponding datasheet.To increase the output voltage, insert a jumper to LK2 in the upper position, so that the link is between the middle and upper pin.To reduce the output voltage, insert a jumper to LK2 in the lower position, so that the link is between the middle and lower pin.If the output voltage needs to be set to a different value (within the adjustment range) then connect different value resistors in place of R3 (0Ω) or R4 (68K) and connect the jumper into the corresponding link setting.Note: ensure that the down adjust resistor is not shorted when connecting a module that has a higher stated resistance in the datasheet, as this could cause damage to the module.Data OutputAny data that is provided over the PI (Ethernet cable) connected to the Data & Power port, J100 will be transposed onto the Data output port, J101 via the data transformer.The data traces on the evaluation board have been designed to pass through10/100/1000/10GBASE-T Ethernet data signals. No processing or amplification of this signal will be performed on the evaluation board5 OperationTo ensure that the PSE does not apply power to a non-PoE enabled device the output port first checks for a valid PoE signature. If the PSE does not see a valid signature then it will disconnect, wait approximately 2 seconds then try again. Once a valid signature has been detected the PSE will then perform classification to determine the power requirement of the PD, only after this has occurred will the PSE supply power to the powered device.LED outputThere are three LEDs fitted to the EvalAgSil board, each of these can be disabled by removing the associated link jumper.EMIThe EvalAgSil contains many of the recommended components for preliminary EMI testing of an application.‘V’ capacitors, C2 & C3, can be enabled by inserting a jumper on to LK4.The board is fitted with ferrite beads, L1-6; if these are not required they can be effectively removed from the circuit by fitting R1 and R2 with 0 resistors.With some of the newer Silvertel module designs an additional EMI filtration method is to fit a 68nF capacitor to C4. Silvertel recommend that this capacitor is rated to 250V so that it retains more of the rated capacitance in the operating voltage range.6 Test SetupFigure 2 shows the basic set up using the EvalAgSil evaluation board powered bySilvert el’s E valAg6120 PSE.The equipment required: -EvalAgSil fitted with compatible Silvertel PD Sil Module.EvalAg6120 or other IEEE802.3 compliant PSEPower supply unit, +44-57V output e.g. 60V bench power supplyCAT5e or greater cablesApplication CircuitOptional equipment: -Data source e.g. PCFigure 2 Basic Test SetupData ThroughputTo pass data via the Evaluation boards, the data input (e.g. Internet) can be connected to J100 on the EvalAg6120 Board using a cat5e cable. The data is then passed through the data transformer, where power is added and sent out via connector J101 of theEvalAg6120 Board. The Data and power is extracted through J101 of the EvalAgSil board and then divided into its separate power and data through the data transformer. The data output is then available from J100 of the EvalAgSil Board, which can then be connected to the application device.7 Additional informationFull operating conditions and features of the Silvertel module set can be found in the relevant product datasheet, available from .8 Schematic9 Bill of Materials。
Agile Product Lifecycle Management管理指南说明书
A gile Product Lifecycle Management Administrator GuideRelease 9.3.6E71145-01January 2017Agile Product Lifecycle Management Administrator Guide, Release 9.3.6E71145-01Copyright © 2010, 2017, Oracle and/or its affiliates. All rights reserved.Primary Author: Oracle CorporationContributing Author: Claire-Marie CostanzaContributor:This software and related documentation are provided under a license agreement containing restrictions on use and disclosure and are protected by intellectual property laws. Except as expressly permitted in your license agreement or allowed by law, you may not use, copy, reproduce, translate, broadcast, modify, license, transmit, distribute, exhibit, perform, publish, or display any part, in any form, or by any means. Reverse engineering, disassembly, or decompilation of this software, unless required by law for interoperability, is prohibited.The information contained herein is subject to change without notice and is not warranted to be error-free. If you find any errors, please report them to us in writing.If this is software or related documentation that is delivered to the U.S. Government or anyone licensing it on behalf of the U.S. Government, then the following notice is applicable:U.S. GOVERNMENT END USERS: Oracle programs, including any operating system, integrated software, any programs installed on the hardware, and/or documentation, delivered to U.S. Government end users are "commercial computer software" pursuant to the applicable Federal Acquisition Regulation and agency-specific supplemental regulations. As such, use, duplication, disclosure, modification, and adaptation of the programs, including any operating system, integrated software, any programs installed on the hardware, and/or documentation, shall be subject to license terms and license restrictions applicable to the programs. No other rights are granted to the U.S. Government.This software or hardware is developed for general use in a variety of information management applications. It is not developed or intended for use in any inherently dangerous applications, including applications that may create a risk of personal injury. If you use this software or hardware in dangerous applications, then you shall be responsible to take all appropriate fail-safe, backup, redundancy, and other measures to ensure its safe use. Oracle Corporation and its affiliates disclaim any liability for any damages caused by use of this software or hardware in dangerous applications.Oracle and Java are registered trademarks of Oracle and/or its affiliates. Other names may be trademarks of their respective owners.Intel and Intel Xeon are trademarks or registered trademarks of Intel Corporation. All SPARC trademarks are used under license and are trademarks or registered trademarks of SPARC International, Inc. AMD, Opteron, the AMD logo, and the AMD Opteron logo are trademarks or registered trademarks of Advanced Micro Devices. UNIX is a registered trademark of The Open Group.This software or hardware and documentation may provide access to or information about content, products, and services from third parties. Oracle Corporation and its affiliates are not responsible for and expressly disclaim all warranties of any kind with respect to third-party content, products, and services unless otherwise set forth in an applicable agreement between you and Oracle. Oracle Corporation and its affiliates will not be responsible for any loss, costs, or damages incurred due to your access to or use of third-party content, products, or services, except as set forth in an applicable agreement between you and Oracle.ContentsPreface (xxv)Audience (xxv)Documentation Accessibility (xxv)Related Documents (xxv)Conventions (xxv)1 IntroductionWelcome to Agile PLM Administrator................................................................................................. 1-1 How to Find Documentation for Agile PLM................................................................................. 1-1 Documentation for the PLM Administrator....................................................................................... 1-1 Agile Configuration Propagation (ACP) Guide............................................................................ 1-1 Recipe & Material Workspace Administrator Guide.................................................................... 1-1 Getting Started with Agile PLM...................................................................................................... 1-1 PLM Solution-Specific User Guides................................................................................................ 1-2 Agile Product Lifecycle Management Solutions................................................................................ 1-2 What's New in Administrator................................................................................................................ 1-3 Features and Enhancements added in Rel. 9.3.6........................................................................... 1-3 SmartRules................................................................................................................................... 1-4System Preferences..................................................................................................................... 1-4 Features and Enhancements added in Rel. 9.3.5........................................................................... 1-4 Features and Enhancements added in Rel. 9.3.4........................................................................... 1-5 Features and Enhancements added in Rel. 9.3.3........................................................................... 1-5 Features and Enhancements added in Rel. 9.3.2........................................................................... 1-6 Features and Enhancements added in Rel. 9.3.1........................................................................... 1-7 Features and Enhancements added in Rel. 9.3.............................................................................. 1-8 Installation Test Notice...................................................................................................................... 1-8 2 Getting Started in AdministratorOverview.................................................................................................................................................... 2-1 Logging in to Agile Clients as an Administrator............................................................................... 2-1 Creating New Administrator Users...................................................................................................... 2-2 Dates and Times in Agile PLM.............................................................................................................. 2-3 Example............................................................................................................................................... 2-4 Administrator User Interfaces............................................................................................................... 2-4 Filtering Data in Java Client............................................................................................................. 2-4iiiAdministrator Nodes in Java Client................................................................................................ 2-4 Administrative Capabilities...................................................................................................... 2-7Guidelines for Implementing Agile PLM................................................................................ 2-8Example Nodes in Java Client................................................................................................... 2-8 Administration in Web Client.......................................................................................................... 2-9 Agile PLM Variables............................................................................................................................... 2-9 Default Value Variables.................................................................................................................2-10 $CURRENTREV Criteria Logic..............................................................................................2-10 Privilege Mask Criteria Variables.................................................................................................2-10 Workflow Assignment and Status Type Variables....................................................................2-11 Routing Manager Variables...........................................................................................................2-12 3 Administrator Functions in Web ClientOverview to Administrator in Web Client.......................................................................................... 3-1 Configuring the Dashboard................................................................................................................... 3-2 Tab Display Configuration.................................................................................................................... 3-2 Visual Themes.......................................................................................................................................... 3-3 Selecting Theme Options.................................................................................................................. 3-3 Branding Logo............................................................................................................................. 3-3Icon Motif..................................................................................................................................... 3-3Color Palette................................................................................................................................. 3-3Replacing the Oracle Logo......................................................................................................... 3-4 Modifying Style Schemes.................................................................................................................. 3-5 Specifying Colors in Hexadecimal Format.............................................................................. 3-6 Report Templates..................................................................................................................................... 3-6 Manage Report Template (AppliedTo Choice).............................................................................. 3-7 Dynamic and Static Templates......................................................................................................... 3-7 Creating Report Templates............................................................................................................... 3-7 Reports Unsupported by BI Publisher............................................................................................ 3-8 Logging Configuration............................................................................................................................ 3-8 Cache Health Monitor............................................................................................................................. 3-9 How the Cache Health Monitor Works.......................................................................................3-10 Buttons on Cache Health Monitor Page...............................................................................3-10 Automatic Synchronization using Java Client Administrator.................................................3-11 Logging and Debugging Errors....................................................................................................3-11 Deleting Objects in Agile....................................................................................................................3-13 4 Administrator Functions in Java ClientAPI Name................................................................................................................................................... 4-1 API Name field in Java Client.......................................................................................................... 4-1 Administrator Reports............................................................................................................................. 4-2 Utilities on Admin Toolbar.................................................................................................................... 4-4 Sending Email to Users..................................................................................................................... 4-4 Global Replace.................................................................................................................................... 4-5 Global Replace Properties.......................................................................................................... 4-5 History Tracking....................................................................................................................................... 4-6 Object History and Administrative Object History...................................................................... 4-7 ivAdministrator History....................................................................................................................... 4-7 Purging Administrator History................................................................................................ 4-8 History of Deleted Objects................................................................................................................ 4-8 Deleting Objects in Agile................................................................................................................... 4-9 Administrator Import and Export......................................................................................................4-10 Encoding Types...............................................................................................................................4-10 Administrator Export.....................................................................................................................4-11 Administrator Import.....................................................................................................................4-11 Process Extensions Library..................................................................................................................4-12 Multiple Language Support................................................................................................................4-12 Administrator Data that is Supported for Multi-Language Capability..................................4-13 Supported Administrator Nodes...........................................................................................4-13Data Settings.............................................................................................................................4-13Workflow Settings...................................................................................................................4-14User Settings.............................................................................................................................4-14System Settings.........................................................................................................................4-14Supported Predefined System Objects..................................................................................4-15 Administrator Data that is Not Supported for Multi-Language Capability..........................4-15 Configuring a System for Multi-Languages................................................................................4-16 5 ClassesConfiguring Business Objects with Agile PLM Classes.................................................................. 5-1 Agile PLM Class Structure..................................................................................................................... 5-1 Routable and Nonroutable Objects................................................................................................. 5-2 Object Types in Agile PLM............................................................................................................... 5-3 Viewing Agile PLM Classes............................................................................................................. 5-3 Agile PLM's Installed Routable Object Types................................................................................... 5-3 Agile PLM's Installed Nonroutable Object Types............................................................................ 5-6 Disabling Object Types...................................................................................................................... 5-9 Customizing Lifecycle Phases............................................................................................................... 5-9 Modifying a Lifecycle Phase..........................................................................................................5-10 Adding a Lifecycle Phase...............................................................................................................5-10 Removing a Lifecycle Phase..........................................................................................................5-11 Configuring Subclasses.......................................................................................................................5-11 Before You Begin.............................................................................................................................5-12 Viewing Subclass Properties.........................................................................................................5-12 Changing the AutoNumber Source Property.............................................................................5-13 Preventing Manual Number Assignment...................................................................................5-13 Changing a Subclass Name or Description.................................................................................5-14 Changing the Site-Specific BOM Property..................................................................................5-14 Creating a New Subclass................................................................................................................5-15 Deleting a Subclass..........................................................................................................................5-15 Configuring Tabs..................................................................................................................................5-16 About Page Two Tabs.....................................................................................................................5-16 About Page Three Tabs..................................................................................................................5-17 Showing, Hiding, or Renaming a Tab..........................................................................................5-17 Modifying the Format of Tabs............................................................................................................5-18vModifying Attribute Order on a Form Tab, Single Column.....................................................5-18 Multi-Column Layout on a Web Client Form Tab..............................................................5-19Attribute Input Width Setting................................................................................................5-20Two-Column Attribute Order................................................................................................5-20Thumbnails on Two-Column Form Tabs.............................................................................5-21 Modifying Attribute Order on a Table Tab.................................................................................5-22 Designing a Page Two or Page Three Tab...................................................................................5-22 About the Page Two Create User Attribute.........................................................................5-23 Guidelines for Designing Page Two and Page Three Tabs.......................................................5-23 Preparing Page Two or Page Three Attributes....................................................................5-23Before You Begin......................................................................................................................5-24Stage II: Setting Up the Tab....................................................................................................5-25Field Tab Order........................................................................................................................5-25Using Heading Attributes.......................................................................................................5-25Removing a Page Two or Page Three Tab...........................................................................5-26 About Attributes, Flex Fields, and Read-Through Fields.............................................................5-27 User-Defined Flex Fields................................................................................................................5-27 Where user-defined flex fields are fully supported:...........................................................5-28Where user-defined flex fields are partially supported:....................................................5-29Where User-Defined Flex Fields cannot be Used................................................................5-29 Read-Through Fields......................................................................................................................5-29 Read-Through Fields Made Consistent in Items and Changes.........................................5-30Read-Through Fields on the BOM and Manufacturers Tabs............................................5-30 Defining Attributes...............................................................................................................................5-31 Recognizing Attribute Types.........................................................................................................5-32 Defining Attribute Properties........................................................................................................5-33 An Exception involving Required Fields in Object Modification.....................................5-39Image Attributes......................................................................................................................5-39Numeric Attribute and Money Attribute Display Formats...............................................5-39Hidden Date Attribute Sources of the Routed Date on Workflow Routings Tab..........5-40 Defining LargeText Attributes......................................................................................................5-41 HTML Features........................................................................................................................5-43 Configuring Attributes.........................................................................................................................5-45 Modifying Attributes......................................................................................................................5-45 Matching the Properties of Attributes Common to Several Tabs............................................5-46 Setting Default Values....................................................................................................................5-46 Showing or Hiding an Attribute on a Tab...................................................................................5-47 Editing a Field Label or Table Column Name............................................................................5-47 Using Custom Icons for Subclasses...................................................................................................5-48 Smart URL Quick Access to Objects, Files, and Searches.............................................................5-48 6 Character SetsAvailable Character Sets......................................................................................................................... 6-1 Creating a Character Set.......................................................................................................................... 6-2 Modifying a Character Set...................................................................................................................... 6-3 vi7 ListsOverview.................................................................................................................................................... 7-1 Routing Manager Lists............................................................................................................................ 7-1 Creating Custom Lists and Adding to Lists................................................................................... 7-2 More Kinds of Lists.................................................................................................................................. 7-4 Simple Lists......................................................................................................................................... 7-5 Cascade Lists....................................................................................................................................... 7-6 Dynamic Lists..................................................................................................................................... 7-6 Criteria Association to Dynamic Lists..................................................................................... 7-7 Configuring Lists...................................................................................................................................... 7-7 Setting Default Values for Lists........................................................................................................ 7-9 Display Type for Lists in Web Client....................................................................................... 7-9 Failure Mode Lists.............................................................................................................................. 7-9 Creating Cascade Lists..........................................................................................................................7-10 8 Process ExtensionsOverview to Process Extensions............................................................................................................ 8-1 Using the Process Extension Library.................................................................................................... 8-2 Assigning Process Extensions to Classes............................................................................................. 8-4 Assigning Process Extensions to Workflow Statuses........................................................................ 8-4 9 AutoNumbersHow AutoNumbers Are Used................................................................................................................ 9-1 Modifying an AutoNumber Source................................................................................................. 9-1 About AutoNumber Sources.................................................................................................................. 9-2 Configuring AutoNumber Sources....................................................................................................... 9-4 Changing an AutoNumber's Prefix or Suffix................................................................................. 9-5 Changing Where an AutoNumber Source Is Used....................................................................... 9-5 Custom AutoNumbers...................................................................................................................... 9-6 Timeout................................................................................................................................................ 9-6 Creating a New AutoNumber Source................................................................................................... 9-6 Before You Begin................................................................................................................................ 9-6 Deleting an AutoNumber Source.......................................................................................................... 9-7 10 CriteriaAbout Reusable Criteria......................................................................................................................10-1 Exploring Reusable Criteria................................................................................................................10-1 Viewing Reusable Criteria.............................................................................................................10-2 Criteria Windows and Tabs...........................................................................................................10-3 Creating a New Criteria.......................................................................................................................10-3 Modifying an Existing Reusable Criteria.........................................................................................10-5 Using Affected Items Tab Fields in Reusable Criteria..................................................................10-5 How Changes Are Matched When Reusable Criteria Specify Affected Items Tab Fields...10-5 Difference Between "Item" and "Part" in Affected Items Names.............................................10-6 More about Affected Items: Adding Approvers, Acknowledgers, and Observers...............10-6vii。
非金融企业债务融资工具公开发行注册文件表格体系(2020版)
非金融企业债务融资工具公开发行注册文件表格体系(2020版)中国银行间市场交易商协会2020年4月目录使用说明 (1)第一部分注册文件清单 (10)1. 注册文件清单(Y表) (10)2. 备案文件清单(YB表) (11)3. 文件说明 (13)4. 注意事项 (21)第二部分信息披露表格 (24)1. M系列表(募集说明书信息披露表) (24)1.1 基础表格 (24)1.1.1 M系列表目录 (24)1.1.2 M表(募集说明书信息披露表) (24)1.1.3 BM表(补充募集说明书信息披露表) (43)1.1.4 XM表(项目收益票据募集说明书信息披露表) (61)1.2 补充表格 (86)1.2.1 补充表格目录 (86)1.2.2 情形补充表格 (91)MQ.1表(涉及安全生产信息披露表) (91)MQ.2表(涉及非标准无保留意见审计报告信息披露表) (92)MQ.3表(涉及关联交易信息披露表) (92)MQ.4表(涉及重大资产重组信息披露表) (93)MQ.5表(涉及信用增进信息披露表) (100)MQ.6表(涉及突发事件信息披露表) (101)MQ.7表(涉及重要事项信息披露表) (103)MQ.8表(涉及股权委托管理信息披露表) (108)MQ.9表(企业涉及自律处分信息披露表) (112)1.2.3 产品补充表格 (114)MC.1表(供应链债务融资工具信息披露表) (114)MC.2表(永续票据信息披露表) (116)MC.3表(创投债务融资工具信息披露表) (122)MC.4表(超短期融资券信息披露表) (125)MC.5表(保障性安居工程债务融资工具信息披露表) (126)MC.6表(绿色债务融资工具信息披露表) (132)MC.7表(住房租赁债务融资工具信息披露表) (134)MC.8表(扶贫票据信息披露表) (136)MC.9表(双创专项债务融资工具信息披露表) (137)MC.10表(“债券通”专项募集说明书信息披露表) (145)MC.11表(并购票据信息披露表) (146)1.2.4 行业补充表格 (149)MH.1表(房地产企业信息披露表) (149)MH.2表(城市基础设施建设企业信息披露表) (155)MH.3表(煤炭企业信息披露表) (163)MH.4表(制药企业信息披露表) (165)MH.5表(水泥企业信息披露表) (167)MH.6表(钢铁企业信息披露表) (169)MH.7表(电力企业信息披露表) (171)MH.8表(土木建筑企业信息披露表) (173)MH.9表(高速公路企业信息披露表) (175)MH.10表(港口企业信息披露表) (177)MH.11表(航空企业信息披露表) (180)MH.12表(机场企业信息披露表) (181)MH.13表(融资租赁企业信息披露表) (183)MH.14表(旅游企业信息披露表) (187)MH.15表(新闻与出版企业信息披露表) (191)2. C表(财务报告信息披露表) (193)3. F系列表(法律意见书信息披露表) (197)3.1 基础表格 (197)3.1.1 F系列表目录 (197)3.1.2 F表(法律意见书信息披露表) (197)3.1.3 XF表(项目收益票据法律意见书信息披露表) (202)3.2 补充表格 (210)3.2.1 FH.1表(城市基础设施建设企业法律意见书信息披露表) (210)4. P系列表(评级报告信息披露表) (213)4.1 基础表格 (213)4.1.1 P表目录 (213)P.1表(主体评级报告信息披露表) (213)P.2表(债项评级报告信息披露表) (215)P.3表(信用增进机构主体评级报告信息披露表) (218)P.4表(跟踪评级报告信息披露表) (220)4.1.2 XP表目录 (222)XP.1表(项目收益票据主体评级报告信息披露表) (223)XP.2表(项目收益票据债项评级报告信息披露表) (225)XP.4表(项目收益票据跟踪评级报告信息披露表) (227)5. Z系列表(信用增进信息披露表) (231)5.1 基础表格 (231)5.1.1 Z系列表目录 (231)5.1.2 Z.1表(信用增进函信息披露表) (231)6. T表(受托管理协议信息披露表) (233)7. FA表(发行方案信息披露表) (235)8. SG表(申购说明信息披露表) (239)9. FQ表(发行情况公告信息披露表) (242)10. 其他 (243)10.1 XS表(项目收益评估预测报告信息披露表) (243)10.2 GP表(绿色评估报告信息披露表) (245)第三部分第一、二类企业表格范例 (249)1. 第一、二类企业注册报告 (249)2. 第一、二类企业注册文件清单 (255)3. 第一、二类企业募集说明书 (256)第四部分行业分类说明 (274)1. 行业分类填写说明 (274)2. 附件1:Nafmii行业分类 (276)使用说明一、表格体系的基本内容《非金融企业债务融资工具公开发行注册文件表格体系》包括注册文件清单、信息披露表格等,具体如下:(一)注册文件清单注册文件清单(Y表、YB表)列示企业注册或备案发行债务融资工具应向交易商协会提交的要件。
Webasto T91 Telestart操作说明书
Operating Instructions T91 Telestart1About this document1.1Purpose of the documentThese operating instructions are part of the product and provide the user with information on the safe operation of the Telestart T91.All the functions of the control element are explained in these operating in-–Before operating the Telestart T91, carefully read and follow these operating instructions as well as the operating instructions for the heater.–Hand over the data carrier (e.g. CD or DVD) and the quick start guide(s) to the subsequent device owner or user.1.3can be requested from Webasto. Texts with the symbol refer to technicalfeatures. Texts with the symbol orof accident or injury. Text with the symbolwith the symbol describes an action.2Warranty and liabilityWebasto shall not assume liability for defects or damage that are the result of the installation and operating instructions being disregarded. This liability exclu-sion particularly applies for:–mechanical damage to the equipment–installation by untrained personnel–failure to comply with inspection and service instructions–conversion of the unit without permission from Webasto–improper use–repairs not carried out by a Webasto service workshopGeneral safety informationThe control element Telestart T91 is currently approved for the following ap-plications:Switching Webasto water or air heaters on and off.5Overview1Operating indicator (LED)2Switch "ON" push button3Switch "OFF" push buttonFig. 1: Operation exampleAn optimum signal transmission is achieved in an open area or from elevated locations. This makes it possible to operate the parking heater at distance of approximately 1000 m from the vehicle.When pressing the transmitter, hold it vertically upwards and do not cover the top (see figure).If you determine, since there is no feedback, that the operating signal has not reached the vehicle, it frequently helps to change your location by a few7Setting up a vehicle heating systemu Before switching on the heater (with the ignition on), set the vehicle heating system to “warm”.uu Press and hold the ON and OFF push buttonssimultaneously.The operating indicator lights up. The operatingmode is displayed:–Red for heating–Green for ventilationu Release the ON and OFF push button (or after 3seconds):The operating indicator goes out.The operating time of the heater or vehicle fan can be set on the transmitter in 10-minute increments. The operating time is set to 30 minutes at the factory.Check the operating timeu Briefly press the ON and OFF push button simul-taneously 3x consecutively.The LED flashes according to the operating time.Count the number of flashing pulses. The corres-ponding operating time is specified in the table.Also count the first flashing pulse that appears im-mediately after the third time the ON and OFF pushbutton is pressed.Setting the operating timeu Briefly press the ON and OFF push buttons simultaneously 3x consecutively. The LED flashes according to the set operating time (see table).u Press the OFF push button within 10 seconds after the operating time indic-ator lights up. The operating indicator flashes according to the next operat-ing time.u Press the OFF push button until the operating indicator flashes according to the desired operating time.üHold the hand-held transmitter vertically upwards.u Press the ON push button (> 1 sec.) until the op-erating indicator lights up.The operating indicator lights up (confirmation of re-ception). The operating indicator then flashes untilthe set operating time is complete. (See "Operatingtime on page 5").üThe parking heater or parking ventilation mode isdisplayed on the push button.u Press the push button (switch the heater or vent-ilation on or off)operating modeu Briefly press the ON and OFF push button 2xwithin 1 second.The operating indicator changes colour. During thenext time when the hand-held transmitter is oper-ated, the heater operates in the selected operatingmode until the operating mode changes. See "Op-erating mode indicator on page 5".12Switching off the heaterüThe operating indicator flashes (the heater is op-erating).u Press the OFF push button until the operating in-dicator lights up (approx. 1 sec.). Afterwards, theoperating indicator goes out. See also "Switchingon the heater on page 6"The hand-held transmitter must be taught on the Telestartmodule in the vehicle.13.1Determining the installation position of the fuse Depending on the heater and its installation or application, the control element fuse Telestart T91 is installed in the engine compartment or the vehicle interior.üThe installation position is noted in the installation instructions during install-ation.u Determine the correct fuse installation position of the Telestart T91 in the vehicle.13.2Teaching the unitu Install the battery in the hand-held transmitteru Determine the fuse installation position of theTelestart module (image serves as an example, inthe heater's wiring harness)u Pull the fuse of the Telestart moduleu Reset the fuse (do not wait longer than 5 s)u Press the OFF push button after 2 s (do not waitfor longer than 6 s). The hand-held transmitterhas now been taught.Battery for hand-held transmitter14.1Hand-held transmitter disposalBatteries and electronic devices are subject to the current versions ofthe European Directive 2006/66/EC or 2002/96/EC and must not be disposed of as household waste.Every consumer is therefore legally obligated to dispose of batteriesand used/scrap electronic devices in the marked recycling containersat a waste collection point or return to retail trade. Return is free of charge.Dispose of packaging in corresponding recycling container in accordance with national regulations.14.2Changing the hand-held transmitter batteryu Ensure the correct polarity when inserting the bat-tery into the hand-held transmitter.14.3Hand-held transmitter battery statusu Press the ON push button (or OFF push button).taught. See "Switching on the heater on page 6".Lights orange for 2 seconds Almost spent . Very cold.–Battery is almost spent; re-place it as soon as possible –Transmitter heats up.Flashes orange veryquickly for 5secondsBattery spent; replace battery.No display Battery spent; replace battery.14.4Restarting the hand-held transmitterTo extend the life of the battery, we recommend removing the battery from the hand-held transmitter if it is not to be used for a longer period of time.u Insert battery in the battery compartment of thehand-held transmitter.u Press the OFF push button six times for 2 secondsat approx. 2 second intervals.u Wait for approx. 2 minutes.Battery and hand-held transmitter:–Avoid damage.–Do not let it heat up over 70°C (e.g. direct sunlight).–Operating temperature between 0°C to +50°C.–Only store the unit in a dry and dust-free environment.–Protect against moisture–Store at room temperature.16Declaration of ConformityThe Telestart T91 was developed, manufactured, tested and supplied in accord-ance with the relevant directives, regulations and standards for safety, EMC and environmental compatibility.Webasto declares that the product Telestart T91 is manufactured and delivered in accordance with the directives and regulations.The complete CE Declaration of Conformity can be found in the download area at https://.These are the original instructions. The German language is binding.You can request your language if it is missing. The telephone number of each country can be found in the Webasto service centre leaflet or the website of the respective Webasto representative of your country.Webasto Thermo & Comfort SE Postfach 141082199 GilchingGermanyCompany address: Friedrichshafener Str. 982205 GilchingGermanyOnly within GermanyTel************IdentNo.93719B•7/18•Errorsandomissionsexcepted•©WebastoThermo&ComfortSE•218。
91ki_QAV-1_Viewpoints_(ENG)_2014 03
-1. Manufacturing Equipment Control -1. Final Inspection -2. Reliability Test / Adequacy Confirmation Test -1. Measuring Devices / QA Machines -1. Trouble Countermeasure and deviation Acceptance -1. Internal Quality Audit -1. Quality Education (For Each Level) -2. Department Quality Education / Training
-1. Contract -2. Audit / Evaluation / Guidance -3. Receiving Inspection (Delivered Parts) -4. Change Point Control -1. IPP Control -2. Lot Control -3. ID Control -4. Quality Deterioration Preventive Control -5. Honda-supply Parts Control
16 15 14 0 Code
3/3/2014 3/1/2013 3/9/2012 11/1/1993 Date
Part revision / implementation Part revision / implementation Full revision/implementation Newly established / published
-1. Manufacturing Condition Control -2. In-process Inspection -3. Improvement on Non-conforming Parts in Process -4. New Critical Control (Hazardous Substances)
- 1、下载文档前请自行甄别文档内容的完整性,平台不提供额外的编辑、内容补充、找答案等附加服务。
- 2、"仅部分预览"的文档,不可在线预览部分如存在完整性等问题,可反馈申请退款(可完整预览的文档不适用该条件!)。
- 3、如文档侵犯您的权益,请联系客服反馈,我们会尽快为您处理(人工客服工作时间:9:00-18:30)。
2020广西高校毕业生平均初次就业率达91%
2017广西高校毕业生平均初次就业率达91%
截至7月底,广西高校毕业生平均初次就业率达到91.74%,比2016年同期提高1.45个百分点,顺利完成今年的就业工作目标,初次就业率已连续3年达到90%以上,且均高于全国平均水平。
广西教育厅5日介绍,从就业人数总量来看,截至7月31日,广西2017届高校毕业生就业总人数达200269人,较2016年同期就业人数增加21885人。
从就业指标分析来看,广西2017届毕业生就业主要有以下几个方面特点:一、从各学科就业情况看,毕业生人数在500人以上的学科,本科毕业生就业率前三位的学科为艺术学、教育学、军事学;专科毕业生就业率前三位的学科为公共事业大类、轻纺食品大类、生化与药品大类。
其二,从本专科各专业初次就业情况看,毕业生人数在100人以上的专业,本科毕业生初次就业率前三位的专业是表演、资源勘查工程、给排水科学与工程。
专科毕业生初次就业率前三位的是铁道机车车辆、小学教育、临床医学。
三、从高校毕业生就业去向分布看,私营企业吸纳毕业生人数最多,为121281人,占就业总人数的60.56%。
而专科生在私营企业工作居多,占专科生就业总人数的65.55%。
毕业生在国有企业和医疗卫生单位就业的比例分别位居第2和第3位,分别占就业总人数的7.95%和6.43%。
在毕业生自主创业方面,2017届毕业生自主创业的人数为1172人,占就业总人数的0.59%。
其四、从高校毕业生就业区域分布来看,广西2017届高校毕业生主要以广西地区就业为主。
广西区内就业人数为131528人,占就业总人数的65.68%。
此外,在珠三角地区就业的毕业生人数为
30102人,占就业总人数的15.03%。
在广西区内,毕业生主要流向前三位的地市为:南宁、柳州、桂林。
最后,从本专科毕业生在不同行业的初次就业情况来看,毕业生就业人数在1000人以上的行业,本科毕业生就业的行业人数前五位的是“信息传输、软件和信息技术服务业”、“教育”、“卫生和社会工作”、“制造业”、“批发和零售业”;专科毕业生就业的行业人数前五位的是“建筑业”、“批发和零售业”、“信息传输、软件和信息技术服务业”、“教育”、“租赁和商务服务业”。
据介绍,2017年广西按照就业工作早启动、早计划、早布署、早落实的“四早”原则,通过实施“建机制、强帮扶、助创业、拓渠道、优服务”等五方面就业措施,全力推动高校毕业生就业创业工作。
据统计,截至7月31日,2017届广西离校未就业高校毕业生有18008人,其尚未就业原因主要分为4种情况,第一种为已有意向就业单位,正准备正式签订协议合同的1953人;第二种为有创业意愿准备创业45人;第三种为目前正在择业或不确定就业单位的有10859人;第四种为准备升学考试或因个人原因暂不就业的有5151人。
为促进离校未就业毕业生就业,广西教育部门将配合人社等部门对不同离校未就业毕业生群体,开展针对性的就业服务工作,并做好应届毕业生在离校阶段和离校后的信息衔接和服务接续工作,及时将毕业生信息数据反馈至人社部门,重点对困难毕业生和有就业意愿未就业的高校毕业生实施就业援助计划。