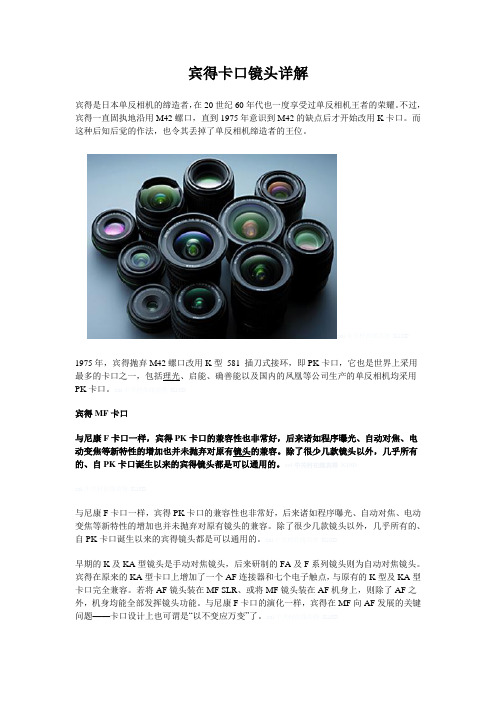
理光发布宾得HDPENTAX—DA20~40mm F2.8~4ED Limited DC WR镜头
宾得单反相机广告介绍(doc 10页)

宾得单反相机广告一、宾得相机——宾得-kr作品名:生活的色彩广告投放时间:2011/02/01媒介:网络媒体广告主:旭光学工业公司广告主介绍:宾得相机的制造商是旭光学工业公司。
其前身是旭光学合资公司,创立于1919年,主要生产眼镜和放映镜头。
1923年开始为小西六写真工业公司(即后来的柯尼卡公司)生产照相机镜头。
1938年正式改组成立旭光学工业股份有限公司,生产光学仪器和望远镜。
1951年公司试制成第一台照相机--Asahiflex,于1952年投入生产,这也是日本生产的第一台35mm单反相机,从此公司一直专门从事单反相机的生产。
旭光学工业公司的照相机生产虽然晚于日本的其他几家公司。
但是它制造了好几个照相机的世界第一和日本第一。
二、宾得-kr的基本介绍1、宾得-kr详细参数:2、产品定位:根据客户对数码相机的的使用状态和要求,把宾得相机的目标市场------时尚摄影爱好者细分为:个人用户----青年时尚人群(主要指年轻白领和青年学生):年轻白领生活时尚,收入丰厚有购买需求和购买能力;青年学生,特别是大学生,追求时尚,他们往往可以依托家里消费,也是有购买需求和购买能力的人群。
这个市场十分巨大,要作为我们公司的主打市场,加大对这一市场的广告投入等。
家庭用户:家庭需要用相机记录孩子的成长,家里发生的值得纪念的事情等,所以对于那些摩登时尚的家庭来说性能良好的宾得-kr是家庭数码相机不二的选择。
这个市场近年来一直在不断地增长,所有要注重适当增加对这部份市场的投入。
单位用户(单位宣传和摄影师):单位会议,单位活动需要选择报道和记录,宾得K-r画面清晰,是很好的选择;还有那些影楼摄影师,宾得KR良好的性能,精致的画面是他们的不错选择。
这个市场的客户关注我们相机的质量,在针对这部份目标市场做广告要注重加强产品质量。
3、产品主要特色(1)高画质逼真影像再现K-r具备新一代约1240万有效像素的CMOS影像传感器,能够保证高速的数据处理。
一篇整理宾得镜头的文章,不要再说镜头少了

一篇整理宾得镜头的文章,不要再说镜头少了宾德镜头大事记:1952 -1975罗口M42时代1975 PK口的K系列入市1977 M系列入市1983 A系列入市1987 F系列入市1991 FA系列入市2003 FA-J系列和DFA系列入市2004 DA系列入市一、罗口M42’太苦玛’时代罗口“太苦玛”镜头有很多批,名字也让人一团雾水,有Takumar,Auto-Takumar,s-m-c Takumar,SMC-Takumar等等。
还是让我们从它的发展史来了解一下“太苦玛”镜头吧。
1952年入市的第一批“太苦玛”罗口头是为ASAHIFLEX像机用的,它不是M42的而是37MM罗口的.1957年真正M42口的“太苦玛”上市,是为像机“Asahi Pentax”生产的,仍是58MM/2.4的标头.1958年随着像机“Asahi Pentax K”推出了“Auto-Takumar”。
镜头PG上第一次带有光圈顶针,实现了用像机控制镜头的光圈收缩。
代表做55/1.8的斑马标头.1960年起出了一种“Super Takumar” 镜头,对光圈顶针做了一些改善.1971年起Super-Multi-Coated Takumar镜头上市,也叫s-m-c Takumar,多层镀膜的时代来了.1972年起“SMC Takumar” 上市,它和S-M-CTakumar 的区别主要在对焦环上(有橡皮在上面),镀膜完全一样。
SMC Takumar很有收藏价值,许多K系列头的光学结构和SMC Takumar 完全一样,只是换了卡口罢了。
1975年起,又出了批PK口的Takumar廉价镜头,大部分是由别人代工的,镜头上不带SMC字样。
这种廉价“太苦玛”,成像很差,根本不值得购买和收藏。
有些JS就爱拿这类头来唬人。
大家淘头的时候要注意了。
Takumar M42系列镜头:SMC-Takumar 20/4.5,最小光圈16,11片10组,最近对焦0.2米,视角94度,重251克。
Ricoh XR-20sp 说明书

Ricoh XR-20sp(Never put a Ricoh program lens on a Pentax AF or Digital body, there is a pin on lens that will get stuck on the body. This includes lenses by Sears madeas PK/R, for both film bodies)This camera manual library is for referenceand historical purposes, all rights reserved.This page is © 2001 by M. Butkus, NJ.This page may not be sold or distributed withoutthe expressed permission of the producerOn-line camera manual libraryIf you find this manual useful, how about a donation of $3 to:M. Butkus, 29 Lake Ave., High Bridge, NJ 08829This will help me to continue to host this site,buy new manuals, and pay their shipping costs.It'll make you feel better, won't it?If you use Pay Pal, use the link below. Use the above address for a check, M.O. or cash.www.PayPal.me/butkusVenmo @mike-butkus-cameraThis page copyright byBack to my Camera manual web siteNOMENCLATUREMike Butkus ou=,email=***************,c=USATTACHING THE VIEWFINDER CAP AND STRAP MOUNT THE LENSSET LENS AT "P" POSITIONBatteries for useFour alkaline 1.5V batteries (LR44): Lasting about six months under normal use. Four silver oxide 1.55V batteries (SR44): Lasting about one year under normal use. Two lithium 3V batteries (CR-1/3N): Lasting about one year under normal use.* Also refer to "CARE OF BATTERIES."CHECK CONDITION OF BATTERIESINSERT THE FILM* When inserting the film in a cold place, the film leader may be hard and become brittle. Warm the film leader. with your hand in such conditions.* When inserting the film, it is more convenient to set the Shutter Speed Dial to a high speed rather than "P" (Program) while advancing the film to the number 1 position, to avoid a slow shutter speed (the slowest is 16 seconds) When you are ready for shooting, be sure to set the Shutter Speed Dial back to "P" (Program).SET THE FILM SPEEDHOW TO HOLD YOUR CAMERA* It is important to practice correct shooting position to avoid blurred or tilted pictures. PROGRAM AE PHOTOGRAPHYSPEED PROGRAM (SP) AE PHOTOGRAPHYto the brightness of the subject, and you can see the selected shutter speed as well as f-stop number in the viewfinder. If the brightness of the subject is not enough even at full-open aperture, a slower shutter speed is automatically selected to obtain correct exposure. In this case, the Shutter Speed Indicator blinks to warn that a slower shutter speed than 1/250 is selected.APERTURE-PRIORITY AE PHOTOGRAPHY2. Turn the F-Stop Ring to set the desired f-stop number.When the Shutter Speed Indicator is in the orange range, the shutter speed is too slow. Select a new f-stop number or mount the camera on a tripod or other suitable platform.* When overexposure mark (up arrow) or underexposure mark (down arrow) appears in the viewfinder, exposure is not correct. Turn the F-Stop Ring to change the f-stop number.MANUAL PHOTOGRAPHY1. Set the Shutter Speed Dial to the desired speed.(Webmaster - In ENGLISH this means: the solid bar is what the shutter is currently set at, you can change the camera's shutter speed dial and see the new setting in the viewfinder . You must change the shutter or aperture to get the solid bar [what the shutter is set on the camera] to overlap the blinking bar [what the light meter says is the correct exposure]. When the blinking bar and solid bar overlap, that is the correct exposure for whatever the lens is pointing at that moment. You can then change the shutter one speed and then adjust the aperture for more/less light so the two bars still overlap. EXAMPLE: if you get the two bars to overlap and the shutter speed is set at 1/125 at F16, you can change the shutter to 1/250 at F11, 1/500 at F8 or 1/60 atF22. (Note: you couldn't shoot slower than 1/60 with that lighting situation as this time as most lenses don't go smaller than F22. If you do have yet a smaller aperture, it would be 1/30 at F32)FOCUSINGREWIND THE FILM2. Unfold the Film Rewind Crank and turn it in the arrow direction. When the film has been completely rewound, the tension of the Film Rewind Crank is suddenly released and turns freely. (Fig. 32)3. Open the Back Cover and unload the film. (Fig. 33)* Never open the Back Cover until film rewinding is completed. Immediately close the Back Cover to save some of your shots if the Back Cover is opened by mistake during or before rewinding.* If you wind the film beyond the set number of frames, the Film Advance Lever may get stuck mid-stroke. The Film Rewind Release Button will not stay depressed in. If this occurs, rewind the film while holding the Film Rewind Release Button pressed down.SELF-TIMER PHOTOGRAPHY2. Press the Self-Timer Button. The Self Timer Indicator Lamp blinks. In 10 seconds, the shutter is automatically released. (Fig. 34)* To cancel the Self-Timer after it is set, press the Self-Timer Button again.* Use the Viewfinder Cap attached to the strap to cover the Viewfinder Eyepiece when using the Self-Timer in modes other than "Manual" to avoid incorrect exposure due to incident-light from the Viewfinder Eyepiece. (Fig. 35)* B (Bulb) setting is not available when the Self-Timer is used. FLASH PHOTOGRAPHY (PROGRAMMED FLASH PHOTOGRAPHY)Focus the subject and press the Shutter Release Button for shooting.* Refer to Operating Instructions for the flash unit for more creative techniques and technical details.FLASH PHOTOGRAPHY WITH RICOH FLASH UNIT OTHER THAN 300P & 2401. RICOH flash units (SPEEDLITE 400 and 180) can be used with XR-20SP with the Shutter Speed Dial set to "P" or "SP" and with the F-Stop Ring set to the designated number. When the flash is fully charged, the Flash Ready Indicator in the viewfinder will light up.* Shutter speed is automatically set to 1/125 sec.* You may set shutter speed and f-stop number manually but shutter speed must be slower than 1/125 sec., however, when you select shutter speed faster than 1/125 sec., the shutter speed is automatically set to 1/125 sec.* Refer to Operating Instructions for flash units for further details.FLASH PHOTOGRAPHY WITH "NON-DEDICATED" FLASH UNITS(General use of flash)1. Set the Shutter Speed Dial to 1/125 sec. when a generic flash unit is used.Note: Such units cannot be used in P mode.* Avoid use of flash units other than RICOH with special contact pins, incorrect exposure or other problems may result.* The Flash Ready Lamp does not light in the viewfinder if such a "non-dedicated" flash is used.* Refer to operating instructions for these flash units for further details.EXPOSURE COMPENSATIONExposure adjustment examples: AE LOCK* Press AE Lock Button a second time to cancel without taking a picture.* AE Lock can be used continuously if the AE Lock Button is kept pressed in.DEPTH OF FIELD (GENERAL GUIDE LINES)The depth of field can be checked in the following way.1. A depth of field indicator is engraved on every lens. When a 50 mm standard lens is set to f-16 and focused ata distance of 3 meters, the depth of field indicator is the scale of numbers on each side of mark, ranging from 16 to 16 (about 2m to em). Subjects in this distance range will be in good focus.(Fig. 45)B (BULB) SETTING* Use a tripod and cable release for Bulb photography to prevent unintentional movement of the camera. VIEWFINDER LIGHTINGPOWER ON-OFF SWITCHXR-20SP is designed to shut off the power supply automatically to save the battery energy, i.e. the electric supply will be shut off automatically when the camera is not in use for 1 minute even the Power ON-OFF Switch is ON. Press the Shutter Release Button lightly to turn ON the power. However, we suggest you should turn the Power ON-OFF Switch to the OFF position when the camera is not used.MEMO HOLDERINFRARED MARK* Always refer to infrared film operating instructions when the infrared film is used.XR WINDER 2XR DATA BACK2 When the Back Cover of XR-20SP camera is replaced by the XR Data Back, "Year, month and date" "Hour, minute, second" and "Stop watch" can be printed on your film.The automatic dating mechanism is incorporated into the XR Data Back. Once the date is set, no adjustment is necessary until 1999, because leap years and months with 31 or less days are automatically adjusted. When the switch is turned OFF, it can be used as digital watch. (Fig. 52) (Mike - I don't have one so I can't tell you if it is Y2K compliant)DIOPTRIC LENSESIf a dioptric lens is fitted, you do not have to wear eye-glasses when taking pictures. Slip the lens in the groove in the finder eyepiece.Dioptric lenses are available in 7 types: -4, -3, -2, -1, +1, +2 and +3 (Diopters) (Fig. 53)Note: Some forms of astigmatism etc. may make dioptric eyepiece correction impossible. Please check with your vision specialist for a recommendation based on your prescription.CARE OF BATTERIES1. After handling, do not leave sweat or grease on battery surface. This could result in poor contact. Wipe both ends of the battery with a clean cloth.2. Do not attempt to disassemble the batteries and do not throw them into fire or expose to high temperatures.3. When batteries are unloaded from the camera, keep them away from children. If a child should swallow a battery, immediately consult with a doctor. Battery chemicals are highly poisonous.4. Unload batteries when the camera is not used for a long period of time.CARE AND STORAGE OF YOUR CAMERA* Do not touch the lens or mirror with your fingers to clean them. Blow dust away with a blower or wipe them gently with soft cloth.* Shock, humidity or salt may make the camera malfunction. When you use your camera at the beach or in a place where chemicals are used, wipe it clean carefully.* Do not use chemically-treated dusters to clean the camera.* Do not expose your camera to temperature extremes.* Do not leave your camera in a car or at the beach or in high temperature conditions to prevent possible trouble. When using a tripod, do not try to force a long screw into the socket. (The screw length should be less than 5.7 mm)* Do not store your camera near a television, radio or other magnetic substance.* Remove batteries f ram your camera before storing it. Store it in a humidity and dust free place. SPECIFICATIONSType: 35 mm SLR with focal plane shutter and automatic electronic exposure control.Photographic Modes: Program automatic exposure mode, speed program automatic exposure mode, aperture-priority automatic exposure mode and manual exposure mode.Film Format and Frame Size: 35mm film, J135, 24 x36 mmLens Mount: RICOH system R-K mountShutter: Electronically controlled, vertically moving metal focal plane shutter.Automatic: 16 sec. to 1/2000 sec.Manual: 4 sec. to 1/2000 sec.,B (Bulb)Self-Timer:Operating time: 10 seconds View finder. During operation, red lamp blinks.Viewfinder:Field of view covers 93% horizontally and vertically.Magnification: 0.88X (with 50 mm F1.4 standard lens)Displays in the viewfinder:Exposure adjustment, AE lock, manual, program mode, overexposure mark, shutter speed indicator, long time exposure, underexposure mark, bulb, battery low warning signal, and programmed f-stop number. LED indicator: Flash ready indicator.Focusing: Diagonal split-image spot in microprism bandExposure Meter: TTL full open metering for center-weighted average light reading.Exposure Coupling Range: EV 0 to EV 18 (with ASA 100 film, 50 mm F1.4 standard lens)Film Speed Range: ISO 12 to 3200Accessory Shoe: Hot Shoe (with Flash Ready Signal Contact)Exposure Adjustment: Exposure adjustment system (+2 to -2, in 1/3 steps), AE lock system,Film Advance: Single stroke film advance lever, 135° winding angle and 35° stand-off. Automatic Film Advance: Possible with XR winder 2 or motor drive.Exposure Counter: Additive, automatic resetting.Film Rewind: Film rewind crank system.Mirror: Swing back type quick return mirror.Back Cover: Hinged type, opened by pulling up Film rewind knob.Other Functions: Interchangeable grip and direct contact for data back.Power Source: Four LR44 1.5V alkaline batteries, four SR44 1.55V silver oxide batteries or two CR-1/3N 3V lithium batteries.Dimensions: 137 (W) x 89 (H) x 51 (D) mm (Body only)Weight: 490g (Body only)。
宾得卡口镜头详解
宾得卡口镜头详解宾得是日本单反相机的缔造者,在20世纪60年代也一度享受过单反相机王者的荣耀。
不过,宾得一直固执地沿用M42螺口,直到1975年意识到M42的缺点后才开始改用K卡口。
而这种后知后觉的作法,也令其丢掉了单反相机缔造者的王位。
zol中关村在线宾得K10D1975年,宾得抛弃M42螺口改用K型581 插刀式接环,即PK卡口,它也是世界上采用最多的卡口之一,包括理光、启能、确善能以及国内的凤凰等公司生产的单反相机均采用PK卡口。
zol中关村在线宾得K10D宾得MF卡口与尼康F卡口一样,宾得PK卡口的兼容性也非常好,后来诸如程序曝光、自动对焦、电动变焦等新特性的增加也并未抛弃对原有镜头的兼容。
除了很少几款镜头以外,几乎所有的、自PK卡口诞生以来的宾得镜头都是可以通用的。
zol中关村在线宾得K10Dzol中关村在线宾得K10D与尼康F卡口一样,宾得PK卡口的兼容性也非常好,后来诸如程序曝光、自动对焦、电动变焦等新特性的增加也并未抛弃对原有镜头的兼容。
除了很少几款镜头以外,几乎所有的、自PK卡口诞生以来的宾得镜头都是可以通用的。
zol中关村在线宾得K10D早期的K及KA型镜头是手动对焦镜头,后来研制的FA及F系列镜头则为自动对焦镜头。
宾得在原来的KA型卡口上增加了一个AF连接器和七个电子触点,与原有的K型及KA型卡口完全兼容。
若将AF镜头装在MF SLR、或将MF镜头装在AF机身上,则除了AF之外,机身均能全部发挥镜头功能。
与尼康F卡口的演化一样,宾得在MF向AF发展的关键问题——卡口设计上也可谓是“以不变应万变”了。
zol中关村在线宾得K10D宾得AF卡口zol中关村在线宾得K10D早期的宾得AF镜头是机身驱动型,没有内部聚焦马达,镜筒上边有光圈调节环,内部也有CPU等,并无新奇之处。
1991年宾得推出了第二代智能化AF单反相机Z-10和Z-1。
这两款AF 单反相机的特点是具有自动变焦控制功能,因此也要求镜头半514 ??应该具有变焦马达。
宾得镜头群

FA*250-600/5.6
DA镜:
广角:
DA Fish-Eye 10-17mm F3.5-4.5 ED
DA 12-24mm F4.0 ED/AL
DA 14mm F2.8 ED
DA 16-45mm F4 ED
DA 18-55mm F3.5-5.6
Pentax-F* F系列AF大口径镜头,第一代AF镜头
Pentax-FA FA系列AF镜头,第二代AF镜头
Pentax-FA* FA系列AF大口径镜头,第二代AF镜头
Pentax-M M系列MF镜头
Pentax-M* M系列MF大口径镜头
Soft Focus 柔焦镜头
三公
smc PENTAX-FA 31mm F1.8AL Limited、
smc PENTAX-FA 43mm F1.9 Limited
smc PENTAX-FA 77mm F1.8 Limited。
三支超薄设计的“饼干”镜头
smc PENTAX-DA 21mm F3.2AL Limited、
M:M系列手动对焦镜头。
M.O.D:Minimum Object Distance 最近对焦距离。
PowerZoom:电动变焦。
SMC:Super Mluti Coating超级多层镀膜,宾得特有的镜头镀膜技术,抗炫光能力比较强。
Soft Focus:柔焦镜头。
SDM:超声波马达
*:*镜是宾得的高档专业镜头,就像佳能的L头一样,俗称星镜。
IF (Inner Focus) 内焦
内焦(InnerFocus)技术主要应用于中高档镜头,在对焦时只是镜头内部的一部分镜片组做整体移动,来实现对焦。这种镜头的特点是对焦时长度不变化,速度快,前片不转,有利于装滤光镜。同时也可以缩短最短摄影距离
宾得所有镜头分类及介绍DOC
一、常见名词缩写释义A:A系列手动对焦镜头。
AF/MF:手动/自动对焦全程切换。
AL:Aspherical非球面镜片。
CF Micro:continue focus micro全程微距。
DA:DA镜头是宾得专为APS-C画幅的数码单反相机设计的数码专用镜头,用绿圈标识,无法用在全画幅机型上。
ED:Extra-low Dispersion超低色散镜片。
F:宾得早期的AF镜头卡口。
FA:也是宾得的AF镜头卡口,比F卡口多了两个电子触点。
IF:Inter Focus内对焦。
Limited:限量版镜头,也是宾得高性能、高档次的镜头。
M:M系列手动对焦镜头。
M.O.D:Minimum Object Distance 最近对焦距离。
PowerZoom:电动变焦。
SMC:Super Mluti Coating超级多层镀膜,宾得特有的镜头镀膜技术,抗炫光能力比较强。
Soft Focus:柔焦镜头。
*:*镜是宾得的高档专业镜头,就像佳能的L头一样,俗称星镜。
实例说明:FA* 80-200 F2.8 ED镜头表示焦距为80-200mm、最大光圈恒定F2.8、使用了ED超低色散镜片的宾得专业星镜;而FA31mm F1.8 AL Limited 镜头表示焦距为31mm定焦、光圈F1.8、使用了非球面镜片的Limited限量版镜头。
DA★:内置超声波马达的数码单反相机专用镜头,优异的防尘防滴设计和宾得独创的SP超级防护涂层。
FA★:是宾得的高档AF镜头,就像佳能的L头一样,俗称星镜。
2012-7-30更新:为了方便宾友查阅、打印镜头资料,我收集整理了宾得220枚镜头的参数规格图片信息资料,望摄友们斧正,提出意见,我会随时更新。
一:APS定焦镜头-18枚, 374-391楼;二:APS变焦镜头-19枚, 392-410楼;三:35mmAF定焦镜头-31枚, 411-441楼;四:35mmAF变焦镜头-30枚, 442-471楼;五:35mmMF定焦镜头-54枚, 472-525楼;六:35mmMF变焦镜头-15枚, 526-540楼;七:120中画幅镜头-53枚, 541-593楼。
OLYMPUS 数码照相机 stulus 1000 1000 高级说明书
开启和关闭照相机电源
2 快门钮
拍摄图像
拍摄静止图像 将模式拨盘设为 K、 s、 g,然后轻轻按快门钮 (半按) 。聚焦和曝光被锁定时,绿 色灯点亮 (聚焦锁定) 。再按快门钮 (完全按下)拍摄图像。
绿色灯
P
聚焦锁定 - 锁定聚焦然后取景构图 聚焦锁定时取景构图,然后完全按下快门钮拍摄图像。
•绿色灯闪烁时,聚焦未正确调节。再次尝试锁定聚焦。
将模式拨盘设定 为 K 时选择拍摄模式。
P (程序自动) AUTO (全自动) 照相机根据被摄对象的亮度自动设定最佳光圈值和快门速度。 除光圈值和快门速度外,照相机还自动设定白平衡和 ISO 感光度。
可以使用功能菜单设定的其他功能 g “WB 调节图像色彩” (第 20 页) “ISO 改变 ISO 感光度” (第 21 页) “DRIVE 使用连拍” (第 21 页) “ESP/n 改变测量被摄对象亮度的区域” (第 21 页) 功能菜单
• 在超级近拍模式中无法使用变焦和闪光灯。
CS
13
按钮操作
0 2Y 钮
Y 开 Y 关 设定自拍定时器。 取消自拍定时器。
使用自拍定时器拍摄
按拍摄模式中的 2Y 选择打开和关闭自拍定时器。按 o 确认您所做出的选择。
• 完全按下快门钮后,自拍定时器指示灯点亮约 10 秒钟,并闪烁约 2 秒,然后拍摄图像。 • 要取消自拍定时器,按 2Y。 • 拍摄一张图像后,自拍定时器拍摄即被自动取消。
X
ฤ!Ꮬ!྇!ဟମ ဟମ
2006.11 2006 11.26 26 12 12:30 30
ฤ/Ꮬ/྇
ནሿ
MENU
ࢾ
OK
j. 设定所有项目后,按 o 钮。
• 为使设定更精确,请在时间信号到达 00 秒时按 o 钮。
优秀的M42镜头

优秀的M42镜头优秀的M42镜头20mm~24mm:最有名的就是前东德的Carl Zeiss Jena MC Flektogon 20mmF2.8了,它成像柔润、色彩清丽,而且做到F2.8的大光圈,极为难得!我则比较喜欢PENTAX SMC TAKUMAR 20mm F4.5镜头,它色彩鲜艳、成像锐利。
PENTAX做事比较严谨,没有追求大光圈,而是把重点放在了控制畸变上,别看是20mm广角,畸变控制却非常好。
PENTAX SMC TAKUMAR 24mm F3.5镜头有其同门师兄20mm F4.5的一切优点,而且24mm这个焦距比20mm好控制,所以是我使用率较高的镜头之一。
28mm~35mm:PENTAX SMC TAKUMAR 28mm F3.5镜头按说比24mm F3.5要好做,但据我实拍,它的成像却比不上24mm F3.5,不知是不是特例。
PENTAX SMC TAKUMAR的35mm镜头有两只,分别是35mm F3.5 和35mm F2。
35mm F3.5是我用过的最顺手、成像最优秀的M42接口35mm镜头。
35mm F2稍差,不够锐,颜色发黄。
Carl Zeiss Jena有一只MC Flektogon 35mm F2.4,成像也很不错。
50mm~55mm:俗话说“标头无弱旅”,我用过的不下10只M42标头没有一款差劲儿的,这里就不一一列举了。
85mm~135mm:这个焦距段常被称为人像镜头。
85mm镜头的价格曾被人为炒得极高,是性价比最不合理的镜头,但因为它最适合拍半身人像,还是极受用户的追捧。
Carl Zeiss Jena MC Pancolar 80mm F1.8和PENTAX SMC TAKUMAR 85mm F1.8都是难得一见的好镜头,价格当然也极高。
价格因素是我至今还没找到合适的85mm镜头试拍的原因。
135mm这个焦距很容易做,有许多杂牌小厂都生产过此焦距镜头,价钱也很便宜。