智能硬盘快速入门教程
大华DVR0404AH-UD智能ATM数字硬盘录像机 快速操作手册

2
目 录
安全注意事项.............................................................................................................................................................. 2 开箱检查和线缆连接 .................................................................................................................................................. 4 1. 2. 开箱检查 ......................................................................................................................................................... 4 硬盘安装 ......................................................................................................................................................... 5 2.1 2.2 3. 4. 5. 6. 非减震硬盘架硬盘安装步骤 ................................................................................................................... 5 减震硬盘架硬盘安装步骤 ....................................................................................................................... 5
智能硬盘录像机(IVR_5.0) 快速操作指南说明书

智能硬盘录像机(IVR_5.0)快速操作指南版本:1.0日期:2022.04IVR快速操作指南声明非常感谢您购买我公司的产品,如您有任何疑问或需求请随时联系我们,我们将竭尽全力为您提供技术支持本手机适用于我司所有IVR系列型号的网络高清录像机我公司将根据产品功能的增强或者变化来更新本手册相关内容,恕不另行通知安装注意事项1.设备应远离潮湿、高温、强磁环境,请置于通风良好的场所;在多雷地区使用时,请安装避雷装置,以避免雷击引起的主机故障或硬件烧坏2.请使用正规渠道购买的SATA硬盘(监控专用硬盘)3.请确保主机以及机箱接地避免被静电损坏,供电不能超出电源工作电压范围,推荐使用标配电源4.机器在运行过程中请不要强行直接断电,先通过系统软件关闭本机后再断开电源,防止硬盘损坏使用前请仔细阅读以下操作说明1.硬盘安装注:安装前请断开设备电源步骤1拧开机箱四周的螺丝,并取下上盖步骤2将硬盘螺丝孔位与机箱底板上的螺丝孔位对齐,并逐个拧上硬盘螺丝固定步骤3将硬盘数据线、电源线连接到主板上,另外一端连接到硬盘上步骤4盖好机箱上盖板,并用螺丝固定2.连接示意图3.云智AI远程连接注:使用云眼AI APP远程连接前,请确保IVR已接入Internet步骤1下载云眼AI APP在IVR开机向导手机监控或点击预览界面右上角P2P云服务按钮,或者右键菜单-手机监控,扫描二维码下载对应的云眼AI APP步骤2注册云眼AI帐号登陆帐号步骤3扫描二维码添加设备并预览进入IVR主界面后,您可以在预览界面右上角P2P云服务按钮或者右键菜单-手机监控中显示设备二维码,APP界面左上角扫一扫功能扫描二维码添加设备4.装箱单序号名称数量1网络硬盘录像机1台2快速操作指南1份3鼠标1个4电源适配器1个5硬盘数据线1条6硬盘电源线1条7硬盘固定螺丝若干说明:硬盘数据线根据盘位配对相应数目;硬盘电源线依据电源适配器是否外置配对相应数目,内置电源时不配。
移动硬盘的使用方法

移动硬盘的使用方法移动硬盘是一种便携式的数据存储设备,广泛应用于个人和商业领域。
它具有大容量、高速传输和便携性等优点,成为了人们备份和传输数据的首选设备之一。
然而,对于一些初次使用移动硬盘的人来说,可能会对其使用方法感到困惑。
本文将为大家介绍移动硬盘的使用方法,希望能够帮助大家更好地利用这一便捷的数据存储设备。
首先,当您购买一个新的移动硬盘时,第一件事就是要格式化它。
格式化是指对硬盘进行初始化操作,将其分区并建立文件系统,以便计算机能够识别和使用它。
在Windows系统中,您可以通过“我的电脑”右键点击移动硬盘的图标,选择“格式化”来进行操作。
在Mac系统中,您可以打开“磁盘工具”来进行格式化操作。
需要注意的是,格式化会清空硬盘上的所有数据,请务必提前备份好重要文件。
其次,当移动硬盘格式化完成后,您就可以开始将文件复制到移动硬盘中了。
在Windows系统中,您可以打开“我的电脑”,找到移动硬盘的图标,然后将需要复制的文件拖拽到移动硬盘中。
在Mac系统中,您可以打开“Finder”,找到移动硬盘的图标,然后进行文件复制操作。
需要注意的是,复制完成后,建议进行一次文件校验,确保文件没有损坏。
另外,当您需要从移动硬盘中读取文件时,也可以通过类似的操作来实现。
在Windows系统中,您可以打开“我的电脑”,找到移动硬盘的图标,然后双击打开移动硬盘,找到需要的文件进行打开。
在Mac系统中,您可以打开“Finder”,找到移动硬盘的图标,然后进行文件查找和打开操作。
需要注意的是,使用完毕后要及时将移动硬盘进行安全拔出,避免数据丢失或损坏。
最后,当您不再需要使用移动硬盘时,也要注意进行正确的退出操作。
在Windows系统中,您可以在任务栏找到“安全删除硬件”图标,点击并选择移动硬盘后进行安全拔出。
在Mac系统中,您可以在桌面找到移动硬盘的图标,将其拖放到废纸篓中,然后在废纸篓中右键选择“弹出”来进行安全退出。
智能硬盘录像机NVR英文版操作说明书
NVR2.0Quick Operation GuideProduct Overview●This equipment is a digital video surveillance product specially designed for the security field. By using theembedded LINUX operating system to enable the system to operate more stably.; besides, with the standardH.264 video compression algorithm, to achieve a high quality, low bit rate, single frame play and other videofunctions;●This equipment can be used in banking, telecommunications, power, justice, transportation, intelligentresidential areas, factories, warehouses, resources, water conservancy facilities, and other fields.1 Statement●Thank you very much for purchasing this NVR product, if you have any question or requirement, please feelfree to contact us.●The company will update the contents of this manual based on the enhancement of product function, and willregularly improve or update the products or processes described in this manual. The updated content will be added to the new version of this manual without prior notice. If the product description does not match with the physical one, all to prevail in kind.2 Notice:●The NVR with more than 9 channels must access the gigabit switch, otherwise there will be a loss of videoor standstill phenomenon;●All the IP addresses of the network devices in lan cannot conflict.●The gateway needs to be set by right IP address.3 Install Hard DiskNeed to prepare a cross screwdriver. This series of NVR can be installed in the case with 1 to 9 hard disks, and the largest capacity of hard disk could reach to 6TB.3.1 Hard Disk Installation Steps:1. Unscrew the screws of the case, open the case cover.2. Connect the hard disk data cable and power cord.3. Use the screws to fix the hard disk onto the hard disk screw hole on the baseplate.4. Cover the case cover, and fixed with a screw.Note: Before the operation of replacing the hard disk, the power of device should be turn off, and disconnect power supply.4.1 Host Operation4.1.1 Boot the hostInsert the power line, press the power switch on backboard, and then press the switch button on the front panel to boot the recorder. The video output is the default for the multi- image output mode. If the boot time be in the time of recording which preset before, the system will automatically start the timing recording function.Note: Please use the right power which matching the network digital video recorder, do not use the other type or brand of power instead of the original one.4.1.2 Login SystemAfter normal boot, click the icon, or click the right mouse button, there is a shortcut menu,Select Start - login.Input user name admin and initial password 888888 in the dialogue box.1. Login: click the "Login" button, the user can login; click the "Log out" button, can log out the current user.2. Restart: click the "R eboot" button, the device automatically restart;3. Shut down: click the "S hutdown" button, the device automatically shut down;4.1.3 ShutdownTo shutdown, press the power button of the rear panel to shutdown the device.Click [Start] than [Shutdown], choose [yes], and then turn off the power switch(the user should need to have Shutdown authority ).Tips: It is recommended to use this method when shutdown to prevent damage to equipment during power outages.4.2 Display Setup4.2.1Click the icon on the interface:1. Split screen mode settings: split the screen into1, 4, 9, 16, 25, 36 parts, oretc. Choose your choiceaccording to the number of NVR channels.2. Turning patrol interval settings: set theturning interval time; after switching split screen,click " Open Turning Patrol " and the previewscreens can automatically be showed turn by turnand turning pages for the rest channel images.4.2.2 PTZ4.2.2.1 PTZ Control1. PTZThe camera of PTZ could be controlled to move to 8 directions: up, down,left, right, upper left, upper right, upper right and lower right; magnificationand reduction of the times; enlargement and narrowing of the focal length;the enlargement of the aperture and the Narrow; tilt speed setting, lights, wipers, fan and other functions. As the figure shown on the right:2. Preset Position●Firstly, rotate the camera to the position that need set, and then doubleclick the corresponding No.●The blank area that besides the corresponding serial number couldbe set to be the name of preset position , click "Setting" , then it can be set successfully. If you need to change the preset position, you can move the camera directly to the desired location and click "Setting" button againto save, then the preset point will be updated, the max preset position number is limited by the camera.●Click the "Clear" button clear the preset position.●Select the serial number, click "Change to", camera will move to thecorresponding preset position.3. Cruise●Enter the cruise setting interface:●Double click the blank areas that beside the corresponding No. to select the preset point name, then click “Setting” and pop-up window, enter the cruise name, click "Add cruise", and select the preset point in the drop-down boxto set cruise speed and residence time, and the max cruise path number is determined by the camera. Select the cruise control point, click"Delete cruise", you can delete the added cruise point. After save the setting successfully, click "Call" can be turned on the cruise, click "Stop" canturn off cruise.4.3 PlaybackLeft click mouse, click [Playback] icon, enter the interface shown as below:●Channel Selection: select the channels that need to be playback, the image could be retrieved automatically, itwill be highlighted by blue color in the right side calendar bard.●Date Selection: select the date that needs to be playback, the background of the selected date becomes red, asin December 1, 2015●Playback Video: Click the date by mouse, it will appear the color bar of the 24 hours below the date. The colorbar will show in defferent color according to the different recording mode. Use the mouse roller to magnify and adjust the time unit scales on the 24 hours time axis. Degrees are: 2 hours, 1 hour, half an hour, 5 minutes,1 minute; when the mouse center point moves to the color bar of the time axis, it will automatically appearaccurate time prompt, accurate to second. Double click on the color bar of time axis can make playback play fastly. Adjust the scale according to the requiement of accuracy of playback, so that the playback time will be positioned more accurately.1. Pause / Play: pause / play the current playback screen.2. Stop: stop the current playback3. Forward/Backward: forward/backward play the current video4. Single Frame: Click one time, then play a frame.5. Forward Jump/Backward Jump: forward / backward to skip 30 seconds to play6. Slow-forward: slow playback speed (respectively: 1/2, 1/4, 1/8, 1/16 times).7. Fast-forward: to speed up the playback speed (respectively: 2, 4, 8, 16 times).8. Split Screen / Switch: adjust the playback preview screen (respectively: 1, 4, 6, 8, 9, 16 split screen for option),click on previous page, the next page, can do screen switch while doing multi-channels playback.9. Capture: you can take a snapshot of playback of any channel.10. Backup: you can do video backup for any channel playback, backup time can be accurate to seconds. See 7.3 [video backup]11. Mute / Adjustment: mute the playback audio, drag the bar to adjust the volume.4.4 File backupClick [file backup] icon by the left mouse button, and enter the interface as shown below:Insert USB external storage devices, click refresh can detect USB device. It supports I8 and A VI formats for the backup file, and AVI is recommended, as this format can check the backup file by using document management, and also can be played by computer player. Image backup can save the snapshot backup to mobile devices.●Precise backup: the backup time can be arbitrarily selected, the minimum back time can be one second video;file capacity can be viewed immediately;●Fast backup: high speed transmission, save backup time;●Accuracy backup: backup video files can be reviewed in NVR local document management folder, to ensurethe accuracy of the backup video.4.5 Channel Setting4.5.1Click [Channel Setting] icon by mouse left button to enter the interface shown as below:Click “Search ”,NVR will search out all the IPC in the same LAN, search time is about 10-15 seconds, all the IPC IP addresses will be listed, enter user name and password, click save after setting successfully and exit. Image will come out in 1-60 seconds.1. Click search to search out the IPC IP address in the same LAN;2. Double click the IP address in the A zone or select the IP address and click “Details”, it will show IPC networkparameter, some IP cameras have private protocol with NVR, which can amend IP address directly;3. B zone is IP cameras channel number setting area;4. C zone shows the detail information of IP camera, and some parameters can be amended in here, input camerauser name and password, save it after finishing setting.4.5.2.1Click Channel Setting→ Channel Parameter→ Display SettingA ZoneB ZoneC ZoneClick Channel Setting→Channel Parameter, choose channel, its preview image will come out1.Click Local Channel Name can define local channel’s name2.Click Show Channel Name can define channel’s name3.Click Show Time/Date can modify time and date format4.Click Image Setting →Setting button can adjust the parameter of channel interface such as brightness,contrast, saturation, chroma , click “Save”, then exit4.5.2.2 Click Channel Setting →Channel Parameter →Encoding Setting1. Encoding Setting: can choose main stream, sub streamMain Stream: double click single channel screen or 4ch split interface image is shown by main stream, playback image is shown by main stream alsoSub Stream: 9、16、25、36 channel split interface image is shown by sub stream, and IE or mobile app remote access image is shown by sub stream also.2.Stream Type: Composite Stream and Video Stream are for optional, when audio is needed please choose Composite Stream, or else there’s no audio when playback video.3. Resolution: NVR will get IP camera’s main、sub stream automatically, please manual adjust resolution when you are not satisfy with it4. Bit-rates’ Type: can set up variable bit rate and constant bit rate5. Bit-rates’ Upper Limit: after choosing encoding setting’s main stream bit rate upper limit, stream will in selected value, change will not too big6. Frame Rate: suggest selecting 25/307. Video Quality: suggest selecting highestWhen connect IP cameras with the same brand, set up No.1 channel, you may click “copy to” all channels, click “save” and exit.4.5.2.3 Click Channel Setting →Channel Parameter →Motion Detection1.Firstly, choose the channel need to be set and detect mode(Front-end detect and NVR local detect)2.Enable Motion Detection: tick the small squares in front of the enable motion detection3.Device Detect Area: Click Area Setting, enter the interface. Choose motion detect area, according to differentIPC, can set up different area number, usually is 4, hold the left mouse button, drag to motion detect area, hold right mouse button, can cancel the selectedmotion detect area, click Save.4.Sensitivity: set up motion detect sensitivity,Medium is suggested.5.Schedule Plan: Click Schedule Plan setting,enter below interface, anytime could be set,default setting is 7x24 hours.6.Linkage: Click Linkage, enter below interface●Linkage way introduction:●Audio Alarm: after ticked, when motion detection trigger the alarm, the buzzer on the main board will ring●Alarm on Monitor: after ticked, when motion detection trigger the alarm, screen right bottom will appear amovement state red people icon●Email Link age: the switch of email linkage, after ticked, please set up on Network Parameter → Emailparameter settingThe first three lines: email address, password, confirm password: add sender's email address and password, please click attachment, or email can't receive capture picture.Recipient: maximum support three recipientsSending Interval: capture picture sending time intervalSMTP Server、SMTP Port: Provided by mail service, please check sender's email setting, for example, email should input: , port: 25●Upload to Center: ticked, can check alarm information and action on client software and IE browser●Alarm Output: ticked, when motion detection trigger the alarm, alarm output will ring●Local Preview: ticked, when motion detection trigger the alarm, will trigger relevant channel preview●Local Record: ticked, when motion detection trigger the alarm, will trigger relevant channel record, please besure correspond to relevant channel, or will disorder the recording●Local Picture Capture: ticked, when motion detection triggers the alarm, will trigger relevant channel capturepicture7. Connect same model IPC on NVR, set up first channel, can click “Copy to” all channel, copy first channel’s setting to others channel, click “Save”, then exit.4.5.2.4 Click Channel Setting →Channel Parameter →Video Lost1. Choose the channel need to be set2. Enable Video Lost: ticked the small squares in front of the enable motion lost, schedule time and linkage pleaserefer to 4.5.2.3 setting3. Connect same model IPC to NVR, set up first channel, then can click “Copy to” all channels, it will copy first channel’s setting to other channels, click “Save”, then exit.4.5.2.5 Click Channel Setting →Channel Parameter →Mask Alarm1. Choose setting channel2. Enable Video Lost: tick the small squares in front of the enable video lost, adjust proper sensitivity, delimit mask area, when someone mask the delimit mask area intentionally, will trigger the alarm3. Schedule time and Linkage processing setting please refer to4.5.2.34. Connect same model IPC on NVR, set up first channel, can click Copy to all channel, copy first channel’s setting to other channels, click “Save”, then exit.4.5.2.6 Click Channel Setting →Channel Parameter →Video Tampering1. Choose setting channel, tick Enable Video Mask, set up mask area, click Save, then exit, can mask the delimitmask area, also can’t see the mask area in the recording file2. Connect same model IPC on NVR, s et up first channel, click “Copy to” all channel, copy first channel’s setting to other channels, click “Save”, then exit4.5.3 Click Channel Setting →Channel Connection →Record SettingClick Channel Setting icon, click Record Setting, default already set up Schedule Record, 24 hours record, can set up different time period record on each channel based on user demand, after set up can copy to other channels, click “Save”, then exit.4.5.4 Click Channel Setting → Channel Connection → Channel Grouping1. StructureDivide channels into groups, click add a new group and define its name, tick group in the B area, tick IPC channel in A area add them into group, multiple groups could be set up under structure, click “Save” after set up finished, then exit. Click Structure in real time preview, choose group, double click mouse left button can browse channel group.2. Preview TourDivide channels into groups, click add a new group and define its name, tick group in the B area tour, tick IPC channel in A area and add them into group, can set up multiple groups under tour , click “Save” after set up finished, then exit. Click Structure in real time preview, choose group, double click mouse left button can browse channel group. Set up all channel group, clickcan turn on TourB AreaA Area A AreaB Area4.5.5.1 Click Channel Setting →Intelligent Detection→Detection ModeAccording to IPC and NVR’s function, choose detection mode. IPC is front-end detection mode, NVR is local detection mode。
智能无线硬盘Z1使用及常见
智能无线硬盘Z1使用及常见1.手机连接硬盘智能无线硬盘接通电源(硬盘用数据线连接后用适配器供电默认开启WiFi模式,与电脑连接默认是pc模式)wifi启动后等待指示灯为蓝色呼吸亮;手机系统设置连接硬盘WIFI,打开客户端,连接硬盘WiFi就可以访问硬盘里面的文件了。
2.手机连接硬盘同时上网(有线连接、无线中继)有线连接:通过网线把硬盘与家庭路由器连接到一起,网线的一端连接智能移动硬盘WAN接口,另一端需要插入家庭路由LAN网口。
当硬盘的指示灯变为绿色常亮时,就可以用硬盘看片,边上网聊微信了。
无线中继:通过客户端设置互联网连接外网登陆智能移动硬盘客户端设置 -> 设备设置–>互联网设置;选择要连接的无线WiFi,输入密码,连接无线路由器,设备wifi会中断重启;待指示灯变为绿色呼吸亮,就可以使用无线中继功能3.电脑连接硬盘智能移动硬盘直接连接电脑:USB直连,数据线连接电脑USB接口,即可在“我的电脑”里面查看和管理。
使用windows电脑无线访问:开始-运行输入\\10.10.10.254电脑和智能移动硬盘需要连同一个局域网,目前该pc客户端只支持以下3种连接访问方式:1.电脑通过wifi无线连接到智能移动硬盘[电脑] --- wifi --- [智能移动硬盘]2.电脑通过网线连接到路由器[电脑] --- 网线1 --- [路由] --- 网线2 --- [智能移动硬盘]3.电脑通过wifi无线连接到路由器[电脑] --- wifi --- [路由] --- 网线 --- [智能移动硬盘]4.远程访问硬盘手机远程访问:首先连上硬盘wifi同时需要连上互联网,打开客户端连上硬盘后就会提示未开通远程,点确定->进入客户端主界面->设置->远程设置->开通远程就可以使用远程功能了。
5.电脑远程访问硬盘打开连接下载安装电脑远程客户端(/client/final/pc/AiCloud_PC.msi)电脑远程访问:双击APP,进入软件登录界面,输入S/N号点击登录,登录成功后进入管理员登陆界面,没有设置管理员密码的可以直接进入,有设置管理员密码的需要输入密码后进入。
PNY Pro Elite Portable SSD 快速入门指南说明书
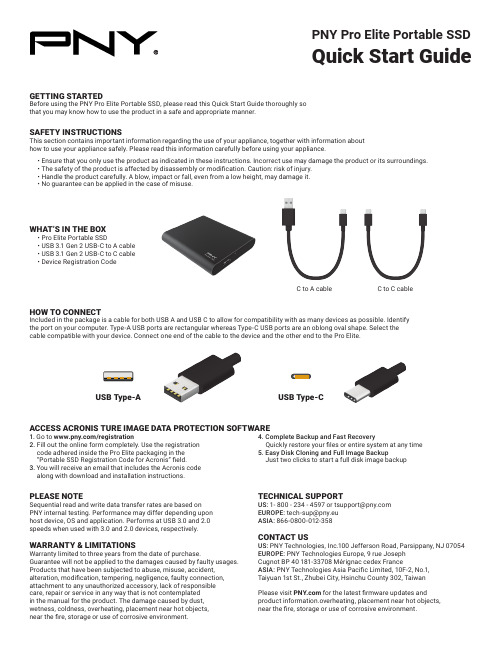
PNY Pro Elite Portable SSD Quick Start GuidePLEASE NOTE Sequential read and write data transfer rates are based on PNY internal testing. Performance may differ depending upon host device, OS and application. Performs at USB 3.0 and 2.0 speeds when used with 3.0 and 2.0 devices, respectively.WARRANTY & LIMITATIONS Warranty limited to three years from the date of purchase.Guarantee will not be applied to the damages caused by faulty usages.Products that have been subjected to abuse, misuse, accident, alteration, modification, tempering, negligence, faulty connection, attachment to any unauthorized accessory, lack of responsible care, repair or service in any way that is not contemplated in the manual for the product. The damage caused by dust, wetness, coldness, overheating, placement near hot objects, near the fire, storage or use of corrosive environment.GETTING STARTED Before using the PNY Pro Elite Portable SSD, please read this Quick Start Guide thoroughly so that you may know how to use the product in a safe and appropriate manner.1. Go to /registration2. Fill out the online form completely. Use the registration code adhered inside the Pro Elite packaging in the “Portable SSD Registration Code for Acronis” field.3. You will receive an email that includes the Acronis code along with download and installation instructions.4. Complete Backup and Fast Recovery Quickly restore your files or entire system at any time5. Easy Disk Cloning and Full Image Backup Just two clicks to start a full disk image backupTECHNICAL SUPPORT US:********************************EUROPE:***************ASIA: 866-0800-012-358CONTACT USUS: PNY Technologies, Inc.100 Jefferson Road, Parsippany, NJ 07054EUROPE: PNY Technologies Europe, 9 rue Joseph Cugnot BP 40 181-33708 Mérignac cedex France ASIA: PNY Technologies Asia Pacific Limited, 10F-2, No.1, Taiyuan 1st St., Zhubei City, Hsinchu County 302, Taiwan Please visit for the latest firmware updates and product information.overheating, placement near hot objects, near the fire, storage or use of corrosive environment.SAFETY INSTRUCTIONS This section contains important information regarding the use of your appliance, together with information about how to use your appliance safely. Please read this information carefully before using your appliance.• Ensure that you only use the product as indicated in these instructions. Incorrect use may damage the product or its surroundings.• The safety of the product is affected by disassembly or modification. Caution: risk of injury.• Handle the product carefully. A blow, impact or fall, even from a low height, may damage it.• No guarantee can be applied in the case of misuse.HOW TO CONNECTWHAT’S IN THE BOX • Pro Elite Portable SSD • USB 3.1 Gen 2 USB-C to A cable • USB 3.1 Gen 2 USB-C to C cable • Device Registration CodeACCESS ACRONIS TURE IMAGE DATA PROTECTION SOFTWARE C to C cableUSB Type-AUSB Type-C。
移动硬盘首次使用方法
移动硬盘首次使用方法
移动硬盘是一个方便存储数据的设备,可以用于备份重要文件、传输大文件、扩展电脑存储空间等。
当你第一次使用移动硬盘时,以下是一些需要注意的事项:
1. 格式化硬盘
在使用移动硬盘之前,你需要先格式化它。
格式化可以清空硬盘上的数据并建立文件系统,让电脑识别硬盘并使用它。
注意:格式化会清空硬盘上所有数据,所以在格式化前要备份好重要文件。
2. 安装驱动程序
对于某些移动硬盘,电脑可能需要安装驱动程序才能识别它。
如果你的移动硬盘需要安装驱动程序,请按照说明书中的步骤进行操作。
3. 连接电脑
将移动硬盘插入电脑的USB接口,并等待电脑自动识别硬盘。
如果电脑没有自动识别硬盘,可以尝试重新插拔硬盘或者重启电脑。
4. 复制文件
当硬盘被电脑识别后,就可以开始复制文件了。
将需要备份或者复制的文件拖拽到移动硬盘上即可。
5. 安全移除硬盘
在所有的文件复制完成后,务必要安全地移除移动硬盘。
在Windows系统中,可以找到“设备和打印机”,右键点击移动硬盘,
选择“安全删除硬件”,然后选择移动硬盘并点击“停用”,等待硬盘
指示灯熄灭后才能安全拔出。
以上是移动硬盘首次使用的方法,希望能帮助到你使用移动硬盘更加方便。
硬盘知识培训讲义(ppt)
Data Syncronizer 6. 资料同步器
Pulse Detector/AGC 2. 脉波侦测器 自动增益控制 脉波侦测器/自动增益控制
HSA : Head Stack Assembly 磁头堆组件 读
RDX/RDY 差动电压
HSA
Encoder/Decoder 4. 编码器 解码器 编码器/解码器
写 WDI
Preamplifier 1. 前置放大器
Confidential
Rotational direction (旋转方向 旋 方向)
Disk (高精密金属盘片) 高精密金属盘 高精密金属盘片
Confidential
EXCELSTOR Technology
磁碟结构示意图
润滑层(Lubricant) 保护层(Overcoat Layer) 磁性材料层(Magnetic Layer) 介面层(Under Layer) 基材(Substructure)
主轴马达 (Spindle Motor)
磁性锁 Magnetic latch 循环过滤器 (Recircle Filter) 音圈马达 (Voice Coil Motor)
Confidential
止动块 (Crash Stop)
EXCELSTOR Technology
主控芯片 (Interface Controller & CPU)
Confidential
EXCELSTOR Technology
AT or SCSI Controller 界面控制器
Time Base Generator 5. 时基产生器
Fref 参考频率 -ERD 数位脉波 转换
工作原理 (Working of the Principle)
- 1、下载文档前请自行甄别文档内容的完整性,平台不提供额外的编辑、内容补充、找答案等附加服务。
- 2、"仅部分预览"的文档,不可在线预览部分如存在完整性等问题,可反馈申请退款(可完整预览的文档不适用该条件!)。
- 3、如文档侵犯您的权益,请联系客服反馈,我们会尽快为您处理(人工客服工作时间:9:00-18:30)。
D盘
C盘
D盘 D盘
C盘 C盘
1 2 3 外置优盘 光盘
D盘
C盘
D盘
C盘
只读
L盘 K盘
禁止访问 引导区 微系统管理区 设置区
为封闭区分配数据空间
如图所示打开 分配数据空间 对话框,步骤 比较多,请看 仔细了哦 :-)
为封闭区分配数据空间
第一张图右边竖着的三个按钮分别对应添加、修改和删除一个 数据空间;每个数据空间对应下图 [ 数据空间 ] 下的一个文件 夹;理解起来是不是有点困难?那就先记住再说吧。
为封闭区分配存储空间
每个封闭区都要有相应的存储空间来安装软件和存放数据, 智能硬盘上有两种存储空间,分别为虚拟硬盘和数据空间,其中 虚拟硬盘主要用来安装操作系统和应用软件,数据空间主要用来 存放用户数据。 如果勉强拿传统硬盘来比较,虚拟硬盘就相当于原来的 C 盘,而数据空间就相当于原来的 D 盘。所不同的是智能硬盘上有 很多组这样的 C 盘、 D 盘,而传统硬盘上却只有唯一的一组。
打开一个封闭区
在左边封闭区 列表中,用鼠 标双击您要打 开的封闭区名 称,即可打开 该封闭区; 这里留一个问 题给大家,能 不能同时打开 两个封闭区?
关闭一个封闭区
用鼠标关闭封闭 区窗口,在出现 的对话框中选择 [ 正常关闭 ] ,按 [ 确定 ] 即可关闭 该封闭区。 至于快速休眠和 强制退出有什么 用,就留给大家 琢磨实验了。
为封闭区分配硬件资源
分配光驱: 能看明白吧,不明白 的话照着图做两遍, 肯定能明白。这个操 作和刚才分配内存不 一样哦,刚才封闭区 处于关闭状态,现在 是运行状态。
顺便透露个小秘密, 光驱用完后,记得立 即释放光驱,这能提 高运行速度。另外, 上面有个虚拟光盘很 有用哦,自己琢磨吧
为封闭区分配硬件资源
分配 USB 设备: 列表是电脑上的所有 USB 设备,打钩表示 已分配,没打钩表示 已释放,用鼠标左键 在该设备名称上单击 可在这两种状态间切 换。假如你电脑上有 个 USB 接口的打印 机,但不知道哪个名 称和它对应,呵呵, 怎么办?考一下哦! 注意:以 Cypress 开头的那个是保留设备,点不了哦!另外,一个设备 如果已分某个区,就不能再同时分给其它区哦,除非你先释放它;
所有数据都应尽可能放在数据空间中,也就是数据 盘中,而不是虚拟硬盘上,否则在执行快速修复时 就会全部丢失!
如何访问内置硬盘中的数据
出于安全(特别是从根本上隔离病毒传播)考虑,每个封闭区内只 能访问分配给它的虚拟硬盘、数据空间和光盘。如果想访问内置硬 盘上的数据,那只能通过管理区中的文件管理器将内置硬盘上的数 据复制到该封闭区的数据空间中。具体操作如下:启动数据管理: [ 管理区 / 数据管理 ] ,在下面窗口中复制粘贴即可。
为封闭区分配数据空间
通过本窗口可选择该数据空间要对应的文件夹;同时通过本窗口还可 新建,删除、重命名 [ 数据空间 ] 下的文件夹;
注意:一个数据空间也 可同时分配给很多个封 闭区,这样做有什么好 处或坏处呢,一定要想 清楚哦,呵呵 :-)
为封闭区分配数据空间
数据空间一般都分配为固 定的,至于临时的有什么 用,自己琢磨哦,还有上 面那个只读选项在某些情 况下很有用,您也自己研 究看看!
使用方式上的主要区别:分锅吃饭
使用方式上,传统硬盘好比吃大锅饭,所有软件都混在一个大 锅里一块煮;智能硬盘好比分锅吃饭,软件根据不同的需要被分到 几个单独的小锅里,分开煮,每个小锅根据需要配给相应的硬件设 施。这一个个小锅就是一个个独立的封闭区。
智能硬盘在出厂时,预设了六个常用的封闭区,可分别用于工 作、演示、娱乐、项目、杀毒和网银等,供您安装相应的操作系统 和应用软件。 每个封闭区出厂时只分配了最基本的硬件资源,您应根据实际 需要为它分配更多的硬件资源,如内存、光驱、 USB 设备和存储 空间等。
智能硬盘在出厂时已为每个封闭区预先各分配了一个虚拟硬 盘和数据空间,详见下图,因此对于大多数的用户来说,您只需 直接在每个封闭区的虚拟硬盘(即 C 盘)下安装软件,在数据空 间(即 D 盘)下存放数据即可,而无须再自己设置。
内置硬盘 C 盘 D 盘 E 盘
管理区内 自由访问 禁止打开
存储空间分布图
清空垃圾箱中的数据
先转到垃圾箱 中,然后在空 白的地方按鼠 标右键,在出 现的菜单中选 [ 清空垃圾箱 ]
为封闭区分配虚拟硬盘和安装软件
安装应用软件的方法和以前没有区别,除了可以通过互联网和光盘 来安装,还可以从数据空间和虚拟光盘上安装。当让您选择软件安 装路径时,请直接使用默认值,即装到 C 盘上。
网络设置 ~ 概况
在智能硬盘内,网络设置由管理区统一负责,封闭区内使用默认设 置即可 ( 别画蛇添足,弄巧成拙哦 :-) 。
智能硬盘上的网络设置不但智能,而且便捷。所有网络设置,包括 有线、无线、宽带及移动上网都集中在一个统一的界面下完成。
网络设置 ~ 有线网络
管理区会自动为其识别到的每块网卡创建一个自动连接,今 后只要在能自动分配 IP 地址的网络上,它就会自动从该网 络上的 DHCP (动态 IP 地址分配)服务器获取 IP 地址。 如果所在网络不能自动分配 IP 地址,那么就需要通过创建 一个静态连接,来为其设置 IP 地址信息。如果需要在几个 都不能自动分配 IP 地址的网络中工作,则需要为每个网络 分别创建一个静态连接,来为其设置相应的 IP 地址信息。 在管理区任务栏右下角的网络连接图即可打开网络连接对换框。
为封闭区分配硬件资源
自动分配 USB 设备: 用刚才那种方式分配的 USB 设备在封闭区关闭后就会自 动释放,下次要用时还要重 新分配。对于一些在该区中 经常要用到的设备,比如打 印机,这会很不方便,这时 最好用自动分配
呵呵,还记得这个窗口从哪 里打开吗?带加号的按钮用 来新建一个自动分配,今后 一旦该设备接入电脑,就会 自动分配给该区;带减号的 用来删除所选的自动分配; 如果把一个设备同时自动分 配给两个区,而它们又要同 时运行,会有什么问题呢?
有关分配虚拟硬盘和安装操作系统的介绍,都在中级应用教程中, 请直接到数据空间的 [ 使用教程 ] 下查看。
备份已装好软件的封闭区
每次安装新软件或更改设置,并测试正常后 都应马上做个备份,以保证今后该软件出问 题时能快速修复,千万不要偷懒哦,要不然 有一天肯定要后悔的!
1. 选择要备份的封闭区; 2. 转到[快速修复]页面; 3. 点击[生成备份]按钮; 4. 输入一个备份名称(一般 为日期)和描述信息(可不 写),按[确定]即可;
到这里数据空间就分配好 了,但您可能会有个疑 问,那怎么用啊,在封闭 区内它对应哪个盘符呢? 请看下页。
为封闭区分配数据空间
打开桌面上的 [ 映射数据空间到 网络驱动器 ] 右 键单击刚分配好 的数据空间,选 择 [ 映射网络驱 动器 ]
为封闭区分配数据空间
驱动器号 ( 即盘符 ) 可按默认值,也可自 己选,其它设置不要 动即可,映射完成 后,该盘符就对应到 刚刚分配的数据空间 了,今后往该盘存的 任何数据,都自动保 存到数据空间中;这 个也就是您今后的数 据盘了。
电脑的关机和重启
在管理区任务栏中,单击 [ 管理区 ] ~ [ 关机重启 ] ,在出现的对话框中 选择 [ 关机 ] 或 [ 重启 ] 即可。
注意:关机前,请务必先关闭每个正在运行的封闭区,否则 可能导致该封闭区内的软件出现异常。重启也一样哦!
为封闭区分配硬件资源
用鼠标右键单击 目标封闭区,在 出现的右键菜单 中选 [ 设置 ] ,打 开下页的硬件资 源分配窗口。 注意:只有封闭 区处于关闭状态 时才能如此分配 硬件资源。当封 闭区处于运行状 态时,要用其它 方式分配。
安全~便捷~易维护 一盘在手~万事无忧
智能硬盘快速入门教程
( V-1.8.7/2008.12 )
目录
了解主要区别 ..............03 封闭区的开关 ..............06 分配硬件资源 ..............10 分配数据空间 ..............15 访问内置硬盘 ..............25
为封闭区分配数据空间
为方便使用, 还可将这些映 射的盘符拉到 桌面上作为快 捷方式使用, 并且还能给它 改名;
使用数据空间的注意事项
在数据空间所对应的盘符中删除文件,该文件会被 直接删除,而不是先放入回收站,因此今后也无法 恢复。如果想让文件在删除时暂时放入回收站,那 必须用后面介绍的管理区中的文件管理器来删除。
恢复封闭区内的软件到备份时状态
1. 选择要修复的封闭区; 2. 转到[快速修复]页面; 3. 点击[恢复最近备份]按钮 后,几秒钟内出问题的软件即可 恢复到最近备份时的正常状态。 该操作会删除这个封闭区的虚拟 硬盘从最近一次备份起到现在的 所有变化,但不会影响保存在数 据空间上的任何数据,这就是为 什么我们前面特别强调要把所有 数据都放到数据空间中的原因。 备份会占用一定的磁盘空间,因此对于那些早期生成的备份,应定期清除,以 免占用太多空间,毕竟最有用的备份一般都是近期生成的。怎么清除以前的备 份呢,自己研究看看,千万别弄错哦 :-)
垃圾箱 数据空间
1. 日常工作区 2. 演示专用区 3. 网上交易区 4. 休闲娱乐区 5. 项目专用区 6. 杀毒专用区
D盘
封闭区
1. 日常工作区 2. 演示专用区 3. 网上交易区 4. 休闲娱乐区 5. 项目专用区 6. 杀毒专用区
C盘
虚拟硬盘
daily-work.vdi demo-action.vdi net-banking.vdi playing-room.vdi project-focus.vdi virus-killer.vdi
如何访问移动存储介质上的数据
同样出于安全考虑,封闭区内也无法直接访问优盘、移动硬盘和存 储卡上的数据。如果想在封闭区内访问这些介质上的数据,也要象 访问内置硬盘上的数据一样,先通过管理区的文件管理器把它们复 制到相应的数据空间中才行。