HP StorageWorks MSA2312&2324fc Installation instructions (500917-001, January 2009) (c01712109)
HP_StorageWork_MSA2324FC配置

MSA2324简易配置方法。
storage management utility盘柜配置软件集成在msa2300的控制器里面,控制器后面的网口默认管理IP地址是10.0.0.2 或10.0.0.3,子网掩码255.255.255.0,也有个别是DHCP的。
找台笔记本或者台式机设置同一个网段,例如10.0.0.5,直连或者通过交换机连接控制器,只要网卡灯亮,并且能ping通10.0.0.2,打开IE浏览器,输入10.0.0.2即可打开storage management utility工具,用户名manage,密码!manage。
1、在msa2324fc上右键,选择provisioning下的create vdisk。
2、填写vdisk名字、属于controller a还是b、raid级别、选择online初始化,然后看到下面有raid1和spare两个选项表,如果选择raid1,那么可以在最下面的硬盘列表中选择可用硬盘。
3、下面这张图是我们选择了2个硬盘做raid1后,还可以选spare添加一个热备盘。
4、我们选spare后,选了最后一个做为热备盘。
5、在建立好的vdisk上右键,选择create volumes建立卷。
6、输入volume的名字和尺寸7、例如我们就建立一个volume,那么就把所有空间给这个volume。
8、然后点中新做的volume,右键选择provisioning,选default做映射。
9、map打勾后,输入lun号1,(如果有第2个volume,那么第2个volume映射时lun输入2,依次类推,只要不重复就好),然后可以在最下面的背板图中选择让哪个端口连接的服务器可以看到这个volume,默认全选(做双机就要全选)。
配置完毕,重新启动服务器。
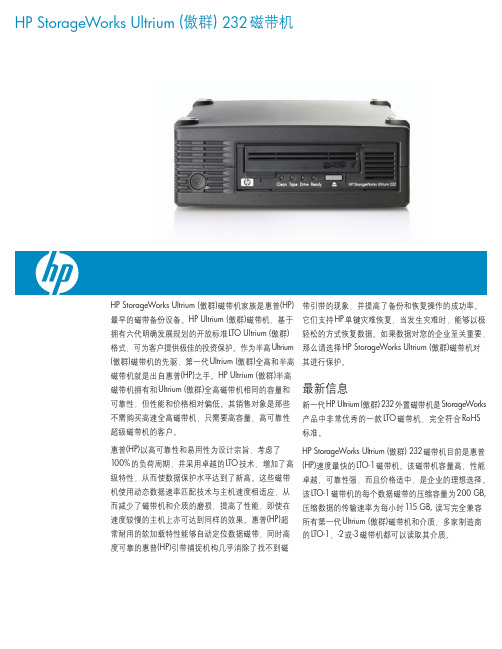
HP StorageWorks Ultrium (傲群) 232磁带机 说明书
惠普(HP)建议您在 HP Ultrium (傲群)磁带机上使用惠普(HP)品牌的磁带,以确保为您的宝贵数据提供更高级别的保护。我们的 HP Ultrium (傲群)介质测试 计划极彻底、全面,在业界有口皆碑。
所有的惠普(HP)磁带都必须通过大量的附加测试,这些测试与实际数据和业务紧密相关。惠普(HP)品牌介质的优点是始终如一的质量。通过对数千台惠 普(HP)磁带机和惠普(HP)磁带进行测试,制定理想的备份性能方案,然后不断对其进行监测。这个巨大的资源密集型流程为惠普(HP)所独有,深入剖析 了在各种环境和负荷周期下的惠普(HP)+ 惠普(HP)备份解决方案。支持方便、可靠性最高的最佳选择是始终使用惠普(HP)品牌的 Ultrium (傲群)磁带。
• 可靠:包括读写 DRAM 在内的高完整性数据路径为
• 降低功耗,以最低的成本提供最高的可靠性
您的数据提供保护
• 软加载特性自动定位数据磁带并可将其移到加载位置
HP FC SAN Switch 详细配置及项目实例

HP StorageWorks 8Gb SAN Switch配置手册及实例编辑:Windy.Chen目 录第一分部:SAN相关的重要概念第二部分,配置命令及实例第三部分: 附HP StorageWorks 8Gb SAN Switch的初始配置第四部分: 附Brocade光纤交换机划分Zone的案例及纠错第一分部:SAN相关的重要概念1,SAN是什么?SAN英文全称:Storage Area Network,即存储区域网络。
它是一种通过光纤集线器、光纤路由器、光纤交换机等连接设备将磁盘阵列、磁带等存储设备与相关服务器连接起来的高速专用子网。
SAN由三个基本的组件构成:接口(如SCSI、光纤通道、ESCON等)、连接设备(交换设备、网关、路由器、集线器等和通信控制协议(如IP和SCSI等)。
这三个组件再加上附加的存储设备和独立的SAN 服务器,就构成一个SAN系统。
SAN提供一个专用的、高可靠性的基于光通道的存储网络,SAN允许独立地增加它们的存储容量,也使得管理及集中控制(特别是对于全部存储设备都集群在一起的时候)更加简化。
而且,光纤接口提供了10 km的连接长度,这使得物理上分离的远距离存储变得更容易.SAN的一个概念是允许存储设备和处理器(服务器)之间建立直接的高速网络(与LAN相比)连接,通过这种连接实现只受光纤线路长度限制的集中式存储。
SAN可以被看作是存储总线概念的一个扩展,它使用局域网(LAN)和广域网(WAN)中类似的单元,实现存储设备和服务器之间的互连。
这些单元包括:路由器、集线器、交换机和网关。
SAN 可在服务器间共享,也可以为某一服务器所专有,既可以是本地的存储设备也可以扩展到地理区域上的其他地方。
SAN的接口可以是企业系统连接(ESCON)、小型计算机系统接口(SCSI)、串行存储结构(SSA)、高性能并行接口(HIPPI)、光纤通道(FC)或任何新的物理连接方法。
2,什么是SAN Switch?交换机是用于连接大量设备、增加带宽、减少阻塞和提供高吞吐量的一种高性能设备。
HP MSA2312fc初始化配置

MSA2312fc简单配置文档1.登录到SMU拿一根网线,一头接在控制器的管理接口上,一头接在笔计本上,控制器默认的IP地址为A:上面的控制器为10.0.0.2 子网掩码为:255.255.255.0B:下面的控制器为10.0.0.3 子网掩码为:255.255.255.0我们的控制器地址10.143.131.76子网掩码为:255.255.255.0输入默认的用户名为:manage 密码为:!manage2.添加主机、创建Vdisk3.选择好RAID级别和本地热备盘后点击Create Vdisk4.创建全局热备盘5.选择要添加成全局热备的硬盘点击修改备用硬盘6.在虚拟磁盘上创建虚拟卷7.创建好虚拟卷映射给主机使用8.映射成功后服务器重启后可以识别到卷磁盘到此HP MSA 2312fc 初始化配置完毕!驱动Linux系统下的HBA卡下载地址:/bizsupport/TechSupport/SoftwareDescription.jsp?lang=en&cc=us& prodTypeId=3709945&prodSeriesId=1844104&swItem=co-99797-1&prodNameId=1844105&swE nvOID=4048&swLang=8&taskId=135&mode=4&idx=0下载下来后,可以在windows下解压,把文件夹:QLogic-HP-FC-installer-sles11sp1-20110816-1 直接拷贝到服务器上就行。
Linux 给予权限#chmod –R 777 QLogic-HP-FC-installer-sles11sp1-20110816-1.ygzLinux下解压:#tar –zxvfQLogic-HP-FC-installer-sles11sp1-20110816-1.tgz安装:#cd QLogic-HP-FC-installer-sles11sp1-20110816-1#./qlinstall要是有报错安装不上的话强制安装:#./qlinstall --force查看驱动的话:方法1.rpm–qa *qla2xxx方法2cd /proc/scsi/qla2xxxls是否有文件看机器认没认到HBA卡:lspci |grepFibre因为我们的物理状态是一台DL380G6两个HBA卡,链接MSA2312fc两个FC接口所以我们配置完MSA后在OS下面fdisk–l 会看到很多磁盘卷,需要们做聚合9.如果OS下出现重卷(虚拟4个卷系统下识别8个卷)需要安装HPDMmultipath 链路聚合10.在惠普官网下载HPDM RHLinux 5.5 X64下载链接如下/bizsupport/TechSupport/SoftwareDescription.jsp?lang=en&cc =us&prodTypeId=18964&prodSeriesId=3559651&prodNameId=3559652&swEnvOID=4004& swLang=13&mode=2&taskId=135&swItem=co-90384-111.解压安装12.编辑multipath.conf #vi /etc/ multipath.conf13.重启multipath服务#service multipath restart14.查看一下mapper下面的分区#ls /dev/mapper15.查看一下链路聚合状态看以看到mpath69是由sda和sdb组成#multipath–ll注意:在mount逻辑磁盘的时切记不要mount /dev/sda (sdb、sdc、sdd、sde、sdf、sdg、sdh)应该mount /dev/mapper/mapth69(mapth70、mapth71、mapth72)逻辑盘。
医院心电网络方案-前期

――――――医院心电、电生理网络系统方案纳龙科技有限公司800-8582-141 400-0592-818二○一二年四月一、心电信息管理系统意义信息化建设对各大医院的未来发展起着至关重要的作用。
近几年来我国医院数字化建设取得长足进步,并且随着医院管理信息系统的普及,临床信息化正在成为医院信息化的新热点。
管理信息系统以财务管理为核心,临床信息系统以病人为中心。
临床信息系统是以电子病历为核心,把病人的诊断和治疗信息集成,从而真正实现医院对病人信息的共享,从而提高医院社会效益和经济效益,真正做到对病人的关怀。
在医院的信息化建设中,心电图的全程数字化管理是医院建立完整电子病历管理的必要组成部分,与影像数据的数字化管理和化验数据的数字化管理具有同等重要的地位。
实现心电图的全院数字化管理,既可以减少病人划价交费,减少等候时间,从而极大地方便病人就诊,也可以解决长期以来困扰医院的心电图资料无法有效保存的问题;既可以通过有效的分工提高技师和心电医生的工作效率,也可以医生通过和历史心电图对比,更好的观察病情和治疗效果,提高医院的临床和科研工作水平;既可以实时了解仪器使用状态提高医院收益,也可以提高医疗服务水平,提升医院的整体形象。
心电信息管理系统可以把全医院的静息心电图机数据,动态心电图数据,运动平板心电图数据,以及在救护车中移动的心电图数据统一纳入医院的信息网络管理系统中,在医院的信息管理平台上,心电图检查完全实现在网上申请、收费、预约和登记,实时在线诊断,网上传输报告及远程会诊等,使全医院的心电图检查,心电图数据的储存,心电图诊断和心电图报告实现数字化,网络化,无纸化集中管理。
1.1在医院建立心电电生理网络系统的应用价值心电信息管理系统将心电图机与医院信息管理系统(HIS)的计算机组成网络。
在病人做心电图检查后对检查结果进行分析,并对检查报告进行自动存储、打印及数据统计查询等,实现了智能化、自动化和规范化,减少了管理漏洞,提高了工作效率。
HPStorageWorks磁碟阵列解决方案
HPStorageWorks磁碟阵列解决方案儲存伺服器解決方案67HP StorageWorks磁碟陣列解決方案HP儲存資源最佳化解決方案提升儲存的效能、效率與永續性各企業大量利用IT以改善其自身的經營績效,IT能力的良窳已經是企業策略性的競爭優勢。
在多年來各式應用程式及IT設備的引入,企業內累積了大量的資料,儲存在各式各樣的儲存設備上,以提供各個關鍵性應用程式所使用。
資料的儲存、存取、保護及歸檔不但是企業內IT部門重要的工作,其運作的效率及效能,更直接影響企業每日的正常運作。
以下將整理出3種企業內使用儲存設備最常運見的使用情境及HP 相對應的解決方案,以提供確實可行的架構及產品,來解決每一情境的問題與挑戰。
這些解決方案包括:HP儲存整合解決方案(Storage Consolidation Solution)HP儲存/網路整合解決方案(Storage/Network Consolidation Solution)HP儲存虛擬化解決方案(Storage Virtualization Solution)6869儲存伺服器解決方案效益:1. HP 完整SAN 儲存裝置,提供符合各種不同需求的性能價格比2. HP 有共種不同領域及不同應用程式的技術顧問,可針對整合架構作專業規劃3. 整合不是一蹴可及,HP 有完整的Roadmap 可引導客戶階段性的完成整合專案典型組態包含如下組件:1. HP StorageWorks EVA 、XP 磁碟陣列或LeftHand 產品2. SAN Director 或HP ProCure 交換器3. HP 儲存整合專業服務及專案管理二、NAS (Network Attach Storage )問題與挑戰:1. 檔案分散,整合不易2. 檔案容量成長快速,磁碟空間不敷使用3. 不同的NAS ,操作及管理均不相同4. 企業內同時擁有多套NAS 時,系統管理者需面對複雜的檔案版本控管、檔案更新、檔案重複及同步、檔案安全設定、使用者帳戶管理、備份、…等多個複雜議題5. 針對應用程式的效能調校HP NAS 解決方案,包括簡單易用的X1000系列,基於標準x86架構及Microsoft Storage Server 的ProLiantStorage Server 及叢集式高效能的EFS Clustered Gateway 。
HP+StorageWorks+P2000+G3存储系统用户使用指南
HP StorageWorks P2000 G3用户使用指南一. P2000介绍1.概述HP StorageWorks P2000 G3 模块化智能阵列具备极高的性能,可以连接8 Gb 光纤通道或Combo FC/iSCSI,能够以适中的价格提供高效的存储整合能力。
选择FC/iSCSICombo控制器,可以通过两个协议灵活共享阵列资源,在预算范围内充分满足不同部门的不同需求。
HP StorageWorks P2000 G3 标配64个快照(选配512个)和卷拷贝软件,可以增强数据保护。
选配的远程快照软件可以让您通过iSCSI或光纤通道执行快照复制。
2.关键特性和优势2.1易于管理和价格经济的存储整合解决方案•高效的整合与存储共享:HP StorageWorks P2000 G3模块化智能阵列是一款价格经济的整合存储阵列解决方案,它采用8Gb光纤通道或Combo FC/iSCSI 解决方案和最新的大尺寸和小尺寸SAS、SAS MDL以及SATA硬盘,能够满足部门和中小型企业的整合需求。
•磁盘类型和容量选择灵活:P2000 G3阵列提供了多种硬盘选择,包括高性能企业级SAS硬盘和低成本、高容量归档级SAS MDL或SATA MDL。
阵列标配有12个或24个硬盘托架,能够同时支持双端口SAS硬盘和SATA硬盘。
•经济高效:P2000 G3阵列既可以配备一个控制器,降低初始成本,也可以配备两个控制器,增强数据保护。
FC/iSCSI Combo控制器通过最经济高效的协议支持部门间资源共享。
广泛的硬盘类型选择可以带来高额投资回报(ROI)。
2.2按需进行初始配置和扩展,根据需要增加连接的服务器数量和总容量•从小规模起步,最可随着存储需求的增长进行适当扩展:P2000 G3 阵列允许客户随着需要的增加扩展存储容量,最高可扩展至57.6TB SAS或192TB SATA,光纤通道连接最多可支持64台主机。
P2000 G3阵列最多可支持7个LFF硬盘机箱和96块LFF硬盘或者支持5个SFF机箱和149块SFF硬盘。
存储产品手册

MSA50 机箱可以直接连接到 HP ProLiant 服务器和 技术特性与优势
HP Integrity动能服务器上。MSA50支持 1+1 的机箱 级联配置,因此一个控制器端口可以连接2U配置,最 多安装 20 个 SFF 磁盘驱动器。一个控制器端口中包
● 灵活性:支持 SAS 和 SATA 驱动器—可以在同一个 机箱内灵活地混合配置SAS/SATA硬盘。将分层存 储的优势带给使用直连存储的用户。
HP StorageWorks 500 G2模块化智 能阵列(MSA500)
概述 HP StorageWorks 500 G2模块化智能阵列采用端到端 Ultra320 SCSI 技术,可提供一流的性能和快速驱动器 重建技术。它最多可安装 14 个 HP 通用பைடு நூலகம்盘驱动器,能 够在本机上升级到 MSA1000。此外,新型 MSA500 G2 系统还支持 4 节点集群、一个综合的集群和存储共 享环境。
HP StorageWorks 500 G 2 模块化智能阵列 (MSA500)
HP StorageWorks 50模块化智能阵 SAS 存储或者 9TB SATA 存储。MSA60 支持将存储
列机箱(MSA50)
设备直接连接到 HP Proliant 服务器上,并支持 1+3 的设备级联配置,因此智能阵列 P800 控制器的每个
6
简 单 直 连 存 储 产 品
HP StorageWorks 70 模块化智能 阵列(MSA70)
概述 HP StorageWorks 70模块化智能阵列,这款低成本、 灵活的分层存储系统最多可提供 14.4TB 的存储容量, 同时支持 SAS 和 SATA 驱动器,机箱能够支持 2.5 英 寸通用外形的SAS或SATA硬盘。借助惠普阵列配置实 用程序(ACU),可轻松进行配置和设置。2U的存储配 置可以直接连接到 HP ProLiant 服务器和 HP Integrity 动 能服务器上。 您还可以对机箱进行 1+1 级联配置,这 样,Smart Array P800 控制器的每个端口可以连接 4U 配置。1 个 4U 配置最多可容纳 50 块硬盘,因此整套系 统总计可以安装 100 块硬盘。
- 1、下载文档前请自行甄别文档内容的完整性,平台不提供额外的编辑、内容补充、找答案等附加服务。
- 2、"仅部分预览"的文档,不可在线预览部分如存在完整性等问题,可反馈申请退款(可完整预览的文档不适用该条件!)。
- 3、如文档侵犯您的权益,请联系客服反馈,我们会尽快为您处理(人工客服工作时间:9:00-18:30)。
HP StorageWorksMSA2312/2324fc Installation Instructions©Copyright2008Hewlett-Packard Development Company,L.P. First edition:November2008The information in this document is subject to change without notice. Printed in China500917-001Audience AssumptionsThis document is for the person who installs,administers,andtroubleshoots servers and storage systems.HP assumes that you arequalified in the servicing and installation of computer equipment andare trained in recognizing hazards in products and hazardous energylevels.For complete information on installing and configuring your MSAproduct,please see the2312fc and2324fc Modular Smart Array userguide provided on the Software Support/Documentation CD or on theweb at /support/manualsStep1:Install and secure equipment intothe rackUse the rack installation poster provided with your MSA2312/2324fcarray controller and any additional drive enclosures(MSA70orMSA20003.5"12-drive enclosure)into the rack.Site requirementsDetailed site requirements are provided on the back of the rackinstallation poster and in the user guide located on the SoftwareSupport/Documentation CD.Rack PlanningFor information about setting up the rack,including the appropriatewarnings and cautions,refer to the documentation that came withyour rack.Updated rack information can be downloaded from the HPwebsite /products/racksStep2:Install hardware optionsInstall any additional hard drives and options.For information,see theinstallation instructions provided with your option or the documentationCD provided with your equipment.Step3:CablingCommon cable configurations are shown here.For the complete list ofsupported cable/controller configurations see the MSA2312/2324fccable configuration guide which can be downloaded at/support/manualsSee the user guide for complete details and guidelines onconnecting the MSA2312/2324fc to the server(s).MSA2312/2324fc direct connectThe MSA2312/2324fc supports four server connections,two percontroller.Connect Fibre Channel cables from host ports on eachcontroller to FC HBAs on server(s),as shown in the following illustrations.One server/single pathCable Required:•Fibre Channel(1)One server/dual pathCables Required:•Fibre Channel(2)Two servers/dual pathCables Required:•Fibre Channel(4)MSA2312/2324fc switch connectThe MSA2312/2324fc supports four server connections,two percontroller.Connect FC cables from controller hosts ports to switch ports,and from switch ports to data hosts.See the user guide for completedetails.Two servers/two switchesCables Required:•Fibre Channel(8)Connecting remote management hostsThe management host directly manages systems out-of-band over anEthernet network.1.Connect an Ethernet cable to the Ethernet management port oneach controller.2.Connect the other end of each Ethernet cable to a network that yourmanagement host can access(preferably on the same subnet).Additional drive enclosure cablerequirementsObserve the following guidelines when installing SAS cables:•Only use supported SAS4x mini cables with3Gbconnectors.•Ensure that the servers being connected to the MSA arepowered down and power cords are disconnected beforeconnecting SAS cables.MSA20003.5"12-drive enclosure cable optionsMSA2312/2324fc single-controller enclosure and one MSA20003.5”12-drive enclosureCable Required:•Mini SAS4x to SAS4x(1)MSA2312/2324fc dual-controller enclosure and one MSA20003.5”12-drive enclosureCables Required:•Mini SAS4x to SAS4x(2)MSA2312/2324fc dual-controller enclosure and three MSA20003.5"12-drive enclosures (maximum)Cables Required:•Mini SAS 4x to SAS 4x (2)•SAS 4x to SAS 4x(4)MSA70drive enclosure cableoptionsThe MSA2324fc supports both the HP StorageWorks MSA20003.512–drive enclosure and the MSA70drive enclosure with firmware version 2.18or later.The MSA2312supports only the HP StorageWorks MSA20003.512–drive enclosure.MSA2324fc single-controller enclosure and one MSA70drive enclosureCable Required:•Mini SAS 4x to Mini SAS 4x(1)MSA2324fc dual-controller enclosure and one MSA70drive enclosureCables Required:•Mini SAS 4x to Mini SAS 4x(2)MSA2324fc dual-controller enclosure and up to three MSA70drive enclosures (maximum)Cables Required:•Mini SAS 4x to Mini SAS 4x(6)Step 4:PowerCordsImportant safety information about power cords can be found on the Software Support/Documentation CD provided with your MSA chassis.To locate this information look for the Safety and Disposal guide located on the Documents tab.AC models1.Verify that all power switches are off.ing the provided AC power cords,connect each power supplymodule to one power source in the rack.3.Connect the primary power cords from the rack to separate externalpower sources.DCmodelsUse only the DC power cables provided with your product.1.Verify that the main breaker to the rack is shut off prior to makingany DC connections.2.Verify that all enclosure power switches are off.3.Connect a DC power cable to each power supply using theD-shell e the up arrow on the shell to ensure proper positioning beforetightening.4.Tighten the screws at the top and bottom of the shell with a torquebetween 1.7N-m (15lb-in)and 2.3N-m (20lb-in)to attach the cable securely to the DC power sources.5.Securely connect the other end of the DC power cables to the DCpowersource.Check the DC cable labels carefully before connecting the cable to the source.One wire is labeled as ground;the other two are labeled as positive and negative.6.Turn on the main breaker to the rack.Step 5:PoweringupWhen powering up,make sure to power up the enclosures and associated server(s)in the following order:•Drive enclosures first (MSA20003.5"12-drive or MSA70enclosures)•Array controllers next (MSA2312fc or MSA2324fc)•Server(s)last (if they are powered down for maintenancepurposes)To power on the system:1.Press the power switches at the back of each drive enclosure to theOn position.Wait several minutes to make sure that all drives have had time to spin up so that they can be recognized by the array controller.2.Press the power switches at the back of the array controllerenclosure to the On position.Step 6:Con figure your MSARefer to the user guide on the Software Support/Documentation CD provided with your MSA2312/2324fc for complete con figuration and setup information.Additional information sitesMSA products:/go/msa Storage products:/storage Servers:/go/servers SAN infrastructure:/go/san Ethernet NICs:/servers/networking Web Based Enterprise Services:/support/svctools/webes/index.html。