气象站说明书-通用版
自动气象站使用说明
自动气象站使用说明书一、概述自动气象站是由多要素气象传感器、气象数据采集单元、太阳能(市电)供电系统、低功耗GPRS(或北斗卫星)专用通讯模块、防辐射外罩、防水箱、不锈钢支架和避雷装置等部分构成。
风速风向等传感器为气象专用传感器,具有高精度高可靠性的特点。
微电脑气象数据采集仪具有气象数据采集、实时时钟、气象数据定时存储、参数设定和标准通信功能,搭配GPRS(或北斗)通讯模块,可实现远程收集气象信息。
广泛应用于气象、环保、机场、农林、水文、军事、仓储、科学研究等领域。
二、主要技术参数(参考表1)表1:1三、结构简图、各部件名称及各部件功能说明结构简图、各部件名称见附图1;各部件功能见表2。
表2四、安装方法4.1 基础的预埋24.1.1 将4件M12的地脚螺钉埋入浇筑成长600mm、宽600mm、深550mm 的混泥土中,螺钉露出混凝土30mm。
螺钉间距成127mm×127mm正方形。
混凝土顶面要求在同一水平面中。
4.1.2 在距离气象站基础中心1500mm远处,再预埋安装避雷针的基础,其深度不少于1500mm,材料可采用钢钎或其它强导电金属。
4.2 避雷针杆、太阳能电板、免维护电瓶及多要素传感器的安装。
避雷针杆、太阳能电板、数据传输系统、免维护电瓶及多要素传感器的安装(见附图1)。
4.3电气箱的安装4.3.1 打开电气箱,找到无线传输终端,从SIM卡标出正确地插入有效的SIM卡,并确定已插到位。
4.3.2 将无线终端的接收天线从箱底部的孔中穿出,放置在电气箱的顶板上。
4.3.3 将各要素传感器的电缆线按接线图正确连接;再次确认接线无误最后接上电瓶电源(注意电瓶的正、负极)。
五、网络地址及软件说明5.1 网络地址每套自动气象站安装好使用前,需要设置其所在站点的ID号(注册报文)、服务器IP地址及远程端口;这些参数在系统安装时被写入无线数传模块中,正常工作时不需要再进行配置。
每个站点ID号必须是唯一的,否则有些的站点将无法与控制软件进行通信;IP地址必须是固定,通过3ADSL拨号上网的电脑,通常情况下,自动获取的外网IP是动态变化的,除非向网络运营商提出申请,否则,各站点将无法完成与中心的通讯;在系统测试阶段,可以通过改写无线数传模块的服务器IP来适应变化的外网IP。
天气站说明书

PROFESSIONNAL WEATHER STATION- Instruction Manual -1/ FUNCTION DESCRIPTION5 kinds of weather forecast, BAR display in dynamic curve, pressure measurement, history record and trend display of pressure in the past 12 hoursMax/min value of indoor temperature and humidityFive channels in total. Three channels for outdoor temperature and humidity, one for wind speed and direction, and the other for rainfall. Max/ min value and trend of outdoor wireless temperature and humidity.Real-time outdoor wireless wind speed and direction, the average of wind speed, wind trend and max and min value of the wind information. Outdoor heat index, dew point, chill coefficient.Display the rainfall of current day; the current rainfall rate; Record of the past 1 hour, 24hours, 1 week and 1 month. Perpetual calendar with moon phase, RCC DCF Alarm, backlight, snooze2/ MAIN FUNCTION12 functional keys: -/RCC 、+/℃/℉、MODE 、CHANNEL 、MAX/MIN 、SNOOZE/LIGHT 、ALERT 、HISTORY 、RAINFALL 、ALARM ON/OFF 、HI/DP/CHILL 、WIND. Automatically clock receiving (DCF) Daylight saving time.Time and perpetual calendar displaying. Two time format to be selected 12/24 hr. Single alarm, five minutes snooze function.Two temperature display format options (℃ / ℉). Indoor temperature and humidity displaying.Range of indoor temperature testing: -10℃~ 60℃ (14 ℉ ~ 140℉) testing cycle: 30 seconds Range of indoor humidity testing: 20% ~ 95%.Max and min values of Indoor temperature and humidity.Three different wireless channels work together for three sets receiving of outdoor temperature and humidity. Range of temperature testing: -40 ℉ ~ 158 ℉; Testing cycle: about 1 minute.The max and min of outdoor temperature and humidity.The up and low limit of indoor and outdoor temperature alarm. Indoor/ outdoor temperature trend.Range of outdoor wind speed and direction testing: 00KM/Hr ~ 150KM/Hr, 16 wind directions index.The average wind speed, max and min record and / trend of wind speed.The average and real-time wind speed display.RF outdoor rainfall detection.Rainfall display: total rainfall of the day, current rainfall rate, rainfall of the past 1 hour &24 hours, 1 week and Last monthUnit to select: mm (/ h) or inch (/ h).Calculate of outdoor Dew point, Heart index and Wind chill.5 kinds of weather forecast: sunny, semi-sunny, cloudy, rainy and stormy.Atmospheric pressure unit selection: mb / hpa or inHg.Record of atmospheric pressure changes in the past 12-hour.BAR display of the atmospheric pressure in the past 12-hour.Moon phase calculate.Receiver can display low power index of 4 parts: Receiver, temperature sensor , wind speed sensor , rainfall sensor.LED backlight.3/ P OWER AND RESETAfter put on the battery, LCD will display three seconds with a sound of BI at the sametime, start detecting temperature humidity and pressure inside the sensor, and then automatically enter the RF and RCC receiving. RCC receiving for 7 minutes, exit after received or press "-/RCC" key to exit.Perpetual calendar defaults to 1 January, 2009 0: 00.Alarm default (AM) 7:00.The time format default for 24 hr.Default temperature unit (DCF): ℃.Default weather symbol: cloudy.Default pressure unit is hpa mBar.Default rainfall unit is mm (mm/hr).4/ OPERATION4.1/ KEY FUNCTIONS4.2.1/ MODEIn normal mode, press MODE once to check ALARM, DST; Hold to enter time setting mode.In alarm mode, hold to enter alarm setting.4.2.2/ ALARMIn normal mode or alarm mode, press ALARM ON/OFF key to on/off alarm.4.2.3/ +/C/FWhen setting, press +/℃/℉once to adjust by one step (ahead), hold more than 2 seconds to adjust fast by 8 steps/ second.In normal mode, press to switch between ℃/℉4.2.4/ -/RCCIn setting mode, press -/RCC to adjust by one step (back), hold more than 2 seconds to adjust fast by 8 step/second.In normal mode, press to switch the ZONE OFFSET +1 →+2 →-1→normal.In normal mode, Hold more than 2 second force into RCC receiving mode, press again to exit.4.2.5/ HI/DPSwitch among HEATINDEX、DEWPOINT and WINDCHILL4.2.6/ SNOOZEIn normal mode, press SNOOZE to light for 5 seconds.When alarm, press SNOOZE key stop alarm and into five minutes snooze mode.4.2.7/ CHANNELIn normal mode, press CHANNEL to switch RF channels CH1 --> CH2--> CH3 -->cycle display.In normal mode, press CHANNEL key longer than 2 seconds, clear all outdoor channel records (outdoor temperature and humidity, wind speed, rainfall).Channel set in the ALERT mode, select the channel settings.4.2.8/ RAINFALLIn normal mode, press RAINFALL to switch among the current rainfall rate, the rainfall in the past 1 hour, past 24 hours, past 1 week and past a month. Press again to back to rainfall display of current day.4.2.9/ ALERTIn normal mode, press ALERT once to on/off temperature alarm.In normal mode, hold ALERT more than two seconds to enter temperature alarm setting.In temperature alarm setting mode, press ALERT to confirm setting item.4.2.10/ HISTORYIn normal mode, press once to check pressure record in the past 12 hours,hold for more than two seconds into relative pressure setting.Setting order:Select LOCAL → weather state setting → unit setting (mb hpa or inHg) →exit.Select SEA LEVEL → weather state setting → unit setting (mb hpa or inHg) → sealevel setting →exit.4.2.11/ WINDHold more than two seconds into wind speed setting, press "+/℃/℉" or "-/RCC" to select unit and to set average wind speed.4.2.12/ MAX / MINPress MAX / MIN to check the max value of indoor and outdoor temperature humidity and wind speed. The display will continue for 20 seconds if without pressing any key.Press again to check the min value, the display will continue for 20 seconds. Press again back to normal display.When display max or min, hold MAX / MIN for 2 seconds to clear the present memory of max/min value and then back to the normal display mode.4.3/ TIME SETTINGIn normal mode, hold ”MODE for more than 2 seconds into time setting.Time setting order: hour→ minute →year(2000-2099 year)→month date / date month→12/24H → exitThe setting item will twinkling at a frequency of 1HZ.Press MODE to confirm the setting and turn to next setting item.Press “+/℃/℉”once to ahead one step, hold m ore than 2 seconds to ahead by 8 steps/ second.Press “-/RCC”once to back one step, hold more than 2 seconds to back by 8 steps/ second.Without any effective handling more than 20 seconds, will exit setting automatically.4.4/ ALARM SETTING1. Hold MODE more than into ALARM setting.2. Setting order: ALARM hour→ ALARM minute →exit.3. When setting, the setting item will twinkling at a frequency of 1HZ.4. Press MODE to confirm the setting item and turn to next setting.5. Press “+/℃/℉”once to ahead one step, hold more than 2 seconds to ahead by 8 steps/ second.6. Press “-/RCC”once to back one step, hold more than 2 seconds to back by 8 steps/ second.7. Without any effective handling more than 20 seconds, will exit setting automatically.8. When into alarm setting, the alarm will be on automatically.4.5/ TEMPERATURE ALERT SETTINGPress “ALERT” to on/ off temperature alert.Hold “ALERT” more than 2 seconds into alert setting.Setting order: upper limit→lower limit →exit, in the setting mode, press CHANNEL to select the channel of outdoor temperature alert.Default upper limit of indoor temperature is 60°C (122 °F) and outdoor temperature is 70°C (158 °F) , the lower limit is: indoor -10°C (14 °F), outdoor -40°C(-40 °F). When setting, the setting item will twinkling at a frequency of 1HZ.Press “ALERT” to confirm setting item and turn to next setting.Press “+/°C/°F”once to ahead one step, hold more than 2 seconds to ahead by 8 steps/ second.Press “-/RCC”once to back one step, hol d more than 2 seconds to back by 8 steps/ second.Without any effective handling more than 20 seconds, will exit setting automatically.When into alert setting, the alert will be on automatically.4.6/PRESSURE SETTINGSIn normal mode, press “HISTORY” once to check record of pressure in the past 12 hours.Hold “HISTORY” more than 2 seconds into relative setting of weather.Setting order:Select LOCAL →weather state →unit option (mb hpa or inHg) →exit.Select SEA LEVEL → weather state → unit option (mb hpa or inHg) → sealevel setting →exit.When setting, the setting item will twinkling at a frequency of 1HZ.Press “HISTORY”to confirm setting item and turn to next setting.Press “+/°C/°F”once to ahead one step, hold more than 2 seconds to ahead by 8 steps/ sec ond.Press “-/RCC”once to back one step, hold more than 2 seconds to back by 8 steps/ second.Without any effective handling more than 20 seconds, will exit setting automatically.4.7/ WIDE SPEED SETTINGHold “WIND”more than 2 into wind relative setting.Setting order: select unit→ time of average wind speed→exit.When setting, the setting item will twinkling at a frequency of 1HZ.Press “Wind” to confirm setting item and turn to next setting.When setting unite, press “+/°C/°F ”or“-/RCC” to select m/s、Km/h、mph、knotsWhen in time setting o f average wind speed, press “+/°C/°F”once to ahead one step, hold more than 2 seconds to ahead by 8 steps/ second.When in time setting of average wind speed, press “-/RCC”once to back one step, hold more than 2 second s to back by 8 steps/ second.Without any effective handling more than 20 seconds, will exit setting automatically.4.8/ RAINFALL SETTINGHold “RAINFALL” more than 2 seconds into rainfall setting.When setting, the setting item will twinkling at a frequency of 1HZ.When in unit setting, press “+/°C/°F”or“-/RCC” to select INCH, MM.Press “RAINFALL” or without any effective handling more than 20 seconds, w ill exit setting automatically.5/ FUNCTION AND EFFECT5.1/ RF RECEIVINGWhen power on, it will automatically into RF receive for 3 minutes after temperature and humidity testing. 3 minutes later into RCC receiving.In normal mode, press Channel more than 2 seconds to force clear all registration information of channelsIf the registered CH temperature does not receive any effective signals from the same ID Code in 60 minutes, the CH temperature will display twinkling. If the wind speed does not receive any effective signals from the same ID Code in 60 minutes, it will display twinkling.If the rainfall does not receive any effective signals from the same ID Code in 60 minutes, it will display twinkling.When the information of temperature / wind speed / rainfall lost, it will return to display after receive the signal again.5.2/ RCC RECEIVING FUNCTIONSEnter the RCC receiving conditions:⏹When change the battery or reset to enter RCC receiving.⏹Automatically receiving RCC at 2:03, 3:03, 4:03, and 5:03 everyday.⏹Press “RCC ” 2 seconds receive the RCC receiving comely.RCC receiving time is 7 minutes.Symbol of RCC receiving:When into RCC receiving, the tower-like RCC symbol will twinkling at a 1HZ frequency.⏹When received signals successfully, RCC receiving symbol will display fully and exit receiving mode.⏹When successfully received signal, the sign of the RCC display quiescence and exit the receiving modeWhen RCC receiving, there are no functions of other keys. Press "-/RCC" will exit receiving modeIf failed to receive present-day, time for receiving next day is 2:03 a.m..When in RCC receiving, exit RCC receiving and turn into alarm when alerting.DST symbol on LCD displays when received DST signals. RCC & DST symbol disappears after resetting time when RCC & DST symbol displaying.5.3/ ALARM FUNCTIONBUZZER alarm for 2 minutes and alarm mode as belowa.0-8 seconds: beep once every secondb.9-22 seconds: beep twice each secondc.23-56 seconds: beep four times each secondd.57-120 seconds, serial beep.When alarming, press SNOOZE and prolong for 5 minutes, press other keys to exit.5.4/ TEMPERATURE AND HUMIDITY FUNCTIONSIndoor temperature scope: -10°C ~ +60°C (14°F ~ +140 °F).Humidity detection scope: 20% ~ 95%.Outdoor temperature display scope: -40°C ~ +70°C (-40°F ~ +158°F).Detecting indoor temperature cycle: 30 seconds.Temperature testing accuracy: +/-1°C when in 0°C~50°C (32 °F ~ +122 °F),+/-1.5 °C when in -10°C~0°C(14 °F ~ +32 °F) and 50°F~60°F(122 °F ~ +140 °F).It will stop testing when in alarming or in RCC receiving.5.5/ TEMPERATURE ALARM FUNCTIONDefault upper limit of indoor temperature is 60°C and outdoor temperature is 70°C ,the lower limit is: indoor -10°C, outdoor -40°C.When alarming, relative temperature and alarming symbol is twinklingTemperature alarm buzzers:⏹Continue alarming 4 Bi per second.⏹Stop until the conditions meets alarm.Stop alarm conditions:⏹Press any key to stop the temperature alarming, alarm again the next minute.⏹Stop alarming when the temperature back to the range of setting temperature.5.6/ FORECAST AND PRESSUREPressure units: Hpa / Mb or InHg.5 kinds of weather forecast.Temperature, humidity and wind speed display.Past 12 hours pressure data record.Past 12 hours BAR pressure chart display.5.7/ OUTDOOR WIND CHILL HEAT INDEX AND DEW POINTAutomatically calculate the channels of outdoor Wind Chill, Heat Index and Dew Point value.According to outdoor temperature and Wind speed to calculated Wind Chill value; Display the current value when temperature higher than 4.4°C (40°F) According to outdoor humidity and temperature to calculated Heat Index value; Display the current value when temperature lower than 4.4°C (40°F) According to outdoor humidity and temperature to calculated Dew Point value5.8/ WIND SPEED AND WIND DIRECTION16 levels of wind directionGust show.Display the average wind speed of user-defined (1-19 minutes average wind speed adjustable).The trend of the average wind speed.Unit: M / S, KM / H, MPH, Knot.When the anemometer reset, adjust the wind vane to the north of compass manually, then press the TX button inside the wind cup.5.9/ RAINFALLRainfall unite: mm (/ h) or inch (/ h)Intraday rainfall.The current rainfall rate.Total rainfall of 1 past hour.Total rainfall of 24 past hours.Total rainfall of 1 past week.Total rainfall of 1 past month6/ DETAILS AND PRECAUTIONS ON THE USE OF BATTERIES- Discard a used battery in nature or garbage pollutes and prevents the recovery of recyclable materials.It is therefore important to limit consumption of batteries and follow these guidelines:focus on alkaline batteries (that last longer than the saline batteries) and when possible, rechargeable batteriesdeposit batteries and accumulators in specific containers arranged among traders.For example, metals will be valued and polluted the environment because they contain heavy metals hazardous to health and the environment primarily (cadmium and nickel)- The piles must installation by respecting the polarity indicated on the apparatus and the pile.An incorrect positioning can is to damage the apparatus, is to cause escapes on the level of the pile, is to the extreme to cause a fire or the explosion of the pile.- To ensure proper operation, the batteries must be in good condition. In case of abnormality in the functioning of the device, put fresh batteries- Never attempt to recharge non-rechargeable batteries. They could run, warm up, causing a fire or explosion.- Replace all batteries at the same time. Never mix zinc batteries with alkaline batteries or rechargeable batteries- The batteries must be removed from the device- Also, remove the batteries from your device if you do not use it for a long time, if the batteries may leak and cause damage.- Never try to short-circuit the battery terminals- Never dispose of batteries in fire, they might explode- Charging of batteries is to be performed by an adult.- Remove batteries from the device before reloading.- We recommend an adult to supervise children when they change the batteries so that these instructions are complied with or to make himself the replacement of batteries.- If a battery is swallowed, immediately consult a doctor or poison control center nearest you. Do not forget to carry the product with you.- Fix the anemometer as shown on the picture 2, then install 2 AA batteries.- Push the wind vane towards the true north, based on the indication of the compass on the wind vane.- Check that the wind vane is correctly oriented, then press on the button "TX" (picture 4): the system will consider this direction as being the default true north (picture 3).- Each time you replace the batteries of the anemometer, or you change the location, check through the method above that the wind vane is correctly oriented towards the true north.。
DZZ5型自动气象站说明书(多要素)

1 2 3 系统概述 ....................................................................................................................................................... 1 技术指标 ....................................................................................................................................................... 3 数据采集系统 ............................................................................................................................................... 5 3.1 3.2 3.3 3.4 4 主采集器.............................................................................................................................................. 5 分采集器.............................................................................................................................................. 7 温湿智能测量传感器 .......................................................................................................................... 9 总线 ................................................................................................................................................... 10
PR-QXZN-M 气象站说明书

新版气象站PR-QXZN-MVer2.1目录第1章产品简介 (3)1.1产品概述 (3)1.1功能特点 (3)1.3主要参数 (4)1.5产品选型 (4)第2章硬件连接 (5)2.1设备安装前检查 (5)2.2采集终端安装 (6)2.3气象监测一体机安装 (7)2.4防水箱安装 (7)2.5接线及上电 (8)第3章参数配置 (9)第4章连接软件平台 (11)第5章ModBus-RTU从站口通信说明 (12)5.1接线说明 (12)5.2参数设置 (12)5.3通讯基本参数 (13)5.4数据帧格式定义 (13)5.5寄存器说明 (14)5.6通讯协议示例以及解释 (16)第1章产品简介1.1产品概述PR-QXZN-M气象监控主机是一款气象站专用控制主机。
该设备具有1路ModBus-RTU主站接口(可通过此接口连接我司485变送器:1路风速,1路风向,4路土壤温度+水分,4路土壤EC+PH,1路空气温湿度,1路噪声,1路二氧化碳,1路大气压力,1路光照,1路雨雪状态,1路紫外线,1路总辐射,1路一氧化碳,1路臭氧,1路二氧化氮,1路二氧化硫,1路硫化氢,1路氧气,1路空气质量)、1路雨量采集(总雨量+瞬时雨量+日雨量+当前雨量)、一路氮磷钾、1路负氧离子,2路继电器输出(选配);该设备可通过GPRS方式将数据上传值监控软件平台,同时该监控主机还带有1路ModBus-RTU从站接口也可将数据通过485通信的方式上传至客户的监控软件或PLC组态屏等;该主机还能外接1路LED屏显示(点阵数96*48)。
1.1功能特点⏹具有1路ModBus-RTU主站接口可接入我司485变送器:风速、风向、土壤温度水分、土壤ECPH、空气温湿度、噪声、空气质量、大气压力、光照、雨雪、紫外线、总辐射、CO、O3、NO2、SO2、H2S、O2、CO2、氮磷钾、蒸发量、负氧离子等变送器。
⏹外接翻斗式雨量计,可采集总雨量、瞬时雨量、日雨量、当前雨量。
sx-11气象站说明书
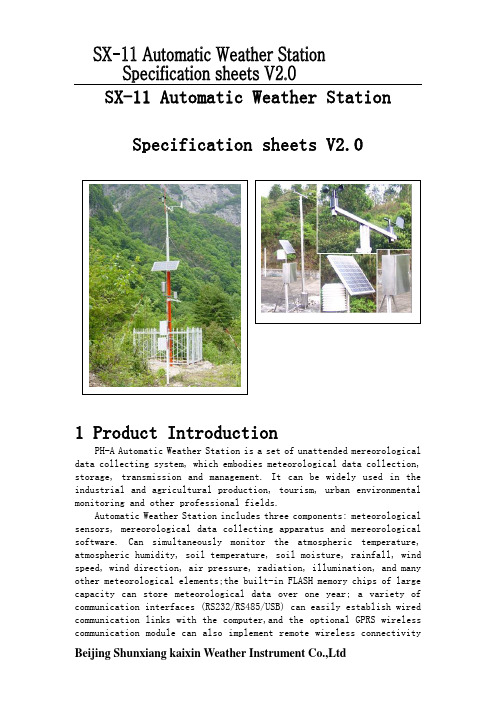
SX-11 Automatic Weather Station Specification sheets V2.01 Product IntroductionPH-A Automatic Weather Station is a set of unattended mereorological data collecting system, which embodies meteorological data collection, storage, transmission and management. It can be widely used in the industrial and agricultural production, tourism, urban environmental monitoring and other professional fields.Automatic Weather Station includes three components: meteorological sensors, mereorological data collecting apparatus and mereorological software. Can simultaneously monitor the atmospheric temperature, atmospheric humidity, soil temperature, soil moisture, rainfall, wind speed, wind direction, air pressure, radiation, illumination, and many other meteorological elements;the built-in FLASH memory chips of large capacity can store meteorological data over one year; a variety of communication interfaces (RS232/RS485/USB) can easily establish wired communication links with the computer,and the optional GPRS wirelesscommunication module can also implement remote wireless connectivity2Basic ConfigurationCollection Apparatus:Meteorological Data Collction ApparatusSensor:□wind speed□wind direction□air temperature□air humidity□soil temperature□soil humidity□rainfall□atmospheric pressure□evaporation□global solar radiation□ray radiation□other Communications:□RS232、□RS485、□USB、□GPRS(wireless)Power Supply System:□ DC 12~36V;□ AC 220V;□ Solar battery;□other Software Installation Disk:Mereorological software installation disk Installation Parts:□Light thermosceen□Outdoor profective housing、□Tripods、□Adaptive cables3 Sensor Paramater4 Installation & UseDetailed installation methods, please consult“ PH450 Automatic Meteorological Station Installation M anual”5 Operating method of Meteorological Data Collction ApparatusStructureDiagramInterfaceLiquid crystal screenKey patSensor interfaceEMIFCommunication interface6 Operating method of meteorological softwarePH450 Meteorological data collction apparatus and computer communicate via standard RS232/485 serial ports, USB, GPRS wireless communications or LAN access style. PH meteorological software can communicate with more than one PH meteorological data collction apparatus, composing multi-site meteorological monitoring network. Meteorological software can read both current and historical meteorological data, store them in the Access database and make data analysis through tables and curved view.【Software Installation】Findthe installation source files of “Automatic Meteorological Station S oftware”, and install them in the computer.【Software Use】Click on "Help" menu in the menu bar click, open the "Help" selection, then"PH Automatic Meteorological Station Help Documents" will pop up.Consult this document for detailed using method.7. Precautions1、Examine whether the package is intact or not please, and check whether the productis consistent with your selected type.2、Be sure no power is aupplied before you ensure the wiring connection is errorless;3、No alteration to factory-set compnents or canles;4、Do not disassemble the apparatus to avoid damage;5、Please keep verification certificate and certificate of approval;and return themalong with the product for maintenance.Additional list:Wind force(wind speed) Scale。
自动气象站使用说明书

目录第一章系统概述--------------------------------------------------------------------------------------- 21.1 概述--------------------------------------------------------------------------------------------- 21.2 系统构成--------------------------------------------------------------------------------------- 21.3 系统特点--------------------------------------------------------------------------------------- 21.4 系统配置清单--------------------------------------------------------------------------------- 3 第二章传感器、设备主要参数与安装说明------------------------------------------------------- 42.1 传感器主要参数------------------------------------------------------------------------------ 42.2 设备主要参数--------------------------------------------------------------------------------- 42.3 设备安装说明--------------------------------------------------------------------------------- 5第三章数据采集控制器使用说明------------------------------------------------------------------- 83.1 概述--------------------------------------------------------------------------------------------- 83.2 传感器接口说明------------------------------------------------------------------------------ 83.3 技术指标-------------------------------------------------------------------------------------- 93.4 数据采集控制器的使用方法-------------------------------------------------------------- 103.5 按键与显示介面介绍----------------------------------------------------------------------- 10 第四章监测分析软件的介绍与使用---------------------------------------------------------------- 144.1 概述-------------------------------------------------------------------------------------------- 144.2 安装、卸载与运行--------------------------------------------------------------------------- 154.3 登陆界面与主菜单介绍--------------------------------------------------------------------- 174.4 实时数据的界面操作------------------------------------------------------------------------ 184.5 全要素实时曲线界面操作------------------------------------------------------------------ 194.6 单要素实时曲线界面操作------------------------------------------------------------------ 204.7 历史趋势界面操作--------------------------------------------------------------------------- 214.8 通讯参数的设置------------------------------------------------------------------------------ 224.9 子站参数设置与管理------------------------------------------------------------------------ 234.10 子站参数浏览------------------------------------------------------------------------------- 244.11 子站时间校对------------------------------------------------------------------------------- 244.12 子站容量控制操作------------------------------------------------------------------------- 254.13 导出数据的操作---------------------------------------------------------------------------- 25 后记-------------------------------------------------------------------------------------------------------- 26第一章系统概述1.1 概述:DZR-N2自动气象站是由大自然测控技术有限公司研制开发,针对温度、湿度、降雨量、风速和风向五种环境要素的综合监测系统。
手持式气象站使用说明书
手持式气象站使用说明书目录1、产品简介 (1)2、功能特点 (2)3、技术参数 (2)4、安装使用方法 (3)4.1传感器的安装 (3)4.2电池的安装 (3)4.3按键功能说明 (4)5、菜单说明 (4)5.1温度、湿度、风速、风向、时间及电池电量显示 (4)5.2参数修改 (4)5.2.1本机地址、存储间隔、语言设置及参数复位设置 (4)5.2.2系统时间设置 (5)6、软件的使用 (5)6.1软件的安装 (5)6.2软件的运行设置及使用方法 (7)6.3数据的导出方法 (11)7、注意事项 (12)8、附表风力(风速)等级表 (13)9、联系方式 (13)1、产品简介手持式气象站是一款携带方便,操作简单,集多项气象要素于一体的可移动式气象观测仪器。
系统采用精密传感器及智能芯片,能同时对风向、风速、大气压、温度、湿度五项气象要素进行准确测量。
内置大容量FLASH存储芯片可存储至少一年的气象数据;通用USB通讯接口,使用配套的USB线缆即可将数据下载到电脑,方便用户对气象数据的进一步处理分析。
本仪器可广泛应用于气象、环保、机场、农林、水文、军事、仓储、科学研究等领域。
2、功能特点●128×64大屏幕液晶显示温度、湿度、风速、气压值;●特制的风向刻度盘(16个方位)及指针用来指示实时风向;●大容量数据存储,最多可存储40960条气象数据(数据记录间隔可在1~240分钟之间设置);●通用USB通讯接口,方便数据下载;●系统语言可在中文和英文之间切换;●只需三节5号干电池供电;低功耗设计,长时间待机;●结构设计科学合理,方便携带。
3、技术参数气象参数测量要素测量范围精度分辨率单位风速0~45±0.30.1m/s风向16方位±1方位1方位方位大气温度-50~80±0.3℃0.1℃相对湿度0~100%±50.1%RH大气压力10~1100±0.30.1hPa电源5号干电池(3节)通讯USB存储4万条数据主机尺寸160mm×70mm×28mm整机尺寸405mm×100mm×100mm 重量约0.5Kg工作环境-20℃~80℃;5%RH~95%RH4、安装使用方法SETO N/O F F16.mm70.00 m m4.1传感器的安装(1)将风速传感器部件插入到手持气象仪顶部的传感器接口,并将固定螺盖顺时针拧紧。
小型气象站说明书
小型气象站说明书小型气象站,用于对风速、风向、雨量、空气温度、空气湿度、太阳辐射、光照强度、土壤温度、土壤湿度、蒸发量、大气压力等气象要素进行全天候现场监测。
既可以通过无线通讯将数据传送至云平台,又可以通过专业配套的数据采集通讯线与计算机进行连接,将数据传输到计算机数据库中,用于统计分析和处理。
小型气象站由气象传感器、数据采集终端、电源系统、野外防护箱和支架等部分构成。
风速、风向、雨量、蒸发量等传感器为气象专用传感器,具有高精度高可靠性的特点。
数据采集终端具有气象数据采集、气象数据定时存储、参数设定、友好的软件人机界面和标准通信功能。
★ 主控制器技术参数·数据存储空间:40000条(视通道数量而定)·记录间隔:30分-24小时可调·通讯接口:USB 2.0·工作环境:-40℃~85℃·供电:220V或太阳能供电·数据传输:4G或RS485★ 传感器技术参数三、功能特点◆ 实时监测风速、风向、雨量、空气温度、空气湿度、光照强度、土壤温度、土壤湿度、蒸发量、大气压力等十个气象要素参数;◆ 气象数据记录仪具有气象数据采集、气象数据定时存储、参数设定、参数和气象历史数据断电自动保护等功能;◆ 可靠运行于各种恶劣的野外环境,低功耗、高稳定性、高精度、可无人值守;◆ 采用全不锈钢支架和野外防护箱,外形美观、耐腐蚀、抗干扰。
不锈钢支架总高2.3米,支架分两节,可拆装,运输、携带方便;记录仪采用密闭防水理念设计,可有效保护箱体内器件不被损坏或发生短路现象。
◆ 可配置避雷装置保护措施;◆ 硬件和软件均采用模块组合式开放性设计,可灵活组合使用;◆ 汉字软件人机界面,人机界面友好;◆ 气象传感器可根据需要选配,配置不同参数;◆ 光伏充电系统供电与AC 220V供电可自由选择;◆ 软件功能强大,可以将采集器中的数据导入计算机中,并可以存储为EXCEL表格文件,以供其它分析软件进一步进行数据处理;◆ 通讯方式灵活多样,标配无线通讯,云端数据上传,另外可定制RS485通讯等本地通讯方式。
第二代自动气象站功能规格书
第二代自动气象站功能规格书中国气象局监测网络司2008年4月目录1前言 (1)1.1目标 (1)1.2编写原则 (1)1.3编写依据 (1)2组成结构 (2)2.1概述 (2)2.2采集器 (3)2.3总线 (7)2.4传感器 (8)2.5外围设备 (8)2.6软件 (9)3总线物理接口及应用层协议 (10)3.1物理接口 (10)3.2连接器 (10)3.3应用层协议 (11)4功能要求 (11)4.1软件初始化 (11)4.2数据采集 (11)4.3数据处理 (11)4.4数据存储 (12)4.5数据传输 (15)4.6数据质量控制 (16)4.7终端操作命令 (21)4.8GPS对时功能 (23)4.9人工输入观测资料 (23)4.10嵌入式软件在线升级 (23)5测量性能 (23)5.2量和单位 (24)5.3要求 (25)5.4采样和算法 (26)6嵌入式软件流程 (38)6.1采集软件流程 (38)6.2数据流程 (40)7传感器要求 (40)7.1气压传感器 (40)7.2温度测量传感器 (41)7.3湿度测量传感器 (41)7.4风测量传感器 (42)7.5降水测量传感器 (43)7.6蒸发测量传感器 (43)7.7红外地表测温仪 (44)7.8辐射测量传感器 (44)7.9日照测量 (46)7.10能见度测量传感器 (46)7.11土壤水分传感器 (46)7.12地下水位测量传感器 (47)7.13天气现象观测传感器 (47)7.14云量测量传感器 (47)7.15积雪深度测量传感器 (47)7.16冻土深度测量传感器 (47)7.17电线积冰测量传感器 (47)7.18闪电频次测量传感器 (47)7.19海洋测量传感器 (48)8供电电源要求 (48)9安全要求 (48)9.1标记要求 (48)9.2文件要求 (49)9.3结构安全 (49)10工作环境适应性要求 (51)10.1气候条件 (51)10.2生物条件 (51)10.3化学活性物质 (51)10.4机械条件 (51)11电磁兼容性要求 (52)11.1电磁骚扰限值要求 (52)11.2电磁抗扰度要求 (52)12防雷要求 (53)12.1一般要求 (53)12.2直接雷击的防护措施 (53)12.3雷击电磁脉冲的防护 (53)13结构和外观要求 (54)13.1机械结构要求 (54)13.2机械强度要求 (54)13.3材料与涂复要求 (54)13.4外观要求 (54)14可靠性要求 (54)15可维性要求 (55)16其他要求 (55)16.1时钟精度要求 (55)16.2功耗要求 (55)16.3观测的时制 (55)16.4扩展性要求 (55)16.5互换性要求 (55)16.6传感器选型 (56)16.7人机界面要求 (56)17检验要求 (56)18附录 (56)1前言1.1 目标提高防灾减灾能力,做好应对气候变化工作,是党和政府对气象部门的根本要求,也是气象工作者的重要责任。
家庭气象站的使用说明书
家庭气象站的使用说明书一、概述家庭气象站是一款集气温、湿度、气压、风速、降水量等气象数据收集及显示于一体的专业仪器。
本使用说明书旨在帮助用户正确使用家庭气象站,获取准确的气象信息并享受更便捷的生活。
二、外观及功能介绍家庭气象站外观简洁、规格合适,操作简便。
主要功能包括以下几个方面:1. 温度测量与显示:家庭气象站配有高精度的温度传感器,可快速准确地测量当前室内外温度,并在仪器面板上显示。
2. 湿度测量与显示:家庭气象站配备湿度传感器,可实时测量当前室内外湿度,并在仪器面板上直观显示。
3. 气压测量与显示:家庭气象站具备气压传感器,能够实时监测大气压强,并通过数字显示屏直观地展示给用户。
4. 风速测量与显示:家庭气象站内置风速传感器,能够检测风的强度以及风向,并通过可调节的指针付以显示。
5. 降水量测量与显示:家庭气象站根据降水检测原理,能够自动记录并显示降水量,帮助用户了解降水情况。
三、使用方法在开始使用家庭气象站之前,请先仔细阅读以下使用方法,确保操作正确:1. 电源接入:家庭气象站支持USB电源供应,可以通过连接电源适配器或电脑USB接口来提供电力。
2. 室内外温度检测:将气象站合理放置于室外,避免阳光直射和阴雨天气影响测量准确度。
显示屏会同步显示室内外温度。
3. 室内外湿度检测:家庭气象站能同时监测室内外湿度,根据标准读数显示湿度百分比。
4. 气压监测:家庭气象站会持续监测大气压强,读数以标准气压值显示。
5. 风速测量:家庭气象站的风速指针会根据实际风速进行移动。
请确保仪器处于相对通风的位置,以保证测量准确性。
6. 降水量检测:家庭气象站能够记录并显示降水量。
每天凌晨自动归零。
四、注意事项1. 使用环境:家庭气象站适用于室内及室外环境,但要避免暴雨、暴晒等极端天气条件下的使用,以免损坏仪器。
2. 清洁注意:使用柔软的干布轻轻擦拭气象站表面,切勿使用腐蚀性或磨蚀性溶剂进行清洁。
3. 定期校准:为了确保测量结果准确,建议用户定期校准家庭气象站,参考使用说明书中的校准方法。
- 1、下载文档前请自行甄别文档内容的完整性,平台不提供额外的编辑、内容补充、找答案等附加服务。
- 2、"仅部分预览"的文档,不可在线预览部分如存在完整性等问题,可反馈申请退款(可完整预览的文档不适用该条件!)。
- 3、如文档侵犯您的权益,请联系客服反馈,我们会尽快为您处理(人工客服工作时间:9:00-18:30)。
折弯板 螺丝、螺母
1块 3套 固定在折弯板 ===============================
1.将空气温湿度传感器水平放置在百叶箱内,用螺丝固定(出 安装 厂时已固定好) 。 位置 2.通过折弯板固定在支架横臂上。
5
将空气温湿度传感器和折弯板从包装箱内取出,先将折弯 板与气象站支架横臂固定,然后将传感器信号线自上而下穿过 折弯板圆孔,用螺母固定传感器与折弯板。最后将传感器信号 线缆与采集器对应接线口相连。
目
录
一、产品概述................................................................................................................2 1、概述..................................................................................................................2 2、构成单元..........................................................................................................3 二、传感器说明............................................................................................................4 1、空气温湿度传感器..........................................................................................4 2、风速传感器......................................................................................................6 3、风向传感..........................................................................................................7 4、雨量传感器......................................................................................................8 5、光照传感器.................................................................................................... 11 6、土壤水分传感器............................................................................................12 7、土壤温度传感器............................................................................................14 8、水面蒸发传感器............................................................................................15 9、二氧化碳传感器............................................................................................16 10、大气压力传感器..........................................................................................18 11、叶面湿度传感器..........................................................................................19 12、叶面温度传感器..........................................................................................20 13、总辐射表......................................................................................................21 14、有效辐射表..................................................................................................23 三、数据采集器..........................................................................................................25 1、220V 供电、带 GPRS 传输的数据采集器..................................................25 2、220V 供电、带 GPRS 传输的数据采集器..................................................27 四、支架安装..............................................................................................................29 1、支架结构........................................................................................................29 2、用户前期准备工作........................................................................................30 3、气象站安装....................................................................................................32 五、软件使用说明......................................................................................................39 1、软件说明........................................................................................................39 2、软件安装........................................................................................................39 3、软件登录........................................................................................................40 4、软件主界面....................................................................................................41 5、即时数据........................................................................................................42 6、历史数据........................................................................................................43 7、设置记录时间间隔........................................................................................44 8、校正表............................................................................................................45
1
一、产品概述
1、概述
本品是一款集气象数据采集、存储、传输和管理于一体气象 采集系统,按照国际 WMO 组织气象标准开发制造,可同时监测 大气温度、大气湿度、土壤温度、土壤湿度、雨量、风速、风向、 气压、辐射、照度等诸多气象要素,具有自动实时显示、自动记 录、实时时钟、数据通讯等功能。 本产品由气象传感器、 气象数据采集器和气象软件三部分组 成。系统采用模块化设计,可根据用户需要(测量的气象要素) 灵活增加或减少相应的模块和传感器,可任意组合,方便快捷的 满足各类用户的需要。系统内置大容量 FLASH 存储芯片可存储 一年以上的气象数据,汉字液晶屏,可随时观测当前气象信息。 与计算机相连可分项查看数据, 并将数据导出到 Excel 进行编辑, 按需要生成图表,快速实现数据统计分析、准确预报。具有技术 先进、测量精度高、数据容量大、遥测距离远、人机界面友好、 可靠性高的优点,广泛用于气象、农业、海洋、环境、机场、 港 口、工农业及交通等领域。