OpenFire插件开发基础教程
openfire详细安装配置步骤
openfire详细安装配置步骤说明:红⾊字体可任意改动(但⼀旦改动,后⾯与此对应的名称也要⼀起改动),该⽂档下的步骤是在win7(32位,64位皆可)Eclipse环境下实现的,openfire⽤的是openfire_src_3_8_2版本;第⼀步:在D盘⾥新建⼀⽂件夹openfire_src,把openfire_src_3_8_2/openfire下的所有⽂件夹copy到openfire_src⾥;第⼆步:因为openfire源码中没有包含coherence.jar、coherence-work和tangosol.jar包,所以把这三个包copy到D://openfire_src/build/lib⾥;第三步:启动Eclipse,新建⼯程File-->New-->javaproject,填⼊项⽬名openfire,选中Createprojectfromexistingsource,然后单击Browse...选出在D盘⾥新建的Openfire_src;单击Finish。
第四步:双击openfire,会看到3处错误,第⼀处错误,是由于hazelcast下⾯包⾥的java代码与clustering下⾯包⾥的java代码重复引起的,直接对⽐包名跟java⽂件名即可,然后在clustering源码中删除与hazelcast想同的java代码;完成后hazelcast将没有错误;第五步:plugins中的错误的修正,直接打开plugins中的最后⼀个包,双击SipCommRouter.java找出出错的地⽅,把光标停留在出错部分,系统会⾃动提⽰错误原因,并提供解决⽅案,单击第⼀个⽅案(Addunimplementedmethods),再点击保存(或按Ctrl+S),SipCommRouter.java的错误会消失;SipManager.java的错误也是这样改的(注意它⾥⾯有2处错误),改正后保存,错误会全部消失(包裹src的错误);第六步:删除clustering插件的plug.xml⽂件,双击src--->双击plugins---->双击clustering----->删除plug.xml;然后再右键点击openfire⼯程--->buildpath---->configurationbuildpath会出现界⾯:单击AddFolder...然后把src/i18n和src/resources/jar勾上,单击OK,第七步:使⽤ant编译,单击window->showview->ant,会出现如下图右侧的界⾯,在空⽩区域右击,选择AddBuildfiles...(或者直接单击蜘蛛快捷图标)出现如下窗⼝项⽬名->buil->build.xml,双击build.xml再次右击右侧空⽩区域,选择RefreshBuildfiles进⾏刷新,最后,单击ant窗⼝⾥⾯的run(也就是绿圆⾥有⼀个⽩⾊三⾓形的图标);等Console窗⼝⾥不再弹出编译信息时,再次单击ant窗⼝⾥⾯的run,Console窗⼝最后倒数第⼆⾏会出现BUILDSUCCESSFUL的提⽰;如下图:第⼋步:右击项⽬名openfire,选择Refresh进⾏刷新,会发现多出了两个⽂件夹target和work。
Openfire-java工程搭建
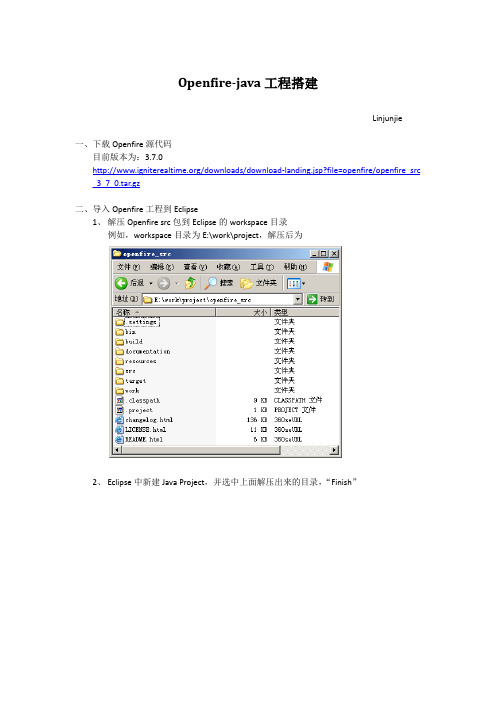
Openfire-java工程搭建Linjunjie一、下载Openfire源代码目前版本为:3.7.0/downloads/download-landing.jsp?file=openfire/openfire_src _3_7_0.tar.gz二、导入Openfire工程到Eclipse1、解压Openfire src包到Eclipse的workspace目录例如,workspace目录为E:\work\project,解压后为2、Eclipse中新建Java Project,并选中上面解压出来的目录,“Finish”3、添加Plugin的依赖包coherence(3.3.1版本,如下),编译通过4、打开Ant view,右键中加入build.xml编译打包脚本5、配置Openfire运行环境1)打开运行配置对话框,新建Java Application配置2)配置运行参数Main标签页中Name:openfireMain class:org.jivesoftware.openfire.starter.ServerStarter选中“Stop in main”Arguments标签页中VM arguments:-DopenfireHome="${workspace_loc:openfire_src}/target/openfire"Classpath标签页中User Entries Advanced->Add Floders添加两个目录:openfire_src\resources、openfire_src\src\i18nCommon标签页中,勾选“Run”、“Debug”“Apply”配置参数。
3)复制配置文件到运行目录拷贝openfire_src\src\i18n\openfire_i18n_en.properties openfire_src\src\resources\jar\admin-sidebar.xml 到openfire_src\bin目录下三、Eclipse编译&运行openfire1、编译通过ant编译,双击Ant脚本2、Run/Debug“openfire”。
OpenFire源码学习之二十:在openfire中使用redis插件(下)

OpenFire源码学习之二十:在openfire中使用redis插件(下)Redis插件实现首先来看下插件目录:RedisServicePlugin源码清单:[java] view plain copyprint?1.import java.io.File;2.import java.sql.Connection;3.import java.sql.PreparedStatement;4.import java.util.Collection;5.import java.util.HashMap;6.import java.util.Map;7.8.import org.jivesoftware.database.DbConnectionManager;9.import org.jivesoftware.openfire.XMPPServer;10.import org.jivesoftware.openfire.container.Plugin;11.import org.jivesoftware.openfire.container.PluginMana ger;12.import org.jivesoftware.util.JiveGlobals;13.import org.jivesoftware.util.PropertyEventDispatcher;14.import org.jivesoftware.util.PropertyEventListener;15.import org.jivesoftware.util.redis.enity.RedisConfig;16.import er;17.import erVcard;18.import org.slf4j.Logger;19.import org.slf4j.LoggerFactory;20.import redis.clients.jedis.Jedis;21.22.public class RedisServicePlugin implements Plugin, Pr opertyEventListener{23.24.private static final Logger log = LoggerFactory.getLog ger(RedisServicePlugin.class);25.26.private static final String OF_REDIS_CONFIG_DELETE = "delete from redisConfiguration";27.private static final String OF_REDIS_CONFIG_INSERT = "INSERT INTO redisConfiguration (name, ip, port, auto) VALUES (?, ?, ?, ?)";28.29.private XMPPServer server;30.private boolean enabled;31.32.@Override33.public void propertySet(String property, Map<String, Object> params) {34.if (property.equals("plugin.redis.enabled")) {35.this.enabled = Boolean.parseBoolean((String)params.g et("value"));36.}37.}38.......39.public boolean isEnabled() {40.return enabled;41.}42.43.public void setEnabled(boolean enabled) {44.this.enabled = enabled;45.JiveGlobals.setProperty("plugin.redis.enabled", enabled ? "true" : "false");46.}47.48.@Override49.public void initializePlugin(PluginManager manager, Fi le pluginDirectory) {50.enabled = JiveGlobals.getBooleanProperty("plugin.red is.enabled", true);51.server = XMPPServer.getInstance();52.PropertyEventDispatcher.addListener(this);53.}54.55.@Override56.public void destroyPlugin() {57.enabled = JiveGlobals.getBooleanProperty("plugin.redis.enabled", false);58.PropertyEventDispatcher.removeListener(this);59.}60.61.public void initializeAllData () {62.Collection<RedisConfig> crcfs = getAllRedisConfig();63.if (!crcfs.isEmpty()) {64.for (RedisConfig rcf : crcfs) {65.if ("REDIS_USER".equals(rcf.getName())) {66.setRedisByUserInfo();67.}68.}69.}70.}71.72.public void saveRedisConfig(Collection<RedisConfig> object) {73.PreparedStatement pstmt = null;74.Connection con = null;75.try {76.con = (Connection) DbConnectionManager.getConnec tion();77.if (object != null) {78.pstmt = con.prepareStatement(OF_REDIS_CONFIG_DE LETE);79.pstmt.execute();80.pstmt = (PreparedStatement) con.prepareStatement(O F_REDIS_CONFIG_INSERT);81.for (RedisConfig cr : object) {82.pstmt.setString(1, cr.getName());83.pstmt.setString(2, cr.getIp());84.pstmt.setString(3, cr.getPort());85.pstmt.setString(4, cr.getAuto());86.pstmt.executeUpdate();87.}88.}89.} catch (Exception e) {(e.getMessage());91. e.printStackTrace();92.}93.finally {94.DbConnectionManager.closeConnection(pstmt, con);95.}96.}97.98.public Collection<RedisConfig> getAllRedisConfig() {99.if (server == null)100.server = XMPPServer.getInstance();101.return server.getJedisConfDao().getAllRedisConfig();102.}103.104.public void setRedisOfflineMessage() {105.XMPPServer.getInstance().getChatMessageJedisPoolM anager().initDataByOfflineMessage();106.}107.108.public void destroyOfflineMessage() {109.Jedis jedis = server.getChatMessageJedisPoolManager ().getJedis();110.jedis.flushDB();111.server.getChatMessageJedisPoolManager().returnRes(j edis);112.}113.114.public void setRedisUserSearch() {115.XMPPServer.getInstance().getRedisSearchManager().cr eateSearchAllUserData();116.}117.118.public void destroyUserSearch() {119.Jedis jedis = server.getRedisSearchManager().getSearc hJedis();120.jedis.flushDB();121.XMPPServer.getInstance().getUserJedis().returnRes(jed is);122.}123.124.public void destroyRedisByUserInfo () {125.Jedis jedis = server.getUserJedis().getJedis();126.Map<String, String > user = jedis.hgetAll("OFUSER:ad min");127.jedis.flushAll();128.jedis.hmset("OFUSER:admin", user);129.XMPPServer.getInstance().getUserJedis().returnRes(jed is);130.}131.132.public void setRedisByUserInfo () {133.Jedis jedis = server.getUserJedis().getJedis();134.int i = 1;135.136.Collection<User> users = server.getUserJedis().getAll User();137.if (!users.isEmpty()) {138.for (User user : users) {139.Map<String,String> map = new HashMap<String, Stri ng>();140.map.put("PASSWORD", user.getPassword());141.if (user.getName() != null )142.map.put("NAME", user.getName());143.if (user.getMoblie() != null )144.map.put("MOBILE", user.getMoblie().trim());145.if (user.getEmail() != null)146.map.put("EMAIL", user.getEmail().trim());147.map.put("CREATIONDATE",user.getCreationDate().trim ());148.map.put("MODIFICATIONDATE",user.getModificationD ate().trim());149.jedis.hmset("OFUSER:" + user.getUsername(), map);150.151.System.out.println("The " + i++ + "user generation=> username:" + user.getUsername() + ", name:" + user.getName() );152.}153.System.out.println("the end:user base info generated... ");154.i = 1;155.156.for (User user : users) {157.if (user.getMoblie() != null && !"".equals(user.getMoblie())) {158.jedis.set("MOBILE:" + user.getMoblie(), user.getUserna me());159.System.out.println("The" + i++ + "user,mobile relation generation=> mobile:" + user.getMoblie() + ", username:" + us er.getUsername());160.}161.}162.System.out.println("the end:user and mobile relation g enerated...");163.i = 1;164.}165.166.Collection<UserVcard> uservcards = server.getUserJe dis().getUserVcard();167.if (!uservcards.isEmpty()) {168.for (UserVcard uv : uservcards) {169.if (uv.getVcard() != null && !"".equals(uv.getVcard())) {170.jedis.set("OFVCARD:" + uv.getUsername(), uv.getVcard ());171.System.out.println("The" + i++ + "user vcard generati on=> username:" + uv.getUsername());172.}173.}174.i = 1;175.System.out.println("the end:user vcard generated...");176.}177.178.server.getUserJedis().returnRes(jedis);179.}180.}RedisUserInfoOpt:[java] view plain copyprint?1.import java.util.HashMap;2.import java.util.Map;3.4.import org.jivesoftware.openfire.XMPPServer;5.import er;6.import org.slf4j.Logger;7.import org.slf4j.LoggerFactory;8.9.import redis.clients.jedis.Jedis;10.11.public class RedisUserInfoOpt {12.13.private static final Logger Log = LoggerFactory.getLog ger(RedisUserInfoOpt.class);14.15.public void setBaseUserInfo(User user) {16.if (user != null) {17.Jedis jedis = XMPPServer.getInstance().getUserJedis(). getJedis();18.19.try {20.Map<String,String> map = new HashMap<String, Stri ng>();21.map.put("PASSWORD", user.getPassword());22.if (user.getName() != null )23.map.put("NAME", user.getName());24.if (user.getMoblie() != null )25.map.put("MOBILE", user.getMoblie().trim());26.if (user.getEmail() != null)27.map.put("EMAIL", user.getEmail().trim());28.map.put("CREATIONDATE",user.getCreationDate().trim ());29.map.put("MODIFICATIONDATE",user.getModificationD ate().trim());30.jedis.hmset("OFUSER:" + user.getUsername(), map);("user generation=> username:" + user.getUs ername() + ", name:" + user.getName());32.} finally{33.XMPPServer.getInstance().getUserJedis().returnRes(jed is);34.}35.}36.}37.38.public void setUserMobile(User user) {39.if (user != null) {40.Jedis jedis = XMPPServer.getInstance().getUserJedis(). getJedis();41.try {42.43.} finally {44.XMPPServer.getInstance().getUserJedis().returnRes(jed is);45.}46.47.}48.}49.}redis-service.jsp[html] view plain copyprint?1.<%@ page import="java.util.*,.jivesoftware.openfire.XMPPServer,.jivesoftware.util.*,.montnets.redis.plugin.RedisServicePlugin,.jivesoftware.util.redis.enity.RedisConfig"6.errorPage="error.jsp"7.%>8.9.<%@ taglib uri="/jstl/core_rt" prefix="c" %>10.<%@ taglib uri="/jstl/fmt_rt" prefix="fmt" %>11.12.<%-- Define Administration Bean --%>13.<jsp:useBean id="admin" class="org.jivesoftware.util. WebManager" />14.<c:set var="admin" value="${admin.manager}" />15.<% admin.init(request, response, session, application, out ); %>16.17.<% // Get parameters18.boolean save = request.getParameter("save") != null;19.String initdata = request.getParameter("initdata");20.String deldata = request.getParameter("deldata");21.boolean success = request.getParameter("success") != null;22.RedisServicePlugin rsp = new RedisServicePlugin();23.Collection<RedisConfig> rcList = rsp.getAllRedisConfi g();24.25.// Handle a save26.Map errors = new HashMap();27.Collection<RedisConfig> rcColl = new ArrayList<Redis Config>();28.29.if ("REDIS_USER".equals(initdata)) {30.rsp.initializeAllData();31.response.sendRedirect("redis-service.jsp?success=true");32.return;33.}34.else if ("REDIS_USER".equals(deldata)) {35.rsp.destroyRedisByUserInfo();36.response.sendRedirect("redis-service.jsp?success=true");37.return;38.}39.......40.if (save) {41.String uname = request.getParameter("REDIS_USER");42.String r_user_name = request.getParameter("REDIS_U SER_IP").trim();43.String r_user_port = request.getParameter("REDIS_USE R_PORT").trim();44.String r_user_auto = request.getParameter("REDIS_USER_AUTO").trim();45.if (r_user_name == null || r_user_port == null) {46.errors.put("uname", "Redis-User is error!");47.}48.else {49.RedisConfig rc = new RedisConfig();50.rc.setName(uname);51.rc.setIp(r_user_name);52.rc.setPort(r_user_port);53.rc.setAuto(r_user_auto);54.rcColl.add(rc);55.}56.......57.String mmname = request.getParameter("REDIS_MUC _MESSAGE");58.String r_mm_name = request.getParameter("REDIS_M UC_MESSAGE_IP").trim();59.String r_mm_port = request.getParameter("REDIS_MU C_MESSAGE_PORT").trim();60.String r_mm_auto = request.getParameter("REDIS_MU C_MESSAGE_AUTO").trim();61.if (r_mm_name == "" || r_mm_port == "") {62.errors.put("mname", "Redis-MUC MESSAGE is error!");63.}64.else {65.RedisConfig rc = new RedisConfig();66.rc.setName(mmname);67.rc.setIp(r_mm_name);68.rc.setPort(r_mm_port);69.rc.setAuto(r_mm_auto);70.rcColl.add(rc);71.}72.73.String omname = request.getParameter("REDIS_OFFLI NE_MESSAGE");74.......75.if (errors.size() == 0) {76.rsp.saveRedisConfig(rcColl);77.response.sendRedirect("redis-service.jsp?success=true");78.return;79.}80.}81.82.%>83.84.<html>85.<head>86.<title>Redis Service Properties</title>87.<meta name="pageID" content="redis-service"/>88.</head>89.<body>90.<% if (!errors.isEmpty()) { %>91.92.<div class="jive-error">93.<table cellpadding="0" cellspacing="0" border="0">94.<tbody>95.<tr>96.<td class="jive-icon"><img src="images/error-16x16.gif" width="16" height="16" border="0" alt=""/></td>97.<td class="jive-icon-label">98.99.<% if (errors.get("uname") != null) { %>100.<%=errors.get("uname") %>101.<% } else if (errors.get("gname") != null) { %>102.<%=errors.get("gname") %>103.<% } else if (errors.get("rname") != null) { %>104.<%=errors.get("rname") %>105.<% } else if (errors.get("mname") != null) { %>106.<%=errors.get("mname") %>107.<% } else if (errors.get("mmname") != null) { %>108.<%=errors.get("mmname") %>109.<% } else if (errors.get("omname") != null) { %>110.<%=errors.get("omname") %>111.<% } else if (errors.get("cmname") != null) { %>112.<%=errors.get("cmname") %>113.<% } %>114.</td>115.</tr>116.</tbody>117.</table>118.</div><br>119.120.<% } %>121.122.<p>123.This is redis plugin124.</p>125.126.<% if (success) { %>127.128.<div class="jive-success">129.<table cellpadding="0" cellspacing="0" border="0"> 130.<tbody>131.<tr><td class="jive-icon"><img src="images/success-16x16.gif" width="16" height="16" border="0"></td> 132.<td class="jive-icon-label">133.redis service properties edited successfully.134.</td></tr>135.</tbody>136.</table>137.</div><br>138.<% } %>139.140.<form action="redis-service.jsp?save=true" method="post">141.142.<fieldset>143.<legend>Redis Service</legend>144.<div>145.<ul>146.<%if (rcList.size() < 1) { %>147.<label for="r_user">REDIS_USER:</label>148.<input type="hidden" id="r_user_name" name="REDI S_USER" value="REDIS_USER"/>149.<input type="text" id="r_user_ip" name="REDIS_USER _IP" size="20" value=""/>150.<label for="r_port">port:</label>151.<input type="text" id="r_user_port" name="REDIS_US ER_PORT" size="5" value=""/>152.<label for="r_auto">auto:</label>153.<input type="text" name="REDIS_USER_AUTO" size=" 10" value=""/>154.<br><br>155.156.<label for="r_user">REDIS_GROUP:</label>157.<input type="hidden" id="r_group_name" name="RE DIS_GROUP" value="REDIS_GROUP"/>158.<input type="text" id="r_group_ip" name="REDIS_GR OUP_IP" size="20" value=""/>159.<label for="r_port">port:</label>160.<input type="text" id="r_group_port" name="REDIS_ GROUP_PORT" size="5" value=""/>161.<label for="r_auto">auto:</label>162.<input type="text" name="REDIS_GROUP_AUTO" size ="10" value=""/>163.<br><br>164.165.<label for="r_user">REDIS_ROSTER:</label>166.<input type="hidden" id="r_roster_name" name="RE DIS_ROSTER" value="REDIS_ROSTER"/>167.<input type="text" id="r_roster_ip" name="REDIS_RO STER_IP" size="20" value=""/>168.<label for="r_port">port:</label>169.<input type="text" id="r_roster_port" name="REDIS_R OSTER_PORT" size="5" value=""/>170.<label for="r_auto">auto:</label>171.<input type="text" name="REDIS_ROSTER_AUTO" size="10" value=""/>172.<br><br>173.174.<label for="r_user">REDIS_MUC:</label>175.<input type="hidden" id="r_muc_name" name="REDI S_MUC" value="REDIS_MUC"/>176.<input type="text" id="r_muc_ip" name="REDIS_MUC _IP" size="20" value=""/>177.<label for="r_port">port:</label>178.<input type="text" id="r_muc_port" name="REDIS_M UC_PORT" size="5" value=""/>179.<label for="r_auto">auto:</label>180.<input type="text" name="REDIS_MUC_AUTO" size=" 10" value=""/>181.<br><br>182.183.<label for="r_user">REDIS_MUC_MESSAGE:</label> 184.<input type="hidden" id="r_mm_name" name="REDI S_MUC_MESSAGE" value="REDIS_MUC_MESSAGE"/> 185.<input type="text" id="r_mm_ip" name="REDIS_MUC _MESSAGE_IP" size="20" value=""/>186.<label for="r_port">port:</label>187.<input type="text" id="r_mm_port" name="REDIS_M UC_MESSAGE_PORT" size="5" value=""/>188.<label for="r_auto">auto:</label>189.<input type="text" name="REDIS_MUC_MESSAGE_AU TO" size="10" value=""/>190.<br><br>191.192.<label for="r_user">REDIS_OFFLINE_MESSAGE:</label>193.<input type="hidden" id="r_om_name" name="REDIS _OFFLINE_MESSAGE" value="REDIS_OFFLINE_MESSAGE"/> 194.<input type="text" id="r_om_ip" name="REDIS_OFFLI NE_MESSAGE_IP" size="20" value=""/>195.<label for="r_port">port:</label>196.<input type="text" id="r_om_port" name="REDIS_OFF LINE_MESSAGE_PORT" size="5" value=""/>197.<label for="r_auto">auto:</label>198.<input type="text" name="REDIS_OFFLINE_MESSAGE _AUTO" size="10" value=""/>199.<br><br>200.201.<label for="r_user">REDIS_CHAT_MESSAGE:</label> 202.<input type="hidden" id="r_cm_name" name="REDIS _CHAT_MESSAGE" value="REDIS_CHAT_MESSAGE"/> 203.<input type="text" id="r_cm_ip" name="REDIS_CHAT_ MESSAGE_IP" size="20" value=""/>204.<label for="r_port">port:</label>205.<input type="text" id="r_cm_port" name="REDIS_CH AT_MESSAGE_PORT" size="5" value=""/>206.<label for="r_auto">auto:</label>207.<input type="text" name="REDIS_CHAT_MESSAGE_A UTO" size="10" value=""/>208.<br><br>209.210.<label for="r_user">REDIS_SEARCH:</label>211.<input type="hidden" id="r_rs_name" name="REDIS_ SEARCH" value="REDIS_SEARCH"/>212.<input type="text" id="r_rs_ip" name="REDIS_SEARCH_IP" size="20" value=""/>213.<label for="r_port">port:</label>214.<input type="text" id="r_rs_port" name="REDIS_SEAR CH_PORT" size="5" value=""/>215.<label for="r_auto">auto:</label>216.<input type="text" name="REDIS_SEARCH_AUTO" siz e="10" value=""/>217.<br><br>218.219.<% } %>220.<% if (rcList.size() >= 1) { %>221.<% for (RedisConfig cr : rcList) { %>222.<label for="r_user"><%=cr.getName() %></label> 223.<input type="hidden" name="<%=cr.getName() %>" value="<%=cr.getName() %>"/>224.<input type="text" name="<%=cr.getName() %>_IP" size="20" value="<%=cr.getIp() %>"/>225.<label for="r_port">port:</label>226.<input type="text" name="<%=cr.getName() %>_PO RT" size="5" value="<%=cr.getPort() %>"/>227.<label for="r_auto">auto:</label>228.<input type="text" name="<%=cr.getName() %>_AU TO" size="10" value="<%=cr.getAuto() %>"/>229.<br>230.<input type="button" value="initialize data" onclick=" window.location.href='redis-service.jsp?initdata=<%=cr.getName() %>'; return false;"/> 231.<input type="button" value="destroy data" onclick=" window.location.href='redis-service.jsp?deldata=<%=cr.getName() %>'; return false;"/>232.<br><br>233.<%} %>234.<% } %>235.</ul>236.</div>237.</fieldset>238.239.<br><br>240.241.<input type="submit" value="Save Settings">242.<input type="hidden" name="initdata" value=""/> 243.</form>244.245.</body>246.</html>Plugin.xml[html] view plain copyprint?1.<?xml version="1.0" encoding="UTF-8"?>2.<plugin>3.<class>com.montnets.redis.plugin.RedisServicePlugin</cl ass>4.<name>Redis Service</name>5.<description>Redis distributed cache</description>6.<author>HuWenFeng</author>7.<version>1.3.3</version>8.<date>17/1/2014</date>9.<minServerVersion>3.8.2</minServerVersion>10.11.<adminconsole>12.<tab id="tab-redis" name="Redis" url="redis-service.jsp">13.<sidebar id="sidebar-redis-settings" name="Redis Service" >14.<item id="redis-service" name="Redis Service" url="redis-service.jsp"15.description="Redis distributed cache" />16.</sidebar>17.</tab>18.</adminconsole>19.</plugin>这里只简单贴出了用户这类的相关数据的预加载。
openfire插件编译及部署

Openfire插件编译及部署插件编译1、编译参数配置打开eclipse或者Myeclipse,点击菜单栏里的run选项,在其下拉菜单中选择External Tools按钮,在它的下一级菜单中点击External Tools Configuration即可进入配置页面。
如图1所示。
图1图2所示为配置页面。
图2选择左侧导航栏中的Ant Build选项,点击新建按钮来新建一个编译配置。
如图3所示。
图3接下来就可以来配置插件的编译参数了。
首先,在Name框中为该编制配置项命名以示区别,如图4所示:图4其次,打开Main选项卡,点击在Buildfile框下面Browse Workspace按钮,来选择用来编译插件的Build文件,它的目录是openfire/build/build.xml。
如图5所示。
图5完成后框内显示数据为“${workspace_loc:/openfire/build/build.xml}”,如图6所示。
图6再填写Arguments框,内容格式为“-Dplugin=XXXX”,其中“XXXX”是我们要编译的插件名。
完成后如图7所示。
图7打开Targets勾选plugin,若编译所有插件就勾选plugins,完成后如图8所示。
图8再打开Common选项卡,设置编译的编码格式一般为UTF_8格式。
完成后如图9所示。
图9最后点击按钮保存设置,点击就可对插件进行编译。
2、检查编译结果当控制台出现编译成功的结果时,即代表编译已经完成,如图10所示。
图10在openfire/target/plugins目录,出现对应的插件jar文件,就代表编译成功了!如图11所示。
图11最后,将编译好的插件jar文件复制出来,以备上传导服务器。
插件部署首先,访问openfire服务器的管理控制台,URL是http://服务器IP:9090。
输入管理员用户名和密码。
如图12所示。
图12登录进入后,选择“插件”网页中机会显示服务器目前所安装的所有插件,如图13所示。
火狐插件开发教程

⽕狐插件开发教程firefox的插件分两种类型,⼀种extension,叫扩展,⼀种是plugin,我们叫插件.两种是完全不同的两个东西。
extension相对来说简单很多,⽤的主要是XUL,只是xml的⼀个变相。
⽽plugin相对来说复杂⼀些。
具体的官⽹说明如下⼀、插件的标准1、在windows平台,⽕狐的插件是以动态库形式(dll)存在的,并只去识别在其安装⽬录下plugins⽂件夹下的dll;2、dll的名是以8.3原则来命名的,即其名字所包含的字符不超过8个字符且以dll结尾的⽂件,还有⼀个规定就是其名字必须以np开头,例如:npXXX.dll,⽽XXX不超过六个字符;3、dll是属于MIME(⼀种标准)类型,要不⽕狐浏览器不认识他;4、dll导出的函数必须是NP_GetEntryPoints、NP_Initialize、NP_Shutdown是这三个,这是⽕狐浏览器能够识别的在个接⼝,具体说明在插件的⽣命周期中说明。
⼆、插件的⽣命周期1、第⼀次打开含量有插件的页⾯时,浏览器最先调⽤NP_GetEntryPoints作为调⽤插件的⼊⼝,此⽅法也只在第⼀次加载插件时调⽤。
2、调⽤NP_GetEntryPoints后,浏览器会调⽤NP_Initialize初始化插件,NP_Initialize只在第⼀次调⽤时被浏览器调⽤,与NP_Initialize 配对的是NP_Shutdown,NP_Shutdown是在关闭了所有含有该插件的页⾯后被浏览器调⽤,在⽣命周期内也只被调⽤⼀次3、调⽤NP_Initialize后,浏览器会调会NPP_New来创建⼀个插件实例,每打开⼀个页⾯都会调⽤NPP_New⼀次来创建⼀个插件实例,与 NPP_New配对的是NPP_Destory,在每关闭⼀个页⾯都会调⽤NPP_Destory来释放NPP_New创建的实例4、调⽤NP_Initialize后,⼀般会调⽤NPP_SetWindow来调置窗⼝,对于没有窗⼝的插件当然不⽤调⽤。
openfire环境搭建
Openfire环境搭建Linux:ubuntu 12.10Win:Windows 7版本:Openfire 3.9.1 Spark 2.6.3 Java统一使用6u45这个版本1Openfire服务器部署(非源码)1.1 Win下:1、安装jdk2、在openfire官网igniterealtime中下载win版的openfire,下载完成后,如果你下载的是exe文件,执行你的安装文件,进行安装。
这里我是zip的文件。
解压后,复制openfire目录到C:\Program Files\目录下;一定要在C:\Program Files\目录下的;这样openfire就安装完成了。
3、启动openfire服务器,并配置它。
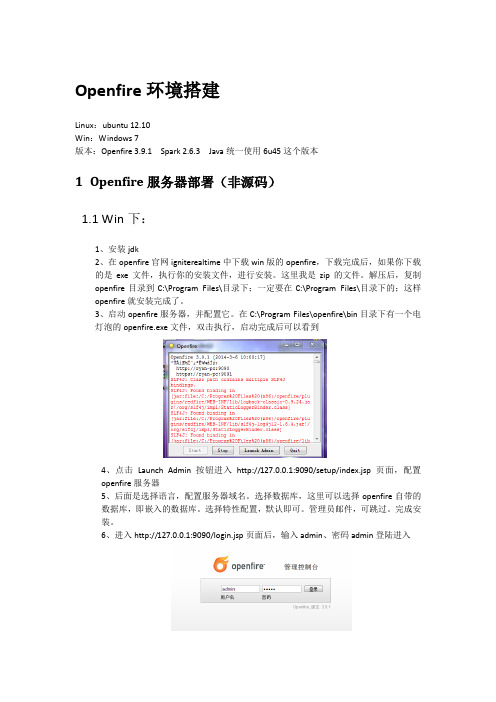
在C:\Program Files\openfire\bin目录下有一个电灯泡的openfire.exe文件,双击执行,启动完成后可以看到4、点击Launch Admin按钮进入http://127.0.0.1:9090/setup/index.jsp页面,配置openfire服务器5、后面是选择语言,配置服务器域名。
选择数据库,这里可以选择openfire自带的数据库,即嵌入的数据库。
选择特性配置,默认即可。
管理员邮件,可跳过。
完成安装。
6、进入http://127.0.0.1:9090/login.jsp页面后,输入admin、密码admin登陆进入7、进入后可以看到:1.2 Ubuntu下:1、先去甲骨文官网下载安装jdk(选择Linux x64 或者Linux x86对应链接,注意不要选择rpm.bin的,选择.bin,6u45对应的是jdk-6u45-linux-i586.bin),也不要使用ubuntu自带的openjdk2、安装全程需要root权限,首先获取root权限sudo –s5、然后就是要告诉系统,我们使用的sun的JDK,而非OpenJDK了(注意下面的2行命令--install后面一共四个参数分别是链接名称路径优先级,我们只要修改对应的6、openfire官网下载Linux版的openfire:openfire_3.9.1_all.deb(这个直接双击通过ubuntu软件中心安装),经过以上软件已经完成安装,此时需要修改一下openfire的启动文件如果openfire没有启动,可以通过/etc/init.d/openfire start启动服务。
openfire插件开发

作用:初始化时在控制台打印测试消息。
开发环境:winxp/myeclipse6.5/jdk1.5&1.6/mysql5.0/openfire3.6.3 QQ群:28588322 (openfire专题研究小组)开发步骤:1. 布署openfire3.6.3源码(请参考openfire3.6.3导入eclipse项目实现方法) 结构如下:2. src/plugins目录下新建文件夹itvi。
并按下图的目录结构新建对应的文件。
plugin.xml文件代码如下:<?xml version="1.0" encoding="UTF-8"?><plugin><class>org.jivesoftware.openfire.plugin.Itvi</class><name>Itvi</name><description>Broadcasts messages to users.</description> <author>openfireteam</author><version>1.7.0</version><date>2/19/2009</date><url></url><minServerVersion>3.6.3</minServerVersion></plugin>Itvi.java文件代码如下:package org.jivesoftware.openfire.plugin;import org.dom4j.Element;import org.jivesoftware.openfire.IQHandlerInfo;import org.xmpp.packet.*;import org.jivesoftware.openfire.handler.IQHandler;import org.jivesoftware.openfire.auth.UnauthorizedException;/*** 处理客户端发来的IQ,并回送结果IQ** @author Phoenix** Mar 14, 2008 4:55:33 PM** version 0.1*/import org.dom4j.DocumentHelper;import org.dom4j.Element;import org.dom4j.QName;import org.jivesoftware.openfire.XMPPServer;import org.jivesoftware.openfire.container.Plugin;import org.jivesoftware.openfire.container.PluginManager; import org.jivesoftware.openfire.disco.IQDiscoInfoHandler; import org.jivesoftware.openfire.disco.IQDiscoItemsHandler; import org.jivesoftware.openfire.forms.DataForm;import org.jivesoftware.openfire.forms.FormField;import org.jivesoftware.openfire.forms.spi.XDataFormImpl; import org.jivesoftware.openfire.forms.spi.XFormFieldImpl; import org.jivesoftware.openfire.resultsetmanager.ResultSet; import org.jivesoftware.openfire.resultsetmanager.ResultSetImpl; import er;import erManager;import erNotFoundException; import org.jivesoftware.util.*;import ponent;import ponentException;import ponentManager;import ponentManagerFactory;import org.xmpp.packet.IQ;import org.xmpp.packet.IQ.Type;import org.xmpp.packet.JID;import org.xmpp.packet.Packet;import org.xmpp.packet.PacketError;import org.xmpp.packet.PacketError.Condition;import java.io.File;import java.util.*;import java.util.Map.Entry;public class Itvi implements Plugin{private XMPPServer server;/** (non-Javadoc)** @see org.jivesoftware.openfire.container.Plugin#destroyPlugin()*/public void destroyPlugin(){}/** (non-Javadoc)** @seeorg.jivesoftware.openfire.container.Plugin#initializePlugin(org.jivesoftware.openfir e.container.PluginManager,* java.io.File)*/public void initializePlugin(PluginManager manager, File pluginDirectory){server = XMPPServer.getInstance();server.getIQRouter().addHandler(new ItviIQHander()); //System.out.println("测试插件启动成功");}}ItviIQHander.java文件代码如下:package org.jivesoftware.openfire.plugin;import org.dom4j.Element;import org.jivesoftware.openfire.IQHandlerInfo;import org.xmpp.packet.*;import org.jivesoftware.openfire.handler.IQHandler;import org.jivesoftware.openfire.auth.UnauthorizedException;/*** 处理客户端发来的IQ,并回送结果IQ** @author Phoenix** Mar 14, 2008 4:55:33 PM** version 0.1*/public class ItviIQHander extends IQHandler{private static final String MODULE_NAME = "group tree handler";private static final String NAME_SPACE = "com:im:group";private IQHandlerInfo info;public ItviIQHander(){super(MODULE_NAME);//info = new IQHandlerInfo("gruops", NAME_SPACE);info = new IQHandlerInfo("query", "jabber:iq:roster");//这里我们对”联系人”的IQ进入监控}/** (non-Javadoc)** @see org.jivesoftware.openfire.handler.IQHandler#getInfo()*/@Overridepublic IQHandlerInfo getInfo(){return info;}/** (non-Javadoc)** @seeorg.jivesoftware.openfire.handler.IQHandler#handleIQ(org.xmpp.packet.IQ) */@Overridepublic IQ handleIQ(IQ packet) throws UnauthorizedException{IQ reply = IQ.createResultIQ(packet);Element groups = packet.getChildElement();//1if (true){System.out.println("非法的请求类型111111");}if (!IQ.Type.get.equals(packet.getType())){System.out.println("非法的请求类型");reply.setChildElement(groups.createCopy());System.out.println("返回的最终XML-SetError前"+reply.toXML());reply.setError(PacketError.Condition.bad_request);System.out.println("返回的最终XML-SetError后"+reply.toXML());return reply;}//String userName =StringUtils.substringBefore(packet.getFrom().toString(),"@");//GroupManager.getInstance().initElement(groups,userName); //reply.setChildElement(groups.createCopy());//2//System.out.println("返回的最终XML" reply.toXML());return reply;}}3.打包插件a.第一次打包需配置ant工具。
Openfire插件开发人员指南

Openfire插件开发人员指南该<adminconsole />部分plugin.xml定义额外的标签,科和项目管理控制台框架。
抽样plugin.xml文件看起来可能如下:样本plugin.xml<?xml version="1.0" encoding="UTF-8"?><plugin>写作网页管理控制台Openfire使用Sitemesh框架装饰网页的管理控制台。
全球定义的装修适用于每个网页,以便使最终产出,如下面的图:建立网页,与Sitemesh是容易的。
只要创建有效的HTML页面,然后使用中继标记来传送指示Sitemesh 。
当渲染输出,Sitemesh将使用您所提供的指示,使装修的任何内容,在您的HTML网页。
以下元标记可用于:<%@ taglib uri="/jstl/core_rt" prefix="c" %><%@ taglib uri="/jstl/fmt_rt" prefix="fmt" %> ...<fmt:message key="" />•国际化在你的Java文件使用LocaleUtils class:org.jivesoftware.util.LocaleUtils.getLocalizedString("", "[plugin_name]");•国际化plugin.xml文件在您使用$ (叶)格式:<sidebar id="gateways" name="${}"description="${plugin.sidebar.description}"><description>${plugin.description}</description>由于Openfire是下发布的开源GPL许可,任何插件发达国家也必须在GPL许可下发布或兼容的开源许可证如果您分发插件以外的组织。
- 1、下载文档前请自行甄别文档内容的完整性,平台不提供额外的编辑、内容补充、找答案等附加服务。
- 2、"仅部分预览"的文档,不可在线预览部分如存在完整性等问题,可反馈申请退款(可完整预览的文档不适用该条件!)。
- 3、如文档侵犯您的权益,请联系客服反馈,我们会尽快为您处理(人工客服工作时间:9:00-18:30)。
O p e n F i r e插件开发基础教程
Openfire是一款优秀的XMPP服务器,而且是开放源码的.大家可以根据自己的需求进行二次开发。
二次开发主要有两种方式:1.修改源代码,2开发openfire插件。
从可扩展性上考虑,自然是开发插件是上策,只有插件无法实现时候才会选择修改源代码。
下面就个人经验,说明一下如何开发openfire插件
一、环境基础
要有一个配置好的openfire开发环境,这个网络上有比较详细的教程了。
比如《》和《行》,这时候ant应该是可以正常运行的,先执行openfire 【default】,就生成了openfire的目标代码,再执行plugins,就个生成所以系统自带的插件。
二、目录拷贝
打开workspace\openfire_src\src\plugins目录,找一个要修改的插件,我选的是subscription,拷贝生成“subscriptionUF”。
打开src目录,里面有两个文件夹
,java就是我们要改的源码,而web里面是修改这个插件所要用的web 配置页面,目前用不到,直接删除。
三、修改plugin.xml
这个一个xml文件,里面的内容就按照自己的样子更改吧。
最关键是确定<class>,插件所在的类名,既然没有web文件夹了adminconsole也全部注释掉吧.
四、修改类和类目录
修改src/java里面的目录层次,Class和src/java中的路径必须一致。
五、引入openfire项目
右击openfire项目,选择New->Source Folder,在Floder name中选择到刚刚新增的插件目录,注意要选到src/java这一层
六、修改类文件
SubscriptionPluginUF是完全copy SubscriptionPlugin的,因此有两个类名不符的error修改一下.
至此,整个openfire已经把我们新加的SubscriptionPluginUF包含在他的plugins中了,通过控制台也能看到一个仿冒的SubscriptionPluginUF插件
七、单独编译插件
如果每次都运行plugins,生成所有插件的同时生成我们修改的插件,固然可行,就是慢了一点,插件有什么错误也要找半天。
Openfire还很贴心的给了只生成我们想要的插件的ant 指令— plugin,我们要做的工作就是告诉ant,我们的目标插件名是
SubscriptionPluginUF。
增加一个plugin的property,这样只需要点击plugin,就能生成我们的插件了。
P.S.openfire插件的目录和文件组织
请参考/documentation/docs/plugin-dev-guide.html。