Solidworks 2013安装教程
Solidworks安装超详细图文教程--学员(努力改变)制作
Solidworks超详细图文安装教程
制作日期:2015年11月20号
制作人:努力改变QQ:447051059
第二步:对于2015、2016及以后的版本适用,2014及以前的版本忽
略这步,直接执行第三步
第三步、所有版本都通用,操作如下
第四步、这里2015的自动填写了序列号,因为第二步已经导入了。
2014及以前的没有第二步,所以这里要手动填写序列号,填好之后点击下一步。
附2014序列号:
SolidWorks Serial:
0000 0000 0000 3486 Q5HF FG98 或者 0001 0001 0736 0361 JK3Q HDJ3 其他产品的序列号:
SolidWorks Simulation9000 0000 0001 8043 TB9T SGD9
SolidWorks Motion9000 0000 0002 7942 9KW4 9FBC
Flow Simulation9000 0000 0003 3107 V8F3 PG44
SW Composer9000 0000 0021 4754 DCB4 HC3J
SW ComposerPlayer9000 0000 0022 1655 536J H9KH
SW Electrical 2D9000 0000 0000 1616 MDZ8 R8J2
第五步、更改安装位置及其他选项
最后一步、到这里,全部安装完成。
下面是破解软件,操作如下:
破解完成,可以打开软件使用了
最后根据电脑配置开启小金球,安装方法如下
全部完成,开启小金球的效果有没有很炫很酷,哈哈……。
solidworks2013安装方法(图文教程)
SolidWorks 2013 不再支持XP系统,只支持Vista/Win7以及64位版的Win8,如果您的电脑还是XP系统,那么您可以歇着了,如果您想安装 solidworks2013的话,请先升级您的操作系统。
注意:关闭所有不必要的软件,拔掉网线,断开无线网路,关闭防火墙。
下载的文件一般是iso的,用虚拟光驱载入。
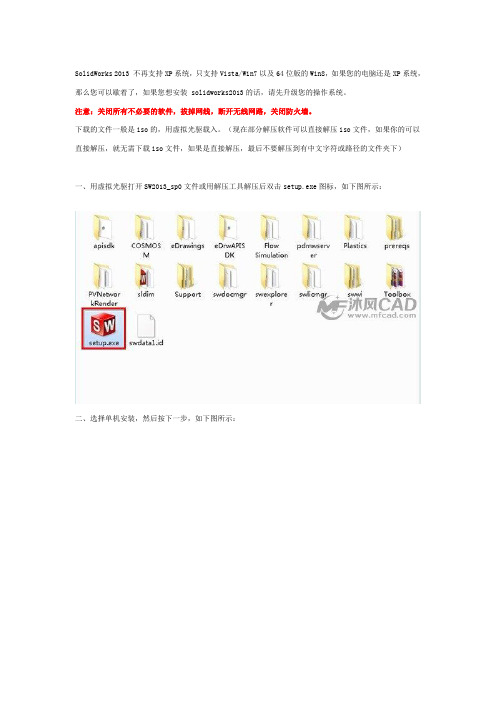
(现在部分解压软件可以直接解压iso文件,如果你的可以直接解压,就无需下载iso文件,如果是直接解压,最后不要解压到有中文字符或路径的文件夹下)一、用虚拟光驱打开SW2013_sp0文件或用解压工具解压后双击setup.exe图标,如下图所示:二、选择单机安装,然后按下一步,如下图所示:三、按照安装图片的序列号输入进去:0001 0001 0736 0361 JK3Q HDJ3,按下一步,如下图所示:补充您也可以用其他的序列号:0000 0000 0000 3486 Q5HF FG98如果您只需要仿真模块的话,只需要填写以下的序列号即可:9000 0000 0001 8043 TB9T SGD9 (SolidWorks Simulation)9000 0000 0002 7942 9KW4 9FBC (SolidWorks Motion)9000 0000 0003 3107 V8F3 PG44 (Flow Simulation)四、在弹出的对话框中,选择取消,如下图所示:五、在下面弹出的对话框中,选择生成solidworks 2013的新安装,如下图所示:六、选择安装位置,这个位置可以更改(一般不要安装在C盘),不会影响使用,然后点击现在安装,如下图所示:七、现在开始安装产品(这个安装过程时间会长一些,请大家耐心等待),如下图所示:继续安装……安装过程到50%左右可能杀毒软件会出现风险提示,全部选择允许程序执行,如下图所示:单击完确定以后,软件会继续安装产品,如下图所示:八、安装过程大概20-30分钟(取决于您的电脑配置),安装好后按完成,接着提示重启,如下图所示:在下面弹出的对话框中,选择了以后重启,如下图所示:安装完成后,桌面出现了solidworks2013的图标,如下图所示:九、打开下载下来的文件,开始破解文件:SW2013_SP0.0_SSQ\_SolidSQUAD_\SW2010-2013.Activator.SSQ.exe双击SW2010-2013.Activator.SSQ.exe注意:该文件有可能会被杀毒软件提示为病毒,选择信任即可。
solidworks2013安装教程

solidworks2013安装教程SolidWorks是一款功能强大的3D设计软件,它可以帮助工程师和设计师创建和分析实体模型。
安装SolidWorks2013之前,你需要确保你的电脑符合最低系统要求。
以下是详细的SolidWorks2013安装教程。
步骤1: 下载SolidWorks2013首先,你需要从SolidWorks官方网站上下载SolidWorks2013安装文件。
打开你的网络浏览器,访问SolidWorks官方网站,找到SolidWorks2013的下载页面。
查看你购买的软件版本(32位或64位),然后点击下载按钮开始下载SolidWorks2013安装文件。
步骤2: 解压安装文件当SolidWorks2013安装文件下载完成后,你需要将它解压到一个适当的文件夹中。
找到下载文件的位置,右键单击安装文件,选择“解压到当前文件夹”选项。
解压后,你将得到一个名为“SolidWorks2013”的文件夹。
步骤3: 运行安装程序打开SolidWorks2013的文件夹,找到名为“setup.exe”的安装程序。
双击运行这个程序,它会引导你进入SolidWorks的安装界面。
步骤4: 选择安装选项在SolidWorks安装界面上,你可以选择从完整安装、自定义安装还是在线安装中进行选择。
推荐选择完整安装,以确保安装所有的必要组件。
点击“继续”按钮继续进行安装。
步骤5: 同意许可协议在安装过程中,你需要阅读并同意SolidWorks的许可协议。
勾选“我同意”后,点击“继续”按钮进行下一步。
步骤6: 选择安装位置根据个人喜好和电脑空间,选择安装SolidWorks2013的位置。
你可以选择默认位置,或者点击“浏览”按钮选择其他路径。
点击“下一步”继续。
步骤7: 选择安装类型根据需要,你可以选择完全安装或自定义安装。
推荐选择完全安装,以确保所有的功能和组件都被安装。
点击“下一步”继续。
步骤8: 输入序列号在安装SolidWorks2013之前,你需要输入你的SolidWorks序列号。
SolidWorks 2013 Education Edition 安装指南说明书
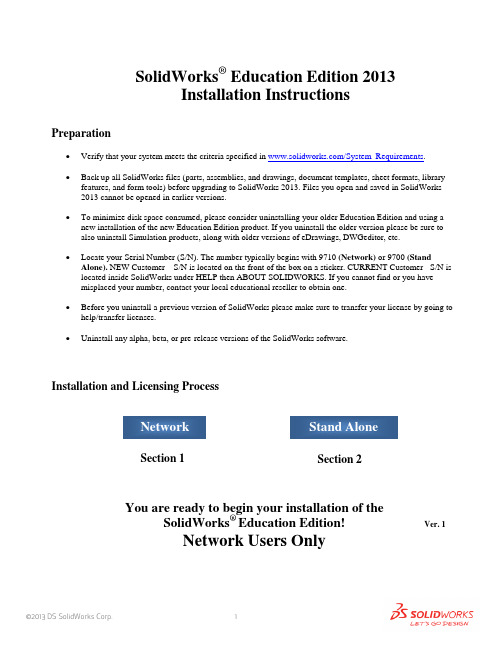
SolidWorks ® Education Edition 2013Installation InstructionsPreparation• Verify that your system meets the criteria specified in /System_Requirements .• Back up all SolidWorks files (parts, assemblies, and drawings, document templates, sheet formats, libraryfeatures, and form tools) before upgrading to SolidWorks 2013. Files you open and saved in SolidWorks 2013 cannot be opened in earlier versions.• To minimize disk space consumed, please consider uninstalling your older Education Edition and using anew installation of the new Education Edition product. If you uninstall the older version please be sure to also uninstall Simulation products, along with older versions of eDrawings, DWGeditor, etc.• Locate your Serial Number (S/N). The number typically begins with 9710 (Network) or 9700 (StandAlone). NEW Customer – S/N is located on the front of the box on a sticker. CURRENT Customer - S/N is located inside SolidWorks under HELP then ABOUT SOLIDWORKS. If you cannot find or you have misplaced your number, contact your local educational reseller to obtain one.• Before you uninstall a previous version of SolidWorks please make sure to transfer your license by going tohelp/transfer licenses.• Uninstall any alpha, beta, or pre-release versions of the SolidWorks software.Installation and Licensing ProcessYou are ready to begin your installation of theSolidWorks ® Education Edition!Network Users OnlySection 2Section 1Ver. 1STEPS FOR SECTION 1: NETWORK INSALLATION:1.Remove previous SolidNetWork License Managers2.Remove previous SolidWorks software3.Install 2013 SolidNetWork License Manager4.Activate 2013 Network License5.Install SolidWorks software on individual clientsSection 1 | SolidWorks® Education Edition Installation (Network)Note:If you are installing SolidWorks on a Network with Restricted Rights, please go to the Customer Portal for additional documentation or contact your local reseller for assistance.This step is only for users who are on NETWORK. If you purchased a Stand Alone, proceed to Section 2 in the installation process.Note:•All previous SolidWorks License Managers must be removed from your computer before beginning the installation of the new SolidWorks License Manager (i.e. 2012 must be removed before installing 2013).•The SolidWorks License Manager must be installed on the machine that will be used to distribute SolidWorks licenses on your network.•The SolidWorks License Manager for 2013 will license all SolidWorks EDU applications., including SolidWorks Simulaton, SolidWorks Sustainability, eDrawings and PhotoView 360.Remove previous SolidNetWork License Managersunch Add/Removeprograms and uninstall theprevious version of theinstallation Manager.Access Add/Removeprograms from Start >Control Panel >Add/Remove Programs.Locate the SolidWorksSolidNetWork LicenseManager and selectRemove.-Once the remove option is selected you will beprompted to confirm theproducts to uninstall.-The product will thenuninstall itself. A progressonly box will appear.-After the product uninstall iscomplete, close theAdd/Remove program swindow and launchWindows Explorer. Locatethe folder in which thelicense manager waspreviously installed to anddelete it. By default thelicense manager is installedto: C:\ProgramFiles\SolidWorksSolidNetWork LicenseManager.Remove previous SolidWorks Software1.If required, uninstall SolidWorks using Add/Remove Programs.2.If required, Delete SolidWorks folders located in C:\ Program Files\SolidWorks CorpBegin 2013 SolidNetWork License Manager Installation1.Insert your 2013 SolidWorks DVD in your local DVD Drive to begin the softwareinstallation process. If SolidWorks Master Setup does not come up automatically, select My Computer and double click the DVD drive, this is generally your D: drive. You may alsolaunch the Installation Manager downloaded from the SolidWorks Customer Portal.Note: Once DVD is placed in your local DVD Drive, the SolidWorks 2013 SP2.0 Installation Manager will appear. Select Server products and then select “Install SolidNetWork License Manager (distributed licensing) on this computer.”Click Next.2.The next screen will prompt you for your SolidWorks and associated products serial number.Enter your product serial number. Click Next.3.Confirm the Summary page and click “Install Now”.Note: Server Installation Progress will appear. Once done checking for Updates, the SolidWorks SolidNetWork License Manager Setup will appear. Click Next.4.After the installation is complete there will be a confirmation of the successful install. Oncecompleted the Installation Manager confirms the product(s) are installed correctly.5.Select Finish and close the installation manager. This completes the installation of theSolidWorks SolidNetWork License Manager. If you choose to tell us your installation experience, the following Survey will be displayed in your Internet Browser. Thank you for your feedback.Activate 2013 SolidNetWork LicenseStarting with SolidWorks 2010 release, a new licensing method has been introduced for network licenses. The new process will require internet connectivity to ‘activate’ the license on the SolidWorks server.What does this mean for the user? The end user will no longer need a license file or existing dongle. The dongle must be returned to your value added reseller.1.To activate the newly installed software go to Start > All programs > SolidWorks 2013 >SolidWorks License Manager > SolidNetWork License Manger.A server information dialog will appear that will allow you to choose the license server port(s)and apply an options file if desired. It is recommended that you select the option for firewall in use on this server. Select Next to continue.Note: You will need to add exceptions in your firewall software, example shown in Windows 7 Firewall settings on the next page.For Windows 7 Firewall1.Add program exceptions to the Windows 7 Firewall. In SNL Server setup, change image toshow that the windows firewall option is selected.2.Bring up the Control Panel and Select System and Security3.Allow programs through the firewall.4.Click “allow another program”And Browse to the folder where you installed theSolidWorks SolidNetwork License Manager. Add both executables. Lmgrde.exe and sw_d.exeWhen lmgrd.exe is added successful to the exceptions list, it will appear as Accresso Software Inc in the list of Allowed programsWhen sw_d is allowed successfully, it will as sw_dn in the allowed programs list.SolidnetWork License Installation, continuedThe SolidWorks Product Activationwindow will appear and you will berequired to fill out an email toassociate to the activation. Enter anemail address and select Next.Note: If you do not have internetaccess, please contact your ValueAdded Reseller.The product will now activate viainternet.After a successful activation therewill be a succeeded message whichwill show all the products associatedwith your serial number.Select Finish, completing activation. The license manager will appear and you can close it out to complete the activation process.SolidnetWork License Installation is complete.SolidWorks Network Monitor ActivationThe SolidWorks network Monitor automatically installs with the SolidnetWork License Manager. Before using the SolidWorks Network Monitor you must complete the setup.1.Open the SolidWorks Network Monitor by going to yourStart Menu>Programs>SolidWorks 2013>SolidWorksTools>SolidWorks Network Monitor2.Select “Coordinator” and Click “Connect To” and you areready to use the SolidWorks Network Monitor.NOTE:You have now finished installing the SolidWorks License Manager. You must now go to your client computers and proceed as follows on steps.Before beginning the installation process, please be sure to close out of all SolidWorks programs currently open on your computer.You can also install SolidWorks on your server machine. Follow the instructions in the next section.Section 2 | SolidWorks® Education Edition Installation (Stand Alone) Note:For SolidWorks Network install, the software does not get installed on the network machine (Server) by default. Normally SolidWorks should be installed on the user machines (Client).Before beginning the installation process, please be sure to close out of all SolidWorks programs currently open on your computer.1.On the CLIENT Machine Insert DVD or launch the Installation Manager downloaded fromthe SolidWorks Customer Portal. Select Individual (on this computer). Click Next in lower right corner.2.For new installation enter your serial number below (24 digits). Click Next.Note: The message in the center of the window under the green bar, “Connecting to SolidWorks”will appear. You may see a screen stating that a newer version is available, ALWAYS selectcontinue installing from DVD and click Next.3.After you have clicked Next, the SolidWorks 2013 SP2.0 Installation Manager will guide youthrough the installation. Accept Defaults on the screen (DO NOT change anything) Click Install Now to continue installation.Note: For the client installation of a network license, you will be asked for your license server name as below. Please enter your license server and the port number that you specified in the server ***************************************************************************“OK”4. Installation is Complete! Confirm if you would like to tell us your installation experience in a survey or participate in the Customer Experience program, then click Finish.Note: Depending upon your computer configuration you may or may not need to restart your computer. Installing SolidWorks will also install Simulation and Sustainability products automatically. You do not have to re-install Simulation after the SolidWorks installation is complete.For client installation of a network license, your SolidWorks is ready now since your network license server has been activated in Section 1 and your client SolidWorks is connected with yourFor standalone license installation, when you start SolidWorks Education Edition for the first time, the SolidWorks Product Activation dialog will appear to guide you through the activation process. Click Next, to continue with activation.To activate you SolidWorks product you must enter a serial number from SolidWorks. The SolidWorks Product Activation will help you collect the information necessary to activate your product. Choose which method for how you would like to activate. Type in email address and then click Next.Now you are done registering your SolidWorks Education Edition. Click Finish.YOU CAN NOW RUN SOLIDWORKS EDUCATION EDITION!。
solidworks Composer 2013安装破解说明
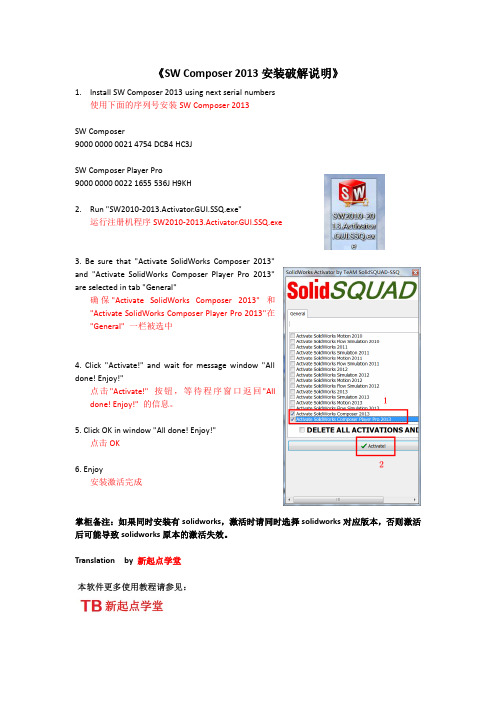
《SW Composer 2013安装破解说明》1.Install SW Composer 2013 using next serial numbers使用下面的序列号安装SW Composer 2013SW Composer9000 0000 0021 4754 DCB4 HC3JSW Composer Player Pro9000 0000 0022 1655 536J H9KH2.Run "SW2010-2013.Activator.GUI.SSQ.exe"运行注册机程序SW2010-2013.Activator.GUI.SSQ.exe3. Be sure that "Activate SolidWorks Composer 2013"and "Activate SolidWorks Composer Player Pro 2013"are selected in tab "General"确保"Activate SolidWorks Composer 2013" 和"Activate SolidWorks Composer Player Pro 2013"在"General" 一栏被选中4. Click "Activate!" and wait for message window "Alldone! Enjoy!"点击"Activate!" 按钮,等待程序窗口返回"Alldone! Enjoy!" 的信息。
5. Click OK in window "All done! Enjoy!"点击OK6. Enjoy安装激活完成掌柜备注:如果同时安装有solidworks,激活时请同时选择solidworks对应版本,否则激活后可能导致solidworks原本的激活失效。
安装手册-AUTODESK

Autodesk Navisworks 2013安装手册2012 年 4 月© 2012 Autodesk, Inc. All Rights Reserved. Except as otherwise permitted by Autodesk, Inc., this publication, or parts thereof, may not be reproduced in any form, by any method, for any purpose.Certain materials included in this publication are reprinted with the permission of the copyright holder.TrademarksThe following are registered trademarks or trademarks of Autodesk, Inc., and/or its subsidiaries and/or affiliates in the USA and other countries: 123D, 3ds Max, Algor, Alias, Alias (swirl design/logo), AliasStudio, ATC, AUGI, AutoCAD, AutoCAD Learning Assistance, AutoCAD LT, AutoCAD Simulator, AutoCAD SQL Extension, AutoCAD SQL Interface, Autodesk, Autodesk Homestyler, Autodesk Intent, Autodesk Inventor, Autodesk M apGuide, Autodesk Streamline, AutoLISP, AutoSketch, AutoSnap, AutoTrack, Backburner, Backdraft, Beast, Beast (design/logo) Built with ObjectARX (design/logo), Burn, Buzzsaw, CAiCE, CFdesign, Civil 3D, Cleaner, Cleaner Central, ClearScale, Colour Warper, Combustion, Communication Specification, Constructware, Content Explorer, Creative Bridge, Dancing Baby (image), DesignCenter, Design Doctor, Designer's Toolkit, DesignKids, DesignProf, DesignServer, DesignStudio, Design Web Format, Discreet, DWF, DWG, DWG (design/logo), DWG Extreme, DWG TrueConvert, DWG TrueView, DWFX, DXF, Ecotect, Evolver, Exposure, Extending the Design Team, Face Robot, FBX, Fempro, Fire, Flame, Flare, Flint, FMDesktop, Freewheel, GDX Driver, Green Building Studio, Heads-up Design, Heidi, Homestyler, HumanIK, IDEA Server, i-drop, Illuminate Labs AB (design/logo), ImageModeler, iMOUT, Incinerator, Inferno, Instructables, Instructables (stylized robot design/logo),Inventor, Inventor LT, Kynapse, Kynogon, LandXplorer, LiquidLight, LiquidLight (design/logo), Lustre, MatchMover, Maya, Mechanical Desktop, Moldflow, Moldflow Plastics Advisers, Moldflow Plastics Insight, Moldflow Plastics Xpert, Moondust, MotionBuilder, Movimento, MPA, MPA (design/logo), MPI, MPI (design/logo), MPX, MPX (design/logo), Mudbox, Multi-Master Editing, Navisworks, ObjectARX, ObjectDBX, Opticore, Pipeplus, Pixlr, Pixlr-o-matic, PolarSnap, PortfolioWall, Powered with Autodesk Technology, Productstream, ProM aterials, RasterDWG, RealDWG, Real-time Roto, Recognize, Render Queue, Retimer, Reveal, Revit, RiverCAD, Robot, Scaleform, Scaleform GFx, Showcase, Show M e, ShowM otion, SketchBook, Smoke, Softimage, Softimage|XSI (design/logo), Sparks, SteeringWheels, Stitcher, Stone, StormNET, Tinkerbox, ToolClip, Topobase, Toxik, TrustedDWG, U-Vis, ViewCube, Visual, Visual LISP, Voice Reality, Volo, Vtour, WaterNetworks, Wire, Wiretap, WiretapCentral, XSI. Lightworks, the Lightworks logo, LWA and LWA-Enabled are registered trademarks of Lightwork Design Ltd. The LWA-Enabled logo, Interactive Image Regeneration, IIR, A-Cubed, Feature-Following Anti-Aliasing and FFAA are all trademarks of Lightwork Design Ltd. All other trademarks, images and logos remain the property of their respective owners. Copyright of Lightwork Design Ltd. 1990-2007, 2008-2012.This software is based in part on the work of the Independent JPEG Group.DisclaimerTHIS PUBLICATION AND THE INFORMATION CONTAINED HEREIN IS MADE AVAILABLE BY AUTODESK, INC. "AS IS." AUTODESK, INC. DISCLAIMS ALL WARRANTIES, EITHER EXPRESS OR IMPLIED, INCLUDING BUT NOT LIMITED TO ANY IMPLIED WARRANTIES OF MERCHANTABILITY OR FITNESS FOR A PARTICULAR PURPOSE REGARDING THESE MATERIALS.目录第 1 章安装过程 . . . . . . . . . . . . . . . . . . . . . . . . . . . . . . . 1第 2 章单机版安装 . . . . . . . . . . . . . . . . . . . . . . . . . . . . . 3准备单机版安装 . . . . . . . . . . . . . . . . . . . . . . . . . . . . . . . 3单机版安装的系统要求 . . . . . . . . . . . . . . . . . . . . . . . . . 3安装 Microsoft .Net Framework 4.0 . . . . . . . . . . . . . . . . . 5了解管理权限要求 . . . . . . . . . . . . . . . . . . . . . . . . . . . 6指定许可 . . . . . . . . . . . . . . . . . . . . . . . . . . . . . . . . 6更改产品语言 . . . . . . . . . . . . . . . . . . . . . . . . . . . . . 6找到 Autodesk Navisworks 序列号和产品密钥 . . . . . . . . . . . . 8避免在安装过程中丢失数据 . . . . . . . . . . . . . . . . . . . . . . 8安装并运行 Autodesk Navisworks 2013 . . . . . . . . . . . . . . . . . . . 8配置和安装 . . . . . . . . . . . . . . . . . . . . . . . . . . . . . . 9启动 Autodesk Navisworks . . . . . . . . . . . . . . . . . . . . . 12如何使用另一种语言启动 Autodesk Navisworks . . . . . . . . . . . 13添加/删除功能 . . . . . . . . . . . . . . . . . . . . . . . . . . . . 14修复 Autodesk Navisworks 2013 . . . . . . . . . . . . . . . . . . 15卸载 Autodesk Navisworks 2013 . . . . . . . . . . . . . . . . . . 15激活产品 . . . . . . . . . . . . . . . . . . . . . . . . . . . . . . . . . . 16从早期版本迁移到 Autodesk Navisworks . . . . . . . . . . . . . . . . . 17iii第 3 章网络管理和展开 . . . . . . . . . . . . . . . . . . . . . . . . . . 19计划展开 . . . . . . . . . . . . . . . . . . . . . . . . . . . . . . . . . . 19检查展开是否已准备就绪 . . . . . . . . . . . . . . . . . . . . . . . 20展开的系统要求 . . . . . . . . . . . . . . . . . . . . . . . . . . . 21确定安装类型 . . . . . . . . . . . . . . . . . . . . . . . . . . . . . 24确定许可服务器模式 . . . . . . . . . . . . . . . . . . . . . . . . . 25包括 Service Pack . . . . . . . . . . . . . . . . . . . . . . . . . . 26创建网络共享 . . . . . . . . . . . . . . . . . . . . . . . . . . . . . 27设置网络工具和许可服务器 . . . . . . . . . . . . . . . . . . . . . . . . . 28安装 Network License Manager . . . . . . . . . . . . . . . . . . . 28通过 激活网络许可证的步骤 . . . . . . . . . . . . . 29配置许可服务器 . . . . . . . . . . . . . . . . . . . . . . . . . . . 29配置选项 . . . . . . . . . . . . . . . . . . . . . . . . . . . . . . . . . . 30静默模式 . . . . . . . . . . . . . . . . . . . . . . . . . . . . . . . 31指定日志文件的位置 . . . . . . . . . . . . . . . . . . . . . . . . . 31更改展开语言 . . . . . . . . . . . . . . . . . . . . . . . . . . . . . 32配置用于展开的各个产品 . . . . . . . . . . . . . . . . . . . . . . . 33选择项目和站点文件夹 . . . . . . . . . . . . . . . . . . . . . . . . 34选择其他配置选项 . . . . . . . . . . . . . . . . . . . . . . . . . . 35创建展开 . . . . . . . . . . . . . . . . . . . . . . . . . . . . . . . . . . 36修改展开 . . . . . . . . . . . . . . . . . . . . . . . . . . . . . . . . . . 39将用户指向管理映像 . . . . . . . . . . . . . . . . . . . . . . . . . . . . 40分发方法概述 . . . . . . . . . . . . . . . . . . . . . . . . . . . . . . . . 40第 4 章安装问题 . . . . . . . . . . . . . . . . . . . . . . . . . . . . . . 43基本安装问题 . . . . . . . . . . . . . . . . . . . . . . . . . . . . . . . . 43如果丢失了序列号或产品密钥该怎么办? . . . . . . . . . . . . . . . 43为什么在安装后需要激活产品? . . . . . . . . . . . . . . . . . . . 43我可以从网站安装 Autodesk 产品吗? . . . . . . . . . . . . . . . . 43如何注册和激活 Autodesk Navisworks? . . . . . . . . . . . . . . 44如何将许可从单机许可切换到网络许可或者从网络许可切换到单机许可? . . . . . . . . . . . . . . . . . . . . . . . . . . . . . . . 45安装后在何处可以找到产品许可信息? . . . . . . . . . . . . . . . . 45如何检查图形卡驱动程序以查看是否需要更新? . . . . . . . . . . . 45如果执行典型安装,将安装哪些功能? . . . . . . . . . . . . . . . . 46如何基于站点和项目共享 Autodesk Navisworks 设置? . . . . . . . 47如何更改需要安装的导出器插件? . . . . . . . . . . . . . . . . . . 48展开和联网问题 . . . . . . . . . . . . . . . . . . . . . . . . . . . . . . 48应将展开放置在何处? . . . . . . . . . . . . . . . . . . . . . . . . 48何时应该为管理映像选择所有产品,以后我还可以添加产品吗? . . . . . . . . . . . . . . . . . . . . . . . . . . . . . . . . 49 iv | 目录在何处可以检查软件的 Service Pack 是否可用? . . . . . . . . . . . 49如何在 32 位展开和 64 位展开之间进行选择? . . . . . . . . . . . . 49从何处查找服务器名称? . . . . . . . . . . . . . . . . . . . . . . . 50什么是管理映像 (MSI) 文件? . . . . . . . . . . . . . . . . . . . . 50如何提取 MSP 文件? . . . . . . . . . . . . . . . . . . . . . . . . 50应该如何针对防火墙配置网络许可服务器 . . . . . . . . . . . . . . . 50许可问题 . . . . . . . . . . . . . . . . . . . . . . . . . . . . . . . . . . 51单机许可和网络许可有何区别? . . . . . . . . . . . . . . . . . . . 51使用软件的网络许可版的优点是什么? . . . . . . . . . . . . . . . . 51什么是 SAMreport-Lite? . . . . . . . . . . . . . . . . . . . . . . 51卸载和维护问题 . . . . . . . . . . . . . . . . . . . . . . . . . . . . . . 52如何查看包含在默认安装中的内容? . . . . . . . . . . . . . . . . . 52添加或删除功能时能否更改安装文件夹? . . . . . . . . . . . . . . . 52在安装产品之后如何安装工具和实用程序? . . . . . . . . . . . . . 52什么时候应该重新安装产品而不是修复它? . . . . . . . . . . . . . 52若要重新安装产品,是否需要原始介质? . . . . . . . . . . . . . . . 52卸载软件时,哪些文件会留在系统中? . . . . . . . . . . . . . . . . 53第 5 章词汇表 . . . . . . . . . . . . . . . . . . . . . . . . . . . . . . . 55索引 . . . . . . . . . . . . . . . . . . . . . . . . . . . . . . . . 57目录 | vvi安装过程下图显示了Autodesk Navisworks 2013产品安装过程的主要部分:运行安装向导时,您可以采用几种安装路径:■对于个人用户或小团体,建议使用“安装”。
3DVIA Composer 2013安装方法

3DVIA Composer的安装方法
1.按自己的系统信息运行相应的32位或者64位安装程序(我这里运行的是64位安装程序)
2.弹出安装介面后点下一步
3.按软件默认路径安装或者选择自己想要安装的路径后点下一步
4.配置要安装的内容(这里按软件默认的全部安装),配置完成后点下一步
5.选择简体中文语言后点下一步
6.按下一步进行安装
9.软件安装完成后会自动弹出协议,点同意 按继续
10.弹出注册窗口,点右边的注册
11.弹出许可窗口,点安装许可证
12.弹出许可证窗口,点“打开许可证文件夹”
13.复制软件下载时CK文件夹里的“3dvia.lic”文件
14.将刚刚复制的LIC文件粘贴到打开的“许可证文件夹”里并关闭此文件夹窗口
15.点取消
16.点取消
17.点关闭
18.在桌面上的3DVIA Composer的快捷方式上点右键,选属性,在弹出的属性窗口中选择“打开文件位置”
19.复制软件下载时CK文件夹里的其余四个文件
20.将此四个文件粘贴并替换刚打开的软件安装位置里的原文件,替换完成后关闭文件夹窗口
21.点桌面上的软件快捷图标启动软件
22.软件启动介面
23.正常运行软件的介面及软件的版本信息
24. 2013版里终于有了中文版的帮助文件了(虽然帮助文件是上一个版本时制作的)
25.如果软件安装完成后没有自动弹出注册窗口,在打开软件时将会弹出来的。
全部讲完
任生
All_r3@
2012.5.25AM。
solidworks2013破解
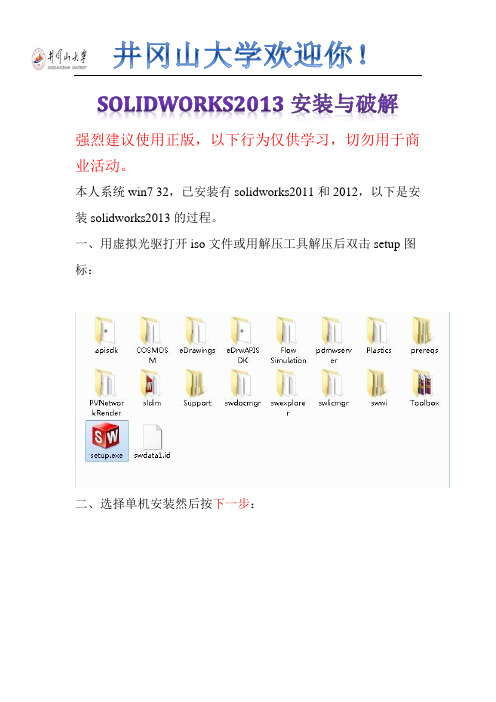
井冈山大学欢迎你!SOLIDWORKS2013安装与破解强烈建议使用正版,以下行为仅供学习,切勿用于商业活动。
本人系统win7 32,已安装有solidworks2011和2012,以下是安装solidworks2013的过程。
一、用虚拟光驱打开iso文件或用解压工具解压后双击setup图标:二、选择单机安装然后按下一步:三、因为本人之前安装过2012,他自动填入序列号,如无自动填入可以安装图片的序列号输入进去:按下一步:四、选择取消:五、选择生成solidworks 2013的新安装:六、自己选择安装位置,这个位置可以更改,不会影响使用,建议不要安装在C盘:七、开始安装:继续安装。
安装过程到%40-50%左右杀毒软件会出现风险提示,全部选择允许程序执行,如果选择阻止此程序执行,将无法安装简体中文语言包,安装成功后双击桌面图标会出现提示:failed to load: X:\Program Files\SolidWorksCorp\SolidWorks\lang\chinese-simplified\slderrresu.dl l,再点就出现X:\ProgramFiles\SolidWorksCorp\SolidWorks\lang\chinese-simplifie d\sldresu.dllcan not be applicated结果无法启动solidworks2013.(解决办法:找到你下载下来的solidworks2013.ISO格式的文件,打开找到swwi\lang\chinese-simplified\setup.exe ,手动安装一遍。
)八、安装过程大概20-30分钟,安装好后按完成,根据电脑配置高低,安装时间也不同。
桌面出现了solidworks2013的图标:九、打开下载下来的文件:双击SW2010-2013KeyGen不用管它。
十、接着会安装一个东西,直接选择Install即可,安装完后他会自动清除临时文件:十一、接下来一连串点击“是”直至破解程序完成。
- 1、下载文档前请自行甄别文档内容的完整性,平台不提供额外的编辑、内容补充、找答案等附加服务。
- 2、"仅部分预览"的文档,不可在线预览部分如存在完整性等问题,可反馈申请退款(可完整预览的文档不适用该条件!)。
- 3、如文档侵犯您的权益,请联系客服反馈,我们会尽快为您处理(人工客服工作时间:9:00-18:30)。
系统win7,安装solidworks2013的过程
安装过程断开网络。
一、用虚拟光驱打开SW2013_sp0_x64_Multilanguage.iso文件或用解压工具解压后双击setup.exe图标:
二、选择单机安装然后按下一步:
三、因为之前安装过2012,他自动填入序列号,如无自动填入可以安装图片的序列号输入进去:0001 0001 0736 0361 JK3Q HDJ3,按下一步:
四、选择取消:
五、选择生成solidworks 2013的新安装:
六、自己选择安装位置,这个位置可以更改,不会影响使用:
七、开始安装:
继续安装
安装过程到50%左右杀毒软件会出现风险提示,全部选择允许程序执行:
八、安装过程大概20-30分钟,安装好后按完成,接着提示重启(本人没有重启照样可以继续)
选择了以后重启
桌面出现了solidworks2013的图标:
九、打开下载下来的文件:
SW2013_SP0.0_SSQ\_SolidSQUAD_\SW2010-2013.Activator.SSQ.exe 双击SW2010-2013.Activator.SSQ.exe
由于下载过程中提示KeyGen.exe有毒,所以没有管它。
十、接着会安装一个东西,直接选择Install即可,安装完后他会自动清除临时文件十一、接下来一连串点击“是”。
这里可以点“否”,点“是”的话会弹出一个网页
十二、点finish完成。
十三、双击桌面solidworks 2013图标
启动画面开启,启动过程有点慢
出现这个框点“是”
十四、点击接受。