A0611ContentProviderContacts
IDOL Content Component软件版本12.8.0发布说明说明书

Document Release Date:February2021 Software Release Date:February2021Legal noticesCopyright notice©Copyright2021 Micro Focus or one of its affiliates.The only warranties for products and services of Micro Focus and its affiliates and licensors(“Micro Focus”) are as may be set forth in the express warranty statements accompanying such products and services. Nothing herein should be construed as constituting an additional warranty.Micro Focus shall not be liable for technical or editorial errors or omissions contained herein.The information contained herein is subject to change without notice.Documentation updatesThe title page of this document contains the following identifying information:l Software Version number,which indicates the software version.l Document Release Date,which changes each time the document is updated.l Software Release Date,which indicates the release date of this version of the software.To check for updated documentation,visit https:///support-and-services/documentation/. SupportVisit the MySupport portal to access contact information and details about the products,services,and support that Micro Focus offers.This portal also provides customer self-solve capabilities.It gives you a fast and efficient way to access interactive technical support tools needed to manage your business.As a valued support customer,you can benefit by using the MySupport portal to:l Search for knowledge documents of interestl Access product documentationl View software vulnerability alertsl Enter into discussions with other software customersl Download software patchesl Manage software licenses,downloads,and support contractsl Submit and track service requestsl Contact customer supportl View information about all services that Support offersMany areas of the portal require you to sign in.If you need an account,you can create one when prompted to sign in.To learn about the different access levels the portal uses,see the Access Levels descriptions.ContentsNew in this Release4 Resolved Issues5 Notes6 Documentation7New in this ReleaseNew in this ReleaseThe following new features were released in Content Component version12.8.0.l You can now require that all queries to Content have a SecurityInfo string,to disable anonymous queries,by setting RequireSecurityInfo to True.In this case,if the query does not include security info,it returns an error.l The TermExpand action now respects the values of the MinDocOccs when Expansion is set to AutoComplete or Phrase.l The TermExpand action now respects field restrictions when Expansion is set to AutoComplete or Phrase.You specify the restrictions as a colon-separated list appended to the Text parameter, in the same way as for other supported Expansion modes.For example:action=TermExpand&Expansion=AutoComplete&Text=World War:SUMMARYl The SecureTermExpansion option has been optimized to reduce unnecessary security checks when expanding terms.l For applications where carriage return characters are important,you can now set the new PreserveCarriageReturn parameter to True.This option configures Content Component toconvert carriage return bytes to their XML entity equivalent in action responses,which receivingXML parsers preserve,rather than converting to a line feed.This behavior affects user-createdvalues that contain carriage returns.l The Admin action was modified to ensure that the IDOL Admin interface can not run in an iframe, to improve clickjacking protection.Resolved IssuesResolved IssuesThe following issues were resolved in Content Component version12.8.0.l The List ACI action sometimes returned an invalid response when a JSON response format was requested and no documents were returned.l In an Agentstore configuration that contained documents with an AlwaysMatchType field,queries without the Text parameter(or with Text=*),and with both FieldText and MatchReference orMatchID,sometimes missed documents from the results set.l At query time,Content could on rare occasions log spurious errors Unable to read term info for non-existent terms to the application log.l The DREDELETEREF index action could not reliably specify multiple ReferenceType fields in the Field parameter.l The server could terminate unexpectedly when an authorization role was configured and the list of Clients included a hostname with a wildcard,such as*.The Clientsparameter accepts wildcards only in IP addresses.NotesNotesThese notes provide extra information about installing and using Content Component.l The default Agentstore configuration files now include an AlwaysMatchType field with PropertyFieldCSVS=*/ALWAYSMATCH.Deprecated FeaturesThe following features are deprecated and might be removed in a future release.DocumentationDocumentationThe following documentation was updated for Content Component version12.8.0.l IDOL Expertl IDOL Getting Started Guidel IDOL Server Referencel IDOL Content Component Referencel IDOL Server Administration Guide。
contentprovide例子(一)
- ContentProvider示例一:联系人数据库在Android开发中,我们经常会需要访问设备的联系人信息。
这时就可以使用ContentProvider来提供联系人数据库的访问功能。
首先,我们需要在文件中声明READ_CONTACTS权限。
然后,我们可以通过ContentResolver类来获取联系人信息,实现对联系人数据库的访问。
我们可以通过以下步骤来实现对联系人数据库的访问:1. 首先,我们需要创建一个继承自ContentProvider的子类,例如ContactsProvider。
在ContactsProvider中,我们需要重写query、insert、update和delete方法,这些方法分别对应了查询、插入、更新和删除操作。
2. 在query方法中,我们可以构建合适的SQL语句,然后通过ContentResolver的query方法来执行查询操作,从而获取联系人信息。
3. 在insert方法中,我们可以通过ContentResolver的insert方法来执行插入操作,向联系人数据库中添加新的联系人信息。
4. 在update方法中,我们可以通过ContentResolver的update方法来执行更新操作,更新联系人数据库中的联系人信息。
5. 在delete方法中,我们可以通过ContentResolver的delete方法来执行删除操作,从联系人数据库中删除指定的联系人信息。
用中获取、添加、更新和删除联系人信息。
- ContentProvider示例二:媒体文件访问除了联系人数据库之外,我们还可以使用ContentProvider来实现对媒体文件的访问。
例如,我们可以访问设备上的音乐文件、视频文件和图片文件。
通过ContentProvider,我们可以实现对媒体文件的查询、插入、更新和删除操作。
要实现对媒体文件的访问功能,我们可以按照以下步骤进行操作:1. 首先,我们需要创建一个继承自ContentProvider的子类,例如MediaProvider。
ADSL拨号上网错误代码解析

ADSL宽带上网错误代码解析晓血家园收集整理,错误之处,敬请指正!ADSL拨号上网错误代码解析(2009-12-1816:14:07)转载标签:电脑电信isp vpn adsl分类:计算机软件硬件网络Error602The port is already open问题:拨号网络由于设备安装错误或正在使用,不能进行连接原因:RasPPPoE没有完全和正确的安装解决:卸载干净任何PPPoE软件,重新安装Error605Cannot set port information问题:拨号网络由于设备安装错误不能设定使用端口原因:RasPPPoE没有完全和正确的安装解决:卸载干净任何PPPoE软件,重新安装Error606The port is not connected问题:拨号网络网络不能连接所需的设备端口原因:RasPPPoE没有完全和正确的安装,连接线故障,ADSL MODEM故障解决:卸载干净任何PPPoE软件,重新安装,检查网线和ADSL MODEMError608The device does not exist问题:拨号网络连接的设备不存在原因:RasPPPoE没有完全和正确的安装解决:卸载干净任何PPPoE软件,重新安装Error609The device type does not exist问题:拨号网络网络连接的设备其种类不能确定原因:RasPPPoE没有完全和正确的安装解决:卸载干净任何PPPoE软件,重新安装Error611The route is not available/612The route is notallocated问题:拨号网络连接路由不正确原因:RasPPPoE没有完全和正确的安装,ISP服务器故障解决:卸载干净任何PPPoE软件,重新安装,致电ISP询问Error617The port or device is already disconnecting问题:拨号网络连接的设备已经断开原因:RasPPPoE没有完全和正确的安装,ISP服务器故障,连接线故障,ADSL MODEM故障解决:卸载干净任何PPPoE软件,重新安装,致电ISP询问,检查网线和ADSL MODEMError619问题:与ISP服务器不能建立连接原因:ADSL ISP服务器故障,ADSL电话线故障解决:检查ADSL信号灯是否能正确同步。
三星中高端机软件删除对照表

三星可精简程序翻译表AccuweatherDaemon.apk自带的天气(可删)ApplicationsProvider.apk应用程序支持服务(可删)AllshareMediaServer.apk(可删)AllSharePlay.apk(可删)AllshareService.apk (可删)AnalogClockSimple.apk 时钟小插件可删AnycallServiceCenter.apk Anycall服务中心可删AppleMint.apk 苹果字体可删AppGuide.apk(可删)ARBook_Quincy_ICS.apk(可删)AwesomeBEATS.apk 魔声音效,必须结合GOOGLE PLAY音乐才能产生效果,可删BackupRestoreConfirmation.apk 备份还原确认BadgeProvider.apk 标志提供者,删除后短信等崩溃BasicLiveWallpapers.apk 动态壁纸选择功能BCService.apk 未知(可删)Bluesea.apk 蓝色海洋(可删)Books.apk(可删)BluetoothAvrcp.apk 蓝牙设备遥控有朋友说删除后会造成使用车载蓝牙死机,请自行测试。
BluetoothMap.apk Map 蓝牙地图可外接GPS 可删BluetoothTest.apk 蓝牙测试组件可删ChocoEUKor.apk 英文特殊字形可删CapabilityManagerService.apk 兼容性管理服务(未知)CellBroadcastReceiver.apk(过滤程序之间传输机制,不可删)CertInstaller.apk 证书安装器可删ChromeBookmarksSyncAdapter.apk 书签同步(可删) ClipboardSaveService.apk 复制板储存(不用复制功能可以删除)ClockPackage.apk 自带时钟,不能删CloudAgent.apk 云智能CoolEUKor.apk 英文字体。
电磁炉4系列产品说明书
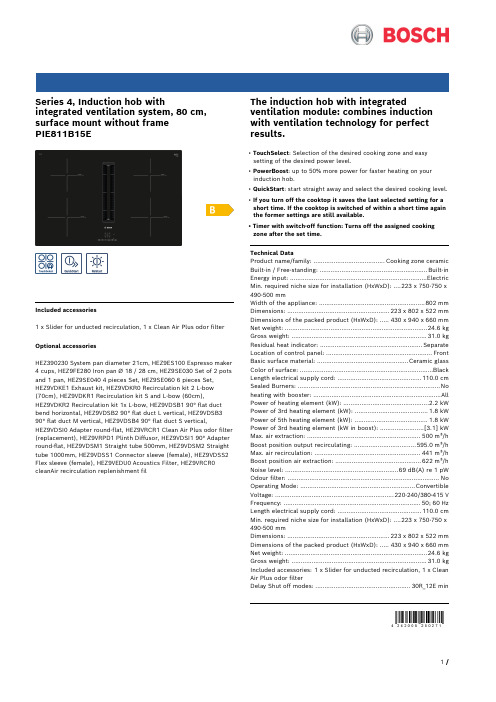
Series 4, Induction hob withintegrated ventilation system, 80 cm, surface mount without framePIE811B15EIncluded accessories1 x Slider for unducted recirculation, 1 x Clean Air Plus odor filter Optional accessoriesHEZ390230 System pan diameter 21cm, HEZ9ES100 Espresso maker 4 cups, HEZ9FE280 Iron pan Ø 18 / 28 cm, HEZ9SE030 Set of 2 pots and 1 pan, HEZ9SE040 4 pieces Set, HEZ9SE060 6 pieces Set,HEZ9VDKE1 Exhaust kit, HEZ9VDKR0 Recirculation kit 2 L-bow(70cm), HEZ9VDKR1 Recirculation kit S and L-bow (60cm),HEZ9VDKR2 Recirculation kit 1x L-bow, HEZ9VDSB1 90° flat duct bend horizontal, HEZ9VDSB2 90° flat duct L vertical, HEZ9VDSB3 90° flat duct M vertical, HEZ9VDSB4 90° flat duct S vertical,HEZ9VDSI0 Adapter round-flat, HEZ9VRCR1 Clean Air Plus odor filter (replacement), HEZ9VRPD1 Plinth Diffusor, HEZ9VDSI1 90° Adapter round-flat, HEZ9VDSM1 Straight tube 500mm, HEZ9VDSM2 Straight tube 1000mm, HEZ9VDSS1 Connector sleeve (female), HEZ9VDSS2 Flex sleeve (female), HEZ9VEDU0 Acoustics Filter, HEZ9VRCR0 cleanAir recirculation replenishment fil The induction hob with integrated ventilation module: combines induction with ventilation technology for perfect results.• TouchSelect: Selection of the desired cooking zone and easysetting of the desired power level.• PowerBoost: up to 50% more power for faster heating on your induction hob.• QuickStart: start straight away and select the desired cooking level.• If you turn off the cooktop it saves the last selected setting for a short time. If the cooktop is switched of within a short time again the former settings are still available.• Timer with switch-off function: Turns off the assigned cooking zone after the set time.Technical DataProduct name/family: .......................................Cooking zone ceramic Built-in / Free-standing: ...........................................................Built-in Energy input: ...........................................................................Electric Min. required niche size for installation (HxWxD): ....223 x 750-750 x 490-500 mmWidth of the appliance: ..........................................................802 mm Dimensions: ........................................................223 x 802 x 522 mm Dimensions of the packed product (HxWxD): .....430 x 940 x 660 mm Net weight: ..............................................................................24.6 kg Gross weight: ..........................................................................31.0 kg Residual heat indicator: ........................................................Separate Location of control panel: ..........................................................Front Basic surface material: ..................................................Ceramic glass Color of surface: .........................................................................Black Length electrical supply cord: ..............................................110.0 cm Sealed Burners: ..............................................................................No heating with booster: ......................................................................All Power of heating element (kW): ...............................................2.2 kW Power of 3rd heating element (kW): ........................................1.8 kW Power of 5th heating element (kW): ........................................1.8 kW Power of 3rd heating element (kW in boost): ........................[3.1] kW Max. air extraction: ..............................................................500 m³/h Boost position output recirculating: ..................................595.0 m³/h Max. air recirculation: ..........................................................441 m³/h Boost position air extraction: ...............................................622 m³/h Noise level: ..............................................................69 dB(A) re 1 pW Odour filter: ...................................................................................No Operating Mode: ...............................................................Convertible Voltage: .................................................................220-240/380-415 V Frequency: ...........................................................................50; 60 Hz Length electrical supply cord: ..............................................110.0 cm Min. required niche size for installation (HxWxD): ....223 x 750-750 x 490-500 mmDimensions: ........................................................223 x 802 x 522 mm Dimensions of the packed product (HxWxD): .....430 x 940 x 660 mm Net weight: ..............................................................................24.6 kg Gross weight: ..........................................................................31.0 kg Included accessories: 1 x Slider for unducted recirculation, 1 x Clean Air Plus odor filterDelay Shut off modes: ....................................................30R_12E minSeries 4, Induction hob withintegrated ventilation system, 80 cm, surface mount without framePIE811B15EThe induction hob with integrated ventilation module: combines induction with ventilation technology for perfect results.- 80 cm: space for 4 pots or pans.Flexibility of cooking zones- Cooking zone front left: 210 mm, 2.2 KW (max. power 3.7 KW)- Cooking zone rear left: 180 mm, 1.8 KW (max. power 3.1 KW)- Cooking zone rear right: 180 mm , 1.8 KW (max power 3.1 KW)- Cooking zone front right: 210 mm, 2.2 KW (max. power 3.7 KW) Usage convenience- TouchSelect: control the power with imprinted +/- touch buttons. - Variable 17-stage power settings for each zone: precisely adapt the heat with 17 power levels (9 main levels and 8 intermediate levels).- Timer for all zones- : switches off the cooking zone at the end of the time set (e.g. for boiled eggs).- Timer - shows how long the cooktop is in use- : an alarm sounds at the end of the time set (e.g. for pasta).Time saving & efficiency- PowerBoost function for all zones- : boil water faster thanks to 50% more energy than at the highest standard level.- QuickStart function: when switching on, the hob automatically selects the cooking zone with cookware (when placed on a zone whilst the hob is off).- ReStart function: in case of unintentional switch-off, this feature restores all previous settings by switching on the hob again within 4 seconds- Quick Stop: quickly switch off a cooking zone with one longer touch.Design- Frameless designSafety- 2 stage residual heat indicator for each zone: indicates which cooking zones are still hot or warm.- Control panel lock: prevent unintended activation of the hob.- Freeze function: wipe overboiled liquids without unintentionally changing settings (blocking all touch buttons for 30 seconds).- Main on/off switch: switch off all cooking zones at the touch of a button.- Safety cut-out switch-off: for safety reasons, heating stops after a preset time if not used (possible to customise).Installation- Dimensions of the product (HxWxD mm): 223 x 802 x 522- Required niche size for installation (HxWxD mm) : 223 x 750 x (490 - 500)- Min. worktop thickness: 16 mm - Connected load: 7.4 KW- Power management options for 16A, 13A or 10A connection: limit the maximum power if needed (depends on fuse protection of electric installation).- Power cord: 1.1 m, Cable included- Suitable for ducted or recirculated extraction installations in 4 different options (unducted, partly and fully ducted recirculation or ducted extraction). Installation accessories for unducted recirculation, among these four cleanAir odor filters and a telescopic slider element, are included in the cooktop. The included accessories allow easy and quick installations and can be planned in all worktop depths ≥60cm. For other types of installation, one of the following accessory kits is recommended:- HEZ9VDKR1 for partly-ducted recirculation in worktops of ≥60cm depth with max. worktop height of 960 mm. HEZ9VDKR0 forpartly-ducted recirculation in worktops of ≥70cm depth with max. worktop height of 960 mm.- HEZ9VDKE1 as starter kit for ducted extraction in worktops of≥60cm depth.- To complete the fully ducted extraction or to do any other individual recirculation planning different ducting accessories are available.Integrated ventilation downdraft system- Induction cooktop with fully integrated high-performance downdraft extractor.- Suitable for ducted or recirculated extraction configuration (incl. differentiated software modes). Installation accessories for unducted recirculation, among these four cleanAir odor filters and a telescopic slider element, are included in the cooktop. Accessories for other installation options are available, details in the planning notes.-- Aesthetically integrated fully flush air intake design with floating, heat resistant glass ceramics element for free movement and placement of cookware.- Ventilation system with 3 electronically controlled fan power levels and 1 Boost-/Intensive fan power levels (with automatic revert) via TouchSelect user interface- - Automatic switch-on of ventilation system when a cooking zone is used.- - Automatic delayed shut-off after cooking to erase residual odours after cooking (in specific ultra low-noise fan level, 12min in ducted extraction, 30min in recirculated extraction, can be shut-off manually).- - Fully manual control possible via TouchSelect.- High-performance, low-noise motor with energy-efficientBLDC-technology. High extraction rates at very low noises with pleasant noise frequencies through psycho-acoustically and aerodynamically optimised interior with enclosed, hidden motor. Highly pressure-drop resistant even with longer and more complex ducting systems.- Easy-to-detach and easy-to-clean grease filter and liquid collector unit:- - Convenient one-hand removal of unit via floating glass ceramics handle.- - Integrated, large-scale, high performance stainless-steel grease filters with 12 filtration layers and one black top layer for enhanced aesthetical integration. Grease filtration efficiency of 94 %.- - All parts of the unit are easy-to-clean, fully dishwasher safe and heat resistant.- - (Upper) Liquid collector unit with 200ml of capacity for standard accidental spillages or cooking condensate.- - Powerful drainage system for spillages that exceed 200ml of liquids.- - Liquid safety collector with additional capacity of 700ml for more severe accidental situations. Dishwasher safe. Easily accessible and detachable from below.- - Overall capturing capacity of 900ml (200ml + 700ml).- - Watertight motor system.- Ventilation system performance:- - Extraction performance in ducted extraction (according to EN 61591): min. normal setting 330 m3/h , max. normal setting 500m3/h , max. Boost-/Intensive setting 622 m3/h .- - Extraction performance in recirculated extraction (according to EN 61591): min. normal setting 252 m3/h , max. normal setting 441m3/h , max. Boost-/Intensive setting 595 m3/h.- - Noise level in ducted extraction (Sound power level according to EN 60704-3): min. normal setting 61 dB re 1 pW, max. normal setting 69 dB re 1 pW, max. Boost-/Intensive setting 74 dB re 1 pW.- - Noise level in recirculated extraction (Sound power level according to EN 60704-3. ): min. normal setting 55 dB re 1 pW, max. normal setting 66 dB re 1 pW, max. Boost-/Intensive setting 72 dB re 1 pW.- - Grease filter efficiency (according to EN 61591) 94 %.- Consumption data and energy efficiency (according to Regulation (EU) No 65/2014):- - Energy Efficiency Class: B (at a range of energy efficiency classes from A+++ to D).- - Fluid Dynamic Efficiency: A .- - Average energy consumption: 57 .- - Grease filtration effciency class: B .- - Noise min. normal setting & max. normal setting: 61 dB & 69 dB . - For recirculation configuration: 2 x 2 battery of directly integrated, high-performance cleanAir odor filters.- - Optimised odour reduction performance for cooking applications with complex odour molecules (e.g. fish).- - Large scale filter surface with high odour reduction capabilities.- - Lifetime of 360 hours of cooking (non-regenerative).- - Low-noise filters with optimised psycho-acoustics.- - Easy-to-access and easy-to-remove from above.- - Replenishment cleanAir filter set HEZ9VRCR0.- For ducted extraction configuration: 2 x 2 sets of directly integrated, high-performance low-noise acoustic filters for significantly lower noise and improved psycho-acoustics.Planning & installation notes- Planning suggestions:- - Installation is possible in island as well as wall oriented configurations.- The product and its accessories comply with the Needle Flame Test (according to IEC 60695-11-5) and the V2 flammability class (according to UL94).- - The max. immersion depth is 223 mm below worktop surface.- - The appliance must be freely accessible from below (i.e. for accessing the lower liquid safety collector).- - No false floor is necessary below the cooktop with integrated downdraft ventilation system. The drawers and/or shelves in the floor unit must be removable. The backpanel of the floor unit can be kept - only a cut-out for the air outlet is needed (position and size can be taken from the installation instructions).- - The "Plug 'n Play" starter kit HEZ9VRUD0 for unducted recirculation requires a vertical aperture of min. 25mm behind thebackpanel of the furniture. Suggested for ideal performance are 50mm.- - The minimum worktop thickness is 16mm for top mounted and flush installed appliances with the standard installation system. Installation in even thinner worktops is also possible with the spare part: content 626792.- - The overall appliance weight is 26kg - the bearing capacity and stability, in the case of very thin worktops in particular, must be supported using suitable substructures. The overall appliance weight and the worktop manufacturer's structural integrity specifications are to be taken into account.- - For partly ducted and unducted recirculation extraction installations, a return-flow aperture of ≥400cm² is to be respected in the plinth area. The aperture can be realized via outlet grids, lamella grids or subtly shortened plinths depending on the assortment of the kitchen furniture manufacturer.- - The air outlet on the backside of the appliance can directly be accessed with a male flat duct element (DN 150).- - The pressuredrop resistant blower allows longer and more complex ductings up to 8m with three 90° elbows while keeping sufficient performance.- - When installing a ventilation hood with ducted extraction and a chimney-vented fireplace, the power supply line of the appliance needs a suitable safety switch. This is not required for configurations in recirculated extraction.- - In ducted extraction configuration a one-way flap (or backflow trap) with a maximum opening pressure of 65Pa should be installed.Series 4, Induction hob with integrated ventilation system, 80 cm, surface mount without framePIE811B15E。
AndroidN7.0中报错:a...

AndroidN7.0中报错:a...发现问题最近在Android N 上安装Apk时报错:android.os.FileUriExposedException: file:///storage/emulated/0/Download/appName-2.3.0.apk exposed beyond app through Intent.getData(),通过查找相关的资料终于找到了解决的⽅法,下⾯分享给⼤家,话不多说了,来⼀起看看详细的介绍吧。
解决⽅法1、在AndroidManifest.xml中添加如下代码<provider android:name="android.support.v4.content.FileProvider"android:authorities="app的包名.fileProvider"android:grantUriPermissions="true"android:exported="false"><meta-dataandroid:name="android.support.FILE_PROVIDER_PATHS"android:resource="@xml/file_paths" /></provider>注意:authorities:app的包名.fileProvidergrantUriPermissions:必须是true,表⽰授予 URI 临时访问权限exported:必须是falseresource:中的@xml/file_paths是我们接下来要添加的⽂件2、在res⽬录下新建⼀个xml⽂件夹,并且新建⼀个file_paths的xml⽂件(如下图)3、打开file_paths.xml⽂件添加如下内容<?xml version="1.0" encoding="utf-8"?><paths><external-path path="Android/data/app的包名/" name="files_root" /><external-path path="." name="external_storage_root" /></paths>path:需要临时授权访问的路径(.代表所有路径)name:就是你给这个访问路径起个名字4、修改代码适配Android NIntent intent = new Intent(Intent.ACTION_VIEW);//判断是否是AndroidN以及更⾼的版本if (Build.VERSION.SDK_INT >= Build.VERSION_CODES.N) {intent.setFlags(Intent.FLAG_GRANT_READ_URI_PERMISSION);Uri contentUri = FileProvider.getUriForFile(context, BuildConfig.APPLICATION_ID + ".fileProvider", apkFile);intent.setDataAndType(contentUri, "application/vnd.android.package-archive");} else {intent.setDataAndType(Uri.fromFile(apkFile), "application/vnd.android.package-archive");intent.setFlags(Intent.FLAG_ACTIVITY_NEW_TASK);}startActivity(intent);1、⾸先我们对Android N及以上做判断;2、然后添加flags,表明我们要被授予什么样的临时权限3、以前我们直接 Uri.fromFile(apkFile)构建出⼀个Uri,现在我们使⽤FileProvider.getUriForFile(context, BuildConfig.APPLICATION_ID + ".fileProvider", apkFile);4、BuildConfig.APPLICATION_ID直接是应⽤的包名总结以上就是这篇⽂章的全部内容了,希望本⽂的内容对⼤家的学习或者⼯作具有⼀定的参考学习价值,如果有疑问⼤家可以留⾔交流,谢谢⼤家对的⽀持。
HP Color LaserJet Enterprise MFP M776用户指南说明书
Legal informationCopyright and License© Copyright 2019 HP Development Company, L.P.Reproduction, adaptation, or translation without prior written permission is prohibited, except as allowedunder the copyright laws.The information contained herein is subject to change without notice.The only warranties for HP products and services are set forth in the express warranty statementsaccompanying such products and services. Nothing herein should be construed as constituting anadditional warranty. HP shall not be liable for technical or editorial errors or omissions contained herein.Edition 1, 10/2019Trademark CreditsAdobe®, Adobe Photoshop®, Acrobat®, and PostScript® are trademarks of Adobe Systems Incorporated.Apple and the Apple logo are trademarks of Apple Inc., registered in the U.S. and other countries.macOS is a trademark of Apple Inc., registered in the U.S. and other countries.AirPrint is a trademark of Apple Inc., registered in the U.S. and other countries.Google™ is a trademark of Google Inc.Microsoft®, Windows®, Windows® XP, and Windows Vista® are U.S. registered trademarks of MicrosoftCorporation.UNIX® is a registered trademark of The Open Group.iiiT able of contents1 Printer overview (1)Warning icons (1)Potential shock hazard (2)Printer views (2)Printer front view (2)Printer back view (4)Interface ports (4)Control-panel view (5)How to use the touchscreen control panel (7)Printer specifications (8)T echnical specifications (8)Supported operating systems (11)Mobile printing solutions (12)Printer dimensions (13)Power consumption, electrical specifications, and acoustic emissions (15)Operating-environment range (15)Printer hardware setup and software installation (16)2 Paper trays (17)Introduction (17)Load paper to Tray 1 (multipurpose tray) (17)Load Tray 1 (multipurpose tray) (18)Tray 1 paper orientation (19)Use alternative letterhead mode (24)Enable Alternative Letterhead Mode by using the printer control-panel menus (24)Load paper to Tray 2 (24)Load Tray 2 (24)Tray 2 paper orientation (26)Use alternative letterhead mode (29)Enable Alternative Letterhead Mode by using the printer control-panel menus (29)Load paper to the 550-sheet paper tray (30)Load paper to the 550-sheet paper tray (30)550-sheet paper tray paper orientation (32)Use alternative letterhead mode (35)Enable Alternative Letterhead Mode by using the printer control-panel menus (35)ivLoad paper to the 2 x 550-sheet paper trays (36)Load paper to the 2 x 550-sheet paper trays (36)2 x 550-sheet paper tray paper orientation (38)Use alternative letterhead mode (41)Enable Alternative Letterhead Mode by using the printer control-panel menus (41)Load paper to the 2,700-sheet high-capacity input paper trays (41)Load paper to the 2,700-sheet high-capacity input paper trays (41)2,700-sheet HCI paper tray paper orientation (43)Use alternative letterhead mode (45)Enable Alternative Letterhead Mode by using the printer control-panel menus (45)Load and print envelopes (46)Print envelopes (46)Envelope orientation (46)Load and print labels (47)Manually feed labels (47)Label orientation (48)3 Supplies, accessories, and parts (49)Order supplies, accessories, and parts (49)Ordering (49)Supplies and accessories (50)Maintenance/long-life consumables (51)Customer self-repair parts (51)Dynamic security (52)Configure the HP toner-cartridge-protection supply settings (53)Introduction (53)Enable or disable the Cartridge Policy feature (53)Use the printer control panel to enable the Cartridge Policy feature (54)Use the printer control panel to disable the Cartridge Policy feature (54)Use the HP Embedded Web Server (EWS) to enable the Cartridge Policy feature (54)Use the HP Embedded Web Server (EWS) to disable the Cartridge Policy feature (55)Troubleshoot Cartridge Policy control panel error messages (55)Enable or disable the Cartridge Protection feature (55)Use the printer control panel to enable the Cartridge Protection feature (56)Use the printer control panel to disable the Cartridge Protection feature (56)Use the HP Embedded Web Server (EWS) to enable the Cartridge Protection feature (56)Use the HP Embedded Web Server (EWS) to disable the Cartridge Protection feature (57)Troubleshoot Cartridge Protection control panel error messages (57)Replace the toner cartridges (58)T oner-cartridge information (58)Remove and replace the cartridges (59)Replace the imaging drums (62)Imaging drum information (62)Remove and replace the imaging drums (63)Replace the toner-collection unit (66)T oner-collection unit information (66)vRemove and replace the toner-collection unit (67)Replace the staple cartridge (M776zs model only) (70)Staple cartridge information (70)Remove and replace the staple cartridge (71)4 Print (73)Print tasks (Windows) (73)How to print (Windows) (73)Automatically print on both sides (Windows) (74)Manually print on both sides (Windows) (74)Print multiple pages per sheet (Windows) (75)Select the paper type (Windows) (75)Additional print tasks (76)Print tasks (macOS) (77)How to print (macOS) (77)Automatically print on both sides (macOS) (77)Manually print on both sides (macOS) (77)Print multiple pages per sheet (macOS) (78)Select the paper type (macOS) (78)Additional print tasks (79)Store print jobs on the printer to print later or print privately (79)Introduction (79)Create a stored job (Windows) (79)Create a stored job (macOS) (80)Print a stored job (81)Delete a stored job (81)Delete a job that is stored on the printer (81)Change the job storage limit (82)Information sent to printer for Job Accounting purposes (82)Mobile printing (82)Introduction (82)Wi-Fi, Wi-Fi Direct Print, NFC, and BLE printing (82)Enable wireless printing (83)Change the Wi-Fi Direct name (83)HP ePrint via email (83)AirPrint (84)Android embedded printing (85)Print from a USB flash drive (85)Enable the USB port for printing (85)Method one: Enable the USB port from the printer control panel (85)Method two: Enable the USB port from the HP Embedded Web Server (network-connectedprinters only) (85)Print USB documents (86)Print using high-speed USB 2.0 port (wired) (86)Method one: Enable the high-speed USB 2.0 port from the printer control panel menus (86)Method two: Enable the high-speed USB 2.0 port from the HP Embedded Web Server (network-connected printers only) (87)vi5 Copy (88)Make a copy (88)Copy on both sides (duplex) (90)Additional copy tasks (92)6 Scan (93)Set up Scan to Email (93)Introduction (93)Before you begin (93)Step one: Access the HP Embedded Web Server (EWS) (94)Step two: Configure the Network Identification settings (95)Step three: Configure the Send to Email feature (96)Method one: Basic configuration using the Email Setup Wizard (96)Method two: Advanced configuration using the Email Setup (100)Step four: Configure the Quick Sets (optional) (104)Step five: Set up Send to Email to use Office 365 Outlook (optional) (105)Introduction (105)Configure the outgoing email server (SMTP) to send an email from an Office 365 Outlookaccount (105)Set up Scan to Network Folder (108)Introduction (108)Before you begin (108)Step one: Access the HP Embedded Web Server (EWS) (108)Step two: Set up Scan to Network Folder (109)Method one: Use the Scan to Network Folder Wizard (109)Method two: Use Scan to Network Folder Setup (110)Step one: Begin the configuration (110)Step two: Configure the Scan to Network Folder settings (111)Step three: Complete the configuration (118)Set up Scan to SharePoint (118)Introduction (118)Before you begin (118)Step one: Access the HP Embedded Web Server (EWS) (118)Step two: Enable Scan to SharePoint and create a Scan to SharePoint Quick Set (119)Scan a file directly to a SharePoint site (121)Quick Set scan settings and options for Scan to SharePoint (122)Set up Scan to USB Drive (123)Introduction (124)Step one: Access the HP Embedded Web Server (EWS) (124)Step two: Enable Scan to USB Drive (124)Step three: Configure the Quick Sets (optional) (125)Default scan settings for Scan to USB Drive setup (126)Default file settings for Save to USB setup (126)Scan to email (127)Introduction (127)Scan to email (127)Scan to job storage (129)viiIntroduction (129)Scan to job storage on the printer (130)Print from job storage on the printer (132)Scan to network folder (132)Introduction (132)Scan to network folder (132)Scan to SharePoint (134)Introduction (134)Scan to SharePoint (134)Scan to USB drive (136)Introduction (136)Scan to USB drive (136)Use HP JetAdvantage business solutions (138)Additional scan tasks (138)7 Fax (140)Set up fax (140)Introduction (140)Set up fax by using the printer control panel (140)Change fax configurations (141)Fax dialing settings (141)General fax send settings (142)Fax receive settings (143)Send a fax (144)Additional fax tasks (146)8 Manage the printer (147)Advanced configuration with the HP Embedded Web Server (EWS) (147)Introduction (147)How to access the HP Embedded Web Server (EWS) (148)HP Embedded Web Server features (149)Information tab (149)General tab (149)Copy/Print tab (150)Scan/Digital Send tab (151)Fax tab (152)Supplies tab (153)Troubleshooting tab (153)Security tab (153)HP Web Services tab (154)Networking tab (154)Other Links list (156)Configure IP network settings (157)Printer sharing disclaimer (157)View or change network settings (157)Rename the printer on a network (157)viiiManually configure IPv4 TCP/IP parameters from the control panel (158)Manually configure IPv6 TCP/IP parameters from the control panel (158)Link speed and duplex settings (159)Printer security features (160)Introduction (160)Security statements (160)Assign an administrator password (160)Use the HP Embedded Web Server (EWS) to set the password (160)Provide user access credentials at the printer control panel (161)IP Security (161)Encryption support: HP High Performance Secure Hard Disks (161)Lock the formatter (161)Energy-conservation settings (161)Set the sleep timer and configure the printer to use 1 watt or less of power (161)Set the sleep schedule (162)Set the idle settings (162)HP Web Jetadmin (163)Software and firmware updates (163)9 Solve problems (164)Customer support (164)Control panel help system (165)Reset factory settings (165)Introduction (165)Method one: Reset factory settings from the printer control panel (165)Method two: Reset factory settings from the HP Embedded Web Server (network-connectedprinters only) (166)A “Cartridge is low” or “Cartridge is very low” message displays on the printer control panel (166)Change the “Very Low” settings (166)Change the “Very Low” settings at the control panel (166)For printers with fax capability (167)Order supplies (167)Printer does not pick up paper or misfeeds (167)Introduction (167)The printer does not pick up paper (167)The printer picks up multiple sheets of paper (171)The document feeder jams, skews, or picks up multiple sheets of paper (174)Clear paper jams (174)Introduction (174)Paper jam locations (174)Auto-navigation for clearing paper jams (175)Experiencing frequent or recurring paper jams? (175)Clear paper jams in the document feeder - 31.13.yz (176)Clear paper jams in Tray 1 (13.A1) (177)Clear paper jams in Tray 2 (13.A2) (182)Clear paper jams in the fuser (13.B9, 13.B2, 13.FF) (188)ixClear paper jams in the duplex area (13.D3) (194)Clear paper jams in the 550-sheet trays (13.A3, 13.A4) (199)Clear paper jams in the 2 x 550 paper trays (13.A4, 13.A5) (206)Clear paper jams in the 2,700-sheet high-capacity input paper trays (13.A3, 13.A4, 13.A5, 13.A7) (213)Resolving color print quality problems (220)Introduction (220)Troubleshoot print quality (221)Update the printer firmware (221)Print from a different software program (221)Check the paper-type setting for the print job (221)Check the paper type setting on the printer (221)Check the paper type setting (Windows) (221)Check the paper type setting (macOS) (222)Check toner-cartridge status (222)Step one: Print the Supplies Status Page (222)Step two: Check supplies status (222)Print a cleaning page (222)Visually inspect the toner cartridge or cartridges (223)Check paper and the printing environment (223)Step one: Use paper that meets HP specifications (223)Step two: Check the environment (223)Step three: Set the individual tray alignment (224)Try a different print driver (224)Troubleshoot color quality (225)Calibrate the printer to align the colors (225)Troubleshoot image defects (225)Improve copy image quality (233)Check the scanner glass for dirt and smudges (233)Calibrate the scanner (234)Check the paper settings (235)Check the paper selection options (235)Check the image-adjustment settings (235)Optimize copy quality for text or pictures (236)Edge-to-edge copying (236)Improve scan image quality (236)Check the scanner glass for dirt and smudges (237)Check the resolution settings (238)Check the color settings (238)Check the image-adjustment settings (239)Optimize scan quality for text or pictures (239)Check the output-quality settings (240)Improve fax image quality (240)Check the scanner glass for dirt and smudges (240)Check the send-fax resolution settings (242)Check the image-adjustment settings (242)Optimize fax quality for text or pictures (242)Check the error-correction setting (243)xSend to a different fax machine (243)Check the sender's fax machine (243)Solve wired network problems (244)Introduction (244)Poor physical connection (244)The computer is unable to communicate with the printer (244)The printer is using incorrect link and duplex settings for the network (245)New software programs might be causing compatibility problems (245)The computer or workstation might be set up incorrectly (245)The printer is disabled, or other network settings are incorrect (245)Solve wireless network problems (245)Introduction (245)Wireless connectivity checklist (245)The printer does not print after the wireless configuration completes (246)The printer does not print, and the computer has a third-party firewall installed (246)The wireless connection does not work after moving the wireless router or printer (247)Cannot connect more computers to the wireless printer (247)The wireless printer loses communication when connected to a VPN (247)The network does not appear in the wireless networks list (247)The wireless network is not functioning (247)Reduce interference on a wireless network (248)Solve fax problems (248)Checklist for solving fax problems (248)What type of phone line are you using? (249)Are you using a surge-protection device? (249)Are you using a phone company voice-messaging service or an answering machine? (249)Does your phone line have a call-waiting feature? (249)Check fax accessory status (249)General fax problems (250)The fax failed to send (250)No fax address book button displays (250)Not able to locate the Fax settings in HP Web Jetadmin (250)The header is appended to the top of the page when the overlay option is enabled (251)A mix of names and numbers is in the recipients box (251)A one-page fax prints as two pages (251)A document stops in the document feeder in the middle of faxing (251)The volume for sounds coming from the fax accessory is too high or too low (251)Index (252)xiPrinter overview1Review the location of features on the printer, the physical and technical specifications of the printer,and where to locate setup information.For video assistance, see /videos/LaserJet.The following information is correct at the time of publication. For current information, see /support/colorljM776MFP.For more information:HP's all-inclusive help for the printer includes the following information:●Install and configure●Learn and use●Solve problems●Download software and firmware updates●Join support forums●Find warranty and regulatory informationWarning iconsUse caution if you see a warning icon on your HP printer, as indicated in the icon definitions.●Caution: Electric shock●Caution: Hot surface●Caution: Keep body parts away from moving partsPrinter overview1●Caution: Sharp edge in close proximity●WarningPotential shock hazardReview this important safety information.●Read and understand these safety statements to avoid an electrical shock hazard.●Always follow basic safety precautions when using this product to reduce risk of injury from fire orelectric shock.●Read and understand all instructions in the user guide.●Observe all warnings and instructions marked on the product.●Use only a grounded electrical outlet when connecting the product to a power source. If you do notknow whether the outlet is grounded, check with a qualified electrician.●Do not touch the contacts on any of the sockets on the product. Replace damaged cordsimmediately.●Unplug this product from wall outlets before cleaning.●Do not install or use this product near water or when you are wet.●Install the product securely on a stable surface.●Install the product in a protected location where no one can step on or trip over the power cord.Printer viewsIdentify certain parts of the printer and the control panel.Printer front viewLocate features on the front of the printer.2Chapter 1 Printer overviewPrinter front view3Printer back viewLocate features on the back of the printer.Interface portsLocate the interface ports on the printer formatter. 4Chapter 1 Printer overviewControl-panel viewThe control panel provides access to the printer features and indicates the current status of the printer.NOTE:Tilt the control panel for easier viewing.The Home screen provides access to the printer features and indicates the current status of the printer.screens.NOTE:The features that appear on the Home screen can vary, depending on the printerconfiguration.Control-panel view5Figure 1-1Control-panel view?i 12:42 PM6Chapter 1 Printer overviewHow to use the touchscreen control panelPerform the following actions to use the printer touchscreen control panel.T ouchT ouch an item on the screen to select that item or open that menu. Also, when scrolling T ouch the Settings icon to open the Settings app.How to use the touchscreen control panel 7SwipeT ouch the screen and then move your finger horizontally to scroll the screen sideways.Swipe until the Settings app displays.Printer specificationsDetermine the specifications for your printer model.IMPORTANT:The following specifications are correct at the time of publication, but they are subject to change. For current information, see /support/colorljM776MFP .T echnical specificationsReview the printer technical specifications.Product numbers for each model ●M776dn - #T3U55A ●Flow M776z - #3WT91A ●Flow M776zs - #T3U56APaper handling specificationsPaper handling features Tray 1 (100-sheet capacity)Included Included Included Tray 2 (550-sheet capacity)IncludedIncludedIncluded8Chapter 1 Printer overview550-sheet paper trayOptional Included Not included NOTE:The M776dn models accept one optional550-sheet tray.Optional Included Included2 x 550-sheet paper tray and standNOTE:The M776dn models accept one optional550-sheet tray that may be installed on top of thestand.Optional Not included Not included2,700-sheet high-capacity input (HCI) paper trayand standNOTE:The M776dn models accept one optional550-sheet tray that may be installed on top of theoptional printer stand.Printer standOptional Not included Not included NOTE:The M776dn models accept one optional550-sheet tray that may be installed on top of theoptional printer stand.Inner finisher accessory Not included Not included Included Automatic duplex printing Included IncludedIncludedIncluded Included Included10/100/1000 Ethernet LAN connection with IPv4and IPv6Hi-Speed USB 2.0Included Included IncludedIncluded Included IncludedEasy-access USB port for printing from a USBflash drive or upgrading the firmwareIncluded Included Included Hardware Integration Pocket for connectingaccessory and third-party devicesHP Internal USB Ports Optional Optional OptionalOptional Optional OptionalHP Jetdirect 2900nw Print Server accessory forWi-Fi connectivity and an additional Ethernet portOptional IncludedIncludedHP Jetdirect 3100w accessory for Wi-Fi, BLE, NFC,and proximity badge readingPrints 45 pages per minute (ppm) on Letter-sizepaper and 46 ppm on A4-size paperEasy-access USB printing for printing from a USBIncluded Included Includedflash driveT echnical specifications9Included Included Included Store jobs in the printer memory to print later orprint privatelyScans 100 pages per minute (ppm) on A4 andIncluded Included Included letter-size paper one-sidedIncluded Included Included 200-page document feeder with dual-headscanning for single-pass duplex copying andscanningNot included Included Included HP EveryPage T echnologies including ultrasonicmulti-feed detectionNot included Included Included Embedded optical character recognition (OCR)provides the ability to convert printed pages intotext that can be edited or searched using acomputerIncluded Included Included SMART Label feature provides paper-edgedetection for automatic page croppingIncluded Included Included Automatic page orientation for pages that haveat least 100 characters of textIncluded Automatic tone adjustment sets contrast,Included Includedbrightness, and background removal for eachpageIncluded Included Includedfolders on a networkIncludedSend documents to SharePoint®Included IncludedIncluded Included Included NOTE:Memory reported on the configurationpage will change from 2.5 GB to 3 GB with theoptional 1 GB SODIMM installed.Mass storage: 500 GB hard disk drive Included Included IncludedSecurity: HP Trusted Platform Module (TPM)Included Included IncludedT ouchscreen control panel Included Included IncludedRetractable keyboard Not included Included Included 10Chapter 1 Printer overviewFax Optional Included IncludedSupported operating systemsUse the following information to ensure printer compatibility with your computer operating system.Linux: For information and print drivers for Linux, go to /go/linuxprinting.UNIX: For information and print drivers for UNIX®, go to /go/unixmodelscripts.The following information applies to the printer-specific Windows HP PCL 6 print drivers, HP print driversfor macOS, and to the software installer.Windows: Download HP Easy Start from /LaserJet to install the HP print driver. Or, go tothe printer-support website for this printer: /support/colorljM776MFP to download the printdriver or the software installer to install the HP print driver.macOS: Mac computers are supported with this printer. Download HP Easy Start either from /LaserJet or from the Printer Support page, and then use HP Easy Start to install the HP print driver.1.Go to /LaserJet.2.Follow the steps provided to download the printer software.Windows 7, 32-bit and 64-bit The “HP PCL 6” printer-specific print driver is installed for this operating system aspart of the software installation.Windows 8.1, 32-bit and 64-bit The “HP PCL-6” V4 printer-specific print driver is installed for this operating systemas part of the software installation.Windows 10, 32-bit and 64-bit The “HP PCL-6” V4 printer-specific print driver is installed for this operating systemas part of the software installation.Windows Server 2008 R2, SP 1, 64-bit The PCL 6 printer-specific print driver is available for download from the printer-support website. Download the driver, and then use the Microsoft Add Printer tool toinstall it.Windows Server 2012, 64-bit The PCL 6 printer-specific print driver is available for download from the printer-support website. Download the driver, and then use the Microsoft Add Printer tool toinstall it.Windows Server 2012 R2, 64-bit The PCL 6 printer-specific print driver is available for download from the printer-support website. Download the driver, and then use the Microsoft Add Printer tool toinstall it.Windows Server 2016, 64-bit The PCL 6 printer-specific print driver is available for download from the printer-support website. Download the driver, and then use the Microsoft Add Printer tool toinstall it.Windows Server 2019, 64-bit The PCL 6 printer-specific print driver is available for download from the printer-support website. Download the driver, and then use the Microsoft Add Printer tool toinstall it.Supported operating systems11macOS 10.13 High Sierra, macOS 10.14 MojaveDownload HP Easy Start from /LaserJet , and then use it to install the print driver.NOTE:Supported operating systems can change.NOTE:For a current list of supported operating systems and HP’s all-inclusive help for the printer, go to /support/colorljM776MFP .NOTE:For details on client and server operating systems and for HP UPD driver support for this printer, go to /go/upd . Under Additional information , click Specifications .●Internet connection●Dedicated USB 1.1 or 2.0 connection or a network connection● 2 GB of available hard-disk space ●1 GB RAM (32-bit) or2 GB RAM (64-bit)●Internet connection●Dedicated USB 1.1 or 2.0 connection or a network connection●1.5 GB of available hard-disk spaceNOTE:The Windows software installer installs the HP Smart Device Agent Base service. The file size is less than 100 kb. Its only function is to check for printers connected via USB hourly. No data is collected. If a USB printer is found, it then tries to locate a JetAdvantage Management Connector (JAMc) instance on the network. If a JAMc is found, the HP Smart Device Agent Base is securelyupgraded to a full Smart Device Agent from JAMc, which will then allow printed pages to be accounted for in a Managed Print Services (MPS) account. The driver-only web packs downloaded from for the printer and installed through the Add Printer wizard do not install this service.T o uninstall the service, open the Control Panel , select Programs or Programs and Features , and then select Add/Remove Programs or Uninstall a Programto remove the service. The file name isHPSmartDeviceAgentBase.Mobile printing solutionsHP offers multiple mobile printing solutions to enable easy printing to an HP printer from a laptop, tablet, smartphone, or other mobile device.T o see the full list and to determine the best choice, go to /go/MobilePrinting .NOTE:Update the printer firmware to ensure all mobile printing capabilities are supported.●Wi-Fi Direct (wireless models only, with HP Jetdirect 3100w BLE/NFC/Wireless accessory installed)●HP ePrint via email (Requires HP Web Services to be enabled and the printer to be registered with HP Connected)●HP Smart app ●Google Cloud Print12Chapter 1 Printer overview。
NetKeeper拨号连接或VPN连接的错误代码列表

NetKeeper拨号连接或VPN连接的错误代码列表600某操作处于挂起状态。
601端口句柄无效。
602端口已打开。
603呼叫方缓冲区太小。
604指定了错误的信息。
605无法设置端口信息。
606无法连接端口。
607事件无效。
608设备不存在。
609设备类型不存在。
610缓冲区无效。
611路由不可用。
612没有分配路由。
613指定了无效的压缩。
614缓冲区溢出。
615找不到端口。
616某异步请求处于挂起状态。
617端口或设备已断开连接。
618端口尚未打开。
619端口已断开连接。
620没有终结点。
621无法打开电话簿文件。
622无法加载电话簿文件。
623找不到电话簿条目。
624无法写入电话簿文件。
625在电话簿中发现无效信息。
626无法加载字符串。
627找不到密钥。
628端口已断开连接。
629端口已由远程机器断开连接。
630端口由于硬件故障已断开连接。
631端口已由用户断开连接。
632结构大小不正确。
633端口已被使用或不是为远程访问拨出配置的。
634无法在远程网络上注册您的计算机。
635未知错误。
636端口连接了错误的设备。
637无法转换字符串。
638请求已超时。
639没有可用的异步网络。
640出现NetBIOS错误。
641服务器无法分配需要用来支持客户端的NetBIOS资源。
642您的一个NetBIOS名称已在远程网络上注册。
643服务器上的网卡失败。
644您将无法接收弹出的网络信息。
645内部身份验证错误。
646不允许本帐户在此时间登录。
647帐户已禁用。
648密码已过期。
649帐户没有远程访问权限。
650远程访问服务器没有响应。
651您的调制解调器(或其它连接设备)报告了一个错误。
652无法识别来自该设备的响应。
653在设备.INF文件段中找不到设备所需的宏。
654在设备.INF文件段中的命令或响应引用了未定义的宏655在设备.INF文件段中找不到<message>宏。
656在设备.INF文件段的<defaultoff>宏中包含未定义的宏657无法打开设备.INF文件。
- 1、下载文档前请自行甄别文档内容的完整性,平台不提供额外的编辑、内容补充、找答案等附加服务。
- 2、"仅部分预览"的文档,不可在线预览部分如存在完整性等问题,可反馈申请退款(可完整预览的文档不适用该条件!)。
- 3、如文档侵犯您的权益,请联系客服反馈,我们会尽快为您处理(人工客服工作时间:9:00-18:30)。
ContentProvider的使用
知识解析
ContentProvider
什么是Content provider?它是Android应用程序的四大组成部分之一,是Android中的跨应用访问数据机制。
为何需要content provider? Android中每一个app的资源是私有的,其他app不可访问它的数据,但可以通过content
provider和其他app共享私有数据。
ContentProvider通过URI来向其他的app提供访问路径。
URI的组成如下图所示。
A:标准前缀,用来说明一个Content
Provider控制这些数据,对于自定义ContentProvider来说,就是“content:/ /”,我们无法改变;
B:URI的标识,它定义了是哪个Content
Provider提供这些数据。
对于第三方应用程序,为了保证URI标识的唯一性,它必须是一个完整的、小写的包名+类名。
这个标识在<provider> 元素的authorities属性中说明:
<provider name=”.TransportationProvider”
authorities=”com.example.myproject.transportationprovi
der” . . . >
C:路径,Content
Provider使用这些路径来确定当前需要的是什么类型的数据,URI中可能不包括路径,也可能包括多层;通常这里对应的是某个表或者视图的名字
D:如果URI中包含,表示需要获取的记录的ID;如果没有ID,就表示返回全部;
由于URI通常比较长,而且有时候容易出错,且难以理解。
所以,对于Android 的内置App如通讯录等,定义了一些辅助类,并且定义了一些常量来代替这些长字符串,例如:ContactsContract.Contacts.CONTENT_URI
ContentResolver
ContentProvider可将Content分享至不同的应用程序之中,而ContentRes olver则是一个标准的方式来取得ContentProvider所提供的数据,也是用来修改数据的方法,但若牵涉到写入或修改数据的话,则要看目标的ContentProvi der是否允许用户对数据做存取的操作,若无此权限,则ContentResolver方法会失败。
ContentProvider通常会使用URI的方式来当作分享数据的依据,故在ContentR esolver要读取某一ContentProvider数据时则必须将要读取的URI当成参数来使用。
ContentResolver使用query()来对指定URI的ContentProvider进行查询,它的参数包括下表中列出的各项。
和SQLiteDatabase的query()基本类似,除了这里提供的是一个uri而不是表名。
它也包括对数据进行其他增、删、改的操作方法,如下表。
可以通过Context上的getContentResolver()来获得一个ContentResolver 对象。
Android自带的应用例如通讯录,也通过ContentProvider向外提供了数据访问接口,我们可以通过ContentREsolver访问它。
下面我们看一下和通讯录相关的ContentProvider信息:
联系人信息URI: ContactsContract.Contacts.CONTENT_URI
电话信息:
monDataKinds.Phone.CONTENT_URI:其中,ContactsC monDataKinds.Phone.CONTACT_ID是ContactsContract.Contacts. _ID的外键
邮件信息: monDataKinds.Email
聊天工具信息: monDataKinds.Im
网站: monDataKinds.Website
职业素质
ContentProvider:为存储和获取数据提供统一的接口。
可以在不同的应用程序之间共享数据。
Android已经为常见的一些数据提供了默认的ContentPr ovider。