VNC配置文档
VNC-服务器配置
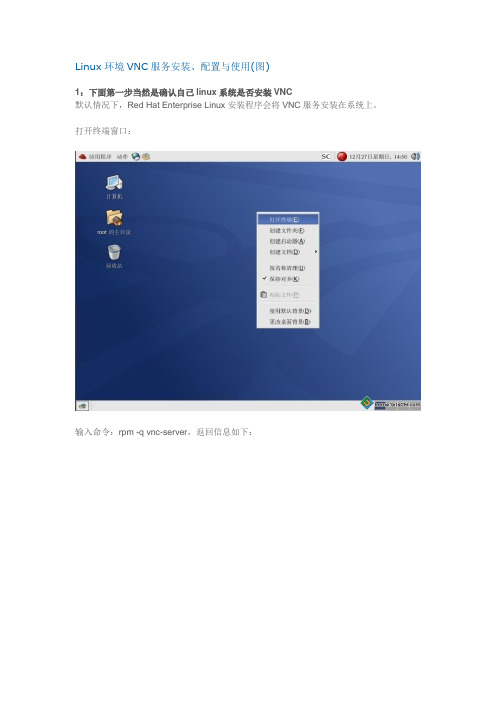
Linux环境VNC服务安装、配置与使用(图)1:下面第一步当然是确认自己linux系统是否安装VNC默认情况下,Red Hat Enterprise Linux安装程序会将VNC服务安装在系统上。
打开终端窗口:输入命令:rpm -q vnc-server,返回信息如下:那就证明已经安装上VNC服务拉。
若系统没有安装,可以到操作系统安装盘的Server目录下找到VNC服务的RPM安装包vnc-server-4.1.2-9.el5.x86_64.rpm,安装命令如下rpm -ivh /mnt/Server/vnc-server-4.1.2-9.el5.x86_64.rpm2.启动VNC服务当然啦,假如检查出你是安装了VNC了,linux里面就告诉他,你要启动了。
命令如下:[root@testdb ~]# vncserver :1输入该命令后出现该界面,要求你输入密码,那个密码是你等会连接linux服务器的密码啊。
细说一下:以上命令执行的过程中,因为是第一次执行,需要输入密码,这个密码被加密保存在用户主目录下的.vnc子目录(/root/.vnc/passwd)中;同时在用户主目录下的.vnc子目录中为用户自动建立xstartup配置文件(/root/.vnc/xstartup),在每次启动VND服务时,都会读取该文件中的配置信息。
BTW:/root/.vnc/目录下还有一个“testdb:1.pid”文件,这个文件记录着启动VNC后对应后天操作系统的进程号,用于停止VNC服务时准确定位进程号。
3.VNC服务使用的端口号与桌面号的关系VNC服务使用的端口号与桌面号相关,VNC使用TCP端口从5900开始,对应关系如下桌面号为“1”---- 端口号为5901桌面号为“2”---- 端口号为5902桌面号为“3”---- 端口号为5903……基于Java的VNC客户程序Web服务TCP端口从5800开始,也是与桌面号相关,对应关系如下桌面号为“1”---- 端口号为5801桌面号为“2”---- 端口号为5802桌面号为“3”---- 端口号为5803基于上面的介绍,如果Linux开启了防火墙功能,就需要手工开启相应的端口,以开启桌面号为“1”相应的端口为例,命令如下[root@testdb ~]# iptables -I INPUT -p tcp --dport 5901 -j ACCEPT[root@testdb ~]# iptables -I INPUT -p tcp --dport 5801 -j ACCEPT输入以上命令出现界面以上步骤其实已经可以通过windows系统控制linux的了,可是不是图形界面往下我会细说一下。
VNC配置
1.查看VNC是否已经安装:$ rpm -q vnc vnc-servervnc-4.1.2-24.fc8vnc-server-4.1.2-24.fc8vnc是客户端,vnc-server是服务器端注:a. 如果想卸载VNC,可用命令yum remove vnc-serverb.yum安装可用命令:yum install vnc-server ,然后在配置2.把用户名加入到配置文件中:CODE:[root@localhost ~]# vi /etc/sysconfig/vncservers# The VNCSERVERS variable is a list of display:user pairs.## Uncomment the line below to start a VNC server on display :1# as my 'myusername' (adjust this to your own). You will also# need to set a VNC password; run 'man vncpasswd' to see how# to do that.## DO NOT RUN THIS SERVICE if your local area network is# untrusted! For a secure way of using VNC, see# URL:/vnc/sshvnc.html# VNCSERVERS="1:myusername"VNCSERVERS="1:root" (注意:root是CentOS用户名)如果建2个,可以用VNCSERVERS="1:root 2:linglong"来配置3.用vncpasswd创建一个vnc的口令注意这将同时在你的home目录下,创建一个隐藏的目录.vnc,其中有一个文件passwd保存着你的vnc口令.CODE:[root@localhost ~]# vncpasswdPassword:Verify:[root@localhost ~]# ls -d .vnc.vnc[root@localhost ~]# ls .vncpasswd4.启动vnc服务.CODE:[root@localhost ~]# /sbin/service vncserver restartShutting down VNC server: 1:root [ OK ]Starting VNC server: 1:root perl: warning: Setting locale failed.perl: warning: Please check that your locale settings:LANGUAGE = (unset),LC_ALL = (unset),LANG = "zh_EN.UTF-8"are supported and installed on your system.perl: warning: Falling back to the standard locale ("C").New 'localhost.localdomain:1 (root)' desktop is localhost.localdomain:1Starting applications specified in /root/.vnc/xstartupLog file is /root/.vnc/localhost.localdomain:1.log[ OK ]察看一下.vnc这个目录的内容,应该类似于下面的东西.注:在这里我刚开始出现“Warning: ***** is taken because of /tmp/.X1-lock”在网上找了好多方法,终于找到解决办法了!我直接将: /tmp/.X1-lock 删除就可以了 ,命令式: rm /tmp/.X1-lock如果还出现其他的文件错误也可照样操作!CODE:[root@localhost ~]# cd .vnc[root@localhost .vnc]# lslocalhost.localdomain:1.log localhost.localdomain:2.log passwdlocalhost.localdomain:1.pid localhost.localdomain:2.pid xstartup[root@localhost .vnc]#编辑这个名为xstartup的脚本,将这内容前面的注释符号去掉,否则你将只能得到一个什么都没有的灰屏。
cento5下远程桌面(VNC)配置

1. 检查vnc客户端和服务器是否已经安装:[root@localhost ~]#rpm -q vnc vnc-servervnc-4.1.2-9.el5vnc-server-4.1.2-9.el5[root@localhost ~]#CentOS已包含vnc的安装包如没有安装,则:[root@localhost ~]#yum -y install vnc vnc-server2.将用户名添加到配置文件:(注:这里的“用户名”是指linux系统用户的名称)[root@localhost ~]#vi /etc/sysconfig/vncservers# The VNCSERVERS variable is a list of display:user pairs.## Uncomment the lines below to start a VNC server on display :2# as my 'myusername' (adjust this to your own). You will also# need to set a VNC password; run 'man vncpasswd' to see how# to do that.## DO NOT RUN THIS SERVICE if your local area network is# untrusted! For a secure way of using VNC, see# <URL:/archive/vnc/sshvnc.html>.# Use "-nolisten tcp" to prevent X connections to your VNC server via TCP.# Use "-nohttpd" to prevent web-based VNC clients connecting.# Use "-localhost" to prevent remote VNC clients connecting except when# doing so through a secure tunnel. See the "-via" option in the# `man vncviewer' manual page.# VNCSERVERS="2:myusername"VNCSERVERS="2:root"# VNCSERVERARGS[2]="-geometry 800x600 -nolisten tcp -nohttpd -localhost" VNCSERVERARGS[2]="-geometry 1024x768 -nolisten tcp -nohttpd"3. 设置用户root的vnc密码:[root@localhost ~]#vncpasswdPassword:Verify:4. 启动VNC服务[root@localhost ~]#/sbin/service vncserver startStarting VNC server: 2:root [ OK ]5.[root@localhost ~]$cd ~/.vnc/[root@localhost .vnc]$vi xstartup#!/bin/sh# Uncomment the following two lines for normal desktop:#unset SESSION_MANAGER#e xec /etc/X11/xinit/xinitrc[ -x /etc/vnc/xstartup ] && exec /etc/vnc/xstartup[ -r $HOME/.Xresources ] && xrdb $HOME/.Xresourcesxsetroot -solid greyvncconfig -iconic &#xterm -geometry 80x24+10+10 -ls -title "$VNCDESKTOP Desktop" & #twm & #Text interfacegnome-session & #set starting GNOME desktop#startkde & #kde desktop6. 重启vncserver[root@localhost ~]#/sbin/service vncserver restartShutting down VNC server: 2:root [ OK ] Starting VNC server: 2:root [ OK ]7.reboot重启服务器输入的时候要输入端口的。
vncserver配置

vncserver配置1、环境说明服务器:Linux Centos6.0 192.168.123.22客户端:Windows XP(vncviewer) 192.168.123.20安装系统时已经自动安装了vncserver,所以直接在此基础上进行配置,如果没有安装,请自行下载安装2、服务器设置chkconfig --list |grep vncvserver 查看是否有vncserverchkconfig --level 345 vncserver on 开启vncserver,这样vncserver将随相同自动启动修改/root/.vnc/xstartupgnome-session& #改为以gnome作为vnc的窗口管理器#twm & 注释掉缺省的twm窗口管理器vncserver 启动vncserver服务,首次启动会要求输入口令,两次必须相同,口令可以通过命令进行修改修改/etc/sysconfig/vncservers,在最后面添加如下内容:VNCSERVERS="1:root" 设置系统启动时启动几个VNC server,此处只启动一个,由root用户登录VNCSERVERARGS[1]="-geometry 1024x768" 针对启动的每一个服务,配置启动参数,此处针对root用户采用1024×768的大小启动窗口启动服务:service vncserver start3、客户端设置客户端不需要特殊的设置,启动vncviewer,在server栏填入地址和服务编号:如192.168.123.22:1,其中前面是ip地址,后面是启动的第一个服务,出现登录窗口后输入密码即可访问服务器的桌面4、其他命令修改口令 vncpasswd中止某个服务 vncserver -kill :1 终止第一个服务vnc服务的端口从5900开始,第一个占用5901,第二个占用5902,以此类推,所以防火墙也要做相应的设置,否则无法连接。
VNC详细配置

[转]VNC (Virtual Network Computing)是虚拟网络计算机配置详细文章分类:Java编程VNC (Virtual Network Computing)是虚拟网络计算机的缩写。
VNC是一款优秀的远程控制工具软件,由著名的AT&T的欧洲研究实验室开发的。
VNC是在基于 UNIX和Linux 操作系统的免费的开放源码软件,远程控制能力强大,高效实用,其性能可以和Windows 和MAC中的任何远程控制软件媲美。
VNC基本上是由两部分组成:一部分是客户端的应用程序(vncviewer);另外一部分是服务器端的应用程序(vncserver)。
一、Windows服务器平台服务器安装:到/网站,下载tightvnc-1.3.9-setup.exe 安装该软件,并在安装过程中选择“Register new TightVNC as a system service“和“Start or restart service"两项。
安装完成后系统会弹出对话窗口,要求输入VNC密码,输入密码后鼠标单击确定就完成了。
安装完成后VNC服务会在系统启动时自动启动。
二、Linux服务器平台的安装、启动和停止:1、安装大多数Linux发行版默认安装都包含了VNC服务器和客户端,用户无须另外安装。
本人已知并测试过的系统为:CentOS4.x/CentOS5.x/RHEL4.x/RHEL5.x/Ubuntu 以上发行版都包含了vnc软件,只要在安装时选择图形界面即可。
(默认安装是包含图形界面的,除非你手工删除)2、启动Linux是多用户系统,在Linux系统上可以开启多个VNC服务让不同用户同时使用一台Linux服务器而互不干扰。
每次启动Linux上的VNC服务,系统会分配一个端口号来区分不同的VNC进程。
在不指定端口号的情况下,系统会选择一个最小的未被使用的端口号来分配给当前的VNC进程,并在当前的终端下提示VNC的主机名和端口号和VNC进程是否启动成功。
远程桌面控制软件VNC使用方法

远程桌面控制软件VNC使用方法远程桌面控制软件VNC使用方法一、主机(服务器)端(被控端)配置1、双击打开“VNC绿色服务端v3.37.exe”,出现如下对话框。
2、在“内向连接”——“接受套接字连接”——“密码”字段输入密码。
单击“确定”按钮。
二、客户端(控制端)配置依照第一步打开服务器端进程,记住输入密码。
以下是客户端的配置:1、双击“VNC客户端.exe”,出项如下对话框。
2、输入“服务器”字段,一般为服务器的IP,单击“确定”按钮。
出现如下对话框。
3、输入“口令”字段值(即在服务器端设置时输入的密码),单击“确定”按钮。
有时会在输入“口令”后出现如下对话框,单击“是”按钮即可继续上述操作。
4、出现如下对话框,即服务器端桌面。
Yeah,成功了。
三、其他方法上述方式必须先打开服务器端进程,再开启客户端守护进程。
下面给出另一种方式,以相反的顺序,即先开启客户端守护进程,然后打开服务器端进程来邀请。
1、“VNC客户端.exe”创建快捷方式,方法如下:○1右击“VNC客户端.exe”,发送桌面快捷方式○2右键创建的快捷方式的属性,修改如下:“目标”字段修改为“./VNC客户端.exe -listen”(无双引号)2、双击刚刚创建的快捷方式,屏幕右下角会出现相应图标。
3、然后按照第一步来配置服务器端。
4、在屏幕右下角单击鼠标右键(或双击鼠标左键)4、选择“添加新客户端(N),,,”命令,输入客户端所在计算机的IP地址,然后单击“确定”按钮。
5、此时,客户端所在计算机会打开相应的服务期短的桌面。
四、备注本软件只是实现远程桌面控制,不能实现远程登录。
经本人测试,这两个程序可使用于两台XP机(一台服务端,一台客户端);也适用于一台XP,一台Win7。
VNC安装和配置rtf

首先从VNC官方网站下载一个FREE版本的VNC。
在目标服务器上解压:# gunzip vnc-4_1_3-sparc_solaris.pkg.gz下面利用pkgadd命令安装VNC包:# pkgadd -d vnc-4_1_3-sparc_solaris.pkgThe following packages are available:1 VNC VNC Free Edition for Solaris(sparc) 4.1.3Select package(s) you wish to process (or 'all' to process all packages). (default: all) [?,??,q]: 1Processing package instance <VNC> from</var/spool/pkg/vnc-4_1_3-sparc_solaris.pkg>VNC Free Edition for Solaris(sparc) 4.1.3Copyright (C) 2002-2005 RealVNC Ltd. All rights reserved.This is free software; you can redistribute it and/or modifyit under the terms of the GNU General Public License as published by the Free Software Foundation; either version 2 of the License, or (at your option) any later version.This software is distributed in the hope that it will be useful,but WITHOUT ANY WARRANTY; without even the implied warranty of MERCHANTABILITY or FITNESS FOR A PARTICULAR PURPOSE. See theGNU General Public License for more details.Using </usr/local> as the package base directory.## Processing package information.## Processing system information.## Verifying disk space requirements.## Checking for conflicts with packages already installed.The following files are already installed on the system and are being used by another package:* /usr/local/bin <attribute change only>* - conflict with a file which does not belong to any package.Do you want to install these conflicting files [y,n,?,q] y## Checking for setuid/setgid programs.This package contains scripts which will be executed with super-userpermission during the process of installing this package.Do you want to continue with the installation of <VNC> [y,n,?] y Installing VNC Free Edition for Solaris as <VNC>## Installing part 1 of 1./usr/local/bin/Xvnc/usr/local/bin/vncconfig/usr/local/bin/vncpasswd/usr/local/bin/vncserver/usr/local/bin/x0vncserver/usr/local/man/man1/Xvnc.1/usr/local/man/man1/vncconfig.1/usr/local/man/man1/vncpasswd.1/usr/local/man/man1/vncserver.1/usr/local/man/man1/x0vncserver.1/usr/local/vnc/classes/index.vnc/usr/local/vnc/classes/logo150x150.gif/usr/local/vnc/classes/vncviewer.jar[ verifying class <server> ]/usr/local/bin/vncviewer/usr/local/man/man1/vncviewer.1[ verifying class <viewer> ]/usr/local/doc/vnc-E/LICENSE.txt/usr/local/doc/vnc-E/README[ verifying class <doc> ]## Executing postinstall script.Checking for xauth... /usr/openwin/binWARNING: /usr/openwin/bin/xauth is not on your path.Checking for perl... [OK]Checking for uname... [OK]Installation of <VNC> was successful.下面就可以通过VNCPASSWORD设置密码,并使用VNCSERVER来启动VNC后台进程:# /usr/local/bin/vncpasswdPassword:Verify:# /usr/local/bin/vncservervncserver: couldn't find "Xvnc" on your PATH.# export PATH=$PATH:/usr/local/bin# vncserver &[1] 15921# xauth: creating new authority file //.XauthorityNew 'ser2:1 ()' desktop is ser2:1Creating default startup script //.vnc/xstartupStarting applications specified in //.vnc/xstartupLog file is //.vnc/ser2:1.log[1]+ Done vncserver注意要将VNCSERVER命令的目录添加到PATH路径中,后台启动VNCSERVER后,就可以使用VNCVIEWER访问ser2:1了。
Ubuntu20.04远程桌面-vnc配置

Ubuntu20.04远程桌⾯-vnc配置1、安装 VNC serverqiuji:~$ sudo apt-get -y install tigervnc-standalone-server2、为 VNC server 设置密码qiuji:~$ vncpasswdPassword:Verify:Would you like to enter a view-only password (y/n)? n3、启动 VNC server 服务qiuji:~$ vncserver :1ubuntu@dlp:~$ vncserver :1/usr/bin/xauth: file /home/ubuntu/.Xauthority does not existNew 'dlp.srv.world:1 (ubuntu)' desktop at :1 on machine dlp.srv.worldStarting applications specified in /etc/X11/Xvnc-sessionLog file is /home/ubuntu/.vnc/dlp.srv.world:1.logUse xtigervncviewer -SecurityTypes VncAuth -passwd /home/ubuntu/.vnc/passwd :1 to connect to the VNC server.4、停⽌ VNC server 服务qiuji:~$ vncserver -kill :1Killing Xtigervnc process ID 4123... success!5、配置 VNC server 服务qiuji:~$ ossifrage@ousikongjian:~$ vi ~/.vnc/xstartup显⽰如下内容:#!/bin/shunset SESSION_MANAGERunset DBUS_SESSION_BUS_ADDRESS[ -x /etc/vnc/xstartup ] && exec /etc/vnc/xstartup[ -r $HOME/.Xresources ] && xrdb $HOME/.Xresourcesxsetroot -solid greyvncconfig -iconic &x-terminal-emulator -geometry 80x24+10+10 -ls -title "$VNCDESKTOP Desktop" &gnome-session &6、重新启动 VNC server 服务qiuji:~$ vncserver :1 -geometry 1920x1080 -localhost no注意事项需要在普通权限下启动 vnc 否者远程不能使⽤普通⽤户权限。